Chapter 6
Azure DNS
Overview
Azure DNS is a domain name hosting and resolution service provided in Microsoft Azure. Customers can add public domain names that they own to Azure DNS and use Azure DNS to manage their DNS records using their Azure AD credentials.
Azure DNS is a completely managed service hosted across the Azure global network of DNS servers, providing an SLA of 100%. It uses AnyCast networking. This enables clients to obtain name-resolution services from the closest available Azure DNS server, reducing latency on DNS queries.
You can manage the Azure DNS service using the Azure Portal, Azure PowerShell, the Azure the CLI, the REST API, and SDKs, allowing integration with applications that require automated DNS-management functionality.
Azure DNS features
Azure DNS provides a number of key features that make it a compelling service to use for most environments. These key features include the following:
Global scale and reduced latency Azure DNS stores customer DNS domains in its global DNS name server network. This ensures that an outage in a single region does not take public DNS services for customers offline. Azure DNS uses AnyCast networking, reducing latency for DNS queries and improving performance for client connections.
Unbeatable SLA Because of the global redundancy of the DNS domains, outage in one region does not bring the DNS domain offline on a global level. Azure DNS guarantees a valid DNS request response from at least one of its DNS servers 100% of the time.
Seamless access management and monitoring Azure’s role-based access control (RBAC) provides access to Azure DNS for complete management or specific actions. Any changes in the DNS service configuration or DNS records are monitored and tracked to detect unwanted changes.
Easy billing management Azure DNS billing is integrated with the billing for all other Azure services, making it easier to keep track of expenses related to your public domain infrastructure. Service charges are based on the number of hosted domains and the number of DNS queries received, providing pay-as-you-go functionality. Using other third-party DNS-hosting services can add overhead with respect to monitoring and managing for service availability, contract renewals, and billing.
Support for private domains One of the key features provided by Azure DNS is the support for private DNS domain hosting. This makes it possible to integrate private virtual networks and use the DNS services to host private custom domains through the integration.
Alias records Alias record sets help to create references to Azure resources such as Traffic Manager profiles, Azure CDN endpoints, and Public IP addresses hosted in Azure. Alias record sets can be set up using Azure DNS, and the integration supports automatic updates to any IP address changes occurring for each of the services.
Management and integration You can manage Azure DNS using the Azure Portal, Azure PowerShell, and the Azure CLI. In addition, Azure DNS has integration capabilities using REST APIs and SDKs for automated DNS management.
Private DNS Azure DNS allows integration with Azure virtual networks to host private DNS zones, which you can use to provide name-resolution services in the virtual network. In addition, VMs can automatically register and update their DNS records, providing name-resolution services within the environment without requiring the use of other DNS services.
Azure DNS limitations
As of this writing, Azure DNS has a few limitations. Some key limitations are listed here:
DNSSEC Azure DNS does not currently support DNSSEC. The current guidance for organizations that require DNSSEC is to use a third-party DNS hosting service instead of Azure DNS.
Domain name procurement You cannot use Azure DNS to buy new domain names. Customers must procure domain names from a third-party domain name registrar, using Azure DNS only for the hosting services and record management.
Zone transfers Azure DNS does not support zone transfers, which enable the migration of DNS services from one DNS hosting provider to another using REST APIs. You can use the Azure CLI to import DNS records into Azure DNS or make entries using Azure Portal or Azure PowerShell, however.
URL redirection Some third-party DNS providers offer URL redirection as part of their DNS services. This enables companies to set up HTTP redirections for their web applications. Although many organizations find this to be a useful service, because the redirection is on the HTTP traffic layer instead of the DNS, it is not considered a real DNS feature. So, at this stage, URL redirection is not offered as part of the Azure DNS feature set.
Design and configuration considerations
You’ll want to consider a few features provided by Azure DNS when setting up the service. The following sections discuss these in more detail.
Types of DNS zones
Azure DNS provides two types of DNS zone services: public and private. Both zone types address specific use cases, and both could be used in the same Azure environment to host the same DNS zone.
Public DNS zones allow for the hosting of publicly available domain names—for example, contoso.com. This type of zone generally contains DNS records for public-facing services, such as web servers, mail servers, and so on. Public DNS zones allow access over the public internet for name resolution of DNS records hosted by an organization for external consumption by customers or vendors and for internal consumption by employees. Examples of scenarios in which DNS records might be set up in public DNS zones might be as follows:
An organization hosting a public-facing website could set up its WWW DNS address (A) record in a public DNS zone.
To provide access to its email services, an organization could host its mail server A records in a public DNS zone.
All organizations would set up their mail exchange (MX) records in a public DNS zone for other DNS servers to identify and route emails to their mail servers.
Private DNS zones allow for the hosting of internal DNS zones required for name resolution between Azure VM resources. A private zone can contain the following types of DNS records:
WWW A DNS records with internal IPs of web servers and web applications
A DNS records with internal IPs (if available) for mail servers
A records for VMs hosted within the virtual network
Pointer (PTR) records for VMs hosted within the virtual network
The zones are interlinked to virtual networks, and name resolution works only for those networks in which the link is in place. No internet-based name resolution of private DNS zones is possible. This provides a secure and reliable way to provide DNS services for VMs hosted in a virtual network without requiring the setup of other DNS solutions to host those custom private zones.
A few notes to keep in mind:
The same domain can be hosted as a public DNS zone and a private DNS zone. This supports split-horizon DNS scenarios for name resolution of the same services with varying internal and external records to enable them to talk efficiently via internal and public networks.
Azure DNS does not support single-labeled private DNS zones. All zones must have two labels separated by a dot (contoso.com), with a maximum of 34 labels.
You must create child domains as separate private DNS zones, as zone delegation is currently not supported.
DNS zone walkthrough
The following sections walk you through the process of creating a DNS zone using the Azure Portal, Azure PowerShell, and the Azure CLI. If you are following along, be sure to select resources and unique resource names based on your environment for each of your deployments. Also, be sure to delete any unwanted resources after you have completed testing to reduce charges levied by Microsoft for these resources.
The steps for creating a public DNS zone in the Azure Portal are nearly identical to those for creating a private one. The difference is that you use the DNS Service to create a public DNS zone, and you use the Private DNS Zones service to create a private one. (See Figure 6-1.) Because the following sections cover more private DNS zone features than public DNS zone ones, the subsequent sections focus on creating private DNS zones.

FIGURE 6-1 DNS services in Azure.
Using the Azure Portal
To create a private DNS zone using Azure Private DNS service using the Azure Portal, follow these steps:
Log in to the Azure Portal, type private DNS zone in the search box to locate the service, and select it from the list that appears.
Click the Create Private DNS Zone button to start the Create Private DNS Zone wizard. (See Figure 6-2.)

FIGURE 6-2 Initiate the creation of a private DNS zone.
In the Basics tab of the Create Private DNS Zone wizard, enter the following information (see Figure 6-3), and click Next:
Subscription Select the subscription that will host the private DNS zone.
Resource Group Select the resource group you want to use to host the private DNS zone. Alternatively, to create a new resource group, click the Create New link and follow the prompts.
Name Type a name for the private DNS zone.
Resource Group Location This will be populated automatically based on the location of the resource group you just selected.

FIGURE 6-3 The Basics tab of the Create Private DNS Zone wizard.
In the Tags tab, enter any tags required for the private DNS zone or leave the fields blank (see Figure 6-4), and click Next.
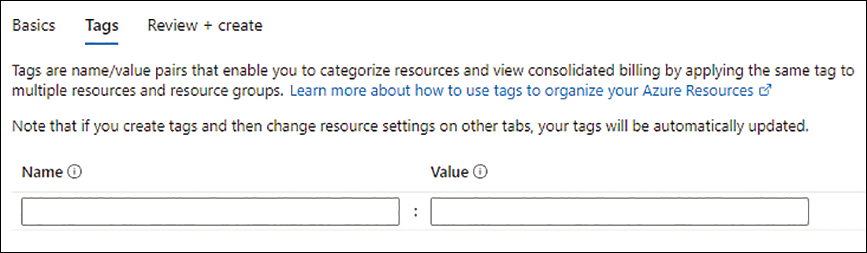
FIGURE 6-4 Set up tags.
In the Review + Create tab (see Figure 6-5), review your settings and click Create.

FIGURE 6-5 Review and create a private DNS zone.
Using Azure PowerShell
You can create a private DNS zone with Azure PowerShell using the New-AzPrivateDNSZone command with various switches to set the zone’s parameters. For example, to create the same private DNS zone as you did in the preceding section, you use the first two lines of code below. If you want to create a public DNS zone instead, use the second two lines of code, and replace the domain name with one that you own:
#Create private DNS zone
New-AzPrivateDnsZone -Name privatedomain.com -ResourceGroupName RG01

#Create public DNS zone
New-AzDnsZone –Name publicdomain.com –ResourceGroupName RG01
Using the Azure CLI
You can create a private DNS zone with the Azure CLI using the az network private-dns zone create command with various switches to set the zone’s parameters. The first two lines of code below show you how to set up the same zone you created in the preceding sections with the Azure CLI. If you want to create a public DNS zone instead, use the second two lines of code, and replace the domain name with one that you own:
#Create private DNS zone
az network private-dns zone create --resource-group RG01 --name privatedomain.com

#Create public DNS zone
Az network dns zone create –-resource-group RG01 –-name publicdomain.com
Linking with Azure virtual networks
You can link a private DNS zone to one or more Azure virtual networks. This enables VMs hosted in the virtual network(s) to use Azure DNS to resolve the names of any private DNS zones hosted in the service. (See Figure 6-6.)

FIGURE 6-6 DNS name resolution after linking with a virtual network.
Virtual network link walkthrough
The following sections walk you through the process of linking the private DNS zone you created in the “DNS zone walkthrough” section to a virtual network using the Azure Portal, Azure PowerShell, and the Azure CLI.
Using the Azure Portal
To set up the virtual network link using the Azure Portal, follow these steps:
In the left pane of the private DNS zone’s configuration page, under Settings, click Virtual Network Links. Then, in the right pane, click the Add button to start the Add Virtual Network Link wizard. (See Figure 6-7.)
In the Add Virtual Network Link wizard, enter the following information (see Figure 6-8) and click OK:
Link Name Enter a unique name to identify the virtual network link.
Subscription Select the subscription for which the link will be created.
Virtual Network Select the virtual network you want to link to the private DNS zone.
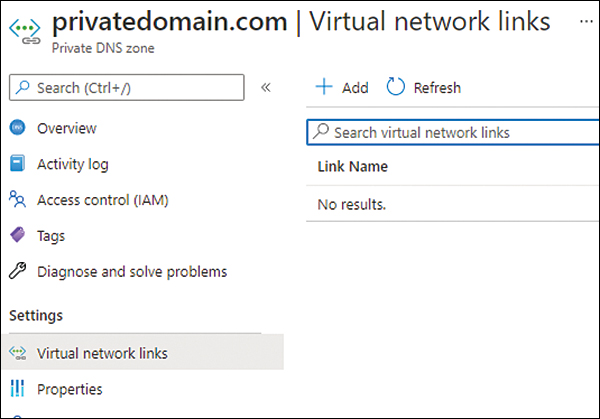
FIGURE 6-7 Add a virtual network.

FIGURE 6-8 The Add Virtual Network Link wizard.
Repeat these steps for any other virtual networks you want to link to the DNS zone.
Using Azure PowerShell
You can link a virtual network to a private DNS zone using Azure PowerShell with the New-AzPrivateDNSVirtualNetworkLink command and various switches to set the link’s parameters. The following code shows you how:
#Define variables
$rg = "RG01"
$name = "Link-To-vNET01"
$vnet = "vNET-01"
#Create the virtual network link
New-AzPrivateDNSVirtualNetworkLink -ZoneName privatedomain.com -ResourceGroupName $rg
-Name $name -VirtualNetworkId $vnet.id
Using the Azure CLI
You can link a virtual network to a private DNS zone using the Azure CLI with the az network private-dns link create command and various switches to set the link’s parameters. The following Bash script shows you how:
#Define variables
rg = "RG01"
name = "Link-To-vNET01"
vnet = "vNET-01"
#Create the virtual network link
az network private-dns link vnet create --resource-group $rg --name $rg --zone-name
privatedomain.com --virtual-network $vnet
Auto registration
Private DNS zones support the use of auto registration to automatically register and update VM DNS records for accurate name resolution between different VMs running on the same virtual network. This involves setting up an A and a PTR record for each VM that already exists or is newly created on the virtual network for which the feature is enabled. When a VM is deleted, the service also deletes the corresponding A and PTR records for the VM.
You can set up multiple virtual networks to use auto registration to the same private DNS zone. However, every virtual network can be connected to only a single private DNS zone if auto-registration is enabled. Here are a few other limitations to this feature to consider:
Auto registration works only for the primary network card on a VM. The remaining network cards require manual DNS record creation and management.
Auto registration will not work if a VM is set to a static IP. Only VMs using DHCP on their primary network card are supported.
Auto registration supports only VMs. Any other Azure service, such as an internal load balancer, requires manual DNS record creation and management.
IPv6 (AAAA) DNS records are not supported.
Auto-registration walkthrough
The following sections walk you through the process of using the Azure Portal, Azure PowerShell, and the Azure CLI to enable auto-registration for the private DNS zone you created in the “DNS zone walkthrough” section when linking it to a virtual network.
Using the Azure Portal
To set up auto registration using the Azure Portal, follow these steps:
In the left pane of the private DNS zone’s configuration page, under Settings, click Virtual Network Links. Then, in the right pane, click the Add button to start the Add Virtual Network Link wizard.
In the Add Virtual Network Link wizard, type a name for the link, select your subscription, and select the virtual network to which you want to link, as you did earlier in the “Virtual network link walkthrough” section.
Under Configuration, select the Enable Auto Registration check box (see Figure 6-9). Then click OK.
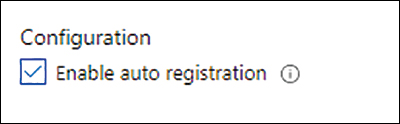
FIGURE 6-9 Enable auto registration.
Using Azure PowerShell
You can enable auto registration during the virtual network link–creation process using Azure PowerShell with the New-AzPrivateDNSVirtualNetworkLink command and the –EnableRegistration switch. The following code shows you how:
#Define variables
$rg = "RG01"
$name = "Link-To-vNET01"
$vnet = "vNET-01"
#Create the virtual network link
New-AzPrivateDnsVirtualNetworkLink -ZoneName privatedomain.com -ResourceGroupName $rg
-Name $name -VirtualNetworkId $vnet.id -EnableRegistration
Using the Azure CLI
You can enable auto registration during the virtual network link–creation process using the Azure CLI with the az network private-dns link create command and the --registration-enabled parameter. The following code shows you how:
#Define variables
rg = "RG01"
name = "Link-To-vNET01"
vnet = "vNET-01"
#Create the virtual network link
az network private-dns link vnet create --resource-group $rg --name $rg --zone-name
privatedomain.com --virtual-network $vnet --registration-enabled true
Alias record sets
Alias record sets are references created in Azure Public DNS zones to public IPs associated with Azure services such as Azure Traffic Manager, Azure CDN, Azure Front Door, Azure App Service with Static IP, and Azure Public IP Address. You can associate an alias record set with any of these resources. Then, during the name-resolution process, the alias record will query and return the current IP address of the associated service.
The DNS record set changes automatically as the public IP of the service changes. This helps to ensure that DNS records are always up-to-date and that no stale or incorrect records can result in unplanned downtimes.
Azure DNS currently supports the following DNS record types:
A
AAAA
CNAME
Alias record sets walkthrough
The following section walks you through the process of creating a public DNS zone and alias record set using the Azure Portal.
Using the Azure Portal
To create an alias record set, you first create a public DNS for the DNS domain you own. To do both these things using the Azure Portal, follow these steps:
Log in to the Azure Portal, type DNS zone in the search box to locate the service, and select it from the list that appears.
Click the Create DNS Zone button to start the Create DNS Zone wizard. (See Figure 6-10.)
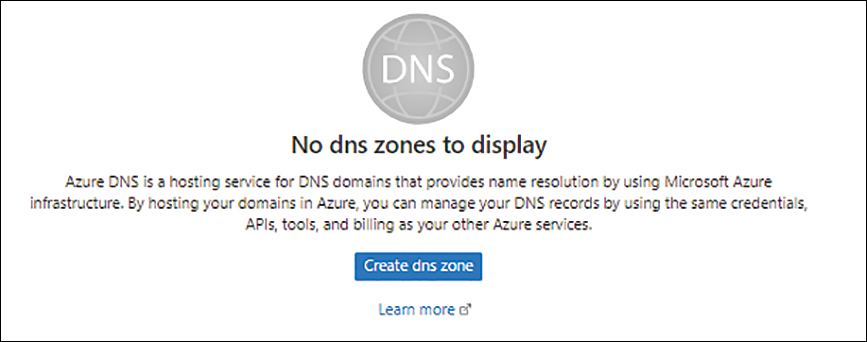
FIGURE 6-10 Create a reverse DNS lookup zone.
In the Basics tab of the Create DNS Zone wizard, enter the following information (see Figure 6-11), and click Next:
Subscription Select the subscription to host the DNS zone.
Resource Group Select the resource group you want to use to host the reverse lookup DNS zone. Alternatively, to create a new resource group, click the Create New link and follow the prompts.
Name Enter a name for the DNS domain that you own.
Resource Group Location This will be populated automatically based on the location of the resource group you just selected.

FIGURE 6-11 The Basics tab of the Create DNS Zone wizard.
In the Tags tab, enter any tags required for the DNS zone or leave the fields blank (see Figure 6-12). Then click Next.

FIGURE 6-12 Set up tags.
In the Review + Create tab, review your settings and click Create.
After the zone has been created, open its blade in the Azure Portal. Then, in the Overview tab, click the Record Set button. (See Figure 6-13.)

FIGURE 6-13 The Record Set button in the Overview tab.
In the Add Alias Record Set dialog box, enter the following information, and click OK. (See Figure 6-14.)
Name Enter a name for the record set.
Type Select the type of DNS record you want to create—in this case, A – Alias Record to IPv4 Address.
Alias Record Set Select the Yes option button to create an alias record set.
Alias Type Select Azure Resource option button.
Subscription Select the subscription in which to create the alias record set.
Azure Resource Select the Azure resource to associate with the alias record set.
TTL Enter the time to live (TTL) for the record set. (I typed 1.)
TTL Unit Select the TTL unit from the drop-down list. (I selected Hours.)

FIGURE 6-14 Create an alias record set.
Reverse DNS lookup
Azure private DNS zones support reverse DNS lookups using reverse DNS lookup zones for private IP addresses associated with VMs hosted in linked virtual networks. This can help in scenarios where applications require reverse lookups for verification purposes.
Reverse DNS lookups, which use Reverse DNS zones, return two FQDNs:
The FQDN containing the name of the VM with a default suffix of internal.cloudapp.net.
If auto-registration is enabled, an additional FQDN with the name of the VM and the suffix for the private DNS domain name.
Reverse DNS lookup zone walkthrough
The following section walks you through the process of creating a reverse DNS lookup zone using the Azure Portal, Azure PowerShell, and the Azure CLI.
Using the Azure Portal
To create a reserve DNS lookup zone using the Azure Portal, follow the steps as detailed here:
Log in to the Azure Portal, type DNS zone in the search box to locate the service, and select it from the list that appears.
Click the Create DNS Zone button to start the Create DNS Zone wizard. (See Figure 6-15.)

FIGURE 6-15 Create a reverse DNS lookup zone.
In the Basics tab of the Create DNS Zone wizard, enter the following information (see Figure 6-16), and click Next:
Subscription Select the subscription to host the DNS zone.
Resource Group Select the resource group you want to use to host the reverse lookup DNS zone. Alternatively, to create a new resource group, click the Create New link and follow the prompts.
Name Enter a name for the reverse DNS lookup zone in the format <IPv4 network prefix in reverse order>.in-addr.arpa.
Resource Group Location This will be populated automatically based on the location of the resource group you just selected.

FIGURE 6-16 The Basics tab of the Create DNS Zone wizard.
In the Tags tab, enter any tags required for the reverse DNS lookup zone or leave the fields blank (see Figure 6-17), and click Next.

FIGURE 6-17 Set up tags.
In the Review + Create tab (see Figure 6-18), review your settings and click Create.

FIGURE 6-18 Review and create a reverse DNS lookup zone.
Using Azure PowerShell
You can create a reverse DNS lookup zone with Azure PowerShell using the New-AzDNSZone command with various switches to set the zone’s parameters. For example, to create the same reverse DNS lookup zone as you did in the preceding section, you use the following code:
#Create reverse DNS zone
New-AzDNSZone -Name 4.168.192.in-addr.arpa -ResourceGroupName RG01
Using the Azure CLI
You can create a reverse DNS lookup zone with the Azure CLI using the az network dns zone create command with various switches to set the zone’s parameters. The following script shows you how to set up the same zone you created in the preceding sections with the Azure CLI:
#Create reverse DNS zone
az network dns zone create --resource-group RG01 --name 4.168.192.in-addr.arpa
Zone delegation
With Azure DNS, you can only host domains authoritatively. Azure DNS does not provide recursive DNS services. An authoritative DNS server is responsible for responding to all DNS queries related to the DNS records only in the zones hosted on it. A recursive DNS server does not host any DNS zones. It uses authoritative servers to respond to all DNS queries it receives.
To better understand this, consider a couple different scenarios. Imagine an environment in which the Azure DNS service hosts the domain contoso.com and receives different DNS queries:
DNS query for name resolution of www.contoso.com In this scenario, Azure DNS hosts the domain contoso.com, so it checks its record sets to identify whether there is a record for www. If so, it responds with the value for that record. If the record does not exist, it responds by stating no such record exists for that domain.
DNS query for name resolution of www.fabrikam.com In this scenario, Azure DNS does not host the DNS zone fabrikam.com. Hence, it is not able to respond to DNS queries, and the queries will fail.
Considering this, if name resolution for other non-authoritative domains is required for the VMs in an environment, you would have to set recursive DNS servers on the Azure VMs.
Best practices
Following are some best practices for the Azure DNS service that can help secure the service against attacks or unwarranted modifications:
Use Azure role-based access control (RBAC) Azure DNS supports Azure RBAC to control access to the DNS service. Use RBAC to limit access to the DNS service on the service, zone, or record level based on the access control requirements of the organization. Incorrect DNS records can result in application outages, so controlling access to avoid unwarranted changes to the DNS service is critical.
Use the DNS Zone Contributor role Azure provides a built-in role called DNS Zone Contributor. Users with this role can manage DNS resources—but that’s all. Use this role if there are individuals in the organization who require access to the DNS service only for management purposes.
Use custom roles In addition to the DNS Zone Contributor role, you can create custom roles to limit access to specific DNS functions—for example, creating and modifying A records but not managing other record types. After you identify or create the required roles, you can ensure that access is assigned only on the required level. The available levels are as follows:
Service-level Azure RBAC Permissions are assigned on the Azure DNS service level, enabling the user to manage all zones hosted in the service.
Zone-level Azure RBAC Permissions are granted on the zone level, enabling the user to manage all records in that zone.
Record-set level Azure RBAC Permissions are assigned on the record set level, enabling the user to manage specific record sets.
You manage all these permissions using the Azure Portal, Azure PowerShell, or the Azure CLI.
Use resource locks Use the resource locks feature to prevent access for making changes to the DNS zones or protect them for deletion. Your options are as follows:
Prevent all changes Creating a read-only lock prevents any changes from being made to the DNS zone. This makes it possible to respond to DNS queries but prevents further changes to the records until the lock is modified or removed. (See Figure 6-19.)

FIGURE 6-19 Create a read-only resource lock.
Prevent individual records deletion You can set resource locks on the record-set level to prevent changes to or deletions of individual DNS records. You can currently configure record set–level resource locks using Azure PowerShell only—not the Azure Portal or the Azure CLI. The following PowerShell snippet shows how to set up a lock on an individual DNS record:
#Define the required variables
$locklevel = "Read-only"
$lockname = "Read-only"
$dnsresource = "contoso.com/www"
$type = "Microsoft.Network/DNSZones/A"
$rg = "RG01"
# Lock a DNS record set
New-AzResourceLock -LockLevel $locklevel -LockName $lockname -ResourceName
$dnsresource -ResourceType $type -ResourceGroupName $rg
Prevent complete zone deletion Creating a no-delete lock prevents the accidental or malicious deletion of a DNS zone. (See Figure 6-20.)
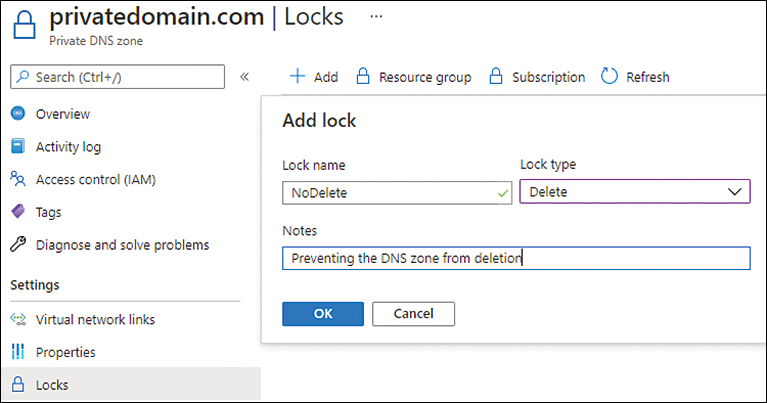
FIGURE 6-20 Create a no-delete resource lock.
Set up monitoring and alerting Azure DNS provides metrics to monitor the performance of hosted DNS zones. In addition, you can integrate with Azure DNS with Azure Monitor to monitor key metrics to gauge performance and identify bottlenecks. Some key metrics include the following:
QueryVolume
RecordSetCount
RecordSetCapacityUtilization
At a minimum, it is recommended that you set up alerting for performance parameters and critical administrative actions.
Integrate with other Azure services If required, you can use Azure DNS to publish custom domain records for other Azure services in use in the environment. This includes Azure Application Gateway, Azure Load Balancer, Azure Traffic Manager, Azure App Service, Azure Resource Manager VMs, and Azure Cloud Services. For each service, based on its IP address configuration, you can create a corresponding DNS A or CNAME record. You can create DNS CNAME records for services with dynamically allocated IP addresses. For services using a static IP address, you can create DNS A records.