In this chapter you will learn about the FSLogix tool, which can be used to store user profiles on remote storage so that they can get the same profile every time they log in to a pooled desktop.
Azure Virtual Desktop has pooled desktop offerings where multiple users can log in to the same back-end VM and use it as a virtual desktop. A pooled desktop is possible with Windows 10 multisession, which allows multiple sessions on the same VM. Azure provides multiple load balancing types to send user sessions to the back-end VMs, which means the user session can go to any of the VMs available in the pooled desktop pool. FSLogix allows admins to configure remote user profile storage so that the user can get the same profile and desktop experience on any back-end VM they log in to.
Configure Storage for FSLogix Components
FSLogix is the tool used to manage user profiles for pooled desktops since pooled desktops are not persistent desktops. FSLogix allows you to configure the user profile location on the desktop, and the user profile gets attached to the desktop whenever the user logs in to the desktop. Pooled desktops can have multiple session hosts, so you must make sure the FSLogix configuration is the same on all session hosts under the same host pool.
There are multiple ways to implement the FSLogix configuration on the session host, but the easiest and preferred way is to configure the FSLogix configuration in the image itself and create different images for each host pool so that each image will have host pool–specific FSLogix and application configuration.
You have to provide the user profile storage account details as part of the FSLogix configuration, so you must create a storage account with the required configuration before you can capture an image for each pooled host pool.
Keep a separate storage account for each pooled host pool’s user profile in each region.
Use a high IOPS/premium storage account for the user profile.
Join the storage account to an AD DS domain.
Always create an AD security group for each host pool and assign it to the Storage File Data SMB Share Contributor role so that authorized users can read/write profile data from a storage account.
Restrict user profile storage access to a specific VNet/subnet.
Enable storage account access over private endpoints to a specific VNet.
The same type of host pool in the same region (i.e., belongs to the same BU) can use the same storage account for the user profile as far as there is no compliance/InfoSec requirement.
Consider GEO replication to a DR region if you’re planning to enable DR for the pooled host pool. Premium file storage does not support GEO replication, so if you want to implement DR, then you have to select the standard storage account tier or use the FSLogix cloud cache to store the user profile on multiple storage accounts in different regions.
- 1.
Log in to the Azure portal and select the correct directory and subscription where you want to create the AVD host pool and desktops. Make sure you have the correct permission (contributor or owner) to create the storage account. See Figure 5-1.

Azure Virtual Desktop, selecting a subscription
- 2.
Search for storage account in the top search bar. See Figure 5-2.

Azure Virtual Desktop, storage account search
- 3.
Click the Create option to create a new storage account. See Figure 5-3.

Azure Virtual Desktop user profile storage account creation
- 4.
Select the correct subscription and resource group names from the drop-down where you want to create the AVD desktops. If the resource group does not exist, then you can create a new resource group by clicking the Create new option. See Figure 5-4.

AVD user profile storage account creation page
- 5.
Scroll down and provide the storage account details such as the name, region, performance (SKU), account type, and redundancy. The following are the recommended values for each field:
Name: As per your organization’s standards, but Azure accepts only 24 lowercase characters and numbers.
Region: This is the same as the AVD host pool.
Performance (SKU): Premium (no GEO replication supported).
Premium account type: File share.
Redundancy: Zone redundant (ZRS).
Click the Next button once you have filled in all the details. See Figure 5-5.

AVD user profile storage account creation, Basic tab
- 6.
You can verify the options available on the Advanced tab and make sure they align with your organization’s requirements. Click the Next button once you have filled in all the details. See Figure 5-6.

AVD user profile storage account creation, Advanced tab
By default, Azure encrypts the storage account data at rest. Infrastructure encryption adds a second layer of encryption to your storage account data.
- 7.
Select “Private endpoint” on the Networking tab and click the “Add private endpoint” option. See Figure 5-7.

AVD user profile storage account creation, Networking tab
- 8.
Select the subscription, resource group, region, endpoint name, storage sub resource (must be a file), and VNet/subnet in the private endpoint pop-up.
Endpoint name: As per your organization’s naming standards.
Storage subresource: This must be a file.
VNet/subnet: This is the same VNet where you want to create a pooled host pool.
Click OK and the Next button once you have filled in all the details. See Figure 5-8.

AVD user profile storage account creation, Private endpoint creation
- 9.
Select “Enable soft delete for file shares” if you want to keep the deleted files for specific days. Click Next and add the tag details as per your organization’s standards. Click the “Review + create” button once you have entered all the required information. See Figure 5-9.

AVD user profile storage account creation, Data protection tab
- 10.
Click Create once the validation is completed. See Figure 5-10.

AVD user profile storage account creation, creating and reviewing
- 11.
Click “Go to resource” to open the storage account’s Overview page. See Figure 5-11.

AVD user profile storage account creation, deployment status
- 12.
Verify all the information on the Overview page such as the name, storage account SKU, and region. See Figure 5-12.

AVD user profile storage account, Overview page
Create File Shares
File shares need to be created once the storage account is ready. FSLogix will be using the Azure storage account file share to store user profiles in the storage account.
- 1.
Go to the storage account created in the earlier step and click “File share” in the left pane. Click “+ File share” to add an additional share. See Figure 5-13.

AVD user profile storage file share creation
- 2.
Enter the file share name and size, and click the Create button in the file share pop-up. See Figure 5-14.

AVD user profile storage file share creation, new share
File share names can contain only lowercase letters, numbers, and hyphens, and they must begin and end with a letter or a number. The name cannot contain two consecutive hyphens.
The minimum share size is 100 GB, but provision more capacity to get more performance (as of November 2021).
- 3.
Once the file share is ready, it will be visible under the “File share” option on the storage account. See Figure 5-15.

AVD user profile storage file share, new share creation
- 4.
Click the file share name, and you will be able to see the permission error in Figure 5-16 as the file share is locked to AVD Azure VNet. Resources/VMs from that VNet instance can access only the file share. It is always recommended to enable the private endpoint for the storage account to the AVD VNet, so the file share will be accessible directly from AVD VM over a private endpoint, and the traffic will not go over the Internet.

AVD user profile storage file share, Overview page
- 5.
Now you can go back to the “File share” option under the storage account to configure Active Directory for the file share. Click Active Directory on the right side, as shown in Figure 5-17.

AVD user profile storage file share, domain join
- 6.
Once you click Active Directory, it will give you two different Active Directory options, as shown in Figure 5-18.

AVD user profile storage file share, domain join options
- 7.
Select the appropriate Active Directory that you are using and click the Setup button. If you are using Azure AD domain services, then it is easy to set up the Active Directory option for the storage account file share, as shown in Figure 5-19.

AVD user profile storage file share, domain join to Azure ADDS
- 8.
Once you enable Azure ADDS, then you will be able to see the screen in Figure 5-20. Note that you can use/configure only one AD (Azure ADDS or on-premises AD).

AVD user profile storage file share, domain join status
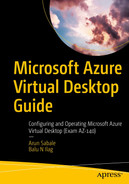
- 9.
Additionally, if you have an Active Directory user and a computer console connected to your Azure AD domain, then you can check the Azure storage file share account/object under the AzureFilesConfig OU. See Figure 5-21.
AVD user profile storage file share, domain join object
- 10.
If you are using an on-premises Active Directory Service (ADDS), then you need the AzFilesHybrid module (https://github.com/Ar-Sa/azure-files-samples/tree/master/AzFilesHybrid ) on the domain join so that you can run the Join-AzStorageAccountForAuth command to domain-join the file share. The following is the script you can run from any domain-joined VM (or download the PowerShell code from https://github.com/Ar-Sa/Arun/blob/master/Powershell/Azure%20storage%20account%20file%20share%20domain%20join/set-AzStorageDomainJoin.ps1):
- 11.
The next step is to create the ADDS group for AVD users and assign permissions on the file share.
- 12.
If you are using the Azure AD domain service, then you can create a security group in Azure AD itself, and it will sync with Azure ADDS. Go to Azure AD and click Groups. On the All Groups plane click “New group.” See Figure 5-22.

AVD user profile permission, user group creation
- 13.
Enter the group name and select the correct members to whom you want to give access to the AVD desktop. See Figure 5-23.

AVD user profile, group creation
- 14.
The group will be also available in the Azure ADDS Active Directory User and Computer (ADUC) console. See Figure 5-24.

AVD user profile, verify group creation
- 15.
If you are using on-premises ADDS, then simply go to the ADDS ADUC console and create new group, and it will sync with Azure AD.
- 16.
Go to the file share, select Access control (IAM), click Add, and select “Add role assignment.” See Figure 5-25.

AVD user profile permission on file share
- 17.
Select the Storage File Data SMB Share Contributor role, and click Next. See Figure 5-26.

AVD user profile permission on file share, SMB contributor
- 18.
Select the AVD group we created in an earlier step, and click Select. See Figure 5-27.

AVD user profile permission on file share, select a group


Summary
In this chapter, you learned about creating an Azure storage account and configuring the Azure file share for a user profile. Additionally, you can use the Azure NetApp for your user profile instead of the Azure file share, but you have to make sure you are adding share permissions for the AVD group we created.