In this chapter, you will learn about the Azure Virtual Desktop application publishing options, including MSIX app attach, application masking, and application RemoteApp groups. All these options are different from each other, so we will explain each option in detail so that you can decide which option is better for your organization’s requirements.
Additionally, you will see how to set up common applications such as Teams, OneDrive, and browsers of your choice for Internet access.
Let’s get started with the MSIX app attach and other application options.
Configure Dynamic Application Delivery by Using MSIX App Attach
In this section, you’ll learn how to configure dynamic application delivery.
What Is MSIX App Attach?
MSIX is a packaging format that offers many features to improve the application packaging experience for all Windows apps. MSIX app attach is different from regular MSIX because it’s made to work better for Azure Virtual Desktop. MSIX app attach is a way to deliver MSIX applications to both physical and virtual machines. Let’s learn what MSIX app attach is and what it can do for you.
Add the app in a master image so that it will be available on all session hosts.
Use app masking to allow specific users to access applications from a full desktop implementation.
Use RemoteApp application groups to publish applications on Azure Virtual Desktop instead of a full desktop.
Use tools like SCCM or Intune for the central management of applications.
Use dynamic app provisioning with AppV, VMware AppVolumes, or Citrix AppLayering.
Create custom tools or scripts using Microsoft and third-party tools.
MSIX app attach is the best out of all of these options, as it’s designed for Azure Virtual Desktop, and it provides apps dynamically to users at runtime and allows admins to centrally manage all applications.
What Does MSIX App Attach Do?
In an Azure Virtual Desktop deployment, MSIX app attach can create a separation between user data (profile), the operating system, and apps by using MSIX containers, which means you don’t need any configuration in the profile or operating system to attach specific applications at runtime and detach them once the user session ends. App attach does not require application repackaging when delivering applications dynamically. This option significantly reduces the time it takes for a user to sign in and reduce additional infrastructure costs for the application.
How to Create a Package with the MSIX Packaging Tool?
The MSIX Packaging tool is a Microsoft tool that allows you to repackage your existing desktop applications to the MSIX format. It offers both an interactive UI and a command line for conversions and gives you the ability to convert an application without having the source code. The MSIX Packaging tool is now available from the Microsoft Store, or you can download it from https://www.microsoft.com/p/msix-packaging-tool/9n5lw3jbcxkf. You can run your desktop installers through this tool and obtain an MSIX package that you can install on your machine.
The MSIX Packaging tool enables you to create an MSIX application package from MSI, EXE, ClickOnce, App-V, Script, and a manual installation. The MSIX Packaging tool currently supports App-V 5.1, but if you have a package with App-V 4.x, then you can use the source installer to convert it to MSIX.
MSIX packaging tool
If you are already working in a clean environment, select “Create package on this computer.”
If you want to connect to an existing virtual or remote machine, select “Create package on a remote machine.”
If you have a local virtual machine on your local VM that you want to convert, select “Create package on a local virtual machine.” Please note that we support only Hyper-V virtual machines; if you want to use another virtualization product, you can connect using the remote machine option. See Figure 9-2.

MSIX packaging tool, creating a new package

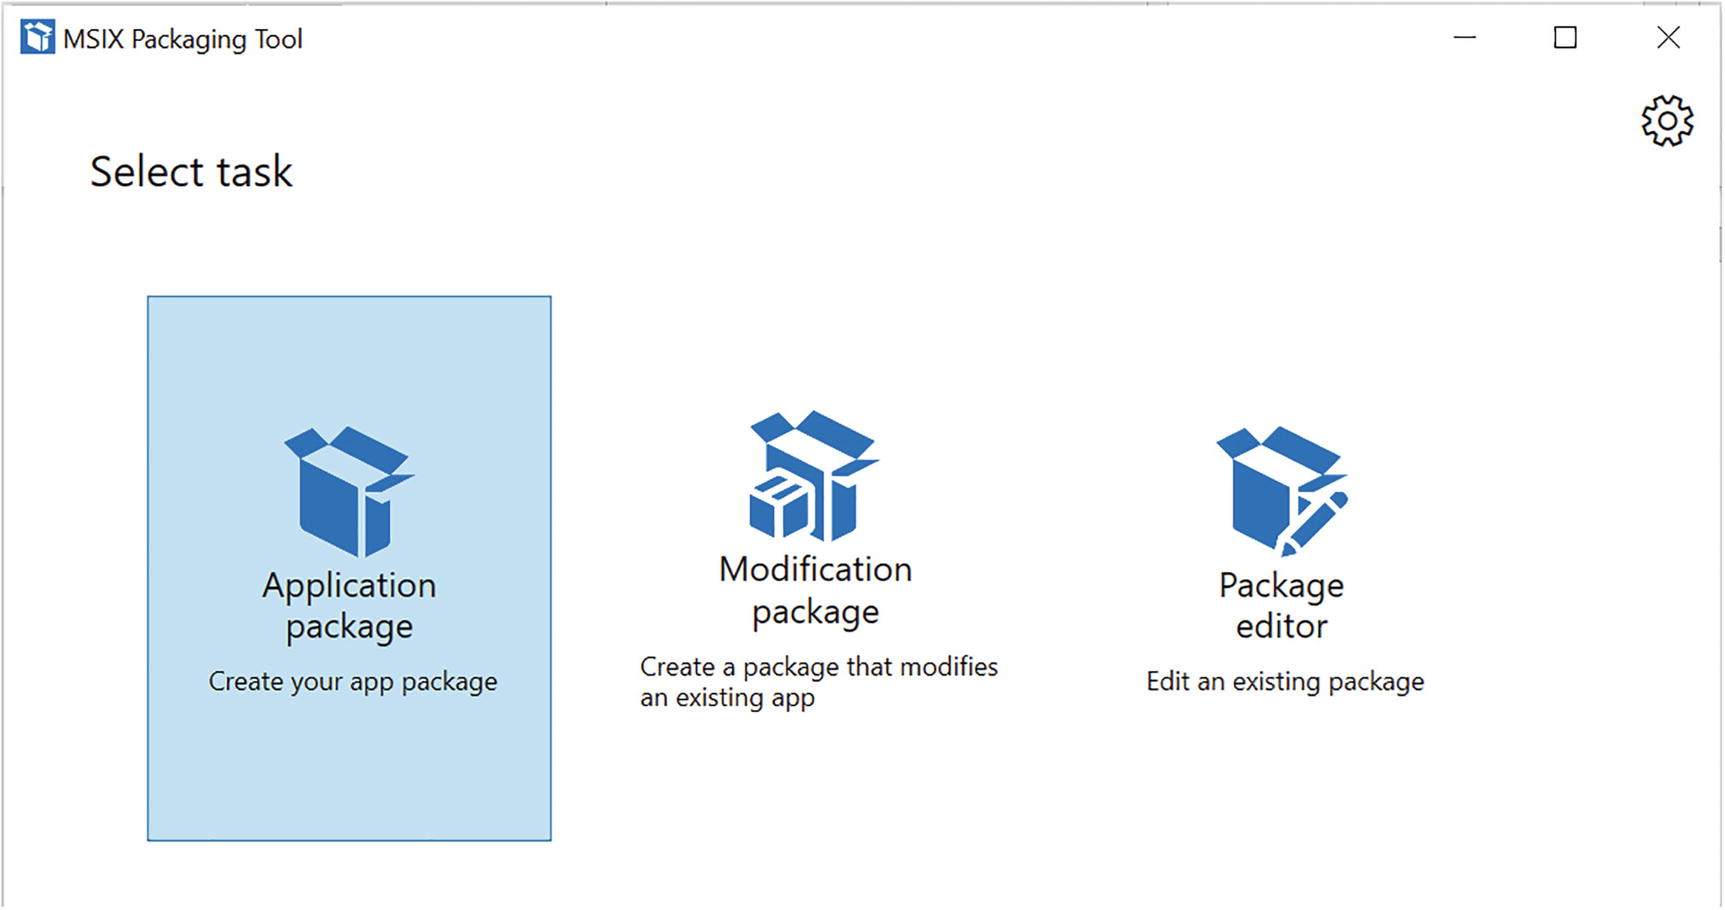
MSIX packaging tool, preparing the computer
You can select an existing installer in case you already have MSI, App-v, EXE, ClickOnce, or script files; otherwise, you can click Next and the MSIX Packaging tool will create the installer file for you, and then you can install the application manually during the installation phase.
If you have any installer arguments, you can enter the desired argument(s) in the “Specify installer arguments” field. This field accepts any string.
Sign with Device Guard signing: This option allows you to sign into your Microsoft Active Directory (AD) account that you have configured to use with Device Guard signing, which is a signing service that Microsoft provides where you don’t need to provide your own certificate.
Sign with a certificate (.pfx): Browse to and select your .pfx certificate file. If the certificate is password protected, type the password in the password box.
Specify a .cer file (does not sign): This option allows you to specify a .cer file. This is useful when you don’t want to sign the package, but you want to ensure that the publisher information matches the subject of the certificate that will be used for signing.
Do not sign package: Select this option if you will be signing your package later, because you cannot install an MSIX package if it is not signed.

MSIX packaging tool, choosing an installer

MSIX packaging tool, package information
MSIX packaging tool, restarting
This page shows application executables that the tool captured. It’s recommended to launch the application at least once, to capture any first launch tasks. You can launch the executable by selecting it and then clicking Run. You can also remove any unnecessary entry points by selecting it and then clicking Remove.

MSIX packaging tool, first-launch tasks

MSIX packaging tool, preparing package
The MSIX Packaging tool can convert an installer with services, and it will be visible on the Services report page. If no services were detected, you will still see this page, but it will be empty with a message that “No services were detected” at the top of the page.

MSIX packaging tool, service report
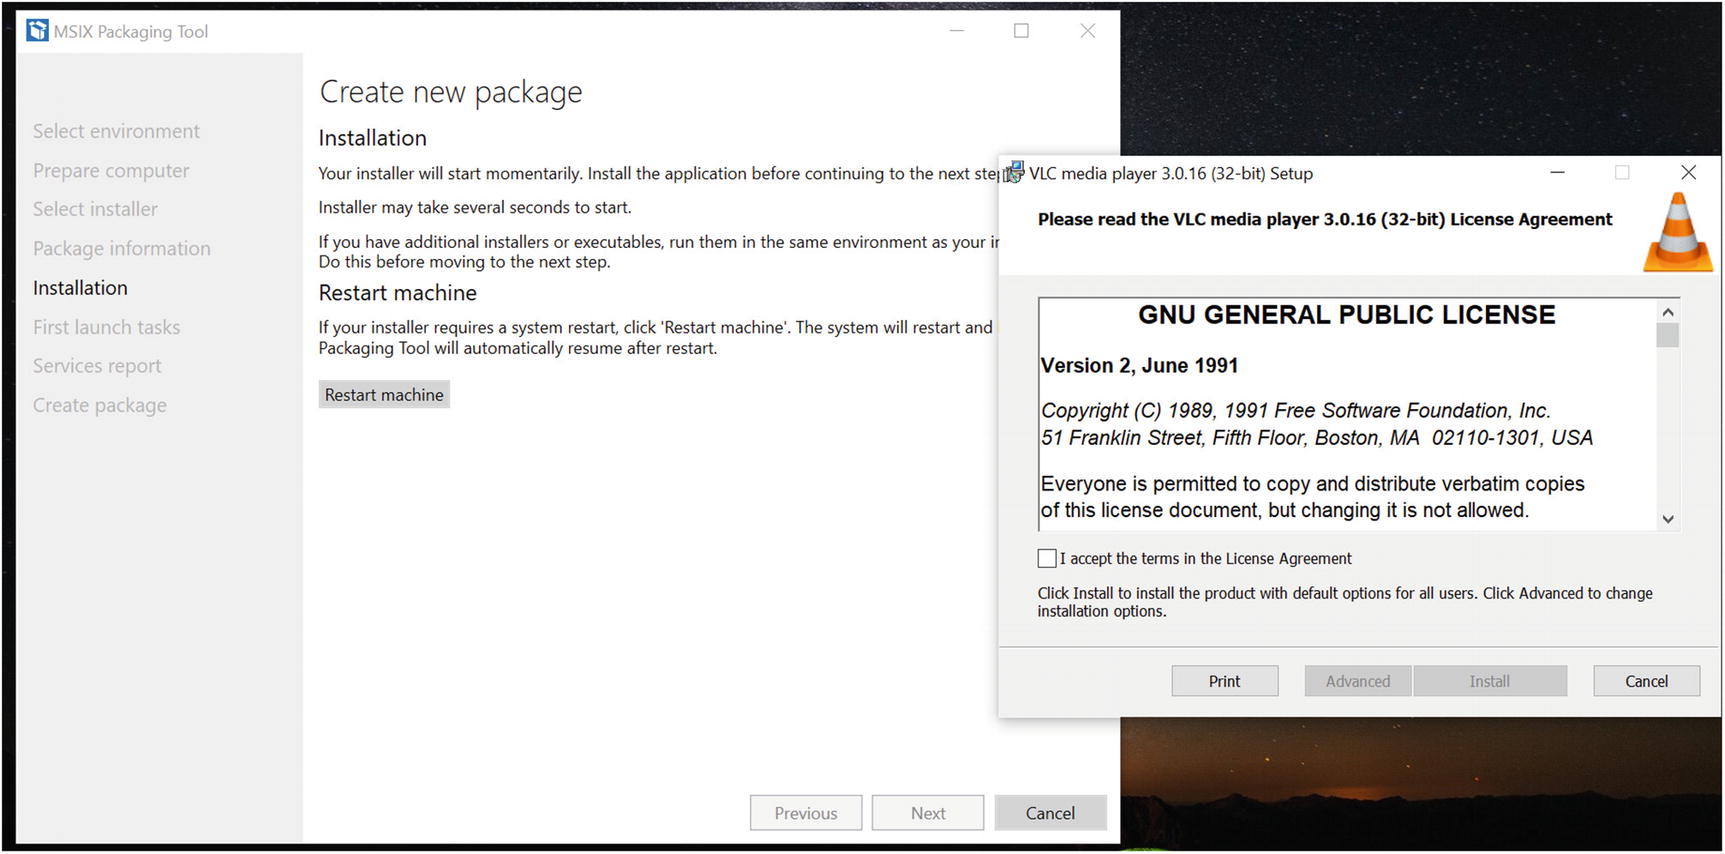
MSIX packaging tool, save location

MSIX packaging tool, package status

MSIX packaging tool, unpack to VHDX
Here is the command syntax:
Now that you have created the image, go to the destination folder, and make sure you successfully created the MSIX image (.vhdx). The next step is to upload the .vhdx file to be file share accessible from all Azure Virtual Desktop session hosts with read access.
Once the package is ready in .vhdx and uploaded to a file share, then you can add the MSIX package to the Azure Virtual Desktop by using the Azure portal or PowerShell.
Recommendations to Avoid Issues with MSIX Packaging
Make sure the certificate you are using for the MSIX signing is trusted in all Azure Virtual Desktop session hosts.
If you are using a self-signed certificate for a proof of concept (POC), then make sure you add the certificate on all AVD session hosts so that the certificate will be trusted.
Copy the final VHDX MSIX image to a file share that is accessible from all session hosts and have at least read permission on the .vhdx file.
Set Up MSIX App Attach with the Azure Portal
Here are the steps to set up an MSIX image in Azure Virtual Desktop.
- 1.
Go to the host pool where you want to add the MSIX package.
- 2.
Select MSIX packages to open the data grid with all the MSIX packages currently added to the host pool.
- 3.
Select + Add to open the Add MSIX package tab.
- 4.In the Add MSIX package tab, enter the following values:
For the MSIX image path, enter a valid UNC path pointing to the MSIX image on the file share (for example, \storageaccount.file.core.windows.netmsixshareappfolderMSIXimage.vhd). When you’re done, select Add to interrogate the MSIX container to check if the path is valid.
For the MSIX package, select the relevant MSIX package name from the drop-down menu in case multiple packages exist in one image. This menu will be populated only if you’ve entered a valid image path in MSIX image path.
For the package applications, make sure the list contains all the MSIX applications you want to make available to users in your MSIX package.
Optionally, enter a display name if you want your package to have a more user-friendly name in your user deployments.
Make sure the version has the correct version number.
Select the registration type you want to use. Which one you use depends on your needs.
“On-demand registration” postpones the full registration of the MSIX application until the user starts the application. This is the registration type we recommend you use so that the application will be registered only if the user is going to use it and it will help to improve user performance.
“Log on blocking” registers only while the user is signing in. We don’t recommend this type because it can lead to longer sign-in times for users.
- 5.For State, select your preferred state.
The Active status lets users interact with the package.
The Inactive status causes Azure Virtual Desktop to ignore the package and not deliver it to users.
- 6.
When you’re done, select Add. See Figure 9-13.

MSIX packaging tool, adding a package from the file share

MSIX packaging tool, publishing a package with an application group
MSIX packaging tool, publish package

MSIX packaging tool, package test
MSIX packaging tool, remote-app

MSIX packaging tool, remote-app test
As you know, now that we can publish MSIX app on the host pool itself, there are a few other options available through which we can attach the MSIX app image at the time of user login scripts via Group Policy.
You can select the MSIX app attach option based on your requirements and complexity.
Implement Application Masking
As you learned earlier, application masking is one of the options you can use to allow only specific groups of users to access specific applications in a pooled environment. The main challenge with a pooled full desktop is the application access if you have different set of applications needed by different groups of users. You can create different pooled host pools for different sets of applications, but it’s not a cost-effective solution, and management will be difficult, so the best option is to have common host pools with multiple applications installed on all session hosts and restrict access by using the FSLogix app masking. Use application masking to manage user access of the installed components. Application masking may be used in both physical and virtual environments. Application masking is most often applied to manage nonpersistent, virtual environments, such as virtual desktops.
Where to Use Application Masking?
Application masking can be used with full desktop pooled Azure Virtual Desktop instances where you need multiple small applications for different groups of users.
For example, let’s consider you have 100 users out of which 50 users want Visual Studio Code, 50 users want Microsoft Office, but all 100 users want the Chrome browser. Now in this case you can create two different host pools, the first one with Visual Studio Code and Chrome for the first 50 users and Microsoft Office and Chrome for another set of 50 users, but you must create two different images, and host pools management will be difficult. Infrastructure costs will be higher, because you must keep a minimum number of VMs running in both pooled host pools.
The alternative is to create a single host pool and install all three applications, and you can add application masking to allow the first 50 users to access Visual Studio Code plus Chrome, and second group of 50 users to access Microsoft Office plus Chrome. By doing that you will be saving infrastructure costs, since there will be a single host pool and fewer VMs will be running during off business hours. Additionally, autoscaling will allow you to stop all VMs if they are not in use.
How to Create Application Masking Rules?
You can apply application masking in the image itself, but you need the FSLogix rule editor to create an application masking rule. FSLogix Rules Editor setup comes with the FSLogix download, so once you download the FSLogix zip file, you can run FSLogixAppsRuleEditorSetup.exe to install the rule editor.
Make sure that the application you want to add in app masking is system centric and not user centric. This applies for all applications you want to install on pooled desktops as if the application is user centric; then the application setup will get stored in user AppData, and other users will not be able to access it.

FSLogix app masking, rule editor

FSLogix app masking, rule set

FSLogix app masking, hiding rule set

FSLogix app masking, hiding rule set test

FSLogix app masking, hiding rule set assignment
Everyone set to No (Not apply): all Allowed
Everyone set to Yes (apply): all deny

FSLogix app masking, hiding rule set assignment

FSLogix app masking, hiding rule files
Deploy an Application as a RemoteApp
RemoteApp is one of the best options to provide specific application access to specific sets of users without providing them with a full desktop. Azure RemoteApp helps you provide secure, remote access to applications from many different user devices. Azure RemoteApp basically hosts nonpersistent Terminal Server sessions in the cloud, and you get to use them and share them with your users. With Azure RemoteApp you can share apps and resources with users on almost any device.
A RemoteApp application group also needs a host pool and a session host in the back end. If you are using a pooled host pool for a RemoteApp with high availability, then you must install the application on all session hosts, before you publish the app with RemoteApp. You can create multiple RemoteApp application groups to publish different applications on one host pool and assign a different set of users on each RemoteApp.
Here we’ll go over the simple steps to publish a specific application with RemoteApp application group.

Deploying an application as a remote app, step 1

Deploying an application as a remote app, step 2
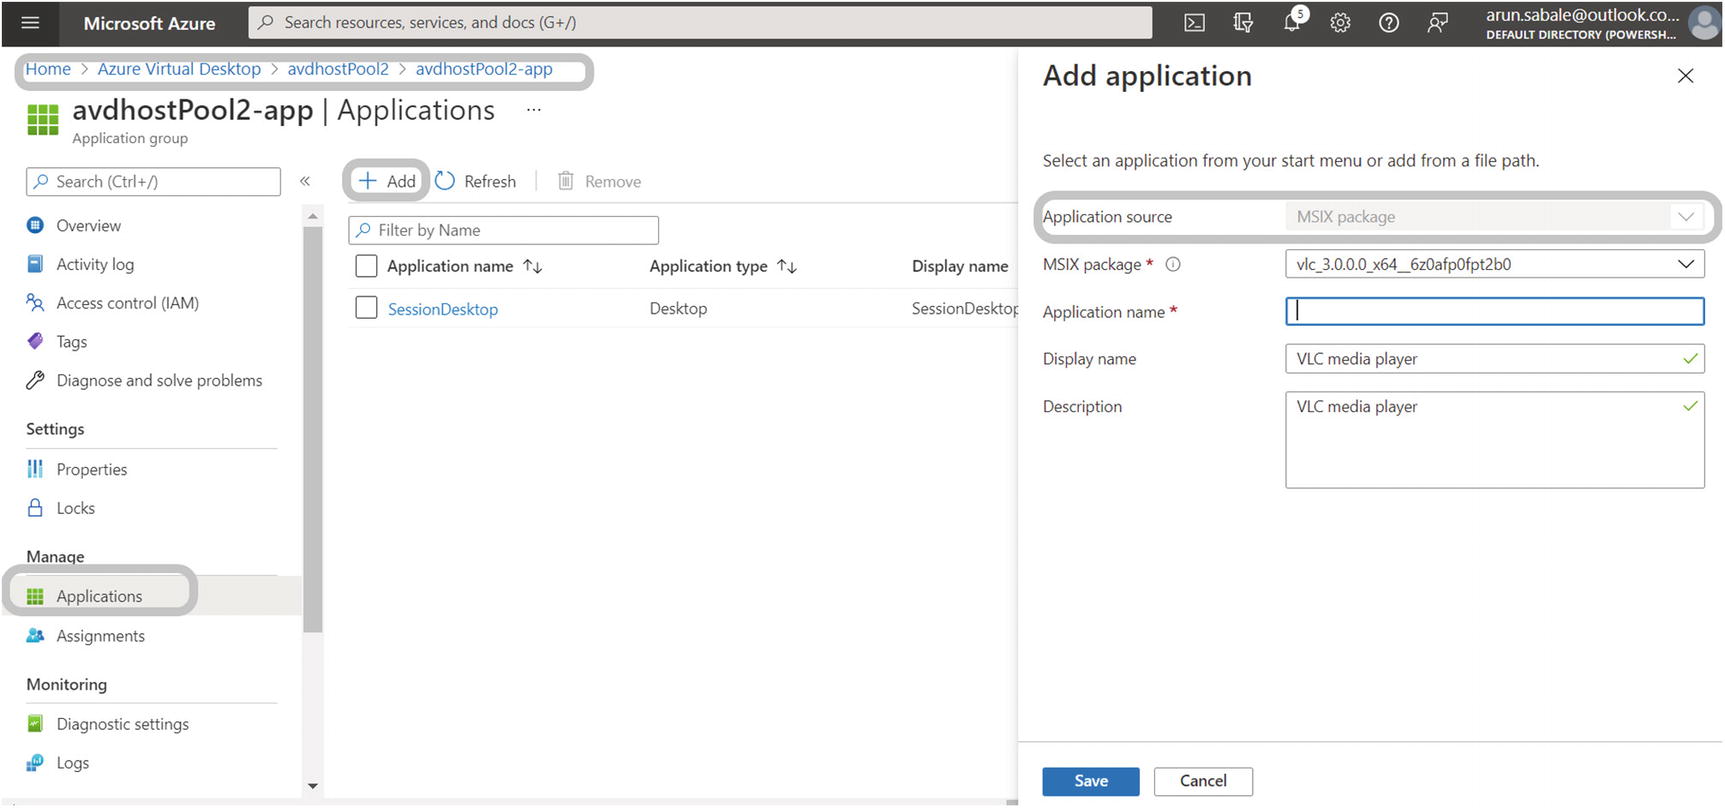
On the Applications tab, click “Add application” and provide the application details.
The application source can be a Start menu from a session host, a specific pile path from a session host, or an MSIX package. If you want to select the Start menu or file path, then make sure that the same application exists on all session hosts in a host pool.

Deploying a application as a remote app, step 3

Deploying an application as a remote app, step 4
On the Advanced tab, select and enable diagnostic settings for the RemoteApp. Finally, click the “Review + create” button and then click Create to create the RemoteApp.

Deploying an application as a remote app, testing
Implement and Manage OneDrive for Business for a Multisession Environment

Microsoft 365 suite
OneDrive is part of the Microsoft 365 suite that includes OneDrive, Teams, Word, Excel, PowerPoint, and many more apps. The licensing is available for personal, business, enterprise, and education. If you already have an E3, E5, or F1 license (Enterprise), then you just must assign the correct license to the user account so the user can access OneDrive.
By default, the Microsoft 365 suite will be installed on a multisession marketplace image with OneDrive, but the OneDrive sync app installs in per-user mode, meaning OneDrive.exe needs to be installed for each user account on the PC, below the %localappdata% folder. With the new per-machine installation option, you can install OneDrive in the Program Files (x86) or Program Files directory (depending on the OS architecture), meaning that all profiles on the computer will use the same OneDrive.exe binary. Other than where the sync app is installed, the behavior is the same.
Automatic transitioning from the previous OneDrive for Business sync app (Groove.exe)
Automatic conversion from per user to per machine
Automatic updates when a new version is available
The per-machine sync app supports syncing OneDrive and SharePoint files in Microsoft 365 and in SharePoint Server 2019.
How to Install OneDrive in Per-Machine Mode?

OneDrive installation
If you are doing the setup on an existing session host, where you have users using the Microsoft 365 suite and accounts were added on that computer, they’ll be migrated automatically.
How to Redirect and Move Windows Known Folders to OneDrive?
There are two primary advantages of moving or redirecting Windows known folders (Desktop, Documents, Pictures, Screenshots, and Camera Roll) to Microsoft OneDrive for the users in your domain; first your users can continue using the folders they’re familiar with. They don’t have to change their daily work habits to save files to OneDrive, and saving files to OneDrive backs up your users’ data in the cloud and gives them access to their files from any device.
Before you redirect known folders, make sure you are using the latest OneDrive build or upgrade to the latest available build before you deploy to decrease deployment issues.
OneDrive policies can be set using Group Policy, using Intune Windows 10 administrative templates, or configuring the Registry settings.
Prompt users to move Windows known folders to OneDrive: Use this setting to give the users a call to action to move their Windows known folders. See Figure 9-33.

OneDrive folder redirect
If users dismiss the prompt, a reminder notification will appear in the activity center until they move all known folders. If a user has already redirected their known folders to a different OneDrive account, they'll be prompted to direct the folders to the account for your organization (leaving existing files behind).
List of OneDrive Policies You Must Check
AllowTenantList: Allow syncing OneDrive accounts for only specific organizations.
AutomaticUploadBandwidthPercentage: Limit the sync app upload rate to a percentage of throughput.
AutoMountTeamSites: Configure team site libraries to sync automatically.
BlockExternalListSync: Control list sync.
BlockExternalSync: Prevent users from syncing libraries and folders shared from other organizations.
BlockKnownFolderMove: Prevent users from moving their Windows known folders to OneDrive.
BlockTenantList: Block syncing OneDrive accounts for specific organizations.
DefaultRootDir: Set the default location for the OneDrive folder.
DehydrateSyncedTeamSites: Convert synced team site files to online-only files.
DisableCustomRoot: Prevent users from changing the location of their OneDrive folder.
DisableFirstDeleteDialog: Hide the “Deleted files are removed everywhere” reminder.
DisableFRETutorial: Disable the tutorial that appears at the end of the OneDrive setup.
DisableNucleusSilentConfig: Control list sync.
DisableNucleusSync: Control list sync.
DisablePauseOnBatterySaver: Continue syncing when devices have battery saver mode turned on.
DisablePauseOnMeteredNetwork: Continue syncing on metered networks.
DisablePersonalSync: Prevent users from syncing personal OneDrive accounts.
DiskSpaceCheckThresholdMB: Set the maximum size of a user’s OneDrive that can be downloaded automatically.
DownloadBandwidthLimit: Limit the sync app download speed to a fixed rate.
EnableAllOcsiClients: Coauthor and share Office desktop apps.
EnableAutomaticUploadBandwidthManagement: Enable automatic upload bandwidth management for OneDrive.
EnableHoldTheFile: Allow users to choose how to handle Office file sync conflicts.
EnableODIgnoreListFromGPO: Exclude specific kinds of files from being uploaded.
FilesOnDemandEnabled: Use OneDrive files on demand.
ForcedLocalMassDeleteDetection: Require users to confirm large delete operations.
GPOSetUpdateRing: Set the sync app update ring.
KFMBlockOptOut: Prevent users from redirecting their Windows known folders to their PCs.
KFMOptInNoWizard: Silently move Windows known folders to OneDrive.
KFMOptInWithWizard: Prompt users to move Windows known folders to OneDrive.
LocalMassDeleteFileDeleteThreshold: Prompt users when they delete multiple OneDrive files on their local computer.
MinDiskSpaceLimitInMB: Block file downloads when users are low on disk space.
PermitDisablePermissionInheritance: Allow OneDrive to disable Windows permission inheritance in folders synced as read-only.
PreventNetworkTrafficPreUserSignIn: Prevent the sync app from generating network traffic until users sign in.
SharePointOnPremFrontDoorUrl: Specify the SharePoint Server URL and organization name. This setting is for customers who have SharePoint Server 2019. For information about using the new OneDrive sync app with SharePoint Server 2019.
SharePointOnPremPrioritization: Specify the OneDrive location in a hybrid environment. This setting is for customers who have SharePoint Server 2019. For information about using the new OneDrive sync app with SharePoint Server 2019.
SilentAccountConfig: Silently sign in users to the OneDrive sync app with their Windows credentials.
UploadBandwidthLimit: Limit the sync app upload speed to a fixed rate.
WarningMinDiskSpaceLimitInMB: Warn users who are low on disk space on One Drive.
Implement and Manage Microsoft Teams AVD Redirect
Teams is the most used application by end users, and most organizations want teams on Azure Virtual Desktop as well. Microsoft Teams is supported on Azure Virtual Desktop personal and pooled desktops as well, but for a pooled desktop we need a different configuration. You have to use a remote desktop client if you want to use audio/video functionality. Teams has media optimization specially for a pooled desktop to enhance the audio and video functionality. Media optimization for Microsoft Teams is available only for the Windows Desktop client on Windows 10 machines. Media optimizations require Windows Desktop client version 1.2.1026.0 or later.
Install the Teams WebSocket Service

Remote desktop WebRTC installation
Install Microsoft Teams

Teams installation
This installs Teams to the Program Files (x86) folder on a 32-bit operating system and to the Program Files folder on a 64-bit operating system. At this point, the golden image setup is complete. Installing Teams per machine is required for nonpersistent setups.
Verify Media Optimizations Are Loaded
- 1.
Quit and restart the Teams application.
- 2.
Select your user profile image and then select About.
- 3.
Select the version.

Teams for WVD optimized
Customize the Group Policies Properties of Your Session Host
It is recommended that you implement the following policy on the session host so that the app privacy allows Teams to use the camera and microphone. Implement the following settings in the GPO and apply it on all pooled session hosts:
- 1.
Configure the following policies on the session host (Windows 10 multisession in Windows Virtual Desktop):
Computer configurationAdministrative TemplatesWindows ComponentsApp PrivacyLet Windows apps access the Camera: Force Allow.
Computer configurationAdministrative TemplatesWindows ComponentsApp PrivacyLet Windows apps access the microphone: Force Allow.
Computer configurationAdministrative TemplatesWindows ComponentsRemote Desktop ServicesRemote Desktop Session HostDevices and Resource Redirection"Do not Allow Video Capture Redirection": Disable it.
RDP Properties for a Host Pool to Enable Video and Audio
audiocapturemode:i:1 enables audio capture from the local device and redirects audio applications in the remote session.
audiomode:i:0 plays audio on the local computer.
camerastoredirect:s:* redirects all cameras.
Implement and Manage Browsers and Internet Access for Azure Virtual Desktop Sessions
Most of the organizations allow end users to use a browser of their choice including Chrome, Edge, and Firefox. The question is how to add the additional browser on the session host. One of the best options is to install the browser in the image itself, but make sure that the installation is not user specific (per user). Alternatively, you can install the browsers using Intune or the configuration manager based on your organization setup.
Additionally, you can apply a Group Policy on all session hosts to control the browser behaver and restrict specific functionality.
Internet access is always required for end users, but in case your organization policy does not allow Internet access from an AVD virtual desktop, you can block the Internet access on an NSG or firewall.

Internet and on-premises access
Create and Configure an Application Group
Desktop application group: The desktop application group allows you to publish full desktops on any host pool, although you can create only one desktop application group in any host pool.
RemoteApp application group: RemoteApp application groups allow you to publish application (like VLC, Visual Studio Code, MS Word) on Azure Virtual Desktop without publishing the full desktop so that users can access direct application without logging into a desktop. This allows an organization to minimize security risk.
How to Create an Application Group?

AVD application group
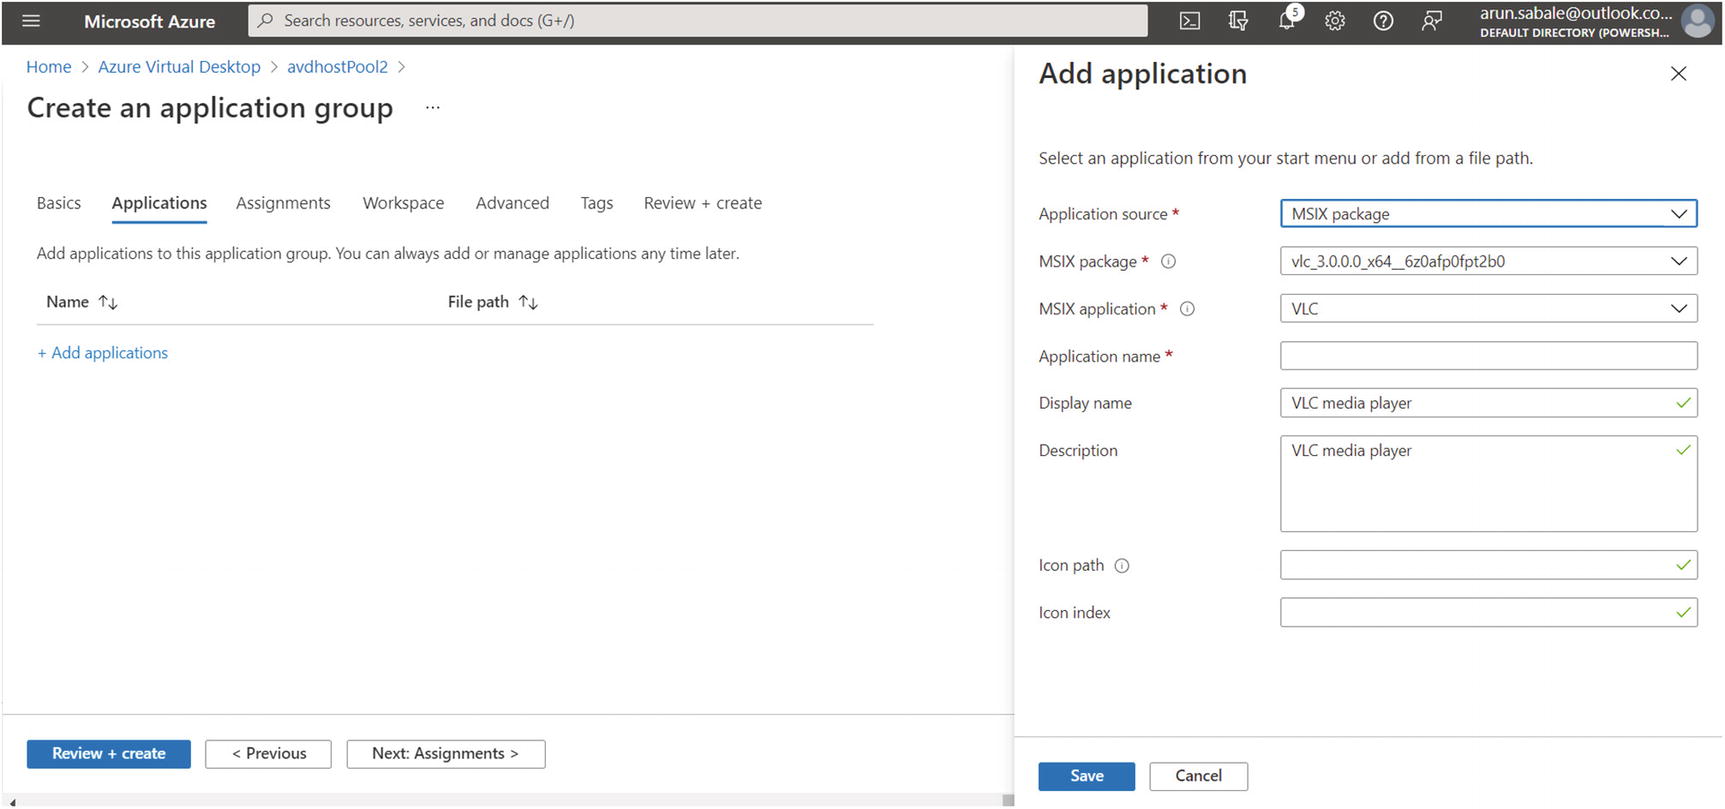
Application tab: The next tab is Application. If you are creating a desktop application group, then you don’t have to select anything here, but if you are creating a RemoteApp, then you must select the application source (MSIX/Start menu/file path) and provide the application information. Click the Next button and go to the Assignment tab.
Assignment tab: On the Assignment tab, add a user/group that you want to access the desktop or RemoteApp. Click the Next button and go to the Workspace tab.
Workspace tab: On the Workspace tab, select an existing workspace if you have already created one, or you can create a new workspace on this tab.
Once you add all the information, click the “Review + create” button to create the application group.
Refer to the RemoteApp section for more details about the RemoteApp application detail and steps.
Summary
In this chapter, you learned all about the options to publish applications in Azure Virtual Desktop, including MSIX app attach, RemoteApp, and app masking. Additionally, you learned about the most common applications such as OneDrive, Teams, and browsers, as well as the steps to implement them in Azure Virtual Desktop.
Now that you know all the options to publish an application in Azure Virtual Desktop, you must select the correct options for your organization for better performance.