The following section will explore cash and bank management in daily transactions. It will focus on bank account reconciliation, which is a key process to ensure that all recorded transactions match the bank statement; and the bank facility will focus on the letter of guarantee.
Bank account reconciliation is a validation process of the bank's account statement, and recorded transactions in the cash and bank management module through customer deposits and vendor payments.
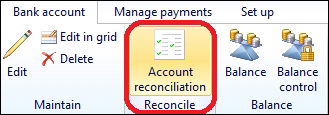
There are two reconciliation mechanisms that you can apply for each bank account: the first one is the manual reconciliation mechanism, and the second one is newly introduced in Microsoft Dynamics AX 2012 R2, the automatic import of bank statements. You have to navigate to Cash and bank management | Common | Bank accounts | Select bank account. In the Bank account ribbon, click on Account reconciliation, as shown in the following screenshot:
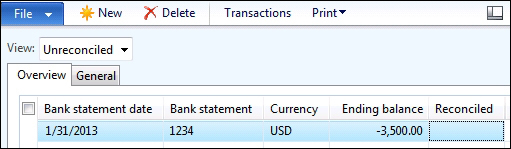
The procedure begins when the company receives the bank account statement from the bank. Under Cash and bank management | Common | Bank accounts, select Bank account | Bank account ribbon | Account reconciliation. In the account reconciliation form, enter the reconciliation date, statement number, and statement ending balance, as shown in the following screenshot:
Under reconciliation transactions, only the booked transactions through Microsoft Dynamics AX modules are listed. If it matches the bank statement, mark it as Cleared, as you can see in the following screenshot:
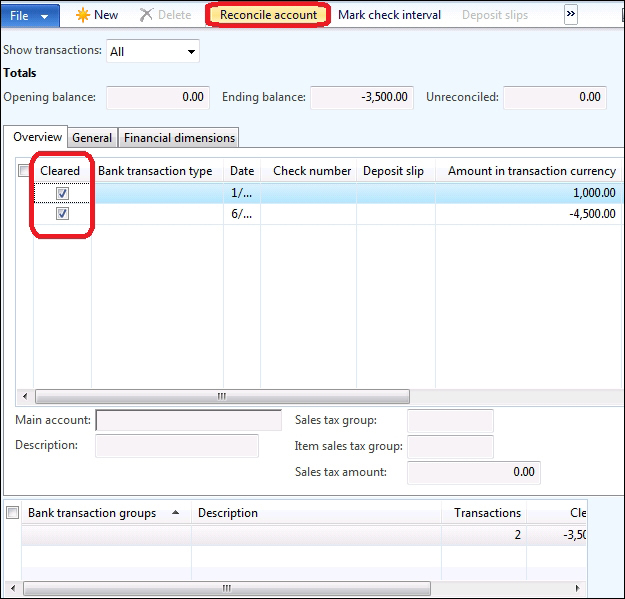
After marking all transactions, click on Reconcile account to confirm the reconciliation process. If the reconciliation is successful, an Infolog window will pop up displaying this message: Account has been reconciled. This is shown in the following screenshot:

To automatically import bank statements, you must activate the Advanced bank reconciliation option. In order to activate the Advanced bank reconciliation option, navigate to Cash and bank management | Common | Bank accounts | Edit | Reconciliation. The following screenshot displays the Advanced bank reconciliation option under the Reconciliation fast tab:
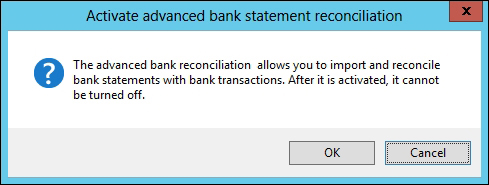
As you can see in the following screenshot, the advanced bank reconciliation option cannot be turned off after activation:
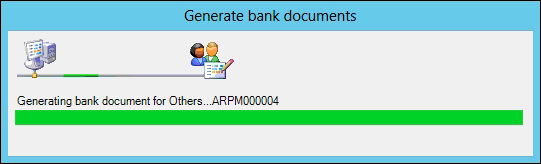
The following screenshot shows the Generate Bank Documents window:
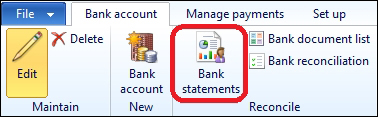
The manual process of importing bank statements starts by selecting Bank account and then by clicking on Bank statements, as you can see in the following screenshot. In order to go to the Bank statements section, navigate to Cash and bank management | Common | Bank accounts. Select a bank account, and then go to the Bank account ribbon and select Bank statements.
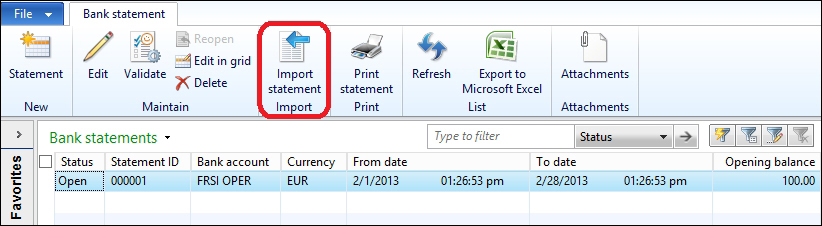
In the Bank statement screen, a journal line has been created with a status of Open. To import the bank statement, click on Import statement. To go to the Bank statement section, navigate to Cash and bank management | Common | Bank statement. The Bank statement screen is shown in the following screenshot:
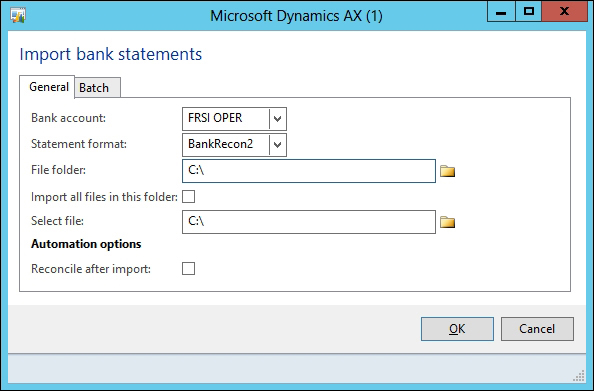
A dialog box will pop up to select the file to be imported. Choose a bank account, locate the file path, and then click on OK. In order to go to the Import bank statements section, you have to navigate to Cash and bank management | Common | Bank statement. In the Bank statement ribbon, select Import statement. The Import bank statements window is shown in the following screenshot:
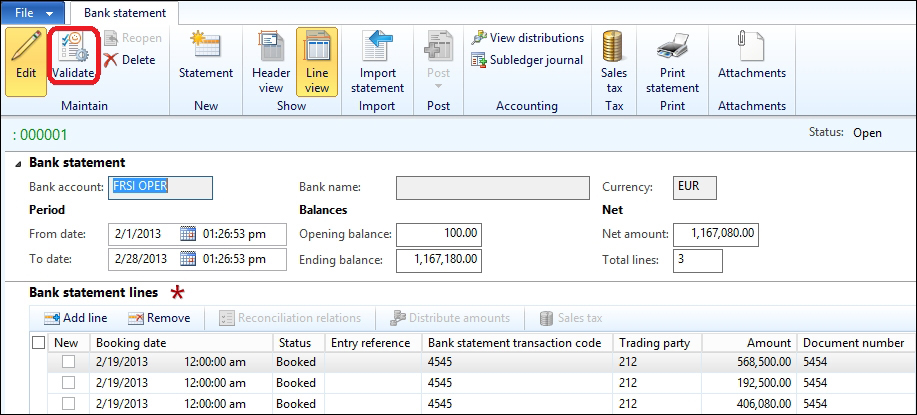
The Bank statement form contains the transaction lines of the imported bank transactions, in addition to the opening balance, ending balance, and net amount details. Click on Validate to validate the imported bank statement. If there is an error with the opening or ending balance, the validation process will stop. In order to edit the bank statement, you have to navigate to Cash and bank management | Common | Bank statement | Edit. The Bank statement screen is shown in the following screenshot:
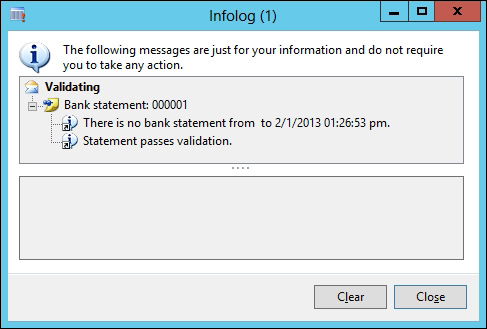
As you can see in the following screenshot, an Infolog window will pop up to confirm that the statement passes the validation process:
In order to match the bank transactions with the bank statement, go to the Bank reconciliation journal by navigating to Cash and bank management | Journals | Bank reconciliation, as shown in the following screenshot:

To create a new journal line, select Bank account and then click on Lines, as shown in the following screenshot:

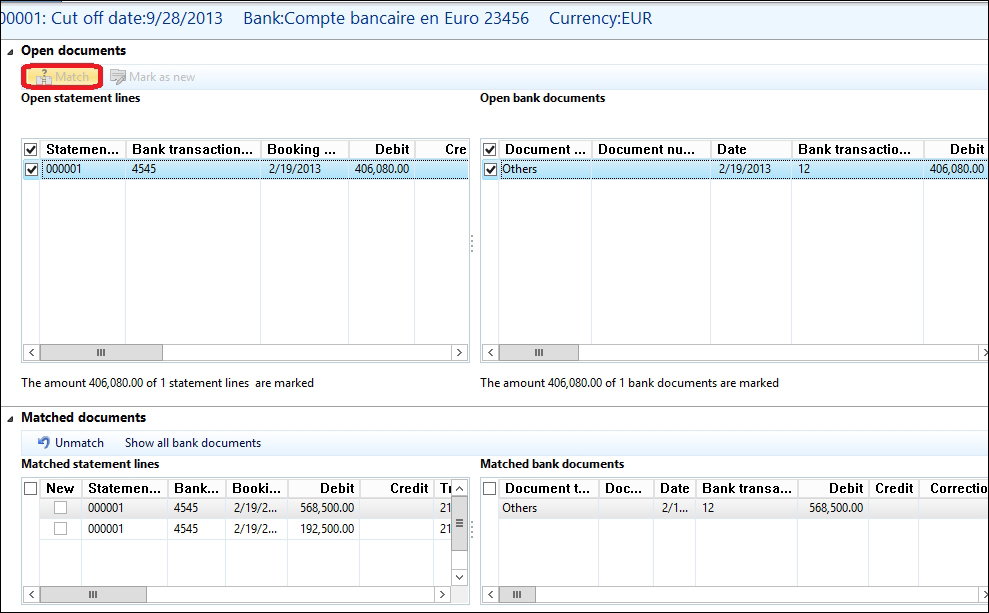
The bank reconciliation worksheet contains the following fields:
- Open statement lines: This represents the imported transactions of the bank statement
- Open bank documents: This represents the bank transactions posted on Microsoft Dynamics AX
- Matched statement lines: This represents the matched line in the statement with posted transactions
- Matched bank documents: This represents the matched bank document in the statement with posted transactions
While checking a bank statement line with a posted transaction, click on Match. As you can see in the following screenshot, the matched lines move to the Matched documents tab:
After matching all transactions against the bank statement, click on Reconcile, as shown in the following screenshot, in order to reconcile this statement and close it:

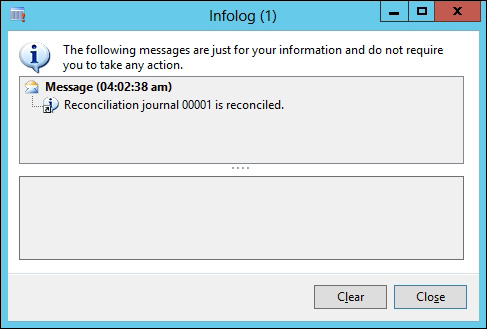
As you can see in the following screenshot, an Infolog window will pop up indicating that the reconciliation process is finished:
A letter of guarantee is an agreement by a bank (the guarantor) to pay a set amount of money to another person (the beneficiary) if the bank's customer (the principal) defaults on a payment or an obligation to the beneficiary. Letters of guarantee are not transferable, and apply only to the beneficiary named in the guarantee agreement. The principal can request an increase or decrease in the value of a letter of guarantee, subject to the terms of the agreement.
The following diagram illustrates the required configuration and setups in order to utilize the letter of guarantee function. The Letter of Guarantee - LG function configuration should be activated, in addition to the basic setups including Bank documents posting profile, Bank facility agreements, and Bank facility.

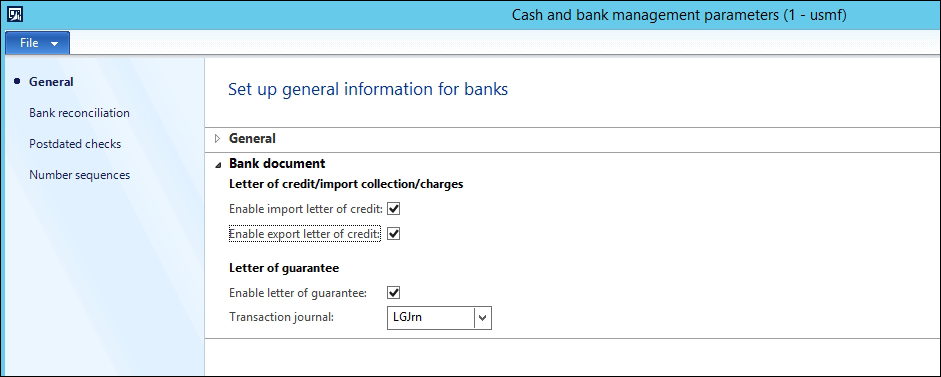
The first step in configuration is to activate the letter of guarantee checkbox on cash and bank management parameters, and assign the journal name that will be used to post the issuance commission and margin transaction. In order to perform this function, navigate to the Cash and bank management | Setup | Cash and bank management parameter | Bank document fast tab. The activation screen is shown in the following screenshot:
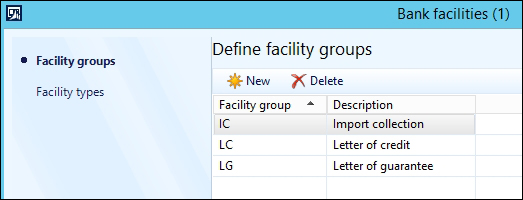
Create the bank facilities records by navigating to Cash and bank management | Setup | Bank documents | Bank facilities. As shown in the following screenshot, go to the Facility groups fast tab, create a new record by clicking on New or by pressing Ctrl + N. Enter the Facility group code and the Description value.
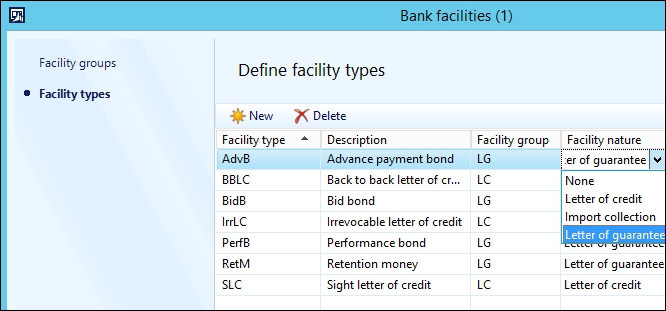
Then move to the Facility types fast tab, and create a new record by clicking on New or by pressing Ctrl + N. Enter the Facility type code and the Description value, select Facility group and Facility nature (whether it is Letter of credit, Import collection, or Letter of guarantee). The Facility types fast tab is shown in the following screenshot:
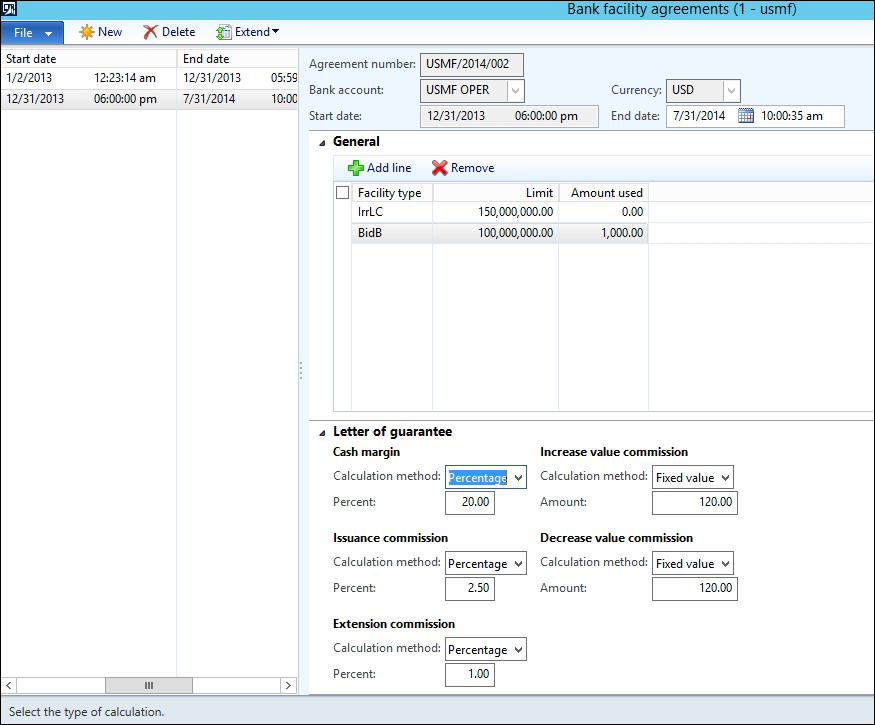
Create the bank facility agreements by navigating to Cash and bank management | Setup | Bank documents | Bank facility agreements on the General fast tab. Identify the start and end date of the facility agreement, in addition to the amount of facility limit and used amount. In the Letter of guarantee fast tab, identify the Cash margin, Issuance commission, Extension commission, Increase value commission, and Decrease value commission. The facility agreements are shown in the following screenshot:
Create the bank documents posting profile by navigating to Cash and bank management | Setup | Bank documents | Bank documents posting profile where you can identify the accounts: Settle account, Charges account, Margin account, and Liquidation account. The posting profile could be distinguished by the bank facility type, facility group, and so on. The Bank documents posting profile window is shown in the following screenshot:

The letter of guarantee is used in sales activities where the customer provides the guarantee to deliver goods or services against this guarantee. In the following section, we will explore a sales order transaction with the letter of guarantee.
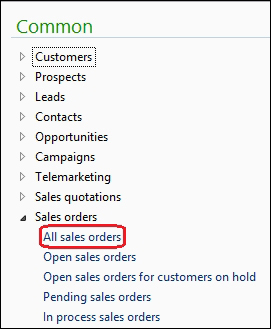
Navigate to Sales and marketing | Common | Sales orders | All sales orders. The sales order menu is shown in the following screenshot:
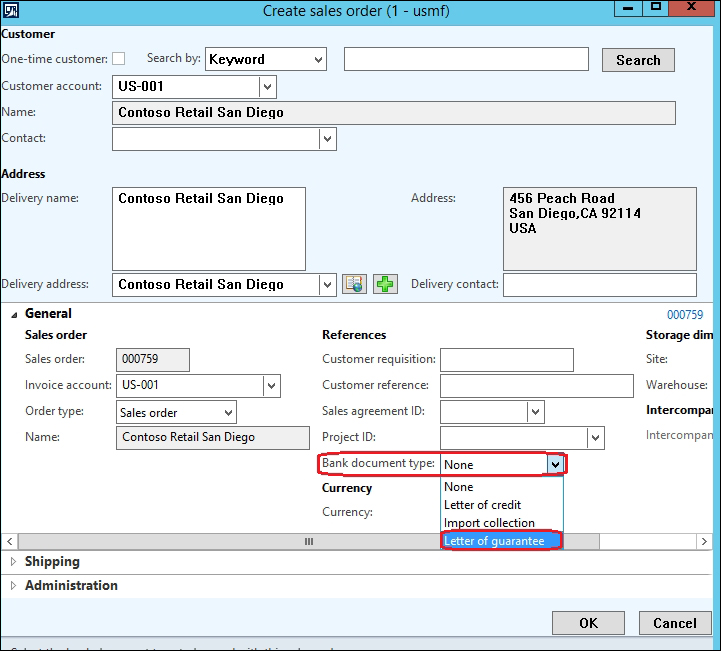
Create a new record by pressing Ctrl + N, select customer account, and then move to the General fast tab. In the Bank document type field, select Letter of guarantee. The sales order creation window is shown in the following screenshot:
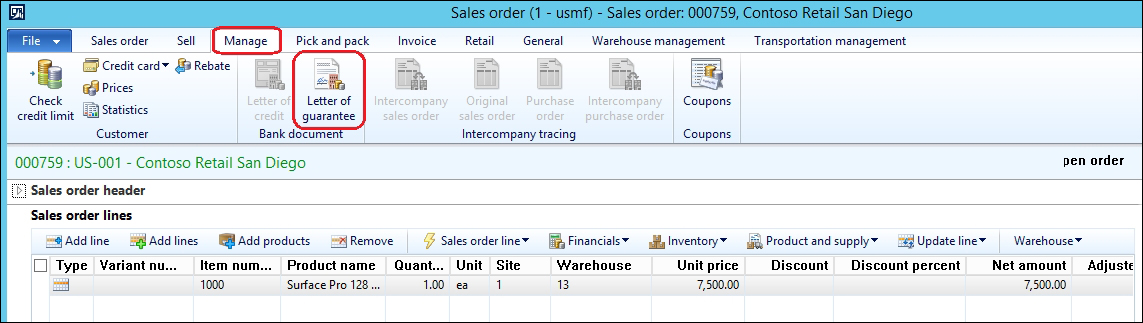
In the sales order form, select the item ID (such as sold, quantity, price, site, and warehouse) of the product. Then move to the Manage ribbon, and then select Letter of guarantee. The sales order form line is shown in the following screenshot:
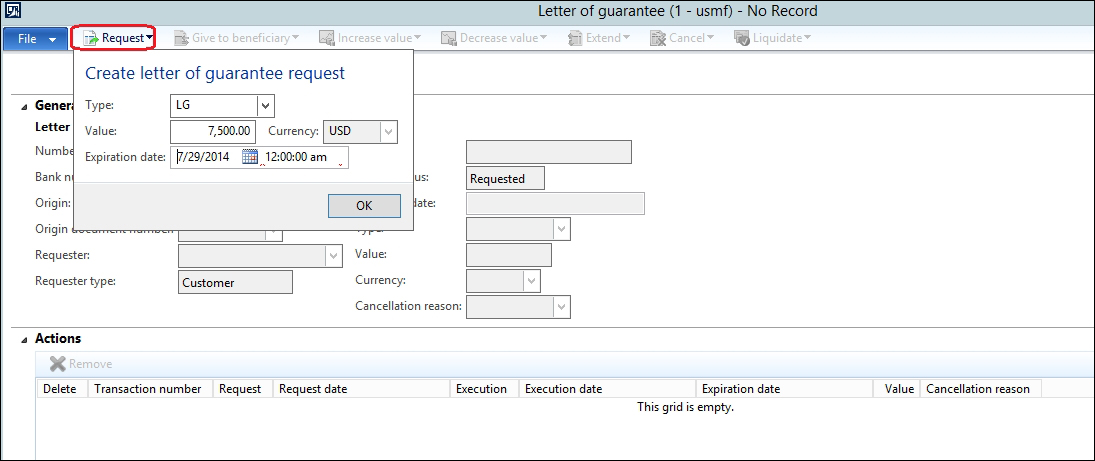
In the letter of guarantee form, click on Request to create a letter of guarantee request, select values for the Type, Value, and Expiration date fields. The letter of guarantee request is shown in the following screenshot:
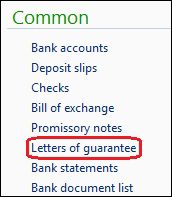
Then move to the letter of guarantee process. This process is executed from the cash and bank management module by navigating to Cash and bank management | Common | Letters of guarantee. The Letters of guarantee menu is shown in the following screenshot:
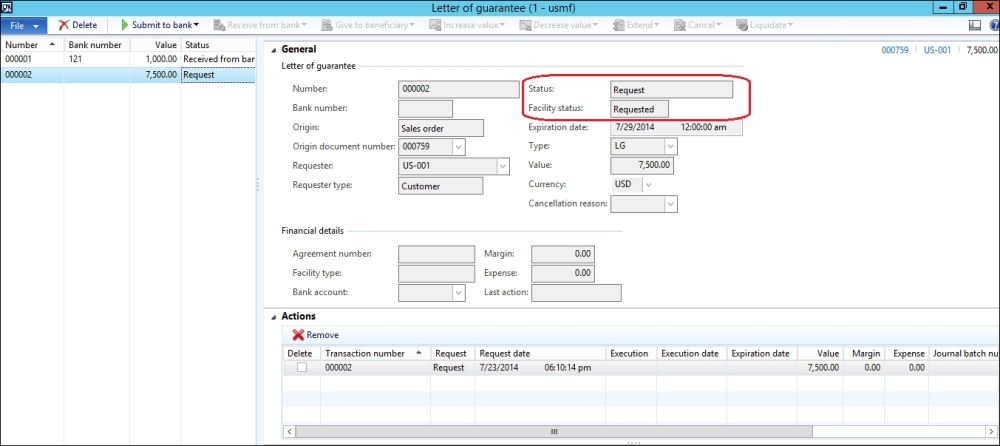
The first step in the letter of guarantee process is submitting the letter of guarantee to the bank. The current Status value is Request, and the Facility status value is Requested. The letter of guarantee, status, and other related information is shown in the following screenshot:
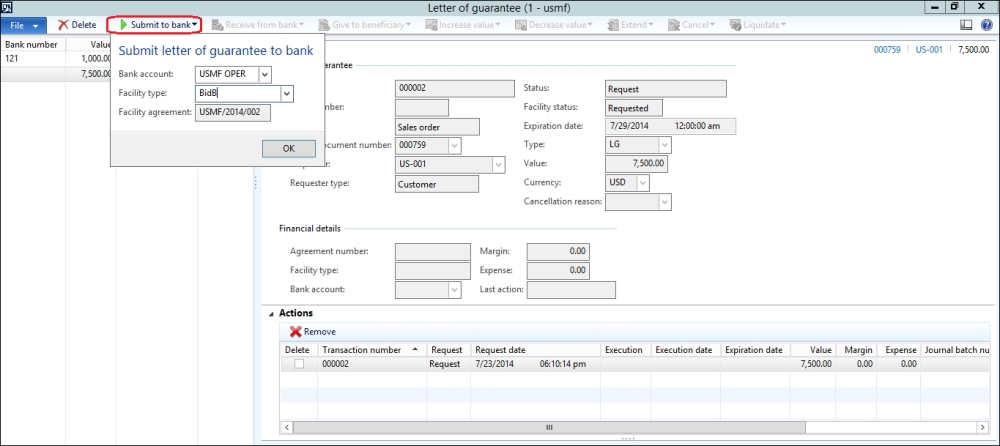
Click on Submit to bank, select the Bank account and Facility type values, and then click on OK. The submit to bank process is shown in the following screenshot:
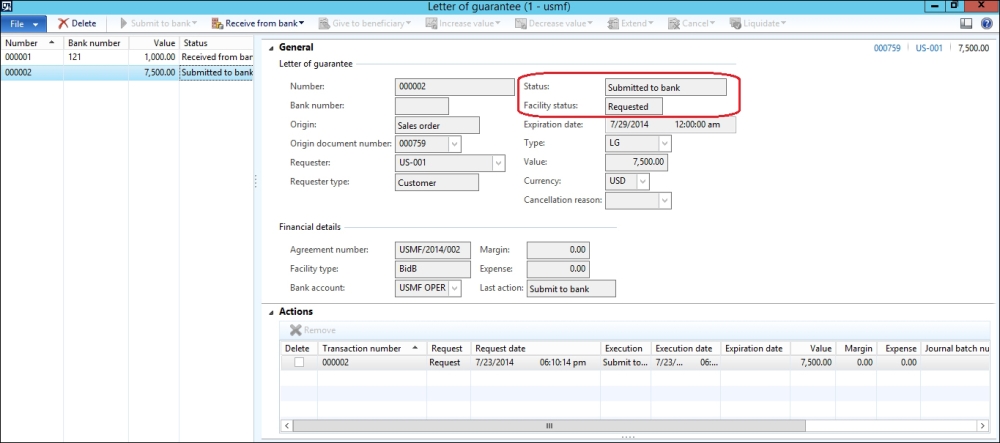
The Status field is updated to be Submitted to bank, and the Facility status field remains as Requested. The financial details are updated with the bank submission information. Status updates and updated submission information are shown in the following screenshot:
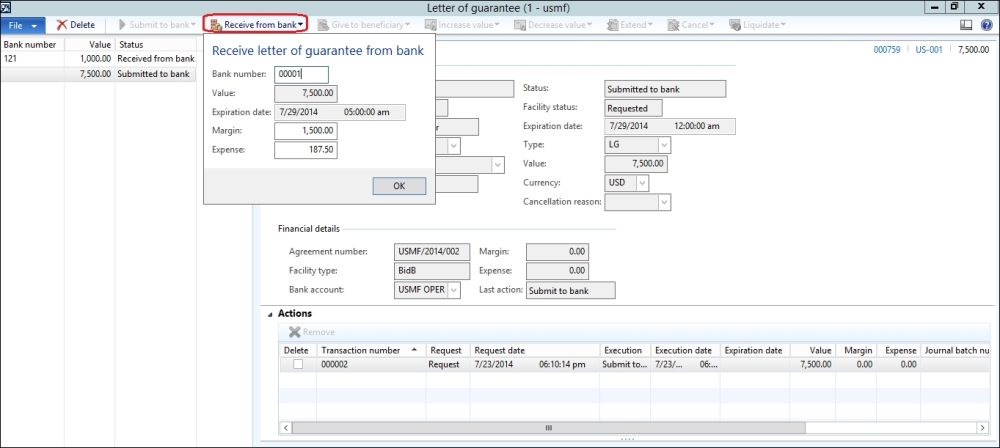
The company receives a confirmation from the bank and the system automatically calculates the Margin and Expense. A confirmation received from the bank function is shown in the following screenshot:
The system generates and posts a general journal transaction; the Infolog window pops up displaying the message indicating that the journal has been posted, as shown in following screenshot:
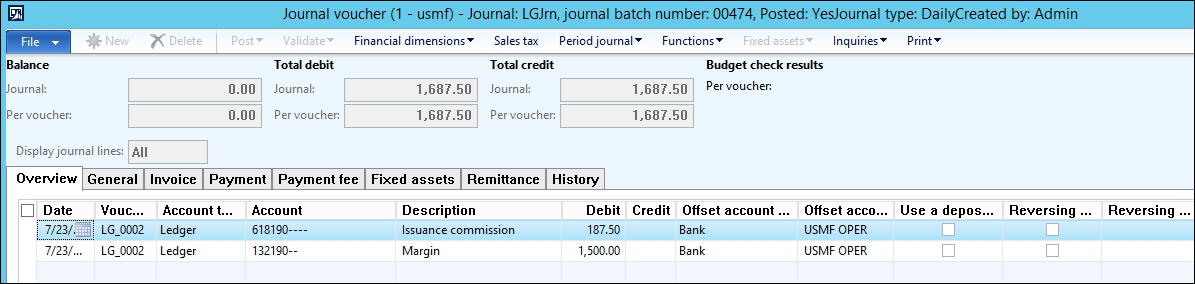
In order to check the posted transaction, you have to navigate to General Ledger | Journals | General journal | Posted and filter on the letter of guarantee journal name. The posted journals are shown in the following screenshot:
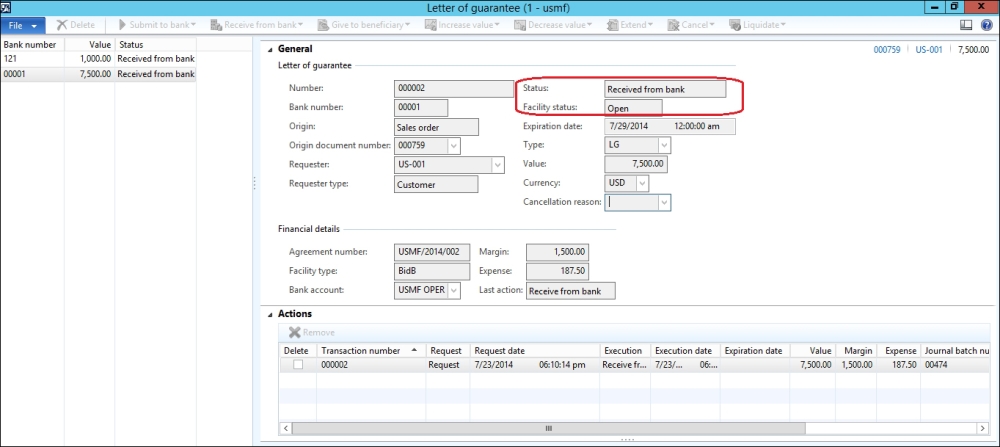
The letter of guarantee document's Status field is updated to be Received from bank and the Facility status field is updated to be Open. The letter of guarantee status update is shown in the following screenshot:
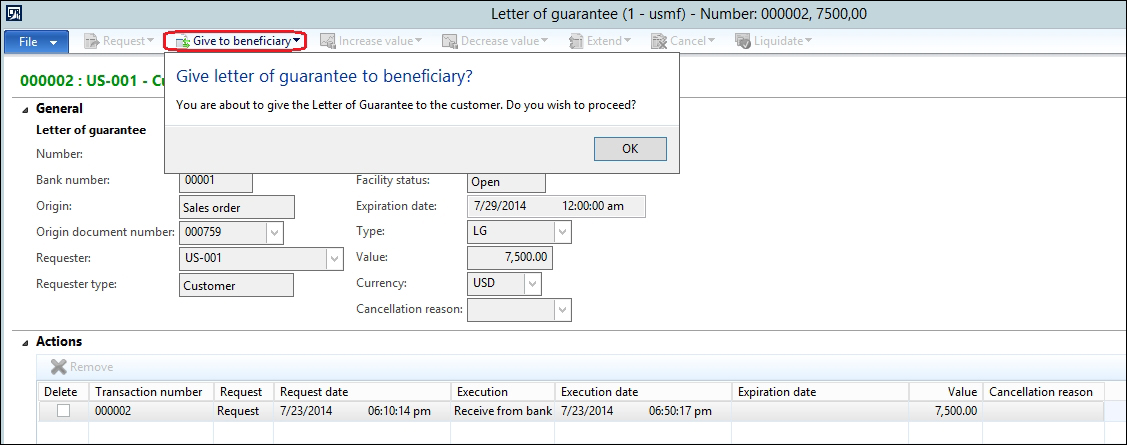
Then you should navigate back to Sales and marketing | Common | Sales orders | All sales orders and filter to the previously created sales order, and on the ribbon move to Manage and select Letter of guarantee, in order to request the letter of guarantee to the customer. The request of giving the letter of guarantee to the beneficiary is shown in the following screenshot:
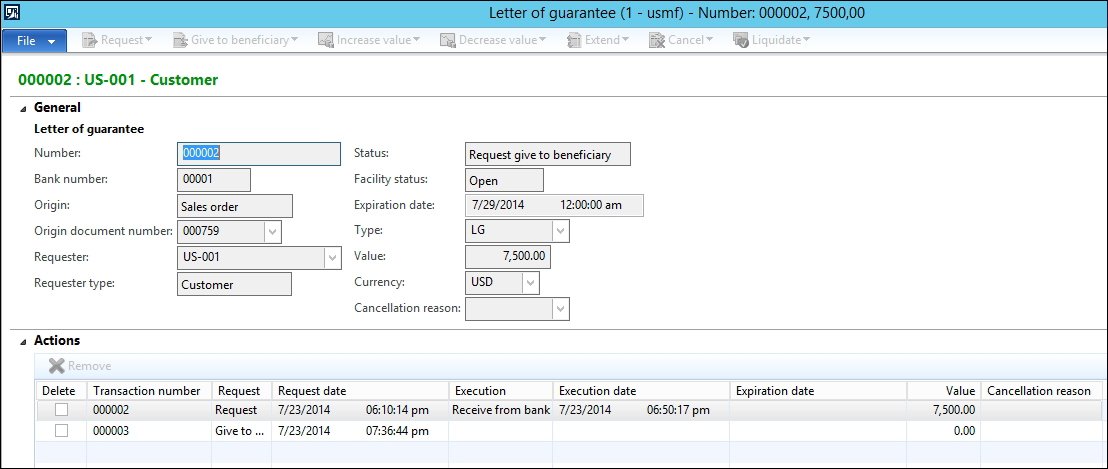
The Status field is updated to be Request give to beneficiary and the bank Facility status field remains as Open. The status update is shown in the following screenshot:
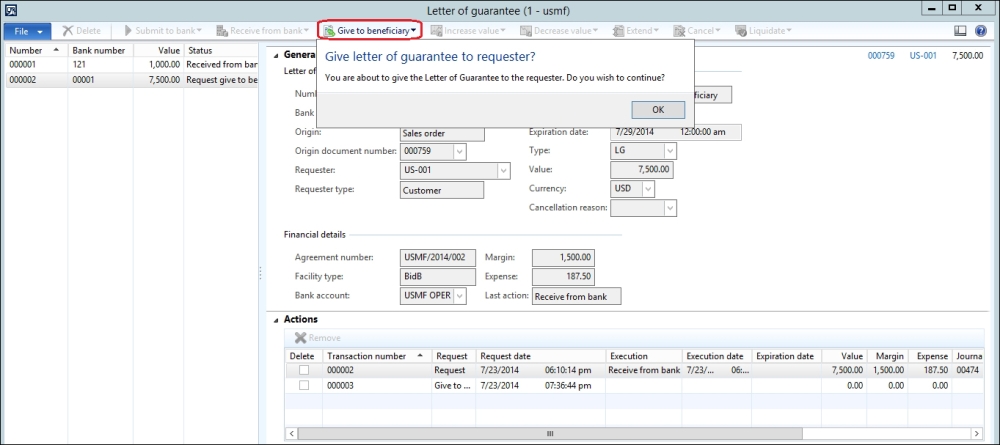
Then navigate to Cash and bank management | Common | Letters of guarantee to give the letter of guarantee to the beneficiary. The following screenshot shows the action of giving the letter of guarantee to the beneficiary:
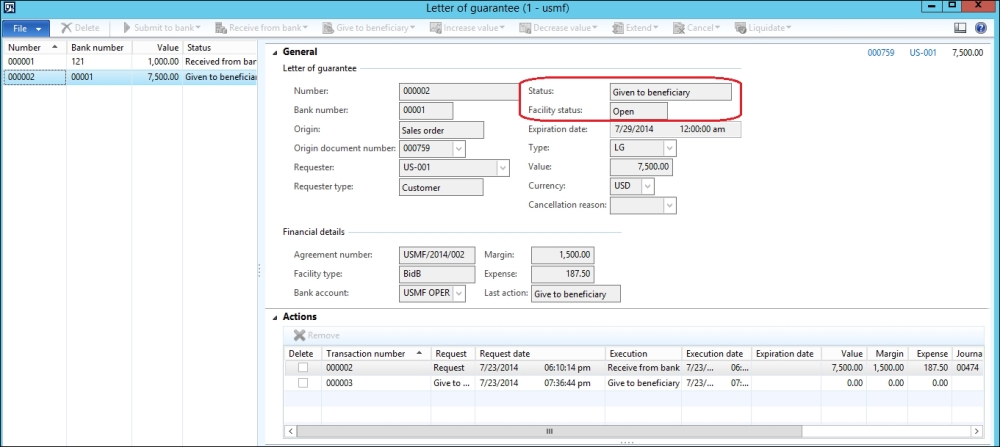
The Status field is updated to be Given to beneficiary and the Facility status field remains as Open. The letter of guarantee is shown in the following screenshot:
There are other options that could be performed after this stage; they are as follows:
- Increase or decrease the letter of guarantee
- Cancel or extend it
- Liquidate the letter of guarantee