
The Accounts receivable module's controls are an essential task to be discussed during the analysis and design phases, in addition to being assessed on the operation phase for enhancements. Microsoft Dynamics AX 2012 R3 addresses the required basic business procedures for this module's controls. It is significant to the business to control the execution of Accounts receivable processes, since it directly affects company revenues. Therefore, it should be controlled and monitored. In the following section, we will explore:
- Customer hold activities
- Customer credit limit management
In the daily business operations in Accounts receivable, the accounting manager may need to stop transactions on a specific customer. The on-hold function for customers in Microsoft Dynamics AX 2012 is located at the customer level. To access this function, navigate to Accounts Receivable | Common | Customers | All Customers, select a customer, and go to the Credit and collection fast tab.
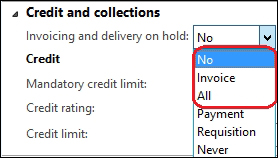
As shown in the following screenshot, the on hold function has several options based on customer transaction type, whether it is Invoice, All, Payment, Requisition, Never, or No (No is the default value). These options are used to prevent the customers from executing particular transactions or to stop the customers entirely.
Note
The customer on hold stats has the following options for customer transactions:
- No: This option means that the customer is allowed to execute all transaction types
- Invoice: This option means that the customer is prevented from executing invoices transactions only
- All: This means that the customer is prevented from executing any transaction
- The other options Payment, Requisition, and Never are related to the Accounts payable module
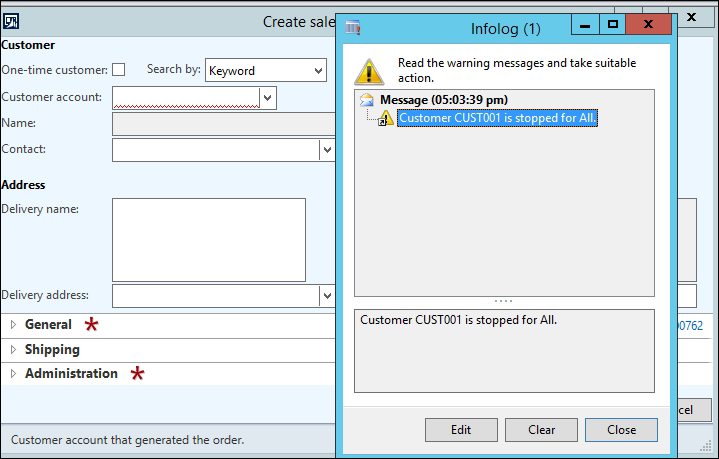
If an end user tries to select a customer with an on-hold status, the system will prevent the transaction from proceeding to the creation step. This is shown in the following screenshot, where a user tried to create a sales order:
There is a common practice in some business domains where the sales are only on a cash basis. The customer pays an amount of money up front, and this payment creates a balance in the customer account. This account is allowed to receive only those goods that are covered by this amount of money. Then the settle sales invoices are calculated against advanced collections.
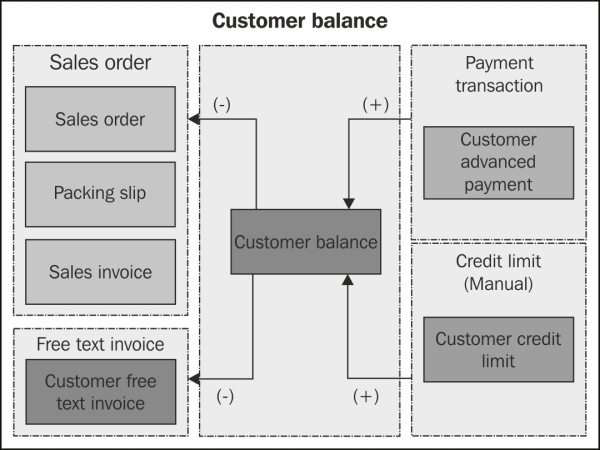
Microsoft Dynamics AX manages the customer credit limit on the customer level, and there are two ways that affect customer balance additions, partly where there is an increase in the customer balance, which consists of a cash transaction (customer advanced collection) and a non-cash transaction credit limit. The second way is a transaction that deducts the customer balance. Here is a diagram that illustrates the customer balance elements:
In order to activate and configure the credit limit, navigate to Accounts Receivable | Setup | Accounts receivable parameters | Credit Rating. The following screenshot denotes the credit rating options:
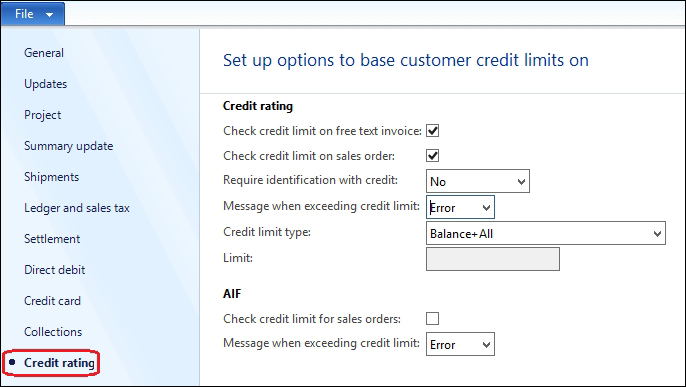
In the Credit rating section, identify whether the message to be displayed when the credit limit is exceeded is just a warning message or an error message. The difference in both of them is as follows:
- The warning message will not stop the transaction
- The error message will prevent the transaction from being executed
The Credit limit type field has four different options that represent the base of credit limit calculation; the options are listed as follows:
- None: The credit limit check is not activated on the module level, and could be overridden on the customer level
- Balance: The credit limit is checked against the customer balance
- Balance + packing slip or product receipt: The credit limit is checked against the customer balance and the deliveries
- Customer balance + all: The credit limit is checked, considering the open orders and delivered orders in it
On the customer master information, navigate to Accounts receivable | Common | Customers | All customers | Credit and collections, as shown in the following screenshot:
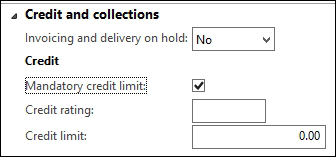
The Credit field group has the activation checkbox and the Credit limit amount on the customer level. These are explained as follows:
- Mandatory credit limit: If this is checked, the credit limit control will be applied on the customer. Otherwise, it will not be applied.
- Credit limit: This specifies the credit limit amount, and the customer cannot let this amount exceed. If the amount is zero, the customer should deposit the amount through payment transactions.
The sales order amount created during the sales order transaction by navigating to Accounts Receivable | Common | Sales order | All sales orders is $1,000 for the CUST003 customer ID. Then navigate to Manage | Check credit limit. Microsoft Dynamics AX displays the Infolog window to indicate that the credit limit has been exceeded. The credit limit could be an automatic action as well.
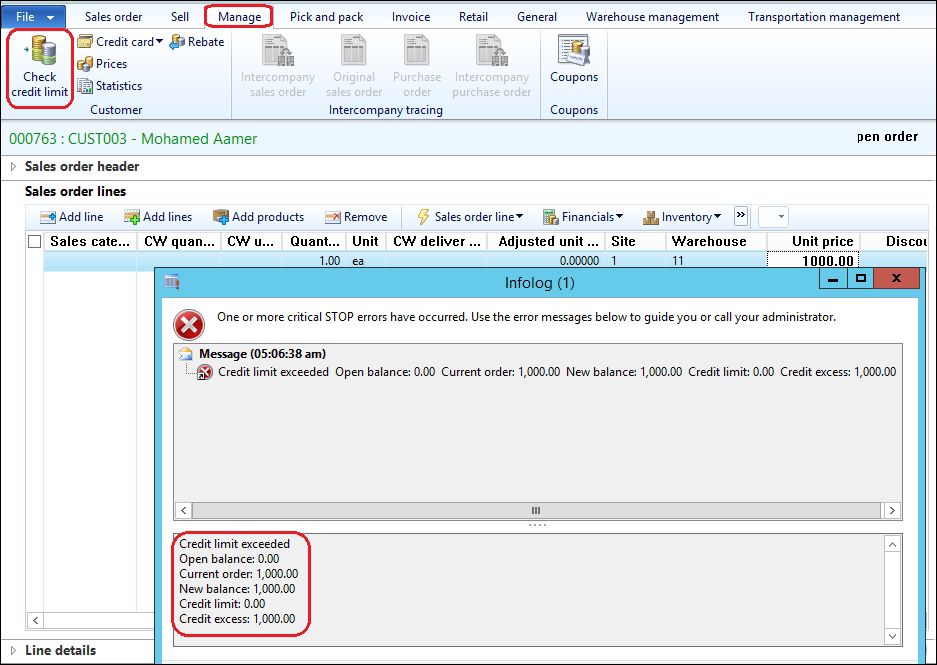
Now we can see the following information:
- Open balance: 0.00: This shows the current customer balance from customer advanced collections and open sales orders
- Current order: 1,000.00: This is the current sales order amount
- New balance: 1,000.00
- Credit limit: 0.00: This is the non-cash credit limit that is assigned to the customer
- Credit excess: 1,000.00: This is the amount that exceeds the customer balance
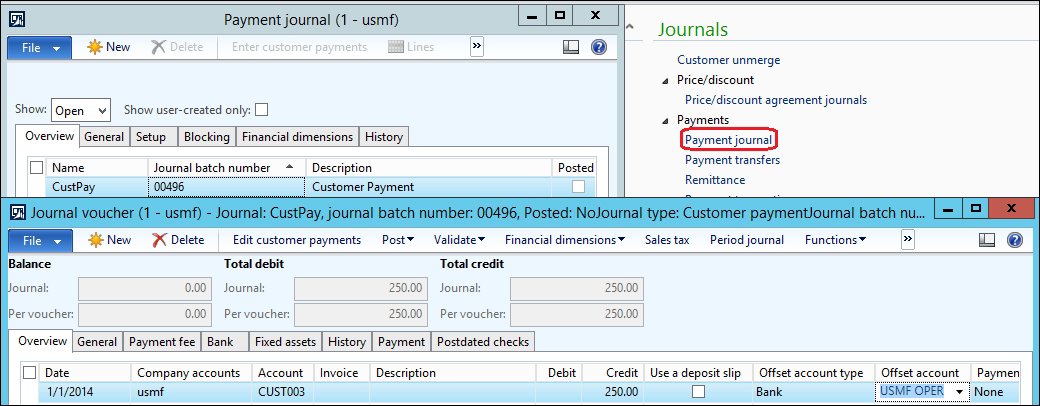
Then post a prepayment transaction with $250, which affects the customer balance by $250. Check the same sales order balance; it will give the upcoming results.
In order to post the prepayment transaction, navigate to Accounts receivable | Journals | Payments | Payment journal. Create a new journal by pressing Ctrl + N. Then go to the lines. Select the customer and enter 250 in the credit side, as shown in this screenshot:
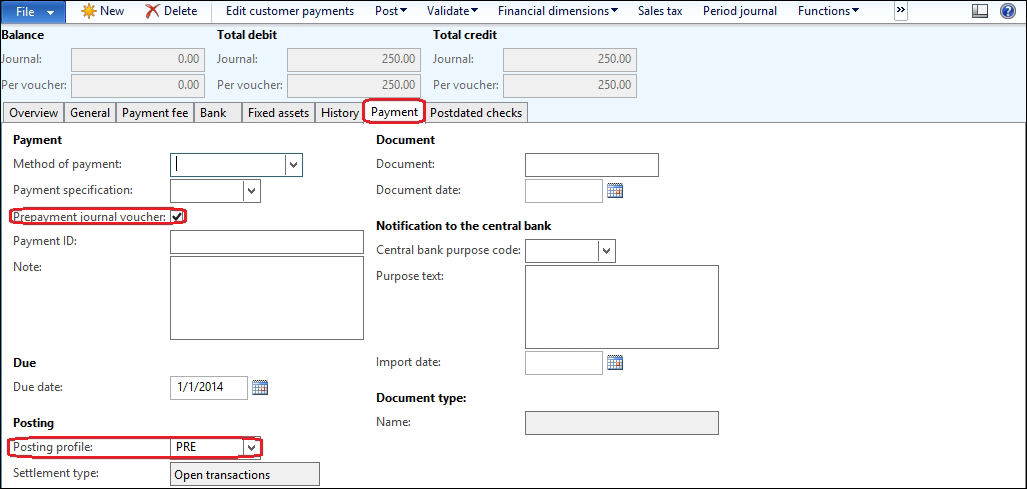
Then move to the Payment tab and select the Prepayment journal voucher checkbox. The posting profile will be automatically updated to be the PRE posting profile, as shown in the following screenshot:
Go to the sales order in order to check the credit limit by navigating to Accounts Receivable | Common | Sales order | All sales orders, and then go to the Manage ribbon and select the Check credit limit option, as shown in the following screenshot:
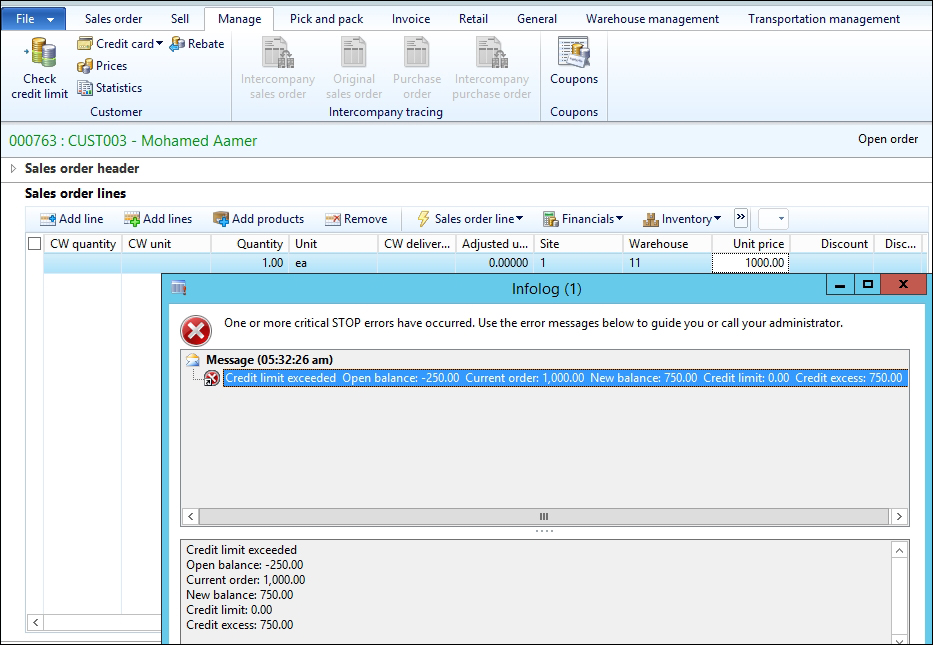
We can see the following results:
- Open balance: -250.00: This is the current customer balance from the customer advanced collections and open sales orders
- Current order: 1,000.00: This is the current sales order amount
- New balance: 750.00
- Credit limit: 0.00: This is the non-cash credit limit that is assigned to the customer
- Credit excess: 750.00: This is the amount that has exceeded the customer balance
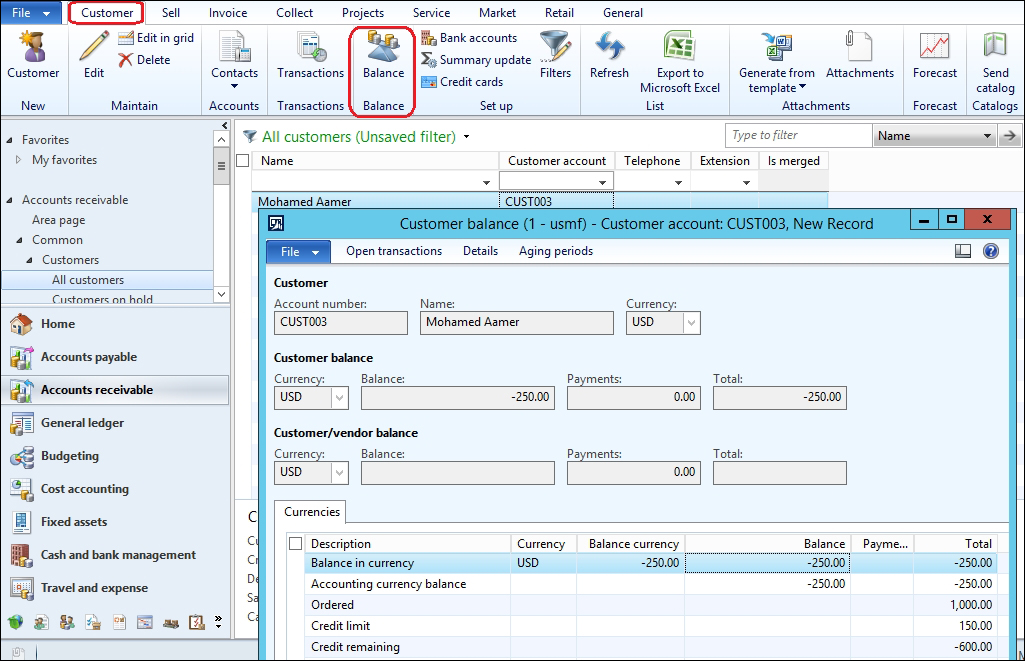
Assume that a credit limit of $150 has been added to a customer, the current balance is $400, and the remaining is $600.
As shown in the following screenshot, navigate to Accounts Receivable | Common | All customers | Customers. Then navigate to Customer | Balance from the ribbon.
While checking the sales order credit limit, we get the Infolog window, like this:
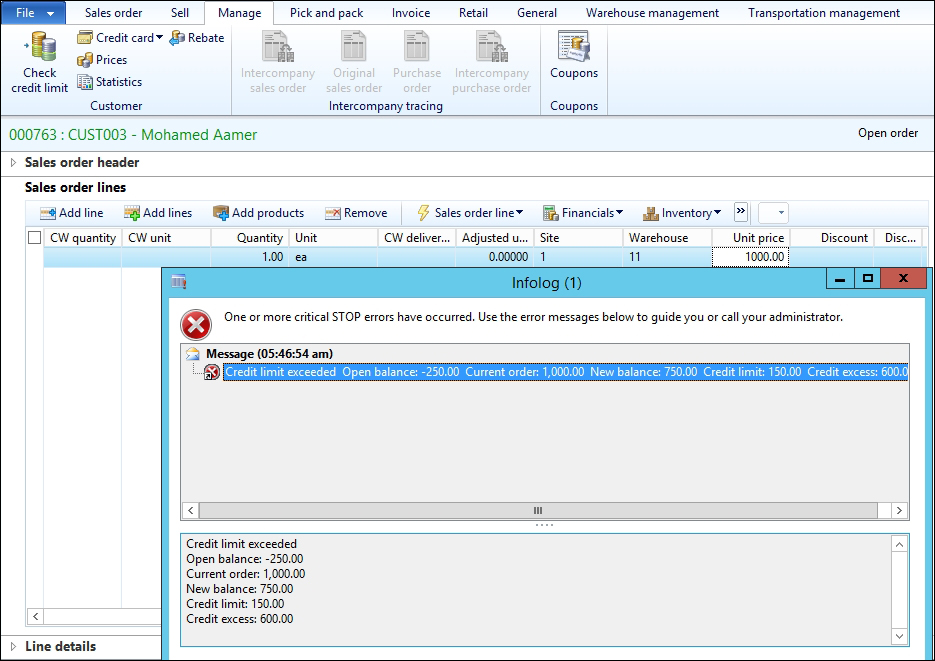
We can see the following results:
- Open balance: -250: This is the current customer balance from the customer advanced collections and open sales orders
- Current order: 1,000.00: This is the current sales order amount
- New balance: 750.00
- Credit limit: 150.00: This is the non-cash credit limit that is assigned to the customer
- Credit excess: 600.00: This is the amount that has exceeded the customer balance
Assume that there is another sales order of $1,000 created, and then check the sales order credit limit, as shown in the following screenshot:
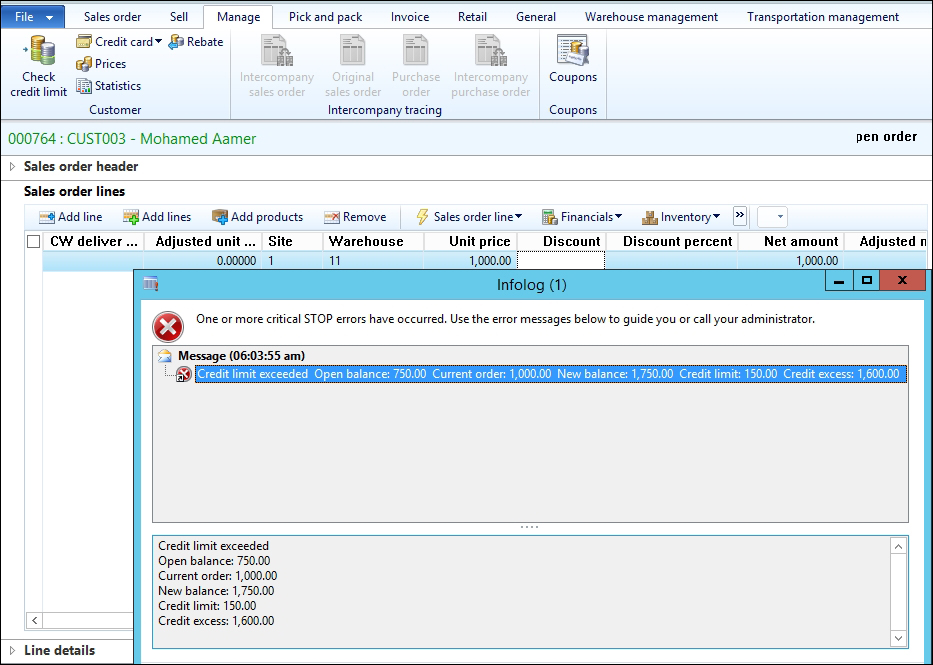
We can see the following results:
- Open balance: 750.00: This is the current customer balance from the customer advanced collections and open sales orders
- Current order: 1,000.00: This is the current sales order amount
- New balance: 1750.00
- Credit limit: 150.00: This is the non-cash credit limit that is assigned to the customer
- Credit excess: 1600.00: This is the amount that has exceeded the customer balance posting profile
Posting represents the integration point between the general ledger and subledger, and it automatically generates the financial entries according to the posting profile's setup. The Accounts receivable posting profiles are assigned on the module parameters. Navigate to Accounts Receivable | Setup | Accounts receivable parameters | Ledger and sales tax. Then perform the following steps:
- In the General fast tab, select a Posting profile value for the general Accounts receivable transactions. In other words, this represents the Accounts receivable ledger account.
- In the Prepayment journal voucher field group, select a Posting profile with prepayment journal voucher value. In other words, this represents the advances from the customer ledger account.
The Accounts Receivable module posting profile are assigned in the accounts receivable parameters, as shown in the following screenshot:
