We have only scratched the surface of Python and Pygame up to this point, learning how to print text with different fonts and draw lines and shapes in different colors. Don’t get me wrong, there’s a lot you can do with just these basic capabilities, but Pygame has so much more to offer! We’re going to devote this chapter solely to user input. That is, getting user input with the keyboard and mouse. I have mentioned before that Python takes some getting used to, and Pygame shares that distinction as well because of the nature of Python. Pygame was actually based on another library entirely: SDL. Simple DirectMedia Layer (www.libsdl.org) is an open source library that makes 2D graphics drawing and user input very easy to support on multiple platforms. Since Pygame is based on SDL, most of the SDL features are supported in Pygame. We’re going to learn to use the user input features in this chapter while making a real-time game.
Here are the topics covered in this chapter:
Learning to use Pygame events
Learning about real-time loops
Learning about keyboard and mouse events
Learning to poll the keyboard and mouse device states
Writing The Bomb Catcher Game
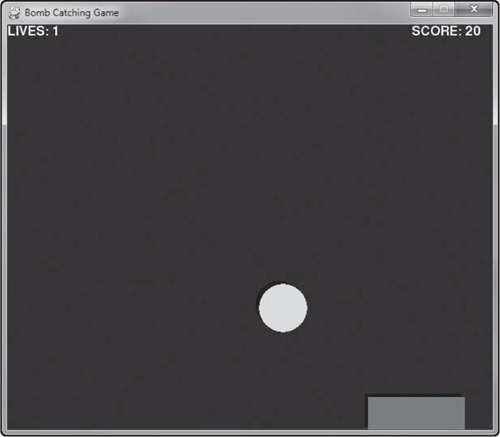
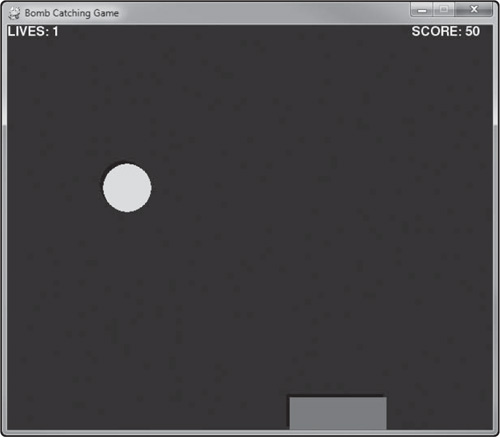
The Bomb Catcher Game is shown in Figure 4.1. This game will help reinforce the information learned during the chapter about player input. Specifically, this game uses the mouse to move a red “paddle” at the bottom of the screen, in order to catch yellow “bombs” falling from the top of the screen.
Pygame events handle a variety of things in a Pygame program. We have already used some of the event types supported by Pygame so they might look familiar to you. Here is the complete list, with the events we’ve already used in bold:
We are not going to address all of the event types, just those related to user input. It is true that Pygame supports joystick input. The joystick must be plugged in and configured with the operating system in order for it to work with Pygame. If you wish to try your hand at joystick programming, by all means, go for it! The code will be similar to what we’re looking at here for the keyboard and mouse.
Note
It is possible to use both the event system and polling to get keyboard and mouse input with Pygame. A combination of the two or just use of one or the other will be based on preference, as it works either way.
Event handling in Pygame is done in a real-time loop. A loop is created with the while statement and a while block, in which all code inside the while block is executed repeatedly as long as the while condition remains true. In many of the examples shown in this book, we have used
while True:
as the conditional qualifier. This code normally would create an infinite loop, and it does, except that we have an out with the sys.exit() function.
To respond to a Pygame event, we have to parse the events and look at each one. While there can be many events happening at a time, there will usually be just one type of event in a simple demo. More complex programs, and especially games, will have many events happening at the same time. So, we need to parse the events as they are generated. This is done using
pygame.event.get()
This code will create a list of events that are currently waiting to be processed. We go through the complete list with a for loop:
for event in pygame.event.get():
which gives us each event in the queue as they are generated. Typical events will be key presses, key releases, and mouse movement. The most common event to which we must respond is QUIT, which happens when the window is closed by the user.
while True:
    for event in pygame.event.get():
        if event.type == QUIT:
            sys.exit()
The keyboard events include KEYUP and KEYDOWN. When you want to respond to a key being pressed, look at the KEYDOWN event, and for released, KEYUP. Often, the best way to respond to key events is with flag variables. For instance, when the Space key is pressed, a flag such as space_key = True is set. Then, when the key is released, space_key = False is set. In this way, we don’t have to respond to events immediately as they happen, but can respond to the flag variable instead (elsewhere in the program).
One common key to look for in nearly every program is the quit key. Normally, I use Escape as the default quit key, as a standard way to end a program. We can code a response to the Escape key like so:
while True:
    for event in pygame.event.get():
        if event.type == QUIT:
            sys.exit()
        elif event.type == KEYDOWN:
            if event.key == pygame.K_ESCAPE:
                sys.exit()
Note in this example that an elif statement had to be used when evaluating the event types. There is no “switch” or “select” conditional statement in Python, only if...elif...else. This works pretty well when we only need to work with a few keys. What if we want to look for input from a large number of keys? In that case, do we have to write an if statement for every key? One way is to look at the key.name property, which will return a string containing the key name. Another way is to poll the keyboard (more on this later).
By default, Pygame does not respond repeatedly to a key that is being held down; it only sends an event the first time the key is pressed, and then another when it is released. To cause Pygame to generate repeat events as a key is being held down, we have to turn on the key repeat:
pygame.key.set_repeat(10)
The parameter is a millisecond repeat value. Calling this method without the parameter disables the key repeat feature.
The mouse events supported by Pygame include these: MOUSEMOTION, MOUSEBUTTONUP, and MOUSEBUTTONDOWN. The Pygame documentation is a bit sparse regarding the properties of each event, so it takes a little digging to find them. We can read these properties in the event handler when the appropriate event comes up.
For the MOUSEMOTION event, the properties are event.pos, event.rel, and event.buttons.
for event in pygame.event.get():
    if event.type == MOUSEMOTION:
        mouse_x,mouse_y = event.pos
        move_x,move_y = event.rel
For both the MOUSEBUTTONDOWN and MOUSEBUTTONUP events, the properties are event.pos and event.button.
for event in pygame.event.get():
    elif event.type == MOUSEBUTTONDOWN:
        mouse_down = event.button
        mouse_down_x,mouse_down_y = event.pos
    elif event.type == MOUSEBUTTONUP:
        mouse_up = event.button
        mouse_up_x,mouse_up_y = event.pos
The event system in Pygame is not the only means at our disposal for detecting user input. We can also poll the input devices to see if the user is interacting with our program.
The interface to keyboard polling in Pygame is with pygame.key,get_pressed(). This method returns a list of bools, which is a big list of flags, one per key. The same key constant values are used to index the resulting array of bools (such as pygame.K_ESCAPE). The benefit to polling all of the keys at once is the ability to detect multiple key presses without going through the event system. We could replace the old event handler code to detect the Escape key with the following:
keys = pygame.key.get_pressed()
if keys[K_ESCAPE]:
    sys.exit()
Note
All of the key code constants in Pygame, such as K_RETURN, correspond to their ASCII code equivalents, so it is easy to look up a key with any ASCII chart.
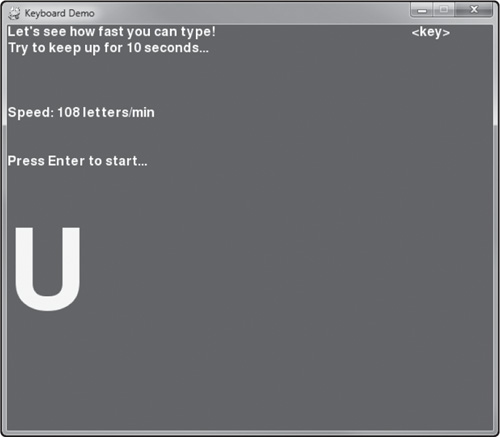
We can use a Python function called chr() to return the character string representation of an ASCII code number. For instance, the lowercase letter ‘a’ is ASCII code 97. Here is a short game that uses the keyboard and a real-time loop to test your typing speed! It’s not as accurate without whole words—we’re only testing typing speed one letter at a time, but it is still a good way to get a handle on the keyboard polling code and support functions. Figure 4.2 shows the program running. Can you beat my score?
import sys, random, time, pygame
from pygame.locals import *

def print_text(font, x, y, text, color=(255,255,255)):
    imgText = font.render(text, True, color)
    screen.blit(imgText, (x,y))

#main program begins
pygame.init()
screen = pygame.display.set_mode((600,500))
pygame.display.set_caption("Keyboard Demo")
font1 = pygame.font.Font(None, 24)
font2 = pygame.font.Font(None, 200)
white = 255,255,255
yellow = 255,255,0

key_flag = False
correct_answer = 97 # "a"
seconds = 11
score = 0
clock_start = 0
game_over = True

#repeating loop
while True:
    for event in pygame.event.get():
        if event.type == QUIT:
            sys.exit()
        elif event.type == KEYDOWN:
            key_flag = True
        elif event.type == KEYUP:
            key_flag = False

    keys = pygame.key.get_pressed()
    if keys[K_ESCAPE]:
        sys.exit()

    if keys[K_RETURN]:
        if game_over:
            game_over = False
            score = 0
            seconds = 11
            clock_start = time.clock()

    current = time.clock() - clock_start
    speed = score * 6
    if seconds-current < 0:
        game_over = True
    elif current <= 10:
        if keys[correct_answer]:
            correct_answer = random.randint(97,122)
            score += 1

    #clear the screen
    screen.fill((0,100,0))

    print_text(font1, 0, 0, "Let's see how fast you can type!")
    print_text(font1, 0, 20, "Try to keep up for 10 seconds...")

    if key_flag:
        print_text(font1, 500, 0, "<key>")

    if not game_over:
        print_text(font1, 0, 80, "Time: " + str(int(seconds-current)))

    print_text(font1, 0, 100, "Speed: " + str(speed) + " letters/min")

    if game_over:
        print_text(font1, 0, 160, "Press Enter to start...")

    print_text(font2, 0, 240, chr(correct_answer-32), yellow)

    #update the display
    pygame.display.update()
There’s quite a bit of new Python code in this small program that would be helpful to study. Did you notice the random module being used? Look for the function called random.randint(). This is a really helpful function that will generate a random number inside the range (supplied by two parameters). Another very helpful new module is time, which we also have not seen before. The time.clock() function returns the current number of seconds (with milliseconds included as a decimal value) since the program started. I’m using time.clock() here in a subtraction calculation to come up with a countdown from 10 down to 1. A variable called seconds starts off at 11, and time.clock() is subtracted from seconds to arrive at a countdown value. Very useful indeed!
We can also ignore the event system and poll the mouse direction if that would work better for our needs. There are really just three mouse functions that we need to learn about. The first one is pygame.mouse.get_pos(), which returns the x and y value pair representing the mouse’s current position:
pos_x,pos_y = pygame.mouse.get_pos()
Likewise, we can read the mouse’s relative movement in a similar manner with pygame.mouse.get_rel():
rel_x,rel_y = pygame.mouse.get_rel()
Mouse buttons are read with a call to pygame.mouse.get_pressed(), which returns an array of the button states.
button1, button2, button3 = pygame.mouse.get_pressed()
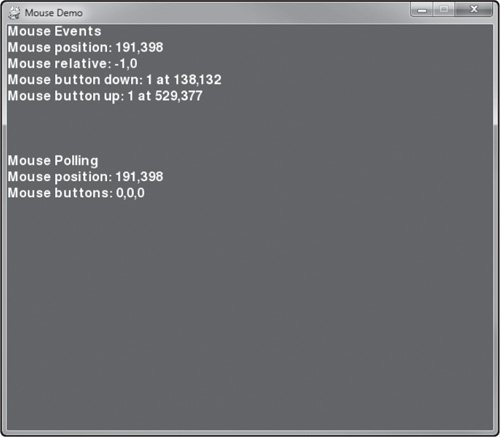
Below is a complete example of mouse input that demonstrates both event and polled mouse input reading. Figure 4.3 shows the Mouse Demo running.
import sys, pygame
from pygame.locals import *

def print_text(font, x, y, text, color=(255,255,255)):
    imgText = font.render(text, True, color)
    screen.blit(imgText, (x,y))

#main program begins
pygame.init()
screen = pygame.display.set_mode((600,500))
pygame.display.set_caption("Mouse Demo")
font1 = pygame.font.Font(None, 24)
white = 255,255,255

mouse_x = mouse_y = 0
move_x = move_y = 0
mouse_down = mouse_up = 0
mouse_down_x = mouse_down_y = 0
mouse_up_x = mouse_up_y = 0

#repeating loop
while True:
    for event in pygame.event.get():
        if event.type == QUIT:
            sys.exit()
        elif event.type == MOUSEMOTION:
            mouse_x,mouse_y = event.pos
            move_x,move_y = event.rel
        elif event.type == MOUSEBUTTONDOWN:
            mouse_down = event.button
            mouse_down_x,mouse_down_y = event.pos
        elif event.type == MOUSEBUTTONUP:
            mouse_up = event.button
            mouse_up_x,mouse_up_y = event.pos

    keys = pygame.key.get_pressed()
    if keys[K_ESCAPE]:
        sys.exit()

    screen.fill((0,100,0))

    print_text(font1, 0, 0, "Mouse Events")
    print_text(font1, 0, 20, "Mouse position: " + str(mouse_x) +
               "," + str(mouse_y))
    print_text(font1, 0, 40, "Mouse relative: " + str(move_x) +
               "," + str(move_y))

    print_text(font1, 0, 60, "Mouse button down: " + str(mouse_down) +
               " at " + str(mouse_down_x) + "," + str(mouse_down_y))

    print_text(font1, 0, 80, "Mouse button up: " + str(mouse_up) +
               " at " + str(mouse_up_x) + "," + str(mouse_up_y))

    print_text(font1, 0, 160, "Mouse Polling")

    x,y = pygame.mouse.get_pos()
    print_text(font1, 0, 180, "Mouse position: " + str(x) + "," + str(y))

    b1, b2, b3 = pygame.mouse.get_pressed()
    print_text(font1, 0, 200, "Mouse buttons: " +
               str(b1) + "," + str(b2) + "," + str(b3))

    pygame.display.update()
The final chapter example is called The Bomb Catcher Game. It is actually just a very simple demonstration of mouse input combined with some drawing of basic shapes and a smidgen of collision detection logic. The “bomb” is really just a yellow circle that falls down from the top of the screen over and over again. When the “bomb” reaches the bottom of the screen, the player missed the catch and loses a life (the lives are displayed at the upper left). But if the bomb hits the paddle, then it is caught and another bomb falls. Each time the player catches a bomb, they receive 10 points (score is displayed at the upper right). Figure 4.4 shows the game.
Note
Be careful when moving a game object (like our trusty bomb here in this game) using a floating-point velocity value. When converting from a float to an integer, not only is precision lost, but it’s possible for game objects to get stuck if they go off the screen due to rounding! I recommend not converting floats to integers except at the point where the integer form is needed (for drawing or printing), but maintain the position of game objects using floats.
# Bomb Catcher Game
# Chapter 4
import sys, random, time, pygame
from pygame.locals import *

def print_text(font, x, y, text, color=(255,255,255)):
    imgText = font.render(text, True, color)
    screen.blit(imgText, (x,y))

#main program begins
pygame.init()
screen = pygame.display.set_mode((600,500))
pygame.display.set_caption("Bomb Catching Game")
font1 = pygame.font.Font(None, 24)
pygame.mouse.set_visible(False)
white = 255,255,255
red = 220, 50, 50
yellow = 230,230,50
black = 0,0,0

lives = 3
score = 0
game_over = True
mouse_x = mouse_y = 0
pos_x = 300
pos_y = 460
bomb_x = random.randint(0,500)
bomb_y = -50
vel_y = 0.7

#repeating loop
while True:
    for event in pygame.event.get():
        if event.type == QUIT:
            sys.exit()
        elif event.type == MOUSEMOTION:
            mouse_x,mouse_y = event.pos
            move_x,move_y = event.rel
        elif event.type == MOUSEBUTTONUP:
            if game_over:
                game_over = False
                lives = 3
                score = 0

    keys = pygame.key.get_pressed()
    if keys[K_ESCAPE]:
        sys.exit()

    screen.fill((0,0,100))

    if game_over:
        print_text(font1, 100, 200, "<CLICK TO PLAY>")
    else:
        #move the bomb
        bomb_y += vel_y

        #has the player missed the bomb?
        if bomb_y > 500:
            bomb_x = random.randint(0, 500)
            bomb_y = -50
            lives -= 1
            if lives == 0:
                game_over = True

        #see if player has caught the bomb
        elif bomb_y > pos_y:
            if bomb_x > pos_x and bomb_x < pos_x + 120:
                score += 10
                bomb_x = random.randint(0, 500)
                bomb_y = -50

        #draw the bomb
        pygame.draw.circle(screen, black, (bomb_x-4,int(bomb_y)-4), 30, 0)
        pygame.draw.circle(screen, yellow, (bomb_x,int(bomb_y)), 30, 0)

        #set basket position
        pos_x = mouse_x
        if pos_x < 0:
            pos_x = 0
        elif pos_x > 500:
            pos_x = 500
        #draw basket
        pygame.draw.rect(screen, black, (pos_x-4,pos_y-4,120,40), 0)
        pygame.draw.rect(screen, red, (pos_x,pos_y,120,40), 0)

    #print # of lives
    print_text(font1, 0, 0, "LIVES: " + str(lives))

    #print score
    print_text(font1, 500, 0, "SCORE: " + str(score))

    pygame.display.update()
That’s about all we need to know about keyboard and mouse input in order to put them to good use in just about any type of program, including a game. You know, there’s a lot we can do with Python and Pygame beyond just games (although that is a fun subject). What about using the code in this chapter to make a drawing program with the ability for the user to save and load their drawings?