
Messaging: Mail, SMS, and Social Media
Since the beginnings of the iOS SDK, Apple has provided the means for developers to send messages. It started with the MessageUI framework, which allowed developers to add support for sending e-mail message from within their applications. Then, Apple extended the MessageUI framework to include SMS messages. With iOS 5, Apple added support for Twitter with a new Twitter framework. Now, with iOS 6, Apple has migrated from the Twitter framework to the Social framework, adding support for Facebook, Sina Weibo, and Twitter. Let’s go over how each messaging system works.
In this chapter, you’re going to build an application that lets the user take a picture using their iPhone’s camera or, if they don’t have a camera because they’re using the Simulator, then you’ll allow them to select an image from the photo library. They can take the resulting image and send it to a friend via e-mail, SMS, Facebook, or Twitter without leaving the application.
Note While it is possible to send a photo via the Messages application, Apple has not exposed this functionality to developers. This functionality is called Multimedia Messaging Service or MMS for short. The iOS SDK only allows you to use Short Message Service (SMS) to send text messages. As a result, you’ll just being sending a text message in your application.
Your application’s interface will be quite simple (Figure 11-1). It will feature a single button to start the whole thing going. Tapping the button will bring up the camera picker controller, in a manner similar to the sample program in Chapter 20 of Beginning iOS 6 Development (Apress, 2012). Once the user has taken or selected an image, they’ll be able to crop and/or scale the image (Figure 11-2). Assuming they don’t cancel, the image picker will return an image, and an activity view to ask the user how they want to send the message (Figure 11-3). Depending on their choice, you’ll display the appropriate composition view (Figure 11-4). You’ll populate the composition view with text and the selected image (unless it’s an SMS message). Finally, once the message is sent, you’ll provide some feedback confirming that the message was sent.
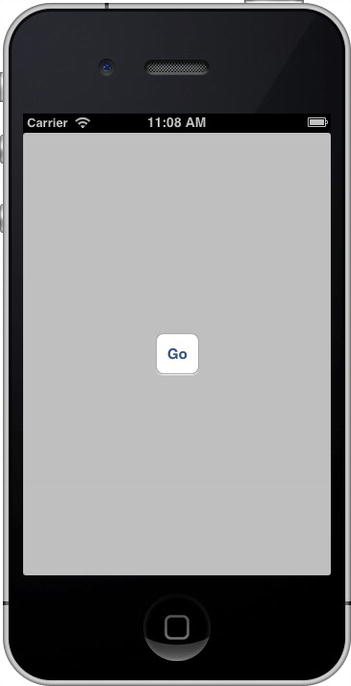
Figure 11-1. The chapter’s application has a very simple user interface consisting of a button
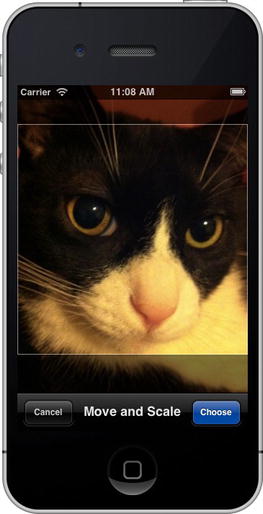
Figure 11-2. The user can take a picture with the camera or select an image from their photo library, and then crop and scale the image
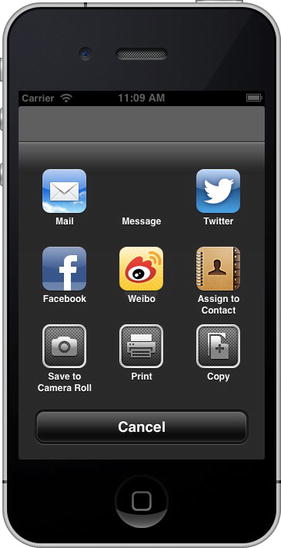
Figure 11-3. After selecting and editing the image, you present the message selector view
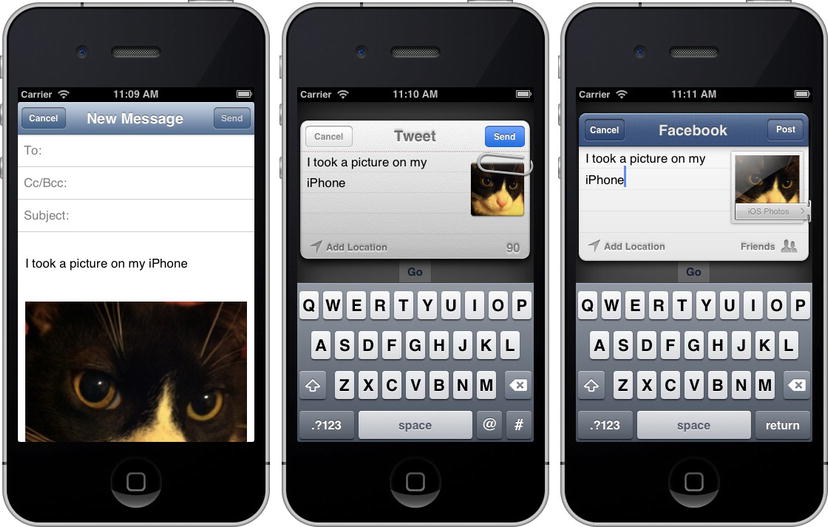
Figure 11-4. Mail, Twitter, and Facebook compose views
Caution The application in this chapter will run in the Simulator, but instead of using the camera, it will allow you to select an image from the Simulator’s photo library. If you’ve ever used the Reset Contents and Settings menu item in the Simulator, then you have probably lost the photo album’s default contents and will have no images available. You can rectify this by launching Mobile Safari in the simulator and navigating to an image on the Web. Make sure the image you are looking at is not a link, but a static image. This technique will not work with a linked image. Click and hold the mouse button with your cursor over an image, and an action sheet will pop up. One of the options will be Save Image. This will add the selected image to your iPhone’s photo library.
In addition, note that you will not be able to send e-mail from within the simulator. You’ll be able to create the e-mail, and the Simulator will say it sent it, but it’s all lies. The e-mail just ends up in the circular file.
To embed e-mail and SMS services in your application, use the MessageUI framework. It is one of the smallest frameworks in the iOS SDK. It’s composed of two classes, MFMailComposeViewController and MFMessageComposeViewController, and their corresponding delegate protocols.
Each class comes with a static method to determine if the device supports the service. For MFMailComposeViewController, the method is canSendMail; for MFMessageComposeViewController, the method is canSendText. It’s a good idea to check if your device can send an e-mail or SMS before attempting do so.
if ([MFMailComposeViewController canSendMail)] {
    // code to send email
    . . .
}
if ([MFMessageComposeViewController canSendText]) {
    // code to send SMS
    . . .
}
Let’s start by reviewing the e-mail class, MFMailComposeViewController.
Creating the Mail Compose View Controller
It’s very simple to use the MFMailComposeViewController class. You create an instance, set its delegate, set any properties that you wish to prepopulate, and then present it modally. When the user is done with their e-mail and taps either the Send or Cancel button, the mail compose view controller notifies its delegate, which is responsible for dismissing the modal view. Here’s how you create a mail compose view controller and set its delegate:
MFMailComposeViewController *mc = [[MFMailComposeViewController alloc] init];
mc.mailComposeDelegate = self;
Before you present the mail compose view, you can preconfigure the various fields of the mail compose view controller, such as the subject and recipients (to:, cc:, and bcc:), as well as the body and attachments. You can populate the subject by calling the method setSubject: on the instance of MFMailComposeViewController, like this:
[mc setSubject:@"Hello, World!"];
E-mails can go to three types of recipients. The main recipients of the e-mail are called the to: recipients and go on the line labeled To:. Recipients who are being cc:ed on the e-mail go on the cc: line. If you want to include somebody on the e-mail but not let the other recipients know that person is also receiving the e-mail, you can use the bcc: line, which stands for “blind carbon copy.” You can populate all three of these fields when using MFMailComposeViewController.
To set the main recipients, use the method setToRecipients: and pass in an NSArray instance containing the e-mail addresses of all the recipients. Here’s an example:
[mc setToRecipients:@[@"[email protected]"]];
Set the other two types of recipients in the same manner, though you’ll use the methods setCcRecipients: for cc: recipients and setBccRecipients: for bcc: recipients.
[mc setCcRecipients:@[@"[email protected]"]];
[mc setBccRecipients:@[@"[email protected]"]];
You can also populate the message body with any text you’d like. You can either use a regular string to create a plain text e-mail or you can use HTML to create a formatted e-mail. To supply the mail compose view controller with a message body, use the method setMessageBody:isHTML:. If the string you pass in is plain text, you should pass NO as the second parameter, but if you’re providing HTML markup in the first argument rather than a plain string, then you should pass YES in the second argument so your markup will be parsed before it is shown to the user.
[mc setMessageBody:@"Ohai!!!

KThxBai" isHTML:NO];
[mc setMessageBody:@"<HTML><B>Ohai</B><BR/>I can has cheezburger?</HTML>" isHTML:YES];
You can also add attachments to outgoing e-mails. In order to do so, you must provide an instance of NSData containing the data to be attached, along with the mime type of the attachment and the file name to be used for the attachment. Mime types, which we discussed briefly back in Chapter 9 when we talked about interacting with web servers, are strings that define the type of data being transferred over the Internet. They’re used when retrieving from or sending files to a web server, and they’re also used when sending e-mail attachments. To add an attachment to an outgoing e-mail, use the method addAttachmentData:mimeType:fileName:. Here’s an example of adding an image stored in your application’s bundle as an attachment:
NSString *path = [[NSBundle mainBundle] pathForResource:@"surpriseCat" ofType:@"png"];
NSData *data = [NSData dataWithContentsOfFile:path];
[mc addAttachmentData:data mimeType:@"image/png" fileName:@"surpriseCat"];
Presenting the Mail Compose View
Once you’ve configured the controller with all the data you want populated, you present the controller’s view, as you’ve done before:
[self presentViewController:mc animated:YES completion:nil];
The Mail Compose View Controller Delegate Method
The mail compose view controller delegate’s method is contained in the formal protocol MFMailComposeViewControllerDelegate. Regardless of whether the user sends or cancels, and regardless of whether the system was able to send the message or not, the method mailComposeController:didFinishWithResult:error: gets called. As with most delegate methods, the first parameter is a pointer to the object that called the delegate method. The second parameter is a result code that tells you the fate of the outgoing e-mail, and the third is an NSError instance that will give you more detailed information if a problem was encountered. Regardless of what result code you received, it is your responsibility in this method to dismiss the mail compose view controller by calling dismissModalViewControllerAnimated:.
If the user tapped the Cancel button, your delegate will be sent the result code MFMailComposeResultCancelled. In that situation, the user changed their mind and decided not to send the e-mail. If the user tapped the Send button, the result code is going to depend on whether the MessageUI framework was able to successfully send the e-mail. If it was able to send the message, the result code will be MFMailComposeResultSent. If it tried, and failed, the result code will be MFMailComposeResultFailed, in which case, you probably want to check the provided NSError instance to see what went wrong. If the message couldn’t be sent because there’s currently no Internet connection, but the message was saved into the outbox to be sent later, you will get a result code of MFMailComposeResultSaved.
Here is a very simple implementation of the delegate method that just logs what happened:
- (void)mailComposeController:(MFMailComposeViewController*)controller
            didFinishWithResult:(MFMailComposeResult)result
                         error:(NSError*)error
{
    switch (result)
    {
        case MFMailComposeResultCancelled:
            NSLog(@"Mail send canceled. . .");
            break;
        case MFMailComposeResultSaved:
            NSLog(@"Mail saved. . .");
            break;
        case MFMailComposeResultSent:
            NSLog(@"Mail sent. . .");
            break;
        case MFMailComposeResultFailed:
            NSLog(@"Mail send error: %@. . .", [error localizedDescription]);
            break;
        default:
            break;
    }
    [controller dismissViewControllerAnimated:YES completion:nil];
}
Message Compose View Controller
MFMessageComposeViewController is similar, but simpler than its e-mail counterpart. First, you create an instance and set its delegate.
MFMessageComposeViewController *mc = [[MFMessageComposeViewController alloc] init];
mc.messageComposeDelegate = self;
There are only two properties that you can populate: recipients and body. Unlike with e-mail, these can be accessed via direct properties on the class, as well as the method accessors. Recipients is an array of strings, where each string is a contact name from your Address Book or phone number. Body is the message you want to send.
mc.recipients = @[@"Manny Sullivan"];
mc.body = @"Hello, Manny!";
The message compose view controller delegate method behaves identically to its e-mail counterpart. There are only three possible results when sending an SMS: cancelled, sent, or failed.
- (void)messageComposeViewController:(MFMessageComposeViewController *)controller
                      didFinishWithResult:(MessageComposeResult)result
{
    switch (result)
    {
        case MessageComposeResultCancelled:
            NSLog(@"SMS sending canceled");
            break;
        case MessageComposeResultSent:
            NSLog(@"SMS sent");
            break;
        case MessageComposeResultFailed:
            NSLog(@"SMS sending failed");
            break;
        default:
            NSLog(@"SMS not sent");
            break;
    }
    [controller dismissViewControllerAnimated:YES completion:nil];
}
In iOS 5, Apple tightly integrated with Twitter (www.twitter.com ). Basically, your Twitter account was available from the system. As a result, it was very easy to send messages (“tweets”) to Twitter or perform Twitter API requests. In iOS 6, Apple abstracted and extended this feature into the Social framework. Along with Twitter, Apple integrated identical functionality for Facebook and Sina Weibo.
SLComposeViewController is very similar in design and principle to the e-mail and message view controller classes in the Message UI framework. However, there isn’t a corresponding delegate class. Rather, SLComposeViewController has a completion handler property that can be assigned a block.
In order to confirm that your application can use a service, you call the static method isAvailableForServiceType:. For example, the check to see if you can send to Facebook is
if ([SLComposeViewController isAvailableForServiceType:SLServiceTypeFacebook]) {
    // code to send message to Facebook
    . . .
}
isAvailableForServiceType: takes a String argument of possible service type constants. These service types are defined in the header file SLServiceTypes.h. Currently, Apple defines the following service type constant:
NSString *const SLServiceTypeFacebook;
NSString *const SLServiceTypeTwitter;
NSString *const SLServiceTypeSinaWeibo;
If you are able to send a send a message to the service, you start by creating an instance of the view controller.
SLComposeViewController *composeVC = [SLComposeViewController
                                          composeViewControllerForServiceType:SLServiceTypeTwitter];
This example would create a view controller for sending a tweet. You’re able to set the initial text, add images, and add URLs before presenting the view controller.
[composeVC setInitialText:@"Hello, Twitter!"];

UIImage *image = [UIImage imageWithContentsOfFile:@"surpriseCat.png"];
[composeVC addImage:image];

NSURL *url = [NSURL URLWithString:@" http://www.apporchard.com
 "];
[composeVC addURL:url];
These methods return YES if on success and NO on failure.
There are two convenience methods, removeAllImages and removeAllURLs, to remove any images or URLs you’ve added.
As mentioned earlier, you don’t assign a delegate to handle message completion. Rather, you set the completionHandler property with a block.
[composeVC setCompletionHandler:^(SLComposeViewControllerResult result) {
    switch (result) {
        case SLComposeViewControllerResultCancelled:
            NSLog(@"Message cancelled.");
            break;
        case SLComposeViewControllerResultDone:
            NSLog(@"Message sent.");
            break;
        default:
            break;
    }
    [self dismissModalViewControllerAnimated:YES completion:nil];
}];
The block accepts one argument, which tells the result of the message. Again, you are expect to dismiss the view controller with a call to dismissModalViewControllerAnimated:completion:.
SLComposeViewController is fine if you just want to post messages. What if you want to take advantage of the APIs these social media services offer? In that case you want to use SLRequest, which is basically a wrapper around an HTTP request that handles the authentication between your application and the social media service.
To create a request, you call the class method requestForServiceType:requestMethod:URL:parameters:.
SLRequest *request = [SLRequest requestForServiceType:SLServiceTypeFacebook
       requestMethod:SLRequestMethodPOST
                                     URL:url
                                            parameters:params];
The first argument is the same service type String constant used in SLComposeViewController. requestMethod: is a subset of HTTP actions: GET, POST, and DELETE. Apple has defined an enumeration for this subset: SLRequestMethod:
   SLRequestMethodGET
   SLRequestMethodPOST
   SLRequestMethodDELETE
URL: is a URL defined by the service provider. This is usually not the public “www” URL of the service. For example, Twitter’s URL begins with http://api.twitter.com/ . Finally, parameters: is a dictionary of HTTP parameters to send to the service. The contents of the dictionary depend on the service being called.
Once you’ve composed your request, you send it to the service provider:
[request performRequestWithHandler:^(NSData *responseData,
                                          NSHTTPURLResponse *urlResponse,
                                          NSError *error) {
    // Handle the response, process the data or error
    . . .
}];
The handler is a block that returns the HTTP response object, along with any accompanying data. An error object is returned, which will be non-nil if an error occurred.
Note This is a pretty short overview of the SLRequest class. You can read more in the class documentation at https://developer.apple.com/library/ios/#documentation/Social/Reference/SLRequest_Class/Reference/Reference.html .
In iOS 6, Apple introduced a new way to access the various services from within an application: the activity view controller (UIActivityViewController). In addition to giving applications access to standard iOS services, like copy and paste, the activity view controller provides a single unified interface for applications to send e-mail, SMS, or post content to social media services. You can even define your own custom service.
Using an activity view controller is simple. Initialize the activity view controller with the items you wish to send (i.e. text, images, etc.) and push it onto your current view controller.
NSString *text = @"some text";
UIImage *image = [[UIImage alloc] initWithContentsOfFile:@"some_image.png"];
NSArray *items = @[ text, image ];

UIActivityViewController *activityVC =     [[UIActivityViewController alloc] initWithActivityItems:items
applicationActivities:nil];

[self presentViewController:activityVC animated:YES completion:nil];
That’s it. Pretty simple, right?
So all the magic happens here:
UIActivityViewController *activityVC =
                [[UIActivityViewController alloc] initWithActivityItems:items applicationActivities:nil];
When you instantiate an activity view controller, you pass it an array of activity items. An activity item can be any object, and it depends on the application and activity service target. In the example code above, the activity items were a string and an image. If you want to use a custom object as an activity item, have it conform to the UIActivityItemSource protocol. Then you will have complete control over how your custom objects presents its data to the activity view controller.
applicationActivities: expects an array of UIActivity objects. If passed a value of nil, then the activity view controller will use a default set of Activity objects. Remember we said earlier you could define your own custom service? You accomplish that by subclassing UIActivity to define the communication to your service. Then you pass in your subclass as part of the array of application activities.
For the purposes of this chapter, you’re going just going to use the default list of application activities. Ready? Let’s go!
Building the MessageImage Application
Create a new project in Xcode using the Single View Application template. Call the project MessageImage. Since this app only has one view controller, you won’t need storyboards. But you’re still using Automatic Reference Counting.
Look back at Figure 11-1. The interface is pretty simple: a single button labeled Go. When you press the button, the application will activate your device’s camera and allow you to take a picture.
Select ViewController.xib .
From the library, drag over a round rect button and place it anywhere on the window titled View. Double-click the button and give it a title of Go. Enter the assistant editor, which should split the Editor pane and open ViewController.h. Control-drag from the Go button to between the @interface and @end in ViewController.h. Add a new Action, and name it selectAndMessageImage.
Next, drag a label from the library to the view window. Place the label above the button, and resize it so that it stretches from the left margin all the way to the right margin. In the Attribute Inspector, change the text alignment to centered. Control-drag from the label to above the selectAndMessageImage: action you just created. Add a new outlet and name it label. Finally, double-click the label and erase the text “Label.”
Put the editor back into Standard mode. Save the XIB file.
Single-click ViewController.h. You need your view controller to conform to two delegate protocols:
@interface ViewController : UIViewController <UINavigationControllerDelegate,
                                               UIImagePickerControllerDelegate>
This is because the image picker controller you’ll be using expects its delegate to conform to both UINavigationControllerDelegate and UIImagePickerControllerDelegate. You’re using the image picker controller so you can use the camera and select an image to send. Now you need to add a property for the image you’ll select.
@property (strong, nonatomic) UIImage *image;
That’s all you need for now. Let’s move on to the view controller implementation file.
Select ViewController.m to open it in the editor.
You need to implement the action method when the button is pressed.
- (IBAction)selectAndMessageImage:(id)sender
{
    UIImagePickerControllerSourceType sourceType = UIImagePickerControllerSourceTypeCamera;
    if (![UIImagePickerController isSourceTypeAvailable:UIImagePickerControllerSourceTypeCamera]) {
        sourceType = UIImagePickerControllerSourceTypePhotoLibrary;
    }

    UIImagePickerController *picker = [[UIImagePickerController alloc] init];
    picker.delegate = self;
    picker.allowsEditing = YES;
    picker.sourceType = sourceType;
    [self presentViewController:picker animated:YES completion:nil];
}
Once the Go button is pressed, you set the image source to be the device’s camera. If the camera is not available (if you’re running on the Simulator), you fall back to using the photo library. You set the image picker delegate to be your view controller and allow the image to be edited. Finally, you display the image picker.
Since you set your view controller to be the image picker’s delegate, you can add the delegate methods you need. Add the following below the selectAndMessageImage: method.
#pragma mark - UIImagePickerController Delegate Methods

- (void)imagePickerController:(UIImagePickerController *)picker
         didFinishPickingMediaWithInfo:(NSDictionary *)info
{
    [picker dismissViewControllerAnimated:YES completion:nil];
    self.image = [info objectForKey:UIImagePickerControllerEditedImage];
}

- (void)imagePickerControllerDidCancel:(UIImagePickerController *)picker
{
    [picker dismissViewControllerAnimated:YES completion:nil];
}
Both methods dismiss the image picker, but imagePickerController:didFinishPickingMediaWithInfo: also sets your image property to the picture you took (or chose).
Let’s make sure everything is working. Run the application, take a picture, and click Use. Nothing should happen, but that’s ok.
Figure 11-3 shows the activity view controller that gets exposed after you select a picture. Let’s set that up.
First, you’ll define a method to show the activity view controller. Open ViewController.h and add the following method declaration:
- (void)showActivityViewController;
Now, select ViewController.m, and add the method implementation. We added ours after selectAndMessageImage:.
- (void)showActivityViewController
{
    NSString *message = NSLocalizedString(@"I took a picture on my iPhone",
                                          @"I took a picture on my iPhone");
    NSArray *activityItems = @[ message, self.image ];
    UIActivityViewController *activityVC =
        [[UIActivityViewController alloc] initWithActivityItems:activityItems
                                  applicationActivities:nil];
    [self presentViewController:activityVC animated:YES completion:nil];
}
Now, you need to call the showActivityViewController method after you’ve picked your picture. Add the following line to the end of imagePickerController:didFinishPickingMediaWithInfo:. You need to delay the presentation of the activity view controller slightly to allow the UIImagePickerController time to be removed from the root view controller.
[self performSelector:@selector(showActivityViewController) withObject:nil afterDelay:0.5];
Check your work so far. Run the application and confirm the alert sheet appears. That’s it. Wow, that was simple.
Note If you select a service and haven’t configured your account information, iOS will pop an alert telling you to set up an account.
In the course of this chapter, you saw how to send e-mail, SMS, or a post to social media services. You should be able to add this functionality to any of your applications. When you’re ready to move on, turn the page to learn the art of iPod Fu.