As we've mentioned a few times in this book, if you try to do too much at one time in an action or delegate method, or in a method called from one of those methods, your application's interface can skip or even freeze while the long-running method does its job. As a general rule, you do not want your application's user interface to ever become unresponsive. Your user will expect to be able to interact with your application at all times, or at the very least will expect to be kept updated by your user interface when they aren't allowed to interact with it.
In computer programming, the ability to have multiple sets of operations happening at the same time is referred to, generally, as concurrency. You've already seen one form of concurrency in the networking chapters when we retrieved data from the Internet asynchronously and also when we listened for incoming connections on a specific network port. That particular form of concurrency is called run loop scheduling, and it's relatively easy to implement because most of the work to make those actions run concurrently has already been done for you.
In this chapter, we're going to look at some more general-purpose solutions for adding concurrency to your application. These will allow your user interface to stay responsive even when your application is performing long-running tasks. Although there are many ways to add concurrency to an application, we're going to look at just two, but these two, combined with what you already know about run loop scheduling for networking, should allow you to accommodate just about any long-running task.
The first mechanism we're going to look at is the timer. Timers are objects that can be scheduled with the run loop, much like the networking classes we've worked with. Timers can call methods on specific objects at set intervals. You can set a timer to call a method on one of your controller classes, for example, ten times per second. Once you kick it off, approximately every tenth of a second, your method will fire until you tell the timer to stop.
Neither run loop scheduling nor timers are what some people would consider "true" forms of concurrency. In both cases, the application's main run loop will check for certain conditions, and if those conditions are met, it will call out to a specific method on a specific object. If the method that gets called runs for too long, however, your interface will still becomes unresponsive. But, working with run loops and timers is considerably less complex than implementing what we might call "true" concurrency, which is to have multiple tasks (and multiple run loops) functioning at the same time.
The other mechanism we're going to look at is relatively new in the Objective-C world. It's called an operation queue, and it works together with special objects you create called operations. The operation queue can manage multiple operations at the same time, and it makes sure that those operations get processing time based on some simple rules that you set down. Each operation has a specific set of commands that take the form of a method you write, and the operation queue will make sure that each operation's method gets run in such a ways as to make good use of the available system resources.
Operation queues are really nice because they are a high-level abstraction and hide the nitty-gritty implementation details involved with implementing true concurrency. On the iPhone, queues leverage an operating system feature called threads to give processing time to the various operations they manage. Apple is currently recommending the use of operation queues rather than threads, not only because operation queues are easier to use, but also because they give your application other advantages.
Note
Even though it's not available when using the iPhone SDK, another form of concurrency is multiprocessing, using the Unix system calls fork() and exec() or Cocoa's NSTask class. Using multiple processes is more heavy-weight than using threads.
If you're at all familiar with Mac OS X Snow Leopard, you've probably heard of Grand Central Dispatch (GCD), which is a technology that allows applications to take greater advantage of the fact that modern computers have multiple processing cores and sometimes multiple processors. If you used an operation queue in a Mac program back before GCD was released, when you re-compiled your application for Snow Leopard, your code automatically received the benefit of GCD for free. If you had used another form of concurrency, such as threads, instead of operation queues, your application would not have automatically benefitted from GCD.
We don't know what the future holds for the iPhone SDK, but we are likely to continue to see faster processors and possibly even multiple core processors. Who knows? Perhaps at some point in the not-too-distant future, we'll even see an iPhone or iPod touch with multiple processors. By using operation queues for your concurrency needs, you will essentially future-proof your applications. If Grand Central Dispatch comes to the iPhone in a future release of the iPhone SDK, for example, you will be able to leverage that functionality with little or no work. If Apple creates some other nifty new technology specifically for handling concurrency in a mobile application, your application will be able to take advantage of that.
You can probably see why we're limiting our discussion of "true" concurrency to operation queues. They are clearly the way of the future for both Cocoa and Cocoa Touch. They make our lives as programmers considerably easier and they help us take advantage of technologies that haven't even been written yet. What could be better?
Let's start with a little detour to look at the problem that concurrency solves.
Before we explore ways of solving the concurrency problem, let's make sure we all understand exactly what that problem is. We're going to build a small application that will demonstrate the problem that arises when you try to do too much at one time on the application's main thread. Every application has at least one thread of operation, and that's the one where the application's main run loop is running. All action methods fire on the main thread and all event processing and user interface updating is also done from the main thread. If any method that fires on the main thread takes too long to finish, the user interface will freeze up and become unresponsive.
Our small application is going to calculate square roots. Lots and lots of square roots. The user will be able to enter a number, and we'll calculate the square root for every number from 1 up to the number they specify (Figure 14-1). Our only goal in this exercise is to burn processor cycles.
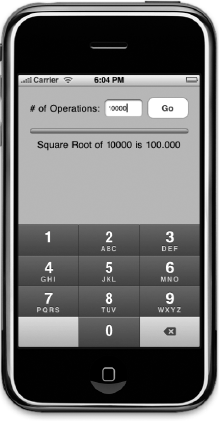
Figure 14.1. The Stalled application will demonstrate the problem of trying to do too much work on the application's main thread
With a sufficiently large number entered, when the Go button is tapped, the user interface will become completely unresponsive for several seconds or even longer. The progress bar and progress label, whose properties will be set each time through the loop, won't actually show any changes to the user until all the values in the loop have been calculated. Only the last calculation will be reflected in the user interface.
In Xcode, create a new project using the View-based Application template and call this project Stalled. Once the new project is open, expand the Classes and Resources folders in the Groups & Files pane. We'll start by declaring our outlets and actions and then go to Interface Builder and design our interface, then we'll come back to write the implementation of our controller and try it out.
Single-click StalledViewController.h and replace the existing contents with the following:
#import <UIKit/UIKit.h>

@interface StalledViewController : UIViewController {
    UITextField     *numOperationsInput;
    UIProgressView  *progressBar;
    UILabel         *progressLabel;
}

@property (nonatomic, retain) IBOutlet UITextField *numOperationsInput;
@property (nonatomic, retain) IBOutlet UIProgressView *progressBar;
@property (nonatomic, retain) IBOutlet UILabel *progressLabel;

- (IBAction)go;
@end
We haven't seen a controller class header this simple in quite a while, have we? Nothing here should be unfamiliar to you. We have three outlets that are used to refer to the three user interface elements whose values we need to update or retrieve, and we have a single action method that gets fired by the one button on our interface. Make sure you save StalledViewController.h.
Double-click StalledViewController.xib to launch Interface Builder. Drag a Round Rect Button from the library to the window titled View, placing the button against the upper-right margins using the blue guidelines. Double-click the button and change its title to Go. Control-click from the new button to File's Owner and select the go action.
Now drag a Text Field from the library and place it to the left of the button. Use the blue guides to line up the text field and place it the correct distance from the button. Resize the text field to about two-third of its original size, or use the size inspector and change its width to 70 pixels. Double-click the text field and set its default value to 10000. Press
Drag a Label from the library and place it to the left of the text field. Double-click it to change its text to read # of Operations and then adjust its size and placement to fit in the available space. You can use Figure 14-1 as a guide.
From the library, bring over a Progress View and place it below the three items already on the interface. We placed it a little more than the minimum distance below them as indicated by the blue guides, but exact placement really doesn't matter much with this application. Once you place the progress bar, use the resize handles to change its width so it takes up all the space from the left margin to the right margin. Next, use the attributes inspector to change the Progress field to 0.0. Finally, control-drag from File's Owner to the progress view and select the progressBar outlet.
Drag one more Label from the library and place it below the progress view. Resize the label so it is stretches from the left to the right margins. Control-drag from File's Owner to the new label and select the progressLabel outlet. Then, double-click the label and press the delete key to delete the existing label text.
Save your nib, close Interface Builder, and head back to Xcode.
Select StalledViewController.m and replace the existing contents with the following code:
#import "StalledViewController.h"

@implementation StalledViewController
@synthesize numOperationsInput;
@synthesize progressBar;
@synthesize progressLabel;

- (IBAction)go {
    NSInteger opCount = [numOperationsInput.text intValue];
    for (NSInteger i = 1; i <= opCount; i++) {
        NSLog(@"Calculating square root of %d", i);
        double squareRootOfI = sqrt((double)i);
        progressBar.progress = ((float)i / (float)opCount);
        progressLabel.text = [NSString stringWithFormat:
            @"Square Root of %d is %.3f", i, squareRootOfI];
    }
}

- (void)viewDidUnload {
    [super viewDidUnload];
    self.numOperationsInput = nil;
    self.progressBar = nil;
    self.progressLabel = nil;
}
- (void)dealloc {
[numOperationsInput release];
[progressBar release];
[progressLabel release];
[super dealloc];
}
@endLet's focus on the go method, because that's where the problem is. Everything else is stuff you've seen before. The method starts by retrieving the number from the text field.
NSInteger opCount = [numOperationsInput.text intValue];
Then, we go into a loop so we can calculate all of the square roots.
for (NSInteger i = 1; i <= opCount; i++) {We log which calculation we're working on. In shipping applications, you generally wouldn't log like this, but logging serves two purposes in this chapter. First, it lets us see, using Xcode's debugger console, that the application is working even when our application's user interface isn't responding. Second, logging takes a non-trivial amount of time. In real-world applications, that would generally be bad, but since our goal is just to do processing to show how concurrency works, this slow-down actually works to our advantage. If you choose to remove the NSLog() statements, you will need to increase the number of calculations by an order of magnitude because the iPhone is actually capable of doing tens of thousands of square root operations per second and it will hardly break a sweat doing ten thousand without the NSLog() statement in the loop to throttle the speed.
Warning
Logging using NSLog() takes considerably longer when running on the device launched from Xcode because the results of every NSLog() statement have to be transferred through the USB connection to Xcode. Although this chapter's applications will work just fine on the device, you may wish to consider restricting yourself to the Simulator for testing and debugging in this chapter, or else commenting out the NSLog() statements when running on the device.
NSLog(@"Calculating square root of %d", i);
Then we calculate the square root of i.
double squareRootOfI = sqrt((double)i);
And update the progress bar and label to reflect the last calculation made, and that's the end of our loop.
progressBar.progress = ((float)i / (float)opCount);
         progressLabel.text = [NSString stringWithFormat:
             @"Square Root of %d is %.3f", i, squareRootOfI];
    }
The problem with this method isn't so much what we're doing as where we're doing it. As we stated earlier, action methods fire on the main thread, which is also where user interface updates happen, and where system events, such as those that are generated by taps and touches, are processed. If any method firing on the main thread takes too much time, it will affect your application's user experience. In less severe cases, your application will seem to hiccup or stall at times. In severe cases, like here, your application's entire user interface will freeze up.
Save StalledViewController.m and build and run the application. Press the Go button and watch what happens. Not much, huh? If you keep an eye on the debug console in Xcode, you'll see that it is working away on those calculations (Figure 14-2) thanks to the NSLog() statement in our code, but the user interface doesn't update until all of the calculations are done, does it?
Note that if you do click in the text field, the numeric keypad will not disappear when you tap the Go button. Since there's nothing being hidden by the keypad, this isn't a problem. In the final version of the application, we'll add a table that will be hidden by the keypad. We'll add some code to deal with that situation as needed.
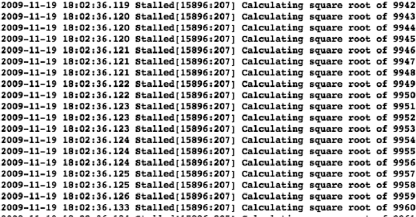
Figure 14.2. The debug console in Xcode shows that the application is working, but the user interface is locked up
If we have code that takes a long time to run, we've basically got two choices if we want to keep our interface responsive: We can break our code into smaller chunks that can be processed in pieces, or we can move the code to a separate thread of execution, which will allow our application's run loop to return to updating the user interface and responding to taps and other system events. We'll look at both options in this chapter.
First, we'll fix the application by using a timer to perform the requested calculations in batches, making sure not to take more than a fraction of a second each time so that the main thread can continue to process events and update the interface. After that, we'll look at using an operation queue to move the calculations off of the application's main thread, leaving the main thread free to process events.
In the Foundation framework shared by Cocoa and Cocoa Touch, there's a class called NSTimer that you can use to call methods on a specific object at periodic intervals. Timers are created, and then scheduled with a run loop, much like some of the networking classes we've worked with. Once a timer is scheduled, it will fire after a specified interval. If the timer is set to repeat, it will continue to call its target method repeatedly each time the specified interval elapses.
Note
Non-repeating timers are no longer very commonly used because you can achieve exactly the same affect much more easily by calling the method performSelector:withObject:afterDelay: as we've done a few times in this book.
Timers are not guaranteed to fire exactly at the specified interval. Because of the way the run loop functions, there's no way to guarantee the exact moment when a timer will fire. The timer will fire on the first pass through the run loop that happens after the specified amount of time has elapsed. That means a timer will never fire before the specified interval, but it may fire after. Usually, the actual interval is only milliseconds longer than the one specified, but you can't rely on that being the case. If a long-running method runs on the main loop, like the one in Stalled, then the run loop won't get to fire the scheduled timers until that long-running method has finished, potentially a long time after the requested interval.
Timers fire on the thread whose run loop they are scheduled into. In most situations, unless you specifically intend to do otherwise, your timers will get created on the main thread and the methods that they fire will also execute on the main thread. This means that you have to follow the same rules as with action methods. If you try to do too much in a method that is called by a timer, you will stall your user interface.
As a result, if you want to use timers as a mechanism for keeping your user interface responsive, you need to break your work down into smaller chunks, only doing a small amount of work each time it fires. We'll show you a technique for doing that in a minute.
Creating an instance of NSTimer is quite straightforward. If you want to create it, but not schedule it with the run loop right away, use the factory method timerWithTimeInterval:target:selector:userInfo:repeats:, like so:
NSTimer *timer = [NSTimer timerWithTimeInterval:1.0/10.0
        target:self
        selector:@selector(myTimerMethod:)
        userInfo:nil
        repeats:YES]
The first argument to this method specifies how frequently you would like the timer to fire and call its method. In this example, we're passing in a tenth of a second, so this timer will fire approximately ten times a second. The next two arguments work exactly like the target and action properties of a control. The second argument, target, is the object on which the timer should call a method, and selector points to the actual method the timer should call when it fires. The method specified by the selector must take a single argument, which will be the instance of NSTimer that called the method. The fourth argument, userInfo, is designed for application use. If you pass in an object here, that object will go along with the timer and be available in the method the timer calls when it fires. The last argument specifies whether the timer repeats or fires just once.
Once you've got a timer and are ready for it to start firing, you get a reference to the run loop you want to schedule it into, and then add the timer. Here's an example of scheduling the timer into the main run loop:
NSRunLoop *loop = [NSRunLoop mainRunLoop];
    [loop addTimer:timer forMode:NSDefaultRunLoopMode];
When you schedule the timer, the run loop retains the timer. You can keep a pointer to the timer if you need to, but you don't need to retain the timer to keep it from getting deallocated. The run loop will retain the timer until you stop the timer.
If you want to create a timer that's already scheduled with the run loop, letting you skip the previous two lines of code, you can use the factory method scheduledTimerWithTimeInterval:target:selector:userInfo:repeats:, which takes exactly the same arguments as timerWithTimeInterval:target:selector:userInfo:repeats:.
NSTimer *timer = [NSTimer scheduledTimerWithTimeInterval:1.0/10.0
        target:self
        selector:@selector(myTimerMethod:)
        userInfo:nil
repeats:YES]When you no longer need a timer, you can unschedule it from the run loop by calling the invalidate method on the instance. Invalidating a timer will stop it from firing any further and remove it from the run loop, which will release the timer and cause it to be deallocated unless it's been retained elsewhere. Here's how you invalidate a timer:
[timer invalidate];
Timers are very handy for any number of purposes. As a tool for keeping your interface responsive, they do have some limitations, however. The first and foremost of these limitations is that you have to make some assumptions about how much time is available for the process that you're implementing. If you have more than a couple of timers running, things can easily get complex and the logic to make sure that each timer's method gets an appropriate share of the available time without taking too much time away from the main thread can get very complex and abstruse.
Timers are great for when you have one, or at most, a small number, of long-running tasks that can be easily broken down into discrete chunks for processing. When you have more than that, or when the processes don't lend themselves to being performed in chunks, timers become far too much trouble and just aren't the right tool for the job.
Let's use a timer to get the Stalled application working the way our users will expect it to work, then we'll move on and look at how we handle scenarios where we have more than a couple of processes.
We're going to keep working with the Stalled application, but before we proceed, make a copy of the Stalled project folder. We're going to fix the project using two different techniques, so you will need two copies of the project in order to play along at home. If you run into problems, you can always copy the 14 - Stalled project in the project archive that accompanies this book as your starting point for both this exercise and the next one.
Before we start modifying our controller class, let's create a class to represent our batch of calculations. This object will keep track of how many calculations need to be performed as well as how many already have. We'll also move the actual calculations into the batch object as well. Having this object will make it much easier to do processing in chunks, since the batch will be self-contained in a single object.
Single-click the Classes folder in the Groups & Files pane, then type
#import <Foundation/Foundation.h>

#define kExceededMaxException   @"Exceeded Max"

@interface SquareRootBatch : NSObject {
    NSInteger   max;
    NSInteger   current;
}

@property NSInteger max;
@property NSInteger current;

- (id)initWithMaxNumber:(NSInteger)inMax;
- (BOOL)hasNext;
- (double)next;
- (float)percentCompleted; - (NSString *)percentCompletedText; @end
We start off by defining a string that will be used for throwing an exception. If we exceed the number of calculations we've specified, we will throw an exception with this name.
#define kExceededMaxException @"Exceeded Max"
Then we define two instance variables and corresponding properties for the maximum number whose square root will be calculated and the current number whose square root is being calculated. This will allow us to keep track of where we are between timer method calls.
@interface SquareRootBatch : NSObject {
    NSInteger   max;
    NSInteger   current;
}
@property NSInteger max;
@property NSInteger current;
Next, we declare a standard init method that takes one argument, the maximum number for which we are to calculate the square root.
- (id)initWithMaxNumber:(NSInteger)inMax;
The next two methods will enable our batch to work similarly to an enumerator. We can find out if we still have numbers to calculate by calling hasNext, and actually perform the next calculation by calling next, which returns the calculated value.
- (BOOL)hasNext;
- (double)next;
After that, we have two more methods used to retrieve values for updating the progress bar and progress label:
- (float)percentCompleted;
- (NSString *)percentCompletedText;
And that's all she wrote for this header file. Save SquareRootBatch.h and then flip over to SquareRootBatch.m. Replace the contents with this new version:
#import "SquareRootBatch.h"

@implementation SquareRootBatch
@synthesize max;
@synthesize current;

- (id)initWithMaxNumber:(NSInteger)inMax {
    if (self = [super init]) {
        current = 0;
        max = inMax;
    }
    return self;
}

- (BOOL)hasNext {
    return current <= max;
}
- (double)next {
if (current > max)
[NSException raise:kExceededMaxException format:
@"Requested a calculation from completed batch."];
return sqrt((double)++current);
}
- (float)percentCompleted {
return (float)current / (float)max;
}
- (NSString *)percentCompletedText {
return [NSString stringWithFormat:@"Square Root of %d is %.3f", current,
sqrt((double)current)];
}
@endBasically, we've taken the logic from our go method and distributed it throughout this little class. By doing that, we make the batch completely self-contained, which will allow us to pass the batch along to the method fired by the timer by making use of the userInfo argument.
Note
In this implementation, you might notice that we're actually calculating the square root twice, once in next, and again in percentCompletedText. For our purposes, this is actually good because it burns more processor cycles. In a real application, you would probably want to store off the result of the calculation in an instance variable so that you have access to the last calculation performed without having to perform the calculation again.
Let's rewrite our controller class to use this new timer. Since our user interface will be useable while the batch is running, we want to make the Go button become a Stop button while the batch is running. It's generally a good idea to give users a way to stop long-running processes if feasible.
Single-click StalledViewController.h and insert the following bold lines of code:
#import <UIKit/UIKit.h>#define kTimerInterval (1.0/60.0)#define kBatchSize 10@interface StalledViewController : UIViewController { UITextField *numOperationsInput; UIProgressView *progressBar; UILabel *progressLabel;UIButton *goStopButton;
BOOL processRunning;} @property (nonatomic, retain) IBOutlet UITextField *numOperationsInput; @property (nonatomic, retain) IBOutlet UIProgressView *progressBar; @property (nonatomic, retain) IBOutlet UILabel *progressLabel;@property (nonatomic, retain) IBOutlet UIButton *goStopButton;- (IBAction)go;- (void)processChunk:(NSTimer *)timer;@end
The first constant we defined—kTimerInterval—will be used to determine how often the timer fires. We're going to start by firing approximately 60 times a second. If we need to tweak the value to keep our user interface responsive, we can do that as we test. The second constant, kBatchSize, will be used in the method that the timer calls. In the method, we're going to check how much time has elapsed as we do calculations because we don't want to spend more than one timer interval in that method. In fact, we need to spend a little less than the timer interval because we need to make resources available for the run loop to do other things. However, it would be wasteful to check the elapsed time after every calculation, so we'll do a certain number of calculations before checking the elapsed time, and that's what kBatchSize is for. We can tweak the batch size for better performance as well.
We're also adding an instance variable and property to act as an outlet for the Go button. That will enable us to change the button's title to Stop when a batch is processing. We also have a Boolean that indicates whether a batch is currently running. We'll use this to determine what to do when the button is tapped and will also use it to tell the batch to stop processing when the user taps the Stop button. We also added one method, processChunk:, which is the method that our timer will call and that will process a subset of the batch.
Save StalledViewController.h and double-click StalledViewController.xib.
Once Interface Builder opens up, control-drag from File's Owner to the Go button. Select the goStopButton action. That's the only change we need, so save the nib and close Interface Builder.
Back in Xcode, single-click on StalledViewController.m. At the top of the file, add the following bold lines of code. The first will import the header from the batch object we created, and the second synthesizes the new outlet property we added for the button.
#import "StalledViewController.h"#import "SquareRootBatch.h"@implementation StalledViewController @synthesize numOperationsInput; @synthesize progressBar; @synthesize progressLabel;@synthesize goStopButton;...
Next, replace the existing go method with this new version:
- (IBAction)go {
    if (!processRunning) {
        NSInteger opCount = [numOperationsInput.text intValue];
        SquareRootBatch *batch = [[SquareRootBatch alloc]
            initWithMaxNumber:opCount];

        [NSTimer scheduledTimerWithTimeInterval:kTimerInterval
            target:self
            selector:@selector(processChunk:)
            userInfo:batch
            repeats:YES];
        [batch release];
        [goStopButton setTitle:@"Stop" forState:UIControlStateNormal];
        processRunning = YES;
    } else {
        processRunning = NO;
        [goStopButton setTitle:@"Go" forState:UIControlStateNormal];
    }

}
We start the method out by checking to see if a batch is already running. If it isn't, then we grab the number from the text field, just as the old version did:
if (!processRunning) {
        NSInteger opCount = [numOperationsInput.text intValue];
Then, we create a new SquareRootBatch instance, initialized with the number pulled from the text field:
SquareRootBatch *batch = [[SquareRootBatch alloc]
            initWithMaxNumber:opCount];
After creating the batch object, we create a scheduled timer, telling it to call our processChunk: method every sixtieth of a second. We pass the batch object in the userInfo argument so it will be available to the timer method. Because the run loop retains the timer, we don't even declare a pointer to the timer we create.
Next, we set the button's title to Stop and set processRunning to reflect that the process has started.
[goStopButton setTitle:@"Stop" forState:UIControlStateNormal];
        processRunning = YES;
If the batch had already been started, then we just change the button's title back to Go and set processRunning to NO, which will tell the processChunk: method to stop processing.
} else {
        processRunning = NO;
        [goStopButton setTitle:@"Go" forState:UIControlStateNormal];
    }
Now that we've updated our go method, add the following new method (place it right below go) that will process a chunk of the overall batch:
- (void)processChunk:(NSTimer *)timer {
    if (!processRunning) {  // Cancelled
        [timer invalidate];
        progressLabel.text = @"Calculations Cancelled";
        return;
    }

    SquareRootBatch *batch = (SquareRootBatch *)[timer userInfo];
    NSTimeInterval endTime = [NSDate timeIntervalSinceReferenceDate] +
        (kTimerInterval / 2.0);

    BOOL isDone = NO;
    while (([NSDate timeIntervalSinceReferenceDate] < endTime) && (!isDone)) {
        for (int i = 0; i < kBatchSize; i++) {
            if (![batch hasNext]) {
                isDone = YES;
                i = kBatchSize;
            }
            else {
                NSInteger current = batch.current;
                double nextSquareRoot = [batch next];
                NSLog(@"Calculated square root of %d as %0.3f", current,
                    nextSquareRoot);
            }
        }
    }
    progressLabel.text = [batch percentCompletedText];
    progressBar.progress = [batch percentCompleted];

    if (isDone) {
        [timer invalidate];
        processRunning = NO;
        progressLabel.text = @"Calculations Finished";
        [goStopButton setTitle:@"Go" forState:UIControlStateNormal];
    }
}
The first thing this method does is see if the user has tapped the Stop button since the last time the method was called. If it was, we invalidate the timer, which will prevent this method from being called any more by this timer, ending the processing of this batch. We also update the progress label to tell the user that we canceled.
if (!processRunning) {  // Cancelled
        [timer invalidate];
        progressLabel.text = @"Calculations Cancelled";
        return;
    }
Next, we retrieve the batch from the timer.
SquareRootBatch *batch = (SquareRootBatch *)[timer userInfo];
After that, we calculate when to stop processing this batch. For starters, we're going to spend half of the time available to us working on the batch. That should leave plenty of time for the run loop to receive system events and update the UI, but we can always tweak the value if we need to.
NSTimeInterval endTime = [NSDate timeIntervalSinceReferenceDate] +
        (kTimerInterval / 2.0);
We set a Boolean that we'll use to identify if we have reached the end of the batch. We'll set this to YES if hasNext returns NO.
BOOL isDone = NO;
Then, we go into a loop until we either reach the end time we calculated earlier, or there's no calculations left to do.
while (([NSDate timeIntervalSinceReferenceDate] < endTime) && (!isDone)) {We're going to calculate the square root for several numbers at a time rather than checking the date after every one, so we go into another loop based on the batch size we defined earlier.
for (int i = 0; i < kBatchSize; i++) {In that loop, we make sure there's more work to be done. If there isn't, we set isDone to YES and set i to the batch size to end this loop.
if (![batch hasNext]) {
                isDone = YES;
                i = kBatchSize;
            }
If there is another number to calculate, we grab the current value and its square root and log the fact to the debug console.
else {
                NSInteger current = batch.current;
                double nextSquareRoot = [batch next];
                NSLog(@"Calculated square root of %d as %0.3f", current,
                    nextSquareRoot);
            }
        }
    }
After we're done with processing a chunk, we update the progress bar and label.
progressLabel.text = [batch percentCompletedText];
    progressBar.progress = [batch percentCompleted];
And, if we're all out of rows to process, we invalidate the timer and update the progress label and button.
if (isDone) {
        [timer invalidate];
        processRunning = NO;
progressLabel.text = @"Calculations Finished";
[goStopButton setTitle:@"Go" forState:UIControlStateNormal];
}All that's left to do now is to take care of our new outlet in the viewDidUnload and dealloc methods, so add the lines in bold to your existing code:
- (void)viewDidUnload {
self.numOperationsInput = nil;
self.progressBar = nil;
self.progressLabel = nil;
self.goStopButton = nil;
}
- (void)dealloc {
[numOperationsInput release];
[progressBar release];
[progressLabel release];
[goStopButton release];
[super dealloc];
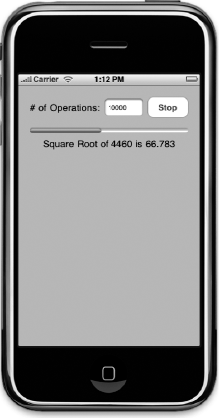
}Go ahead and take this new version for a spin. Build and run your project and try entering different numbers. As the calculations happen, your user interface should get updated (Figure 14-3) and the progress bar should make its way across the screen. While a batch is processing, you should be able to tap the Stop button to cancel the processing.
That's great, and our users are now able to start and stop the process and can continue to use the application while the calculations are being performed. But, if we had more tasks going on in the background, this option wouldn't be ideal. Trying to calculate how much time to let each batch use would be non-trivial. Fortunately, Apple has given us the operation queue and has put all sorts of non-trivial logic in it so that we don't have to reinvent the wheel. Let's take a look at operation queues now.
There are times when your application will need to run more than just a few concurrent tasks. When you get to more than a handful of tasks, the amount of complexity quickly escalates, making it very difficult to try and use any form of run loop scheduling to share time amongst all the tasks. When your application needs to manage many independent sets of instructions, you have to look at other mechanisms besides run loop scheduling to add concurrency.
As we've mentioned before, one of the traditional tools for adding concurrency at the application level is called threads. Threads are a mechanism provided by the operating system that allows multiple sets of instructions to operate at the same time within a single application. In the case of both the iPhone and the Mac, the threading functionality is provided by the POSIX Threads API (often referred to as pthreads), which is part of the OS X operating system. You should rarely, if ever, need to actually use that API in Cocoa Touch applications, however.
The Foundation framework has, for many years, contained a class called NSThread, which is far easier to work with than pthreads, which are implemented as a procedural C API. NSThread was the recommended way, until fairly recently, to add and manage threads in a Cocoa application.
With Mac OS X 10.5 (Leopard), Apple introduced some new classes for implementing concurrency and is strongly recommending the use of these new classes instead of using NSThread directly. NSOperationQueue is a class that manages a queue of instances of a subclass of NSOperation. Each NSOperation (or subclass) contains a set of instructions to perform a specific task. The operation queue will spawn and manage threads as needed to run the queued operations.
The use of operation queues makes implementing concurrency quite a bit easier than the traditional NSThread-based approach, and worlds easier than using pthreads directly. The benefits of using operation queues are so clear and compelling that we're not even going to show you how to use the lower-level mechanisms directly. We are going to discuss threads a bit, but only enough to inform your use of NSOperationQueue. Although NSOperationQueue does make many aspects of concurrency easier, there are still a few gotchas associated with concurrency and threads that you need to be aware of when using operation queues.
As we've mentioned before, every application has at least one thread, which is a sequence of instructions. The thread that begins executing when the program is launched is called the main thread. In the case of a Cocoa Touch application, the main thread contains the application's main run loop, which is responsible for handling inputs and updating the user interface. Although there are some instances where Cocoa Touch uses additional threads implicitly, pretty much all application code that you will write will fire on the main thread unless you specifically spawn a thread or use an operation in an operation queue.
To implement concurrency, additional threads are spawned, each tasked to perform a specific set of instructions. Each thread has equal access to all of your application's memory. This means that any object except local variables, can potentially be modified, used, and changed in any thread. Generally speaking, there's no way to predict how long a thread will run, and if there are multiple threads, there's no way to predict, with any certainty, which thread will finish first.
These two thread traits—the fact that they all share access to the same memory, and that there's no way to predict what share of the processing time each will get—are the root cause of a number of problems that come along for the ride when doing concurrent programming. Operation queues provide some relief from the timing problem, since you can set priorities and dependencies, which we'll look at a little later, but the memory sharing issue is still very much a concern.
The fact that every thread can access the same memory can cause any number of problems if you're not conscious of that fact while programming. When a program doesn't give the expected result because shared data is accessed concurrently by multiple threads, a race condition is said to exist. Race conditions can happen when any thread operates on the assumption that it is the sole user of a resource that is actually shared with other threads.
Take a look at the following code:
static int i;
    for (i = 0; i < 25; i++) {
        NSLog(@"i = %d", i);
    }
There's not really any reason why somebody would declare i to be static in this example, but it illustrates one classic form of race condition. When you declare a variable static, it becomes a single shared variable used whenever this method fires on any object. If this code runs in a program with only a single thread, it will work completely fine. The fact that there is only one variable i shared by multiple objects simply isn't a problem because as long as we're in the loop, no other code can fire and change the value of i.
The second we add concurrency into the mix, that's no longer true. If, for example, we had this code running in multiple threads, they would all be sharing the same copy of i. When one thread increments i, it increments it for all the other threads as well. Instead of each thread looping 25 times, which is likely the intent, all the threads combined would loop a total of 25 times. The output in such a case might look like this:
Thread 1:               Thread 2:               Thread 3:

i = 0                   i = 2                   i = 5
i = 1                   i = 3                   i = 10
i = 4                   i = 6                   i = 13
i = 7                   i = 8                   i = 18
i = 9                   i = 11                  i = 19
i = 12                  i = 14                  i = 24
i = 15                  i = 17
i = 16                  i = 21
i = 20                  i = 22
i = 23
This behavior is almost certainly not what was intended. In this case, the solution is simple: remove the static operator from i. It won't always be quite as obvious as this, but you should understand the potential for problems now with shared memory.
Another example of a race condition can happen with accessors and mutators. Let's say, for example, that we have an object that represents a person with two instance variables, one to hold their first name and another to hold their last name:
@implementation Person : NSObject {
    NSString *firstName;
    NSString *lastName;
}

@property (nonatomic, retain) NSString *firstName;
@property (nonatomic, retain) NSString *lastName;

@end
If an instance of Person is being accessed from multiple threads, we could have problems. Let's say, for example, that the instance is being updated in one thread, and read in another thread. Now, let's say that the first thread, the one that is updating the object, is changing both firstName and lastName. For the sake of argument, let's say that we have an instance of Person called person, and it starts out with a firstName value of George and a lastName value of Washington. The code executing in the first thread is changing both firstName and lastName to new values, like so:
person.firstName = @"Samantha";
    person.lastName = @"Stephens";
Now, concurrently with that, another thread is reading the values from person:
NSLog(@"Now processing %@ %@.", person.firstName, person.lastName);
If the NSLog() statement from the second thread fires between the two assignments we showed from the first thread, the result would be this:
Now processing Samantha Washington.
There is no such person as Samatha Washington. There's George Washington and there's Samantha Stephens. But, as far as that second thread's NSLog() statement is concerned, person represented Samantha Washingon.
Operation queues do not eliminate the problem of race conditions, so it's important to be aware of them. Sometimes, you can give each thread its own copy of a shared resource, perhaps an object or block of data, instead of accessing that shared resource from multiple threads. This will ensure that one thread doesn't change the resource out from under a competing thread. That said, there's some overhead with making multiple copies of data. Often, duplicating resources is just not a viable option, however, because you need to know the current value, not the value as it was when your thread started. In those cases, you need to take additional steps to ensure data integrity and avoid race conditions. The main tool we use to avoid race conditions is the mutex lock.
A mutex lock is a mechanism used to ensure that while a piece of code is firing, other threads can't fire that same piece of code or related code. The term "mutex" is a portmanteau of the words "mutal" and "exclusion" and, as you might suspect based on that, locks are essentially a way to specify that only one thread can execute particular sections of code at a given time.
Originally, locks were always implemented using the class NSLock. Although NSLock is still available, there's now a language-level feature for locking down segments of code: @synchronized blocks.
If you wrap a section of code in a @synchronized block, that code can only fire on one thread at a time. Here's an example of a @synchronized block:
@synchronized(self) {
    person.firstName = @"Samantha";
    person.lastName = @"Stephens";
}
Notice that after the @synchronize keyword, there's a value in parentheses: self. This argument is called a mutual exclusion semaphore or a mutex. To understand semaphores in the context of concurrency, the best real-world metaphor is the bathroom key you might find in some small gas stations. There's a single key to the bathroom, usually attached to a large keychain. Only the person who has the key can use the bathroom. If there's only one key, it's a mutual exclusion semaphore or mutex, because only one person can use the bathroom at a time.
@synchronize works pretty much the same way. When a thread gets to a synchronized block of code, it will check to see if anyone else is using the mutex, which is to say, if any other synchronized chunks of code that take the same semaphore are currently executing. If they are, then the thread will block until no other code is using that semaphore. A thread that is blocked is not executing any code. When the mutex becomes available, the thread will unblock and execute the synchronized code.
This is the main mechanism we'll use in Cocoa Touch to avoid race conditions and to make our objects thread safe.
Throughout Beginning iPhone 3 Development (Apress, 2009), and up until now in this book, we've always had you use the nonatomic keyword when declaring properties. We've never fully explained what nonatomic does, we just said that atomic properties added overhead that we didn't need. A good chunk of the overhead we were referring to is mutex locking. When you don't specify nonatomic, the accessors and mutators get created as if the @synchronized keyword was used with self as the mutex. Now, the exact form of the mutator and accessor methods varies depending on the other keywords and the property's datatype, but here's a simple example of what a nonatomic accessor might look like:
- (NSMutableString *)foo {
    return foo;
}
As a contrast, here's what the atomic version might look like:
- (NSMutableString *)foo {
    NSString *ret;
    @synchronized(self) {
        ret = [[self retain] autorelease];
    }
    return ret;
}
The atomic version does two things that the nonatomic doesn't do. First, it uses self as a mutex around all the code except the return statement and variable declaration. This means that no other code that uses self as a mutex can run while the next line of code is executing. All atomic accessors and mutators block when any other atomic accessor or mutator on the same object is executing on another thread. This helps to ensure data integrity.
The second thing that this version does is put the object to be returned into the autorelease pool. The reason it does that is probably non-obvious. Suppose, immediately after foo was returned, a new value was assigned to foo. In that case, the old foo that was returned by the earlier call would still be a valid object because it's in the autorelease pool. If it wasn't in the pool, then between the time that the new foo was assigned and the time that the calling method attempted to use the old foo, the old foo was probably deallocated. Not a very likely scenario in an application using only one thread, but a very possible one in an application using concurrency.
When we declare a property to be nonatomic, we're removing these protections because, for some reason, we don't think we need them. So far, this has always been fine, because we've only been accessing and setting object properties from the main thread. For outlets, it's still the case that you can pretty much always declare them nonatomic, because you shouldn't use outlets on threads other than the main thread. Most of the UIKit is not thread-safe, which means it's generally not safe to set or retrieve values from threads other than the main thread.
But, if you're creating objects that are used in threads or in operation queues, then you almost certainly want to leave off the nonatomic keyword, because the protection from atomic properties is valuable enough to offset the small amount of overhead.
It's important to note, however, that there's a difference between the concepts of atomicity and thread safety, and the fact that you've used atomic properties does not make your class thread-safe. In some simple cases, having atomic properties may be all that an object needs to be thread-safe, but thread-safety is an object-level trait. In our earlier example with the Person object, removing the nonatomic keyword from the two properties would not make the object thread-safe because the problem we illustrated earlier could still happen. You could still have one thread reading the object after firstName had been changed, but before lastName had been changed. To make the object truly "thread-safe," you'd need to not just synchronize the individual accessors and mutators, but also any transaction involving dependent data. In this case, you would need to synchronize code that sets the first and last name so that other code accessing either firstName or lastName would block until the transaction was finished.
The example that demonstrated @synchronized a few pages back shows an excellent way to ensure that the transaction is atomic. You need to lock down the transaction to make sure that no other code can read either value until both have been changed. In the Person class, you might consider adding a method called something like setFirstName:lastName: to synchronize the entire transaction, like this:
- (void)setFirstName:(NSString *)inFirst lastName:(NSString *)inLast {
    @synchronized (self) {
        self.firstName = inFirst;
        self.lastName = inLast;
    }
}
Notice that we've used mutator methods to set first and last name, even though those mutators are atomic, which means the code in that mutator will also by synchronized. This is okay, because @synchronized is what's called a recursive mutex, which means that a synchronized block can call another synchronized block safely as long as the two blocks share the same mutex.
However, you never want to call a synchronized block from within another synchronized block if they don't use the same mutex. Doing so puts you at risk of a situation known as a deadlock.
Tip
Apple's API documentation will tell you if a class is thread-safe. If the API documentation doesn't say anything on the topic, then you should assume that the class is not thread-safe.
Sometimes solutions have their own problems, and mutex locks, which are the primary solution to race conditions in concurrency, indeed have a very big problem of their own, which is known as a deadlock. A deadlock occurs when a thread blocks and then waits for a condition that can never be met. This can happen, for example, if two threads each have synchronized code that calls synchronized code on the other thread. If both threads are using one mutex and waiting for the one the other thread has, neither thread will ever be able to continue. They will block forever.
There's no simple solution to deadlock scenarios, but one really good rule of thumb that will help you avoid deadlocks is: Never have a synchronized block of code call another synchronized block of code that uses a different mutex.
If you find yourself needing to call a method or function with synchronized code in it, you may need to actually replicate the code from that method inside the synchronized block instead of calling the other method. This seems to violate the idea we've been pounding throughout this book that code shouldn't be unnecessarily duplicated. However, if you don't duplicate the code when necessary and attempt to call synchronized code from synchronized code, you could end up deadlocked.
If too many threads are executing, the system can get bogged down. This is especially true on the iPhone which, as of this writing, has only a single CPU with a single core. Even if you're using threads, your user interface can start to skip or respond slowly if you're trying to do too much in too many threads. One solution to this, of course, is to spawn fewer threads. This is something that NSOperationQueue can actually handle for you, as we'll see in a few moments.
There's another thing that threads (and by extension operations) can do to help keep your application responsive, which is to sleep. A thread can choose to sleep either for a set interval, or until a set point in time. If a thread sleeps, it blocks until it's done sleeping, which yields processor cycles to the other threads. Putting sleep calls in a thread or operation essentially throttles it, slowing it down to make sure that there's plenty of processor time available for the main thread.
To cause the thread where your code is executing to sleep, you can use one of two class methods on the class NSThread. To sleep for a specified number of seconds, you would use the method sleepForTimeInterval:. So, for example, to sleep for two and a half seconds you would do this:
[NSThread sleepForTimeInterval:2.5];
To sleep until a specific date and time represented by an instance of NSDate, you could alternatively use sleepUntilDate:. As a result, the previous example could be rewritten like this:
[NSThread sleepUntilDate:[NSDate dateWithTimeIntervalSinceNow:2.5]];
Note that you should never, ever, and we really mean never, use either of these sleep methods (or their pthreads API counterparts) on the main thread. Why? The main thread is the only thread that handles events and can update the user interface. If you put the main thread to sleep, your interface will just plain stop.
We're going to look at operation queues in a moment, but before we do that, we need to talk about operations, which are the objects that contain the sets of instructions that the operation queue manages. Operations usually take the form of custom subclasses of NSOperation. You write the subclass and, in it, you put the code that needs to be run concurrently.
Note
There's a provided subclass of NSOperation called NSInvocationOperation that will allow you to run code concurrently without creating your own subclasses of NSOperation. NSInvocationOperation allows you to specify an object and selector to use as the basis for the operation. In all but the simplest cases, however, you will want to subclass NSOperation because doing so gives you a lot more control over the process.
When implementing an operation for use in an operation queue, there are a few steps you need to take. First, you create a subclass of NSOperation and define any properties that you'll need as inputs or outputs from the operation. In our square root example, we will create a subclass of NSOperation and define properties for current and max on it.
The only other thing you have to do is to override the method called main, which is where you put the code that makes up the operation. There are a couple of things you need to do in your main method. The first thing you need to do is wrap all of your logic in a @try block so you can catch any exceptions. It's very important that an operation's main method not throw any exceptions. They must be caught and handled without being re-thrown. An uncaught exception in an operation will result in a fatal application crash.
The second thing you have to do in main is to create a new autorelease pool. Different threads cannot share the same autorelease pool. The operation will be running in a separate thread, so it can't use the main thread's autorelease pool, so it's important to allocate a new one.
Here's what a skeleton main method for an NSOperation subclass looks like:
- (void)main {
    @try {
        NSAutoreleasePool *pool = [[NSAutoreleasePool alloc] init];

                // Do work here...

        [pool drain];
    }
    @catch (NSException * e) {
// Important that we don't re-throw exception here
NSLog(@"Exception: %@", e);
}
}Any operation can optionally have one or more dependencies. A dependency is another instance of NSOperation that has to complete before this operation can be executed. An operation queue will know not to run an operation that has dependencies that have not yet finished. You can add dependencies to an operation using the addDependency: method, like so:
MyOperation *firstOperation = [[MyOperation alloc] init];
    MyOperation *secondOperation = [[MyOperation alloc] init];
    [secondOperation addDependency:firstOperation];
    ...
In this example, if both firstOperation and secondOperation are added to a queue at the same time, they will not be run concurrently even if the queue has free threads available for both operations. Because firstOperation is a dependency of secondOperation, secondOperation will not start executing until firstOperation has finished.
You can get an array of an operation's dependencies by using the dependencies method:
NSArray *dependencies = [secondOperation dependencies];
You can remove dependencies using the removeDependency: method. To remove the firstOperation as a dependency from secondOperation, you would do this:
[secondOperation removeDependency:firstOperation];
Every operation has a priority that the queue uses to decide which operation gets run when and that dictates how much of the available processing this operation will get to use. You can set a queue's priority using the setQueuePriority: method, passing in one of the following values:
NSOperationQueuePriorityVeryLowNSOperationQueuePriorityLowNSOperationQueuePriorityNormalNSOperationQueuePriorityHighNSOperationQueuePriorityVeryHigh
Instances of NSOperation default to NSOperationQueuePriorityNormal. Here's how you would change it to a higher priority:
[firstOperation setQueuePriority:NSOperationQueuePriorityVeryHigh];
Although higher priority operations will execute before lower priority ones, no operation executes if it's not ready. So, for example, an operation with a very high priority that has unmet dependencies will not be run, so a lower priority operation could go in front of it. But, among operations that are ready to execute (which can be determined using the isReady property), the operation with the highest priority will be selected.
You can determine the current priority of an operation by calling the queuePriority method on it:
NSOperationQueuePriority *priority = [firstOperation queuePriority];
By subclassing NSOperation, your class will inherit several properties that can be used to determine aspects of its current state. To determine if an operation has been cancelled, you can check the isCancelled property. The code in an operation's main method should periodically check the isCancelled property to see if the operation has been cancelled. If it has been cancelled, your main method should immediately stop processing and return, which will end the operation.
If an operation's main method is currently being executed, the isExecuting property will return YES. If it returns NO, then it means that the operation hasn't been kicked off yet for some reason. This could be because the operation was just created, because it has a dependency that hasn't finished running yet, or because the queue's maximum number of threads have already been created and none are available yet for this operation to use.
When an operation's main method returns, that will trigger the method's isFinished property to be set to YES, which will cause it to be removed from its queue.
Note
NSOperation has another property called isConcurrent, and it's a little counterintuitive. If you're going to use an operation concurrently in a queue, you want to return NO for isConcurrent (which is actually the default value). If you return YES, then the operation queue will not create a thread for your operation. It will expect the operation to create its own thread. So, if you return YES for isConcurrent, and don't write code to spawn a thread by overriding the start method, then your operation will execute on the main thread and be decidedly non-concurrent. This property tells not whether an operation can be run concurrently, but rather whether the operation itself creates a new thread. We're not creating these types of operations in this chapter, but you can read more about them in Apple's Concurrency Programming Guide at http://developer.apple.com/mac/library/documentation/General/Conceptual/ConcurrencyProgrammingGuide
You can cancel operations by calling the cancel method, like so:
[firstOperation cancel];
This will cause the operation's isCancelled property to be set to YES. It is, however, the operation's responsibility to check for this in its main method. Calling cancel will not cause the operation to be force cancelled. It just sets the property and it's the main method's responsibility to finish processing and return when it detects that the operation has been cancelled.
The fact that cancellations are tracked at the operation level and not by the operation queue does cause some behavior that may seem wrong at first. If an operation in a queue that is not yet executing gets cancelled, the operation will stay in the queue. Calling cancel on a pending operation doesn't remove the operation from the queue, and the operation queue doesn't provide a mechanism for removing operations. Cancelled operations don't get removed until they are done executing. The operation will have to wait until it starts executing to realize it's been cancelled and return, triggering its removal from the queue.
Now you know how to create operations, so let's look at the object that manages operations, NSOperationQueue. Operation queues are created like any other object. You allocate and initialize the queue, like so:
NSOperationQueue *queue = [[NSOperationQueue alloc] init];
At this point, the queue is ready to use. You can start adding operations to it immediately without doing anything else. Adding operations is accomplished by using the addOperation: method, like so:
[queue addOperation:newOp];
Once the operation is added to the queue, it will execute as soon as there is a thread available for it and it is ready to execute. It can even start executing operations while you're still adding other operations. Operation queues, by default, set the number of threads based on the hardware available. A queue running on a multi-processor or multi-core device will tend to create more threads than one running on a single-processor, single-core device.
It is generally advisable to let the operation queue decide the number of threads to use. This will, in most cases, ensure that your application makes the best use of available resources now and in the future. However, there may be situations where you want to take control over the number of threads. For example, if you have operations that yield a lot of time by blocking for some reason, you might want to have more threads running than the operation queue thinks it should have. You can do that using the method setMaxConcurrentOperationCount:. To create a serial queue, which is one that only has a single thread, you would to this:
[queue setMaxConcurrentOperationCount:1];
To tell the queue to reset the maximum number of operations based on the hardware available, you can use the constant NSOperationQueueDefaultMaxConcurrentOperationCount, like so:
[queue setMaxConcurrentOperationCount:
NSOperationQueueDefaultMaxConcurrentOperationCount];An operation queue can be paused (or suspended). This causes it to stop executing new operations. Operations that have already started executing will continue, unless cancelled, but new ones will not be started as long as the queue is suspended. Suspending the queue is accomplished using the method setSuspended:, passing YES to pause the queue, and NO to resume the queue.
Now that we've all got a good grasp on operation queues and concurrency, let's use that knowledge to fix the Stalled application one last time. Open up that copy of the Stalled application we had you make earlier. If you didn't do that, you can just copy the 14 - Stalled application from the project archives and use that as your starting point for this section.
This time, we're going to fix the Stalled application by using an operation queue. Tapping the Go button will add another process to the queue, and we'll add a table that shows the number of operations in the queue along with some information about their status. As you can see from Figure 14-4, the individual rows have a red button. In the last chapter, we used the red button to remove songs from the music player's queue. In this chapter, we're using it to cancel operations in the operation queue. To create that button, you'll need to grab the image remove.png from the project archive or grab it from the Simple Player application and add it to the Resources folder of this project. Do that now before proceeding.
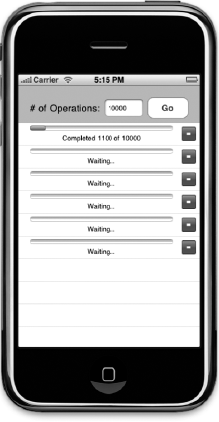
Figure 14.4. Our final version of the Stalled application will use an operation queue to manage a variable number of square root operations
We're going to start by creating our NSOperation subclass. Single-click the Classes folder and press
Single-click SquareRootOperation.h and replace its contents with the following:
#import <Foundation/Foundation.h>

#define kBatchSize          100
#define kUIUpdateFrequency  0.5

@class SquareRootOperation;
@protocol SquareRootOperationDelegate
- (void)operationProgressChanged:(SquareRootOperation *)op;
@end

@interface SquareRootOperation : NSOperation {
    NSInteger   max;
    NSInteger   current;
    id          delegate;
}
@property NSInteger max;
@property NSInteger current;
@property (assign) id<SquareRootOperationDelegate> delegate;
- (id)initWithMax:(NSInteger)inMax
delegate:(id<SquareRootOperationDelegate>)inDelegate;
- (float)percentComplete;
- (NSString *)progressString;
@endWe start off by defining two constants. The first, kBatchSize, will be used to set how many calculations we perform before checking to see if our operation has been cancelled. The second, kUIUpdateFrequency, specifies how often, in seconds, we update the user interface. We are going to be doing, literally, thousands of calculations a second. If we update the interface from every thread every time we do an update, that's an awful lot of updates. Remember, updates to the user interface have to be done on the main thread. We'll show how to safely do that from an operation in a moment, but doing it incurs overhead. Different threads can't talk to each other directly.
You don't need to understand the process that threads use to communicate, but you do need to understand that there is overhead associated with sending messages between threads. Fortunately, as you'll see in a moment, the complexity of inter-thread communication is hidden from us. But there's still a cost involved with that communication that will slow things down if we do it too frequently. By reducing the updates to every half a second, we eliminate a lot of unnecessary inter-thread communications. As you test your application, you might want to tweak this value. You might find that more or less frequent updates give a better user experience, but these settings seem to be a good starting point and give decent results both on the device and on the simulator.
#define kBatchSize          100
#define kUIUpdateFrequency  0.5
After that, we create a protocol for our thread's delegate. Our operation's delegate will be the controller class for our application's main view: StalledViewController. We'll call this protocol's only method to tell that controller that changes have been made that need to be reflected in the row that represents our operation in the table view.
@class SquareRootOperation;
@protocol SquareRootOperationDelegate
- (void)operationProgressChanged:(SquareRootOperation *)op;
@end
After that, things are pretty similar to our SquareRootBatch class from the timer example, except instead of subclassing NSObject, we subclass NSOperation. In addition to the instance variables and properties for current and max calculation, we also have an instance variable and property for our delegate:
@interface SquareRootOperation : NSOperation {
    NSInteger   max;
    NSInteger   current;
    id          delegate;
}
@property NSInteger max; @property NSInteger current; @property (assign) id<SquareRootOperationDelegate> delegate;
We have an init method that takes the max number of calculations and a delegate:
- (id)initWithMax:(NSInteger)inMax
         delegate:(id<SquareRootOperationDelegate>)inDelegate;
And we have two methods that can be called by our delegate to get the current values for the progress bar and label:
- (float)percentComplete;
- (NSString *)progressString;
@end
Make sure you save SquareRootOperation.h and then switch over to SquareRootOperation.m. Replace the current contents with the following:
#import "SquareRootOperation.h"

@implementation SquareRootOperation
@synthesize max;
@synthesize current;
@synthesize delegate;

- (id)initWithMax:(NSInteger)inMax
         delegate:(id<SquareRootOperationDelegate>)inDelegate {
    if (self = [super init]) {
        max = inMax;
        current = 0;
        delegate = inDelegate;
    }
    return self;
}

- (float)percentComplete {
    return (float)current / (float)max;
}

- (NSString *)progressString {
    if ([self isCancelled])
        return @"Cancelled...";
    if (![self isExecuting])
        return @"Waiting...";
    return [NSString stringWithFormat:@"Completed %d of %d", self.current,
        self.max];
}

- (void)main {
    @try {
        NSAutoreleasePool *pool = [[NSAutoreleasePool alloc] init];
        NSTimeInterval  lastUIUpdate = [NSDate timeIntervalSinceReferenceDate];
        while (current < max) {
            if (self.isCancelled)
                self.current = max + 1;
            else {
self.current++;
double squareRoot = sqrt((double)current);
NSLog(@"Operation %@ reports the square root of %d is %f",self,
current, squareRoot);
if (self.current % kBatchSize == 0) {
if ([NSDate timeIntervalSinceReferenceDate] > lastUIUpdate +
kUIUpdateFrequency) {
if (self.delegate && [delegate respondsToSelector:
@selector(operationProgressChanged:)])
[(NSObject *)self.delegate performSelectorOnMainThread:
@selector(operationProgressChanged:) withObject:self
waitUntilDone:NO];
[NSThread sleepForTimeInterval:0.05];
lastUIUpdate = [NSDate timeIntervalSinceReferenceDate];
}
}
}
}
[pool drain];
}
@catch (NSException * e) {
// Important that we don't re-throw exception, so we just log
NSLog(@"Exception: %@", e);
}
}
@endThe init method is pretty standard, and the percentComplete method is just like the one we had earlier in the chapter for the timer-based version of the application. The first code we need to look at is progressString. All this does is return a string that represents the current amount of progress in the operation and will be used in the cell that represents this row (see Figure 14-4). The one extra step we take here to set the label to Cancelled... if the operation has been cancelled. Remember, earlier, we said that cancelled operations that haven't started executing sit in the queue with their isCancelled property set to YES until they get kicked off, at which point they don't do any processing and fall out of the queue. Since we don't have any way to remove these operations from the queue, we do the next best thing and update the label that is displayed in the table to show that the user requested that this operation be cancelled. Otherwise, we return Waiting... if the operation hasn't started yet, or a string identifying how many square roots we've calculated so far if we are executing.
- (NSString *)progressString {
    if ([self isCancelled])
        return @"Cancelled...";
    if (![self isExecuting])
        return @"Waiting...";
    return [NSString stringWithFormat:@"Completed %d of %d", self.current,
        self.max];
}
The next method is the soul of our operation, and it warrants some special attention. The main method is the one that gets called when this operation gets kicked off by the queue. Our operation is going to be running in a thread, so we start of by wrapping everything in a @try block and allocating an autorelease pool.
- (void)main {
    @try {
        NSAutoreleasePool *pool = [[NSAutoreleasePool alloc] init];
Then we declare and initialize a variable that will be used to keep track of how much time has elapsed since the last time we updated the user interface.
NSTimeInterval lastUIUpdate = [NSDate timeIntervalSinceReferenceDate];
Next, we start our loop until current is equal to max.
while (current < max) {Every time through the loop, we check to see if our operation has been cancelled. If it has, then we set current to one more than max, which will cause our loop to end, and will end our method.
if (self.isCancelled)
                self.current = max+1;
If our operation hasn't been cancelled, then we increment current, calculate its square root, and log the result.
else {
                self.current++;
                double squareRoot = sqrt((double)current);
                NSLog(@"Operation %@ reports the square root of %d is %f",self,
                    current, squareRoot);
We then use modulus math to determine if we should check the time. Remember, we specified a batch size constant that tells how often we should check if it's time to do a user interface update, so every time current modulo kBatchSize equals zero, then we've reached a multiple of kBatchSize and should check to see if it's time to update the user interface.
if (self.current % kBatchSize == 0) {If we've processed an entire batch, we check the current time and compare it to the time of the last update added to the update frequency. If the current time is greater than those values added together, it's time to push another update out to our controller so it can get reflected in the user interface.
if ([NSDate timeIntervalSinceReferenceDate] > lastUIUpdate +
                        kUIUpdateFrequency) {
We make sure we have a delegate and that it responds to the correct selector before using performSelector:onMainThread:withObject:waitUntilDone: to let the controller know that the row that represents this operation should be updated. This is a great method that allows us to communicate back to the main thread without having to deal with the nitty-gritty aspects of inter-thread communications. It's an absolutely lovely method, just ask anybody who's had to do it the old-fashioned way using Mach ports.
if (self.delegate && [delegate respondsToSelector:
    @selector(operationProgressChanged:)])
[(NSObject *)self.delegate performSelectorOnMainThread:
@selector(operationProgressChanged:) withObject:self
waitUntilDone:NO];After we update the interface, we're going to sleep for a fraction of a second. This is optional, and the exact value to use here would probably get adjusted as we tested our application, but it's often a good idea to block periodically to yield some time. As of the time this book was written, iPhones and iPod touches come with a single processor with a single core, so yielding some time to the main thread is going to keep our app a little more responsive than it might otherwise be.
[NSThread sleepForTimeInterval:0.05];
Finally, we update lastUIUpdate with the current time so the next time through the loop, we know how long has passed since we updated the user interface.
lastUIUpdate = [NSDate timeIntervalSinceReferenceDate];
                    }
                }
            }
        }
Once we're done, we have to drain the autorelease pool, otherwise we'll end up leaking everything that's in the pool.
[pool drain];
    }
Finally, we catch any exceptions. In this application, we just log them. If you need to do something else here, like show an alert, make sure that you call methods on the main thread to do it. Do not do any UI work directly in an operation because UIKit is not thread safe. Yes, we did say that already, but it's important.
Oh, and by the way? UIKit is not thread safe.
Also, whatever you do, do not throw an exception here. Because this operation is executing on a non-main thread, there is no higher-level exception hander available to catch that exception. This means that any exceptions thrown here will be uncaught exceptions, which is a fatal condition at runtime (aka, a fatal crash).
@catch (NSException * e) {
        // Important that we don't re-throw exception, so we just log
        NSLog(@"Exception: %@", e);
    }
}
Make sure you save SquareRootOperation.m.
We no longer need our progress view and progress label on our user interface, but we do need a table to show the operation queue's operations. Before we go to Interface Builder to make the interface changes, we need to make some changes to StalledViewController.h:
#import <UIKit/UIKit.h>#import "SquareRootOperation.h"@interface StalledViewController : UIViewController<SquareRootOperationDelegate, UITableViewDelegate, UITableViewDataSource>{ UITextField *numOperationsInput; UIProgressView *progressBar; UILabel *progressLabel;UITableView *tableView;NSOperationQueue *queue;} @property (nonatomic, retain) IBOutlet UITextField *numOperationsInput; @property (nonatomic, retain) IBOutlet UIProgressView *progressBar; @property (nonatomic, retain) IBOutlet UILabel *progressLabel;@property (nonatomic, retain) IBOutlet UITableView *tableView;@property (nonatomic, retain) NSOperationQueue *queue;- (IBAction)go;- (IBAction)cancelOperation:(id)sender;- (IBAction)backgroundClick;@end
We imported SquareRootOperation.h, which is the header for the operation class we just created, and then conformed our class to the SquareRootOperationDelegate protocol in addition to the two table view delegates it was already conformed to. We also added an instance variable and property to serve as an outlet to a table view and another instance variable and property for our operation queue.
We added two methods, one that will be used to cancel operations and that will be called when the user taps the accessory pane of a row in the table. The backgroundClick method shouldn't need any explanation at this point. Because our table will be partially obscured by the keyboard, we need to provide a way to make the keyboard go away, which this method will do.
Save StalledViewController.h and double-click StalledViewController.xib to launch Interface Builder.
Once Interface Builder opens up, if the window labeled View is open, close it. Now, click on the View icon in the main window, press
Now double-click the Control icon, which used to be the View icon, to open our application's user interface back up. Single-click the progress view and hit the delete key. Then single-click the progress label (the empty label below the progress bar) and press delete again.
Look in the library for a table view and drag it over to the Control window. Place it in the window, then use the resize handles so that it takes up all of the window from the left side to the right (not the margins, the full window), and from the very bottom of the window until just below the existing text field, button, and label, using the blue guidelines for proper distance.
Control-drag from File's Owner to the table view and select the tableView outlet. Then, control-drag back from the table view to File's Owner twice. The first time, select the delegate outlet, the second time select the dataSource outlet.
Once you've done that, save the nib, quit Interface Builder, and go back to Xcode.
Single-click StalledViewController.m so we can make our final changes. At the top of the file, there are a few additions and a few deletions that need to be made:
#import "StalledViewController.h"#define kTableRowHeight 40.0#define kProgressBarLeftMargin 20.0#define kProgressBarTopMargin 5.0#define kProgressBarWidth 253.0#define kProgressBarHeight 9.0#define kProgressLabelLeftMargin 20.0#define kProgressLabelTopMargin 19.0#define kProgressViewTag 1011#define kProgressLabelTag 1012@implementation StalledViewController @synthesize numOperationsInput; @synthesize progressBar; @synthesize progressLabel;@synthesize tableView;@synthesize queue;...
The constants are going to be used to construct our table view cells. We're going to programmatically create a progress bar and a label and add them to our cells. These values define the location and size of these views, except the last two, which are values that we'll assign to the progress view's and label's tag property and that we'll use to retrieve the two views from dequeued cells.
We then get rid of the @synthesize statements for the two delete outlets, then add @synthesize statements for the new table view outlet and for the operation queue.
Next, look for the method called go and replace the current implementation with this new one:
- (IBAction)go {NSInteger opCount = [numOperationsInput.text intValue];
SquareRootOperation *newOp = [[SquareRootOperation alloc] initWithMax:opCount
delegate:self];
[queue addOperation:newOp];
[newOp release];
}First, we retrieve the number of operations, just as we did in the last two versions. Next, we create an instance of SquareRootOperation with that number, passing self as the delegate so that we get notified of changes that impact the user interface. Finally, we add the operation to the queue and release it.
After the go method, insert the following two methods:
- (IBAction)cancelOperation:(id)sender {
    NSInteger index = [sender tag];
    NSOperation *op = [[queue operations] objectAtIndex:index];

    [op cancel];
    if (![op isExecuting])
        [self.tableView reloadData];
}

- (IBAction)backgroundClick {
    [numOperationsInput resignFirstResponder];
}
The first method you just added gets called when the user taps on one of the red buttons in the table view. We're using the same technique we used in the Simple Player application from the last chapter. The accessory button on each row has its row index assigned as its tag, so we retrieve the tag, and then use that index to retrieve the operation from the queue that corresponds to that index.
Once we have the operation, we cancel it. We check to see if the operation was executing, and if it wasn't, we trigger a reload of the table data so that the row's text gets changes from Waiting... to Cancelled....
The other method you just added just tells the text field to resign the first responder so that the keyboard will retract and we can see the whole table.
Look for the existing viewDidUnload and dealloc methods, and make the following changes to accommodate the changes we made in the header:
- (void)viewDidUnload {
    self.numOperationsInput = nil;
    self.progressLabel = nil;
    self.progressBar = nil;
    self.tableView = nil;
}

- (void)dealloc {
    [numOperationsInput release];
    [progressLabel release];
    [progressBar release]
    [tableView release];
    [queue release];
[super dealloc]; }
After the dealloc method, add the following new method, which is an implementation of viewDidLoad, which gets called when our view loads for the first time.
- (void)viewDidLoad {
    NSOperationQueue *newQueue = [[NSOperationQueue alloc] init];
    self.queue = newQueue;
    [newQueue release];
    [queue addObserver:self
            forKeyPath:@"operations"
               options:0
               context:NULL];
}
The first thing we do in viewDidLoad is create a new instance of NSOperationQueue and assign it to queue. Then we do something kind of neat. We use something called KVO. That's not a typo. We're not talking about KVC, but it's a related concept. KVO stands for Key-Value Observation, and it's a mechanism that lets you get notified when a particular property on another object gets changed. We're registering self as an observer of queue for the keypath called operations. That key path is the name of the property that returns an array with all of the operations in the queue. Whenever an operation is added or gets removed from the queue, our controller class will get notified of that fact thanks to KVO. The options parameter allows us to request additional information about the change, such as the previous value of the changed property. We don't need anything over and above what basic KVO provides, so we pass 0. We also pass NULL into the final argument because we don't have any objects that we want to get passed along to the notification method.
Now that we've registered for the KVO notification, we have to implement a method called observeValueForKeyPath:ofObject:change:context:. Let's add that method to our class and then talk about what it's doing. Insert the following new method after viewDidLoad.
- (void)observeValueForKeyPath:(NSString *)keyPath
                      ofObject:(id)object
                        change:(NSDictionary *)change
                       context:(void *)context {
    NSIndexSet *indices = [change objectForKey:NSKeyValueChangeIndexesKey];
    if (indices == nil)
        return; // Nothing to do

    // Build index paths from index sets
    NSUInteger indexCount = [indices count];
    NSUInteger buffer[indexCount];
    [indices getIndexes:buffer maxCount:indexCount inIndexRange:nil];

    NSMutableArray *indexPathArray = [NSMutableArray array];
    for (int i = 0; i < indexCount; i++) {
        NSUInteger indexPathIndices[2];
        indexPathIndices[0] = 0;
        indexPathIndices[1] = buffer[i];
        NSIndexPath *newPath = [NSIndexPath indexPathWithIndexes:indexPathIndices
            length:2];
[indexPathArray addObject:newPath];
}
NSNumber *kind = [change objectForKey:NSKeyValueChangeKindKey];
if ([kind integerValue] == NSKeyValueChangeInsertion) // Operations were added
[self.tableView insertRowsAtIndexPaths:indexPathArray
withRowAnimation:UITableViewRowAnimationFade];
else if ([kind integerValue] == NSKeyValueChangeRemoval) // Operations removed
[self.tableView deleteRowsAtIndexPaths:indexPathArray
withRowAnimation:UITableViewRowAnimationFade];
}Any change to properties you observe using KVO will trigger a call to this method. The first argument to the method is the keypath that you're watching, and the second is the object that you are observing. In our case, since we're only watching one keypath on one object, we don't need to do anything with these values. If we were observing multiple values, we would probably need to check these arguments to know what to do. The third argument, change, is a dictionary that contains a whole bunch of information about the change that happened. We didn't pass in a value for context earlier when we observed queue, so we won't receive anything in context when this method gets called.
Note
KVO is a neat feature of Cocoa Touch, but one that we're not covering in-depth. If you're interested in leveraging KVO in your own applications, a great place to start is Apple's Key Value Observing Programming Guide available at http://developer.apple.com/mac/library/documentation/cocoa/Conceptual/KeyValueObserving/KeyValueObserving.html
The first thing we do in this method is retrieve the value stored under NSKeyValueChangeIndexesKey. When the property you're getting notified about is a mutable array, which is the case here, any insertions or deletions will be accompanied by a set of indices that tell where the insertions or deletions happen. We're going to need those values to update our table view.
Note
Even though operations is declared as an NSArray, the operation queue actually uses an instance of NSMutableArray to keep track of the operations in the queue. Since NSMutableArray is a subclass of NSArray, this is perfectly appropriate. The fact that operations is an NSArray is a hint to other objects not to change its contents, but it's perfectly fine to observe changes made by the operation queue.
NSIndexSet *indices = [change objectForKey:NSKeyValueChangeIndexesKey];
If this returned value is nil, we've got nothing to do, so we return.
if (indices == nil)
        return; // Nothing to do
If it's not nil, then we need to take the indices, which come in the form of an NSIndexSet object, which is an object designed to keep a collection of indices, and convert them into an array of NSIndexPath objects, which hold an index path that points to the section and row of our table. Since our table has only one section, we know that all rows are in section 0 and we can use that knowledge to craft index paths pointing to our rows:
NSUInteger indexCount = [indices count];
    NSUInteger buffer[indexCount];
    [indices getIndexes:buffer maxCount:indexCount inIndexRange:nil];


NSMutableArray *indexPathArray = [NSMutableArray array];
    for (int i = 0; i < indexCount; i++) {
        NSUInteger indexPathIndices[2];
        indexPathIndices[0] = 0;
        indexPathIndices[1] = buffer[i];
        NSIndexPath *newPath = [NSIndexPath indexPathWithIndexes:indexPathIndices
            length:2];
        [indexPathArray addObject:newPath];
    }
Once we get here, we have an array of NSIndexPath objects, each of which represents one row that was just either deleted or inserted into the queue's operations array. We can find out whether it was an insertion or deletion by grabbing another piece of information out of the change dictionary using the key NSKeyValueChangeKindKey. That will return an NSNumber that, when converted to an integer, will tell us what kind of change happened. If it was an insertion, then the integer representation of the returned value will equal the constant NSKeyValueChangeInsertion. If it was a deletion, it will equal NSKeyValueChangeRemoval. So, we use that information to tell the table to insert new rows, or to delete existing rows, as appropriate:
NSNumber *kind = [change objectForKey:NSKeyValueChangeKindKey];
    if ([kind integerValue] == NSKeyValueChangeInsertion)  // Operations were added
        [self.tableView insertRowsAtIndexPaths:indexPathArray
            withRowAnimation:UITableViewRowAnimationFade];
    else if ([kind integerValue] == NSKeyValueChangeRemoval)  // Operations removed
        [self.tableView deleteRowsAtIndexPaths:indexPathArray
            withRowAnimation:UITableViewRowAnimationFade];
Almost there, friends. Almost there. At the bottom of the class we have a few more methods to add. First, we need to add our SquareRootOperationDelegate method, where we update the user interface. Insert the following method just above the @end declaration:
- (void)operationProgressChanged:(SquareRootOperation *)op {
    NSUInteger opIndex = [[queue operations] indexOfObject:op];
    NSUInteger reloadIndices[] = {0, opIndex};
    NSIndexPath *reloadIndexPath = [NSIndexPath indexPathWithIndexes:reloadIndices
        length:2];
    UITableViewCell *cell = [tableView cellForRowAtIndexPath:reloadIndexPath];
    if (cell) {
        UIProgressView *progressView = (UIProgressView *)[cell.contentView
            viewWithTag:kProgressViewTag];
        progressView.progress = [op percentComplete];
        UILabel *progressLabel = (UILabel *)[cell.contentView
            viewWithTag:kProgressLabelTag];
        progressLabel.text = [op progressString];
[self.tableView reloadRowsAtIndexPaths:[NSArray
arrayWithObject:reloadIndexPath]
withRowAnimation:UITableViewRowAnimationNone];
}
}We take the SquareRootOperation instance that called the method and find its index in the operations array. We use that information to build an index path that points to the row that corresponds to the operation that triggered the method call. We use that index path to get a reference to the cell that displays the updated operation. If there is no corresponding cell, then the row isn't currently visible and we don't need to do anything. If the row is visible, we grab the percentComplete and progressString values from the operation and use them to set the label and progress view for the operation's cell.
All that's left are the table view methods, and you all are old hands at these by now, so just insert the following methods above the @end declaration:
#pragma mark -
#pragma mark Table View Methods
- (NSInteger)tableView:(UITableView *)theTableView
 numberOfRowsInSection:(NSInteger)section {
    return [[queue operations] count];
}

- (UITableViewCell *)tableView:(UITableView *)theTableView
cellForRowAtIndexPath:(NSIndexPath *)indexPath {
    static NSString *identifier = @"Operation Queue Cell";
    UITableViewCell *cell = [theTableView
        dequeueReusableCellWithIdentifier:identifier];
    if (cell == nil) {
        cell = [[[UITableViewCell alloc] initWithStyle:UITableViewCellStyleDefault
            reuseIdentifier:identifier] autorelease];

        UIProgressView *progressView = [[UIProgressView alloc] initWithFrame:
            CGRectMake(kProgressBarLeftMargin, kProgressBarTopMargin,
            kProgressBarWidth, kProgressBarHeight)];
        progressView.tag = kProgressViewTag;
        [cell.contentView addSubview:progressView];
        [progressView release];

        UILabel *progressLabel = [[UILabel alloc] initWithFrame:
            CGRectMake(kProgressLabelLeftMargin, kProgressLabelTopMargin,
            kProgressBarWidth, 15.0)];
        progressLabel.adjustsFontSizeToFitWidth = YES;
        progressLabel.tag = kProgressLabelTag;
        progressLabel.textAlignment = UITextAlignmentCenter;
        progressLabel.font = [UIFont systemFontOfSize:12.0];
        [cell.contentView addSubview:progressLabel];
        [progressLabel release];

        UIButton *removeButton = [UIButton buttonWithType:UIButtonTypeCustom];
        UIImage *removeImage = [UIImage imageNamed:@"remove.png"];
        [removeButton setBackgroundImage:removeImage forState:UIControlStateNormal];
        [removeButton setFrame:CGRectMake(0.0, 0.0, removeImage.size.width,
            removeImage.size.height)];
[removeButton addTarget:self action:@selector(cancelOperation:)
forControlEvents:UIControlEventTouchUpInside];
cell.accessoryView = removeButton;
}
SquareRootOperation *rowOp = (SquareRootOperation *)[[queue operations]
objectAtIndex:[indexPath row]];
UIProgressView *progressView = (UIProgressView *)[cell.contentView
viewWithTag:kProgressViewTag];
progressView.progress = [rowOp percentComplete];
UILabel *progressLabel = (UILabel *)[cell.contentView
viewWithTag:kProgressLabelTag];
progressLabel.text = [rowOp progressString];
cell.accessoryView.tag = [indexPath row];
return cell;
}
- (NSIndexPath *)tableView:(UITableView *)tableView
willSelectRowAtIndexPath:(NSIndexPath *)indexPath {
return nil;
}
- (CGFloat)tableView:(UITableView *)theTableView
heightForRowAtIndexPath:(NSIndexPath *)indexPath {
return kTableRowHeight;
}Nothing in these table view methods should need much explanation. If you're unclear about the way we built the custom cell in tableView:cellForRowAtIndexPath: by adding subviews to the cell's content view, you might want to revisit Chapter 8 of Beginning iPhone 3 Development.
Build and run the application and take it for a spin. You probably want to run this one in the simulator. Try spawning a whole bunch of operations and then watch them run, keeping an eye both on Xcode's debugger console and the application itself. Try deleting both executing and pending operations to see how they behave. If you want to run the application on your phone, you might want to consider commenting out the NSLog() statement in the main method of SquareRootOperation.m, but if you do, make sure you add a few zeros on to the number of calculations to perform or else increase the amount of time that each operation sleeps, otherwise the operations will finish so fast you won't even see the table update.
Make note of how many running operations there are when you run it on the device versus the simulator. We found that the queue defaulted to one concurrent thread on iPhones and iPod touches, but every Mac we tried it on had at least two threads. That makes sense, since every Mac right now ships with at least two processor cores, but every iPhone and iPod touch currently ship with only one. Try experimenting by setting the maximum number of concurrent operations in the queue and see how performance is impacted.
This chapter was just an introduction to concurrency, but you should have enough of a grip on both operation queues and timers to be able to effectively use both techniques in your iPhone applications. Once you've digested it all, turn the page and we'll get into the final frontier: debugging.