
As stated earlier, our aim is to make the first subnet a public subnet. To do that, we need to create a new routing table and attach it to the first subnet.
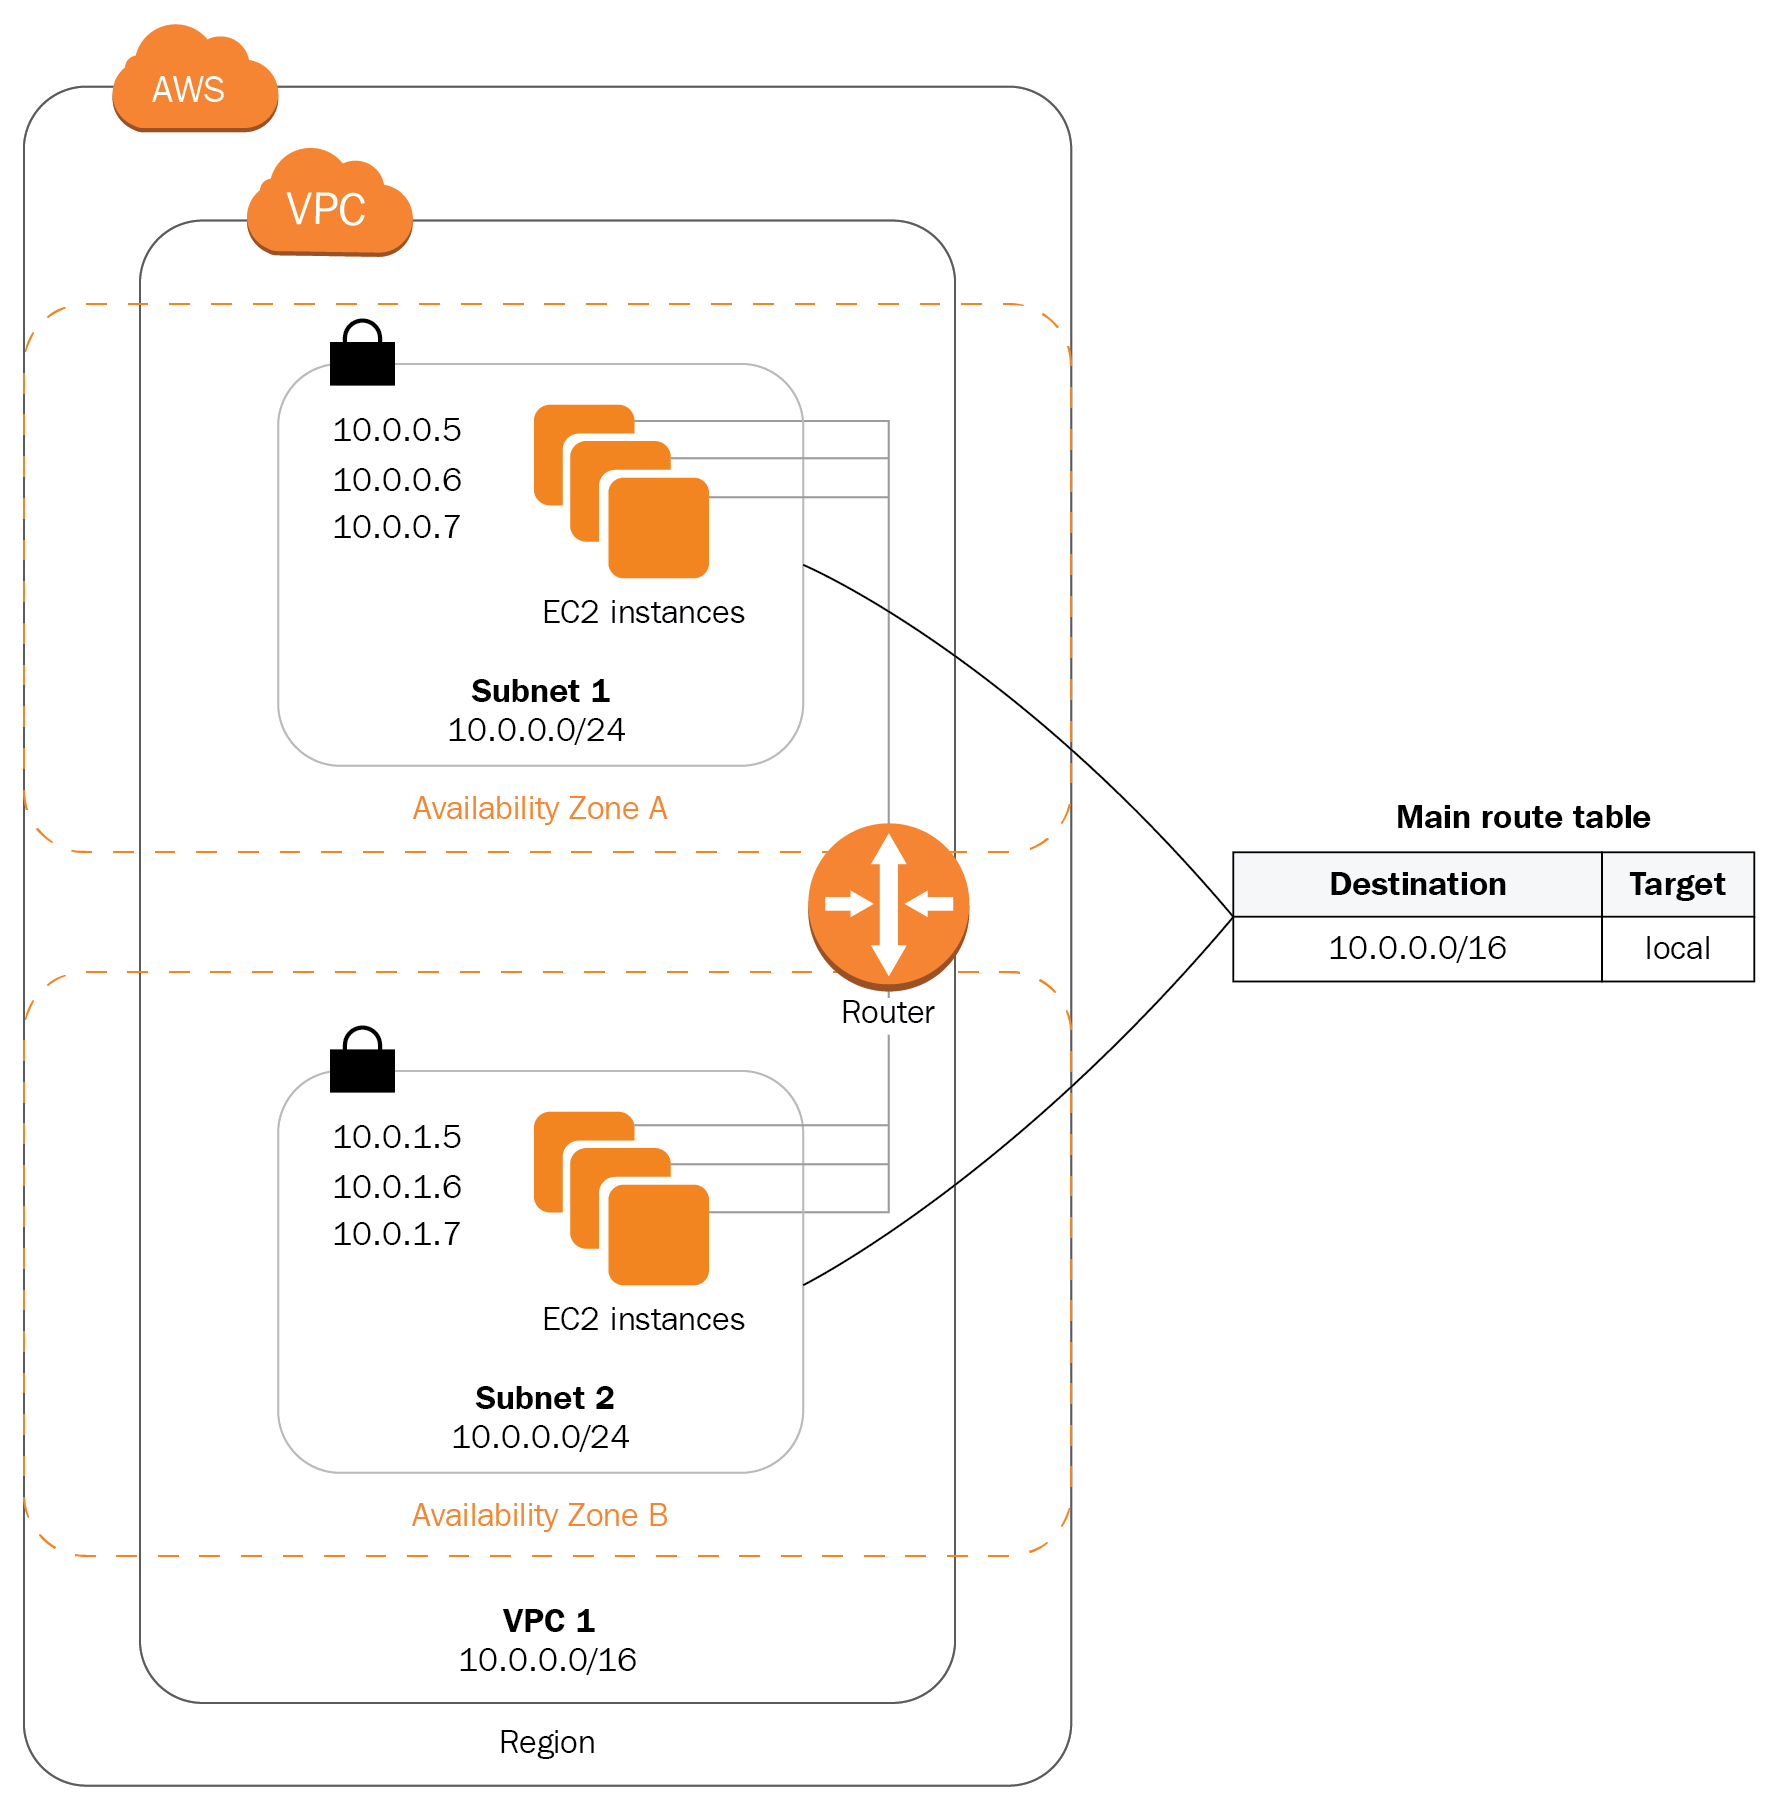
The entry in the main route table is given in the following diagram. This main route table is attached to all subnets by default:
We now create a new route table. We provide a name for the table. The entry in our table should enable all traffic, other than local traffic, to be sent to the internet gateway. In other words, the table must implement the following:
- All traffic out of the subnet whose destination is 10.0.0.0/16 must be routed within the VPC (that is locally).
- All traffic to any other destination must be routed to the internet gateway.
This is how our new routing table will look:

Now we need to associate the routing table with the first subnet. Once the association is done, the first subnet will become a public subnet.