3. Settings and Networking on Your Vita
In this chapter, you learn about your Vita’s settings and networking options.
• LiveArea Screen for Settings
• Network
• Security
• System
• Format
• Using Safe Mode to Troubleshoot
To maximize your enjoyment of the PlayStation Vita, you need to understand and be able to tweak all its settings. This includes the Vita’s networking options, which are critical for enjoying the system’s rich array of social features. In this chapter, you receive a tutorial on what’s behind the Settings icon and get the inside scoop on other useful system-related information.
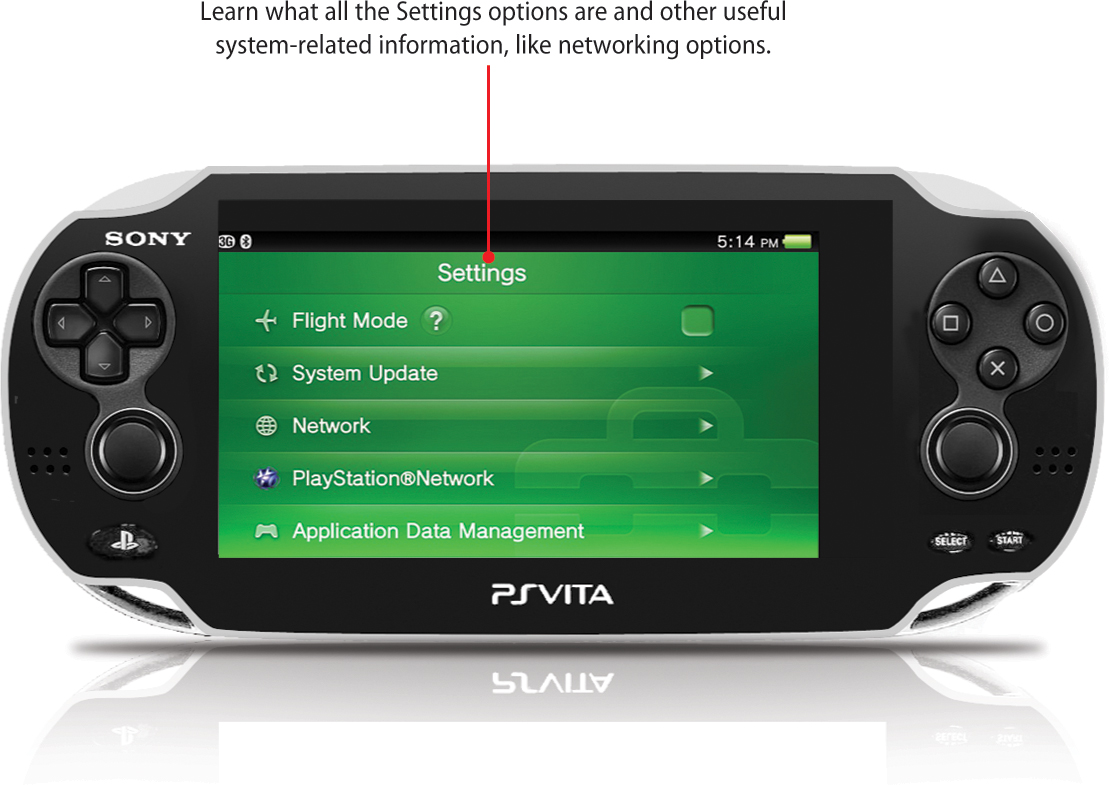
LiveArea Screen for Settings
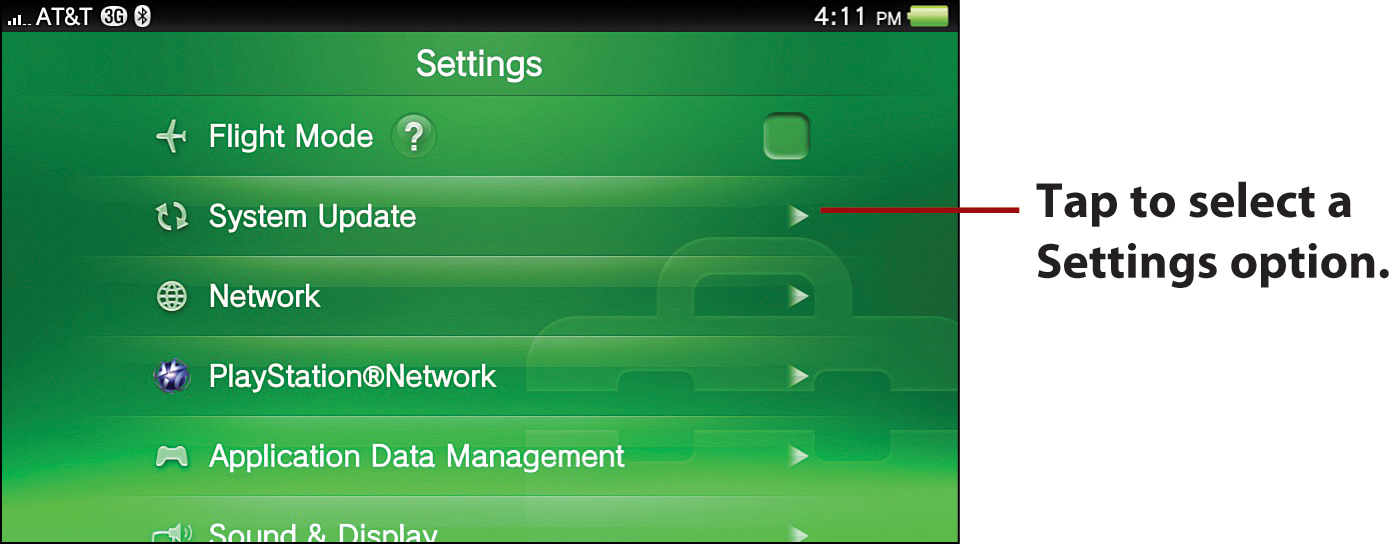
To access the LiveArea screen for Settings, tap the Settings icon on the Home screen.
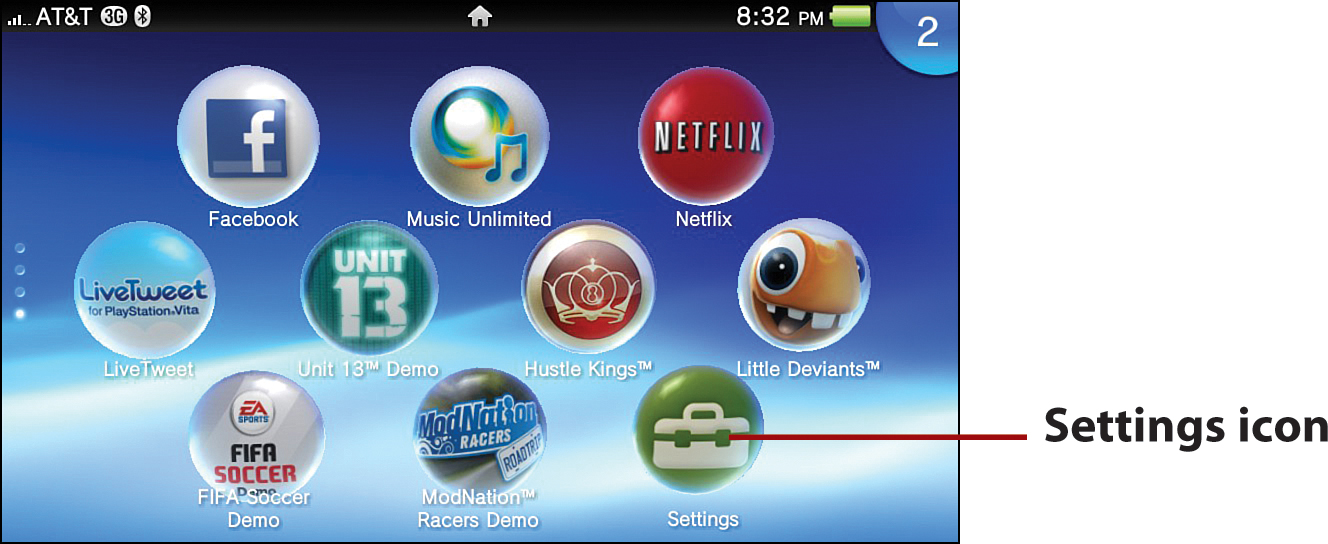
After you select the Settings icon, you see the following options:
• Action icon—Tap to open the web browser to access documentation for all the Settings options.
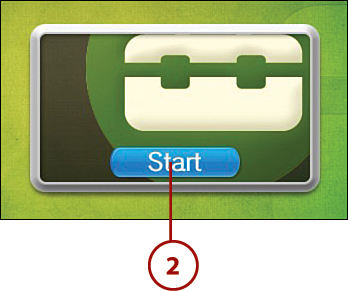
• Gate—Tap the gate to start the Settings app.
• PlayStation Vita User’s Guide—Tap to open Sony’s PlayStation Vita User’s Guide using the Vita’s web browser.
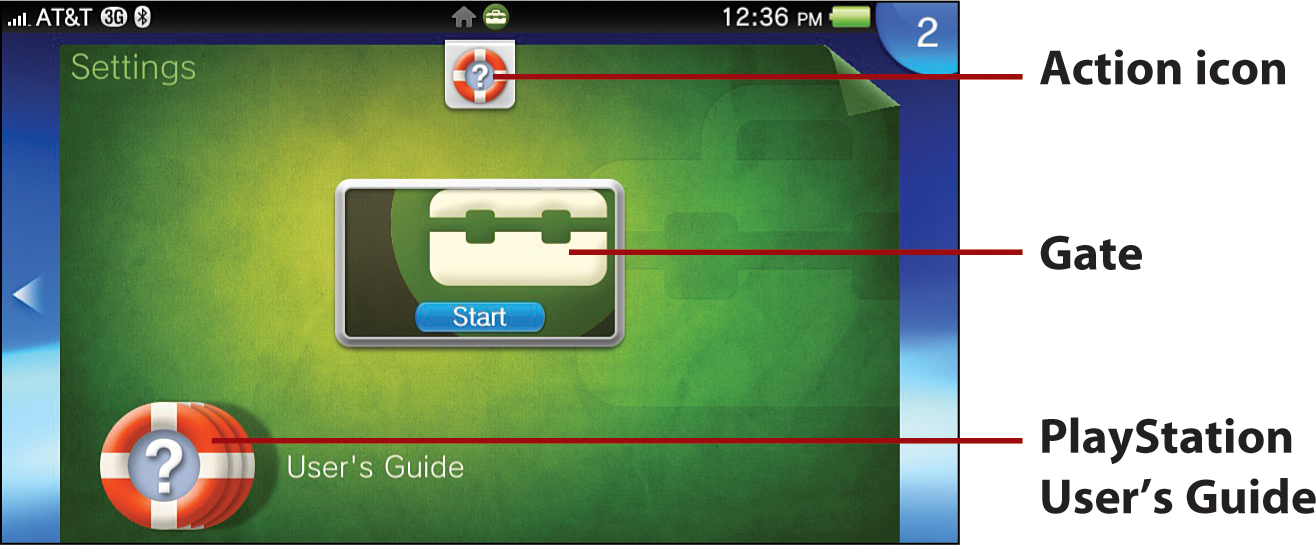
After tapping Start, you can access all the Vita’s settings, which are described in the following sections.
Flight Mode
Radio waves of any type, including the Wi-Fi, 3G, or Bluetooth emanating from your Vita, might adversely affect various types of electronic equipment, particularly if they’re older or not well shielded. This equipment includes critical medical devices such as pacemakers, or the sensitive instrumentation found on airplanes. Similar to other mobile devices, the Vita has a flight mode that, when enabled, temporarily disables the platform’s networking features.
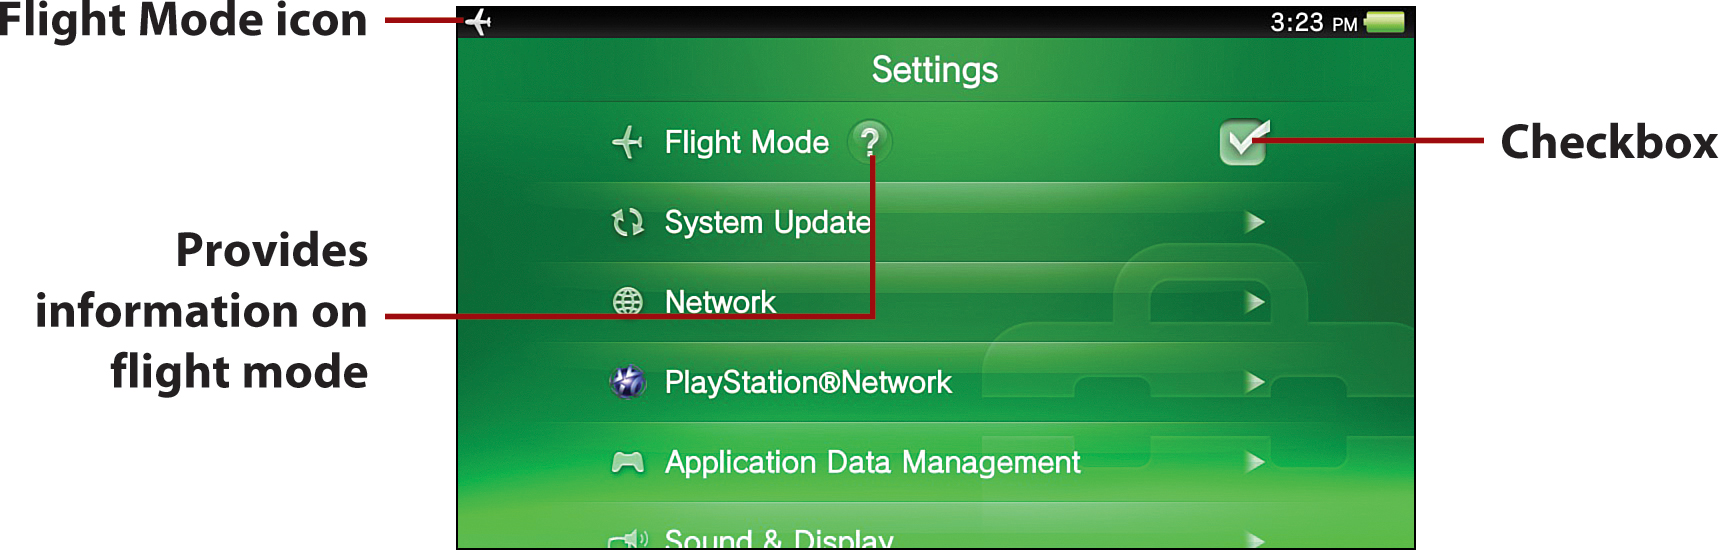
You turn on the Flight Mode setting by tapping the checkbox. The Flight Mode icon displays in the Info bar. Tap the checkbox again to turn off Flight Mode.
You can use the Wi-Fi or Bluetooth features even when flight mode is enabled by setting a check mark for each under Network. See “Network” later in this chapter for more information.
System Update
When connected over Wi-Fi, 3G, or to another connected device such as a PlayStation 3 or computer, you’re occasionally prompted to update to a new version of the Vita’s system software. System software updates include security patches and updated settings or features intended to improve your Vita’s operations, so updating whenever possible is recommended.
Updating the system software is more than just a good practice; it might also become a requirement at times because some applications or content can become inaccessible without an updated operating system. Starting the update process might not be possible if the battery charge level is too low, so charging your Vita first or having the AC adapter handy is also important.
Connecting Over Wi-Fi or 3G
You must first be connected to the Internet via Wi-Fi or 3G to receive an automatic prompt to update. If the system update exceeds 20MB, you cannot update over 3G due to carrier limitations. Connect over Wi-Fi or through one of the other options instead.
To manually update the Vita using Wi-Fi, do the following:
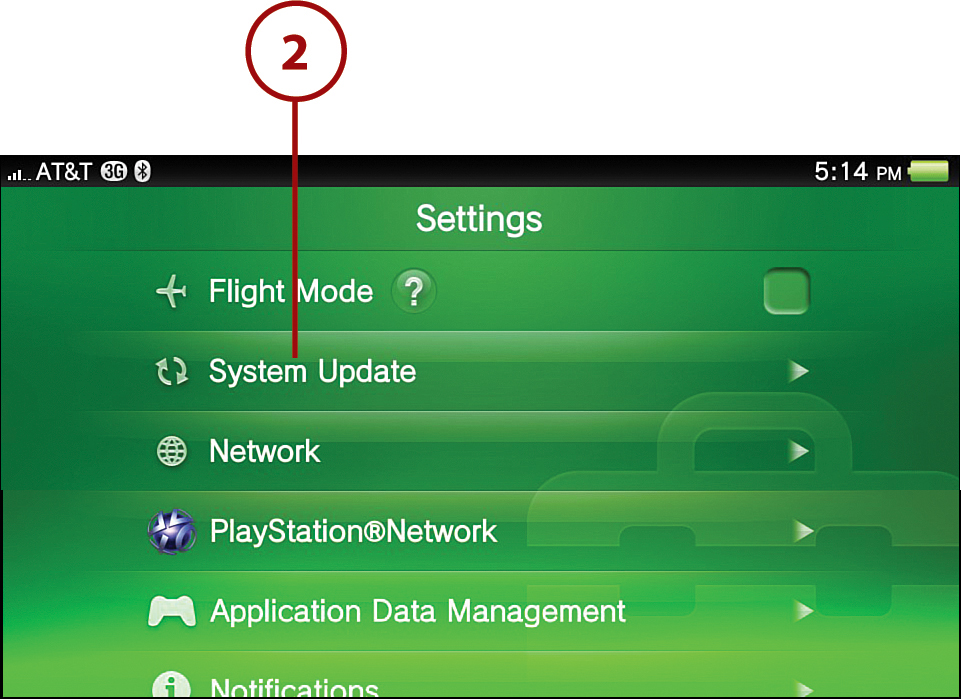
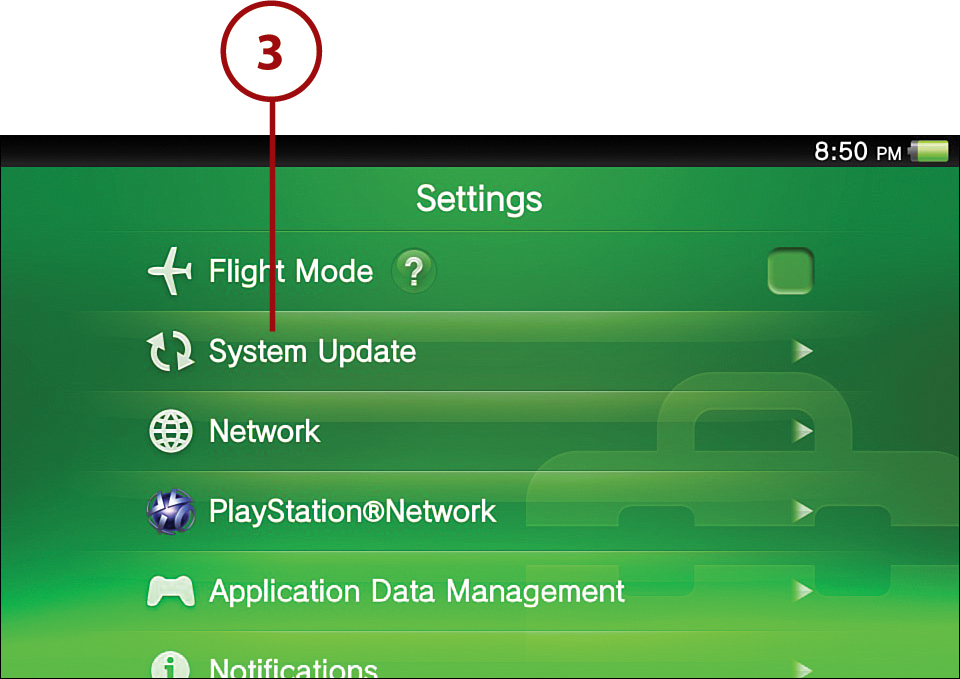
1. From the Settings menu, tap System Update.

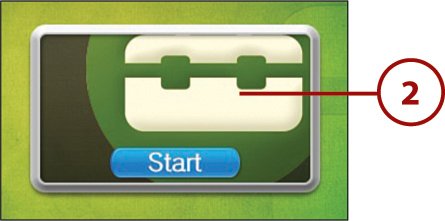
2. Tap Update Using Wi-Fi. Your Vita checks to find out whether an update is available. If the latest version of the system software is already installed, tap OK to return to the Settings screen. Otherwise, proceed to the next step.
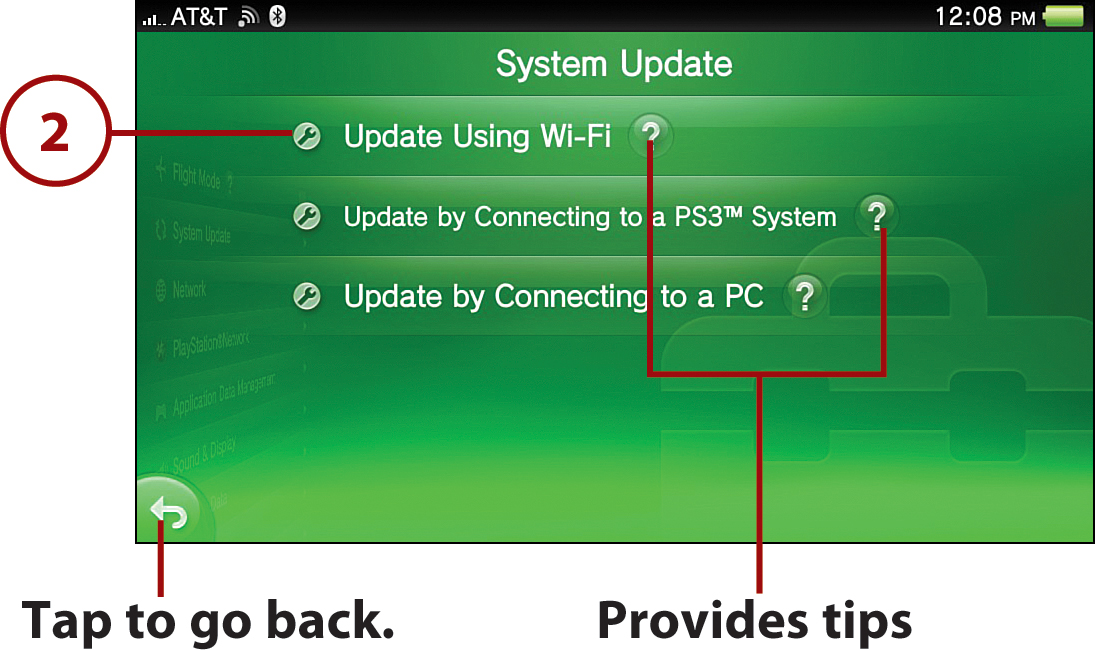
3. Tap Next.
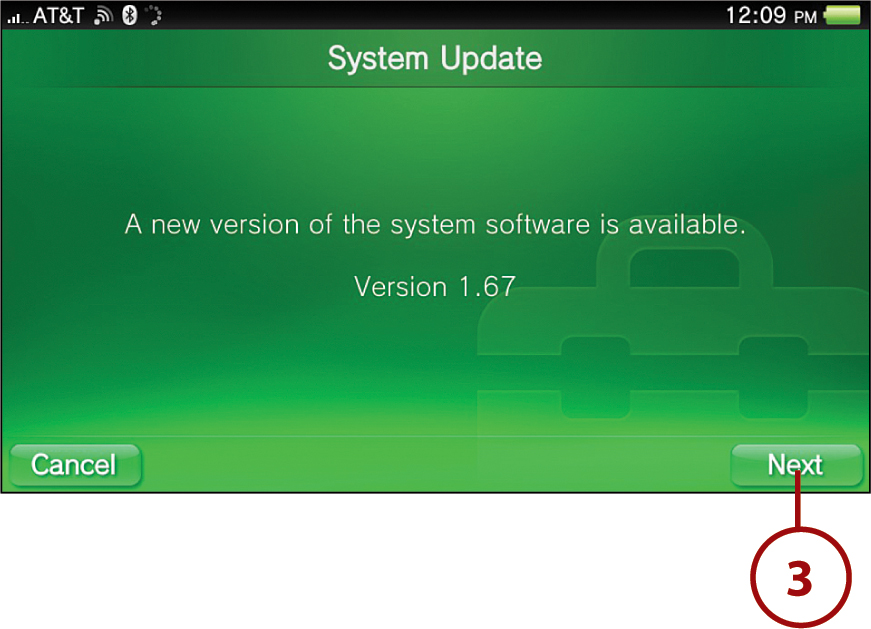
4. Follow the remaining onscreen instructions to complete the update.
Connecting to a PlayStation 3
To do a system update via a PlayStation 3, the console must meet the following prerequisites:
• Have an active Internet connection.
• Have system software updated to version 4.00 or later.
• Have no active applications running.
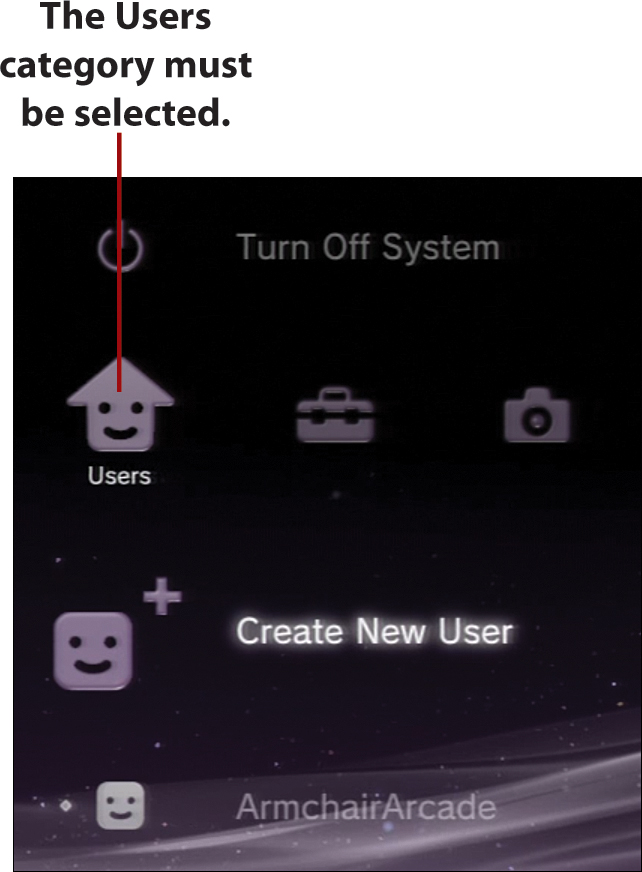
• Have the Users category selected on the PlayStation 3’s main menu.
To update the Vita by connecting to the PlayStation 3, do the following:
1. Connect the Vita to the PlayStation 3 using the Vita’s USB cable.
2. On the Vita, tap System Update from the Settings menu.
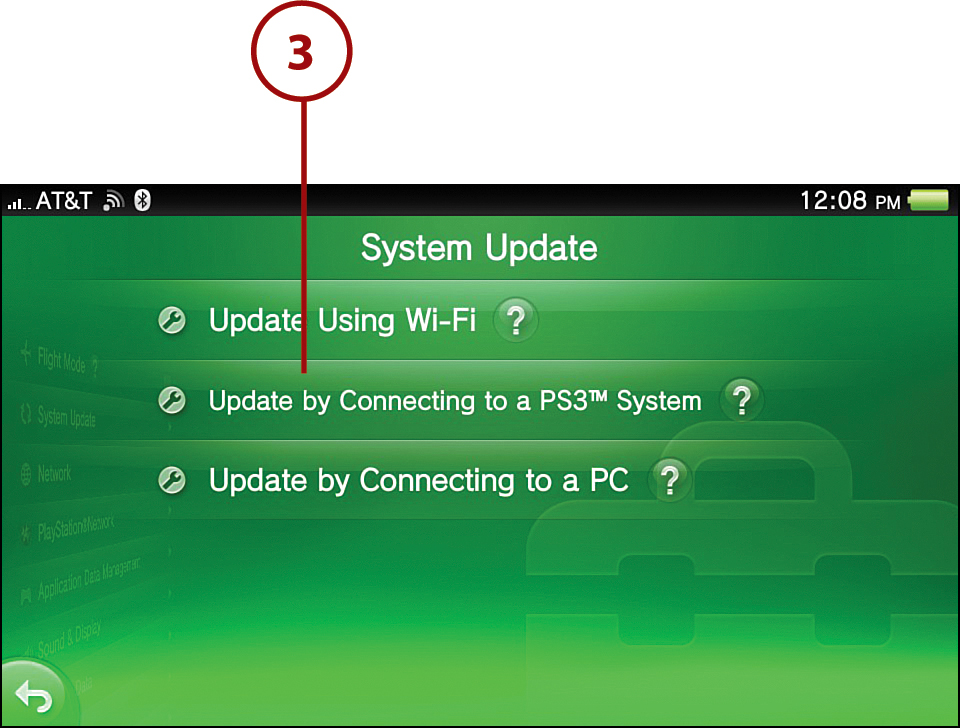
3. Tap Update by Connecting to a PS3 System.
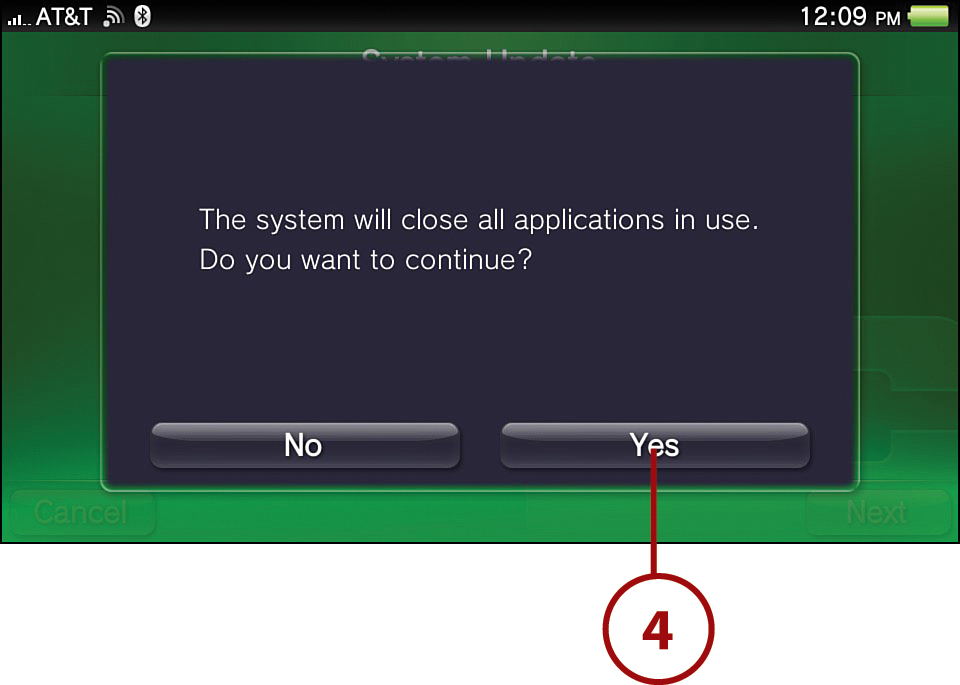
4. If the latest version of the system software is already installed, tap OK to return to the Settings screen. Otherwise, proceed to the next step.
5. With the new version of the system software available, tap Next.
6. Follow the remaining onscreen instructions to complete the update.
Your Vita now has the latest system software. For more information on connecting to a PlayStation 3, see “Working with a PlayStation 3” in Chapter 8, “Managing Media with Content Manager.”
Connecting to a Computer
To do a system update via a Windows-or Macintosh-based computer, the computer must meet the following prerequisites:
• Have an active Internet connection.
• Have Content Manager Assistant downloaded and installed (refer to Chapter 8 for complete instructions).
To update the Vita by connecting to a computer, do the following:
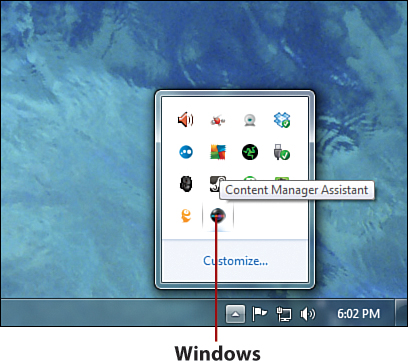
1. On the computer, verify that the Content Manager is installed and started.
On a Windows computer, look for the Content Manager Assistant icon in the notification area of the taskbar.
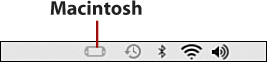
On a Macintosh computer, look for the Content Manager Assistant icon in the menu bar.
2. Connect the Vita to the computer using the Vita’s USB cable.
3. From the Vita’s Settings menu, tap System Update.
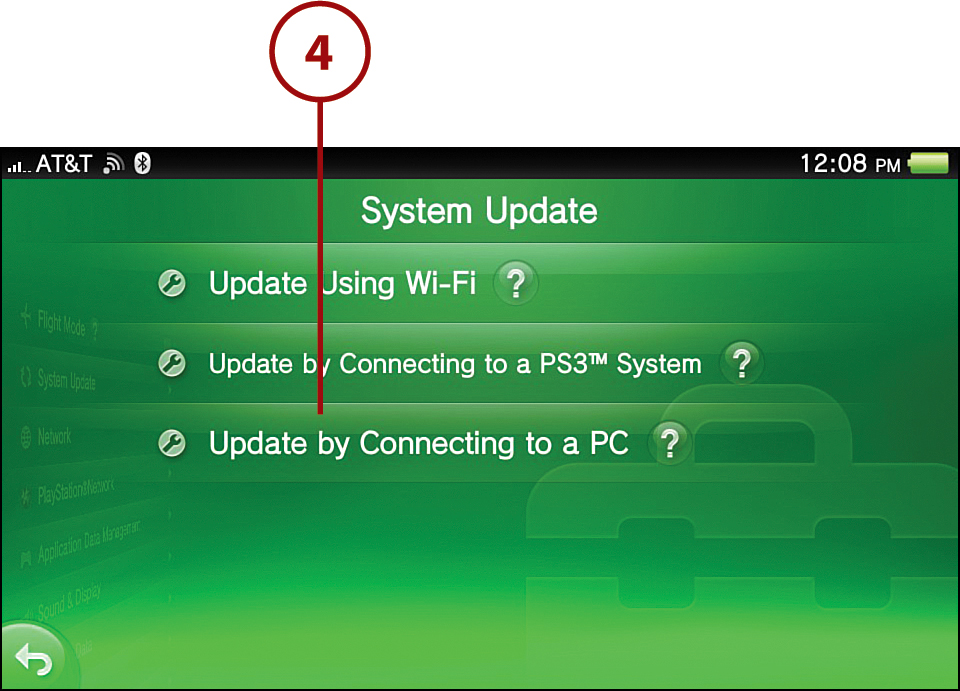
4. Tap Update by Connecting to a PC.
5. If the latest version of the system software is already installed, tap OK to return to the Settings screen. Otherwise, proceed to the next step.
6. With the new version of the system software available, tap Next.
7. Follow the remaining onscreen instructions to complete the update.
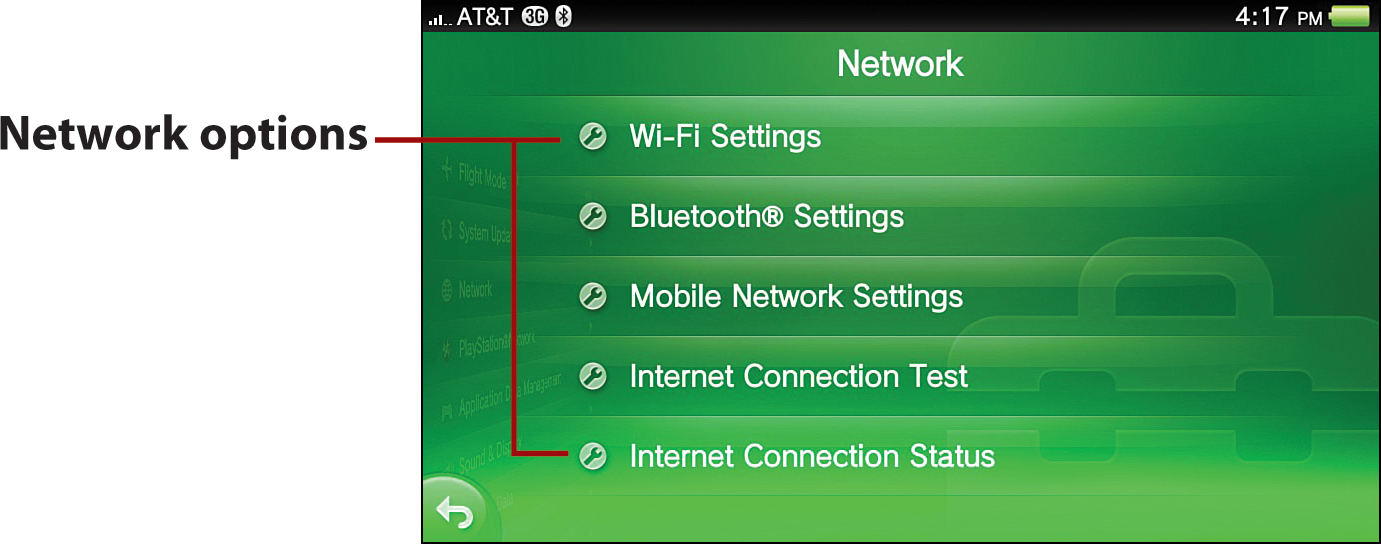
Network
Two types of connectivity fall under Networking: infrastructure and ad hoc. Infrastructure networking involves connecting to external networks such as the Internet, with connections taking place over a Wi-Fi or 3G connection, whereas ad hoc networking involves connecting to local networks or devices, such as when you’re playing games against other Vita owners in the same room or when your Vita connects to a device over Bluetooth.
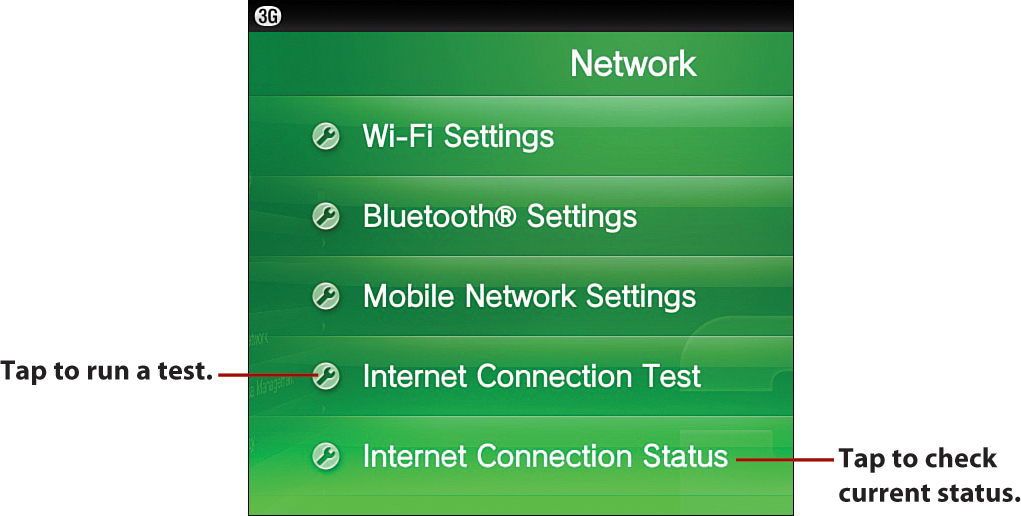
Five options are available in Networking under Settings: Wi-Fi Settings, Bluetooth Settings, Mobile Network Settings, Internet Connection Test, and Internet Connection Status. Each of the five options is discussed in the subsections that follow.
Setting Up Wi-Fi
The PlayStation Vita supports the three most common 802.11 Wi-Fi connectivity standards in the 2.4 and 5.8 GHz spectrums—b, g, and n—as well as the most common WEP, WPA, WPS, and AOSS security protocols. Although connecting with most Wi-Fi networks is a straightforward process, you can adjust numerous connection settings as needed:
• Wi-Fi—When the check mark is present, Wi-Fi is active. Tap to remove the check mark and turn Wi-Fi off.
• Access points—The Service Set Identifier, commonly known as the SSID, is displayed for both saved and newly found access points. After a connection is established with an access point, the Vita automatically connects to it again after it’s in range if the password has been saved. You can access a connection test and advanced settings by tapping a saved access point.
• Searching for access points—This indicator spins every few seconds as the Vita checks for access points.
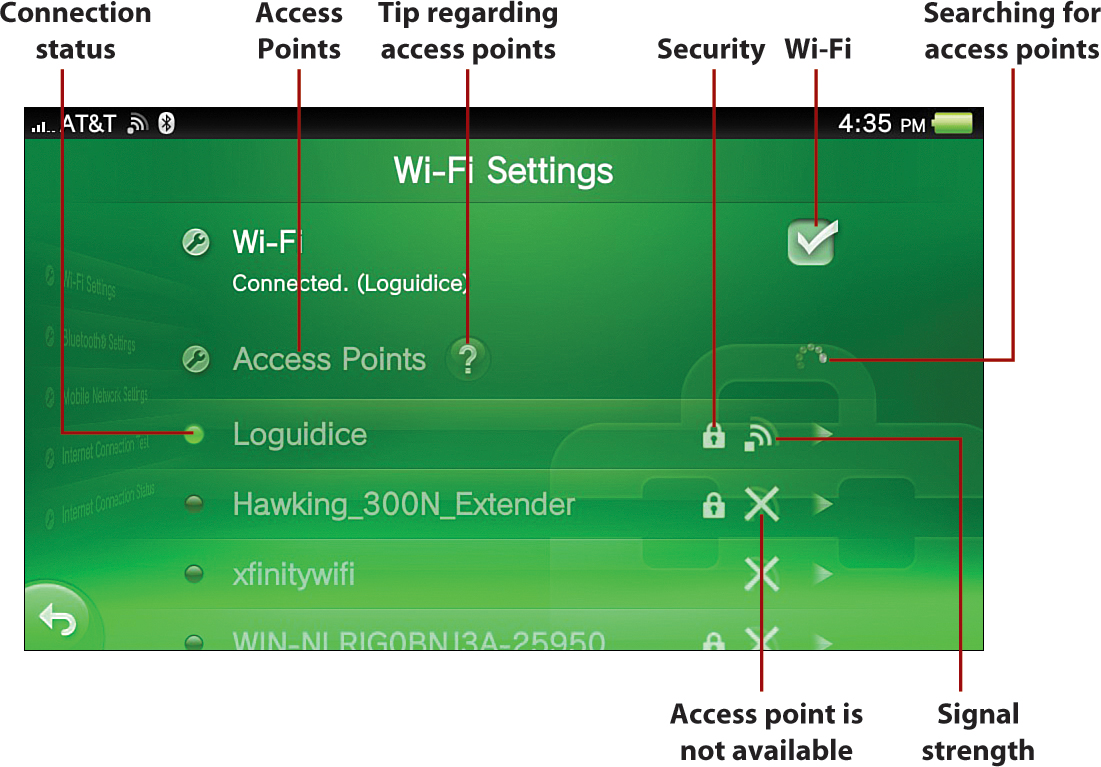
• Security—When the padlock is displayed next to an access point, WEP, WPA-PSK, WPA2-PSK, WPS, or AOSS security has been set, which requires that you correctly enter a password or other identifier before access is granted.
• Signal strength—Signal strength is shown in four levels, including no signal. The Vita always tries to connect to the saved access point with the strongest available signal.
• Connection status—This displays the connection status of a saved access point. Lit green is connected, blinking green is connecting, and not lit is not connected.
If you tap Access Points, you see the following additional set of options:
• Wi-Fi—When the check mark is present, Wi-Fi is active. Tap to remove the check mark and turn Wi-Fi off.
• Save Access Point Automatically—When you are using an access point that supports simplified WPS or AOSS access, setup might be greatly simplified. Refer to your access point manufacturer’s support site for additional information.
• WPS—On the Vita, tap WPS, then press the access point’s WPS button.
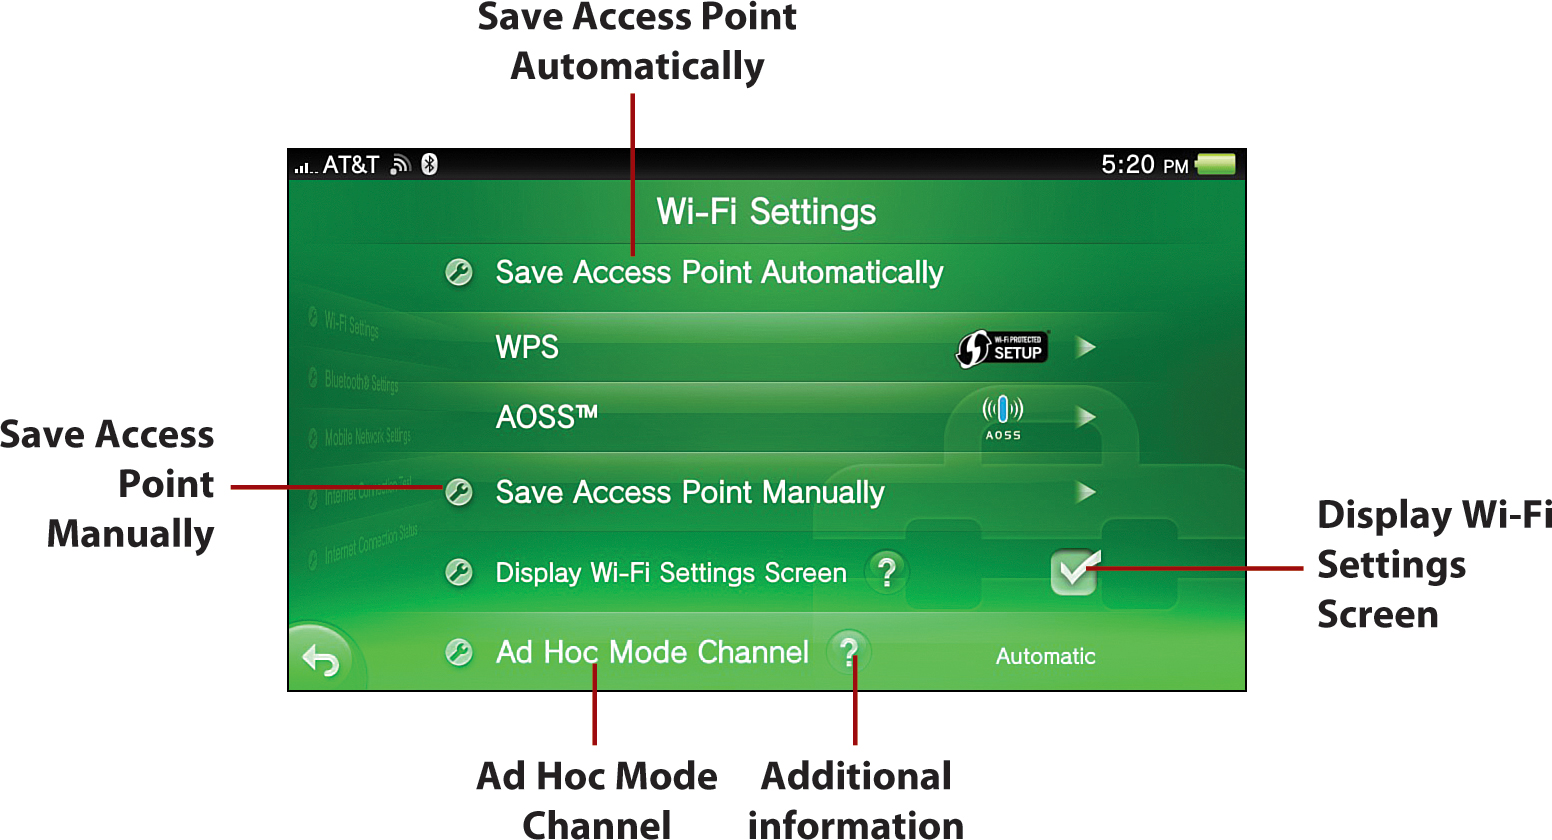
• AOSS—On the Vita, tap AOSS, then press and hold the access point’s AOSS button until the AOSS indicator starts blinking.
WPS stands for Wi-Fi Protected Setup, while AOSS stands for AirStation One-Touch Secure System. Each standard is designed to allow easier setup of a secure wireless network between compatible equipment. Unfortunately, neither standard is compatible with the other and the more wireless equipment you have, the more likely you’ll run into an incompatible device, requiring you to revert to manual setup.
• Save Access Point Manually—When you are connecting to a new access point with WEP or WPA security, you can tap the respective data fields and enter the required information manually, including the access point’s SSID. For the WPS PIN method, tap Use WPS PIN Method and enter the PIN code displayed on the access point you’re trying to connect to.
• Display Wi-Fi Settings Screen—Tap this checkbox to set a check mark to display the Wi-Fi settings screen automatically if you cannot connect to a saved access point.
• Ad Hoc Mode Channel—To connect using ad hoc mode, your Vita must be set to the same channel as the other Vitas or devices you want to connect with. The default setting is Automatic, which automatically selects the optimum channel.
The aforementioned details should enable connectivity under most infrastructure and ad hoc Wi-Fi scenarios. When in doubt, be sure to consult the access point’s or app’s instruction manual.
Setting Up Bluetooth Connections
The PlayStation Vita uses the Bluetooth 2.1 + EDR specification, which supports secure simple pairing (SSP), improving the quality and security of the connection with compatible devices. You can adjust the various settings related to the Vita’s Bluetooth features as follows:
• Bluetooth Feature—When the check mark is present, Bluetooth is active. Tap to remove the check mark and turn Bluetooth off.
While convenient, leaving Bluetooth enabled when you’re not using a Bluetooth device will drain your battery faster. For better battery life, leave Bluetooth off until you absolutely need it.
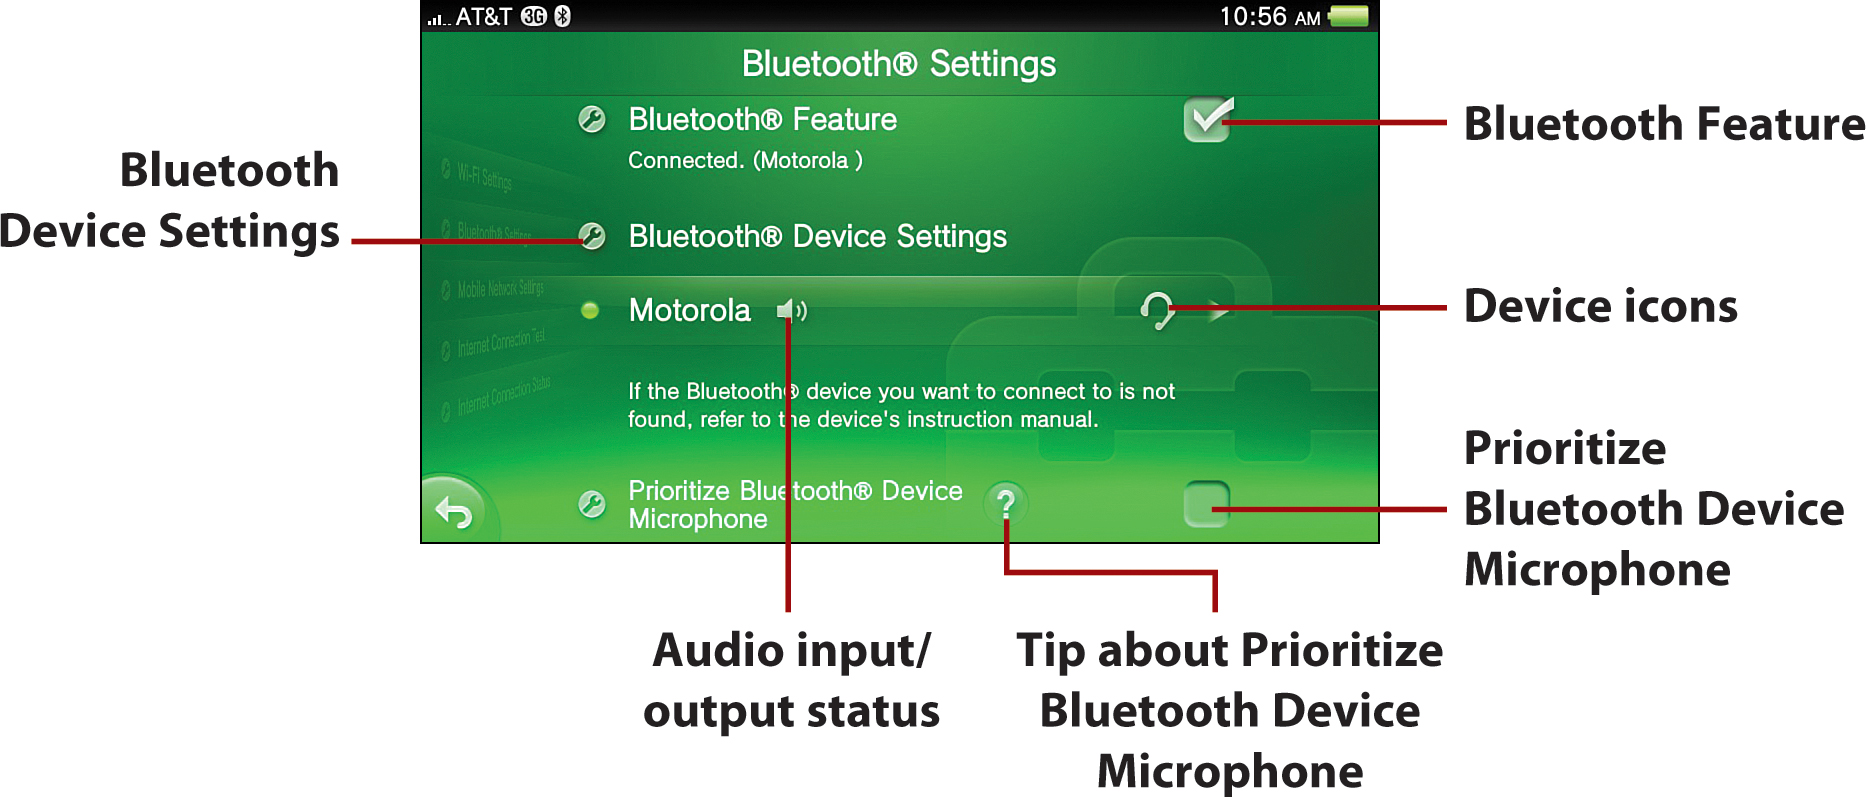
• Bluetooth Device Settings—The Bluetooth device name or device type is displayed for both saved and newly found devices. After a connection is established with a device, the Vita connects to it again in the future when it’s powered on, in range, and you tap Connect.
• Audio input/output status—This displays the connection status of a saved Bluetooth device. When the indicator is green, the device is connected.
• Device icons—You see one of eight possible icons depending on the type of device connected: Computer, Cell Phone/Smartphone, Headset, Speakers, Mouse, Keyboard, Printer, and Other Devices. As of this writing, only Bluetooth-enabled headsets and speakers that use the A2DP, AVRCP, and HSP profiles are known to work. A safe bet is that future system updates will enable more Bluetooth connectivity features.
• Connection status—This displays the connection status of a saved Bluetooth device. When the indicator is green, the device is connected.
• Prioritize Bluetooth Device Microphone—Tap this checkbox to prioritize the Bluetooth device’s microphone over the Vita’s built-in microphone.
Pairing a Bluetooth Device
You must first pair a Bluetooth device with your Vita before connecting it. To pair the device, follow the manufacturer’s instructions for placing it into its pairing mode. On your Vita, tap the Bluetooth device you want to connect under Bluetooth Device Settings and enter its pass key, which is typically 0000. After entering the pass key, pairing is complete. For devices that do not require a pass key, follow the instructions displayed on the Vita.
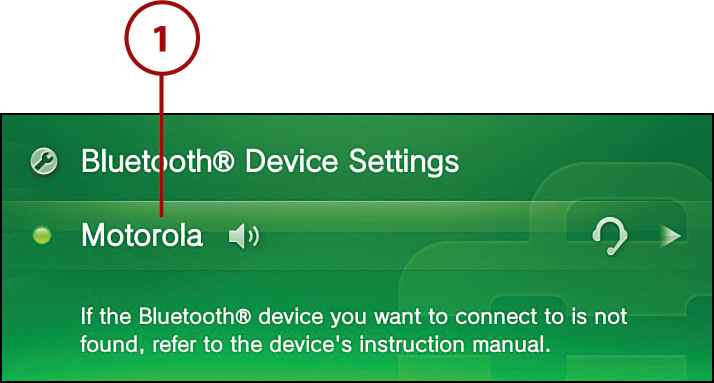
Deleting a Bluetooth Device
The Vita can connect up to seven Bluetooth devices at one time. When the number of Bluetooth devices that can be paired is exceeded, delete any devices that are no longer needed from the list of devices that are already paired.
1. Tap the device under Bluetooth Device Settings.
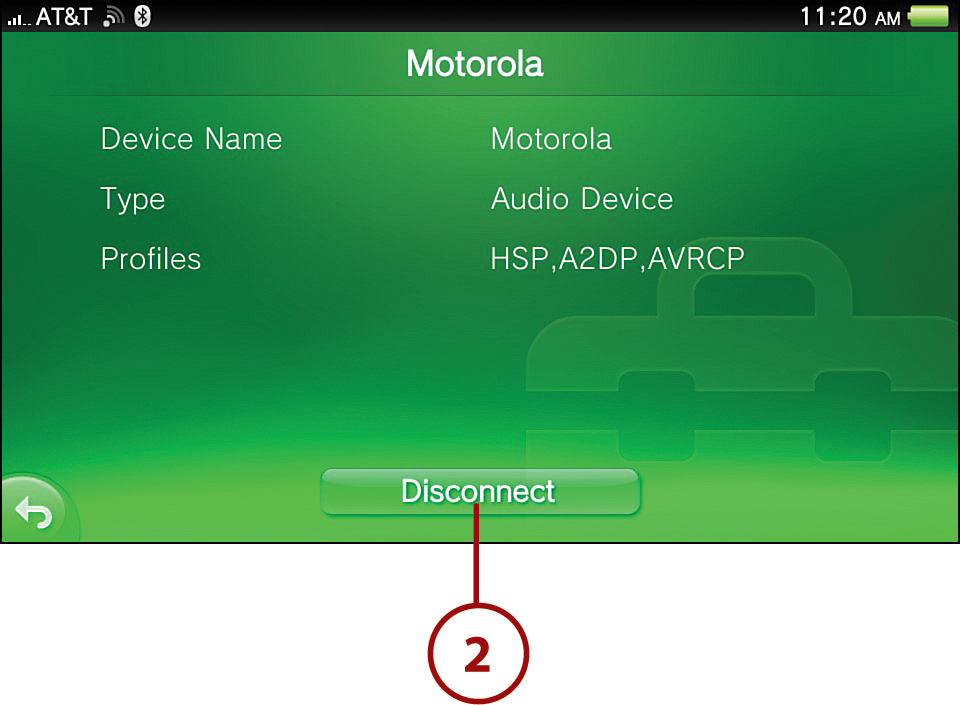
2. Tap Disconnect.
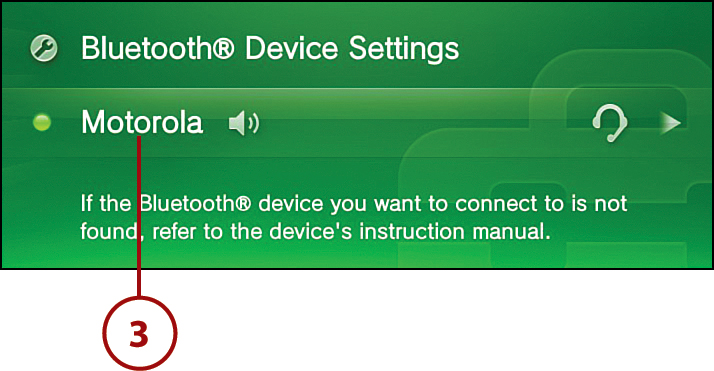
3. Tap the device under Bluetooth Device Settings.
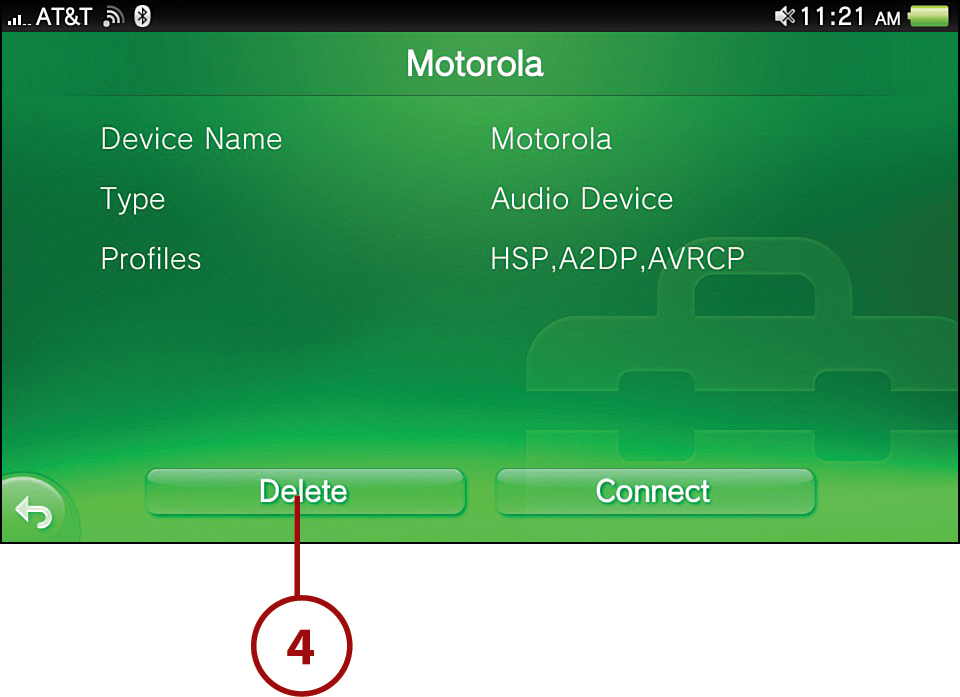
4. Tap Delete.
Establishing 3G Connections
Mobile Network Settings is only displayed on 3G/Wi-Fi Vita models. If you are using Wi-Fi and are connected to a Wi-Fi network, it overrides any cellular connections, displaying the Wi-Fi icon instead of the 2G, E, 3G, or H icons, each of which represents increasingly faster data connections. The most common mobile network connections display the 3G icon.
You can adjust the various settings related to the Vita’s mobile network settings as follows:
• Mobile Network—When the check mark is present, the mobile network connection is used when Wi-Fi is unavailable. Tap to remove the check mark and turn the mobile network feature off.
• Data Roaming—When this option is checked, mobile network data is transmitted even when you’re outside of AT&T’s service area.
• Notices from Operator—This is a list of automatic notifications from the operator of the mobile network that you’re using.
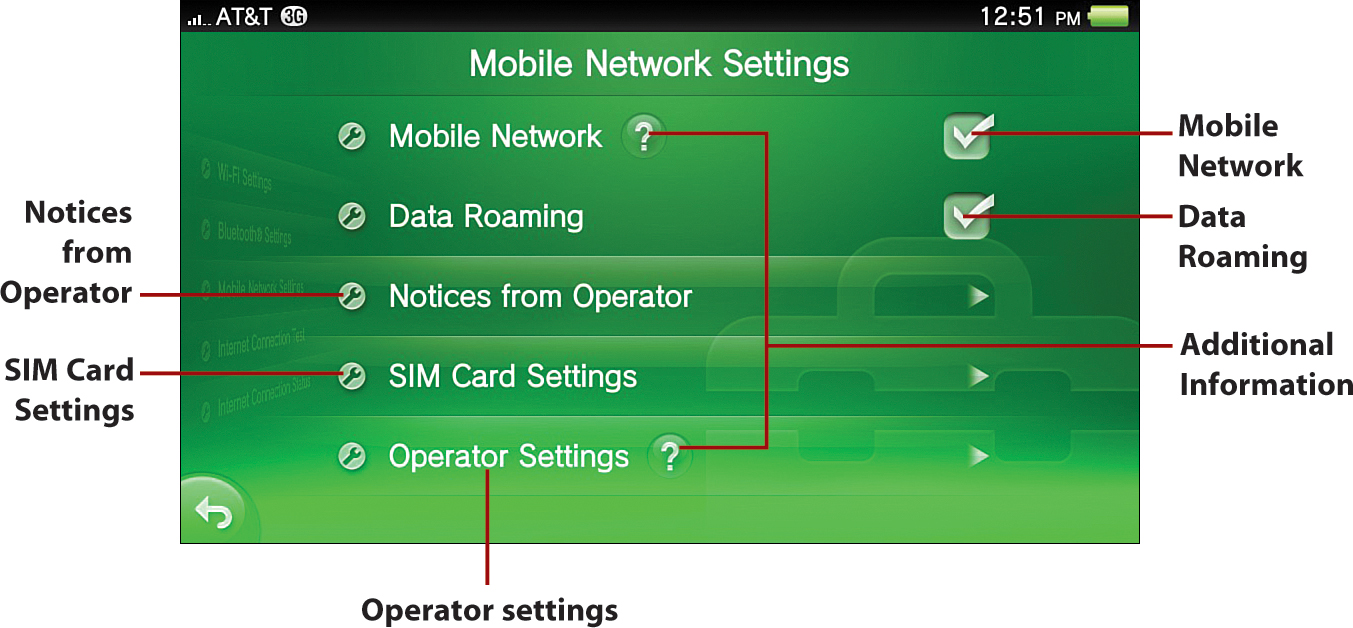
• SIM Card Settings—SIM cards are provided with a preset password, or PIN, to prevent unauthorized usage. By tapping the Lock SIM Card checkbox, you can set your Vita to prompt for a PIN every time the handheld is turned on. To get the preset PIN for your Vita, contact AT&T, or, if available, refer to the documentation provided with your SIM card. When Lock SIM Card is checked, you also have the option to Change PIN.
• Operator Settings—This option enables you to choose Automatic or Manual selection of your mobile network operator by checking off the appropriate option. The default is Automatic.
The AT&T DataConnect Pass plans are month by month and not contract-based. Vita owners with an active AT&T data plan receive free access to approximately 30,000 AT&T Wi-Fi hotspots throughout the United States, which you can locate by going here: http://www.att.com/gen/general?wtSlotClick=1-003EWY-0-1&pid=13540.
Increasingly expensive data plan choices are available, ranging from 250MB of data to 5GB of data, with the least costly (former option) being useful for only light mobile network usage. Depending on the selection you make for notifications when you purchase your plan, you are notified via email, text, or directly on your Vita when your data session is nearly depleted.
Finding IMEI and ICCID Numbers
You can purchase data plans via the Connect to AT&T icon on the Home screen or through AT&T’s website. To sign up for a new data plan, you need to know your Vita’s IMEI and ICCID numbers. You can find both of these numbers by doing the following:
1. Tap the Settings icon.
2. Tap Start.
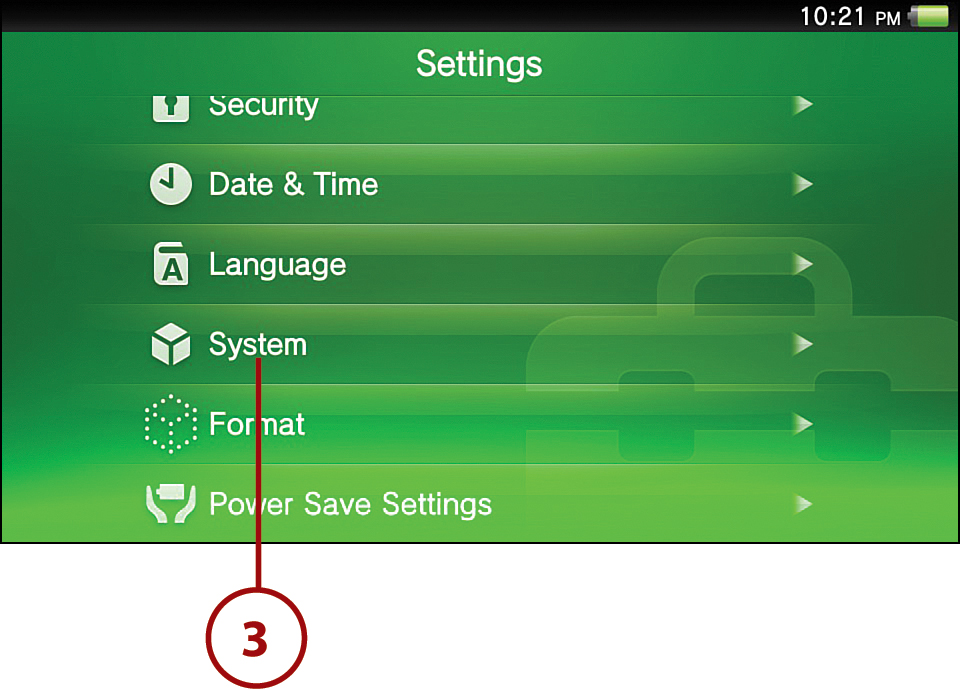
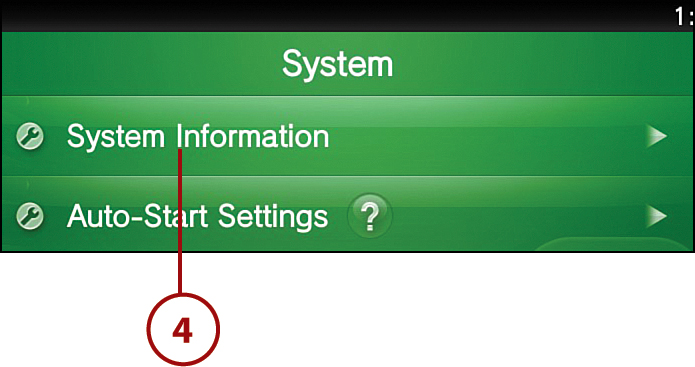
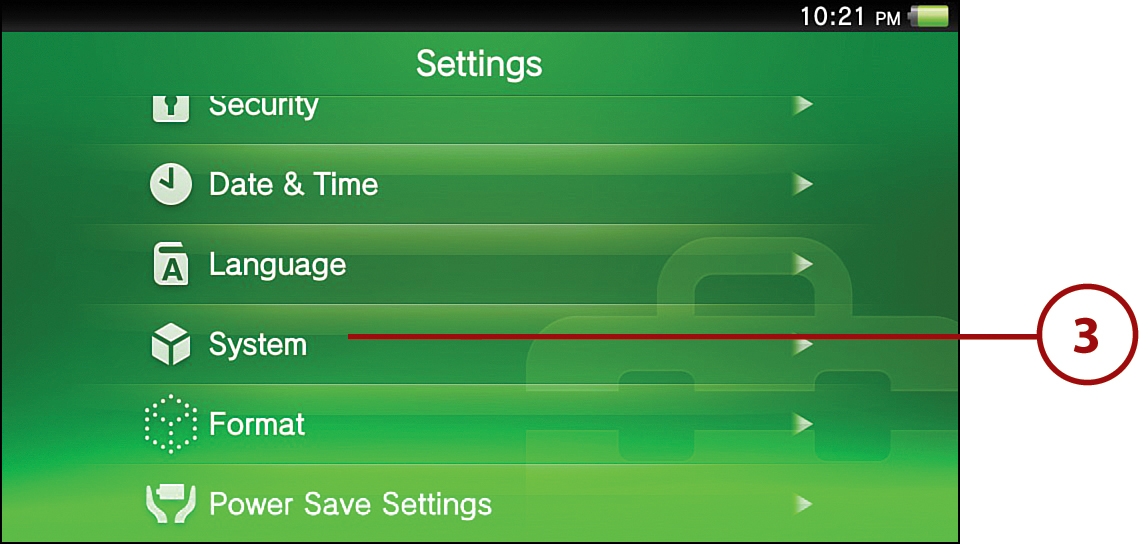
3. Tap System.
4. Tap System Information. Write down the IMEI and ICCID numbers that display at the bottom of the screen.
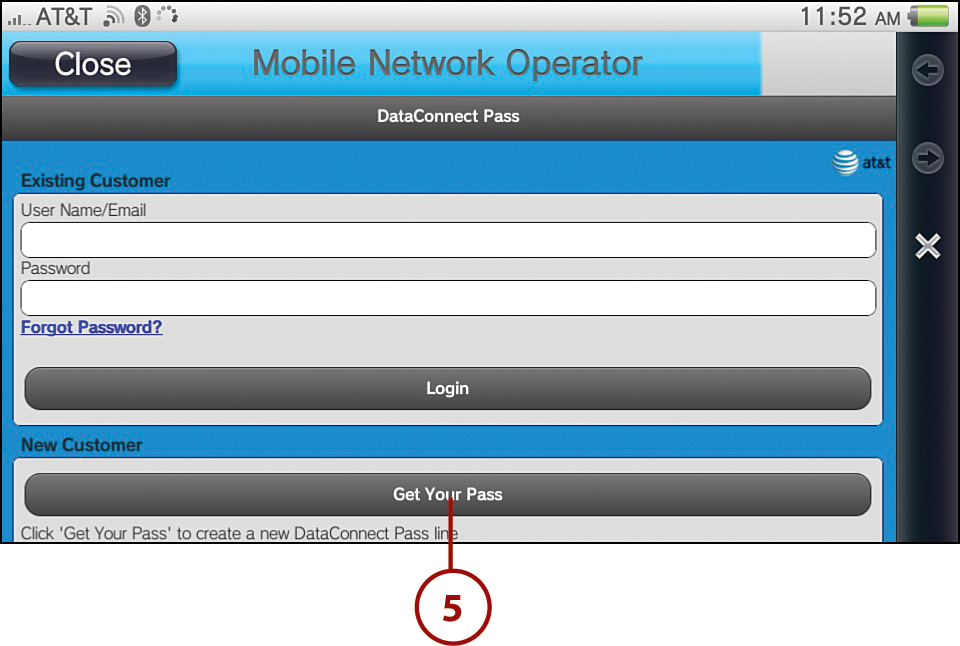
Purchasing a Data Plan Using Your Vita
To purchase a data plan directly on the Vita, follow these steps:
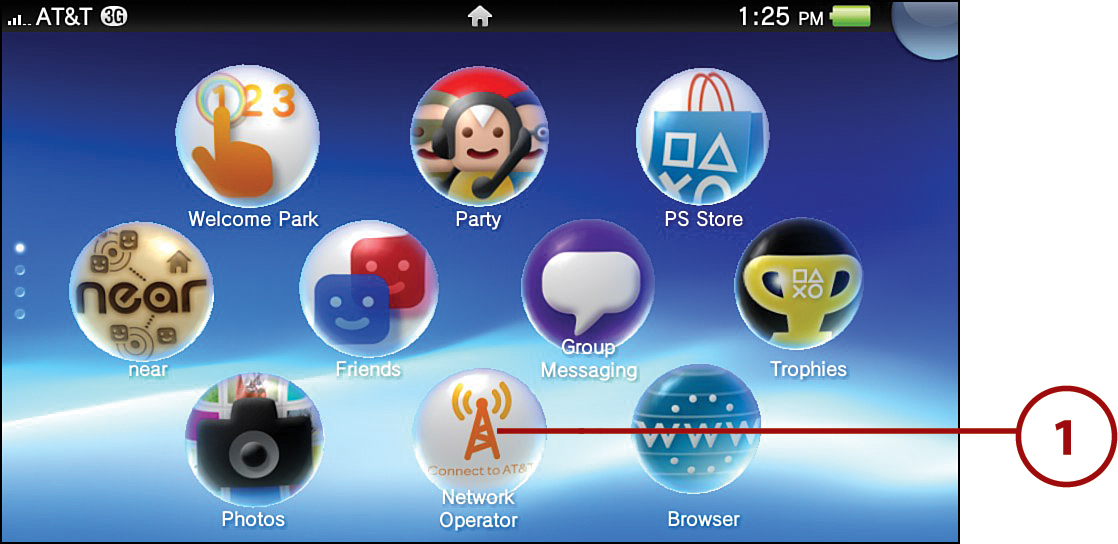
1. Tap the Network Operator icon.
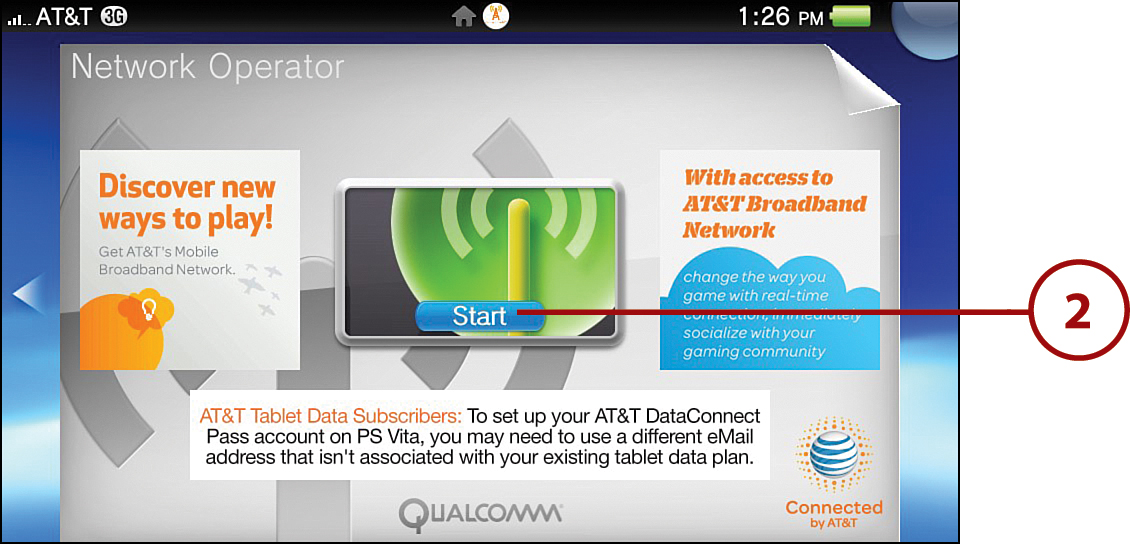
2. Tap Start.
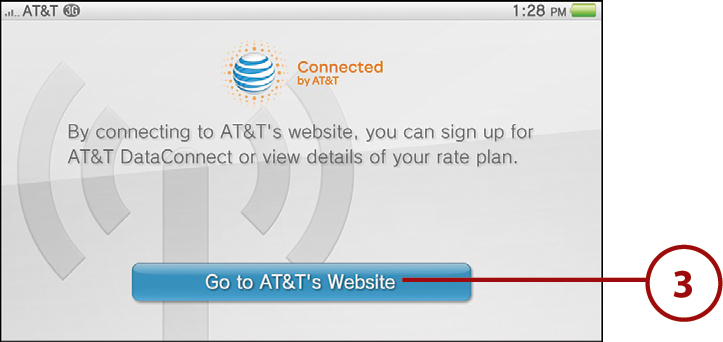
3. Tap Go to AT&T’s Website.
4. Tap Prepaid DataConnect Pass.
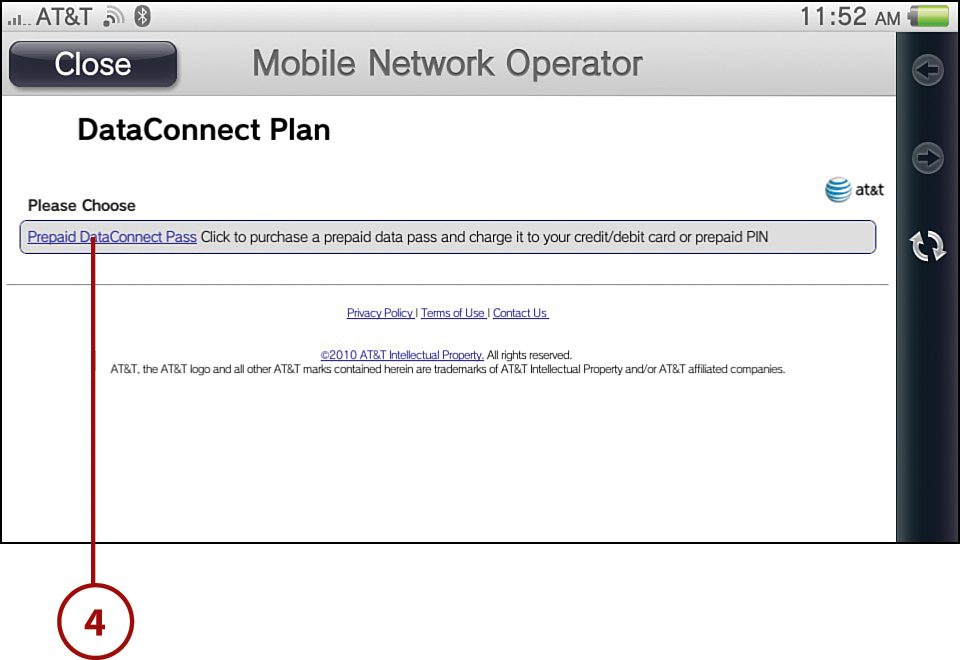
5. Tap Get Your Pass to buy a new plan or tap Login if you already have a plan and want to add new data. Follow the remaining onscreen instructions.
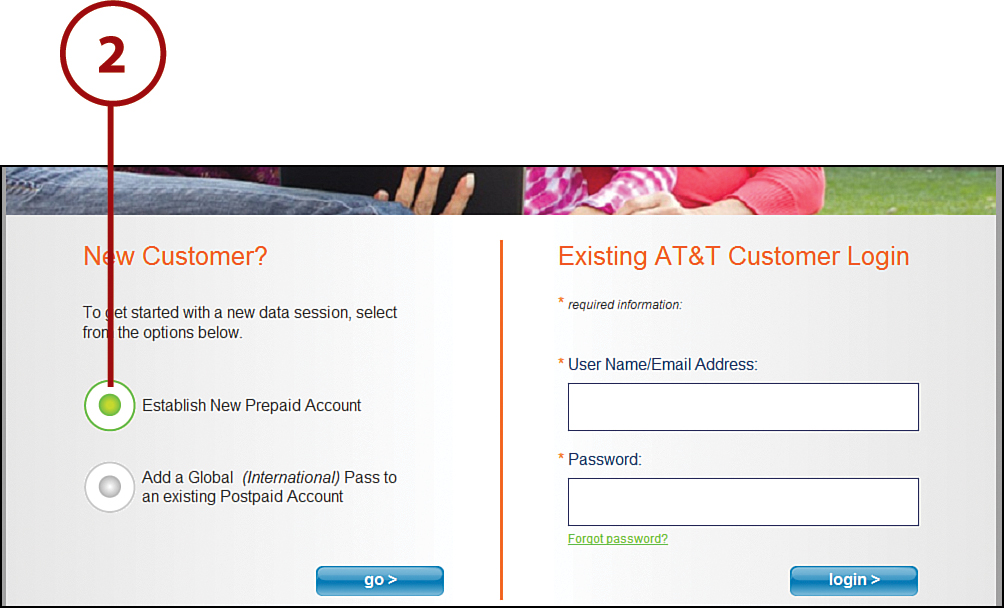
Purchasing a Data Plan Via a Web Browser
To purchase a data plan from the AT&T website using a web browser, follow these steps:
1. Go to https://buyasession.att.com.
2. Tap or click on the radio button for Establish New Prepaid Account to buy a new plan, then tap go. Otherwise, choose Existing AT&T Customer Login and enter your credentials and login if you already have a plan and want to add new data. Follow the remaining onscreen instructions.
Checking Usage Period for Your DataConnect Pass
You can check the usage period for your present DataConnect Pass on your Vita by doing the following:
1. Tap the Settings icon.
2. Tap Start.

3. Tap System.
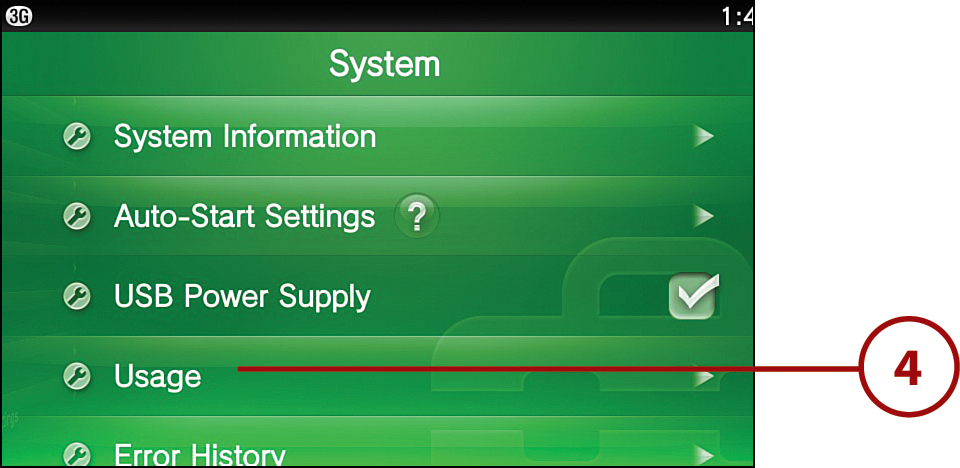
4. Tap Usage. From the usage screen, you can see how much data you have used and the length of time.
Testing Your Connections
Through the Internet Connection Test option, you can test your Internet connection over Wi-Fi or 3G and display the results. The various information displayed during the test is as follows:
• Name—Wi-Fi only. The name of the Internet connection.
• SSID—Wi-Fi only. The SSID of the access point.
• Obtain IP Address—Verifies whether or not an IP address has been obtained.
• Internet Connection—Verifies whether or not an Internet connection has been established.
• PlayStation Network Sign-In—Confirms whether or not you are signed in to the PlayStation Network.
• NAT Type—Displays one of the three possible ways the Vita is connected to the Internet: Type 1 (direct to the Internet), Type 2 (direct to a router connected to the Internet), and Type 3 (direct to a router connected to the Internet). Type 3 connections might limit or inhibit communications with other Vita systems.
• Connecting Speed (download)—The estimated speed with which you can download data to the Vita from the Internet.
• Connecting Speed (upload)—The estimated speed with which you can upload data from the Vita to the Internet.
Testing a Specific Wi-Fi Access Point
To perform an Internet connection test for a specific Wi-Fi access point, tap Network, then tap Wi-Fi Settings. From there, select the access point you want to test, and then tap Internet Connection Test.
If the Internet connection test fails, follow the onscreen instructions to verify settings. If you are unable to fix the problem, consult any documentation or support services provided by your Internet service provider, mobile network operator, or networking equipment.
When a test successfully finishes, tap OK to return to the Network options screen. From there, you can also tap on Internet Connection Status to check the information for the access point you are presently connected to and your current Internet connection status.
PlayStation Network
If you sign up for a PlayStation Network account, which is part of the Sony Entertainment Network, you gain access to various benefits, such as being able to play online games or downloading content from the PlayStation Store. Sign up is free, and you can also use an existing account from or on other Sony devices, such as the PlayStation 3 or PlayStation Portable.
The two types of PlayStation Network accounts are Master and Sub. A Master account is a standard account for users older than a certain age, which in the United States is 13 years. Master account holders can create Sub accounts and set conditions for their use. A Sub account is for users younger than a certain age, which is 12 years old in the United States. Sub account users are under the supervision of a Master account holder. A Sub account cannot be set up or make PlayStation Store purchases without a Master account present.
Setting Up an Account on Your Vita
To set up a new PlayStation Network account on your Vita, follow these steps:
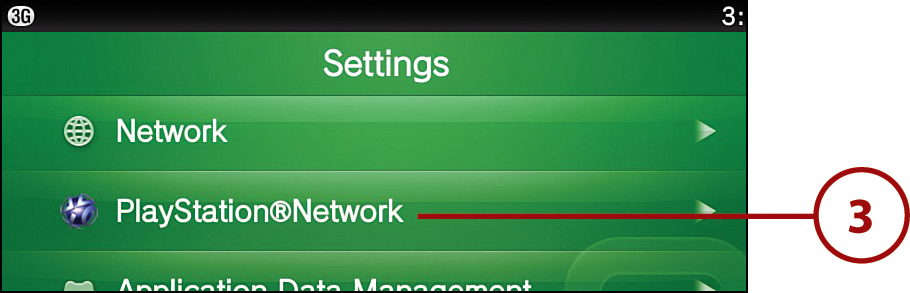
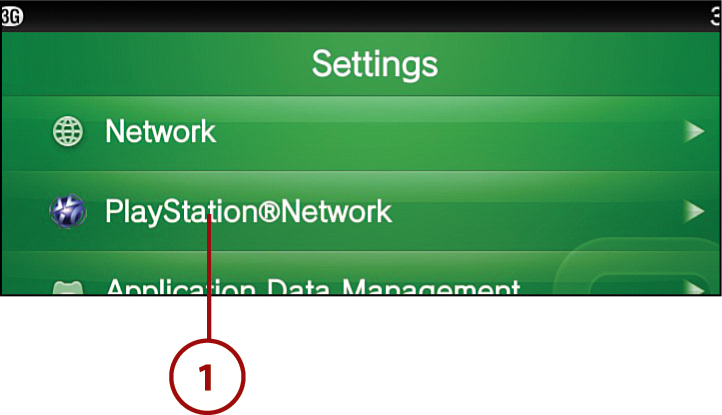
1. Tap Settings from the Home screen.

2. Tap Start.
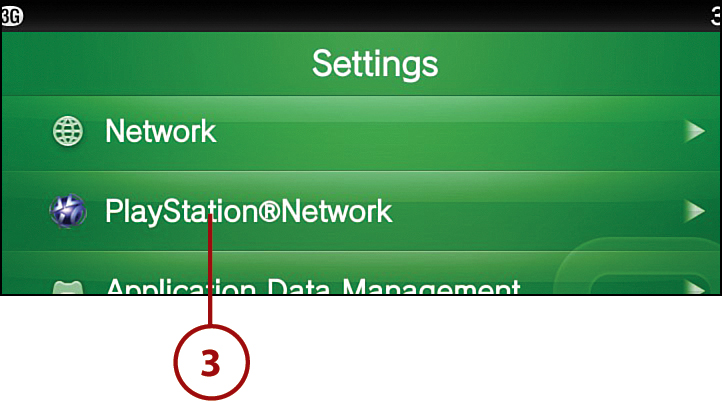
3. Tap PlayStation Network.
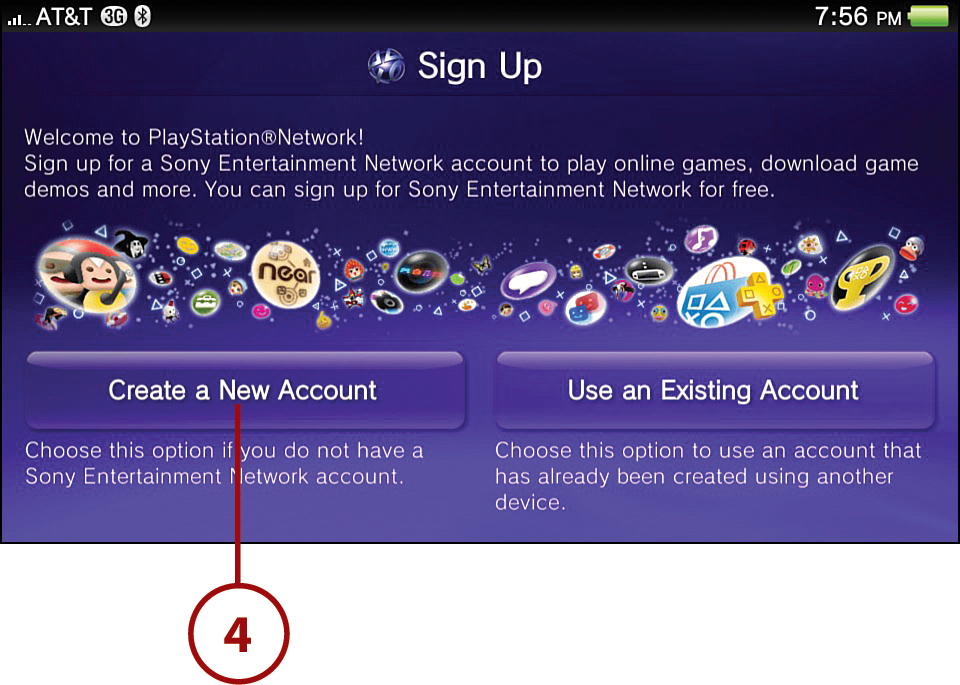
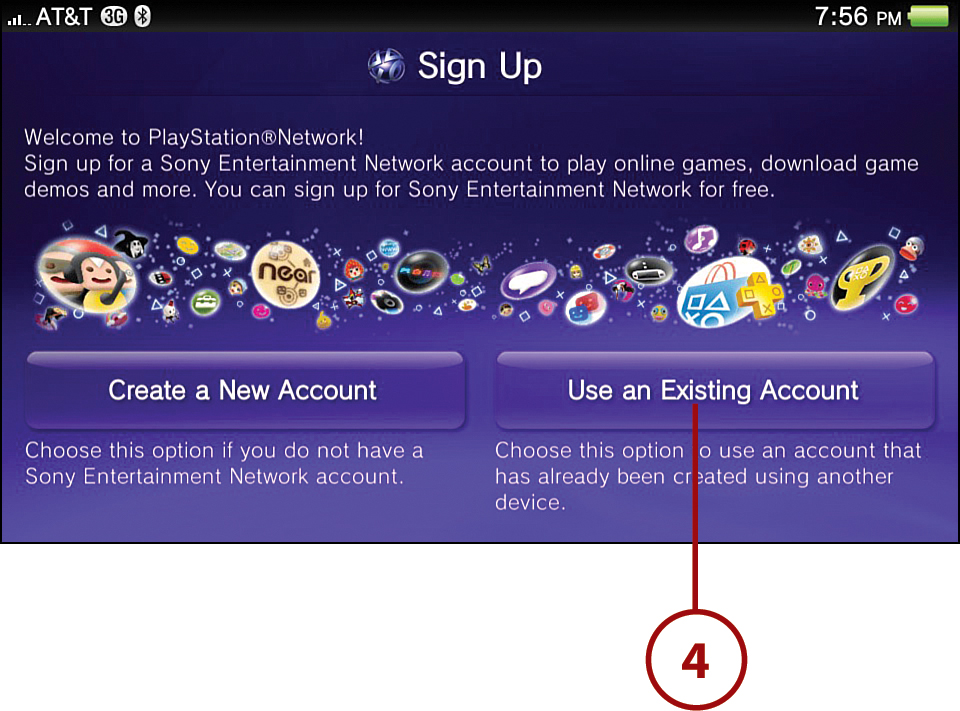
4. At the Sign Up screen, select Create a New Account.
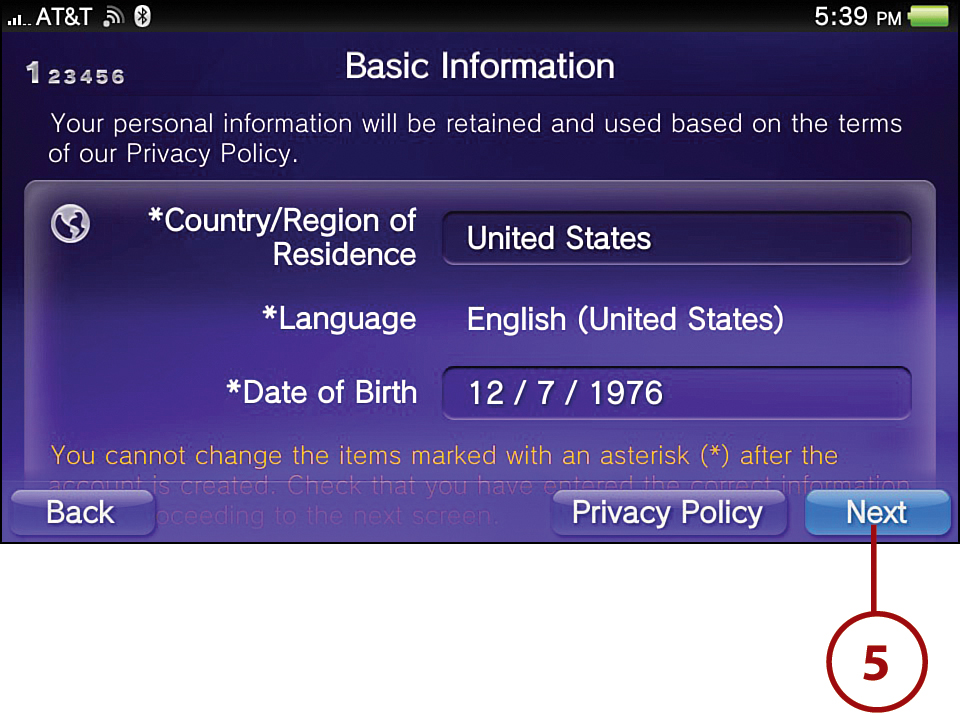
5. At the Basic Information screen, make sure your country and date of birth are entered correctly and select Next.
6. Scroll to the bottom of the first Terms of Service and User Agreement/Privacy Policy screen and select Accept; repeat this with the second screen.
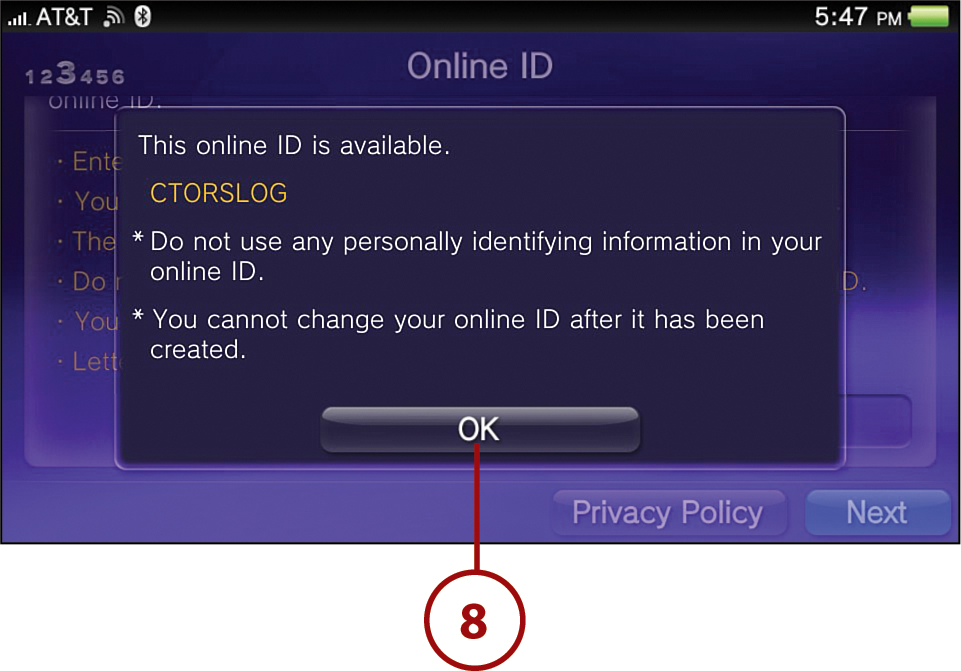
7. On the Online ID screen, enter what you would like your publicly displayed name on the Sony Entertainment Network to be and select Next.
8. If your proposed online ID is available, select OK to proceed, otherwise, try a different name.
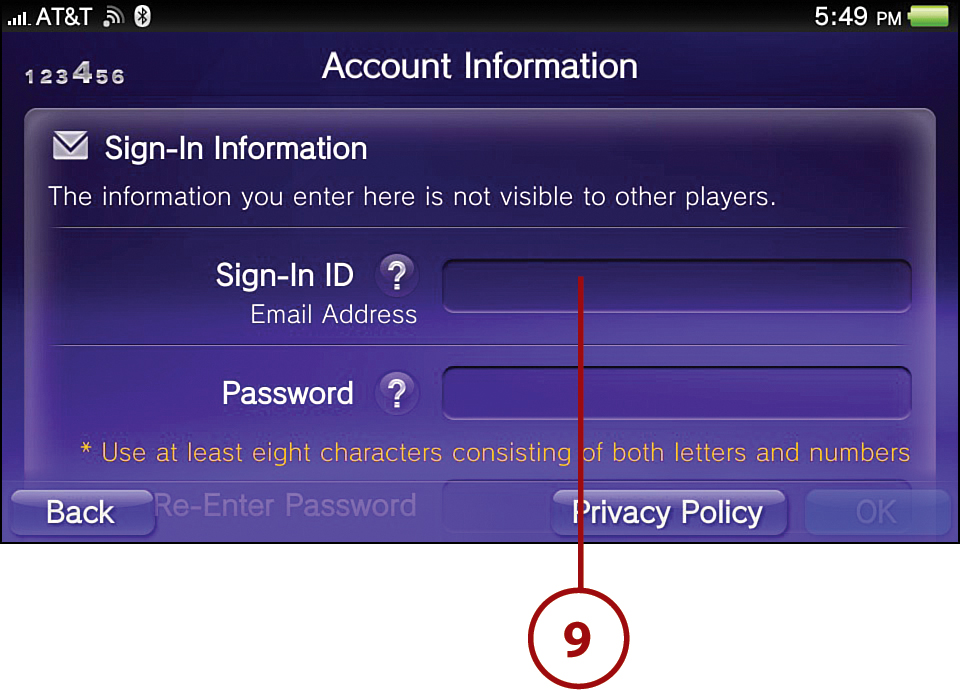
9. At the Account Information screen, enter all the requested information, including your email address and password, first and last name, gender (optional), and address. You can also opt to receive notifications from Sony and its partners as well as to enable Sony Computer Entertainment to share your information for marketing purposes. After you’ve entered the information and made your selections, tap OK.
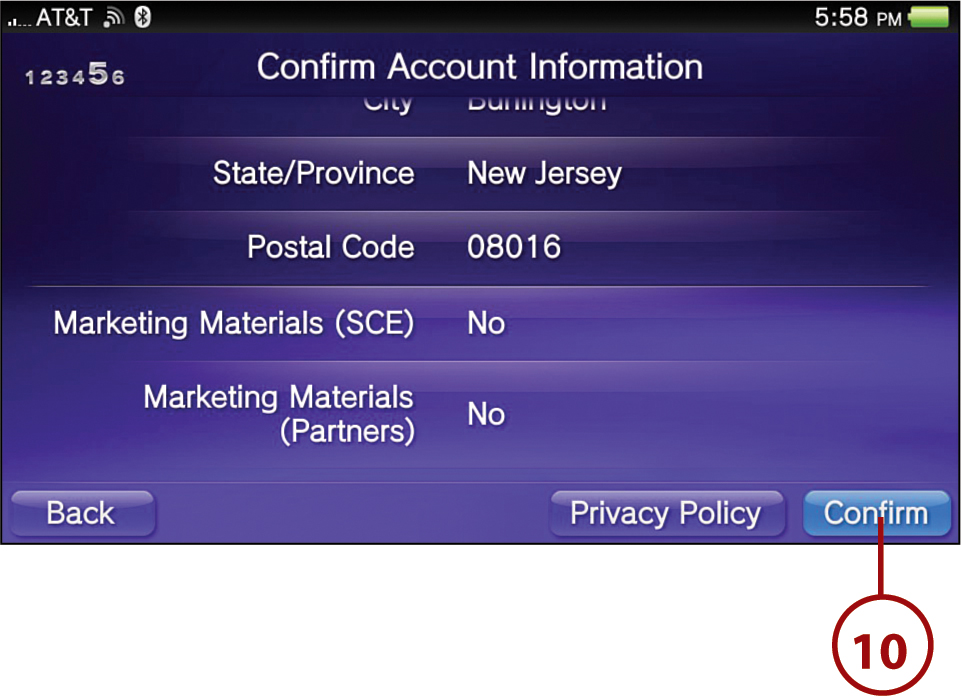
10. Verify your information on the Confirm Account Information screen and then tap Confirm.
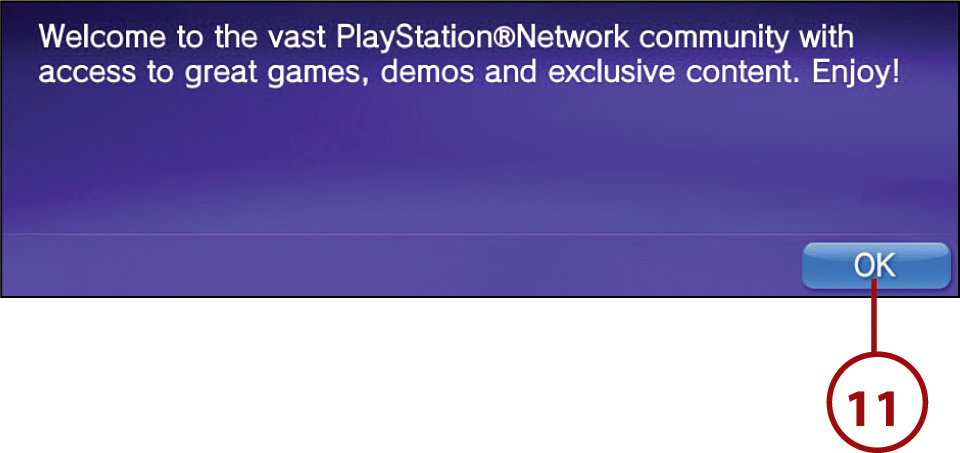
11. At the Finish screen, tap OK.
If you are away from your Vita, you can still set up a PlayStation Network account via a web browser. Go to http://signup.playstation.net/ and follow the onscreen instructions.
Adding an Existing PlayStation Account
To set up an existing PlayStation Network account on your Vita, follow these steps:
1. Tap Settings from the Home screen.
2. Tap Start.

3. Tap PlayStation Network.
4. At the Sign Up screen, tap Use an Existing Account.
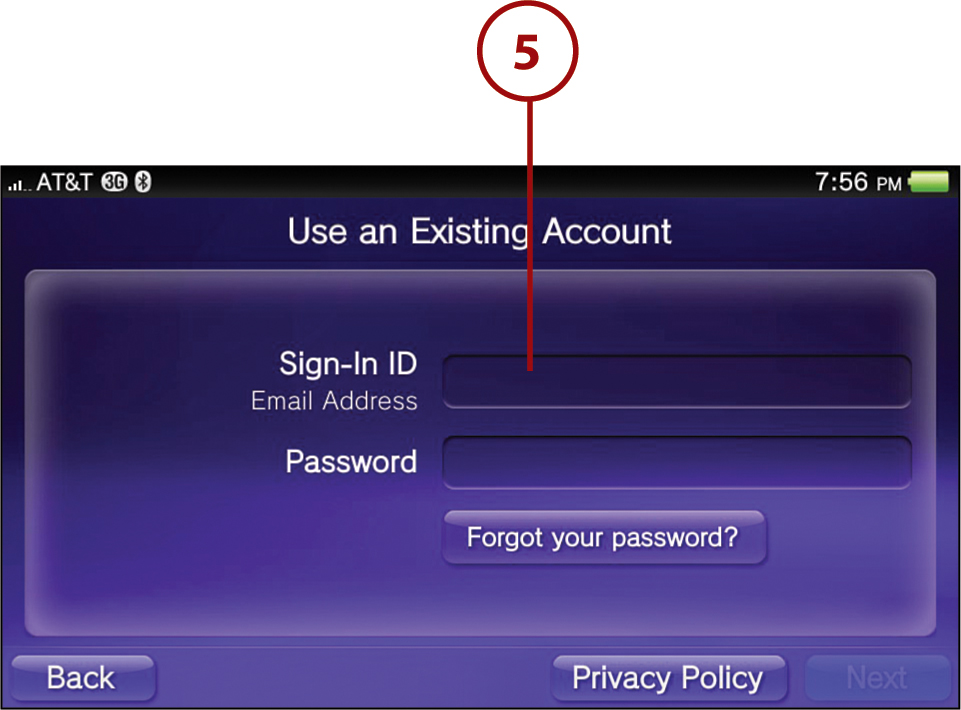
5. Enter the sign-in ID and password for the existing account and then tap Next.
Your existing account is now linked to your Vita system and your sign-in ID and password are saved. You remain signed in to the PlayStation Network unless you manually sign out or you lose your network connection.
Signing In to Your Account
To sign in to your account, do the following:
1. Tap Settings from the Home screen.
2. Tap Start.

3. Tap PlayStation Network.

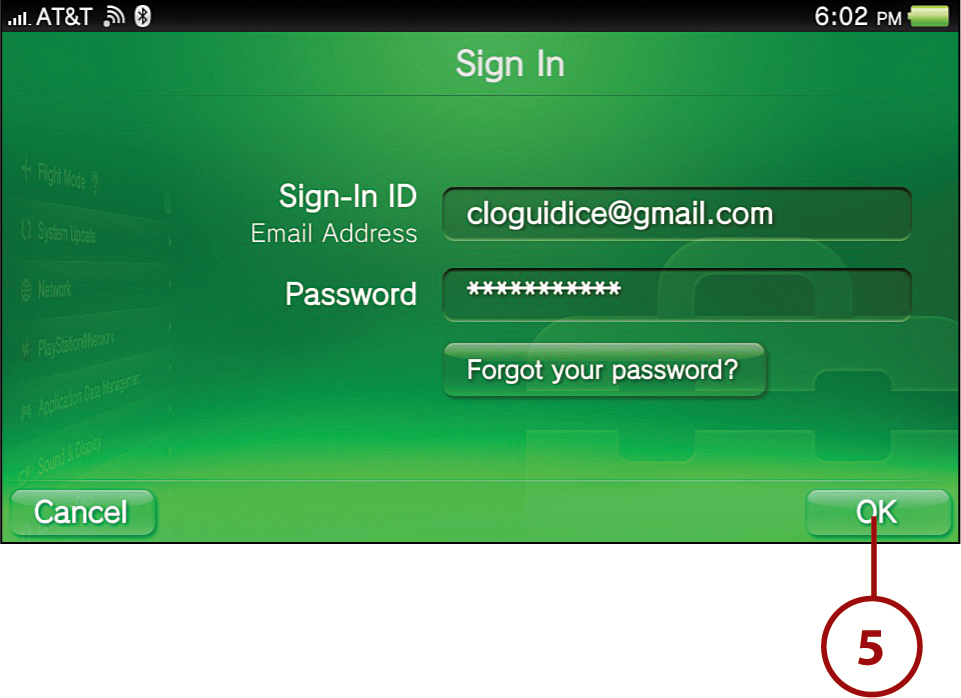
4. Tap Sign In.
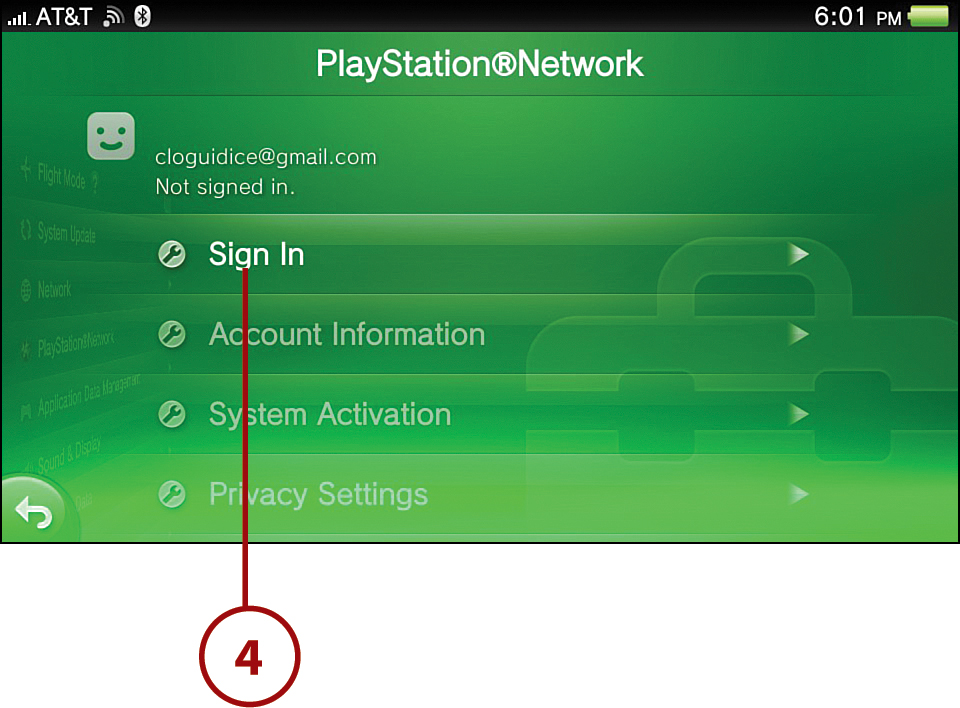
5. Enter your sign-in ID and password and then tap OK to sign in.
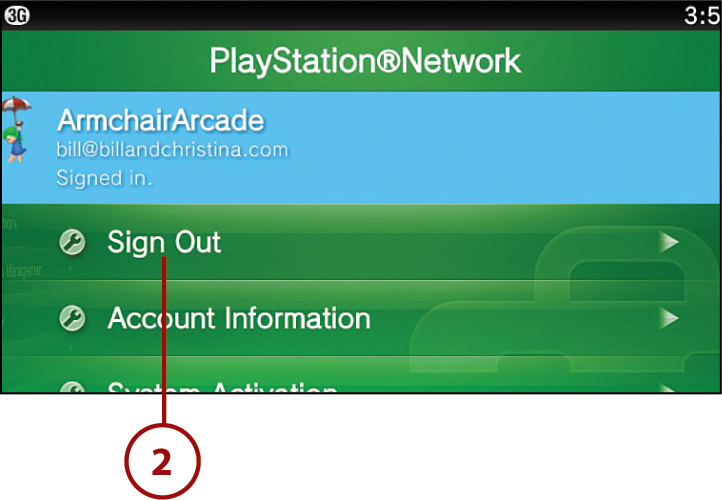
Signing Out of Your Account
Sometimes you might want to sign out manually, such as if you don’t want another person to have access to your PlayStation Network account if they have access to your system.
1. Tap PlayStation Network from the Settings screen.

2. Tap Sign Out. The Sign In screen displays the next time you need to sign in.
Account Information
You can check and modify the information of your PlayStation Network account on your Vita. To get started, sign in to the PlayStation Network.
1. Tap PlayStation Network.
2. Tap Account Information. You are prompted for your password.

3. On the Account Information screen you can review or modify a long list of account-specific information. You can also tap Privacy Policy to review six different categories of the latest privacy, copyright, and terms of service information from Sony.
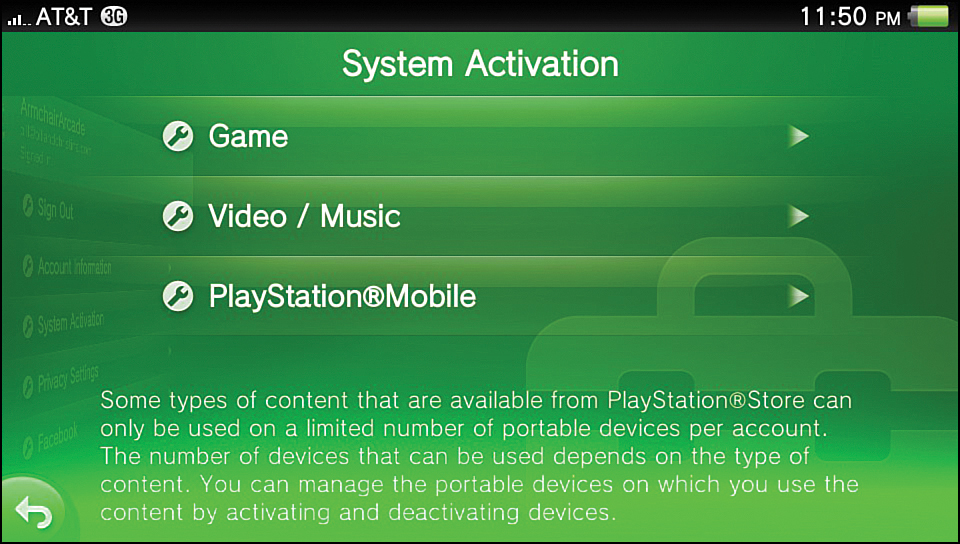
System Activation
You can only play the content that you download from the PlayStation Store through your PlayStation Network Account on devices that you’ve activated. The type of content determines the number of devices that you can use. System activation is typically automatic, except when the limit on the number of associated devices would be exceeded. If that happens, you must deactivate any excess devices.
To activate or deactivate your Vita system, tap PlayStation Network, then System Activation, followed by either Game, Video/Music, or PlayStation Mobile. Enter your password. Follow the onscreen instructions to respectively activate or deactivate the system for the specified content.
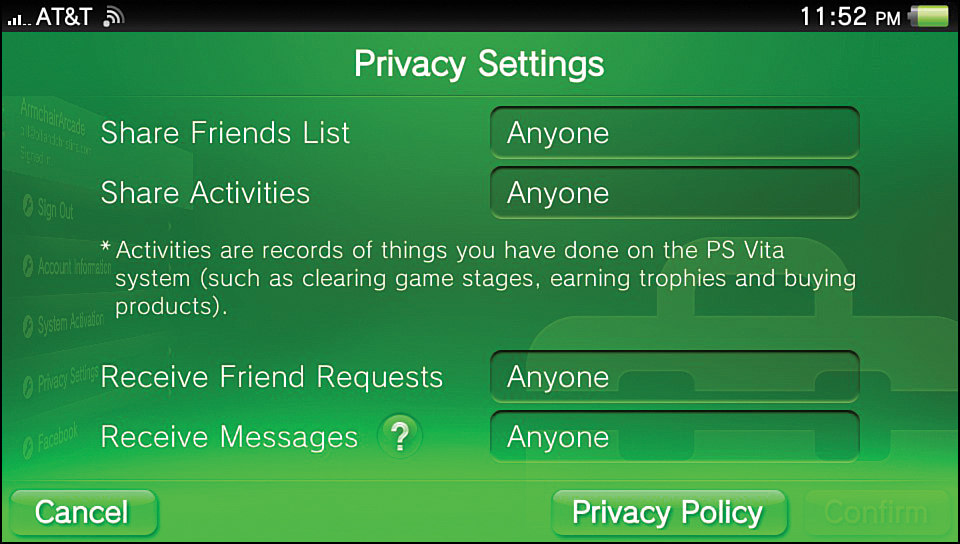
Privacy Settings
Using Privacy Settings, you can adjust the share range of your Friends list or your activity information, as well as the range of people who can send you messages. To adjust these settings, tap PlayStation Network and then tap Privacy Settings. Enter your password. The options available are the following:
• Share Friends List, which sets the disclosure range for your Friends list
• Share Activities, which sets the disclosure range for your activities
• Receive Friend Requests
• Receive Messages, which is valid for Group Message, as well as the PlayStation 3’s system messaging feature.
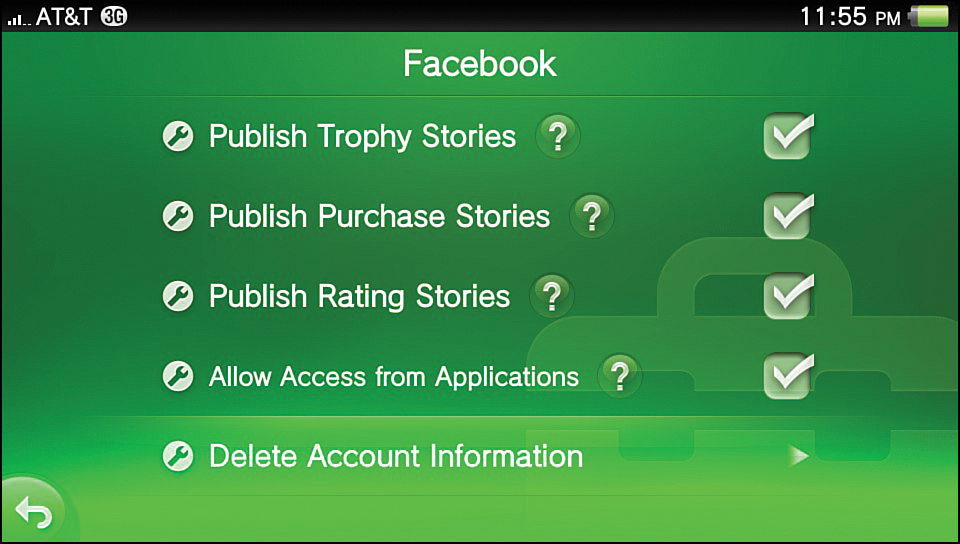
If you have a Facebook account, you can configure the information to publish on Facebook and other related settings. Tap PlayStation Network, then Facebook, to access these settings. The options available are the following:
• Publish Trophy Stories—Publishes stories you allow about your gaming achievements
• Publish Purchase Stories—Publishes stories you allow about the content you purchase at the PlayStation Store
• Publish Rating Stories—Publishes stories you allow every time you rate content
• Allow Access from Applications—Permits Vita apps that support Facebook to access your Facebook profile
• Delete Account Information—Deletes your Facebook account from the Vita
Refer to “Connecting and Sharing with Facebook” in Chapter 6, “Exploring Social Apps,” for information on setting up a Facebook account for use with your Vita.
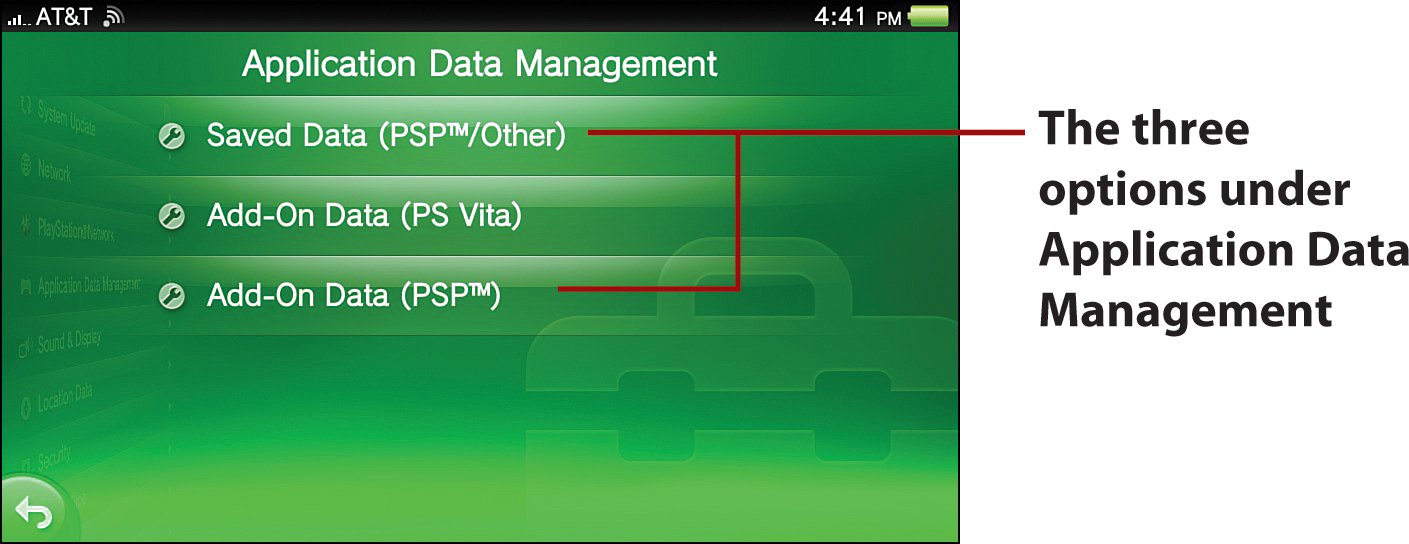
Application Data Management
The Application Data Management option under Settings enables you to verify and delete the saved and add-on data for various types of content that the apps you acquire generate. The three options for Application Data Management are Saved Data (PSP/Other), Add-On Data (PS Vita), and Add-On Data (PSP), each of which is categorized automatically based on source.
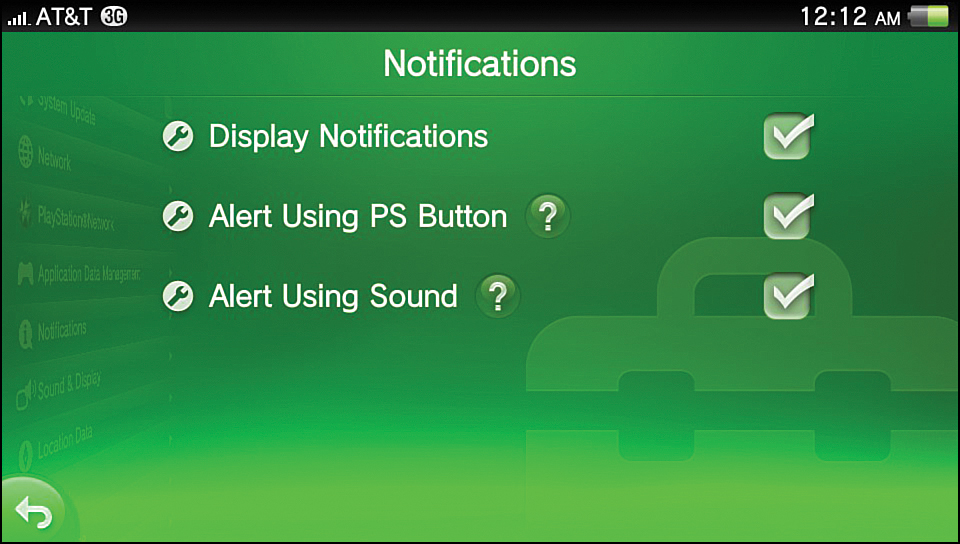
Notifications
The Notifications option, which is found under Settings, enables you to control how your Vita notifies you of incoming messages or important system-related information.
• Display Notifications—Notification alerts appear in the upper right of the screen when a new notification message is received. To disable the alerts, tap the checkbox to remove the check mark.
• Alert Using PS Button—When a new notification is received, the PS button slowly blinks in blue. To disable this feature, tap the checkbox to remove the check mark.
• Alert Using Sound—When a new notification is received, the Vita makes a sound. To disable this feature, remove the check mark by tapping the checkbox.
Sound & Display
The Sound & Display option is found under Settings. With it you can adjust screen brightness and audio settings.
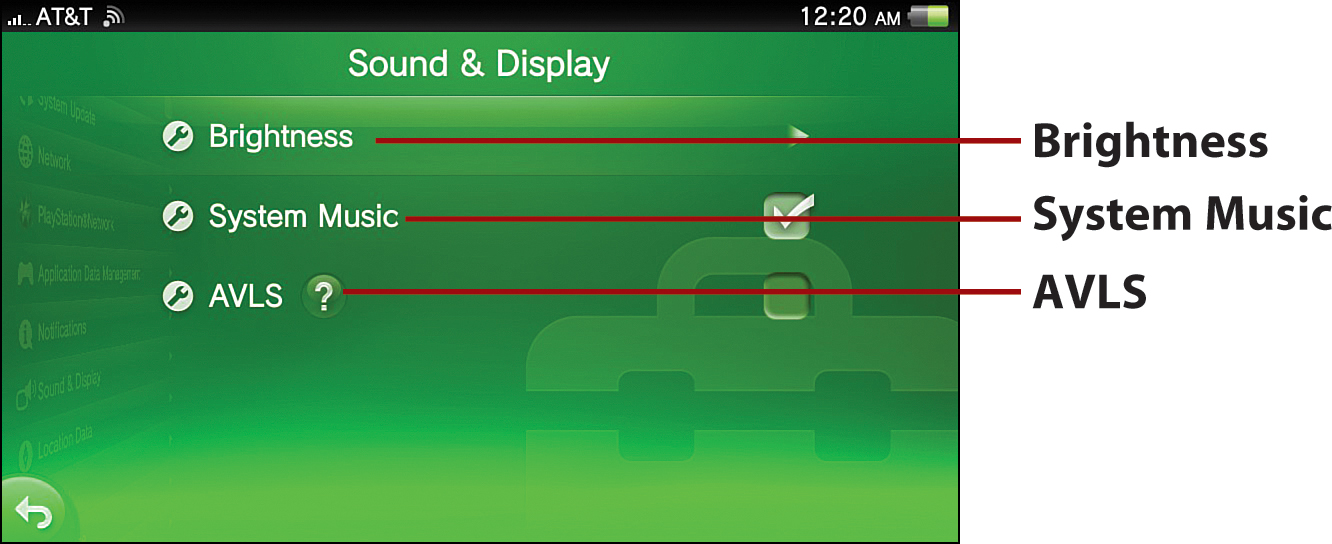
• Brightness—Drag the slider until you achieve the desired brightness and then release your finger.
• System Music—Check the box to enable the music that is played for various screens, including the Home and LiveArea screens. To disable, remove the check mark.
• AVLS—The Automatic Volume Limiter System, or AVLS, sets the maximum volume level for headphones so as not to harm your hearing. Tap the checkbox to set a check mark to prevent the volume from exceeding a certain level.
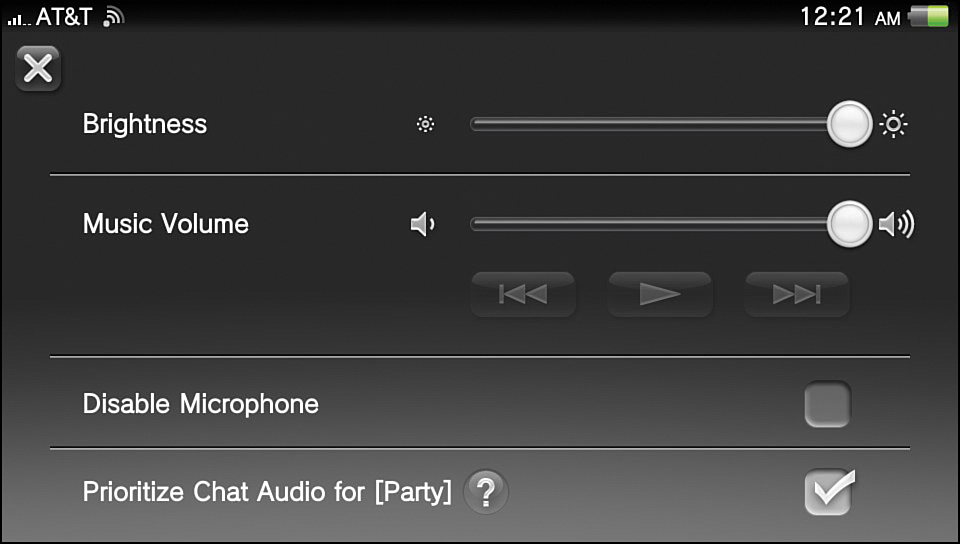
You can directly access additional settings, including quick access to the Brightness slider, at any time by pressing and holding the PS button.
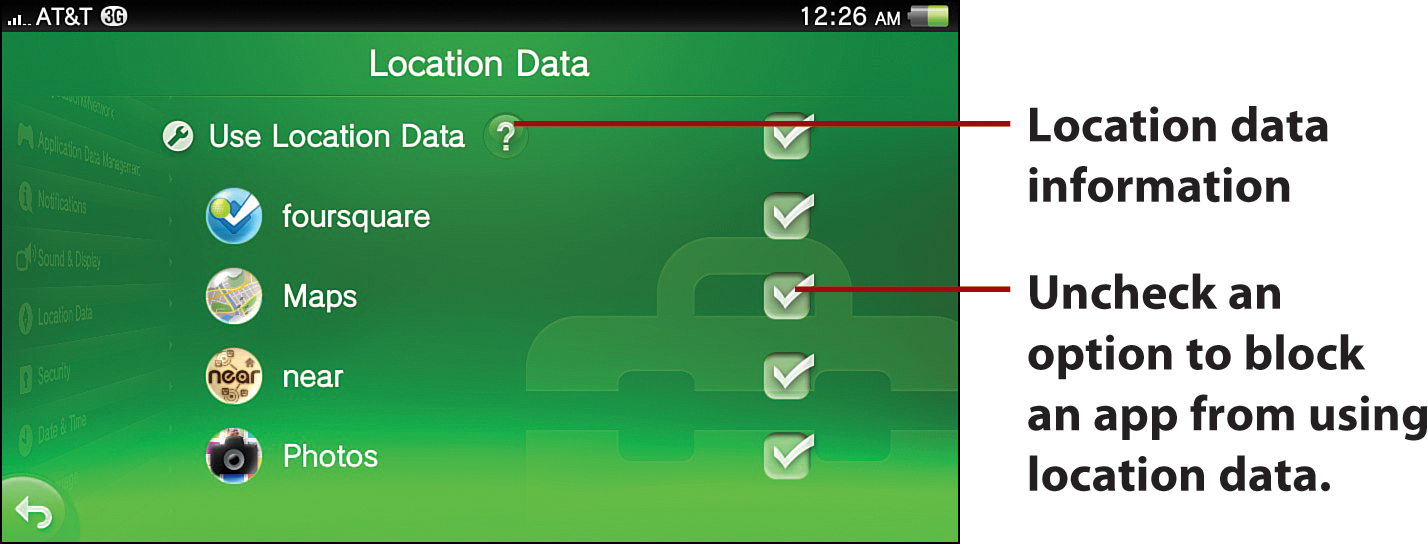
Location Data
The Location Data option is found under Settings and lets you authorize or block apps from using data about your current location. Location data is obtained from any available GPS, Wi-Fi, or mobile network base station access points, depending on your Vita’s available features. If the use of location data is restricted in Parental Controls under Security then these options are disabled.
Security
Security settings consist of two options: Parental Controls and Screen Lock. Parental Controls enable parents or guardians to control the playing of content and the use of features on the Vita. Screen Lock enables you set a passcode-activated screen lock. The following subsections detail both features.
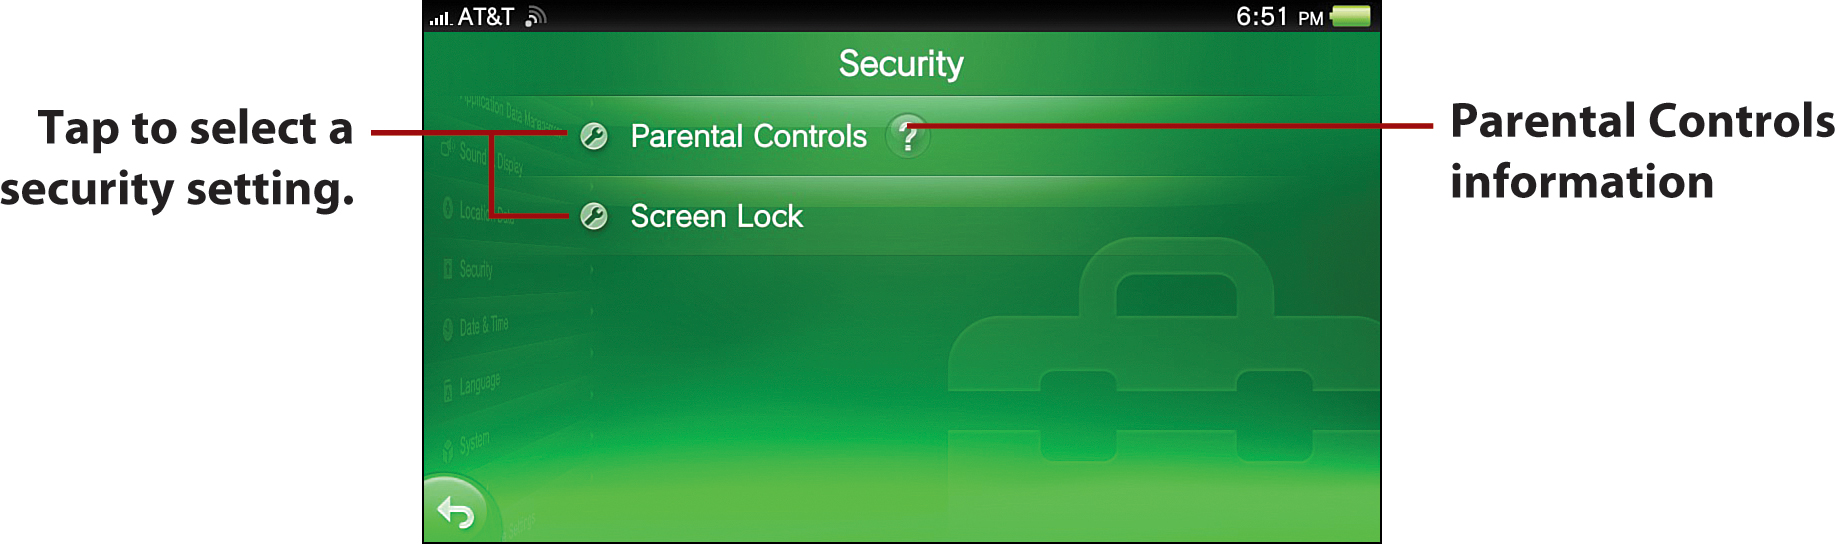
Parental Controls
You must set up a passcode to change the Parental Controls settings. When you are prompted to enter the passcode, enter a four-digit number and tap OK.
After you’ve set a passcode, you can limit which apps can be started or played. Eleven restriction levels are available in addition to the Off setting. The restriction levels get tighter as the numbers get lower; 9 is the default setting.
A combination of the level set on the Vita and the level set on the application or content to be played determines whether or not the application or content starts. To change the settings to a more restrictive level, you must close all applications.
Checking an Apps Restriction Level
To verify the restriction level for an application, do the following:
1. Touch and hold on an empty space on the Home screen to enter edit mode.
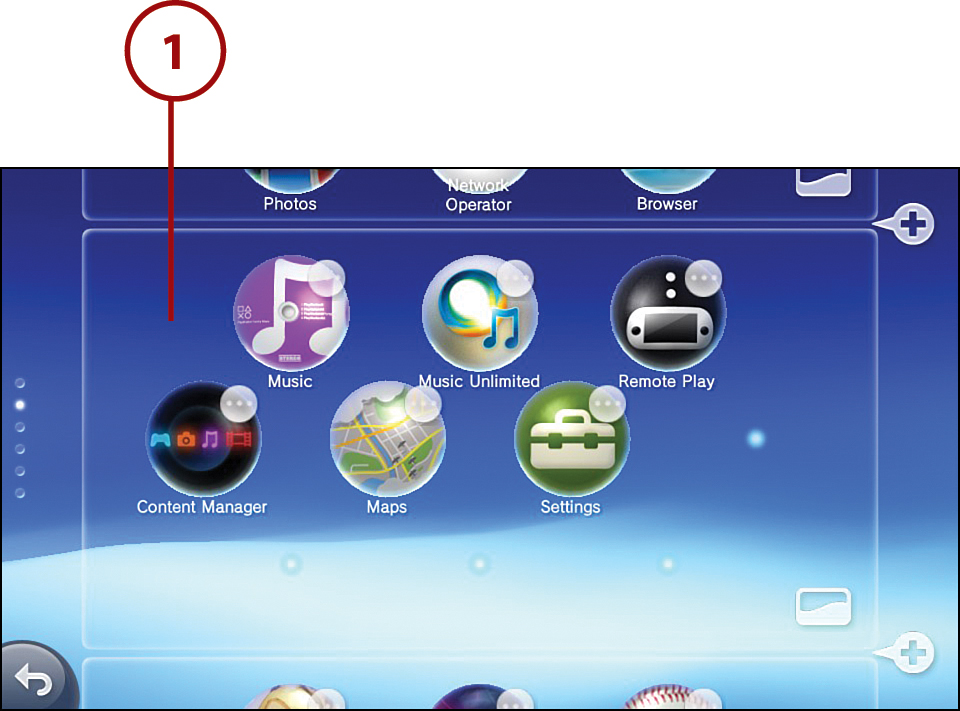
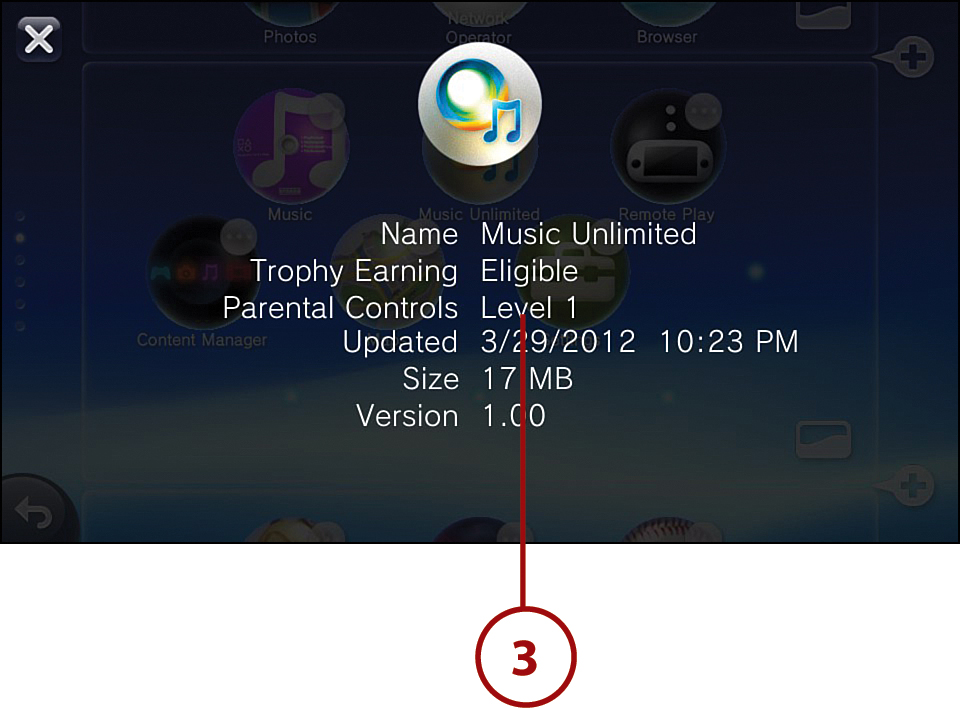
2. Tap the application’s icon and then tap Information.
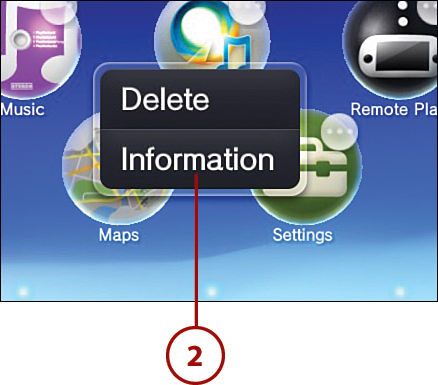
3. The restriction level appears in the Parental Controls field.
To verify the restriction level for video content, tap the Information icon in the Video application for the content on the list that you want to verify. For video content with parental control restrictions, the Parental Controls field displays the restriction level.
If you forget your passcode, you must restore your Vita before you can use it again. See “Using Safe Mode to Troubleshoot” later in this chapter for more information.
Screen Lock
Setting Screen Lock makes entering a passcode necessary when turning on the Vita or when recovering from standby mode, preventing unauthorized use. Just like with parental controls, when you are prompted to enter the passcode, enter a four-digit number and tap OK. Also, as with parental controls, if you forget your passcode, you must restore your Vita before you can use it again.
Date & Time
Date & Time settings consist of five major options that let you adjust everything related to your Vita’s time-keeping capabilities. The various Date & Time options are as follows:
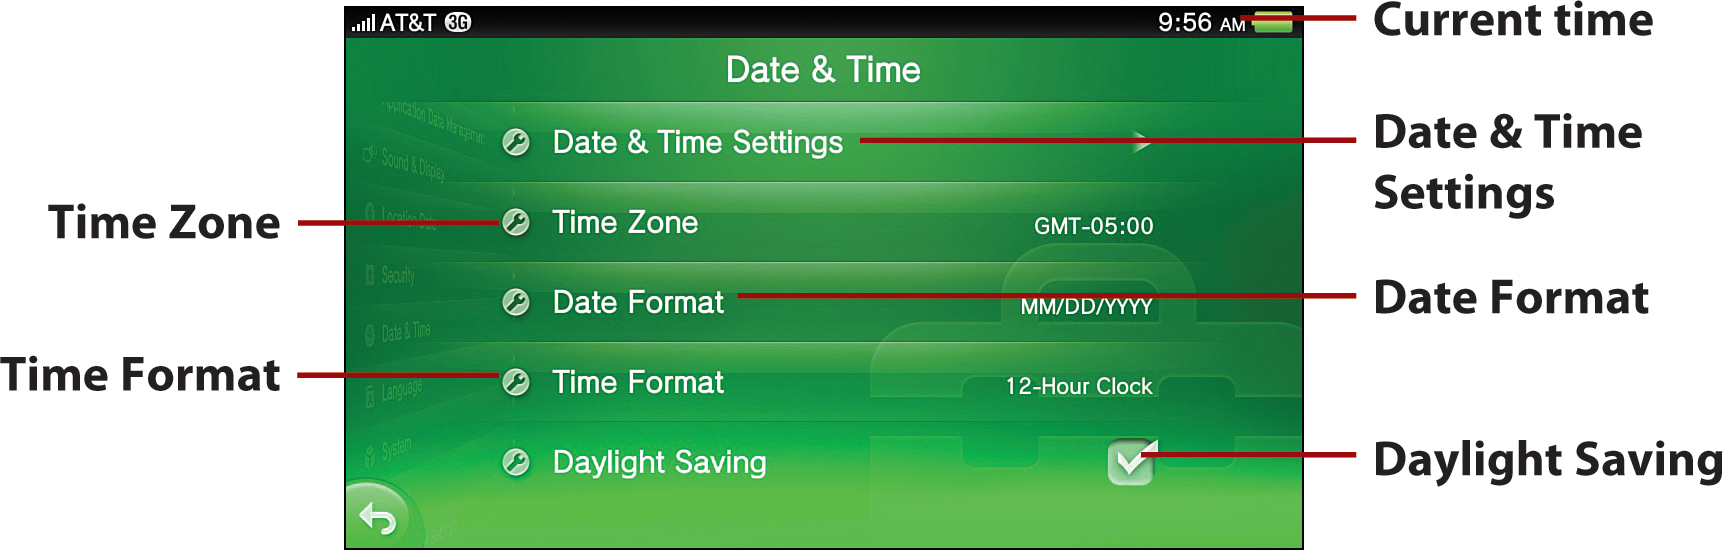
• Date & Time Settings—Tapping this option reveals three choices for automatically and manually setting the time:
• Set Automatically has the Vita set the date and time every time it connects to the PlayStation Network.
• Set Manually enables you to manually set the year, month, day, hour, and minute; when you tap OK, the time count starts from 0 seconds.
• Set Manually (via Internet) syncs date and time information via your Internet connection right after you tap this option.
• Time Zone—Tap to set the Vita’s present time zone. When this setting is changed, the current date and time is changed to reflect that of the selected time zone.
• Date Format—Tap to change the order that the year, month, and day are displayed.
• Time Format—Tap to set the display for a 12-hour (AM and PM) clock, or a 24-hour clock. The current time is always displayed at the top of the Info bar next to the battery indicator.
• Daylight Saving—Tap to set the check mark if you are in a daylight-saving time area.
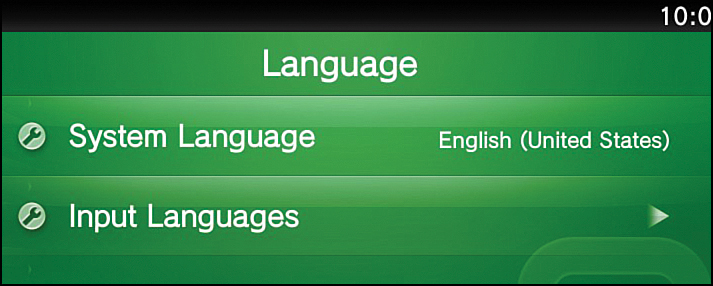
Language
Language settings consists of two options: System Language, which sets the Vita’s default display language, and Input Languages, which sets the languages used for text input.
Input Languages has three main options:
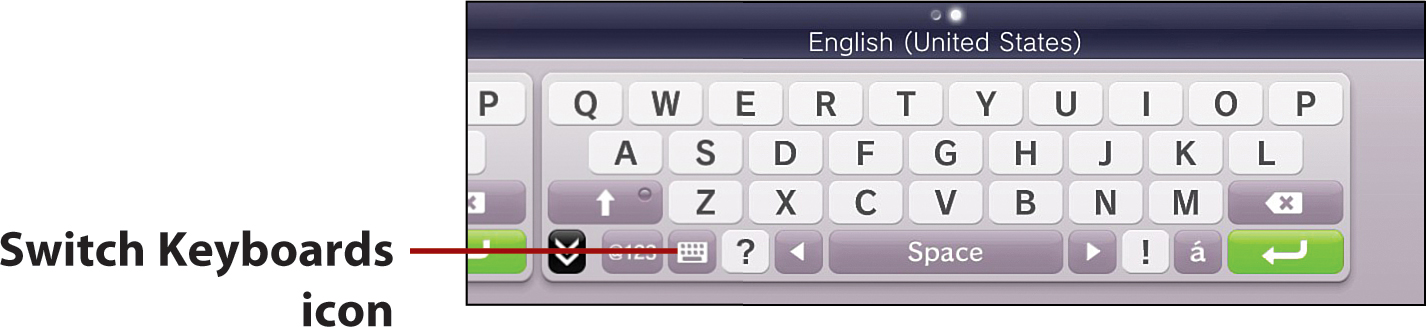
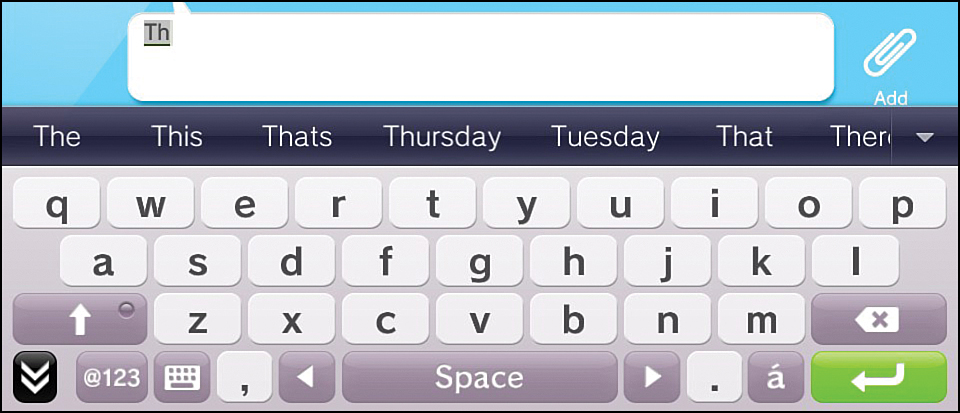
• Keyboards/Add Terms—Tap to set the keyboard language used to enter text. You can set multiple languages and switch between them by tapping the Switch Keyboards icon on the virtual keyboard. The Switch Keyboards icon is only present when more than one language is set.
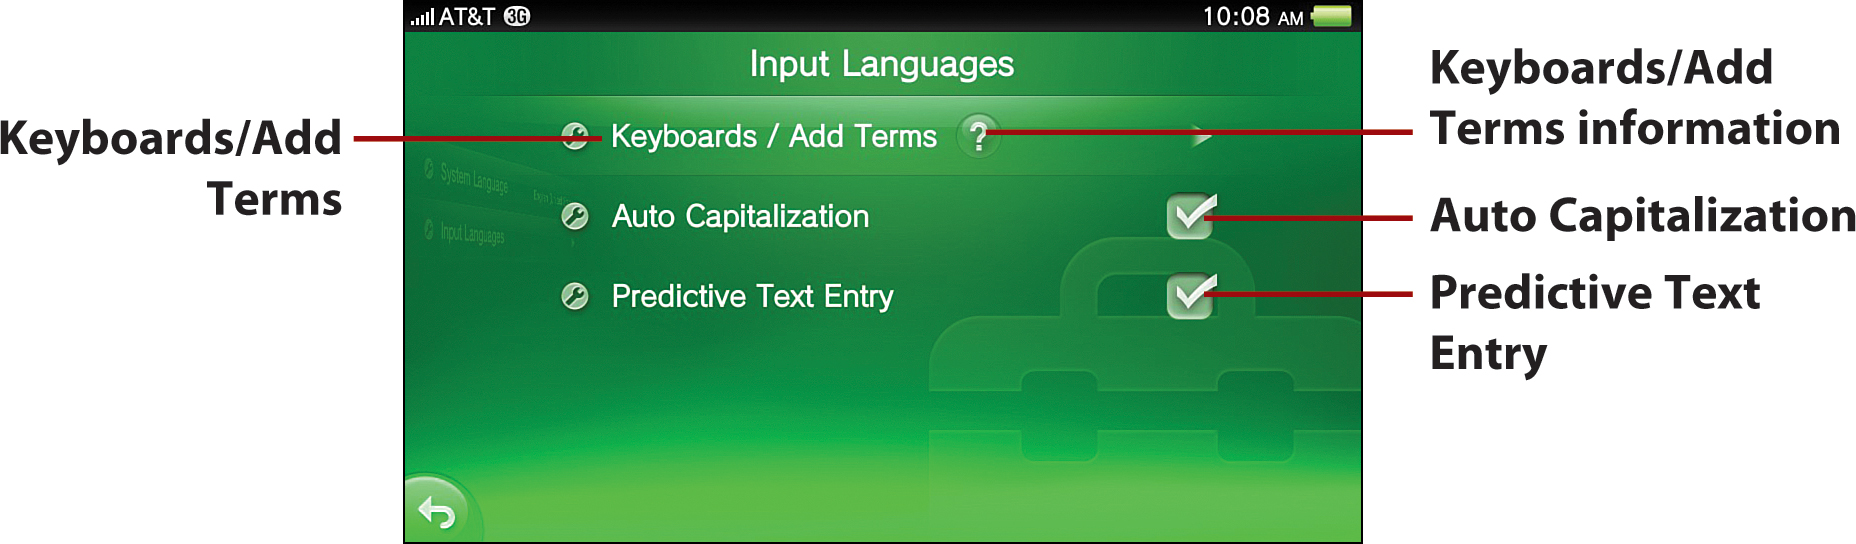
To speed text entry and add a frequently used term in a language, tap the language and then tap Add/Edit Term. Tap Options at the bottom right of the screen and then select Add Term. After you enter a term, you can edit it by tapping the term, or delete it by tapping Options and selecting Delete.
• Auto Capitalization—When the checkbox is enabled, the first letter of a sentence is automatically made uppercase when text is entered.
• Predictive Text Entry—When the checkbox is enabled, predictive input selections are displayed above the virtual keyboard as text is entered.
System
There are eight System settings options, many of which are informational. Each of the available System settings is described as follows:
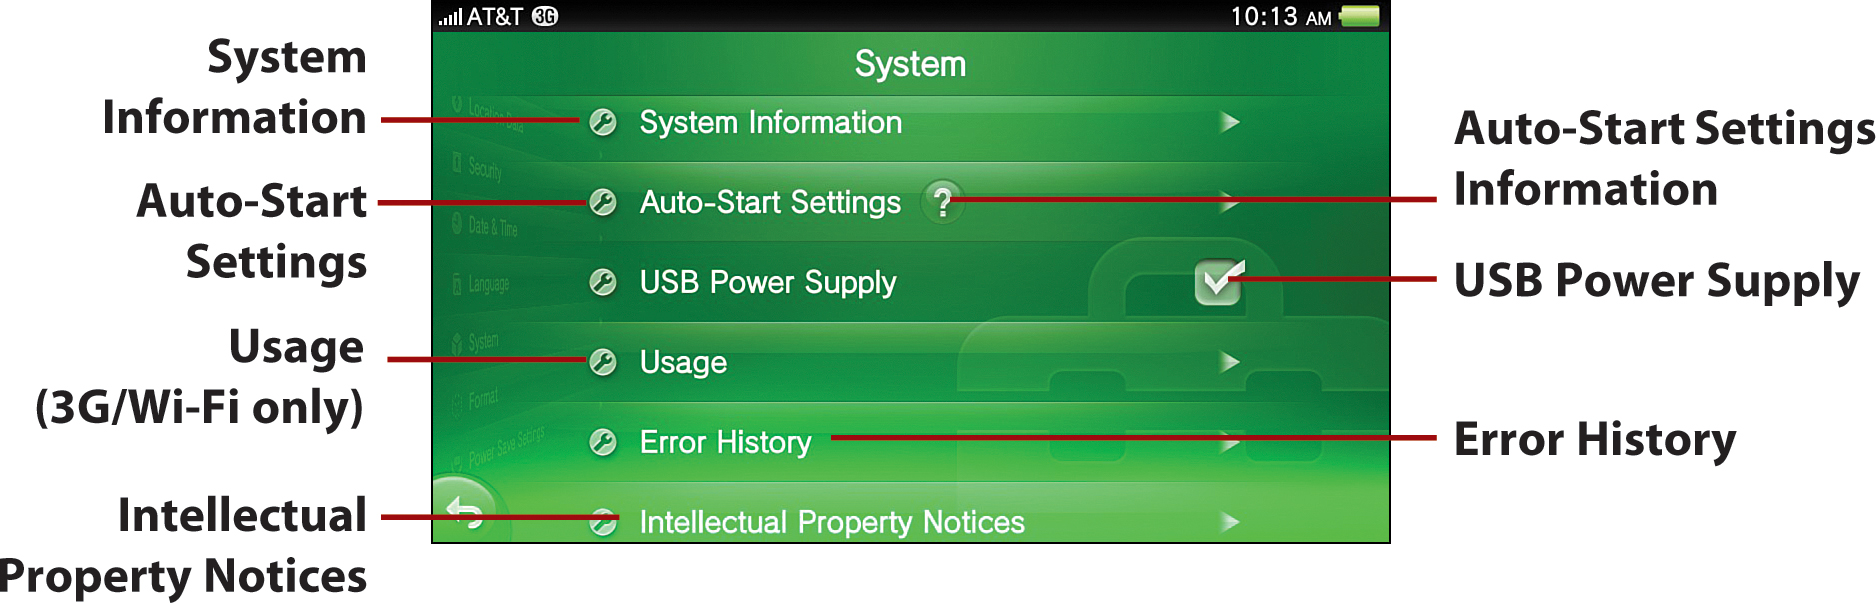
• System Information—Tap this option to see a listing of key information specific to your Vita, as applicable, including system software version, MAC Address, Memory Card Capacity, Free Space, Phone Number, and IMEI and ICCID numbers.
• Auto-Start Settings—This option sets the system so that specific apps or features are started automatically, including refreshing the LiveArea screen. For apps that support Auto-Start Settings, each application can be set on or off. You cannot enable Auto-Start Settings for apps or features that have been restricted by Parental Controls (see “Security” earlier in this chapter).
• Control with Buttons on PS Vita System—Checking this option lets you use the Vita’s physical controls in addition to the touchscreen to control select Home screen and application navigation functions.
• USB Power Supply—When checked, you can charge the Vita via USB connection when it’s powered off. See “Charging the Vita” in Chapter 1, “Getting Started,” for additional information.
• Usage (3G/Wi-Fi only)—This option displays usage statistics, such as the amount of data transmitted and received over the mobile network.
• Error History—Tap this option to display the 10 most recent errors, such as failed downloads or Internet connections. Tap an error to see its details, which might include troubleshooting information, making this a great first stop after having a system issue.
• Intellectual Property Notices—This is legalese related to intellectual property notices associated with the Vita.
• Google Maps: Terms of Use—(not shown) Tap this option to see the terms of use information for Google Maps, which you can read about in Chapter 4, “Getting Oriented with Near and Maps.”
Format
Five options are available in Format settings, which facilitate restoring or refreshing key system features. The Format options are
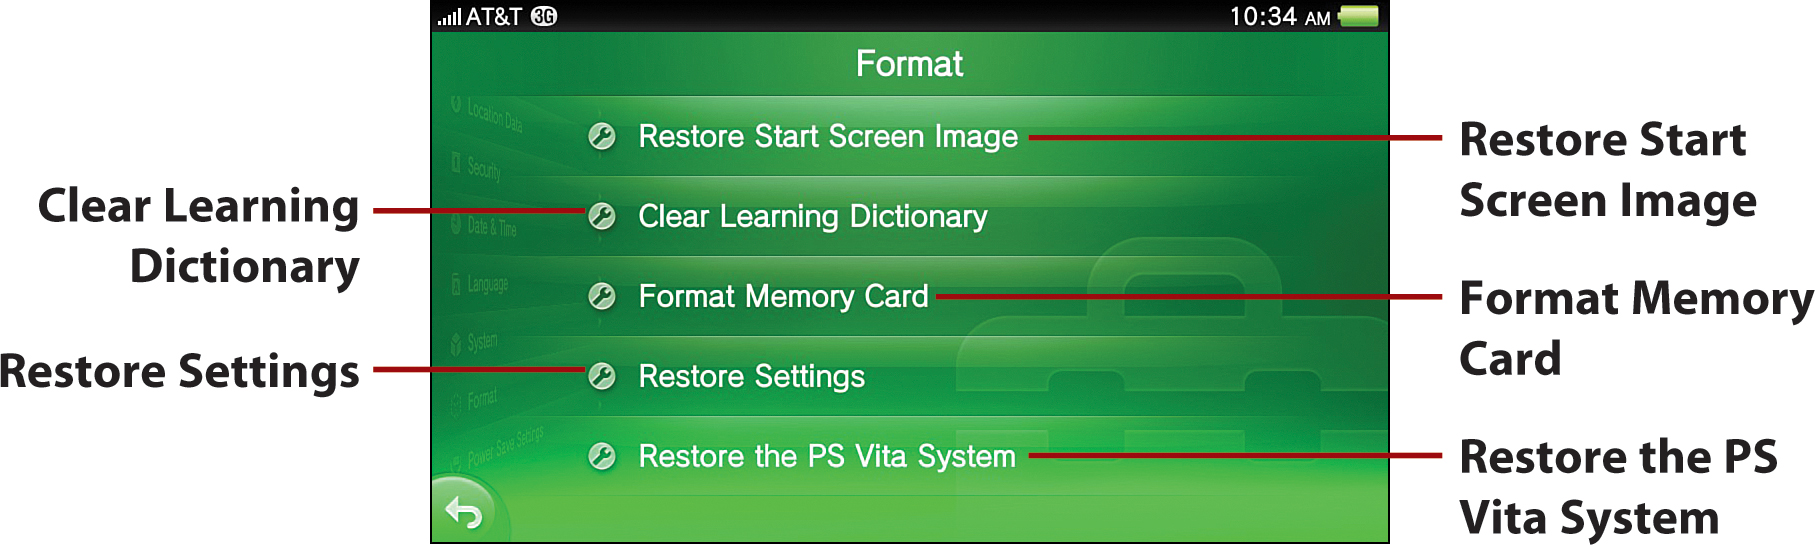
• Restore Start Screen Image—Use this option to restore the Vita’s start screen image to the default. Tap Restore, tap Restore Start Screen Image, and then tap OK to restore the start screen to its default state.
• Clear Learning Dictionary—Rather than deleting individual items from your stored dictionary terms, you can use this option to completely wipe the database. Tap Format, Clear Learning Dictionary, Clear to clear all dictionary items you’ve added onto the default.
• Format Memory Card—This option deletes all the data from your memory card and cannot be undone. After the memory card to be formatted is inserted into your Vita, tap Format, Format Memory Card. Follow the remaining onscreen instructions to complete the operation.
• Restore Settings—This option restores all software settings for your Vita to their default values. After you’ve done it, you cannot undo it. You can also use this option to restore the Vita’s Home and Start screens to their default values. Tap Format, Restore Settings. Follow the remaining onscreen instructions to complete the operation.
• Restore the PS Vita System—This option restores your Vita’s system software to its default state and also deletes all data in system storage. After you’ve done this, you cannot undo it. Tap Format, Restore the PS Vita System, and then follow the onscreen instructions.
Troubleshooting with Safe Mode
Some of these options are also available in safe mode, which is described in “Using Safe Mode to Troubleshoot” later in this chapter.
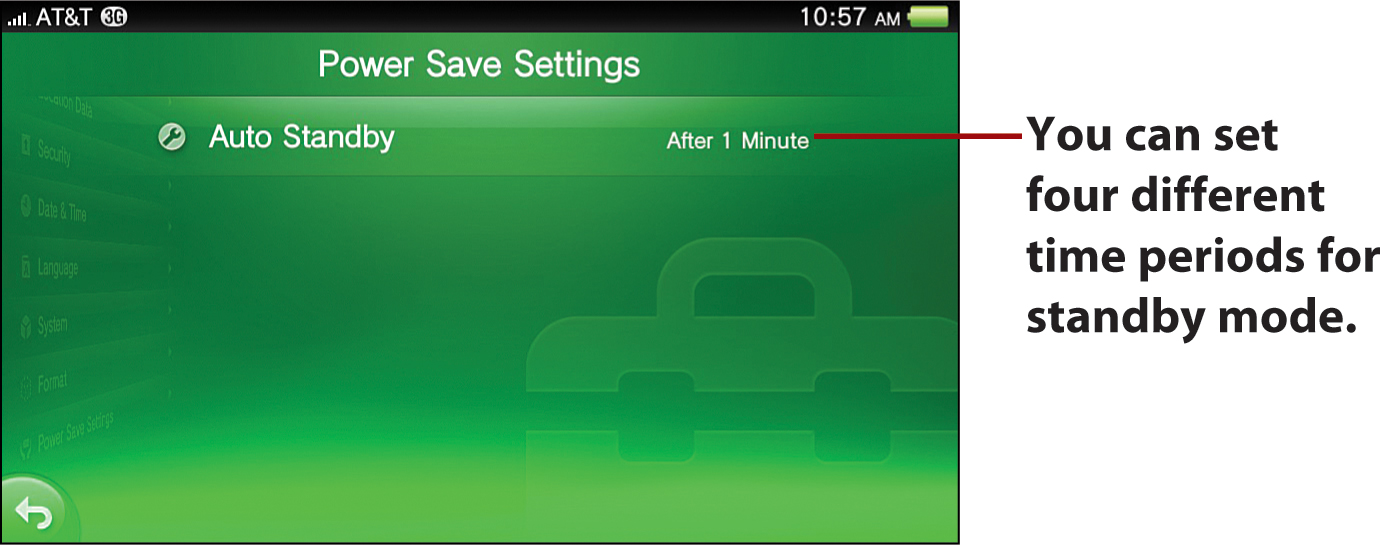
Power Save Settings
Power Save Settings involves exactly one item, Auto Standby, which determines when your Vita goes into sleep mode. Although you can’t turn off this feature, you can set four different time periods: After 1 Minute, After 3 Minutes, After 5 Minutes, and After 10 Minutes. Certain apps or features, such as viewing a slideshow or playing a video, disable standby mode, so be sure that your handheld is connected to a power source if you’re going to leave it unattended in one of these situations.
Using Safe Mode to Troubleshoot
If you cannot turn off your Vita or it’s not otherwise operating the way it’s supposed to, one of the safe mode options might fix the problem. To start the Vita’s safe mode, press and hold the Power button until the Safe Mode menu appears. Because safe mode starts the Vita with its minimum required functionality, you can only navigate the menu with the directional pad and select options with the X button.
Safe mode can also be activated manually when the Vita is completely powered off and not in standby mode by pressing and holding the R button, PS button, and Power button at the same time until the Safe Mode menu appears. When you’re in safe mode, the following options are available:
• Restart the PS Vita System—Use to reboot your system.
• Rebuild Database—Use to rebuild all user-created data, including lists and messages. This is a good option to try if your Vita consistently freezes or crashes.
• Format Memory Card—This deletes everything on your memory card, including downloaded games, game saves, pictures, and music.
• Restore the PS Vita System—Use this option to restore your system to the default state of its current firmware.
• Update System Software—This option enables you to update the Vita through a PlayStation 3, computer, or PlayStation Vita Card. See “System Update” earlier in this chapter for additional information.
If your Vita does not start in safe mode even after you keep pressing the Power button for more than 30 seconds or try to enter it manually, the battery charge might be too low. If charging your Vita safe mode still does not fix your problem, your Vita might require servicing. See “Understanding Your Warranty” in Chapter 1 for service options.