10. Snapping Pictures and Video with the Cameras
In this chapter, you learn all about the Photos application, including how to take pictures and videos and edit them to suit your needs. You also learn about Flickr, a popular, third-party photo-sharing application.
• Viewing the Photos LiveArea Screen
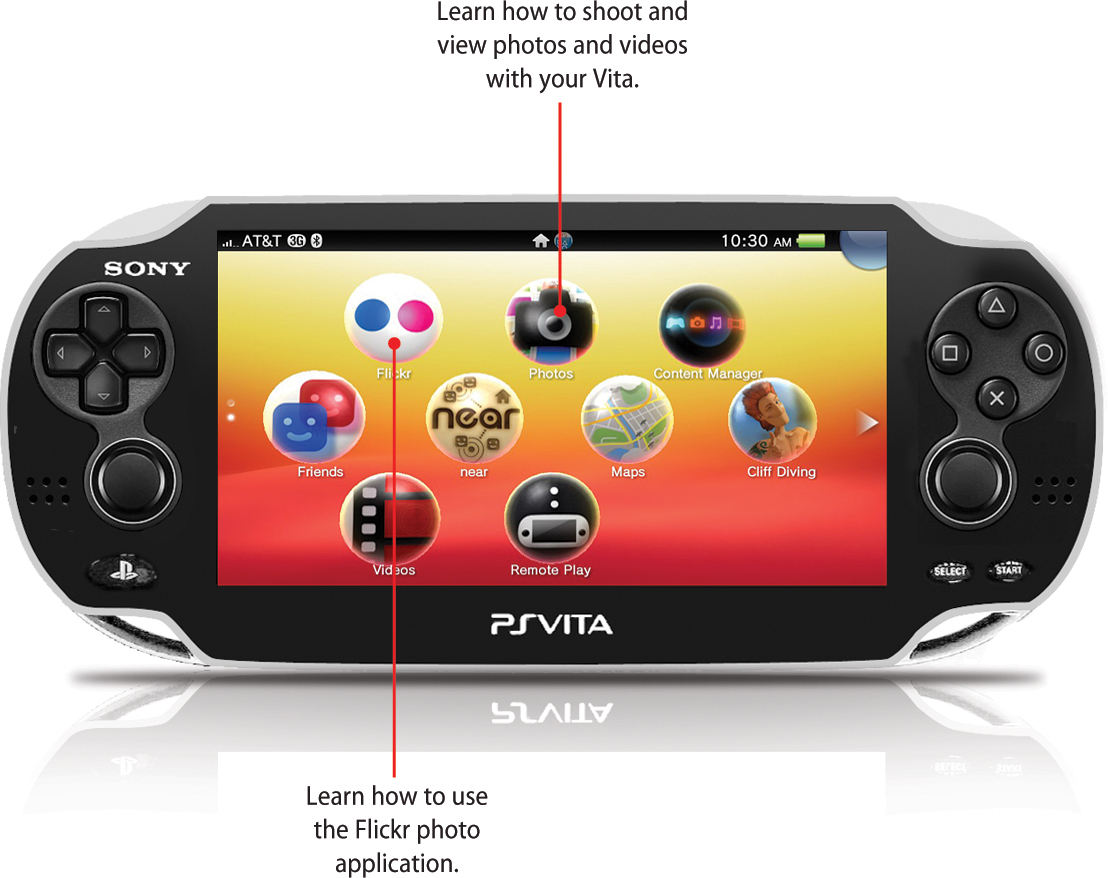
Your Vita is equipped with front and rear cameras, enabling you to use it to take pictures and capture video. Although this feature is nice, it is important to note that your Vita is no substitute for a traditional camera, or even the cameras built into most smartphones, because it has no flash and the resolution is a paltry 0.3 megapixels. To be fair, the cameras’ primary purpose is to facilitate the gaming experience, particularly your Vita’s augmented reality (AR) feature, and not for you to use as a camera replacement. Still, there will be plenty of times you might want to snap pictures with your Vita. You just won’t want to turn them into poster-sized prints to hang in your room, but they’re good enough to use as wallpaper on your Vita.
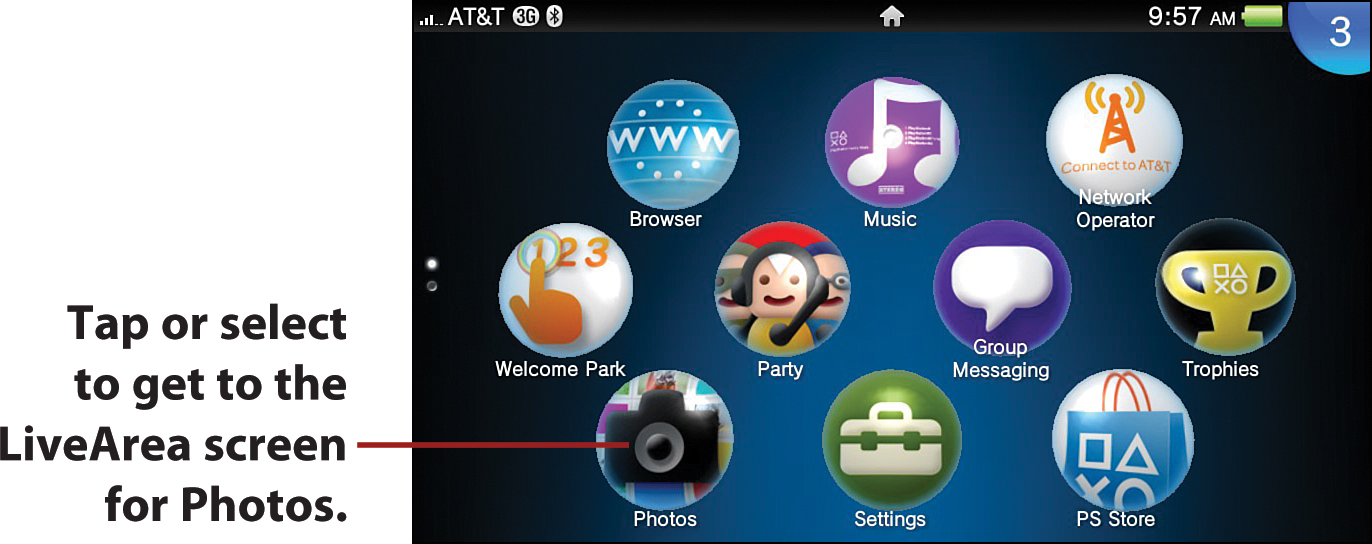
Viewing the Photos LiveArea Screen
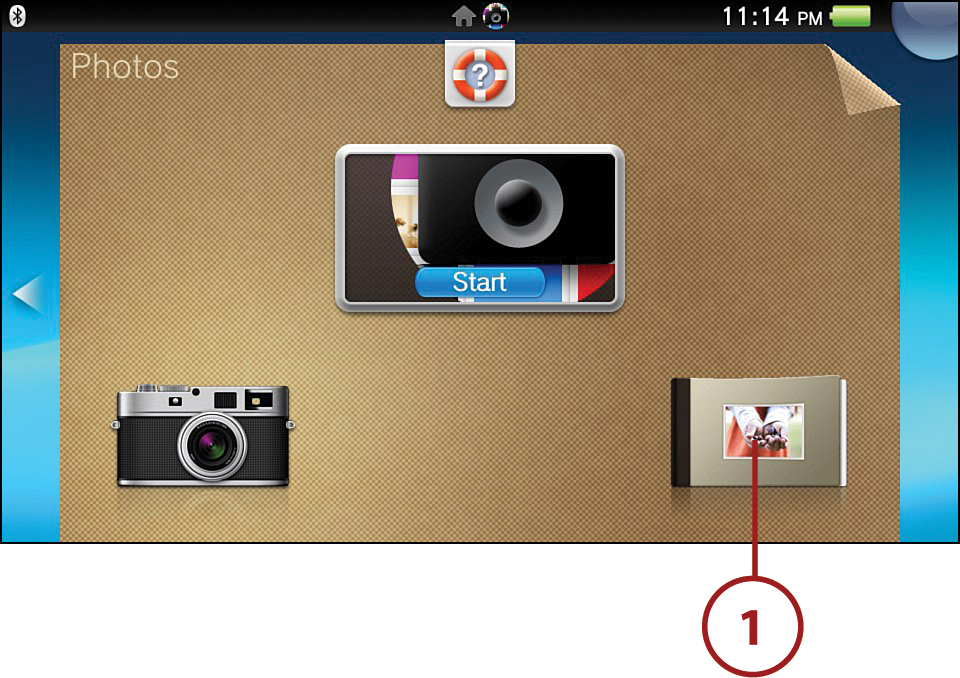
To access your Vita’s photo capabilities, you need to pass through the Photos LiveArea screen. To get to this screen, tap or select the Photos icon from the Home screen.
You now have several options to choose from:
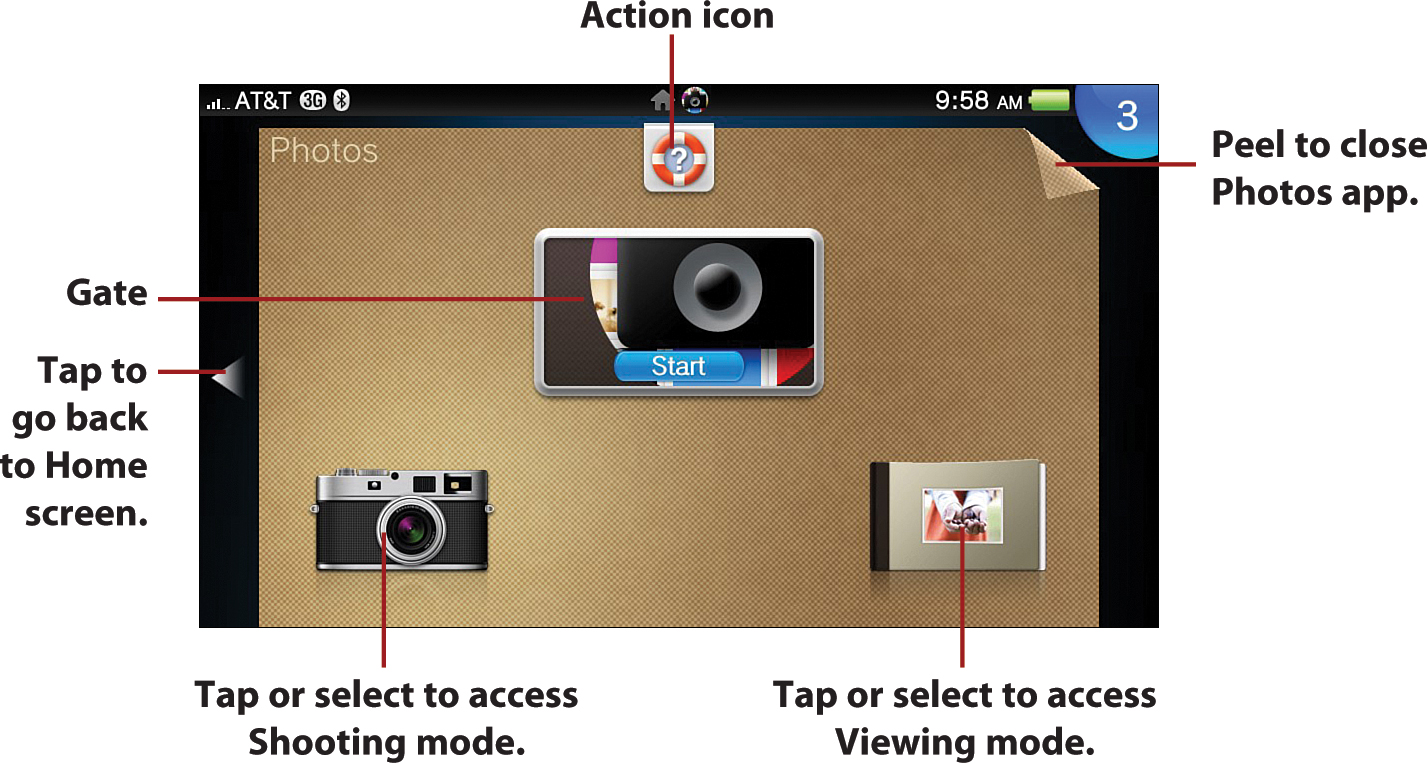
• Action icon—Tap or select this icon to pull up the Photos section of the PlayStation Vita User’s Guide.
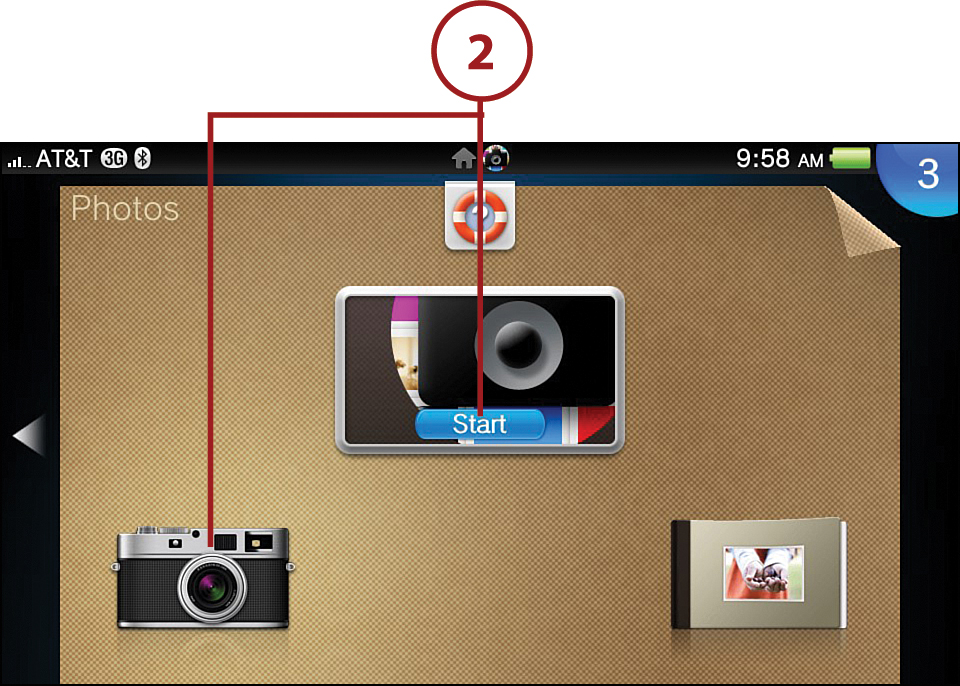
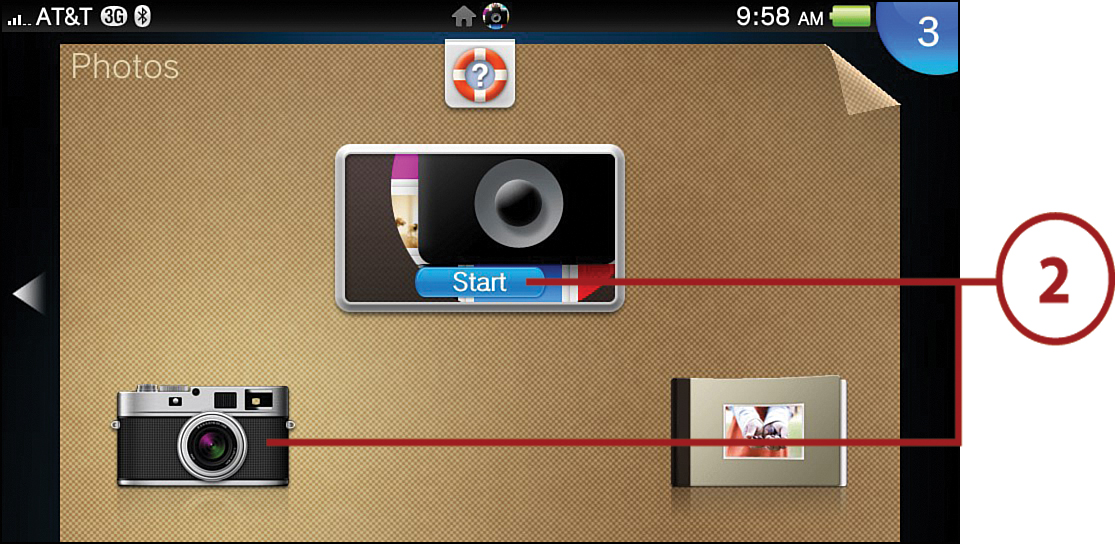
• Gate—Tap or select the Gate to enter the Photos application. When you first access the Photos application, it says Start and brings you to the Shooting mode of the application. If you return to the Photos app (but do not close it out by peeling it off the screen), the Gate says Continue and brings you to the mode you were last in.
• Viewing Mode icon—Tap or select this icon to view your photos and videos. This mode serves as your virtual album. See the later section, “Looking at Viewing Mode,” for more information on the functions available here.
• Shooting Mode icon—Tap or select this icon to take photos or videos. This mode enables the cameras to start capturing whatever catches your eye. See the next section, “Getting into Shooting Mode,” for more information on this mode.
Getting into Shooting Mode
Your Vita is equipped with two cameras, one on the front of the device and one on the rear, both of which can be used to capture photos and videos when in Shooting mode. Using either camera, photographs are captured at 640×480, which equates to 0.3 megapixels. The rear camera captures video at 640×480 (VGA; video graphics array) at 60 fps (frames per second), whereas the front camera captures video at 320×240 (QVGA; quarter-VGA) at 120 frames per second. Because your Vita is not equipped with a flash, you need to optimize your lighting conditions to get decent photographs and video.
When you enter Shooting mode, you see many icons that enable you to customize your photo- and video-taking experience. The options are as follows:
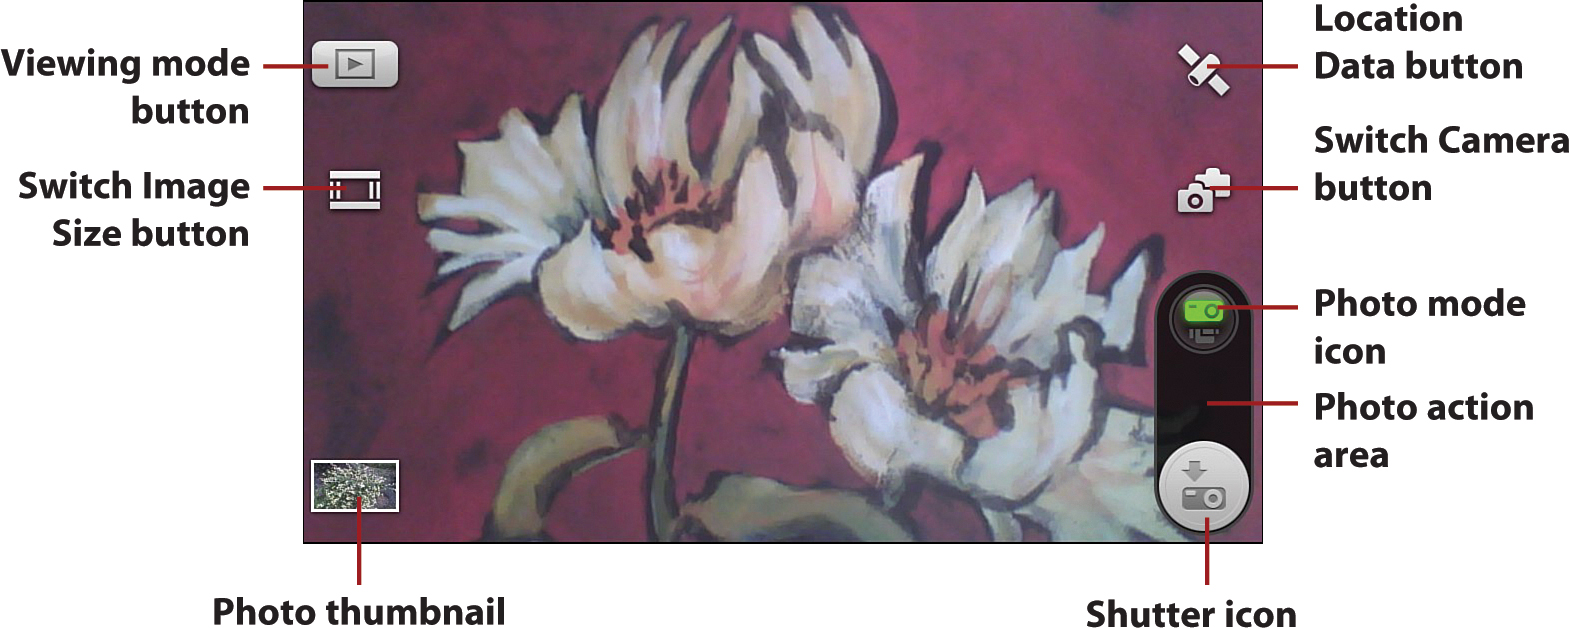
• Viewing Mode button—Tap this button to enter Viewing mode to browse your captured photos, videos, or screenshots.
• Switch Image Size button—Tap this button to switch between three image sizes for photos: portrait, slightly larger than portrait, and widescreen. What you see onscreen is exactly how a photo would be captured at a selected size. This option disappears when you are in Video mode.
• Photo thumbnail—The thumbnail shows your most recently taken photo or video in Viewing mode.
• Location Data button—Tap this button to attach location data to a photo; the location data is added to the information stored in the image’s photo file. This option is only available if you have a 3G/Wi-Fi model. In addition, the button is only displayed if you are in Photo mode and have use of location data enabled under Location Data in the Vita’s Settings application. See “Location Data” in Chapter 3, “Settings and Networking on Your Vita,” for more on this. After these criteria are met, tapping this button instructs your Vita to find your location. When your Vita determines where you are, the location data icon turns green, alerting you that GPS tagging is ready.
• Switch Camera button—Tap this button to switch between the front and rear cameras on your Vita.
• Camera mode area—Tap this area to switch between Photo mode and Video mode. The former shows an icon with a camera, whereas the latter shows an icon with a video camera.
• Photo action area—The icon in this area varies depending on if you are in Photo mode or in Video mode. When in Photo mode, simply tap the camera shutter icon to take your photo. When in Video mode, tap the red dot icon to start recording and the gray square to stop recording.
Are All Those Icons Distracting You?
If so, you can make them disappear simply by tapping the screen. To get them back, just tap the screen again.
Taking Photos
To take photos with your Vita, follow these steps:
1. Tap or select the Photos icon from the Home screen.
2. Tap or select the Gate or the Shooting mode icon from the LiveArea screen.
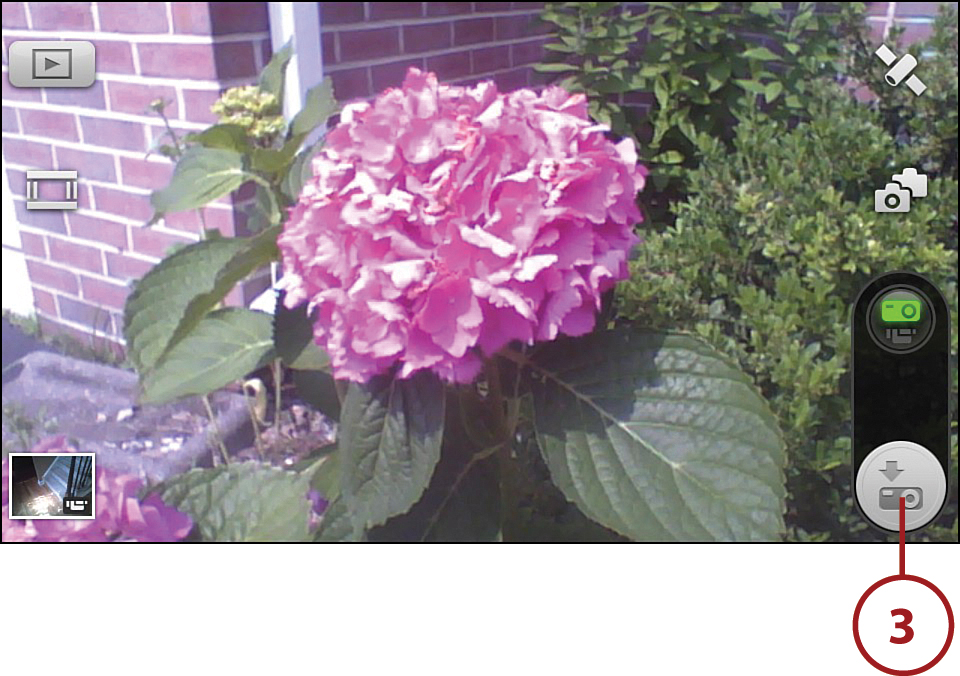
3. At the Shooting mode screen, tap the shutter icon or press the R button to take your photo when you are satisfied with how your subject appears in the frame.
You can customize the size at which your photo is captured (Switch Image Size icon) and add location data to your image (Location Data icon). These options are outlined under “Getting into Shooting Mode” earlier in this chapter.
Capturing Video
Each video you record can be up to 30 minutes long, dependent upon available memory card capacity. To take a video, follow these steps:
1. Tap or select the Photos icon from the Home screen.
2. Tap or select the Gate or the Shooting mode icon from the LiveArea screen.
3. At the Shooting mode screen, tap the Camera mode area so that the video camera icon is displayed.
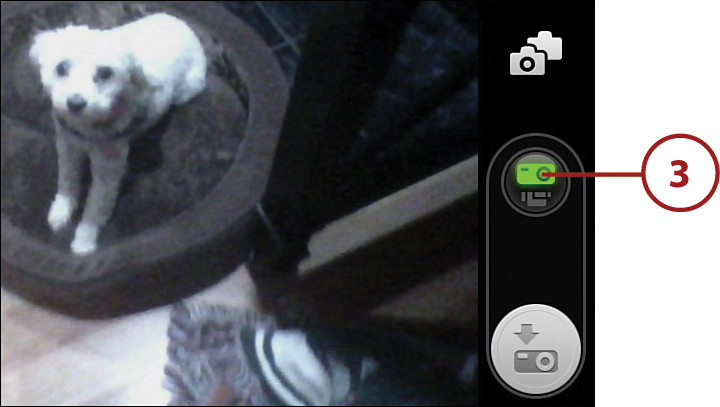
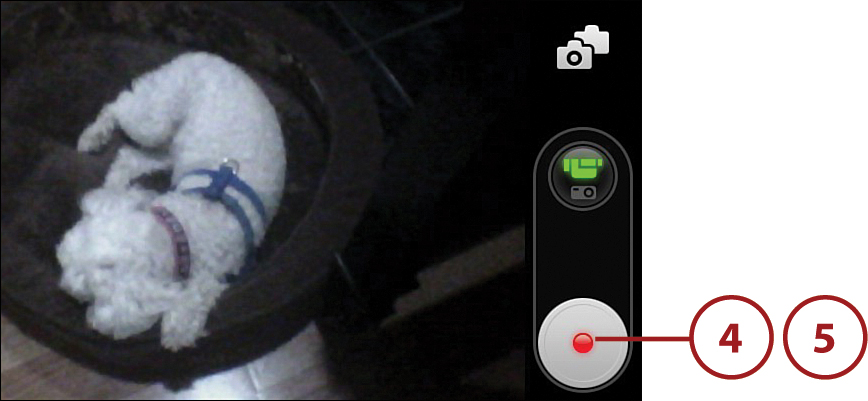
4. Tap the red circle or the R button to start recording. The red circle now turns into a gray square.
5. When you are done recording, tap the gray square or press the R button again.
Looking at Viewing Mode
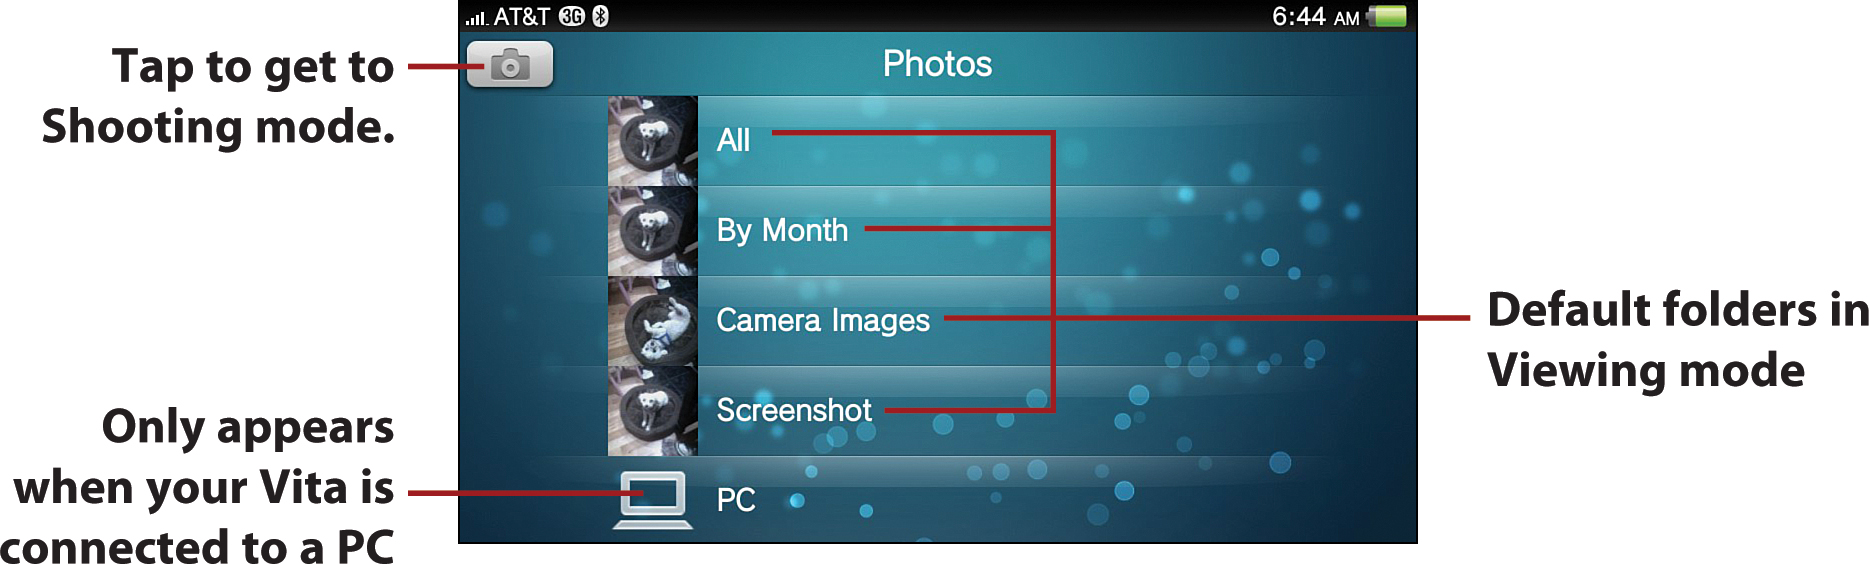
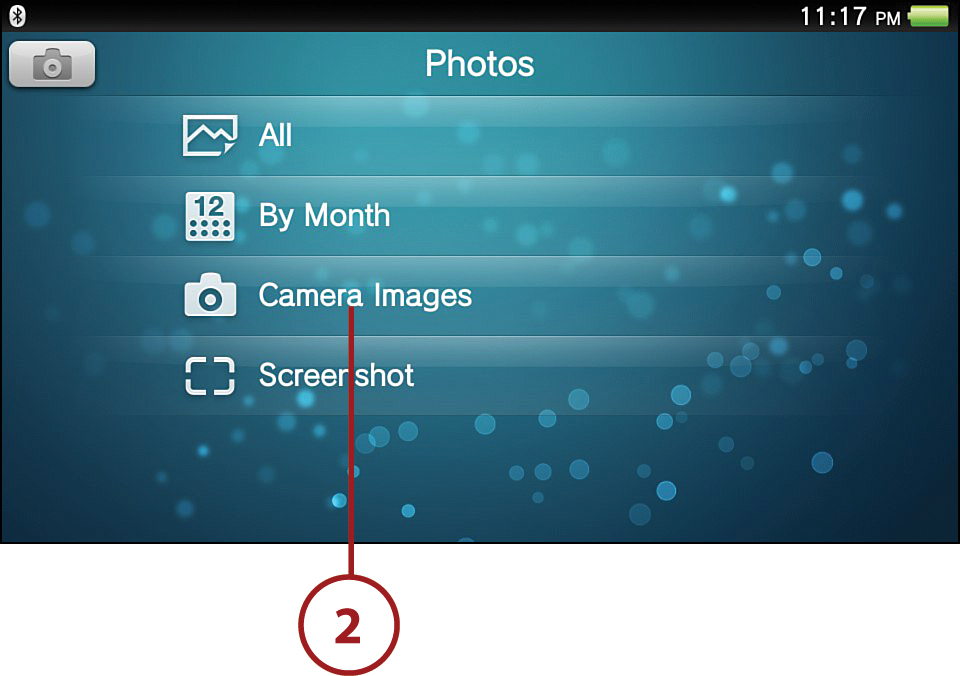
Your Vita enables you to view photos in numerous formats, including JPEG (Exif 2.2.1), TIFF, BMP, GIF, and PNG. When you first enter Viewing mode, you see four folders: All, which includes thumbnails of every image, video, or screenshot you’ve taken with your Vita; By Month, which sorts your pictures in folders by month (to access the thumbnails tap an individual folder); Camera Images, which includes thumbnails of all images and video captured via Shooting mode; and Screenshot, which sorts your screenshots into various folders that are titled to reflect the application or game from which they were captured. If you have your Vita connected to a PC or to your PlayStation 3, you see those additional folders here.
Examining the Thumbnails Screen
When looking at a thumbnails screen for any of your photo collections, the following options are available:
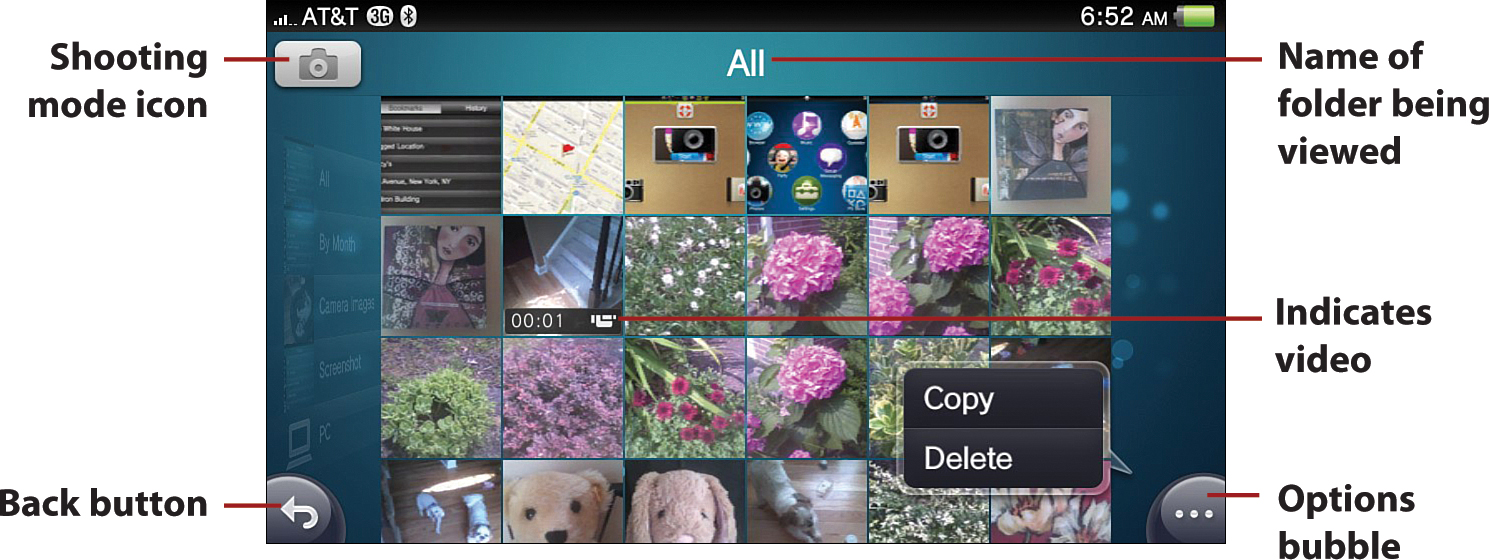
• Shooting mode icon—Tap this icon to switch to Shooting mode.
• Back button—Use this button to go back to the previous screen.
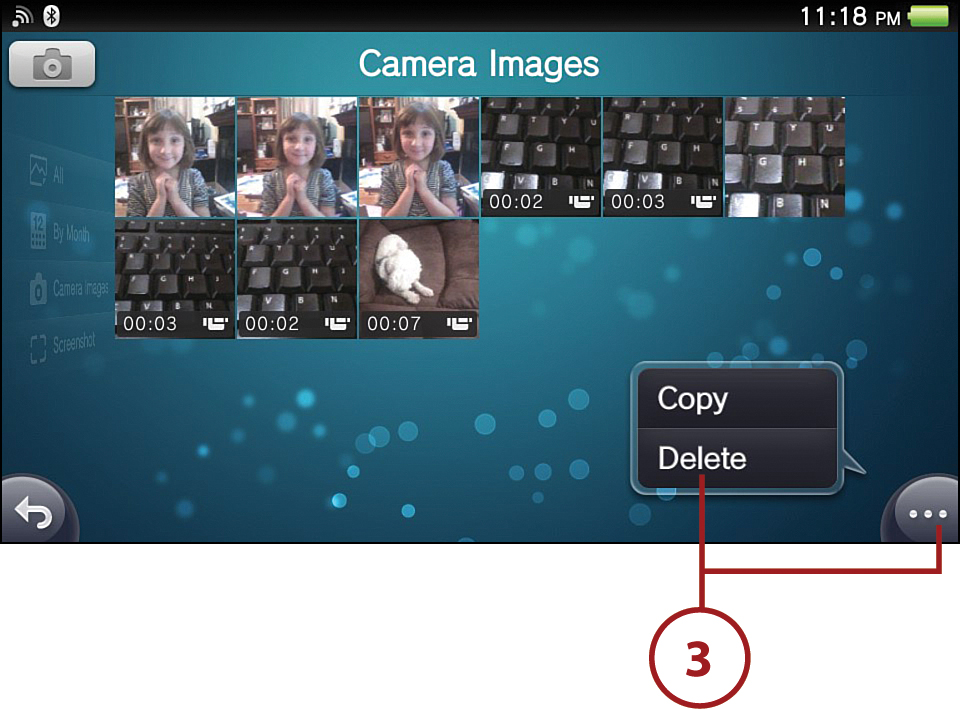
• Options bubble—Tap this button to access the Copy and Delete functions. The Copy option employs the Content Manager and only works if you are connected to a PlayStation 3 or to a computer. For more on copying image and video files over to a computer or to a PlayStation 3, turn to Chapter 8, “Managing Media with Content Manager.” Tapping Delete enables you to delete images.
Deleting Images and Videos
You can delete individual images and videos or purge all image and video files from a folder or collection. Remember, once you delete any item from your Vita, it is gone forever if you have not uploaded it elsewhere, as your Vita has no recycle bin from which items can be retrieved. For more on uploading images to a computer or to a PlayStation 3, turn to these sections in Chapter 8, “Working with a Computer,” and “Working with a PlayStation 3,” respectively. If you want to proceed with deleting photo or video files from your Vita, follow these steps:
1. Tap or select Viewing mode from the Photos LiveArea screen.
2. Select the folder that contains the image(s) or video(s) that you want to delete. If you are unsure which folder to look in, tap All.
3. Tap the Options bubble and select Delete.
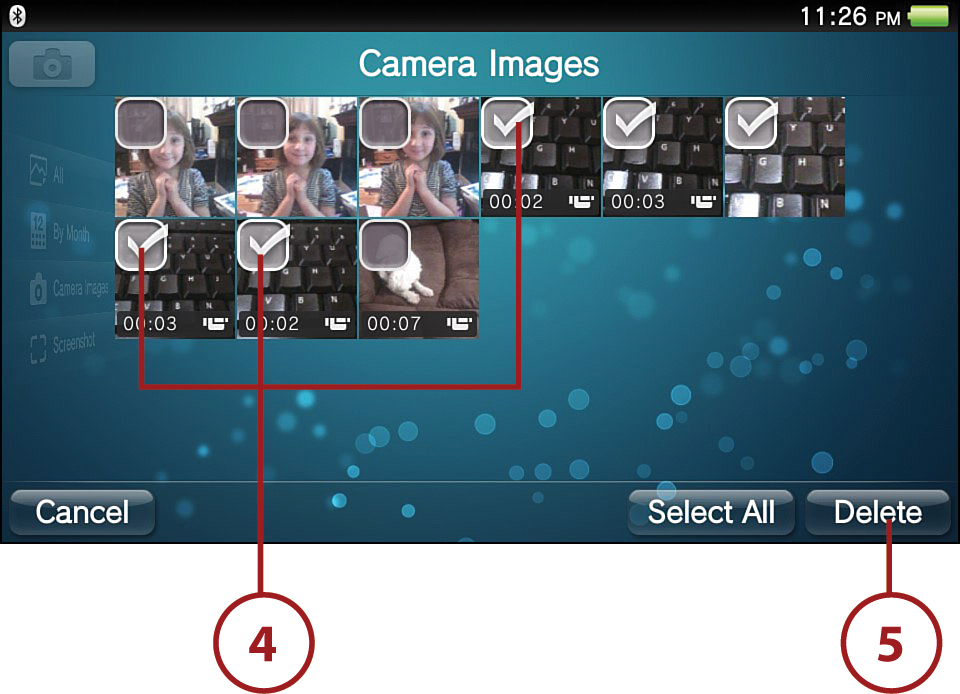
4. Tap the box on the images you want to delete to check mark them.
5. Tap Delete.
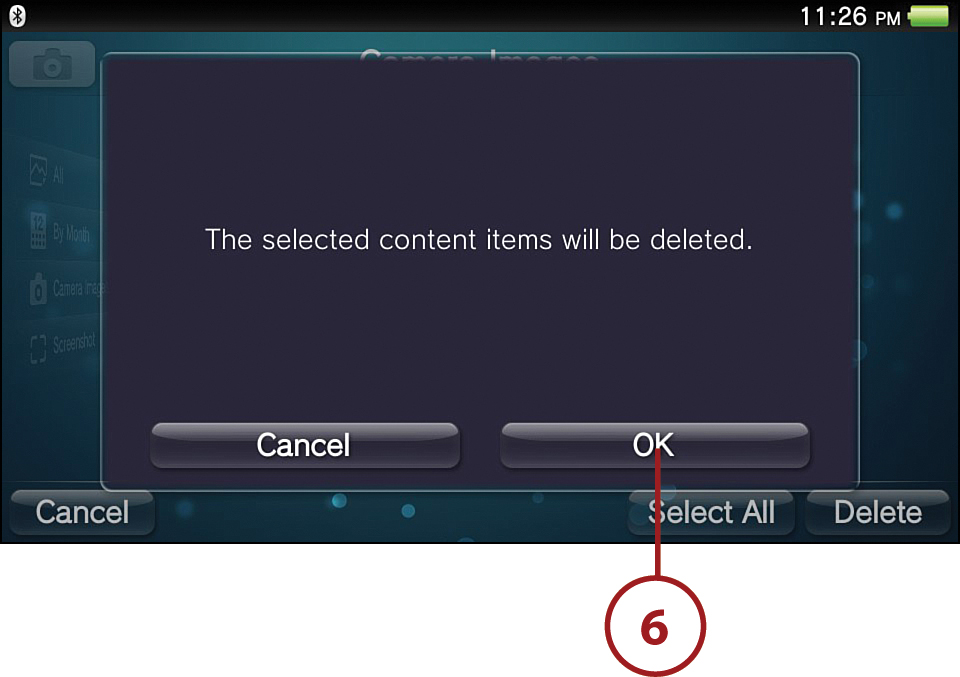
6. At the confirmation screen, select OK. Your images have been deleted.
Viewing Individual Photos and Videos
To view an individual photo or videos on the full screen, tap the thumbnail for that photo or video (which is indicated with an associated video camera banner). This yields an operations panel from which you can perform certain functions. The options for photos are as follows:
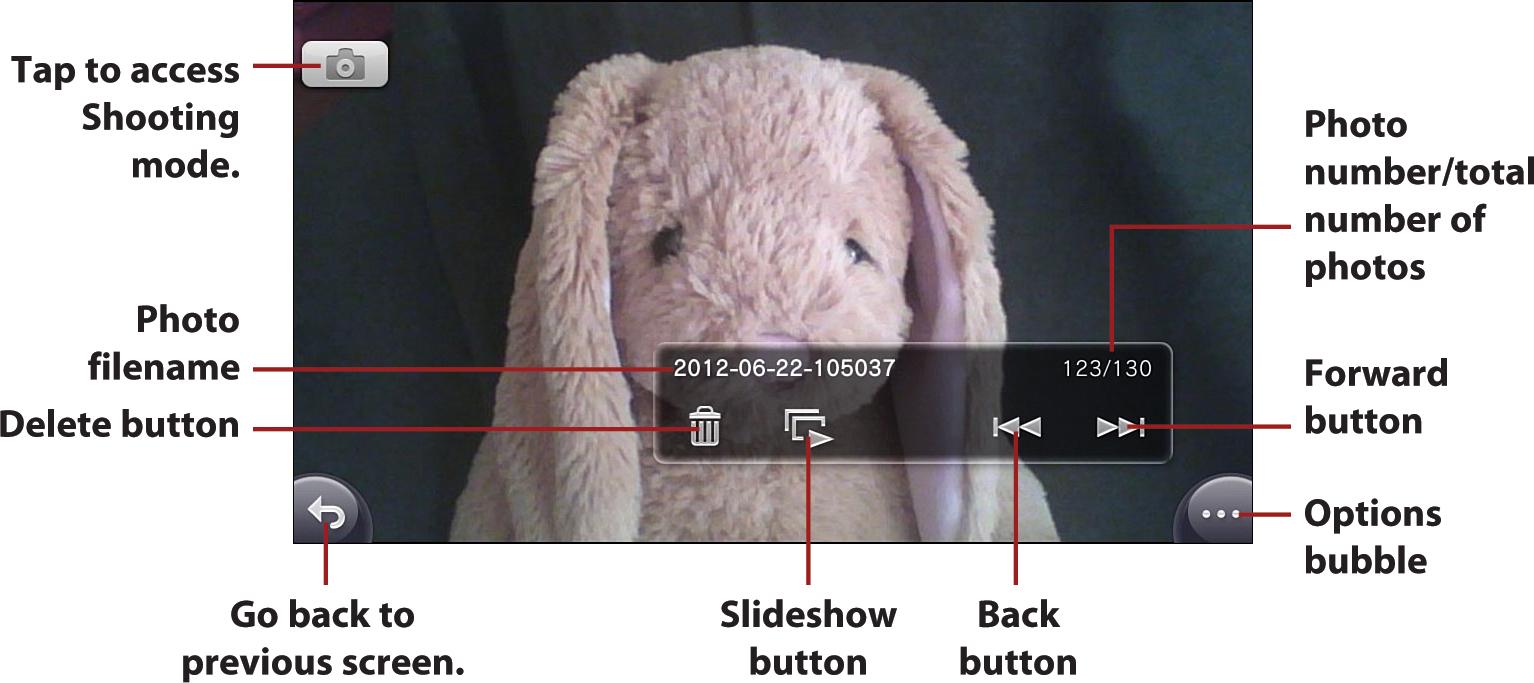
• Delete button—Tap Delete to throw the picture in the trash. After you delete an image, it is gone. There is no recycle bin.
• Slideshow button—Tap this button to launch a slideshow.
• Back button—Use the Back button to go to the previous image or video.
• Forward button—Tap the Forward button to go to the next image or video.
The options for videos are as follows:
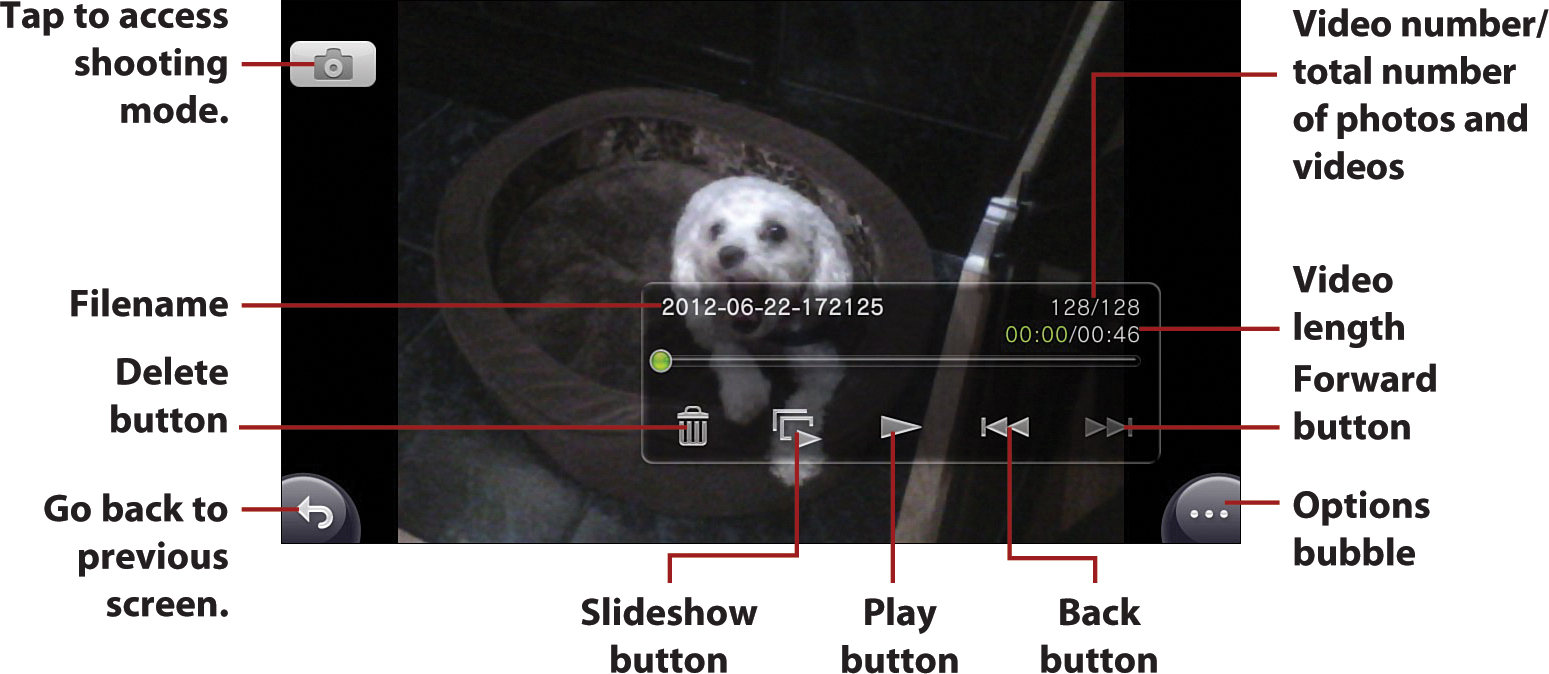
• Delete button—Tap this button to delete the video. After you delete a video, it is gone forever.
• Slideshow button—Tap this button to launch a slideshow. When the slideshow encounters a video, the image associated with the video is shown; the video does not automatically play.
• Play and Pause/Stop buttons—After you tap the play button, it becomes the Pause/Stop button. Tap these buttons to play and pause/stop your video as desired.
• Back button—Tap this button to go to the previous image or video.
• Forward button—Tap this button to go to the next image or video.
Instead of playing a slideshow or using the back and forward buttons to view your images, you can flick the screen left and right to move backward and forward, respectively. Flicking eliminates the distracting operations panel and enables you to cycle through images at your own pace, rather than at the pace designated for the slideshow.
Adjusting Slideshow Settings
If you find that the time interval between images in your slideshow is too long or too short, you can adjust the speed. You can also adjust how the images in your slideshow are presented, by adding certain effects and filters.
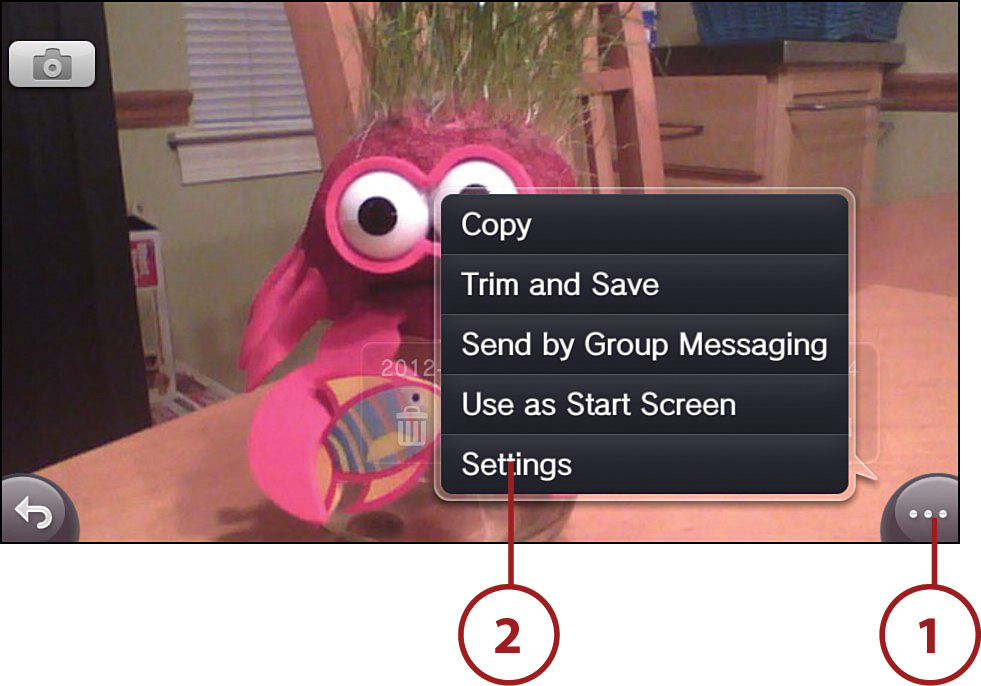
1. When viewing a photo, tap the Options bubble.
2. Select Settings from the Options menu. To adjust the speed, go to step 3. To adjust the style, proceed to step 4.
3. Tap Slideshow Speed and then select Fast, Normal, or Slow.
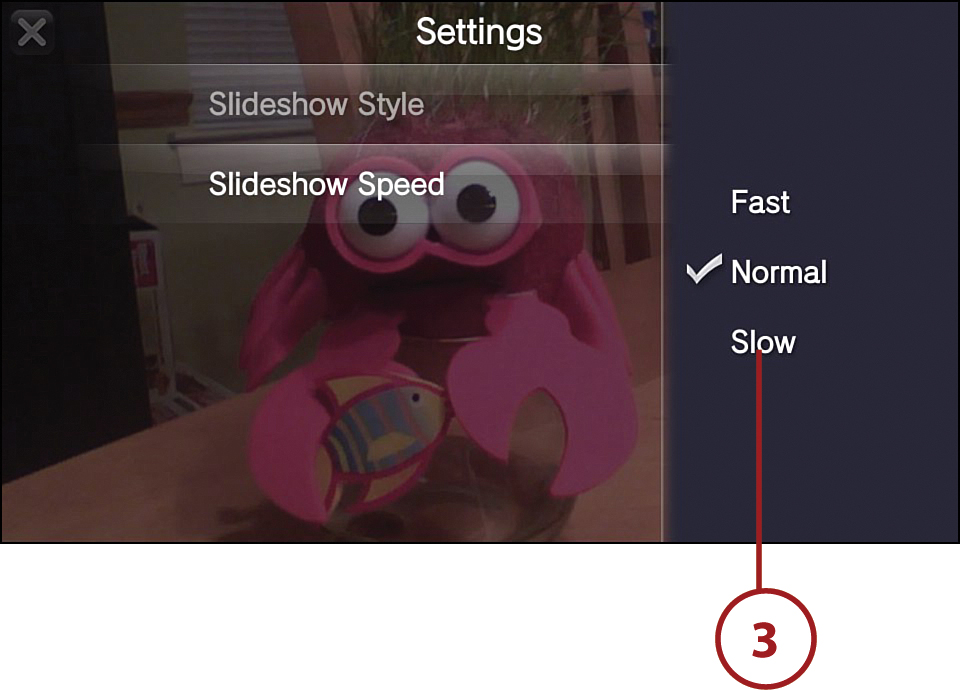
4. Tap Slideshow Style and then select Normal, Slide (slides through images), Toy Camera (applies a fun filter that slightly distorts the image and its colors), Sepia (pictures are shown in a sepia tone), or Vivid (saturates the color so that the pictures appear brighter and more vibrant).

5. Tap the X at the top left of the screen to exit.
Saving a Photo with Special Effects
The style you apply to your images in the slideshow cannot be applied to individual photographs, so unless you view the images as a slideshow, you cannot see these effects. However, if you really like the way a photo looks with a particular filter, just snap a screenshot of it during the slideshow.
Cropping Photos
If you don’t like a certain part of a photo, you can crop that part out.
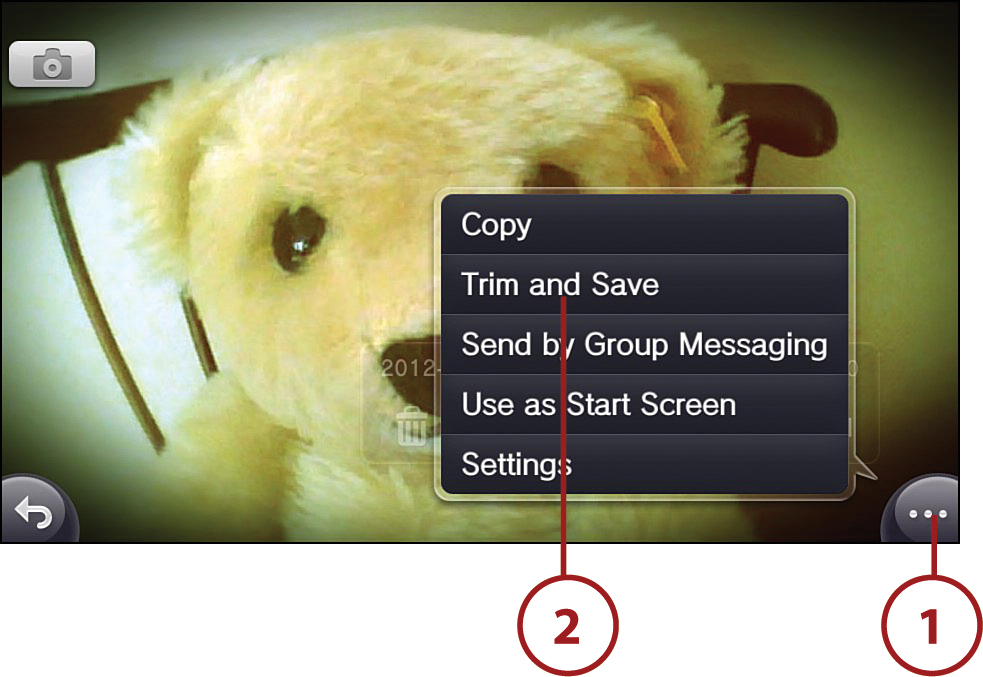
1. When viewing the photo you want to crop, select the Options bubble.
2. Select Trim and Save from the Options menu.
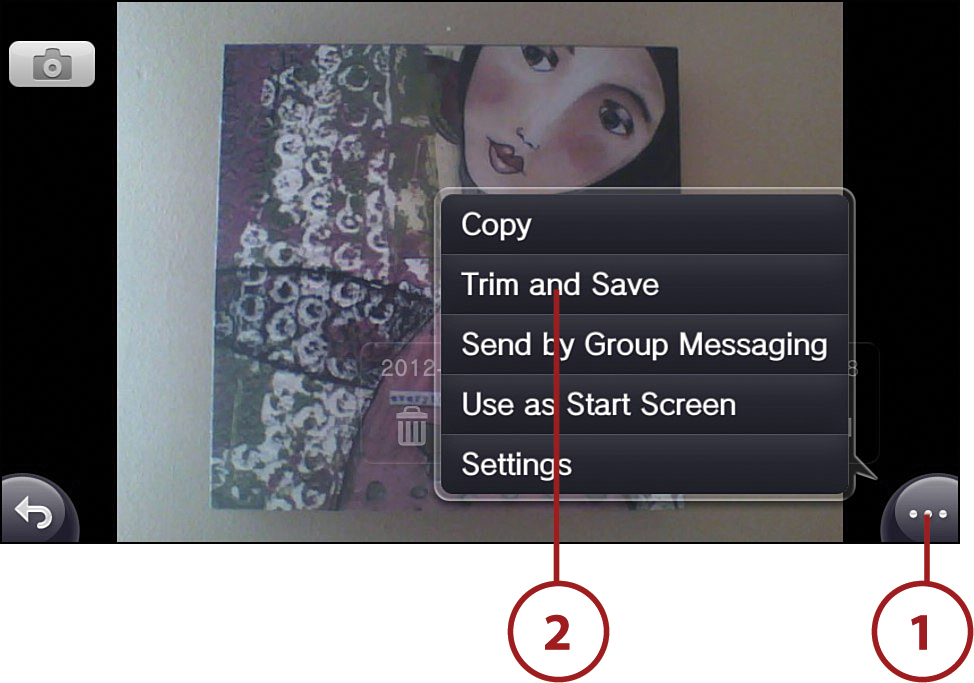
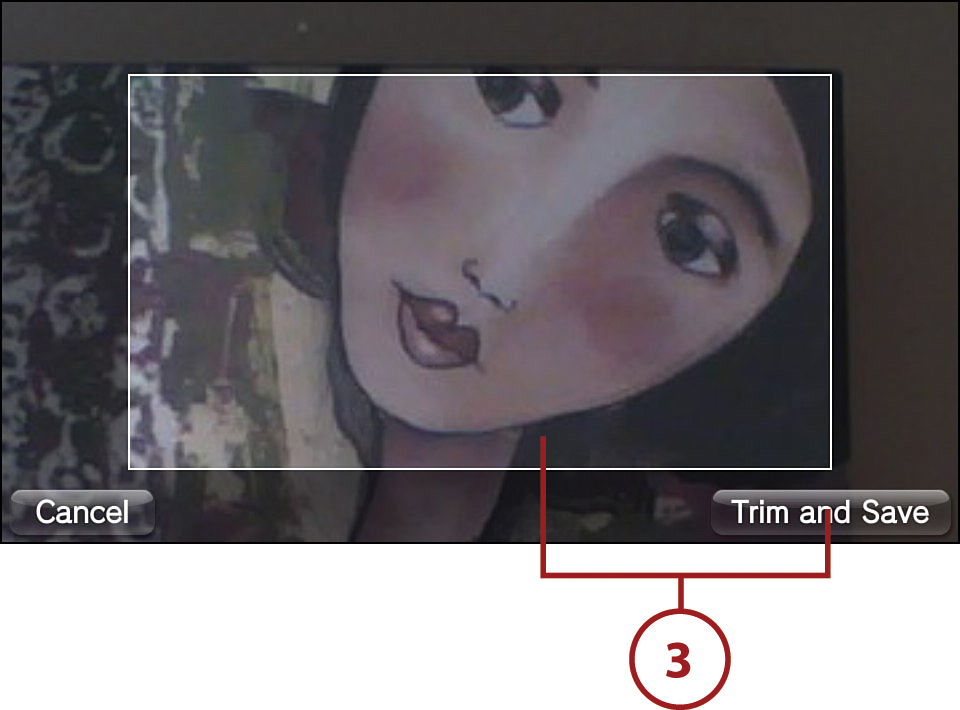
3. Pinch and drag the picture so that only the part you want displayed appears in the frame and then tap Trim and Save.
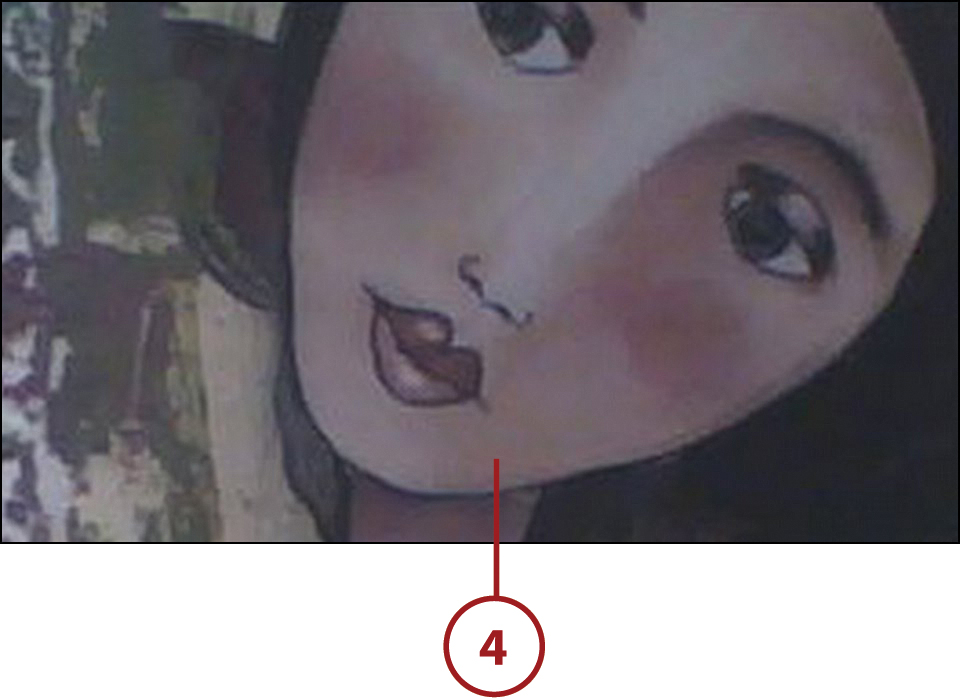
4. The cropped image is automatically saved with a different name, enabling you to access the original should you want to keep it.
Sharing Photos
If you want to share photos and other images on your Vita with friends and other individuals on the PlayStation Network, you can do so using the Group Messaging application. (If you want to share your photos with the world at large, you can use a third-party application such as Flickr, which is discussed in the next section of this chapter.) For more information on the Group Messaging application itself, turn to Chapter 6, “Exploring Social Apps.”
1. When viewing the photo you want to share, select the Options bubble.
2. Select Send by Group Messaging. This automatically opens the Group Messaging application.
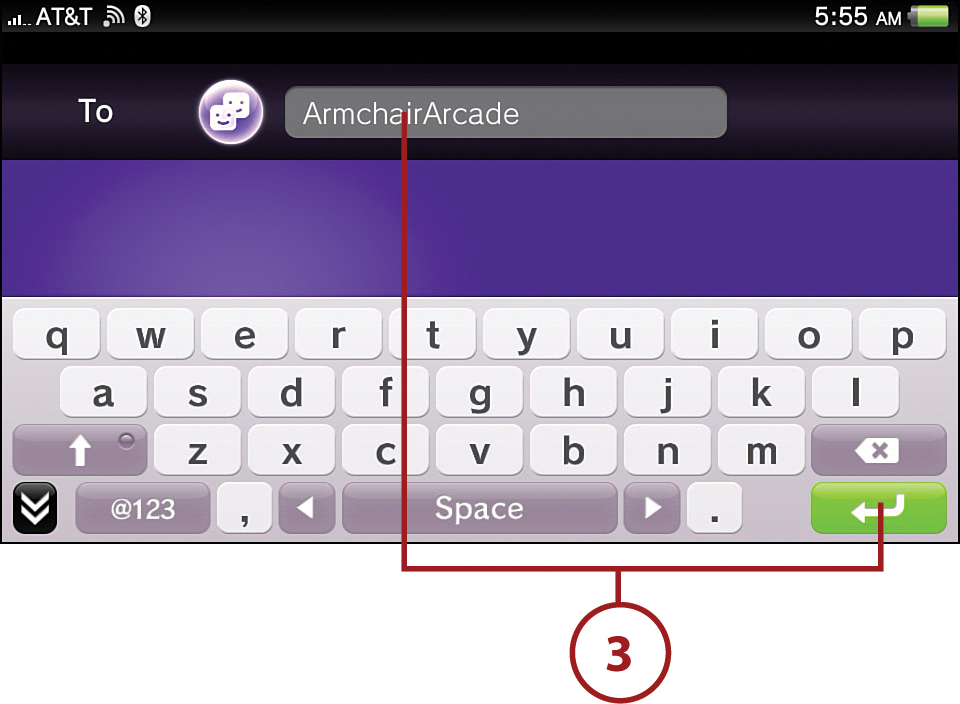
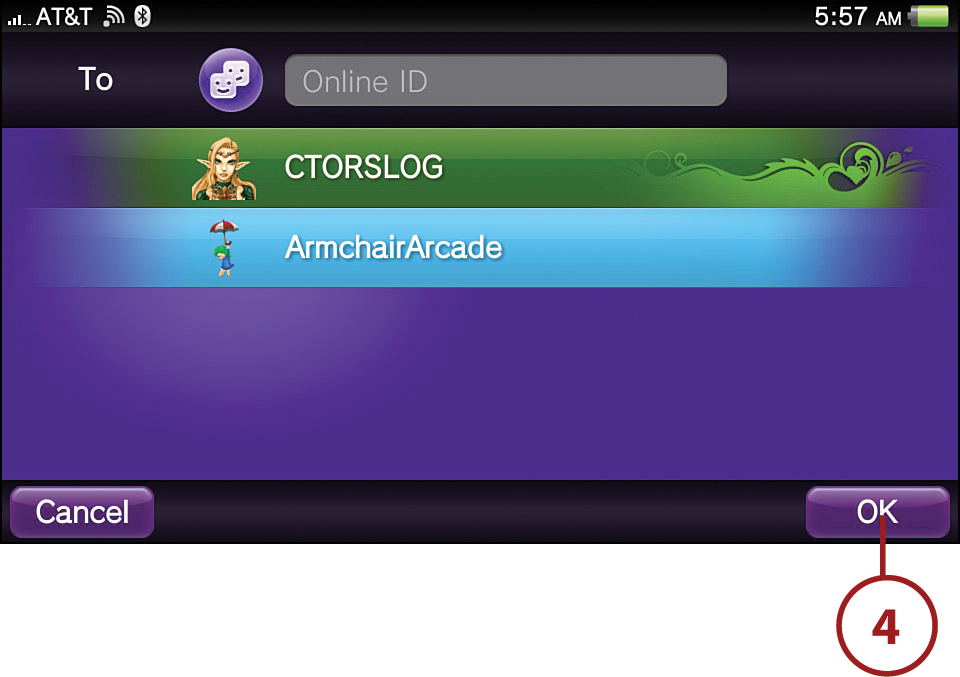
3. Enter the online ID of the person you want to send the image to using the onscreen keyboard and then tap Enter.
4. After the person’s online ID is confirmed, continue adding online IDs until you’ve added everyone to whom you want to send the image and then tap OK.
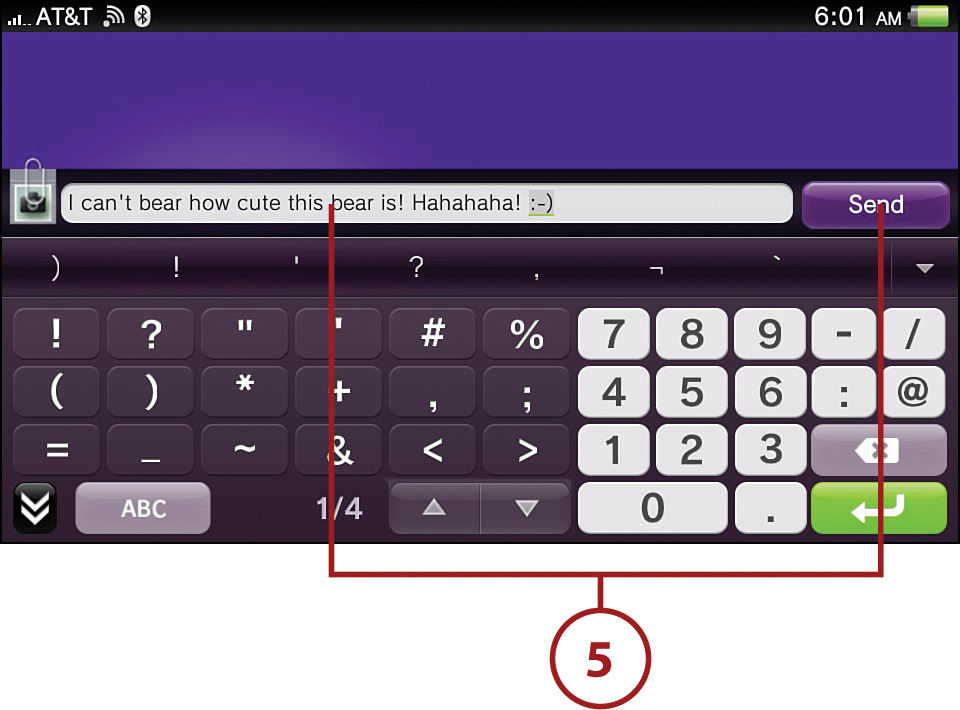
5. Tap the Create Message field and start typing your message. When you’re done, tap Send.
Using an Image as Your Start Screen
You can use any of the images on your Vita as your start screen. When viewing a photo, simply tap the Use as Start Screen option from the Options bubble. For more detailed information on this, see “Changing the Unlock Screen Wallpaper” in Chapter 2, “Understanding and Working with the Interface Screens.”
Getting to Know Flickr
Flickr is a popular online photo management and sharing application that has been reported to host more than 6 billion images. Approximately 50 million people use the service, and more than 80 million routinely visit the website. In addition to using Flickr to share personal photographs, it is also used by bloggers, social media aficionados, and web developers to host images embedded on their websites. You can access photos and videos on Flickr without registering for an account, but you must create an account if you want to upload content to Flickr. You can create an account for free, which enables you to upload two videos and 300 MB of photos to the service every calendar month, or you can pay for a Flickr Pro account, which enables unlimited uploads. More information on Flickr accounts is available at www.flickr.com/help/limits.
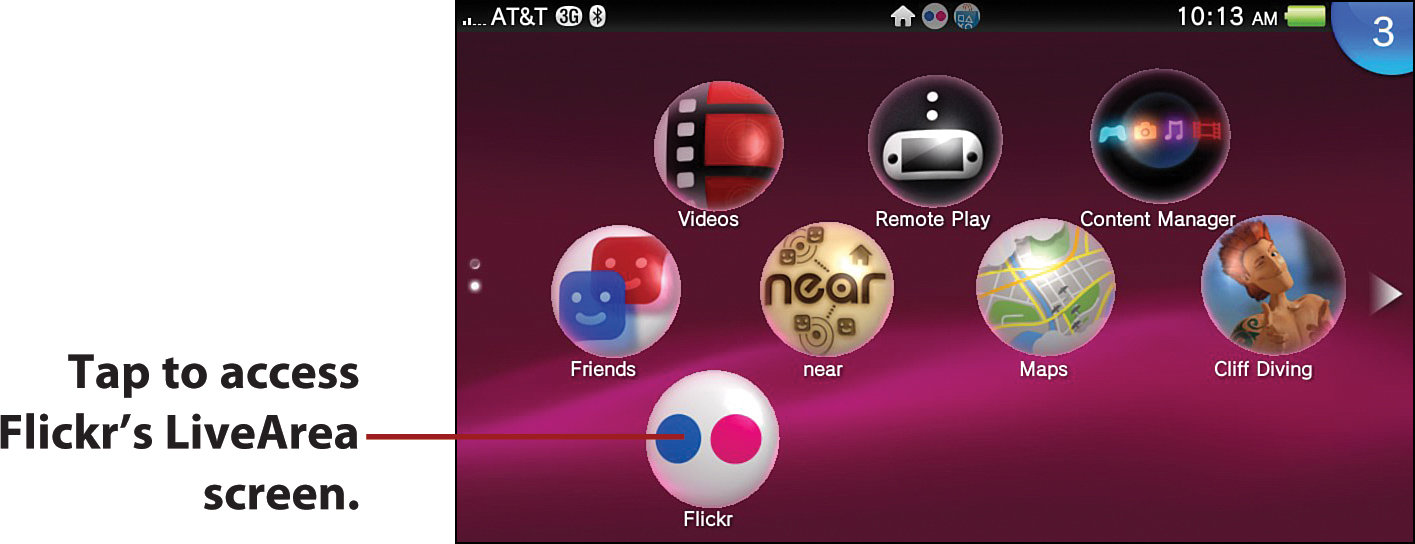
You can download the free Flickr app for Vita from the PlayStation Store. Turn to Chapter 5 for more information on downloading content from the PlayStation Store. After you download the Flickr app to your Vita, its icon appears on the Home screen, and you can use it to do the following:
• Browse photos with your Vita (can also be done without an account)
• Upload photos with your Vita
• Add information and tags to your photos
• Keep up with your Flickr contacts and comment on your favorite images
• Use your Vita’s cameras to take photos and directly post them to Flickr
Examining the Flickr LiveArea Screen
Just like any of the preinstalled apps on your Vita, the Flickr app has a LiveArea screen for you to pass through. The options on it are as follow:
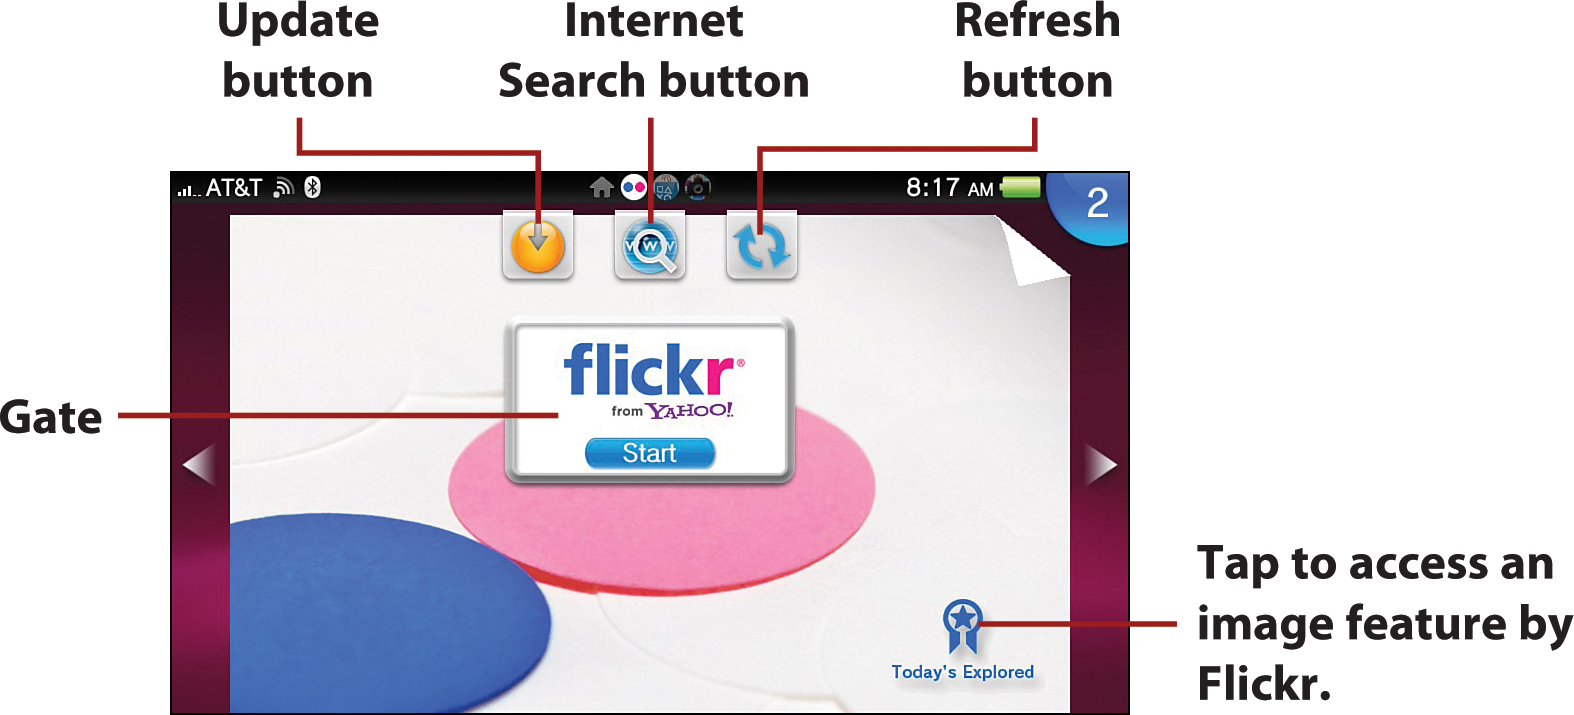
• Update button—Tap or select this button to update the application you are in. After you finish downloading the most recent version of the application, this icon disappears.
• Internet Search button—Tap or select this button to get Google search results on Flickr.
• Refresh button—Tap or select this button to refresh the LiveArea screen.
• Gate—Tap or select to enter Flickr.
• Today’s Explored—Tap or select this icon to randomly see one of the images highlighted under the Explore category of the Flickr interface screen.
Touring the Flickr Interface
The Flickr app for Vita has an intuitive interface, arranging functions in rows from top to bottom, and enabling you to scroll left and right to see thumbnails associated with a particular function. If you don’t have a Flickr account, the function options are more bare bones, including Search, Your Photos, History, Explore, and Settings. After you create an account or log into an existing account, additional options become available, including Recent Activity, Recent Uploads, Photos From, Favorites, Contacts, and Uploads.
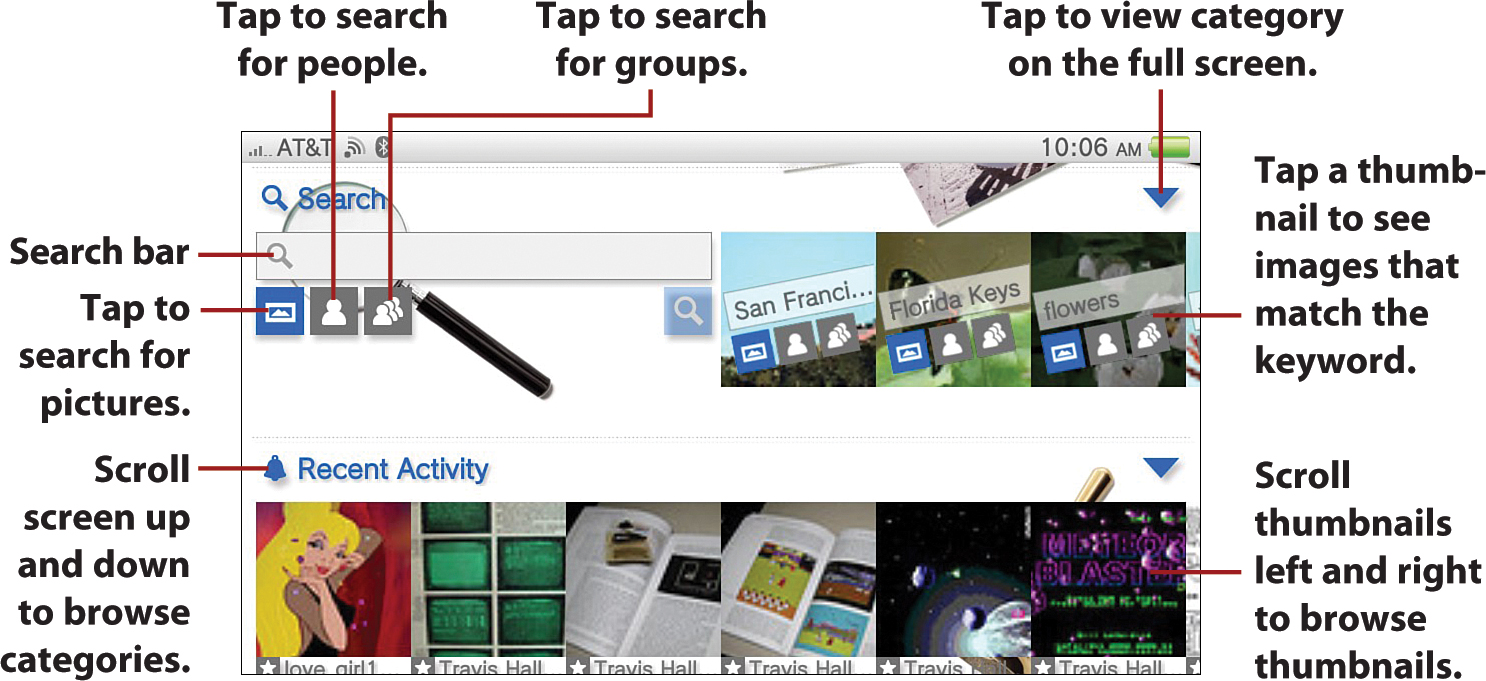
• Search bar—Tap to launch the virtual keyboard to conduct a search for photos, people, and groups on Flickr.
• Recent Activity—See recent Flickr activity, including photos you’ve made favorites and photos others have added to their favorites.
• Recent Uploads—Access photos you’ve recently uploaded to your Flickr account.
• Photos From—See images from your Flickr contacts.
• Favorites—Browse your favorite images.
• [Your] Photos—Access your photostream and photo sets. Selecting Photostream shows you all of your photos, whereas selecting Sets shows you all the folders you’ve placed your photos in, enabling you to find the particular set of photos that you want.
• History—See your recently browsed images.
• Contacts—Tap this option to access your contacts’ photostreams.
• Explore—This feature highlights random images on Flickr.
• Uploads—This enables you to take pictures with your Vita and upload them to Flickr, and to access your photo folders on Vita and upload those images.
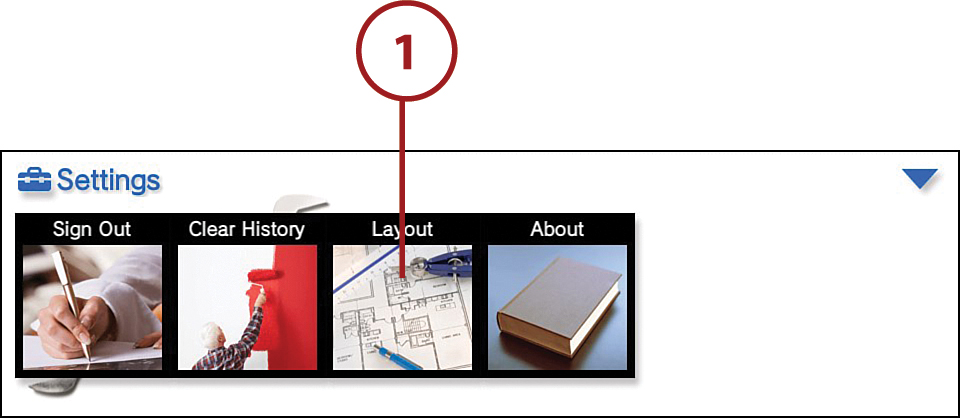
• Settings—This provides options to sign out of your account, clear your browsing history, adjust the order in which the aforementioned functions appear onscreen, and access the copyright statement (which also tells you which version of the app you have) for Flickr on Vita.
Browsing Photos with Flickr
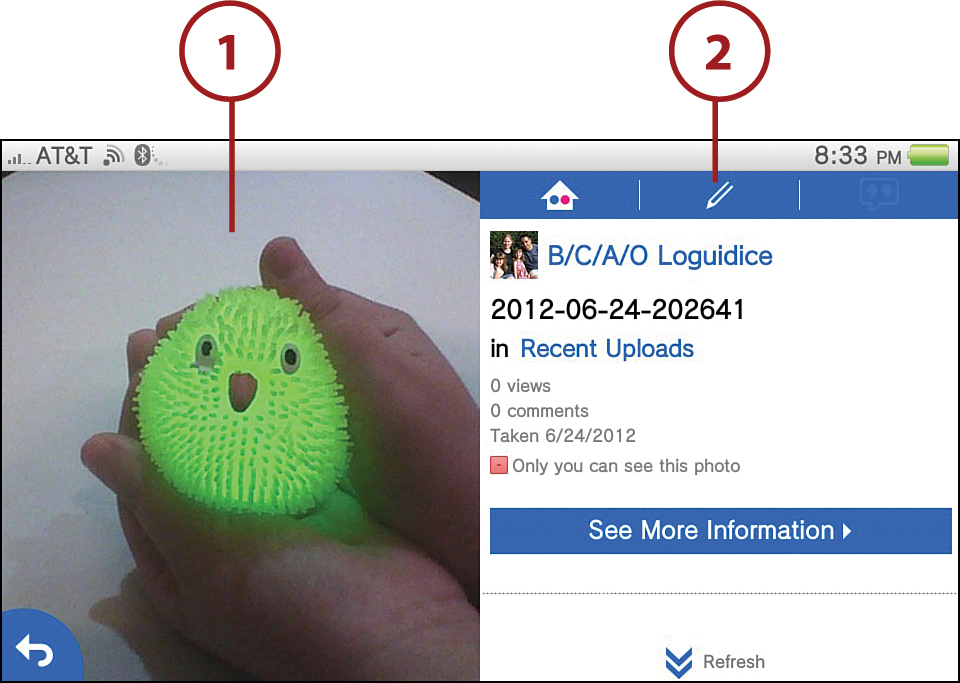
If you have a Flickr account, you can browse your own images and others’ photos in numerous ways, including tapping any of the thumbnails that you see under categories such as Recent Activity, Recent Uploads, and Favorites. Tapping a thumbnail opens an informational screen on that photo, and from this screen you can access the full-screen version of the photo, view information about the photo and on its poster, and comment on the photo. Both Flickr account holders and non-account holders can use the app to browse images by conducting a search.
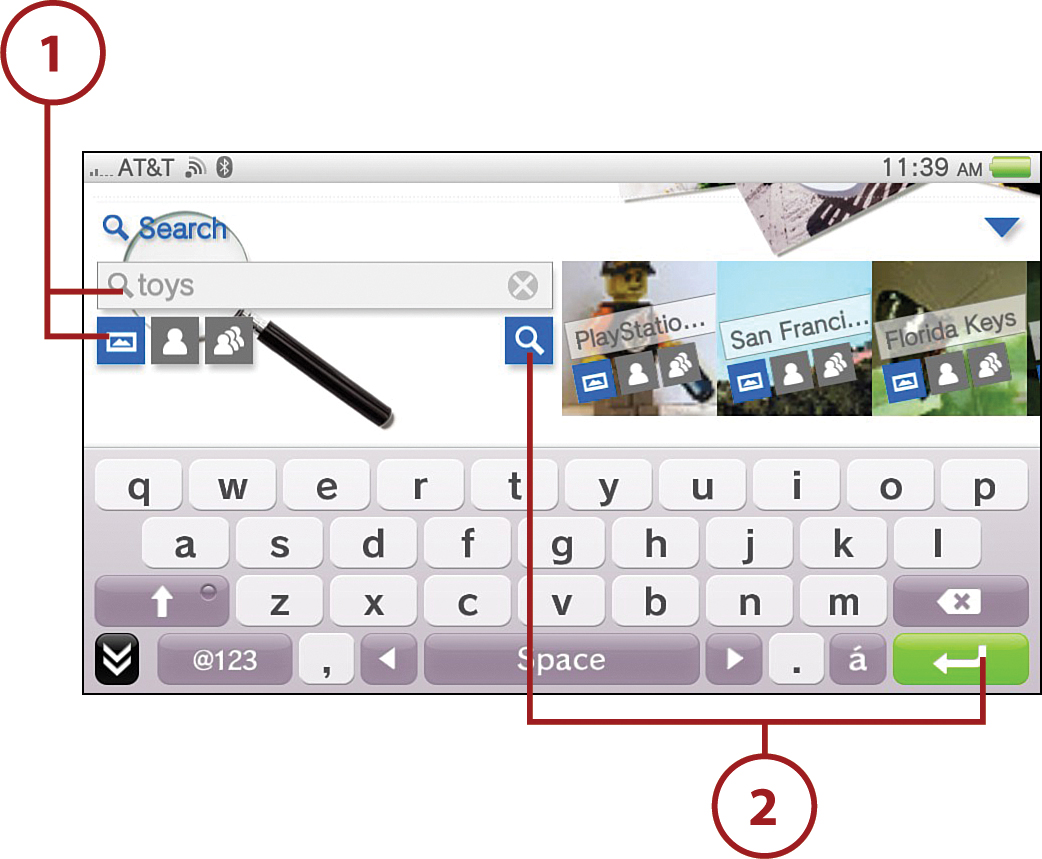
1. Make sure the photo icon is enabled (appears blue) and tap the Search bar to launch the virtual keyboard.
2. Type your search term and tap the Search icon or tap the green enter key on the bottom right of the virtual keyboard.
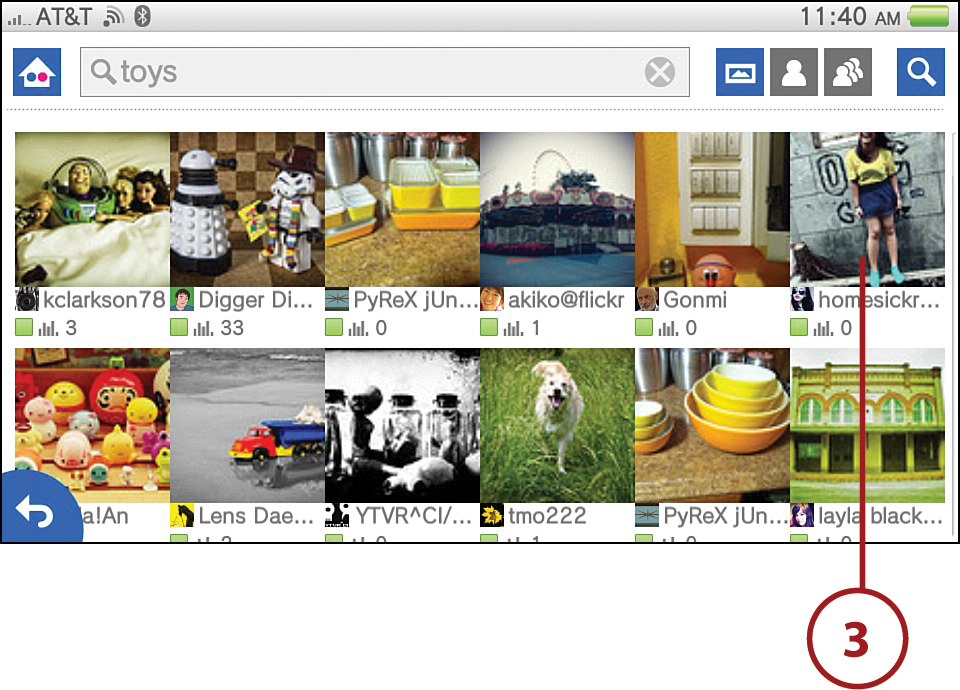
3. After a few seconds, thumbnails meeting your search criteria appear. Scroll down to see additional options and tap an image you want to view. An informational screen appears.
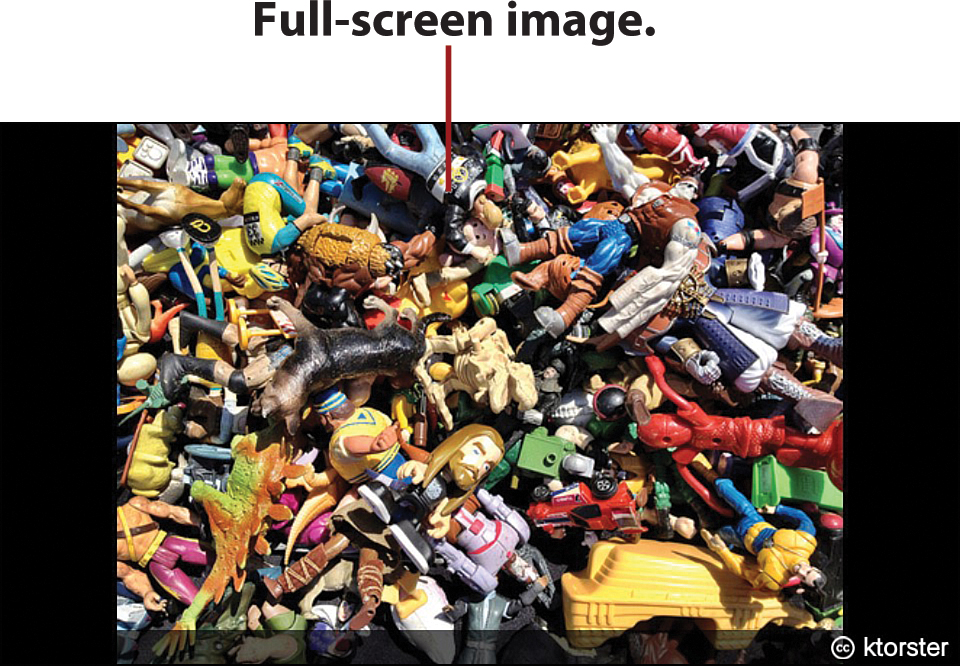
4. Tap the image to see it on the full screen.
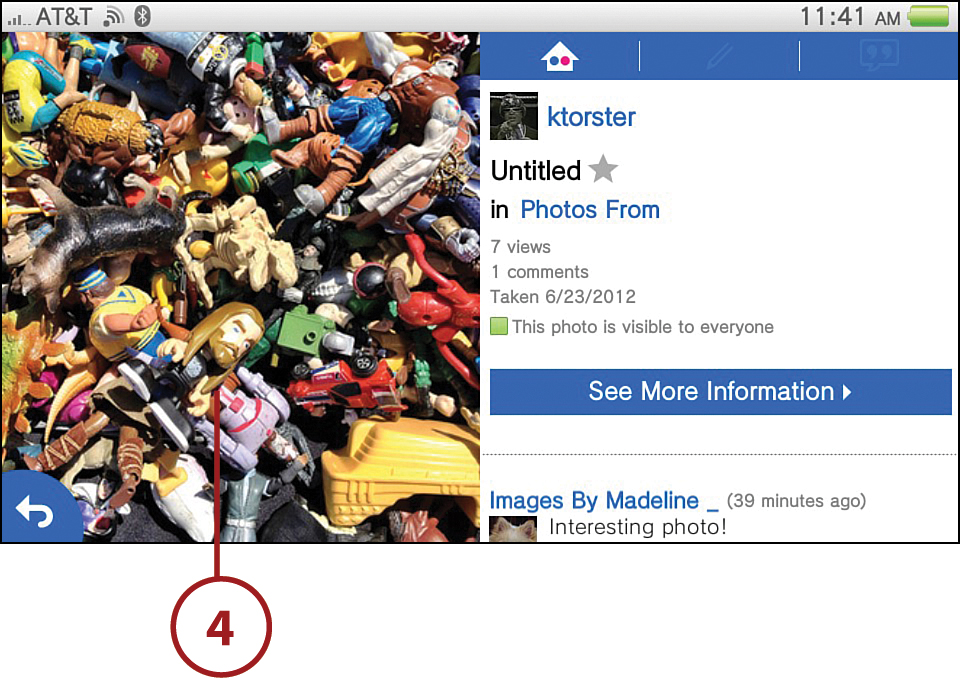
To get out of full screen, tap the back button. If you don’t see the back button, tap the image again to reveal it.
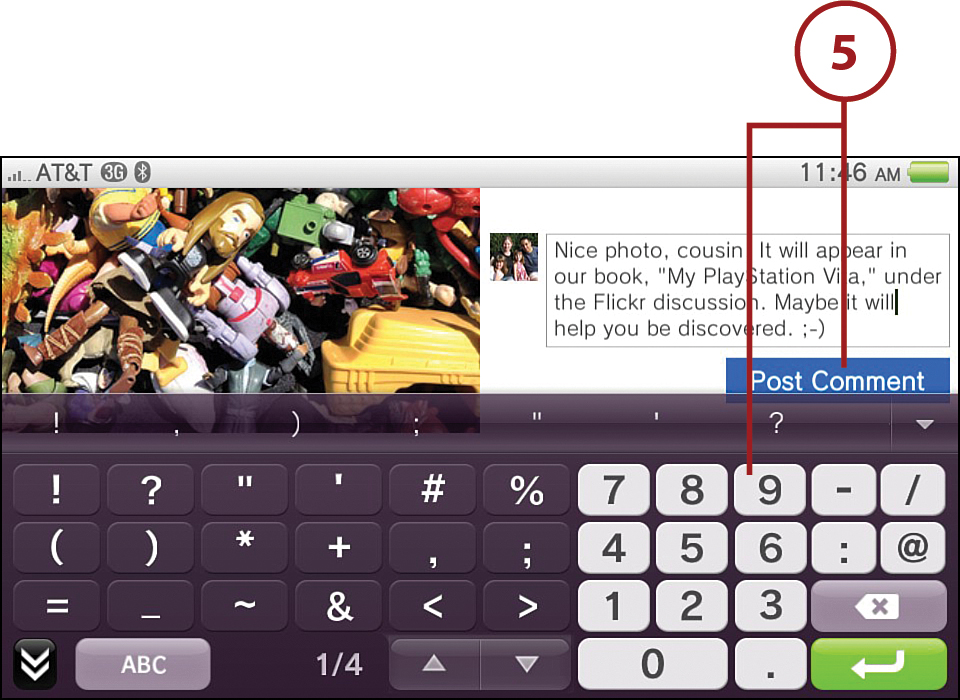
5. At the informational screen, scroll down to get to the bottom of the profile and tap the comment field. Use the keyboard to enter your comment and then tap Post Comment.
Uploading Images to Flickr
After you establish a Flickr account, you can start uploading your photos to Flickr. The Flickr app makes uploading images easy for you, whether you take the images via Flickr or use images already stored on your Vita.
Taking a Picture and Uploading It
To take a picture and upload it directly to Flickr, follow these steps:
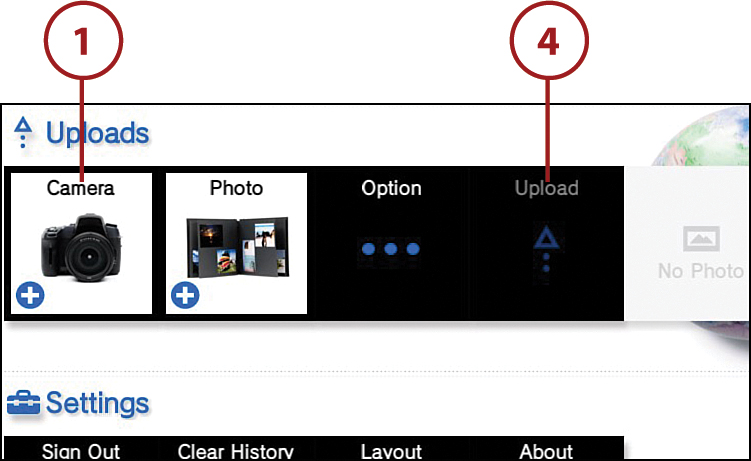
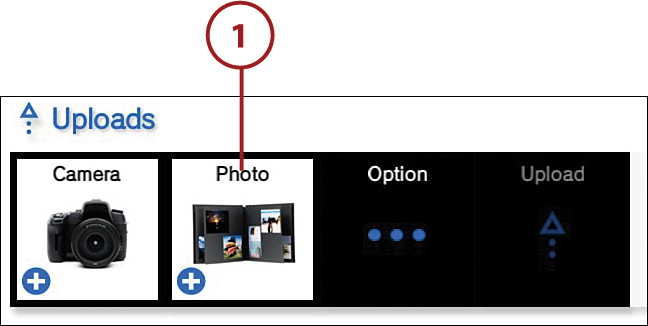
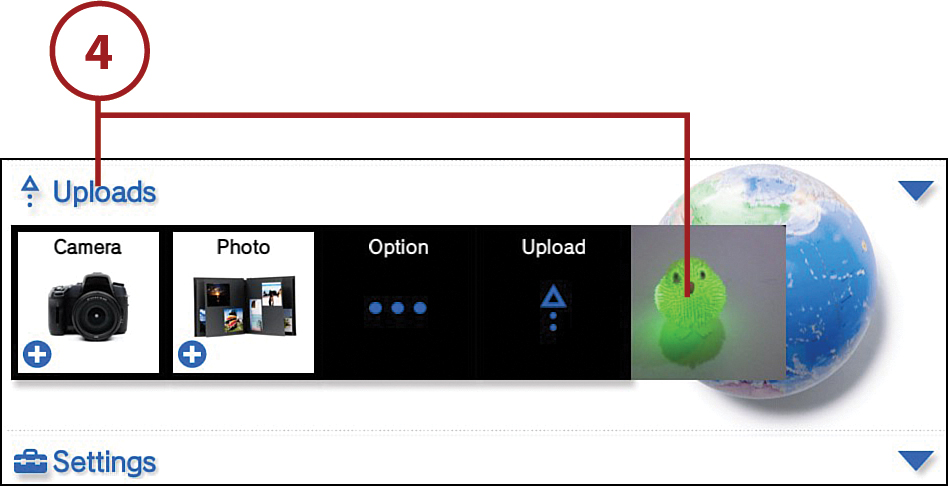
1. From the main Flickr page, scroll down to uploads and select Camera.
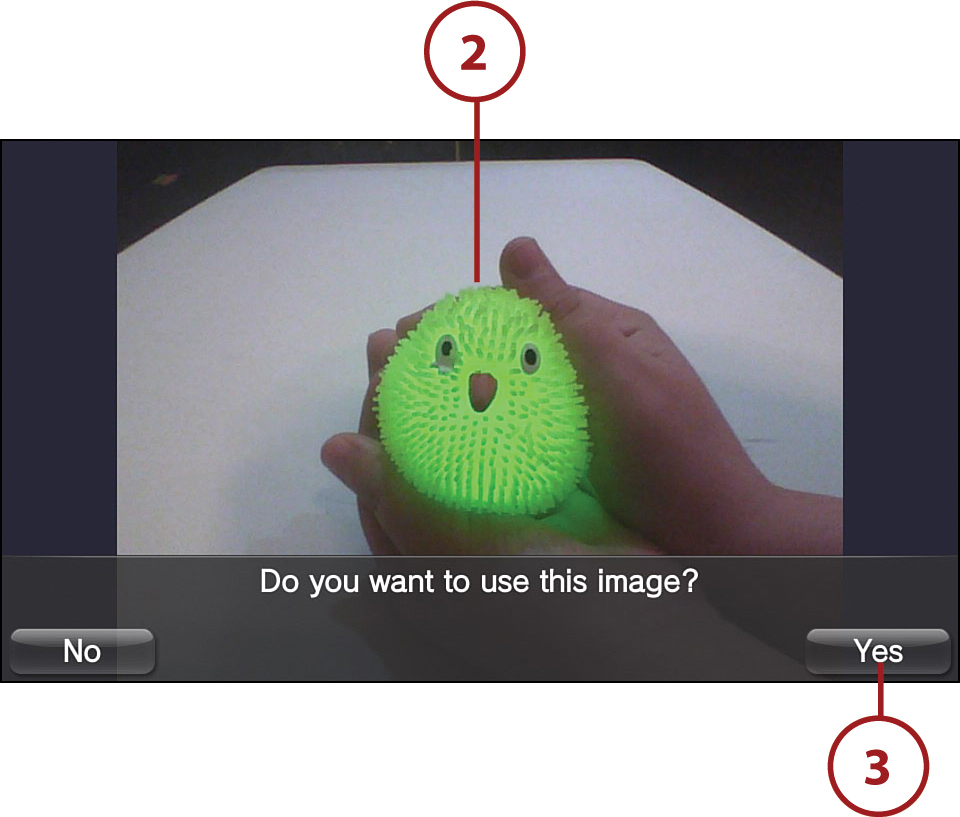
2. Take your Photo(s).
3. If you want to use the photo(s) you’ve taken, tap Yes.
4. Tap Upload from the Upload bar. You see your image(s) uploading.
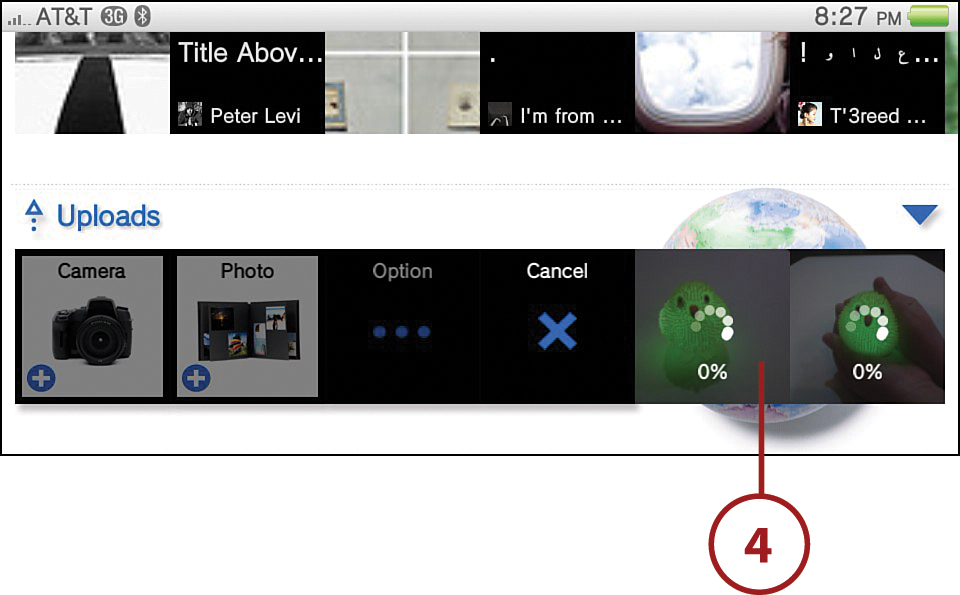
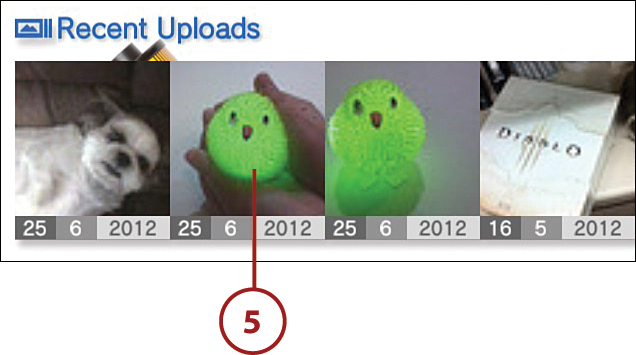
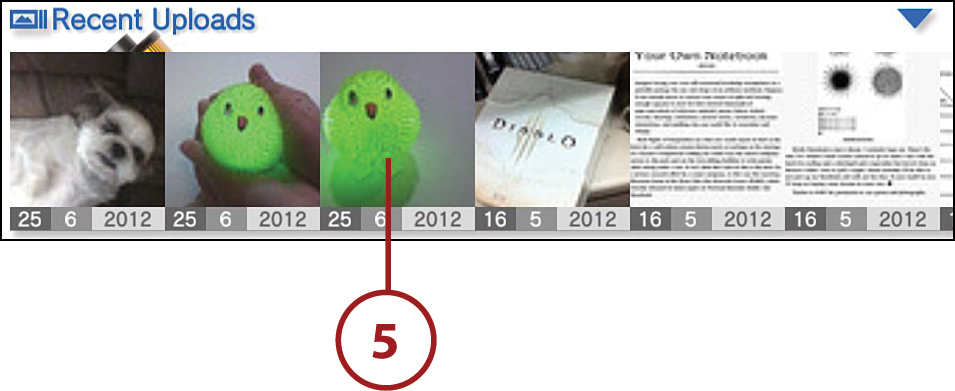
5. Your image(s) appear under Recent Uploads.
Uploading a Stored Photo
To upload a photo stored in the Photos app to Flickr, follow these steps:
1. From the main Flickr page, scroll down to Uploads and select Photo.
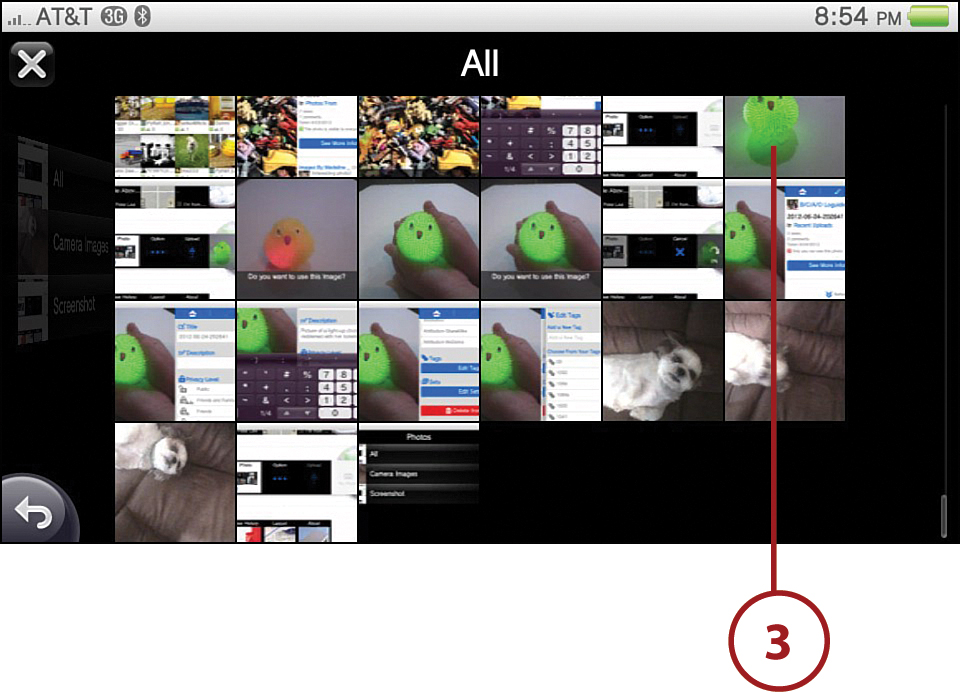
2. Select the folder that contains the image you want.

3. Tap the image you want.
4. The image now appears in the Uploads bar. Tap Upload.
5. You now see your image under Recent Uploads.
Adding Tags and Information to Your Photos
You can add tags to any photos you upload to Flickr. Tags are keywords that help people find your image when they conduct searches in Flickr. You can also add other information to your photos, including a title and description, and you can set parameters, such as who can view the image and how it may be licensed. If you want to add the photo to a particular photo set, you can do that as well.
1. Select the image you want to tag. If it is one you recently added to Flickr, it appears under Recent Uploads.
2. Tap the pencil icon from the informational screen.
3. Tap the Title and/or Description field and use the virtual keyboard to enter a title and/or text that describes your image.
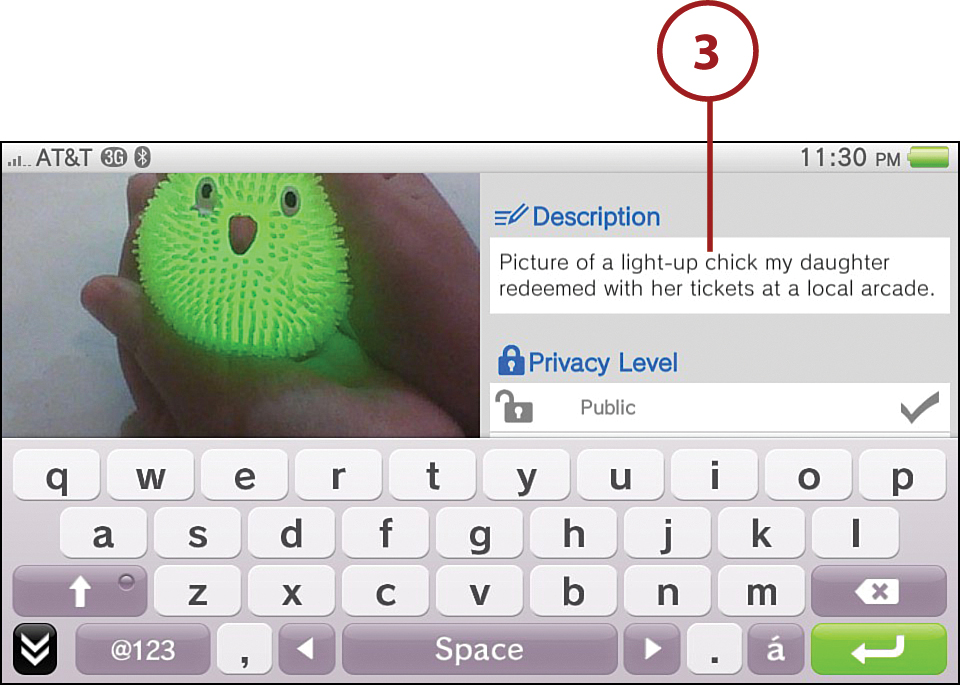
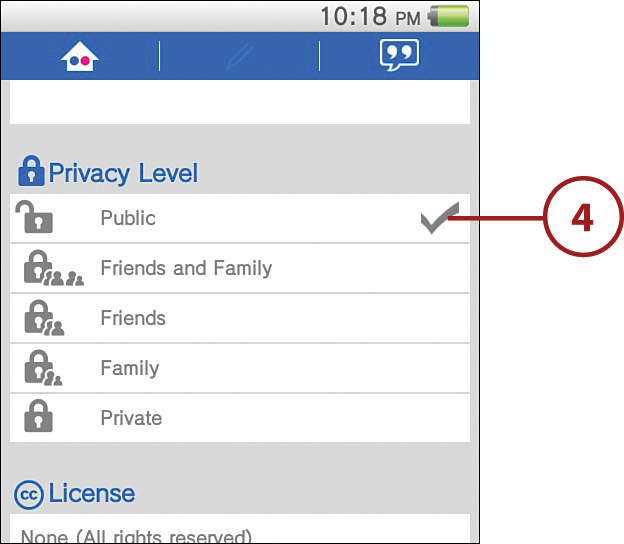
4. Set the Privacy Level by tapping the option you want.
5. Tap the License specification you feel comfortable with.
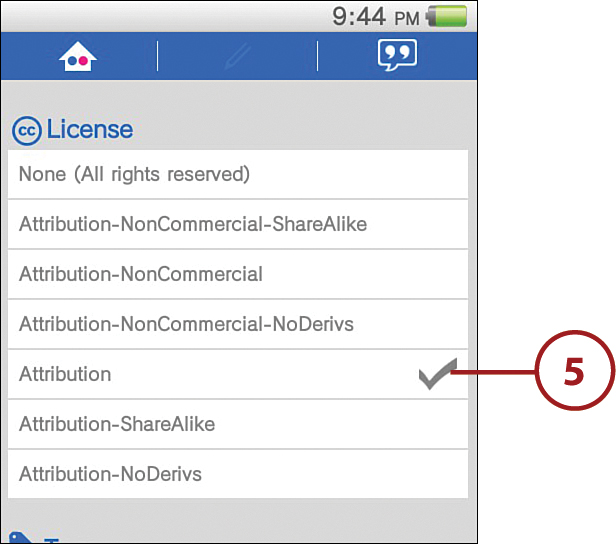
Deciphering License Information
Not sure which license specification to pick? Find out more about these options on the Flickr Website at http://www.flickr.com/help/photos/.
6. Select Edit Tags, tap the Add a New Tag field, enter a keyword using the virtual keyboard, and then tap Add. Keep adding tags until you are satisfied. If you have previously tagged photos via Flickr, a list of those tags appears as well and you can simply tap a relevant tag to add it to your photo.
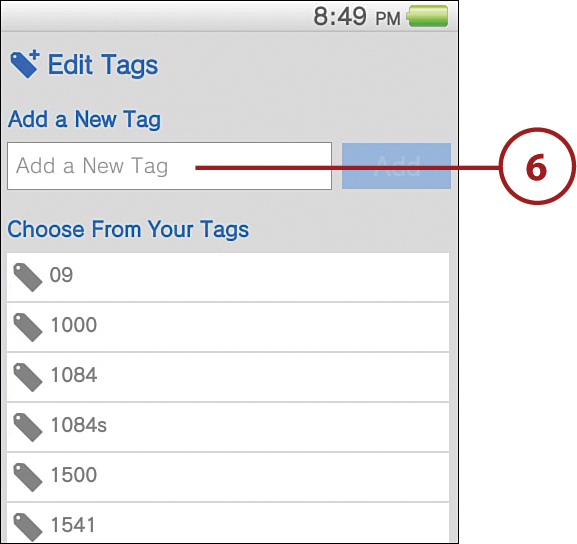
Tags are keywords that are applied to digital photos. They are intended to help people find the images they are looking for. You may tag a photo with a person’s name or simply use terms that help define the photo’s subject.
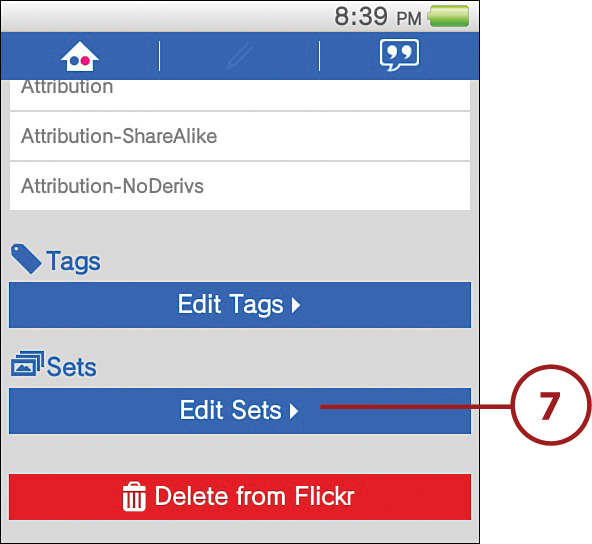
7. Tap Edit Sets if you want to add the photo to a particular set of images.
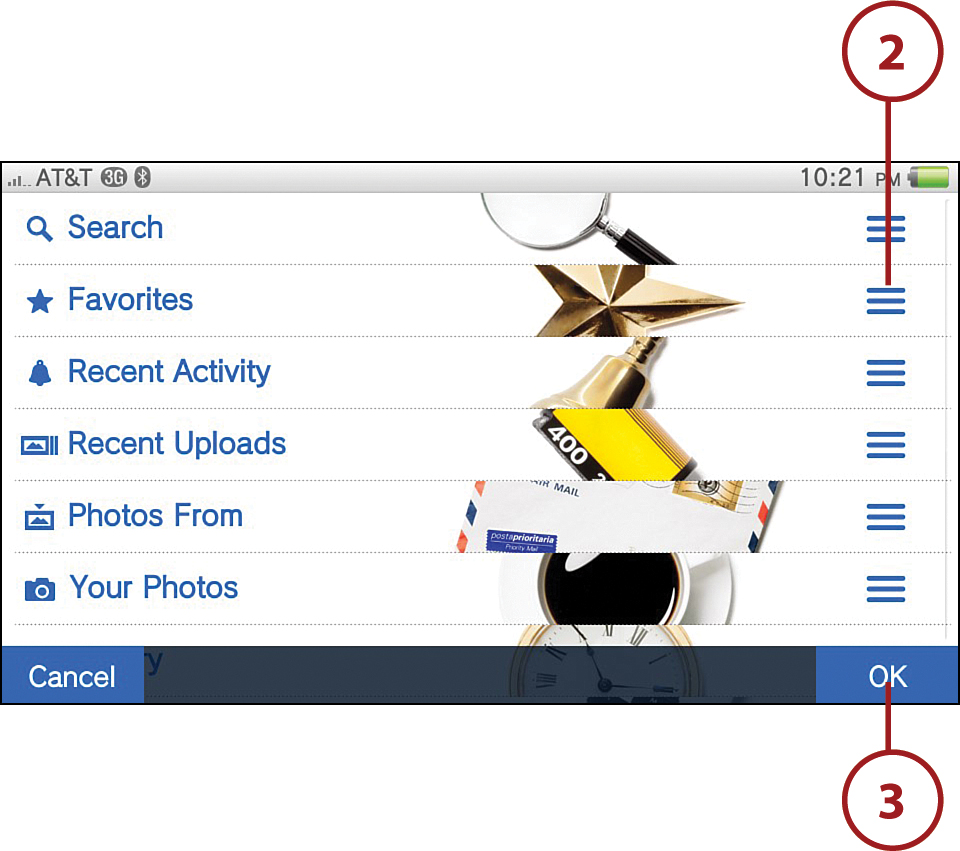
Tweaking Flickr’s Layout on Vita
If you don’t like the order in which items appear in the Flickr app, you can move things around until they suit your preferences.
1. Scroll to Settings and select Layout.
2. Place your finger on the bar icon associated with the category you want to move and then scroll up or down to drop it where you want it.
3. Repeat step 2 until you have organized all categories to your liking, and then tap OK. The category falls into its new position on the main interface screen.