Chapter 6. Email and Web Browsing
Email is the driving force that first motivated many people to invite computers and the Internet into their homes. The millions of electronic epistles that fly through the air between computers, smartphones, and handheld organizers have become an indispensable part of daily personal and professional life. No wonder the U.S. Postal Service has been losing business the past 15 years.
You may be surprised to know that the first email message was sent way back in 1971. Twenty years later, the World Wide Web—the interconnected system of electronic pages containing everything from academic papers on Johannes Gutenberg to video clips of dogs riding skateboards—became another reason to go out and buy a computer.
It’s small wonder, then, that the netbook’s ability to keep a near-constant connection to email and the Web makes them the hottest-selling computers on the market today. This chapter shows you how to get your netbook’s email and web browser fired up and ready to go so you, too, won’t miss a thing.
Setting Up an Email Program
You have two common ways to get email on your netbook: through a web-based mail (webmail) site like Yahoo, or from your Internet service provider and an email program like Outlook Express. Both methods have their pros and cons. But you may not have to choose one way to get email. You can, for example, download your Gmail email into an email program most of the time, so you can organize it better, but also check it on the Gmail website when you’re on the road.
Here’s a quick look at each basic mail-gathering method.
Using a Webmail Account
Most webmail systems work like this: You pick the service you want to use (Hotmail, Gmail, Yahoo, and so on) and sign up for an account. As part of this process, you select an email address and password. Whenever you want to engage in a little postal activity, you log into your account on your chosen webmail site and do all of your mailing activities through your web browser window. (Using a Web Browser explains how web browsers work.)
Webmail is versatile, and it’s always there for you to check and send messages on Internet-connected devices like desktop computers, netbooks, mobile phones—even on certain types of hotel television sets. Webmail also keeps track of your email address book, so you’ve got your contact info right at hand. And, if you want to save any of your mail on your home computer, you can make copies from your web-based Inbox or even download it to a regular email program.
Webmail provides a stable, consistent address on the Internet. If you move to a new town and change ISPs, you have to get a new email address, but your webmail address stays the same no matter how you get online.
The downside to webmail is that many free services are advertiser-supported, so you and your correspondents get to look at little advertisements stuck at the bottom or along the sides of the messages. Another potential bummer: If the webmail site goes down, you can’t get your mail. Mail delivery from your ISP (Setting Up a Wired Network) can be hindered by a server crash as well, but there’s nothing like a Gmail outage to get a whole bunch of people going through email withdrawal at the same time. Google, however, has come up with a way to read Gmail even when you’re offline (Webmail Providers).
Some services also limit the number of messages you have in your account (well, they do own the servers) or the size of the file attachments you’re allowed to send. And if you don’t log in for a few months, you may find your account (and any mail in it) deleted because the service thought you wandered off for good.
And speaking of servers, some people felt uneasy about having all their personal mail sitting around on someone else’s webmail machines. The fact is, all email, not just webmail, bounces around along a series of different computers as it travels along the Internet. Unless you encrypt your messages with a program like PGP, a number of people could potentially read your mail.
Note
When it comes to email privacy, a good rule of thumb here is to never put anything into a plain email message that you wouldn’t put on the back of a postcard. So avoid sending embarrassing personal revelations and valuable data like your Social Security digits, credit card numbers, or bank account info.
Webmail Providers
There are several webmail providers out there, and most of them give you at least 5 GB of server space to store your mailbox. Five gigabytes is plenty for most people—room enough to store at least half a million email messages—although that will fill up faster if you regularly send off megabytes of photo or video attachments and never delete anything. Here’s a quick look at four of the big webmail services.
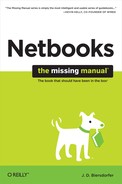
Gmail. Since it debuted in 2004, Google’s take on webmail has been consistently innovative, expansive, and downright fun. Gmail account holders get at least 5 GB of mail storage space storage, easy search, a killer filter to weed out junk mail, text-formatting tools, a spell checker, sortable labels, and clever add-ons from Gmail Labs like a program called Mail Goggles that stops you from sending email when you may have had a bit too much to drink. Google doesn’t charge extra if you download the mail from your account with an email program. You just have to go to your Gmail settings, click the “Forwarding and POP/IMAP” tab, and tell Gmail to enable POP or IMAP downloads (Setting Up an ISP Mail Account).
If you prefer to leave your Gmail on the Web but want to read it even when you’re not connected to the Internet, click the Offline link at the top of your Inbox page and follow the steps to install Google Gears. Google Gears (Google Docs Offline) snags copies of messages and lets you work even without the Web. And finally, Gmail also looks really good on a mobile phone. (http://gmail.google.com)
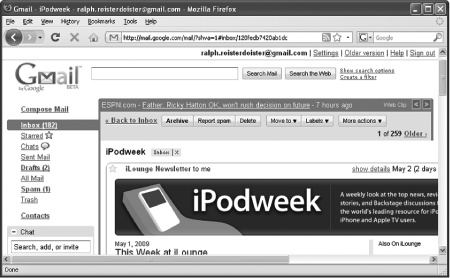
Yahoo Mail. With the recent promise of unlimited mail storage, Yahoo attempts to separate itself from the rest of the herd. For example, it offers junk mail and virus blocking, it can play photo slideshows right in an email message, and it can serve up your local news headlines. If you find Yahoo Mail’s ads irritating, you can pay $20 a year for a Mail Plus account, which gives you ad-free messages, a better spam filter, and the ability to download Yahoo messages to an email program like Thunderbird. Paying for a Mail Plus account also ensures that Yahoo won’t dump all the messages in your account if you don’t log in for four months, which happens on free accounts. (http://mail.yahoo.com)
Windows Live Hotmail. Microsoft currently has two different flavors of webmail: regular free Windows Live Hotmail and $20-a-year Windows Live Hotmail Plus. The free account gives you a 5-gigabyte mailbox, junk mail and phish filters, virus-scanning, plus fancy backgrounds, fonts, and layout styles for your messages. Windows Live Hotmail Plus gets you a 10-gigabyte mailbox, ad-free messages, and an account that won’t disappear into the mists if you don’t check it for a month or so. (www.hotmail.com)
AOL. Once the biggest members-only dial-up ISP in the United States, AOL has pretty much dropped its proprietary software and monthly fees. Anyone can now sign up for a free, web-based AOL email account on the company’s site. Spam and virus protection are included with every account, and there’s always a link to AOL’s news and entertainment pages. (www.aol.com)
Tip
Just about every major webmail provider now offers additional services like instant-messaging and online calendar programs you can get to and use right from your main email window. These sort of things really work well together. For example, if your best friend sends you an email message about having dinner, you can send him an instant message (if you see he’s online) to confirm the date and then update your schedule right in your web calendar so you don’t forget. Want to know more abut instant messages and web calendars? Visit pages Setting Up Instant Message Software and Online Calendars, respectively.
Using ISP Email
When you signed up for your Internet service provider (Setting Up a Wired Network) to get online, odds are the company gave you at least one email address. Unless the company has its own webmail service, you need to collect the mail sent to that address in a dedicated email program on your computer. These types of programs download your mail, display it for you, and let you send you own messages. Email programs, sometimes referred to as email clients, live on your computer and generally keep all your messages (or at least the message header information) on your hard drive, not on some unknown server.
Once you choose a program, you have to set up the software to work with your ISP’s mail server. You simply start your email program, select the New Account option, and then type all the information you got from your ISP when you signed up (like your user name, password, and the names of the mail servers) so your email program knows where to look for your mail.
Although they take longer to set up, email programs typically let you be much more creative in composing your messages. Compared to some online webmail sites, email programs usually make it much easier to do things like change the type style and color or drag and drop photos into your messages. (Services like Gmail, however, have caught up considerably with standalone email programs in the word processing department.)
But in some cases, you don’t even have to make the choice. If your webmail service allows it, you can download the messages from your web-based account with the same email client you use to snag your ISP mail.
Popular (and free) email programs
Email is such a standard now that just about every computer operating system includes some sort of email program. Here’s a quick look at the most popular ones.
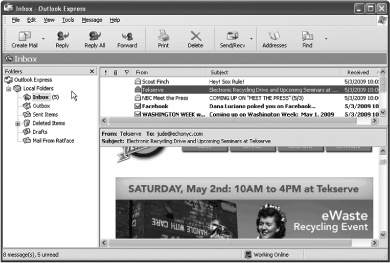
Outlook Express. You don’t have to go any further than your Windows XP Start menu to find Outlook Express right there waiting for you. It’s not the slickest email program ever invented, but it does all the basics: sending, receiving, sorting, and storing messages and file attachments. As old as it is, millions of people still use Outlook Express so you can find plenty of add-ons and other programs that work with it. For example, iTunes 8 even lets you export your OE contacts to your iPod.
Note
Outlook Express is a big target for virus writers and other evildoers who want to fool it into opening messages tainted with malicious code. Still, it’s free and adding an antivirus program (Keeping Viruses at Bay) to your Windows XP netbook is a good idea anyway.

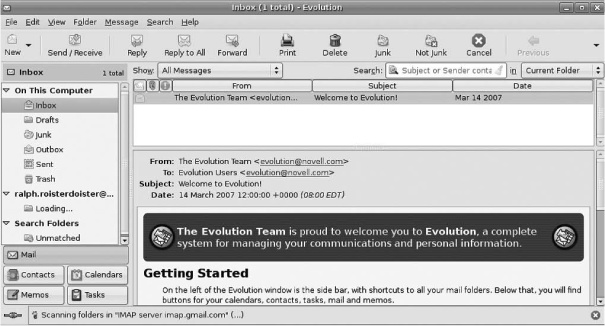
—Evolution. Included with Ubuntu Linux, Evolution does much more than send and receive email. It also serves as a calendar, organizer, and electronic address book. Like Linux itself, Evolution is an open source program, so all of its programming code is right out there on the Web where anyone can see it, improve it, or fix it. Linux systems aren’t as vulnerable to the same viruses and worms that plague Windows machines, but junk mail is universal, so Evolution offers a serious spam filter to weed out the garbage.
— Thunderbird. If you don’t like the mail program that came with your netbook, you can pick out one of your own. Mozilla’s Thunderbird is available for both Windows XP and Ubuntu Linux and makes a nice, open-source alternative. Another good thing to come out of Thunderbird’s open-sourcefulness are the extensions (add-on programs) you can get to make it even more useful. You can find extensions for enhancing your address book, weeding out duplicate entries, or even smacking down more spam than what Thunderbird’s built-in filter already does. You can get Thunderbird extensions by going to Tools→Extensions→Get More Extensions when you have the program open in front of you. Windows people can download a copy at www.mozilla.com/thunderbird, while Linux netbookers can find it in the Ubuntu repository (Adding and Removing Programs).
Setting Up an ISP Mail Account
The word configure is flung around by computer geeks quite a bit, but it’s nothing to be afraid of. It just means “to set up.” If you can put together a tricycle or follow a recipe to make brownies, you can configure an email program. During the process, you have to supply a few basic pieces of information so that the mail program knows where to look for your mail and how to handle the messages you send to other people.
Since Outlook Express comes with Windows XP, it’s a good one to use as an example. To get rolling, go to your Windows Start menu. If Outlook Express is not listed up top there, choose Start→All Programs→Outlook Express.
Ubuntu Linux machines come with the Evolution mail software, which is very similar to set up: Choose Applications→Internet→Evolution. You’re asked to fill out the same basic pieces of information about your email account as with Outlook Express or any other email program, so have your user name, password, and account settings information from your ISP close by. And Mozilla Thunderbird for Windows and Linux uses similar setup steps as well.
Tip
Microsoft’s successor to Outlook Express is called Windows Live Mail, and it works on Windows XP as well as the newer Windows Vista. Windows Live Mail has an updated look and lets you check accounts from several providers—including Yahoo, Gmail, and Hotmail all in one place. If you want to try it out, you can download it for free at http://download.live.com/wlmail.
If you’ve never opened Outlook Express before, the Internet Connection Wizard comes roaring in to help. After you answer each of the questions the wizard asks, click the Next button.
Screen 1: Your Name.
Type your real name, or whatever you want to appear in the message’s From: field. Many email programs and address books grab your name from Outlook Express and file it away for your recipients to keep as your contact information, so don’t call yourself Zaphod Beeblebrox unless you want to be filed in all your friends’ contact files that way.
Screen 2: Internet E-mail Address.
When you signed up, your ISP either let you pick your own user name or assigned you a not-too-clever variation on your real name. Your email address is your user name, followed by the @ sign, and then the ISP’s domain name, so it’ll look something like [email protected] or [email protected].
Screen 3: E-Mail Server Names.
Now things get a wee bit trickier. You have to tell Outlook Express what kind of mail server your ISP uses to receive (incoming) and to send (outgoing) mail and the addresses of those servers. Your choices are usually POP (Post Office Protocol, where your mail downloads from the server to your computer once) or IMAP (Internet Message Access Protocol, where your mail stays on the server). This information is more technical than what you’ve typed so far.
— Type. If your ISP uses a POP3 sever like most of them do, you don’t have to touch the “My incoming mail server” menu. If your ISP uses IMAP, though, select “IMAP” on the drop-down menu.
— Server name. Your incoming mail server is probably named something like mail.comcast.net or imap.aol.com and your outgoing mail server is likely named something like smtp.comcast.net. Since some ISPs try to organize things further with incoming mail servers called pop.central.cox.net or [email protected], make sure you know the exact addresses or you won’t be able to send and receive email.
If you can’t find your paperwork from the ISP, check its website and look for a Technical Support or Frequently Asked Questions area where you might find pages on “Mail setup,” “POP Access,” or “Server names.”
Screen 4: Internet Mail Logon.
Type your email account name and password.
— Account Name. In this box, only enter your account name—the part of your email address before the @ sign. So if your email address is [email protected], just enter starbuck.
— Password. Your password is the one you chose—or that the ISP assigned you—when you signed up for an Internet account. Despite the fact that you’re typing your password here, don’t turn on the box next to “Log on using Secure Password Authentication (SPA)” unless the account setup instructions from your ISP specifically tell you to do so.
When you’re done, the wizard deposits you on the Outlook Express mail screen, which shows your mailboxes and folders. If you want to test it out, click Create to make a new message, address it to your email address, type Hello World, and click Send/Receive to fire it off. Click the same button again to see if your message appears in your new mailbox. If it doesn’t, go back and recheck your settings in Tools→Accounts→Mail→Properties and make sure you correctly typed in all server addresses from the ISP.
Adding SSL Security
Outlook Express, Evolution, and Thunderbird all give you a chance during setup to encrypt your incoming and outgoing messages to add an extra layer of security. You do so by turning on SSL encryption (short for Secure Sockets Layer) in the Security area of your mail account settings. In most programs, you just need to turn on a checkbox telling the mail program to use the same user name and password settings for outgoing mail as incoming mail.
You can turn on SSL during the account setup process—or after you’ve filled in your settings and made sure your email account is working. To get back into your mail settings for any reason after you’ve initially configured the account, choose Tools→Accounts→Mail→Properties in Outlook Express or Edit→Preferences→Mail Accounts→Edit in Evolution.
In the Outgoing Mail Server settings in Outlook Express, for example, you just need to turn on the “My server requires authentication” checkbox. Click the Settings button and select “Use the same settings as my incoming mail server.”
In Evolution’s Receiving Email and Sending Email settings, select SSL Encryption from the Use Secure Connection pop-up menu and choose Password for the Authentication Type. (Turn on the Remember Password checkbox unless you really like typing it all the time.)
In Thunderbird for Windows, you can find the SSL settings at Tools→Account Settings→Server Settings; for Linux, choose Edit→Account→Settings→Server Settings. Under Security Settings, select SSL and turn on the “Use secure authentication” checkbox.
Depending on your ISP, you may have to specify port numbers to use with SSL authentication. Check with your ISP’s technical support or online account setup guide for the information. Most of the time, IMAP connections use port 993, while POP accounts use port 995.
Email Basics
No matter how you get your email—on the Web or downloaded to your netbook’s mail program, the concept behind email remains the same. You read it, reply to it, send new messages, organize it, and so on. The next few pages offer a quick Email 101 refresher course.
Reading Email
Each time your mail program collects your mail, it deposits the fresh batch of new messages into your mail program’s Inbox. Until you delete or move the message, it stays in your Inbox. To help you tell the old from the new, most mail programs highlight the new mail’s subject lines with bold text or place dots next to the unread messages.
Most mail programs offer you a couple ways to view a message: inside a preview pane or open in its very own window.
Outlook Express, Evolution, Thunderbird, and other mail programs divide their main windows into multiple sections called panes, and the preview pane is the horizontal section below the Inbox list. When you click a message’s subject line in the Inbox, the body of the message appears in the preview pane. If you want more room to see the message preview and less of your Inbox, drag the divider bar up or down.
When you open a message in its own window, it’s easier to see all the header information, which is the top part of the message with all the To:, From:, Subject:, and other address stuff. The part of the message with the text is typically called the body.
If you have a stack of mail to plow through, you can blast through them in preview mode by tapping the up and down arrows on the keyboard to display each one’s contents in the preview pane.
Note
Some security experts warn against using the preview pane in Outlook Express because it can also accidentally open a virus or worm sent along with spam or another infected message. If you find it useful and don’t want to give it up, make sure you have an up-to-date antivirus program on your computer so your preview pane doesn’t bring you preview pain.
Sending Email
Once you’ve gone to all the trouble to set up and configure your email account, odds are you’re going to want to tell everyone you know. If you’ve never done it before, here’s how to make and send a message.
In your email program (webmail or ISP client) create a new, blank message.
Look for a New or Create Mail button on your program’s toolbar. Likewise, you can choose File→New Message (or however your program phrases it). An empty message form opens.
Address the message.
In the message’s To: field, type your recipient’s email address. If you’ve written the person before or your computer’s address book has a matching entry, your mail program may recognize the name as you type it and complete the task automatically. If you’re typing the address manually, be sure to enter it exactly and remember, there are no spaces in email addresses. If you’re sending the message to multiple people, separate each address on the To: line with a comma.
Add additional recipients to the CC: or BCC: fields in the message header.
If you need to keep someone else in the loop besides your main recipient(s), type those addresses on the CC: line. As with old-fashioned office memos, CC stands for Carbon Copy and means all the people involved get the exact same copy of the message, and everyone knows it. Putting addresses in the BCC: field (Blind Carbon Copy) means that nobody in the To: or CC: fields can see the address and don’t know that you’re sending the message to other people.
Summarize the message body with a few short words in the Subject line.
Give your recipient a quick tip-off to what your message is about, which can contribute to how quickly your message is opened and read. Subject lines are increasingly important for spotting spam in your Inbox, and many spammers resort to crafty tactics go get the message read with lines like “Did you see my video?” “Important warning from the bank,” or “Account update information.”
Choose a format.
Mail messages can come in different styles, including plain, unvarnished text or laden with fancy styling like different colors, fonts, and backgrounds. Most modern mail programs can display these messages in rich (formatted) text or HTML, but some can’t. If you don’t know what mail program your recipient uses, stick with plain text for best results. Check your mail program’s menus for the commands to change your message style; most keep this info under the Format menu.
Type your message.
Click in the message body below the header and start typing. You can also cut and paste clickable web links or chunks of text from other documents. If your mail program has a spell checker, you can run it to weed out embarrassing typos. Most programs let you attach a signature file to the bottom of each message you send. A signature file is like your letterhead (except it’s at the bottom of the message). You can set one up in your program’s preferences to save yourself the trouble of manually typing out your contact information on the bottom of every message.
Send your message.
Click the Send button on the message to shoot it across the Net and into your recipient’s Inbox.

After you send your message, a copy of it resides in your Sent mailbox, where you can refer to it if needed.
Exploring Your Mail Program
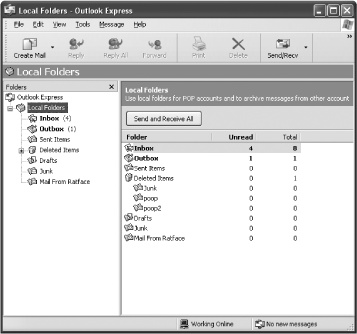
Email programs don’t just have an Inbox, but also have a few different folders depending on if the message is coming or going and what type of message it is. Outlook Express, for example, has five folders in the vertical pane in the mail program’s main window, as do most other email programs. To see what’s inside any of these folders, click an icon in the vertical pane to reveal its contents in the main pane. These folders include:
Inbox. This box holds all the messages you’ve received, both read and unread, until you delete them. New messages show up in bold.
Outbox. Like an outgoing box on your desk with a stack of interoffice memos waiting to be picked up, the Outbox holds messages that you’ve written, but that haven’t been delivered yet. Click the Send/Receive button (or its equivalent in the program you use), to shoot the message out to the Internet and on its way.
Sent Items. Once your message is sent, your copy of it moves to the Sent folder. Some mail programs don’t start out set up to keep outgoing copies of your messages, so if your Sent folder never has anything in it, check your program’s settings.
Deleted Items. When you select a message you don’t want anymore and click Delete, it goes here. As with the Windows Recycle Bin, the contents stay in here until you manually empty the folder. This setup can be good if you accidentally tossed something you need during a fit of spring cleaning, but it also means these messages are taking up space on your drive because they’re not really gone. Look for a menu command that says something like “Empty Deleted Items folder.”
Drafts. This folder holds the messages you’ve started but not yet completed because it was time for dinner when you were still writing them. To go back and finish, go to the Drafts folder and select the message you were writing at the time you stopped.
Junk (optional). Mail programs like Thunderbird and Evolution come with a built-in Junk filter that automatically routes obvious spam into its own festering holding pen so you can dump it all at once. If junk mail lands in your regular Inbox, you can teach your mail program what’s junk by tagging it with the Junk button or command so the filter knows what to look out for in future deliveries.
You’ll also see any other mail folders that you created in the list. Just as you can make new folders on your computer to store specific or related files, most mail programs let you create and name mail folders so you can store and organize messages. Check your mail program’s menus for a “New” or “New Mailbox” option.
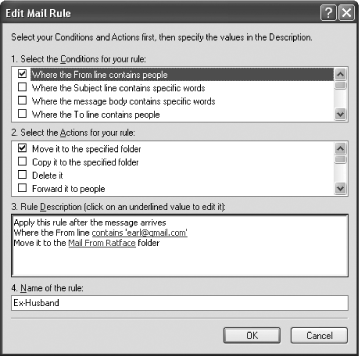
Once you make a special folder, you can store messages in it. These messages can be all on a certain topic or from certain people. Most mail programs let you make a filter that automatically routes messages from specified senders or with particular words in the subject line into your special new mailbox.
A filter, also called a rule, is a standing command you set up to reroute mail to a designated place, like your Quarterly Report folder, your Love Notes folder, or if it’s junk mail—right into the Deleted Items or Junk folder. To set up filters or rules, go to your mail program’s preferences area and look for a New Rule or New Filter option. Type the criteria for your filter (someone’s email address, for example, or certain words in the message Subject line), tell the mail program which folder you want to use for these types of messages, and click OK.
Note
If you use Gmail on the Web, you may have already noticed that the service isn’t much for making folders as a message-organizing method. Instead, Gmail lets you create labels to group your messages. You can make and apply your own labels—like Book Club, Softball Team, Family, and so on—to messages.
When you need to find a message or conversation, you can sort and search mail by label name. Messages can also have multiple labels attached to them for those times when the different parts of your life intersect. To kept that mailbox even tidier, Gmail’s Archive command moves messages into the All Mail area—which clears the way for new messages to be more obvious in the Inbox. Google has more tips for using Gmail at http://mail.google.com/support.
Using File Attachments
To attach a file to your open message-in-progress—like a photo, document, or video clip—just look for an Attach button in your mail program’s toolbar or an Attach File link on the webmail page. Paperclips are usually the chosen icon marking an Attach File command. Once you click the button or link, locate the file you want to send on your hard drive and then click Attach. You see the attached file’s icon on your message. Finish your message and send it off.
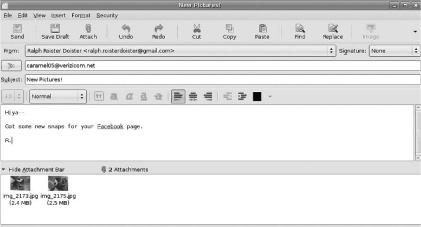
You can tell if someone has sent you a file attachment before you even open the message when there’s a telltale paperclip icon next to the message’s name in the Inbox. When you double-click to open the message, the attachment appears under the message text or in the Attachments: field at the bottom of the message window.
Some mail programs let you double-click the attachment and open it right from the message, while others require you to save the attachment to your hard drive and open it later. You can free the file from its email envelope in either of two ways:
Drag and drop. Drag the attached file’s icon from the message window to your desktop or into a folder of your choice. If the sender went nuts with the attaching and sent a bunch of files at once, click one and press Ctrl+A to select them all so you can do a group-drag. (If you’re using a webmail service, look for a Download link instead, as drag-and-drop doesn’t work with most sites.)
Click and save. Right-click the attached file and choose Save As from the shortcut menu. When the Save As box pops open, navigate to the folder where you want to put the attachment and click Save to dump it in. For multiple attachments, click one and press Ctrl+A to select them all. Then right-click and select Save All.
Outlook Express and Windows XP may block your attempt at seeing, opening, or saving an attachment. Due to the swarm of worms and viruses aimed at Outlook Express, Windows XP stops about 70 different file types that could potentially carry a virus at the gate to your Inbox by graying out the file name or displaying a warning banner to stop you from downloading the attachment. (Microsoft is not alone in its paranoia: Gmail also blocks attachments with an .exe file extension on the grounds that it could be a virus.)
Of course, a lot of people are probably sending you attachments that are perfectly fine, and it can be frustrating when Outlook Express butts in between you and that file you really need to open. If you have an antivirus program installed on your computer, you can safely tell Outlook Express to back off. Choose Tools→Options→Security and on the Security tab, turn off the option called “Do not allow attachments to be saved or opened that could potentially be a virus.” Click OK. Restart Outlook Express if it still stubbornly refuses to let you see the attachment.
Managing Your Mail
You can do lots of things with an email message besides read it: reply to it, forward it, print it, save it, file it, or send it straight to the trash if it turned out to be spam. Here’s a rundown of the basic ways to do all of these in most mail programs:
Replying to a message. Writing back to someone is quick and easy with email. Just click Reply, and your mail program creates a new message already addressed to the person you’re responding to. Most email programs include a copy of the text from the original message so you can respond point-by-point or just leave in the message body to refresh your correspondent’s memory. In the Subject line, “Re:” prefaces the message’s original subject so your friend knows you’re responding to that particular message. If the message was addressed to multiple people, click the Reply All button on the message to respond to everyone at once.
Tip
Before you hit Send, though, check the top of the message to make sure your reply is going to the person or people you mean it to. Don’t assume you’re replying to just one person about your intimate medical details and accidentally share them with the whole mailing list that’s also in the To: field.
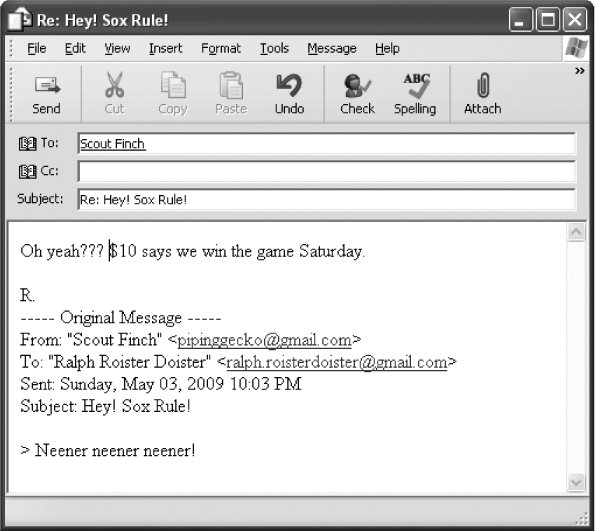
Forwarding a message. Clicking the Forward button on a message creates a new copy of the text in a fresh message form that you can address to other people with your own personal note at the top. Many people forward jokes around the Internet this way, but many bosses like the Forward command to delegate requests to their employees.
Printing a message. Click the Print icon at the top of a message to send a copy to your printer. You can also use the standard print keyboard commands (Ctrl+P) or choose File→Print in most mail programs. Most programs include the message header (Email Basics) with the sender’s name, subject, and time stamp up top. Text messages usually print without problems, but messages formatted in HTML may be too wide to fit on a regular piece of paper and you may have to do some tinkering in your print preferences, like rotating the paper orientation from Portrait to Landscape or shrinking the message to fit on one page.
Sorting a message. All your mail doesn’t have to live in your Inbox, and you can have several other mail folders to sort and store messages, as described on Exploring Your Mail Program. You can drag messages into newly-created folders or pull out messages that were accidentally sent to the Junk folder and place them where you want them.
Deleting a message. When you want to trash an obsolete, unneeded, or unwanted message in a standalone email program, you have plenty of options for zapping it out of your Inbox. You can right-click its name in the Inbox and choose Delete from the menu, click the Delete button in the toolbar, or can select it in the window and press the Delete key on the keyboard. This key sends the messages to the Deleted Items or Trash folder, which doesn’t mean that it’s gone permanently from your computer. If you threw it out accidentally, you can get it back by opening Deleted Items or Trash, and then dragging it back to your Inbox. If you want the messages gone for good, right-click the Deleted Items or Trash folder and choose the option to delete or erase all the messages within. You can delete one message at a time here by selecting it and pressing the Delete key on the keyboard. To toss out messages in most webmail services, turn on the checkbox next to the unwanted message and click the Delete button on the toolbar. There’s often a Select All option at the top of the mailbox that lets you turn on all the checkboxes at once for mass deletion.
Before long, your netbook will be humming with email flying in and out of it. If you need to take a break from all that work, a little Web browsing can be very relaxing…
Using a Web Browser
As mentioned earlier in this chapter, the World Wide Web—or just Web as it’s known to friends—is a vast repository of collected human knowledge, complete with pictures of strawberry Pop-Tarts bursting into flame. All of this comes to your netbook through the web browser, a handy piece of software that comes with the system.
If you have a Windows XP netbook, you start out with Microsoft’s Internet Explorer as your browser. Ubuntu Linux users start out with Mozilla Firefox. Firefox is available in a Windows version at www.getfirefox.com as well, and XP netbook owners can also opt for Google Chrome (www.google.com/chrome), Opera (www.opera.com), and Apple’s Safari browser (www.apple.com/safari).
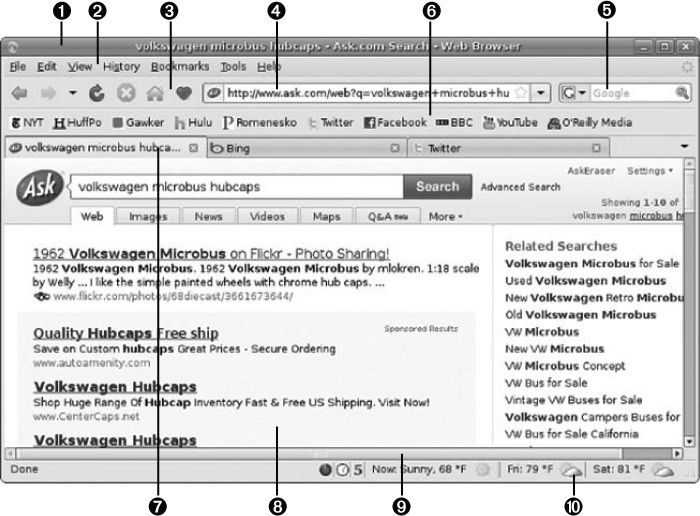
But no matter which browser you use, they all pretty much work the same way. The basic anatomy of a web browser includes:
Title bar. This strip across the very top of the browser window shows the name of the page like “Technology News — The New York Times” or “Facebook | Home.” Click the title bar to drag it around the screen if you need to move the browser window out of the way.
Menu bar. Like most other programs, web browsers have their own menus, with commands to Print or to display the history list of all the sites you’ve looked at recently.
Button bar. A row of big clickable buttons below the Menu bar are shortcuts for navigating backward and forward through a series of web pages you’ve visited, to reload the current page, or to return to your Home page—the first site you see when you start your browser (Transfering Bookmarks from Another Computer).
Address bar. Every page on the Web has its own address, also known as a URL (Uniform Resource Locator, if you want to get all Mr. Spock about it). This address starts with http:// and continues on with the rest of the address, like www.microsoft.com. Once you type or paste the URL into the address bar, hit Enter to go there.
Search box. In the old days, whenever you wanted to go to a search engine, (a website like www.google.com or www.ask.com that’s devoted to matching up web pages with whatever search keywords you type into it), you had to go to the search engine’s own web page. Thanks to the search bar in most web browsers, you can start your search right in the browser window. Click the arrow next to the icon to change search engine sites.
Links bar. When you find a site you want to visit regularly, drag its address out of the Address bar onto the Links bar to make a one-click shortcut for return. The Links bar is called the Bookmarks bar in some circles.
Tabs. When you want to have several different web pages open at once, you can open them in tabs, which gives each one a little file-folder-like tab within the window. Click each open page’s tab to reveal it in the main browser window.
Scroll bar. If the page’s contents are too long or wide to be seen all at once in the browser’s window, drag the scroll bars on the side or bottom of the window to see what you’re missing.
Status bar. This little strip down at the very bottom of the browser window tells you what the program is currently doing, like contacting news.bbc.co.uk or loading http://papercuts.blogs.nytimes.com, and can be informative if you think the browser isn’t paying attention to your clicking.
Tip
Netbook screens may be on the small side, but that doesn’t mean the text in your browser window has to be tiny, too. If you come across a page that needs a boost to make it readable, press the Ctrl and plus (+) keys to zoom in on the page’s contents. Press the Ctrl and minus (–) keys to zoom back out, or Ctrl and zero (0) to return the page to its normal size.
Searching the Web
The Web is so vast, finding the information you seek would be impossible if it weren’t for a handy group of sites called search engines. Most search engines work exactly the same: You type in keywords—search terms relating to the subject you want to read about (like West Highland terrier breeders or sugar cream pie recipe). Once you hit Enter, the search engine consults its vast index of the Web and presents you with a list of pages that contain your keywords.
Many browsers now include a shortcut Search box at the toolbar’s top-right corner. This search box may be set to use a particular search engine, like Yahoo or Google. You can choose a different one by clicking the small triangle next to the box and selecting from the pop-up menu.
Popular search engines include:
Google. The Big Kahuna, where you can search for web pages, images, books, news headlines, and more. (www.google.com)
Yahoo. This time-honored search site is actually older than Google and is still a good resource. (www.yahoo.com)
Microsoft Bing. Also able to run searches on specific categories like images, videos, and regular web pages, Microsoft’s speedy search vehicle has its uses. (www.bing.com)
Ask.com. With a clean interface and super-fast results, Ask.com can help you find what you’re looking for in a flash. (www.ask.com)
Webcrawler. Short on time? Use Webcrawler to search for results from Google, Yahoo, Microsoft Live Search, and Ask.com—all at once. (www.webcrawler.com)
Wolfram Alpha. Billing itself not as a search engine, but a “computational knowledge engine,” Wolfram Alpha comes up with answers to queries on its own instead of running around the Web looking for links to other sites. It’s especially helpful for math and science questions, but covers a huge range of categories. (www.wolframalpha.com)

Navigating the Web
Getting around the Web is easy, given the number of different ways you have to jump from page to page. Here are the most common ways to surf the electronic waves:
Address. As described in the previous section, you can go directly to a web page if you know its address. Just type it into the Address bar and hit the netbook’s Enter key.
Link. Those underlined or colored words on a web page are hyperlinks: shortcuts to another web page. Click the link, and you’re down the rabbit hole to a whole new page.
Button. The navigational icons in the browser’s Button bar let you advance or retreat through web pages you’ve previously looked at during your surfing session.
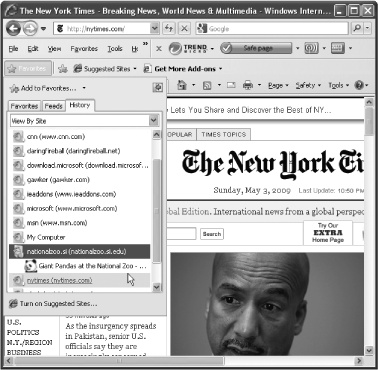
History. The browser’s History list, which can get quite long if you’re an avid Web walker, contains a list of all the pages you’ve looked at today, yesterday, and often the day before. You can specify how much history the browser remembers in the program’s preferences or settings area. Press Ctrl+H to view your History on most browsers.
Bookmarks. Like their analog counterpoints, bookmarks (also known as favorites) take you back to places you want to remember. But where having 400 bookmarks in an actual book doesn’t do you much good, having 400 bookmarks in your web browser means you have 400 quick links to jump back to sites you want to revisit.
Bookmarks are an important part of the web browsing experience. The next section sells you how to make them.
Adding Bookmarks
Whatever you call them, bookmarks and favorites are incredible time savers. When you come upon a site you want to see again, bookmarking it gives you an easy link back to it—and the luxury of not having to type the address.
To make a bookmark for the page you’re currently browsing, go to the Bookmarks or Favorites menu in the menu bar and choose the command that reads something like, “Add Bookmark” or “Bookmark this link” or “Add page to Favorites.” In most browsers, you can also right-click the page to get a shortcut menu with a bookmarking option, and some include buttons with plus signs or stars you can click to bookmark the page.
When you opt to save a bookmark, you get the option to edit its name and even save it to the Links/Bookmarks bar. If you decline to put it in the Links bar (it’s not that great a page, but you just might want to go back there and buy some beef summer sausage gift packs for the holidays), the link lands in the browser’s Bookmarks or Favorites menu.
RSS
In addition to saving bookmarks, you can also subscribe to RSS feeds from icons in the browser’s address bar. RSS stands for Really Simple Syndication, and it’s a way a website can tell you that it’s changed so you don’t have to keep checking back to see if there’s anything new.
When you subscribe to a feed, you get notified when the page is updated, usually by a little number next to the page’s bookmark in the Links bar or Bookmarks menu indicating the number of updates. RSS is great for keeping up with blogs and news sites that change frequently.
To subscribe to a feed, just click the orange icon with the curvy white radio waves on the right side of the address bar. Now the website notifies you when it has something new to show.
To read your feeds in Internet Explorer, click the Favorites button on the toolbar and then the Feeds button or tab; click a feed name to see the newest updates. If you choose to subscribe to your feeds with Firefox’s Live Bookmarks feature, you’ll see a submenu with all the latest news when you select the bookmark.
If you find yourself truly hungry for feeds, consider Google Reader—a free service that lets you easily subscribe to, browse, and share news items and RSS feeds. Once you create your Google Reader account at www.google.com/reader, your favorite feeds also show up when you log in from your mobile phone or other wireless gadget.

Tip
Want to have your browser automatically start up and land on your favorite news site, sports team home page, or blog? In Internet Explorer, choose Tools→Internet Options→General and in the box for Home Page, type or paste in your favorite site’s address and click OK. In Firefox for Windows, choose Tools→Options→General to get there, or Edit→Preferences→Main for Firefoxon Linux.
Transfering Bookmarks from Another Computer
If you bought your netbook to serve as a secondary or traveling computer, you probably already have a whole bunch of bookmarks in the web browser on your primary machine. Wouldn’t you rather bring them along to the netbook instead of having to painstakingly recreate them? Not a problem.
Most modern browsers now include an import/export function that lets you save your bookmarks to a file that you can then transfer to a second browser. The exported bookmarks file is typically just an HTML document (HyperText Markup Language; the lingua franca web page code), that you can email to yourself, copy to a USB drive, or transfer over a home network to get from the old computer to the new computer. (And if you used the Windows XP Files and Settings Transfer Wizard described back on Using the Windows XP Files and Settings Transfer Wizard, your bookmarks are probably already waiting for you on the netbook.)
If you need to move your bookmarks, here’s how:
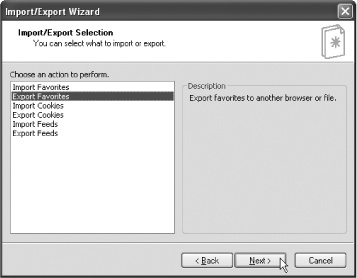
Internet Explorer. Choose File→Import and Export to start the Import/Export Wizard. Click Next to kick it off and on the next screen, click Export Favorites from the list. Click Next again and choose the Favorites folder or subfolder you want to copy. Click Next, save the HTML file to the desktop, and click Next one last time to finish the job. Copy the HTML file (probably called bookmark.htm) to the netbook. If you’re using Internet Explorer on the netbook, too, choose File→Import and Export to start the Import/Export Wizard again, but select Import Favorites instead of Export and point the wizard to the HTML file you just copied to the netbook. If you’re bringing them into Firefox, choose Bookmarks→Organize Bookmarks→Import and Backup→Import HTML and pullin the file.
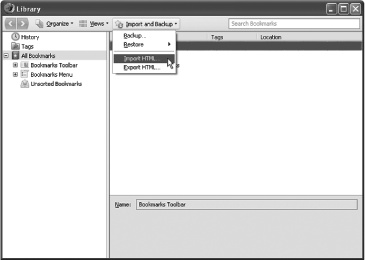
Firefox. Choose Book-marks→Organize Bookmarks→Import and Backup→Export HTML. Pick where you want to save the bookmarks.htm file and click the Save button. Copy the file from the saved location and transfer it to the netbook. If you’re using Internet Explorer on the netbook, choose File→Import and Export to start the Import/Export Wizard again and select Import Favorites. Point the wizard to the HTML file you just copied to the netbook. If you’re bringing them into Firefox, choose Bookmarks→Organize Bookmarks→Import and Backup→Import HTML and pull in the file.
Tip
If you have more bookmarks than the Library of Congress gift shop and add more every day, a program that automatically synchronizes your bookmarks across all your browsers might be in order. Free programs like SyncIT for Windows (www.sync2it.com) can help, as can some Firefox utilities mentioned in the next section.
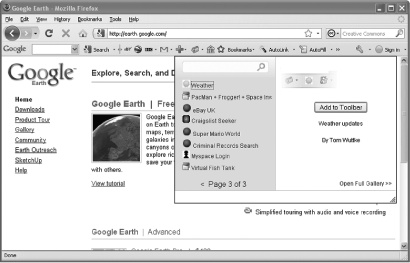
Adding Tools to Your Web Browser
Your browser program is not just your window to the Web. With handy tools and mini-programs called add-ons, you can teach your browser new tricks. Add-ons can do things like show the weather forecast in the status bar or display buttons to control your MP3 jukebox software so you can pause the music without having to switch to the jukebox window.
Both Internet Explorer and Mozilla Firefox make it easy to add cool stuff to your browser.
In Internet Explorer, choose Tools→Manage Add-ons→Find More Add-ons. You end up at the Internet Explorer Add-ons Gallery, where you can stroll through neatly categorized lists of IE helper programs and install them on your browser with a click of the “Add to Internet Explorer” button.
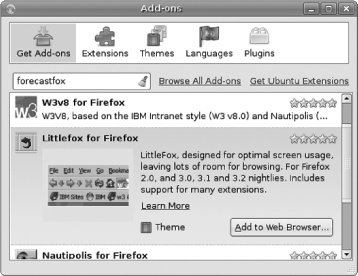
In Firefox, choose Tools→Add-ons→Get Add-ons to see a list of available and recommended goodies. (You can also click the Browse All Add-ons link in the box to jump put to Mozilla’s official Add-ons site for Firefox.) Select the add-ons you want and click the “Add to Firefox” button to install them.
One word of caution, though: Piling up too many add-ons may slow down your browser or cause it to crash. If you’re having problems, you can turn off or uninstall add-ins in the same browser menu you added them from. In IE, choose Tools→Manage Add-ons→Enable or Disable Add-ons and turn off the misbehaving code. In Firefox, choose Tools→Add-ons, find the bad one in the clickable Extensions, Themes, or Plug-ins lists, and click either the Disable or Uninstall button.
Tip
Netbook screens are on the puny side, and sometimes browsing can feel like you’re looking at the Web through a pair of binoculars. To see a little bit more of the page, press the F11 key to ditch the address bar and expand the main browser window into full-screen mode. If you feel lost without your toolbars, though, there are other solutions. The Littlefox or Classic Compact add-ons for Firefox can help a bit—both squish the toolbars and other browser elements into a tighter space so you have more room for your main Web window.
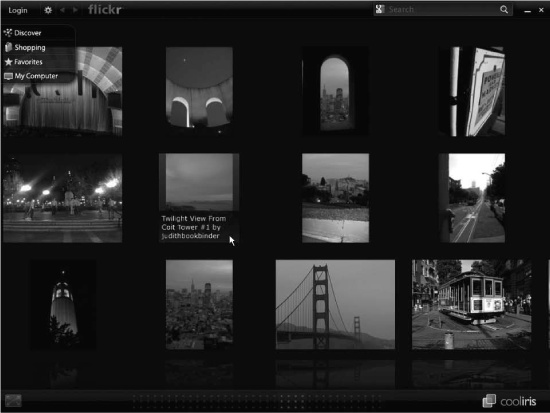
You can also find browser add-ons by searching the Web. For example, if you’re into social networking, Yoono (www.yoono.com) for IE and Firefox puts a pane on the left side of the browser window that keeps a running list of status updates from people you know on Facebook and other social sites—and it keeps your bookmarks in sync with other computers you may use. Photos your thing? The Cooliris add-in (www.cooliris.com) turns your browser into a 3-D wall of images. Although an add-on’s website can tell you more about the software, it’s generally safer to get the add-on from the IE Gallery, Mozilla Firefox Add-Ons page, or other closely monitored browser repository.
Tip
The XMarks add-on for Firefox is another way to keep your bookmarks up to date across your various computers. Just install it from the Get Add-ons list on each of your Firefox-equipped computers to keep your bookmarks backed up and in sync across machines.
Browser toolbars
Browser toolbars
In addition to browser add-ons, you can enhance your browser with additional toolbars, especially if you’re using Windows. (On Linux, check the toolbar’s system requirements before getting too excited.) These toolbars usually add things like search shortcuts, links to maps, pop-up ad blockers, and more. In fact, most of the major search engines have their own toolbars available that do things like highlight your search terms on pages or make suggestions for relayed searches. Here’s where to find more info on each of these toolbars:
The Google Toolbar (http://toolbar.google.com)
The Yahoo! Toolbar (http://toolbar.yahoo.com)
The Windows Live Toolbar (http://live.toolbar.com)
The Ask.com Toolbar (http://toolbar.ask.com)
The AOL Toolbar (http://toolbar.aol.com)
People not into searching may just be annoyed by the extra buttons gunking up the top of the browser. But for people serious about the ability to search, these types of toolbars can help you dig around the Web more efficiently.
Tip
One very popular browser add-on is StumbleUpon (www.stumbleupon.com). Just click the Stumble button in the toolbar to land on a random site that other people have really, really liked. It’s a lot of fun and you never know what you might find.