
18
Implementing Express in Node.js
Express is a lightweight module that wraps the functionality of the Node.js http module in a simple to use interface. Express also extends the functionality of the http module to make it easy for you to handle server routes, responses, cookies, and statuses of HTTP requests. This chapter gets you started implementing Express as the webserver for your Node.js applications. You learn how to configure the Express server, design routes, and use the Request and Response objects to send and receive HTTP requests. You also get a look at how to implement template engines in Express.
Getting Started with Express
It is simple to start using Express in your Node.js projects. All you need to do is add the express module using the following command from the root of your project:
npm install express
You can also add express to your package.json module to ensure that express is installed when you deploy your application.
Once you have installed express, you need to create an instance of the express class to act as the HTTP server for your Node.js application. The following lines of code import the express module and create an instance of express that you can use:
var express = require('express');
var app = express();
Configuring Express Settings
Express provides several application settings that control the behavior of the Express server. These settings define the environment as well as how Express handles JSON parsing, routing, and views. Table 18.1 lists the different settings that can be defined on an express object.
The express object provides the set(setting, value) and enable(setting) and disable(setting) methods to set the value of the application settings. For example, the following lines of code enable the trust proxy setting and set the view engine to pug:
app.enable('trust proxy');
app.disable('strict routing');
app.set('view engine', 'pug');
To get the value of a setting, you can use the get(setting), enabled(setting), and disabled(setting) methods. For example:
app.enabled('trust proxy');  \true
app.disabled('strict routing'); \true
app.get('view engine'); \pug
Table 18.1 Express application settings
Setting |
Description |
|
Defines the environment mode string, such as |
|
Enables/disables reverse proxy support. The default is disabled. |
|
Defines the default callback name of JSONP requests. The default is |
|
Defines the JSON replacer callback function. The default is |
|
Specifies the number of spaces to use when formatting JSON response. The default is |
|
Enables/disables case sensitivity. For example, |
|
Enables/disables strict routing. For example, |
|
Enables/disables view template compilation caching, which keeps the cached version of a compiled template. The default is enabled. |
|
Specifies the default template engine extension that is used when rendering templates if a file extension is omitted from the view. |
|
Specifies the path for the template engine to look for view templates. The default is |
Starting the Express Server
To begin implementing Express as the HTTP server for your Node.js application, you need to create an instance and begin listening on a port. The following three lines of code start a rudimentary Express server listening on port 8080:
var express = require('express');
var app = express();
app.listen(8080);
The app.listen(port) call binds the underlying HTTP connection to the port and begins listening on it. The underlying HTTP connection is the same connection produced using the listen() method on a Server object created using the http library discussed earlier in this book.
In fact, the value returned by express() is actually a callback function that maps to the callback function that is passed into the http.createServer() and https.createServer() methods.
To illustrate this, Listing 18.1 illustrates implementing a basic HTTP and HTTPS server using Node.js. Notice that the app variable returned from express() is passed into the createServer() methods. Also, notice that an options object is defined to set the host, key, and cert used to create the HTTPS server. Lines 13–15 implement a simple get route that handles the / path.
Listing 18.1 express_http_https.js: Implementing HTTP and HTTPS servers using Express
01 var express = require('express');
02 var https = require('https');
03 var http = require('http');
04 var fs = require('fs');
05 var app = express();
06 var options = {
07     host: '127.0.0.1',
08     key: fs.readFileSync('ssl/server.key'),
09     cert: fs.readFileSync('ssl/server.crt')
10   };
11 http.createServer(app).listen(80);
12 https.createServer(options, app).listen(443);
13 app.get('/', function(req, res){
14   res.send('Hello from Express');
15 });
Configuring Routes
The previous section discussed how to start the Express HTTP server. However, before the server can begin accepting requests, you need to define routes. A route is simply a definition that describes how to handle the path portion of the URI in the HTTP request to the Express server.
Implementing Routes
There are two parts when defining the route. First is the HTTP request method (typically GET or POST). Each of these methods often needs to be handled completely differently. Second, is the path specified in the URL—for example, / for the root of the website, /login for the login page, and /cart to display a shopping cart.
The express module provides a series of functions that allow you to implement routes for the Express server. These functions all use the following syntax:
app.<method>(path, [callback . . .], callback)
The <method> portion of the syntax actually refers to the HTTP request method, such as GET or POST. For example:
app.get(path, [middleware, ...], callback)
app.post(path, [middleware, ...], callback)
The path refers to the path portion of the URL that you want to be handled by the callback function. The middleware parameters are 0 or more middleware functions that are applied before executing the callback function. The callback function is the request handler that handles the request and sends the response back to the client. The callback function accepts a Request object as the first parameter and a Response object as the second.
For example, the following code implements some basic GET and POST routes:
app.get('/', function(req, res){
  res.send("Server Root");
});
app.get('/login', function(req, res){
  res.send("Login Page");
});
app.post('/save', function(req, res){
  res.send("Save Page");
});
When the Express server receives an HTTP request, it looks for a route that has been defined for the appropriate HTTP method and path. If one is found, a Request and Response object is created to manage the request and is passed into the callback function(s) for the route.
Express also provides the app.all() method that works exactly the same as the app.post() and app.get() methods. The only difference is that the callback function for app.all() is called on every request for the specified path regardless of HTTP method. Also, the app.all() method can accept the * character as a wildcard in the path. This is a great feature for implementing request logging or other special functionality to handle requests. For example:
app.all('*', function(req, res){
  // global handler for all paths
});
app.all('/user/*', function(req, res){
  // global handler for /user path
});
Applying Parameters in Routes
As you begin implementing routes, you will quickly see that for complex systems the number of routes can get out of hand. To reduce the number of routes, you can implement parameters within the URL. Parameters allow you to use the same route for similar requests by providing unique values for different requests that define how your application handles the request and builds the response.
For example, you would never have a separate route for every user or product in your system. Instead you would pass in a user ID or product ID as a parameter to one route, and the server code would use that ID to determine which user or product to use. There are four main methods for implementing parameters in a route:
![]() Query string: Uses the standard
Query string: Uses the standard ?key=value&key=value... HTTP query string after the path in the URL. This is the most common method for implementing parameters, but the URLs can become long and convoluted.
![]()
POST params: When implementing a web form or other POST request, you can pass parameters in the body of the request.
![]() regex: Defines a regular expression as the path portion of the route. Express uses the regex to parse the path of the URL and store matching expressions as an array of parameters.
regex: Defines a regular expression as the path portion of the route. Express uses the regex to parse the path of the URL and store matching expressions as an array of parameters.
![]() Defined parameter: Defines a parameter by name using
Defined parameter: Defines a parameter by name using :<param_name> in the path portion of the route. Express automatically assigns that parameter a name when parsing the path.
The following sections discuss these methods with the exception of POST params, which is covered in the next chapter.
Applying Route Parameters Using Query Strings
The simplest method to add parameters to a route is to pass them using the normal HTTP query string format of ?key=value&key=value... Then you can use the url.parse() method discussed earlier in the book to parse the url attribute of the Request object to get the parameters.
The following code implements a basic GET route to /find?author=<author>&title=<title> that accepts author and title parameters. To actually get the value of author and title, the url.parse() method is used to build a query object:
app.get('/find', function(req, res){
  var url_parts = url.parse(req.url, true);
  var query = url_parts.query;
  res.send('Finding Book: Author: ' + query.author +
           ' Title: ' + query.title);
});
For example, consider the following URL:
/find?author=Brad&title=Node
The res.send() method returns:
Finding Book: Author: Brad Title: Node
Applying Route Parameters Using Regex
One way to implement parameters in routes is to use a regex expression to match patterns. This allows you to implement patterns that do not follow a standard / formatting for the path.
The following code implements a regex parser to generate route parameters for GET requests at the URL /book/<chapter>:<page> path. Notice that the values of the parameters are not named; instead, req.params is an array of matching items in the URL path.
app.get(/^/book/(w+):(w+)?$/, function(req, res){
  res.send('Get Book: Chapter: ' + req.params[0] +
           ' Page: ' + req.params[1]);
});
For example, consider the following URL:
/book/12:15
The res.send() method returns
Get Book: Chapter: 12 Page: 15
Applying Route Parameters Using Defined Parameters
If your data is more structured, a defined parameter is a better method to use than regex. Using a defined parameter allows you to define your parameters by name within the route path. You define parameters in the path of the route using :<param_name>. When using defined parameters, req.param is a function instead of an array, where calling req.param(param_name) returns the value of the parameter.
The following code implements a basic :userid parameter expecting a URL with a /user/<user_id> format:
app.get('/user/:userid', function (req, res) {
  res.send("Get User: " + req.param("userid"));
});
For example, consider the following URL:
/user/4983
The res.send() method returns
Get User: 4983
Applying Callback Functions for Defined Parameters
A major advantage of using defined parameters is that you can specify callback functions that are executed if the defined parameter is found in a URL. When parsing the URL, if Express finds a parameter that has a callback registered, it calls the parameter’s callback function before calling the route handler. You can register more than one callback function for a route.
To register a callback function, you use the app.param() method. The app.param() method accepts the defined parameter as the first argument, and then a callback function that receives the Request, Response, next, and value parameters.
app.param(param, function(req, res, next, value){} );
The Request and Response objects are the same as are passed to the route callback. The next parameter is a callback function for the next app.param() callback registered, if any. You must call next() somewhere in your callback function or the callback chain will be broken. The value parameter is the value of the parameter parsed from the URL path.
For example, the following code logs every request received that has the userid parameter specified in the route. Notice that next() is called before leaving the callback function:
app.param('userid', function(req, res, next, value){
  console.log("Request with userid: " + value);
  next();
});
To see how the preceding code works, consider the following URL:
/user/4983
The userid of 4983 is parsed from the URL and the consol.log() statement displays
Request with userid: 4983
Applying Route Parameters Example
To clarify the example, Listing 18.2 implements query strings, regex, and defined parameters to Express routes. The POST method is covered in the next chapter. Lines 8–16 implement the query string method. Lines 17–23 implement the regex method. Lines 24–33 implement a defined parameter along with a callback function that is executed whenever the userid parameter is specified in the request parameters. Figure 18.1 shows the console output from the code in Listing 18.2.
Listing 18.2 express_routes.js: Implementing route parameters in Express
01 var express = require('express');
02 var url = require('url');
03 var app = express();
04 app.listen(80);
05 app.get('/', function (req, res) {
06   res.send("Get Index");
07 });
08 app.get('/find', function(req, res){
09   var url_parts = url.parse(req.url, true);
10   var query = url_parts.query;
11   var response = 'Finding Book: Author: ' + query.author +
12                   ' Title: ' + query.title;
13   console.log('
Query URL: ' + req.originalUrl);
14   console.log(response);
15   res.send(response);
16 });
17 app.get(/^/book/(w+):(w+)?$/, function(req, res){
18   var response = 'Get Book: Chapter: ' + req.params[0] +
19               ' Page: ' + req.params[1];
20   console.log('
Regex URL: ' + req.originalUrl);
21   console.log(response);
22   res.send(response);
23 });
24 app.get('/user/:userid', function (req, res) {
25   var response = 'Get User: ' + req.param('userid');
26   console.log('
Param URL: ' + req.originalUrl);
27   console.log(response);
28   res.send(response);
29 });
30 app.param('userid', function(req, res, next, value){
31   console.log("
Request received with userid: " + value);
32   next();
33 });

Figure 18.1 Implementing route parameters using query strings, regex, and defined parameters
Using Requests Objects
The route handlers are passed a Request object as the first parameter. The Request object provides the data and metadata about the request, including the URL, headers, query string, and much more. This allows you to handle the request appropriately in your code.
Table 18.2 lists some of the more commonly used properties available in the Request object.
Table 18.2 Properties and methods of the HTTP Request object
Setting |
Description |
|
The original URL string of the request. |
|
The protocol string, for example, |
|
IP address of the request. |
|
Path portion of the request URL. |
|
Hostname of the request. |
|
HTTP method. |
|
Query string portion of the request URL. |
|
A Boolean that is |
|
A Boolean that is |
|
A Boolean that is |
|
Returns |
|
Returns the value of the |
Listing 18.3 illustrates accessing the various parts of the Request object. The output in Figure 18.2 shows the actual values associated with a GET request.
Listing 18.3 express_request.js: Accessing properties of the Request object in Express
01 var express = require('express');
02 var app = express();
03 app.listen(80);
04 app.get('/user/:userid', function (req, res) {
05   console.log("URL:	   " + req.originalUrl);
06   console.log("Protocol:  " + req.protocol);
07   console.log("IP:	   " + req.ip);
08   console.log("Path:	   " + req.path);
09   console.log("Host:	   " + req.host);
10   console.log("Method:	   " + req.method);
11   console.log("Query:	   " + JSON.stringify(req.query));
12   console.log("Fresh:	   " + req.fresh);
13   console.log("Stale:	   " + req.stale);
14   console.log("Secure:	   " + req.secure);
15   console.log("UTF8:	   " + req.acceptsCharset('utf8'));
16   console.log("Connection: " + req.get('connection'));
17   console.log("Headers: " + JSON.stringify(req.headers,null,2));
18   res.send("User Request");
19 });

Figure 18.2 Accessing properties of the Request object
Using Response Objects
The Response object passed to the route handler provides the necessary functionality to build and send a proper HTTP response. The following sections discuss using the Response object to set headers, set the status, and send data back to the client.
Setting Headers
An important part of formulating a proper HTTP response is to set the headers. For example, setting the Content-Type header determines how the browser handles the response. The Response object provides several helper methods to get and set the header values that are sent with the HTTP response.
The most commonly used methods are get(header) and set(header, value), which gets and sets any header value. For example, the following code first gets the Content-Type header and then sets it:
var oldType = res.get('Content-Type');
res.set('Content-Type', 'text/plain');
Table 18.3 describes the helper methods to get and set header values.
Table 18.3 Methods to get and set header values on the Response object
Setting |
Description |
|
Returns the value of the |
|
Sets the value of the |
|
Accepts an object that contains multiple |
|
Sets the location header to the |
|
Sets the |
|
Sets the |
Setting the Status
You also need to set the HTTP status for the response if it is something other than 200. It is important to send the correct status response so that the browser or other applications can handle the HTTP response correctly. To set the status response, use the status(number) method where the number parameter is the HTTP response status defined in the HTTP spec.
For example, the following lines set different statuses:
res.status(200); // OK
res.status(300); // Redirection
res.status(400); // Bad Request
res.status(401); // Unauthorized
res.status(403); // Forbidden
res.status(500); // Server Error
Sending Response
You already saw the send() method in action when sending simple responses in some earlier examples in this chapter. The send() method can use one of the following formats, where status is the HTTP status code and body is a String or Buffer object:
res.send(status, [body])
res.send([body])
If you specify a Buffer object, the Content-Type is automatically set to application/octet-stream unless you explicitly set it to something else. For example:
res.set('Content-Type', 'text/html');
res.send(new Buffer('<html><body>HTML String</body></html>'));
The send() method can really handle all the responses necessary as long as you set the appropriate headers and status for the response. Once the send() method completes, it sets the value of the res.finished and res.headerSent properties. You can use these to verify the response was sent as well as how much data was transferred. The following shows an example value of the res.headerSent property:
HTTP/1.1 200 OK
X-Powered-By: Express
Content-Type: text/html
Content-Length: 92
Date: Tue, 17 Dec 2013 18:52:23 GMT
Connection: keep-alive
Listing 18.4 illustrates some of the basics of setting the status and headers, and sending a response. Notice that in lines 18–21 the route for /error sets the status to 400 before sending the response. Figure 18.3 shows the res.headerSent data in the console output on the Express server.
Listing 18.4 express_send.js: Sending status, headers, and response data using the Response object
01 var express = require('express');
02 var url = require('url');
03 var app = express();
04 app.listen(80);
05 app.get('/', function (req, res) {
06   var response = '<html><head><title>Simple Send</title></head>' +
07                  '<body><h1>Hello from Express</h1></body></html>';
08   res.status(200);
09   res.set({
10     'Content-Type': 'text/html',
11     'Content-Length': response.length
12   });
13   res.send(response);
14   console.log('Response Finished? ' + res.finished);
15   console.log('
Headers Sent: ');
16   console.log(res.headerSent);
17 });
18 app.get('/error', function (req, res) {
19   res.status(400);
20   res.send("This is a bad request.");
21 });

Sending JSON Responses
A growing trend has been to use JSON data to transfer information from the server to the client and then having the client dynamically populate the HTML elements on the page, rather than the server building HTML documents or parts of HTML documents and sending the HTML to the client. Express facilitates sending JSON by providing the json() and jsonp() methods on the Response object. These methods use a similar syntax as send() except that the body is a JSON stringifiable JavaScript object:
res.json(status, [object])
res.json([body])
res.jsonp(status, [object])
res.jsonp([object])
The JavaScript object is converted to a JSON string and sent back to the client. In the case of jsonp(), the URL of the request object includes a ?callback=<method> parameter and then the JSON string is wrapped in a function with the method name that can be called from the browser client to support the JSONP design.
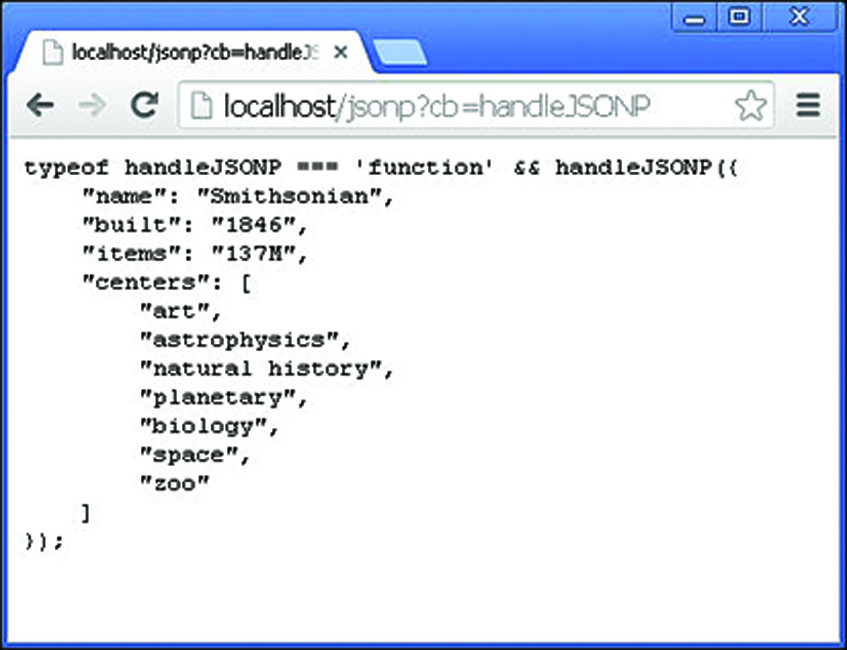
Listing 18.5 implements both json() and jsonp() to illustrate sending JSON data back to the server. Notice that in line 6 the json spaces application setting is set to 4, and in line 7 a basic JavaScript object is passed into the json() call. On line 12 an error code is set in the response, and the response object is a JSON object.
In lines 14–19 the jsonp() method is implemented. Notice that the jsonp callback name is set to cb in line 15. That means that instead of passing ?callback=<function> in the URL, the client needs to pass ?cb=<function> in the URL. Figure 18.4 shows the output to the browser for each of these calls.
Listing 18.5 express_json.js: Sending JSON and JSONP data in the response from Express
01 var express = require('express');
02 var url = require('url');
03 var app = express();
04 app.listen(80);
05 app.get('/json', function (req, res) {
06   app.set('json spaces', 4);
07   res.json({name:"Smithsonian", built:'1846', items:'137M',
08             centers: ['art', 'astrophysics', 'natural history',
09                       'planetary', 'biology', 'space', 'zoo']});
10 });
11 app.get('/error', function (req, res) {
12   res.json(500, {status:false, message:"Internal Server Error"});
13 });
14 app.get('/jsonp', function (req, res) {
15   app.set('jsonp callback name', 'cb');
16   res.jsonp({name:"Smithsonian", built:'1846', items:'137M',
17             centers: ['art', 'astrophysics', 'natural history',
18                       'planetary', 'biology', 'space', 'zoo']});
19 });
Sending Files
A great helper method in Express is the sendfile(filepath) method on the Response object. The sendfile() method does everything that needs to be done to send files to the client in a single function call. Specifically, the sendfile() method does the following:
![]() Sets the
Sets the Content-Type header to the type based on file extension
![]() Sets other appropriate headers such as
Sets other appropriate headers such as Content-Length
![]() Sets the status of the response
Sets the status of the response
![]() Sends the contents of the file to the client using the connection inside the
Sends the contents of the file to the client using the connection inside the Response object
The sendfile() method uses the following syntax:
res.sendfile(path, [options], [callback])
The path should point to the file that you want to send to the client. The options parameter is an object that contains a maxAge property that defines the maximum age for the content and a root property that is a root path to support relative paths in the path parameter. The callback function is called when the file transfer is complete and should accept an error object as the only parameter.


Listing 18.6 illustrates how easy it is to send the contents of a file using the sendfile() command. Notice that a root path is specified in line 8, so only the filename is required in line 6. Also notice that the callback function has code to handle the error. Figure 18.5 shows the image displayed in the browser.
Listing 18.6 express_send_file.js: Sending files in an HTTP request from Express
01 var express = require('express');
02 var url = require('url');
03 var app = express();
04 app.listen(80);
05 app.get('/image', function (req, res) {
06   res.sendfile('arch.jpg',
07                { maxAge: 1,//24*60*60*1000,
08                  root: './views/'},
09                function(err){
10     if (err){
11       console.log("Error");
12     } else {
13       console.log("Success");
14     }
15   });
16 });

Figure 18.5 Image file sent in an HTTP response to the client
Sending a Download Response
Express also includes a res.download() method that works similarly to the res.sendfile() method with only a few differences. The res.download() method sends the file in the HTTP response as an attachment, which means the Content-Disposition header will be set. The res.download() method uses the following syntax:
res.download(path, [filename], [callback])
The path points to the file to send to the client. The filename parameter can specify a different filename that should be sent in the Content-Disposition header. The callback function is executed once the file download has completed.
Redirecting the Response
A common need when implementing a webserver is the ability to redirect a request from the client to a different location on the same server or on a completely different server. The res.redirect(path) method handles redirection of the request to a new location.
Listing 18.7 illustrates the various redirection addressing that you can use. In line 6 a redirect is done to a completely new domain address. In line 9 a redirect is made to a different path on the same server, and in line 15 a redirect is made to a relative path on the same server.
Listing 18.7 express_redirect.js: Redirecting requests on an Express server
01 var express = require('express');
02 var url = require('url');
03 var app = express();
04 app.listen(80);
05 app.get('/google', function (req, res) {
06   res.redirect('http://google.com');
07 });
08 app.get('/first', function (req, res) {
09   res.redirect('/second');
10 });
11 app.get('/second', function (req, res) {
12   res.send("Response from Second");
13 });
14 app.get('/level/A', function (req, res) {
15   res.redirect("../B");
16 });
17 app.get('/level/B', function (req, res) {
18   res.send("Response from Level B");
19 });
Implementing a Template Engine
A growing trend in the industry is to use a template engine to generate HTML using a template file and application data rather than trying to build HTML files from scratch or use static files. The template engines use the template object to build HTML based on values provided by the application. Template engines provide two benefits:
![]() Simplicity: Templates try to make it easy to generate the HTML either by a shorthand notation or by allowing JavaScript to be embedded in the HTML document directly.
Simplicity: Templates try to make it easy to generate the HTML either by a shorthand notation or by allowing JavaScript to be embedded in the HTML document directly.
![]() Speed: Template engines optimize the process of building the HTML documents. Many compile a template and store the compiled version in a cache that makes it faster to generate the HTML response.
Speed: Template engines optimize the process of building the HTML documents. Many compile a template and store the compiled version in a cache that makes it faster to generate the HTML response.
The following sections discuss implementing template engines in Express. Several template engines are available for use in Express, and in this section, you learn about Pug (formerly Jade) and Embedded JavaScript (EJS). These two work in different ways and together give you an idea of what is available. Pug uses a shorthand notation of HTML in the template, so the template files do not look anything like HTML. The advantage is that the template files are small and easy to follow. The disadvantage is that you need to learn yet another language.
EJS, on the other hand, uses special notation to embed JavaScript in normal HTML documents. This makes it much easier to transition from normal HTML. The downside is that the HTML documents are even more complex than the originals and not as tidy as Pug templates.
To run the example for this section, you need to install both the Pug and EJS modules in your application using the following commands:
npm install Pug
npm install EJS
Defining the Engine
The first step in implementing a template engine is to define a default template engine for the Express application. This is done by setting the view engine setting on the express() application object. You also need to set the views setting to the location where your template files are stored. For example, the following sets the ./views directory as the root for template documents and pug as the view engine:
var app = express();
app.set('views', './views');
app.set('view engine', 'pug');
Then you need to register the template engines for the template extensions that you want them to handle using the app.engine(ext, callback) method. The ext parameter is the file extension used for the template files, and the callback is a function that supports Express’s rendering functionality.
Many engines provide the callback functionality in an __express function. For example:
app.engine('pug', require('pug').__express)
The __express functionality often only works on the default extension name. In that case, you can use a different function. For example, EJS provides the renderFile function for that purpose. You can use the following to register EJS for ejs extensions:
app.engine('ejs', require('ejs').__express)
However, if you want to register EJS for HTML extensions, you use
app.engine('html', require('ejs').renderFile)
Once the extension is registered, the engine callback function is be called to render any templates with that extension. If you choose a different engine besides Pug or EJS, you need to figure out how they expect to register with Express.
Adding Locals
When rendering a template, you often want to include dynamic data—for example, to render a user page for user data just read from the database. In this case you can generate a locals object that contains properties that map to variable names defined in the templates. The express() app object provides the app.locals property to store local variables.
To assign a local template variable directly, you can use dot syntax. For example, the following code defines the local variables title and version:
app.locals.title = 'My App';
app.locals.version = 10;
Creating Templates
You also need to create template files. When creating template files, keep in mind these considerations:
![]() Reusability: Try to make your templates reusable in other parts of your application and in other applications. Most template engines cache the templates to speed up performance. The more templates you have requires more caching time. Try to organize your templates so that they can be used for multiple purposes. For example, if you have several tables of a data displayed in your app, only make a single template for all of them that can not only dynamically add the data, but can also set column headers, titles, and such.
Reusability: Try to make your templates reusable in other parts of your application and in other applications. Most template engines cache the templates to speed up performance. The more templates you have requires more caching time. Try to organize your templates so that they can be used for multiple purposes. For example, if you have several tables of a data displayed in your app, only make a single template for all of them that can not only dynamically add the data, but can also set column headers, titles, and such.
![]() Size: As template sizes grow, they tend to become more and more unwieldy. Try to keep your templates compartmentalized to the type of data they are presenting. For example, a page that has a menu bar, form, and table could be split into three separate templates.
Size: As template sizes grow, they tend to become more and more unwieldy. Try to keep your templates compartmentalized to the type of data they are presenting. For example, a page that has a menu bar, form, and table could be split into three separate templates.
![]() Hierarchy: Most websites and applications are built on some sort of hierarchy. For example, the
Hierarchy: Most websites and applications are built on some sort of hierarchy. For example, the <head> section as well as a banner and menu may be the same throughout the site. Use a separate template for components that show up in multiple locations, and just include those subtemplates when building your final page.
Listing 18.8 shows a basic EJS template that applies a set of local variables in a list to display user information. The EJS code is basic and only uses the <%= variable %> to pull values from the Express local variables.
Listing 18.8 user_ejs.html: Simple EJS template for displaying a user
01 <!DOCTYPE html>
02 <html lang="en">
03 <head>
04 <title>EJS Template</title>
05 </head>
06 <body>
07    <h1>User using EJS Template</h1>
08     <ul>
09        <li>Name: <%= uname %></li>
10        <li>Vehicle: <%= vehicle %></li>
11        <li>Terrain: <%= terrain %></li>
12        <li>Climate: <%= climate %></li>
13        <li>Location: <%= location %></li>
14     </ul>
15 </body>
16 </html>
Listing 18.9 and Listing 18.10 show using Pug to implement a main template and then consume it in a subtemplate. The main template in Listing 18.9 is basic, only implementing the doctype, html, head, and title elements. It also defines the block content element defined in Listing 18.10.
Notice that line 1 in Listing 18.10 extends main_pug to include those elements first and then adds the h1, ul, and li elements, which get values from the local variables.
Listing 18.9 main_pug.pug: Simple Pug template that defines the main webpage
1 doctype 5
2 html(lang="en")
3   head
4     title="Pug Template"
5   body
6     block content
Listing 18.10 user_pug.pug: Simple Pug template that includes the main_pug.pug template and adds elements for displaying a user
1 extends main_pug
2 block content
3   h1 User using Pug Template
4   ul
5     li Name: #{uname}
6     li Vehicle: #{vehicle}
7     li Terrain: #{terrain}
8     li Climate: #{climate}
9     li Location: #{location}
Rendering Templates in a Response
Once you have the template engine defined and configured and have created your templates, you can send a rendered template using the Express app object or using the Response object. To render a template in the Express app you use the app.render() method:
app.render(view, [locals], callback)
The view parameter specifies the view filename in the views directory. If no extension is included on the file, the default extensions such as .pug and .ejs are tried. The locals parameter allows you to pass in a locals object if one has not been defined in app.locals already. The callback function is executed after the template has been rendered and accepts an error object for the first parameter and the string form of the rendered template as the second.
To render a template directly into the response, you can also use the res.render() function, which works exactly the same as app.render(), except that no callback is needed. The rendered results automatically are sent in the response.
The app.render() and res.render() methods both work well. If you do not need to do anything with the data before sending it, the res.render() method saves the extra code to call res.send() to send the data.
Listing 18.11 puts all the template rendering concepts together in a couple of basic examples. Lines 5–8 set up the views directory and view engine and register pug and ejs. Then in lines 10–13 user information is defined in app.locals.
Lines 14–16 handle the /pug route, which directly renders the user_pug.pug template from Listing 18.10 with the defined locals in the client response.
Lines 17–21 handle the /ejs route by first calling app.render() to render the users_ejs.html template defined in Listing 18.8 into a string, renderedData. Then that data is sent using the res.send() command. Figure 18.6 shows the rendered webpages from both functions.
Listing 18.11 express_templates.js: Implementing Pug and EJS templates in Express
01 var express = require('express'),
02     pug = require('pug'),
03     ejs = require('ejs');
04 var app = express();
05 app.set('views', './views');
06 app.set('view engine', 'pug');
07 app.engine('pug', pug.__express);
08 app.engine('html', ejs.renderFile);
09 app.listen(80);
10 app.locals.uname = 'Caleb';
11 app.locals.vehicle = 'TARDIS';
12 app.locals.terrain = 'time and space';
13 app.locals.location = 'anywhere anytime';
14 app.get('/pug', function (req, res) {
15   res.render('user_pug');
16 });
17 app.get('/ejs', function (req, res) {
18   app.render('user_ejs.html', function(err, renderedData){
19     res.send(renderedData);
20   });
21 });


Figure 18.6 Webpages generated by rendering Pug and EJS templates
Summary
This chapter focused on the basics of getting Express installed, configured, and running for your Node.js applications. You learned how to configure routes to handle HTTP requests and how to use the Request object to get information about the request. You also learned how to configure the headers and status for the response and then send HTML strings, files, and rendered templates.