
Now that you've learned about Node.js modules, it's time to put this knowledge to use by building a simple Node.js web application. The goal of this book is to learn about web application development with Node.js. The next step in that journey is getting a basic understanding of the HTTPServer and HTTPClient objects. To do that, we'll create a simple application that will enable us to explore a popular application framework for Node.js—Express. In later chapters, we'll do more complex work on the application, but before we can walk, we must learn to crawl.
The goal of this chapter is to start to understand how to create applications on the Node.js platform. We'll create a handful of small applications, which means we'll be writing code and talking about what it does. Beyond learning about some specific technologies, we want to get comfortable with the process of initializing a work directory, creating the Node.js code for an application, installing dependencies required by the application, and running/testing the application.
The Node.js runtime includes objects such as EventEmitter, HTTPServer, and HTTPClient, which provide a foundation on which we can build applications. Even if we rarely use these objects directly, it is useful to understand how they work, and in this chapter, we will cover a couple of exercises using these specific objects.
We'll first build a simple application directly using the HTTPServer object. Then, we'll move on to using Express to create an application for computing Fibonacci numbers. Because this can be computationally expensive, we'll use this to explore why it's important to not block the event queue in Node.js and what happens to applications that do. This will give us an excuse to develop a simple background Representational State Transfer (REST) server, an HTTP client for making requests on that server, and the implementation of a multi-tier web application.
In today's world, the microservice application architecture implements background REST servers, which is what we'll do in this chapter.
We will cover the following topics in this chapter:
- Sending and receiving events using the EventEmitter pattern
- Understanding an HTTP server application by building a simple application
- Web application frameworks
- Using the Express framework to build a simple application
- Handling computationally intensive calculations in an Express application and the Node.js event loop
- Making HTTP Client requests
- Creating a simple REST service with Express
By going through these topics, you'll gain an understanding of several aspects of designing HTTP-based web services. The goal is for you to understand how to create or consume an HTTP service and to get an introduction to the Express framework. By the end of this chapter, you'll have a basic understanding of these two tools.
That's a lot to cover, and it will give us a good foundation for the rest of this book.
Sending and receiving events with EventEmitter
EventEmitter is one of the core idioms of Node.js. If Node.js's core idea is an event-driven architecture, emitting events from an object is one of the primary mechanisms of that architecture. EventEmitter is an object that gives notifications (events) at different points in its life cycle. For example, an HTTPServer object emits events concerning each stage of the startup/shutdown of the Server object and at each stage of processing HTTP requests from HTTP clients.
Many core Node.js modules are EventEmitter objects, and EventEmitter objects are an excellent skeleton on which to implement asynchronous programming. EventEmitter objects are so much a part of the Node.js woodwork that you may skip over their existence. However, because they're used everywhere, we need some understanding of what they are and how to use them when necessary.
In this chapter, we'll work with the HTTPServer and HTTPClient objects. Both are subclasses of the EventEmitter class and rely on it to send events for each step of the HTTP protocol. In this section, we'll first learn about using JavaScript classes, and then we will create an EventEmitter subclass so that we can learn about EventEmitter.
JavaScript classes and class inheritance
Before getting started on the EventEmitter class, we need to take a look at another one of the ES2015 features: classes. JavaScript has always had objects and the concept of a class hierarchy, but nothing as formal as in other languages. The ES2015 class object builds on the existing prototype-based inheritance model, but with a syntax that looks a lot like class definitions in other languages.
For example, consider the following class, which we'll be using later in this book:
class Note {
    constructor(key, title, body) {
        this._key = key;
        this._title = title;
        this._body = body;
    }
    get key() { return this._key; }
    get title() { return this._title; }
    set title(newTitle) { return this._title = newTitle; }
    get body() { return this._body; }
    set body(newBody) { return this._body = newBody; }
}
This should look familiar to anyone who's implemented a class definition in other languages. The class has a name—Note. There is also a constructor method and attributes for each instance of the class.
Once you've defined the class, you can export the class definition to other modules:
module.exports.Note = class Note { .. }   # in CommonJS modules
export class Note { .. }                  # in ES6 modules
Functions marked with the get or set keywords are getters and setters, used as follows:
const aNote = new Note("key", "The Rain in Spain", "Falls mainly on the plain");
const key = aNote.key;
var title = aNote.title;
aNote.title = "The Rain in Spain, which made me want to cry with joy";
New instances of a class are created with new. You access a getter or setter function as if it is a simple field on the object. Behind the scenes, the getter/setter function is invoked.
The preceding implementation is not the best because the _title and _body fields are publicly visible and there is no data-hiding or encapsulation. There is a technique to better hide the field data, which we'll go over in Chapter 5, Your First Express Application.
You can test whether a given object is of a certain class by using the instanceof operator:
if (anotherNote instanceof Note) {
    ... it's a Note, so act on it as a Note
}
Finally, you declare a subclass using the extends operator, similar to how you would in other languages:
class LoveNote extends Note {
    constructor(key, title, body, heart) {
        super(key, title, body);
        this._heart = heart;
    }
    get heart() { return this._heart; }
    set heart(newHeart) { return this._heart = newHeart; }
}
In other words, the LoveNote class has all the fields of Note, plus a new field named heart.
This was a brief introduction to JavaScript classes. By the end of this book, you'll have had lots of practice with this feature. The EventEmitter class gives us a practical use for classes and class inheritance.
The EventEmitter class
The EventEmitter object is defined in the events module of Node.js. Using the EventEmitter class directly means performing require('events'). In most cases, we don't do this. Instead, our typical use of EventEmitter objects is via an existing object that uses EventEmitter internally. However, there are some cases where needs dictate implementing an EventEmitter subclass.
Create a file named pulser.mjs, containing the following code:
import EventEmitter from 'events';

export class Pulser extends EventEmitter {
    start() {
        setInterval(() => {
            console.log(`${new Date().toISOString()} >>>> pulse`);
            this.emit('pulse');
            console.log(`${new Date().toISOString()} <<<< pulse`);
        }, 1000);
    }
}
This is an ES6 module that defines a class named Pulser. The class inherits from EventEmitter and provides a few methods of its own.
Another thing to examine is how this.emit in the callback function refers to the Pulser object instance. This implementation relies on the ES2015 arrow function. Before arrow functions, our callbacks used a regular function, and this would not have referred to the Pulser object instance. Instead, this would have referred to some other object related to the setInterval function. One of the attributes of arrow functions is that this inside the arrow function has the same value as this in the surrounding context. This means, in this case, that this does refer to the Pulser object instance.
Back when we had to use function, rather than an arrow function, we had to assign this to another variable, as follows:
class Pulser extends EventEmitter {
    start() {
        var self = this;
        setInterval(function() {
            self.emit(...);
        });
    }
}
What's different is the assignment of this to self. The value of this inside the function is different—it is related to the setInterval function—but the value of self remains the same in every enclosed scope. You'll see this trick used widely, so remember this in case you come across this pattern in code that you're maintaining.
If you want to use a simple EventEmitter object but with your own class name, the body of the extended class can be empty:
class HeartBeat extends EventEmitter {}
const beatMaker = new HeartBeat();
The purpose of the Pulser class is to send a timed event once a second to any listeners. The start method uses setInterval to kick off a repeated callback execution that is scheduled for every second and calls emit to send the pulse events to any listeners.
Now, let's see how we can use the Pulser object. Create a new file called pulsed.mjs, containing the following code:
import { Pulser } from './pulser.mjs';

// Instantiate a Pulser object
const pulser = new Pulser();
// Handler function
pulser.on('pulse', () => {
    console.log(`${new Date().toISOString()} pulse received`);
});
// Start it pulsing
pulser.start();
Here, we create a Pulser object and consume its pulse events. Calling pulser.on('pulse') sets up an event listener for the pulse events to invoke the callback function. It then calls the start method to get the process going.
When it is run, you should see the following output:
$ node pulsed.mjs
2020-01-06T06:12:29.530Z >>>> pulse
2020-01-06T06:12:29.534Z pulse received
2020-01-06T06:12:29.534Z <<<< pulse
2020-01-06T06:12:30.538Z >>>> pulse
2020-01-06T06:12:30.539Z pulse received
2020-01-06T06:12:30.539Z <<<< pulse
For each pulse event received, a pulse received message is printed.
That gives you a little practical knowledge of the EventEmitter class. Let's now look at its operational theory.
The EventEmitter theory
With the EventEmitter class, your code emits events that other code can receive. This is a way of connecting two separated sections of your program, kind of like how quantum entanglement means two electrons can communicate with each other from any distance. It seems simple enough.
The event name can be anything that makes sense to you, and you can define as many event names as you like. Event names are defined simply by calling .emit with the event name. There's nothing formal to do and no registry of event names is required. Simply making a call to .emit is enough to define an event name.
An object sends events using the .emit function. Events are sent to any listeners that have registered to receive events from the object. The program registers to receive an event by calling that object's .on method, giving the event name and an event handler function.
There is no central distribution point for all events. Instead, each instance of an EventEmitter object manages its own set of listeners and distributes its events to those listeners.
Often, it is required to send data along with an event. To do so, simply add the data as arguments to the .emit call, as follows:
this.emit('eventName', data1, data2, ..);
When the program receives the event, the data appears as arguments to the callback function. Your program listens to this event, as follows:
emitter.on('eventName', (data1, data2, ...theArgs) => {
  // act on event
});
There is no handshaking between event receivers and the event sender. That is, the event sender simply goes on with its business and it gets no notifications about any events that were received, any action taken, or any errors that occurred.
In this example, we used another one of the ES2015 features—the rest operator—used here in the form of ...theArgs. The rest operator catches any number of remaining function parameters into an array. Since EventEmitter can pass along any number of parameters and the rest operator can automatically receive any number of parameters, it's a match made in heaven—or at least in the TC-39 committee.
We've now learned how to use JavaScript classes and how to use the EventEmitter class. What's next is examining how the HTTPServer object uses EventEmitter.
Understanding HTTP server applications
The HTTPServer object is the foundation of all Node.js web applications. The object itself is very close to the HTTP protocol, and its use requires knowledge of this protocol. Fortunately, in most cases, you'll be able to use an application framework, such as Express, to hide the HTTP protocol details. As application developers, we want to focus on business logic.
We already saw a simple HTTP server application in Chapter 2, Setting Up Node.js. Because HTTPServer is an EventEmitter object, the example can be written in another way to make this fact explicit by separately adding the event listener:
import * as http from 'http';

const server = http.createServer();
server.on('request', (req, res) => {
  res.writeHead(200, {'Content-Type': 'text/plain'});
  res.end('Hello, World!
');
});
server.listen(8124, '127.0.0.1');
console.log('Server running at http://127.0.0.1:8124');
Here, we created an HTTP server object, then attached a listener to the request event, and then told the server to listen to connections from localhost (127.0.0.1) on port 8124. The listen function causes the server to start listening and arranges to dispatch an event for every request arriving from a web browser.
The request event is fired any time an HTTP request arrives on the server. It takes a function that receives the request and response objects. The request object has data from the web browser, while the response object is used to gather data to be sent in the response.
Now, let's look at a server application that performs different actions based on the URL.
Create a new file named server.mjs, containing the following code:
import * as http from 'http';
import * as util from 'util';
import * as os from 'os';

const listenOn = 'http://localhost:8124';
const server = http.createServer();
server.on('request', (req, res) => {
    var requrl = new URL(req.url, listenOn);
    if (requrl.pathname === '/') homePage(req, res);
    else if (requrl.pathname === "/osinfo") osInfo(req, res);
    else {
        res.writeHead(404, {'Content-Type': 'text/plain'});
        res.end("bad URL "+ req.url);
    }
});

server.listen(new URL(listenOn).port);
console.log(`listening to ${listenOn}`);

function homePage(req, res) {
 res.writeHead(200, {'Content-Type': 'text/html'});
 res.end(
 `<html><head><title>Hello, world!</title></head>
 <body><h1>Hello, world!</h1>
 <p><a href='/osinfo'>OS Info</a></p>
 </body></html>`);
}

function osInfo(req, res) {
 res.writeHead(200, {'Content-Type': 'text/html'});
 res.end(
 `<html><head><title>Operating System Info</title></head>
 <body><h1>Operating System Info</h1>
 <table>
 <tr><th>TMP Dir</th><td>${os.tmpdir()}</td></tr>
 <tr><th>Host Name</th><td>${os.hostname()}</td></tr>
 <tr><th>OS Type</th><td>${os.type()} ${os.platform()}
      ${os.arch()} ${os.release()}</td></tr>
 <tr><th>Uptime</th><td>${os.uptime()} ${util.inspect(os.loadavg())}</td></tr>
 <tr><th>Memory</th><td>total: ${os.totalmem()} free: ${os.freemem()}</td></tr>
 <tr><th>CPU's</th><td><pre>${util.inspect(os.cpus())}</pre></td></tr>
 <tr><th>Network</th><td><pre>${util.inspect(os.networkInterfaces())}</pre></td></tr>
 </table>
 </body></html>`);
}
The request event is emitted by HTTPServer every time a request arrives from a web browser. In this case, we want to respond differently based on the request URL, which arrives as req.url. This value is a string containing the URL from the HTTP request. Since there are many attributes to a URL, we need to parse the URL so that we can correctly match the pathname for one of two paths: / and /osinfo.
Parsing a URL with the URL class requires a base URL, which we've supplied in the listenOn variable. Notice how we're reusing this same variable in a couple of other places, using one string to configure multiple parts of the application.
Depending on the path, either the homePage or osInfo functions are called.
This is called request routing, where we look at attributes of the incoming request, such as the request path, and route the request to handler functions.
In the handler functions, the req and res parameters correspond to the request and response objects. Where req contains data about the incoming request, we send the response using res. The writeHead function sets up the return status (200 means success, while 404 means the page is not found) and the end function sends the response.
If the request URL is not recognized, the server sends back an error page using a 404 result code. The result code informs the browser about the status of the request, where a 200 code means everything is fine and a 404 code means the requested page doesn't exist. There are, of course, many other HTTP response codes, each with their own meaning.
There are plenty more functions attached to both objects, but that's enough to get us started.
To run it, type the following command:
$ node server.mjs
listening to http://localhost:8124
Then, if we paste the URL into a web browser, we see something like this:

This application is meant to be similar to PHP's sysinfo function. Node.js's os module is consulted to provide information about the computer. This example can easily be extended to gather other pieces of data.
A central part of any web application is the method of routing requests to request handlers. The request object has several pieces of data attached to it, two of which are useful for routing requests: the request.url and request.method fields.
In server.mjs, we consult the request.url data to determine which page to show after parsing using the URL object. Our needs are modest in this server, and a simple comparison of the pathname field is enough. Larger applications will use pattern matching to use part of the request URL to select the request handler function and other parts to extract request data out of the URL. We'll see this in action when we look at Express later in the Getting started with Express section.
Some web applications care about the HTTP verb that is used (GET, DELETE, POST, and so on) and so we must consult the request.method field of the request object. For example, POST is frequently used for any FORM submissions.
That gives us a taste of developing servers with Node.js. Along the way, we breezed past one big ES2015 feature—template strings. The template strings feature simplifies substituting values into strings. Let's see how that works.
ES2015 multiline and template strings
The previous example showed two of the new features introduced with ES2015: multiline and template strings. These features are meant to simplify our lives when creating text strings.
The existing JavaScript string representations use single quotes and double quotes. Template strings are delimited with the backtick character, which is also known as the grave accent:
`template string text`
Before ES2015, one way to implement a multiline string was to use the following construct:
["<html><head><title>Hello, world!</title></head>",
 "<body><h1>Hello, world!</h1>",
 "<p><a href='/osinfo'>OS Info</a></p>",
 "</body></html>"]
.join('
')
This is an array of strings that uses the join function to smash them together into one string. Yes, this is the code used in the same example in previous versions of this book. This is what we can do with ES2015:
`<html><head><title>Hello, world!</title></head>
<body><h1>Hello, world!</h1>
<p><a href='/osinfo'>OS Info</a></p>
</body></html>`
This is more succinct and straightforward. The opening quote is on the first line, the closing quote is on the last line, and everything in between is part of our string.
The real purpose of the template strings feature is to support easily substituting values directly into strings. Many other programming languages support this ability, and now JavaScript does, too.
Pre-ES2015, a programmer would have written their code like this:
[ ...
  "<tr><th>OS Type</th><td>{ostype} {osplat} {osarch} {osrelease}</td></tr>"
  ... ].join('
')
.replace("{ostype}", os.type())
.replace("{osplat}", os.platform())
.replace("{osarch}", os.arch())
.replace("{osrelease}", os.release())
Similar to the previous snippet, this relied on the replace function to insert values into the string. Again, this is extracted from the same example that was used in previous versions of this book. With template strings, this can be written as follows:
`...<tr><th>OS Type</th><td>${os.type()} ${os.platform()} ${os.arch()} ${os.release()}</td></tr>...`
Within a template string, the part within the ${ .. } brackets is interpreted as an expression. This can be a simple mathematical expression, a variable reference, or, as in this case, a function call.
Using template strings to insert data carries a security risk. Have you verified that the data is safe? Will it form the basis of a security attack? As always, data coming from an untrusted source, such as user input, must be properly encoded for the target context where the data is being inserted. In the example here, we should have used a function to encode this data as HTML, perhaps. But for this case, the data is in the form of simple strings and numbers and comes from a known, safe data source—the built-in os module—and so we know that this application is safe.
For this and many other reasons, it is often safer to use an external template engine. Applications such as Express make it easy to do so.
We now have a simple HTTP-based web application. To gain more experience with HTTP events, let's add to one to a module for listening to all HTTP events.
HTTP Sniffer – listening to the HTTP conversation
The events emitted by the HTTPServer object can be used for additional purposes beyond the immediate task of delivering a web application. The following code demonstrates a useful module that listens to all of the HTTPServer events. It could be a useful debugging tool, which also demonstrates how HTTPServer objects operate.
Node.js's HTTPServer object is an EventEmitter object, and HTTP Sniffer simply listens to every server event, printing out information pertinent to each event.
Create a file named httpsniffer.mjs, containing the following code:
import * as util from 'util';
import * as url from 'url';

const timestamp = () => { return new Date().toISOString(); }

export function sniffOn(server) {
    server.on('request', (req, res) => {
        console.log(`${timestamp()} request`);
        console.log(`${timestamp()} ${reqToString(req)}`);
    });

    server.on('close', errno => { console.log(`${timestamp()}
        close errno=${errno}`); });

    server.on('checkContinue', (req, res) => {
        console.log(`${timestamp()} checkContinue`);
        console.log(`${timestamp()} ${reqToString(req)}`);
        res.writeContinue();
    });

    server.on('upgrade', (req, socket, head) => {
        console.log(`${timestamp()} upgrade`);
        console.log(`${timestamp()} ${reqToString(req)}`);
    });

    server.on('clientError', () => { console.log('clientError'); });

    // server.on('connection', e_connection);
}

export function reqToString(req) {
    var ret = `request ${req.method} ${req.httpVersion} ${req.url}`
       +'
';
    ret += JSON.stringify(url.parse(req.url, true)) +'
';
    var keys = Object.keys(req.headers);
    for (var i = 0, l = keys.length; i < l; i++) {
        var key = keys[i];
        ret += `${i} ${key}: ${req.headers[key]}` +'
';
    }
    if (req.trailers)
        ret += util.inspect(req.trailers) +'
';
    return ret;
}
The key here is the sniffOn function. When given an HTTPServer object, it attaches listener functions to each HTTPServer event to print relevant data. This gives us a fairly detailed trace of the HTTP traffic on an application.
In order to use it, make two simple modifications to server.mjs. To the top, add the following import statement:
import { sniffOn } from '../events/httpsniffer.mjs';
Then, change the server setup, as follows:
server.listen(new URL(listenOn).port);
sniffOn(server);
console.log(`listening to ${listenOn}`);
Here, we're importing the sniffOn function and then using it to attach listener methods to the server object.
With this in place, run the server as we did earlier. You can visit http://localhost:8124/ in your browser and see the following console output:
$ node server.mjs
listening to http://localhost:8124
2020-01-05T02:33:09.864Z request
2020-01-05T02:33:09.868Z request GET 1.1 /osinfo
{"protocol":null,"slashes":null,"auth":null,"host":null,"port":null,"hostname":null,"hash":null,"search":null,"query":{},"pathname":"/osinfo","path":"/osinfo","href":"/osinfo"}
0 host: localhost:8124
1 connection: keep-alive
2 cache-control: max-age=0
3 dnt: 1
4 upgrade-insecure-requests: 1
5 user-agent: Mozilla/5.0 (Macintosh; Intel Mac OS X 10_13_6) AppleWebKit/537.36 (KHTML, like Gecko) Chrome/78.0.3904.108 Safari/537.36
6 sec-fetch-user: ?1
7 accept: text/html,application/xhtml+xml,application/xml;q=0.9,image/webp,image/apng,*/*;q=0.8,application/signed-exchange;v=b3
8 sec-fetch-site: same-origin
9 sec-fetch-mode: navigate
10 referer: http://localhost:8124/
11 accept-encoding: gzip, deflate, br
12 accept-language: en-US,en;q=0.9
{}
You now have a tool for snooping on HTTPServer events. This simple technique prints a detailed log of event data. This pattern can be used for any EventEmitter objects. You can use this technique as a way to inspect the actual behavior of EventEmitter objects in your program.
Before we move on to using Express, we need to discuss why we use application frameworks at all.
Web application frameworks
The HTTPServer object is very close to the HTTP protocol. While this is powerful in the same way that driving a stick shift car gives you low-level control over the driving experience, typical web application programming is better done at a higher level. Does anyone use assembly language to write web applications? It's better to abstract away the HTTP details and concentrate on your application.
The Node.js developer community has developed quite a few application frameworks to help with different aspects of abstracting away HTTP protocol details. Of these frameworks, Express is the most popular, and Koa (http://koajs.com/) should be considered because it has fully integrated support for async functions.
The Express.js wiki has a list of frameworks built on top of Express.js or tools that work with it. This includes template engines, middleware modules, and more. The Express.js wiki is located at https://github.com/expressjs/express/wiki.
One reason to use a web framework is that they often have well-tested implementations of the best practices used in web application development for over 20 years. The usual best practices include the following:
- Providing a page for bad URLs (the 404 page)
- Screening URLs and forms for any injected scripting attacks
- Supporting the use of cookies to maintain sessions
- Logging requests for both usage tracking and debugging
- Authentication
- Handling static files, such as images, CSS, JavaScript, or HTML
- Providing cache-control headers to caching proxies
- Limiting things such as the page size or execution time
Web frameworks help you invest your time in a task without getting lost in the details of implementing the HTTP protocol. Abstracting away details is a time-honored way for programmers to be more efficient. This is especially true when using a library or framework that provides prepackaged functions that take care of the details.
With that in mind, let's turn to a simple application implemented with Express.
Getting started with Express
Express is perhaps the most popular Node.js web app framework. Express is described as being Sinatra-like, which refers to a popular Ruby application framework. It is also regarded as not being an opinionated framework, meaning the framework authors don't impose their opinions about structuring an application. This means Express is not at all strict about how your code is structured; you just write it the way you think is best.
As of the time of writing this book, Express 4.17 is the current version, and Express 5 is in alpha testing. According to the Express.js website, there are very few differences between Express 4 and Express 5.
Let's start by installing express-generator. While we can just start with writing some code, express-generator provides a blank starting application, which we'll take and modify.
Install express-generator using the following commands:
$ mkdir fibonacci
$ cd fibonacci
$ npm install [email protected]
This is different from the suggested installation method on the Express website, which says to use the -g tag for a global installation. We're also using an explicit version number to ensure compatibility. As of the time of writing, [email protected] does not exist, but it should exist sometime in the future. The instructions here are written for Express 4.x, and by explicitly naming the version, we're ensuring that we're all on the same page.
Earlier, we discussed how many people now recommend against installing modules globally. Maybe they would consider express-generator as an exception to that rule, or maybe not. In any case, we're not following the recommendation on the Express website, and toward the end of this section, we'll have to uninstall express-generator.
The result of this is that an express command is installed in the ./node_modules/.bin directory:
$ ls node_modules/.bin/
express
Run the express command, as follows:
$ ./node_modules/.bin/express --help

  Usage: express [options] [dir]

  Options:

        --version output the version number
    -e, --ejs add ejs engine support
        --pug add pug engine support
        --hbs add handlebars engine support
    -H, --hogan add hogan.js engine support
    -v, --view <engine> add view <engine> support
    (dust|ejs|hbs|hjs|jade|pug|twig|vash) (defaults to jade)
        --no-view use static html instead of view engine
    -c, --css <engine> add stylesheet <engine> support
    (less|stylus|compass|sass) (defaults to plain css)
        --git add .gitignore
    -f, --force force on non-empty directory
    -h, --help output usage information
We probably don't want to type ./node_modules/.bin/express every time we run the express-generator application, or, for that matter, any of the other applications that provide command-line utilities. Refer back to the discussion we had in Chapter 3, Exploring Node.js Modules, about adding this directory to the PATH variable. Alternatively, the npx command, also described in Chapter 3, Exploring Node.js Modules, is useful for this.
For example, try using the following instead of installing express-generator:
$ npx [email protected]  --help
npx: installed 10 in 4.26s

 Usage: express [options] [dir]
...
This executes exactly the same, without having to install express-generator and (as we'll see in a moment) remembering to uninstall it when you're done using the command.
Now that you've installed express-generator in the fibonacci directory, use it to set up the blank framework application:
$ express --view=hbs --git .
destination is not empty, continue? [y/N] y

   create : public/
   create : public/javascripts/
   create : public/images/
   create : public/stylesheets/
   create : public/stylesheets/style.css
   create : routes/
   create : routes/index.js
   create : routes/users.js
   create : views/
   create : views/error.hbs
   create : views/index.hbs
   create : views/layout.hbs
   create : .gitignore
   create : app.js
   create : package.json
   create : bin/
   create : bin/www

   install dependencies:
     $ npm install

   run the app:
     $ DEBUG=fibonacci:* npm start
This creates a bunch of files for us, which we'll walk through in a minute. We asked it to initialize the use of the Handlebars template engine and to initialize a git repository.
The node_modules directory still has the express-generator module, which is no longer useful. We can just leave it there and ignore it, or we can add it to devDependencies of the package.json file that it generated. Most likely, we will want to uninstall it:
$ npm uninstall express-generator
added 62 packages from 78 contributors, removed 9 packages and audited 152 packages in 4.567s
This uninstalls the express-generator tool. The next thing to do is to run the blank application in the way that we're told. The npm start command relies on a section of the supplied package.json file:
"scripts": {
    "start": "node ./bin/www"
},
It's cool that the Express team showed us how to run the server by initializing the scripts section in package.json. The start script is one of the scripts that correspond to the npm sub-commands. The instructions we were given, therefore, say to run npm start.
The steps are as follows:
- Install the dependencies with npm install.
- Start the application by using npm start.
- Optionally, modify package.json to always run with debugging.
To install the dependencies and run the application, type the following commands:
$ npm install
$ DEBUG=fibonacci:* npm start

> [email protected] start /Users/David/chap04/fibonacci
> node ./bin/www

 fibonacci:server Listening on port 3000 +0ms
Setting the DEBUG variable this way turns on the debugging output, which includes a message about listening on port 3000. Otherwise, we aren't told this information. This syntax is what's used in the Bash shell to run a command with an environment variable. If you get an error when running npm start, then refer to the next section.
We can modify the supplied npm start script to always run the app with debugging enabled. Change the scripts section to the following:
"scripts": {
    "start": "DEBUG=fibonacci:* node ./bin/www"
},
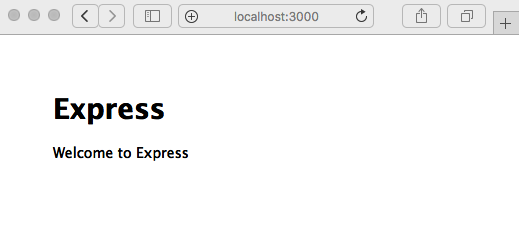
Since the output says it is listening on port 3000, we direct our browser to
http://localhost:3000/ and see the following output:
Cool, we have some running code. Before we start changing the code, we need to discuss how to set environment variables in Windows.
Setting environment variables in the Windows cmd.exe command line
If you're using Windows, the previous example may have failed, displaying an error that says DEBUG is not a known command. The problem is that the Windows shell, the cmd.exe program, does not support the Bash command-line structure.
Adding VARIABLE=value to the beginning of a command line is specific to some shells, such as Bash, on Linux and macOS. It sets that environment variable only for the command line that is being executed and is a very convenient way to temporarily override environment variables for a specific command.
Clearly, a solution is required if you want to be able to use your package.json file across different operating systems.
With this package installed, commands in the scripts section in package.json can set environment variables just as in Bash on Linux/macOS. The use of this package looks as follows:
"scripts": {
    "start": "cross-env DEBUG=fibonacci:* node ./bin/www"
},
"dependencies": {
    ...
    "cross-env": "^6.0.3"
}
Then, the command is executed, as follows:
C:UsersdavidDocumentschap04fibonacci>npm install
... output from installing packages
C:UsersdavidDocumentschap04fibonacci>npm run start

> [email protected] start C:UsersdavidDocumentschap04fibonacci
> cross-env DEBUG=fibonacci:* node ./bin/www

fibonacci:server Listening on port 3000 +0ms
GET / 304 90.597 ms - -
GET /stylesheets/style.css 304 14.480 ms - -
We now have a simple way to ensure the scripts in package.json are cross-platform. Our next step is a quick walkthrough of the generated application.
Walking through the default Express application
We now have a working, blank Express application; let's look at what was generated for us. We do this to familiarize ourselves with Express before diving in to start coding our Fibonacci application.
Because we used the --view=hbs option, this application is set up to use the Handlebars.js template engine.
Generally speaking, a template engine makes it possible to insert data into generated web pages. The Express.js wiki has a list of template engines for Express (https://github.com/expressjs/express/wiki#template-engines).
Notice that the JavaScript files are generated as CommonJS modules. The views directory contains two files—error.hbs and index.hbs. The hbs extension is used for Handlebars files. Another file, layout.hbs, is the default page layout. Handlebars has several ways to configure layout templates and even partials (snippets of code that can be included anywhere).
The routes directory contains the initial routing setup—that is, code to handle specific URLs. We'll modify this later.
The public directory contains assets that the application doesn't generate but are simply sent to the browser. What's initially installed is a CSS file, public/stylesheets/style.css. The package.json file contains our dependencies and other metadata.
The bin directory contains the www script that we saw earlier. This is a Node.js script that initializes the HTTPServer objects, starts listening on a TCP port, and calls the last file that we'll discuss, app.js. These scripts initialize Express and hook up the routing modules, as well as other things.
There's a lot going on in the www and app.js scripts, so let's start with the application initialization. Let's first take a look at a couple of lines in app.js:
const express = require('express');
...
const app = express();
...
module.exports = app;
...
This means that app.js is a CommonJS module that exports the application object generated by the express module. Our task in app.js is to configure that application object. This task does not include starting the HTTPServer object, however.
Now, let's turn to the bin/www script. It is in this script where the HTTP server is started. The first thing to notice is that it starts with the following line:
#!/usr/bin/env node
This is a Unix/Linux technique to make a command script. It says to run the following as a script using the node command. In other words, we have Node.js code and we're instructing the operating system to execute that code using the Node.js runtime:
$ ls -l bin/www
-rwx------  1 david  staff  1595 Feb  5  1970 bin/www
We can also see that the script was made executable by express-generator.
It calls the app.js module, as follows:
var app = require('../app');
...
var port = normalizePort(process.env.PORT || '3000');
app.set('port', port);
...
var server = http.createServer(app);
...
server.listen(port);
server.on('error', onError);
server.on('listening', onListening);
Namely, it loads the module in app.js, gives it a port number to use, creates the HTTPServer object, and starts it up.
We can see where port 3000 comes from; it's a parameter to the normalizePort function. We can also see that setting the PORT environment variable will override the default port 3000. Finally, we can see that the HTTPServer object is created here and is told to use the application instance created in app.js. Try running the following command:
$ PORT=4242 DEBUG=fibonacci:* npm start
By specifying an environment variable for PORT, we can tell the application to listen in on port 4242, where you can ponder the meaning of life.
The app object is next passed to http.createServer(). A look at the Node.js documentation tells us that this function takes requestListener, which is simply a function that takes the request and response objects that we saw previously. Therefore, the app object is the same kind of function.
Finally, the bin/www script starts the server listening process on the port we specified.
Let's now go through app.js in more detail:
app.set('views', path.join(__dirname, 'views'));
app.set('view engine', 'hbs');
This tells Express to look for templates in the views directory and to use the Handlebars templating engine.
The app.set function is used to set the application properties. It'll be useful to browse the API documentation as we go through (http://expressjs.com/en/4x/api.html).
Next is a series of app.use calls:
app.use(logger('dev'));
app.use(bodyParser.json());
app.use(bodyParser.urlencoded({ extended: false }));
app.use(cookieParser());
app.use(express.static(path.join(__dirname, 'public')));

app.use('/', indexRouter);
app.use('/users', usersRouter);
The app.use function mounts middleware functions. This is an important piece of Express jargon, which we will discuss shortly. At the moment, let's say that middleware functions are executed during the processing of requests. This means all the features named here are enabled in app.js:
- Logging is enabled using the morgan request logger. Refer to https://www.npmjs.com/package/morgan for its documentation.
- The body-parser module handles parsing HTTP request bodies. Refer to https://www.npmjs.com/package/body-parser for its documentation.
- The cookie-parser module is used to parse HTTP cookies. Refer to https://www.npmjs.com/package/cookie-parser for its documentation.
- A static file web server is configured to serve the asset files in the public directory. Refer to http://expressjs.com/en/starter/static-files.html for its documentation.
- Two router modules—routes and users—to set up which functions handle which URLs.
The static file web server arranges to serve, via HTTP requests, the files in the named directory. With the configuration shown here, the public/stylesheets/style.css file is available at http://HOST/stylesheets/style.css.
We shouldn't feel limited to setting up an Express application this way. This is the recommendation of the Express team, but there is nothing constraining us from setting it up another way. For example, later in this book, we'll rewrite this entirely as ES6 modules, rather than sticking to CommonJS modules. One glaring omission is handlers for uncaught exceptions and unhandled Promise rejections. We'll go over both of these later in this book.
Next, we will discuss Express middleware functions.
Understanding Express middleware
Let's round out our walkthrough of app.js by discussing what Express middleware functions do for our application. Middleware functions are involved in processing requests and sending results to HTTP clients. They have access to the request and response objects and are expected to process their data and perhaps add data to these objects. For example, the cookie parser middleware parses HTTP cookie headers to record in the request object the cookies sent by the browser.
We have an example of this at the end of our script:
app.use(function(req, res, next) {
  const err = new Error('Not found');
  err.status = 404;
  next(err);
});
The comment says catch 404 and forward it to the error handler. As you probably know, an HTTP 404 status means the requested resource was not found. We need to tell the user that their request wasn't satisfied, and maybe show them something such as a picture of a flock of birds pulling a whale out of the ocean. This is the first step in doing this. Before getting to the last step of reporting this error, you need to learn how middleware works.
The name middleware implies software that executes in the middle of a chain of processing steps.
Middleware functions take three arguments. The first two—request and response—are equivalent to the request and response objects of the Node.js HTTP request object. Express expands these objects with additional data and capabilities. The last argument, next, is a callback function that controls when the request-response cycle ends, and it can be used to send errors down the middleware pipeline.
As an aside, one critique of Express is that it was written prior to the existence of Promises and async functions. Therefore, its design is fully enmeshed with the callback function pattern. We can still use async functions, but integrating with Express requires using the callback functions it provides.
The overall architecture is set up so that incoming requests are handled by zero or more middleware functions, followed by a router function, which sends the response. The middleware functions call next, and in a normal case, provide no arguments by calling next(). If there is an error, the middleware function indicates the error by calling next(err), as shown here.
For each middleware function that executes, there is, in theory, several other middleware functions that have already been executed, and potentially several other functions still to be run. It is required to call next to pass control to the next middleware function.
What happens if next is not called? There is one case where we must not call next. In all other cases, if next is not called, the HTTP request will hang because no response will be given.
What is the one case where we must not call next? Consider the following hypothetical router function:
app.get('/hello', function(req, res) {
    res.send('Hello World!');
});
This does not call next but instead calls res.send. The HTTP response is sent for certain functions on the response object, such as res.send or res.render. This is the correct method for ending the request-response cycle, by sending a response (res.send) to the request. If neither next nor res.send are called, the request never gets a response and the requesting client will hang.
So, a middleware function does one of the following four things:
- Executes its own business logic. The request logger middleware shown earlier is an example of this.
- Modifies the request or response objects. Both body-parser and
cookie-parser do this, looking for data to add to the request object. - Calls next to proceed to the next middleware function or otherwise signals an error.
- Sends a response, ending the cycle.
The ordering of middleware execution depends on the order that they're added to the app object. The first function added is executed first, and so on.
The next thing to understand is request handlers and how they differ from middleware functions.
Contrasting middleware and request handlers
We've seen two kinds of middleware functions so far. In one, the first argument is the handler function. In the other, the first argument is a string containing a URL snippet and the second argument is the handler function.
What's actually going on is app.use has an optional first argument: the path that the middleware is mounted on. The path is a pattern match against the request URL, and the given function is triggered if the URL matches the pattern. There's even a method to supply named parameters in the URL:
app.use('/user/profile/:id', function(req, res, next) {
    userProfiles.lookup(req.params.id, (err, profile) => {
          if (err) return next(err);
          // do something with the profile
          // Such as display it to the user
          res.send(profile.display());
    });
});
This path specification has a pattern, id, and the value will land in req.params.id. In an Express route, this :id pattern marks a route parameter. The pattern will match a URL segment, and the matching URL content will land and be available through the req.params object. In this example, we're suggesting a user profile service and that for this URL, we want to display information about the named user.
As Express scans the available functions to execute, it will try to match this pattern against the request URL. If they match, then the router function is invoked.
It is also possible to match based on the HTTP request method, such as GET or PUT. Instead of app.use, we would write app.METHOD—for example, app.get or app.put. The preceding example would, therefore, be more likely to appear as follows:
app.get('/user/profile/:id', function(req, res, next) {
    // ... as above
});
The required behavior of GET is to retrieve data, while the behavior of PUT is to store data. However, as the example was written above, it would match either of the HTTP methods when the handler function is only correct for the GET verb. However, using app.get, as is the case here, ensures that the application correctly matches the desired HTTP method.
Finally, we get to the Router object. This is the kind of middleware used explicitly for routing requests based on their URL. Take a look at routes/users.js:
const express = require('express');
const router = express.Router();
router.get('/', function(req, res, next) {
   res.send('respond with a resource');
});
module.exports = router;
We have a module that creates a router object, then adds one or more router functions. It makes the Router object available through module.exports so that app.js can use it. This router has only one route, but router objects can have any number of routes that you think is appropriate.
This one route matches a GET request on the / URL. That's fine until you notice that in routes/index.js, there is a similar router function that also matches GET requests on the / URL.
Back in app.js, usersRouter is added, as follows:
app.use('/users', usersRouter);
This takes the router object, with its zero-or-more router functions, and mounts it on the /users URL. As Express looks for a matching routing function, it first scans the functions attached to the app object, and for any router object, it scans its functions as well. It then invokes any routing functions that match the request.
Going back to the issue of the / URL, the fact that the router is mounted on the /users URL is important. That's because the actual URL it considers matching is the mount point (/users) concatenated with the URL in the router function.
The effect is that the mount prefix is stripped from the request URL for the purpose of matching against the router functions attached to the router object. So, with that mount point, an incoming URL of /users/login would be stripped to just /login in order to find a matching router function.
Since not everything goes according to plan, our applications must be capable of handling error indications and showing error messages to users.
Error handling
Now, we can finally get back to the generated app.js file, the 404 Error page not found error, and any other errors that the application might show to the user.
A middleware function indicates an error by passing a value to the next function call, namely by calling next(err). Once Express sees the error, it skips over any remaining non-error routings and only passes the error to error handlers instead. An error handler function has a different signature than what we saw earlier.
In app.js, which we're examining, the following is our error handler, provided by express-generator:
app.use(function(err, req, res, next) {
  // set locals, only providing error in development
  res.locals.message = err.message;
  res.locals.error = req.app.get('env') === 'development' ? err : {};

  res.status(err.status || 500);
  res.render('error');
});
Error handler functions take four parameters, with err added to the familiar req, res, and next functions.
Remember that res is the response object, and we use it to set up the HTTP response sent to the browser; even though there is an error, we still send a response.
Using res.status sets the HTTP response status code. In the simple application that we examined earlier, we used res.writeHead to set not only the status code but also the Multipurpose Internet Mail Extensions (MIME) type of the response.
The res.render function takes data and renders it through a template. In this case, we're using the template named error. This corresponds to the views/error.hbs file, which looks as follows:
<h1>{{message}}</h1>
<h2>{{error.status}}</h2>
<pre>{{error.stack}}</pre>
In a Handlebars template, the {{value}} markup means to substitute into the template the value of the expression or variable. The values referenced by this template—message and error—are provided by setting res.locals as shown here.
To see the error handler in action, let's add the following to routes/index.js:
router.get('/error', function(req, res, next) {
  next({
    status: 404,
    message: "Fake error"
  });
});
This is a route handler, and going by what we've said, it simply generates an error indication. In a real route handler, the code would make some kind of query, gathering up data to show to the user, and it would indicate an error only if something happened along the way. However, we want to see the error handler in action.
By calling next(err), as mentioned, Express will call the error handler function, causing an error response to pop up in the browser:

Indeed, at the /error URL, we get the Fake error message, which matches the error data sent by the route handler function.
In this section, we've created for ourselves a foundation for how Express works. Let's now turn to an Express application that actually performs a function.
Creating an Express application to compute Fibonacci numbers
As we discussed in Chapter 1, About Node.js we'll be using an inefficient algorithm to calculate Fibonacci numbers to explore how to mitigate performance problems, and along the way, we'll learn how to build a simple REST service to offload computation to the backend server.
The Fibonacci numbers are the following integer sequence:
0, 1, 1, 2, 3, 5, 8, 13, 21, 34, ...
Each Fibonacci number is the sum of the previous two numbers in the sequence. This sequence was discovered in 1202 by Leonardo of Pisa, who was also known as Fibonacci. One method to calculate entries in the Fibonacci sequence is using the recursive algorithm, which we discussed in Chapter 1, About Node.js. We will create an Express application that uses the Fibonacci implementation and along the way, we will get a better understanding of Express applications, as well as explore several methods to mitigate performance problems in computationally intensive algorithms.
Let's start with the blank application we created in the previous step. We named that application Fibonacci for a reason—we were thinking ahead!
In app.js, make the following changes to the top portion of the file:
const express = require('express');
const hbs = require('hbs');
const path = require('path');
const favicon = require('serve-favicon');
const logger = require('morgan');
const cookieParser = require('cookie-parser');
const bodyParser = require('body-parser');

const indexRouter = require('./routes/index');
const fibonacciRouter = require('./routes/fibonacci');

const app = express();

// view engine setup
app.set('views', path.join(__dirname, 'views'));
app.set('view engine', 'hbs');
hbs.registerPartials(path.join(__dirname, 'partials'));

app.use(logger('dev'));
app.use(bodyParser.json());
app.use(bodyParser.urlencoded({ extended: false }));
app.use(cookieParser());
app.use(express.static(path.join(__dirname, 'public')));

app.use('/', indexRouter);
app.use('/fibonacci', fibonacciRouter);
Most of this is what express-generator gave us. The var statements have been changed to const for that little teensy bit of extra comfort. We explicitly imported the hbs module so that we could do some configuration. We also imported a router module for Fibonacci, which we'll see in a minute.
For the Fibonacci application, we don't need to support users and so we have deleted the routing module. The routes/fibonacci.js module, which we'll show next, serves to query a number for which we'll calculate the Fibonacci number.
In the top-level directory, create a file, math.js, containing the following extremely simplistic Fibonacci implementation:
exports.fibonacci = function(n) {
    if (n === 0) return 0;
    else if (n === 1 || n === 2) return 1;
    else return exports.fibonacci(n-1) + exports.fibonacci(n-2);
};
In the views directory, look at the file named layout.hbs, which was created by express-generator:
<!DOCTYPE html>
<html>
  <head>
    <title>{{title}}</title>
    <link rel='stylesheet' href='/stylesheets/style.css' />
  </head>
  <body>
    {{{body}}}
  </body>
</html>
This file contains the structure that we'll use for the HTML pages. Going by the Handlebars syntax, we can see that {{title}} appears within the HTML title tag. This means that when we call res.render, we should supply a title attribute. The {{{body}}} tag is where the view template content lands.
Change views/index.hbs to just contain the following:
<h1>{{title}}</h1>
{{> navbar}}
<p>Welcome to {{title}}</p>
This serves as the front page of our application. It will be inserted in place of {{{body}}} in views/layout.hbs. The marker, {{> navbar}}, refers to a partially named navbar object. Earlier, we configured a directory named partials to hold partials. Now, let's create a file, partials/navbar.html, containing the following:
<div class='navbar'>
<p><a href='/'>home</a> | <a href='/fibonacci'>Fibonacci's</a></p>
</div>
This will serve as a navigation bar that's included on every page.
Create a file, views/fibonacci.hbs, containing the following code:
<h1>{{title}}</h1>
{{> navbar}}
{{#if fiboval}}
  <p>Fibonacci for {{fibonum}} is {{fiboval}}</p>
  <hr/>
{{/if}}
<p>Enter a number to see its' Fibonacci number</p>
<form name='fibonacci' action='/fibonacci' method='get'>
<input type='text' name='fibonum' />
<input type='submit' value='Submit' />
</form>
If fiboval is set, this renders a message that for a given number (fibonum), we have calculated the corresponding Fibonacci number. There is also an HTML form that we can use to enter a fibonum value.
Because it is a GET form, when the user clicks on the Submit button, the browser will issue an HTTP GET method to the /fibonacci URL. What distinguishes one GET method on /fibonacci from another is whether the URL contains a query parameter named fibonum. When the user first enters the page, there is no fibonum number and so there is nothing to calculate. After the user has entered a number and clicked on Submit, there is a fibonum number and so something to calculate.
In routes/index.js, change the router function to the following:
router.get('/', function(req, res, next) {
  res.render('index', { title: "Welcome to the Fibonacci Calculator" });
});
The anonymous object passed to res.render contains the data values we provide to the layout and view templates. We're now passing a new welcome message.
Then, finally, in the routes directory, create a file named fibonacci.js, containing the following code:
const express = require('express');
const router = express.Router();

const math = require('../math');
router.get('/', function(req, res, next) {
  if (req.query.fibonum) {
    // Calculate directly in this server
    res.render('fibonacci', {
      title: "Calculate Fibonacci numbers",
      fibonum: req.query.fibonum,
      fiboval: math.fibonacci(req.query.fibonum)
    });
  } else {
    res.render('fibonacci', {
      title: "Calculate Fibonacci numbers",
      fiboval: undefined
    });
  }
});

module.exports = router;
This route handler says it matches the / route. However, there is a route handler in index.js that matches the same route. We haven't made a mistake, however. The router object created by this module becomes fibonacciRouter when it lands in app.js. Refer back to app.js and you will see that fibonacciRouter is mounted on /fibonacci. The rule is that the actual URL path matched by a router function is the path that the router is mounted on plus the path given for the router function. In this case, that is /fibonacci plus /, and for a URL, that equates to /fibonacci.
The handler checks for the existence of req.query.fibonum. Express automatically parses the HTTP request URL and any query parameters will land in req.query. Therefore, this will trigger a URL such as /fibonacci?fibonum=5.
If this value is present, then we call res.render('fibonacci') with data including fibonum, the number for which we want its Fibonacci number, and fiboval, the corresponding Fibonacci number. Otherwise, we pass undefined for fiboval. If you refer back to the template, if fiboval is not set, then the user only sees the form to enter a fibonum number. Otherwise, if fiboval is set, both fibonum and fiboval are displayed.
The package.json file is already set up, so we can use npm start to run the script and always have debugging messages enabled. Now, we're ready to do this:
$ npm start

> [email protected] start /Users/david/chap04/fibonacci
> DEBUG=fibonacci:* node ./bin/www

fibonacci:server Listening on port 3000 +0ms
As this suggests, you can visit http://localhost:3000/ and see what we have:

This page is rendered from the views/index.hbs template. Simply click on the Fibonacci's link to go to the next page, which is, of course, rendered from the views/fibonacci.hbs template. On that page, you'll be able to enter a number, click on the Submit button, and get an answer (hint—pick a number below 40 if you want your answer in a reasonable amount of time):

We asked you to enter a number less than 40. Go ahead and enter a larger number, such as 50, but go take a coffee break because this is going to take a while to calculate. Or, proceed on to reading the next section, where we will start to discuss the use of computationally intensive code.
Computationally intensive code and the Node.js event loop
This Fibonacci example is purposely inefficient to demonstrate an important consideration for your applications. What happens to the Node.js event loop when long computations are run? To see the effect, open two browser windows, each viewing the Fibonacci page. In one, enter the number 55 or greater, and in the other, enter 10. Note how the second window freezes, and if you leave it running long enough, the answer will eventually pop up in both windows. What's happening in the Node.js event loop is blocked from processing events because the Fibonacci algorithm is running and does not ever yield to the event loop.
Since Node.js has a single execution thread, processing requests depends on request handlers quickly returning to the event loop. Normally, the asynchronous coding style ensures that the event loop executes regularly.
This is true even for requests that load data from a server halfway around the globe because the asynchronous request is non-blocking and control is quickly returned to the event loop. The naïve Fibonacci function we chose doesn't fit into this model because it's a long-running blocking operation. This type of event handler prevents the system from processing requests and stops Node.js from doing what it's meant to do—namely, to be a blisteringly fast web server.
In this case, the long-response-time problem is obvious. The response time to calculate a Fibonacci number quickly escalates to the point where you can take a vacation to Tibet, become a Lama, and perhaps get reincarnated as a llama in Peru in the time it takes to respond! However, it's also possible to create a long-response-time problem without it being as obvious as this one. Of the zillion-and-one asynchronous operations in a large web service, which one is both blocking and takes a long time to compute the result? Any blocking operations like this will cause a negative effect on the server throughput.
To see this more clearly, create a file named fibotimes.js, containing the following code:
const math = require('./math');
for (var num = 1; num < 80; num++) {
  let now = new Date().toISOString();
  console.log(`${now} Fibonacci for ${num} = ${math.fibonacci(num)}`);
}
Now, run it. You will get the following output:
$ node fibotimes.js
2020-01-06T00:26:36.092Z Fibonacci for 1 = 1
2020-01-06T00:26:36.105Z Fibonacci for 2 = 1
2020-01-06T00:26:36.105Z Fibonacci for 3 = 2
2020-01-06T00:26:36.105Z Fibonacci for 4 = 3
2020-01-06T00:26:36.105Z Fibonacci for 5 = 5
...
2020-01-06T00:26:36.106Z Fibonacci for 10 = 55
2020-01-06T00:26:36.106Z Fibonacci for 11 = 89
2020-01-06T00:26:36.106Z Fibonacci for 12 = 144
2020-01-06T00:26:36.106Z Fibonacci for 13 = 233
2020-01-06T00:26:36.106Z Fibonacci for 14 = 377
...
2020-01-06T00:26:37.895Z Fibonacci for 40 = 102334155
2020-01-06T00:26:38.994Z Fibonacci for 41 = 165580141
2020-01-06T00:26:40.792Z Fibonacci for 42 = 267914296
2020-01-06T00:26:43.699Z Fibonacci for 43 = 433494437
2020-01-06T00:26:48.985Z Fibonacci for 44 = 701408733
...
2020-01-06T00:33:45.968Z Fibonacci for 51 = 20365011074
2020-01-06T00:38:12.184Z Fibonacci for 52 = 32951280099
^C
This quickly calculates the first 40 or so members of the Fibonacci sequence, but after the 40th member, it starts taking a couple of seconds per result and quickly degrades from there. It is untenable to execute code of this sort on a single-threaded system that relies on a quick return to the event loop. A web service containing code like this would give a poor performance to the users.
There are two general ways to solve this problem in Node.js:
- Algorithmic refactoring: Perhaps, like the Fibonacci function we chose, one of your algorithms is suboptimal and can be rewritten to be faster. Or, if it is not faster, it can be split into callbacks dispatched through the event loop. We'll look at one method for this in a moment.
- Creating a backend service: Can you imagine a backend server that is dedicated to calculating Fibonacci numbers? Okay, maybe not, but it's quite common to implement backend servers to offload work from frontend servers, and we will implement a backend Fibonacci server at the end of this chapter.
With that in mind, let's examine these possibilities.
Algorithmic refactoring
To prove that we have an artificial problem on our hands, here is a much more efficient Fibonacci function:
exports.fibonacciLoop = function(n) {
  var fibos = [];
  fibos[0] = 0;
  fibos[1] = 1;
  fibos[2] = 1;
  for (let i = 3; i <= n; i++) {
    fibos[i] = fibos[i-2] + fibos[i-1];
  }
  return fibos[n];
}
If we substitute a call to math.fibonacciLoop in place of math.fibonacci, the fibotimes program runs much faster. Even this isn't the most efficient implementation; for example, a simple, prewired lookup table is much faster at the cost of some memory.
Edit fibotimes.js as follows and rerun the script. The numbers will fly by so fast that your head will spin:
for (var num = 1; num < 8000; num++) {
    let now = new Date().toISOString();
    console.log(`${now} Fibonacci for ${num} = ${math.fibonacciLoop(num)}`);
}
Sometimes, your performance problems will be this easy to optimize, but other times, they won't.
The discussion here isn't about optimizing mathematics libraries but about dealing with inefficient algorithms that affect event throughput in a Node.js server. For that reason, we will stick with the inefficient Fibonacci implementation.
It is possible to divide the calculation into chunks and then dispatch the computation of those chunks through the event loop. Add the following code to math.js:
module.exports.fibonacciAsync = function(n, done) {
    if (n === 0) done(undefined, 0);
    else if (n === 1 || n === 2) done(undefined, 1);
    else {
        setImmediate(() => {
            exports.fibonacciAsync(n-1, (err, val1) => {
                if (err) done(err);
                else setImmediate(() => {
                    exports.fibonacciAsync(n-2, (err, val2) => {
                        if (err) done(err);
                        else done(undefined, val1+val2);
                    });
                });
            });
        });
    }
};
This converts the fibonacci function from a synchronous function into a traditional callback-oriented asynchronous function. We're using setImmediate at each stage of the calculation to ensure that the event loop executes regularly and that the server can easily handle other requests while churning away on a calculation. It does nothing to reduce the computation required; this is still the inefficient Fibonacci algorithm. All we've done is spread the computation through the event loop.
In fibotimes.js, we can use the following:
const math = require('./math');

(async () => {
   for (var num = 1; num < 8000; num++) {
       await new Promise((resolve, reject) => {
           math.fibonacciAsync(num, (err, fibo) => {
               if (err) reject(err);
               else {
                   let now = new Date().toISOString();
                   console.log(`${now} Fibonacci for ${num} =
                   ${fibo}`);
                   resolve();
               }
           })
       })
    }
})().catch(err => { console.error(err); });
We're back to an inefficient algorithm, but one where calculations are distributed through the event loop. Running this version of fibotimes.js demonstrates its inefficiency. To demonstrate it in the server, we need to make a few changes.
Because it's an asynchronous function, we will need to change our router code. Create a new file, named routes/fibonacci-async1.js, containing the following code:
const express = require('express');
const router = express.Router();

const math = require('../math');

router.get('/', function(req, res, next) {
  if (req.query.fibonum) {
    // Calculate using async-aware function, in this server
    math.fibonacciAsync(req.query.fibonum, (err, fiboval) => {
      if (err) next(err);
      else {
        res.render('fibonacci', {
          title: "Calculate Fibonacci numbers",
          fibonum: req.query.fibonum,
          fiboval: fiboval
        });
      }
    });
  } else {
    res.render('fibonacci', {
      title: "Calculate Fibonacci numbers",
      fiboval: undefined
    });
  }
});

module.exports = router;
This is the same code as earlier, just rewritten for an asynchronous Fibonacci calculation. The Fibonacci number is returned via a callback function, and even though we have the beginnings of a callback pyramid, it is still manageable.
In app.js, make the following change to the application wiring:
// const fibonacci = require('./routes/fibonacci');
const fibonacci = require('./routes/fibonacci-async1');
With this change, the server no longer freezes when calculating a large Fibonacci number. The calculation, of course, still takes a long time, but at least other users of the application aren't blocked.
You can verify this by again opening two browser windows in the application. Enter 60 in one window, and in the other, start requesting smaller Fibonacci numbers. Unlike with the original fibonacci function, using fibonacciAsync allows both windows to give answers, although if you really did enter 60 in the first window, you might as well take that three-month vacation to Tibet:

It's up to you and your specific algorithms to choose how best to optimize your code and handle any long-running computations you may have.
We've created a simple Express application and demonstrated that there is a flaw that affects performance. We've also discussed algorithmic refactoring, which just leaves us to discuss how to implement a backend service. But first, we need to learn how to create and access a REST service.
Making HTTPClient requests
Another way to mitigate computationally intensive code is to push the calculation to a backend process. To explore that strategy, we'll request computations from a backend Fibonacci server, using the HTTPClient object to do so. However, before we look at that, let's first talk in general about using the HTTPClient object.
Node.js includes an HTTPClient object, which is useful for making HTTP requests. It has the capability to issue any kind of HTTP request. In this section, we'll use the HTTPClient object to make HTTP requests similar to calling a REST web service.
Let's start with some code inspired by the wget or curl commands to make HTTP requests and show the results. Create a file named wget.js, containing the following code:
const http = require('http');
const url = require('url');
const util = require('util');

const argUrl = process.argv[2];
const parsedUrl = url.parse(argUrl, true);

// The options object is passed to http.request
// telling it the URL to retrieve
const options = {
  host: parsedUrl.hostname,
  port: parsedUrl.port,
  path: parsedUrl.pathname,
  method: 'GET'
};

if (parsedUrl.search) options.path += `?${parsedUrl.search}`;

const req = http.request(options);
// Invoked when the request is finished
req.on('response', res => {
  console.log(`STATUS: ${res.statusCode}`);
  console.log(`HEADERS: ${util.inspect(res.headers)}`);
  res.setEncoding('utf8');
  res.on('data', chunk => { console.log(`BODY: ${chunk}`); });
  res.on('error', err => { console.log(`RESPONSE ERROR: ${err}`); });
});
// Invoked on errors
req.on('error', err => { console.log(`REQUEST ERROR: ${err}`); });
req.end();
We invoke an HTTP request by using http.request, passing in an options object describing the request. In this case, we're making a GET request to the server described in a URL we provide on the command line. When the response arrives, the response event is fired and we can print out the response. Likewise, an error event is fired on errors, and we can print out the error.
This corresponds to the HTTP protocol, where the client sends a request and receives a response.
You can run the script as follows:
$ node wget.js http://example.com
STATUS: 200
HEADERS: {
  'accept-ranges': 'bytes',
  'cache-control': 'max-age=604800',
  'content-type': 'text/html; charset=UTF-8',
  date: 'Mon, 06 Jan 2020 02:29:51 GMT',
  etag: '"3147526947"',
  expires: 'Mon, 13 Jan 2020 02:29:51 GMT',
  'last-modified': 'Thu, 17 Oct 2019 07:18:26 GMT',
  server: 'ECS (sjc/4E73)',
  vary: 'Accept-Encoding',
  'x-cache': 'HIT',
  'content-length': '1256',
  connection: 'close'
}
BODY: <!doctype html>
<html>
...
Yes, example.com is a real website—visit it someday. There's more in the printout, namely the HTML of the page at http://example.com/. What we've done is demonstrated how to invoke an HTTP request using the http.request function.
The options object is fairly straightforward, with the host, port, and path fields specifying the URL that is requested. The method field must be one of the HTTP verbs (GET, PUT, POST, and so on). You can also provide a headers array for the headers in the HTTP request. For example, you might need to provide a cookie:
var options = {
  headers: { 'Cookie': '.. cookie value' }
};
The response object is itself an EventEmitter object that emits the data and error events. The data event is called as data arrives and the error event is, of course, called on errors.
The request object is a WritableStream object, which is useful for HTTP requests containing data, such as PUT or POST. This means the request object has a write function, which writes data to the requester. The data format in an HTTP request is specified by the standard MIME type, which was originally created to give us a better email service. Around 1992, the World Wide Web (WWW) community worked with the MIME standard committee, who were developing a format for multi-part, multi-media-rich electronic mail. Receiving fancy-looking email is so commonplace today that you might not be aware that email used to come in plaintext. MIME types were developed to describe the format of each piece of data, and the WWW community adopted this for use on the web. HTML forms will post with a content type of multipart/form-data, for example.
The next step in offloading some computation to a backend service is to implement the REST service and to make HTTP client requests to that service.
Calling a REST backend service from an Express application
Now that we've seen how to make HTTP client requests, we can look at how to make a REST query within an Express web application. What that effectively means is making an HTTP GET request to a backend server, which responds to the Fibonacci number represented by the URL. To do so, we'll refactor the Fibonacci application to make a Fibonacci server that is called from the application. While this is overkill for calculating Fibonacci numbers, it lets us see the basics of implementing a multi-tier application stack in Express.
Inherently, calling a REST service is an asynchronous operation. That means calling the REST service will involve a function call to initiate the request and a callback function to receive the response. REST services are accessed over HTTP, so we'll use the HTTPClient object to do so. We'll start this little experiment by writing a REST server and exercising it by making calls to the service. Then, we'll refactor the Fibonacci service to call that server.
Implementing a simple REST server with Express
While Express can also be used to implement a simple REST service, the parameterized URLs we showed earlier (/user/profile/:id) can act like parameters to a REST call. Express makes it easy to return data encoded in JSON format.
Now, create a file named fiboserver.js, containing the following code:
const math = require('./math');
const express = require('express');
const logger = require('morgan');
const app = express();
app.use(logger('dev'));
app.get('/fibonacci/:n', (req, res, next) => {
    math.fibonacciAsync(Math.floor(req.params.n), (err, val) => {
        if (err) next(`FIBO SERVER ERROR ${err}`);
        else {
            res.send({
                n: req.params.n,
                result: val
            });
        }
    });
});
app.listen(process.env.SERVERPORT);
This is a stripped-down Express application that gets right to the point of providing a Fibonacci calculation service. The one route it supports handles the Fibonacci computation using the same functions that we've already worked with.
This is the first time we've seen res.send used. It's a flexible way to send responses that can take an array of header values (for the HTTP response header) and an HTTP status code. As used here, it automatically detects the object, formats it as JSON text, and sends it with the correct Content-Type parameter.
In package.json, add the following to the scripts section:
"server": "cross-env SERVERPORT=3002 node ./fiboserver"
This automates launching our Fibonacci service.
Now, let's run it:
$ npm run server
> [email protected] server /Users/David/chap04/fibonacci
> cross-env SERVERPORT=3002 node ./fiboserver
Then, in a separate command window, we can use the curl program to make some requests against this service:
$ curl -f http://localhost:3002/fibonacci/10
{"n":"10","result":55}
$ curl -f http://localhost:3002/fibonacci/11
{"n":"11","result":89}
$ curl -f http://localhost:3002/fibonacci/12
{"n":"12","result":144}
Over in the window where the service is running, we'll see a log of GET requests and how long each request took to process:
$ npm run server

> [email protected] server /Users/David/chap04/fibonacci
> cross-env SERVERPORT=3002 node ./fiboserver

GET /fibonacci/10 200 0.393 ms - 22
GET /fibonacci/11 200 0.647 ms - 22
GET /fibonacci/12 200 0.772 ms - 23
That's easy—using curl, we can make HTTP GET requests. Now, let's create a simple client program, fiboclient.js, to programmatically call the Fibonacci service:
const http = require('http');
[
  "/fibonacci/30", "/fibonacci/20", "/fibonacci/10",
  "/fibonacci/9", "/fibonacci/8", "/fibonacci/7",
  "/fibonacci/6", "/fibonacci/5", "/fibonacci/4",
  "/fibonacci/3", "/fibonacci/2", "/fibonacci/1"
].forEach((path) => {
    console.log(`${new Date().toISOString()} requesting ${path}`);
    var req = http.request({
      host: "localhost",
      port: process.env.SERVERPORT,
      path,
      method: 'GET'
    }, res => {
      res.on('data', (chunk) => {
          console.log(`${new Date().toISOString()} BODY: ${chunk}`);
      });
    });
    req.end();
});
This is our good friend http.request with a suitable options object. We're executing it in a loop, so pay attention to the order that the requests are made versus the order the responses arrive.
Then, in package.json, add the following to the scripts section:
"scripts": {
  "start": "node ./bin/www",
  "server": "cross-env SERVERPORT=3002 node ./fiboserver" ,
  "client": "cross-env SERVERPORT=3002 node ./fiboclient"
}
Then, run the client app:
$ npm run client

> [email protected] client /Volumes/Extra/nodejs/Node.js-14-Web-Development/Chapter04/fibonacci
> cross-env SERVERPORT=3002 node ./fiboclient

2020-01-06T03:18:19.048Z requesting /fibonacci/30
2020-01-06T03:18:19.076Z requesting /fibonacci/20
2020-01-06T03:18:19.077Z requesting /fibonacci/10
2020-01-06T03:18:19.077Z requesting /fibonacci/9
2020-01-06T03:18:19.078Z requesting /fibonacci/8
2020-01-06T03:18:19.079Z requesting /fibonacci/7
2020-01-06T03:18:19.079Z requesting /fibonacci/6
2020-01-06T03:18:19.079Z requesting /fibonacci/5
2020-01-06T03:18:19.080Z requesting /fibonacci/4
2020-01-06T03:18:19.080Z requesting /fibonacci/3
2020-01-06T03:18:19.080Z requesting /fibonacci/2
2020-01-06T03:18:19.081Z requesting /fibonacci/1
2020-01-06T03:18:19.150Z BODY: {"n":"10","result":55}
2020-01-06T03:18:19.168Z BODY: {"n":"4","result":3}
2020-01-06T03:18:19.170Z BODY: {"n":"5","result":5}
2020-01-06T03:18:19.179Z BODY: {"n":"3","result":2}
2020-01-06T03:18:19.182Z BODY: {"n":"6","result":8}
2020-01-06T03:18:19.185Z BODY: {"n":"1","result":1}
2020-01-06T03:18:19.191Z BODY: {"n":"2","result":1}
2020-01-06T03:18:19.205Z BODY: {"n":"7","result":13}
2020-01-06T03:18:19.216Z BODY: {"n":"8","result":21}
2020-01-06T03:18:19.232Z BODY: {"n":"9","result":34}
2020-01-06T03:18:19.345Z BODY: {"n":"20","result":6765}
2020-01-06T03:18:24.682Z BODY: {"n":"30","result":832040}
We're building our way toward adding the REST service to the web application. At this point, we've proved several things, one of which is the ability to call a REST service in our program.
We also inadvertently demonstrated an issue with long-running calculations. You'll notice that the requests were made from the largest to the smallest, but the results appeared in a very different order. Why? This is because of the processing time required for each request, and the inefficient algorithm we're using. The computation time increases enough to ensure that larger request values have enough processing time to reverse the order.
What happens is that fiboclient.js sends all of its requests right away, and then each one waits for the response to arrive. Because the server is using fibonacciAsync, it will work on calculating all the responses simultaneously. The values that are quickest to calculate are the ones that will be ready first. As the responses arrive in the client, the matching response handler fires, and in this case, the result prints to the console. The results will arrive when they're ready, and not a millisecond sooner.
We now have enough on our hands to offload Fibonacci calculation to a backend service.
Refactoring the Fibonacci application to call the REST service
Now that we've implemented a REST-based server, we can return to the Fibonacci application, applying what we've learned to improve it. We will lift some of the code from fiboclient.js and transplant it into the application to do this. Create a new file, routes/fibonacci-rest.js, with the following code:
const express = require('express');
const router = express.Router();
const http = require('http');
const math = require('../math');

router.get('/', function (req, res, next) {
    if (req.query.fibonum) {
        var httpreq = http.request({
            host: "localhost",
            port: process.env.SERVERPORT,
            path: `/fibonacci/${Math.floor(req.query.fibonum)}`,
            method: 'GET'
        });
        httpreq.on('response', (response) => {
            response.on('data', (chunk) => {
                var data = JSON.parse(chunk);
                res.render('fibonacci', {
                    title: "Calculate Fibonacci numbers",
                    fibonum: req.query.fibonum,
                    fiboval: data.result
                });
            });
            response.on('error', (err) => { next(err); });
        });
        httpreq.on('error', (err) => { next(err); });
        httpreq.end();
    } else {
        res.render('fibonacci', {
            title: "Calculate Fibonacci numbers",
            fiboval: undefined
        });
    }
});

module.exports = router;
This is a new variant of the Fibonacci route handler, this time calling the REST backend service. We've transplanted the http.request call from fiboclient.js and integrated the events coming from the client object with the Express route handler. In the normal path of execution, the HTTPClient issues a response event, containing a response object. When that object issues a data event, we have our result. The result is JSON text, which we can parse and then return to the browser as the response to its request.
In app.js, make the following change:
const index = require('./routes/index');
// const fibonacci = require('./routes/fibonacci');
// const fibonacci = require('./routes/fibonacci-async1');
// const fibonacci = require('./routes/fibonacci-await');
const fibonacci = require('./routes/fibonacci-rest');
This, of course, reconfigures it to use the new route handler. Then, in package.json, change the scripts entry to the following:
"scripts": {
  "start": "cross-env DEBUG=fibonacci:* node ./bin/www",
  "startrest": "cross-env DEBUG=fibonacci:* SERVERPORT=3002 node ./fiboserver",
  "server": "cross-env DEBUG=fibonacci:* SERVERPORT=3002 node ./bin/www",
  "client": "cross-env DEBUG=fibonacci:* SERVERPORT=3002 node ./fiboclient"
},
How can we have the same value for SERVERPORT for all three scripts entries? The answer is that the variable is used differently in different places. In startrest, this variable is used in routes/fibonacci-rest.js to know at which port the REST service is running. Likewise, in client, fiboclient.js uses this variable for the same purpose. Finally, in server, the fiboserver.js script uses the SERVERPORT variable to know which port to listen on.
In start and startrest, no value is given for PORT. In both cases, bin/www defaults to PORT=3000 if a value is not specified.
In a command window, start the backend server, and in another, start the application. Open a browser window, as before, and make a few requests. You should see an output similar to the following:
$ npm run startrest

> [email protected] startrest /Users/David/chap04/fibonacci
> cross-env DEBUG=fibonacci:* SERVERPORT=3002 node ./fiboserver

GET /fibonacci/34 200 21124.036 ms - 27
GET /fibonacci/12 200 1.578 ms - 23
GET /fibonacci/16 200 6.600 ms - 23
GET /fibonacci/20 200 33.980 ms - 24
GET /fibonacci/28 200 1257.514 ms - 26
The output looks like this for the application:
$ npm run server

> [email protected] server /Users/David/chap04/fibonacci
> cross-env DEBUG=fibonacci:* SERVERPORT=3002 node ./bin/www

  fibonacci:server Listening on port 3000 +0ms
GET /fibonacci?fibonum=34 200 21317.792 ms - 548
GET /stylesheets/style.css 304 20.952 ms - -
GET /fibonacci?fibonum=12 304 109.516 ms - -
GET /stylesheets/style.css 304 0.465 ms - -
GET /fibonacci?fibonum=16 200 83.067 ms - 544
GET /stylesheets/style.css 304 0.900 ms - -
GET /fibonacci?fibonum=20 200 221.842 ms - 545
GET /stylesheets/style.css 304 0.778 ms - -
GET /fibonacci?fibonum=28 200 1428.292 ms - 547
GET /stylesheets/style.css 304 19.083 ms - -
Because we haven't changed the templates, the screen will look exactly as it did earlier.
We may run into another problem with this solution. The asynchronous implementation of our inefficient Fibonacci algorithm may cause the Fibonacci service process to run out of memory. In the Node.js FAQs, https://github.com/nodejs/node/wiki/FAQ, it's suggested to use the --max_old_space_size flag. You'd add this to package.json, as follows:
"server": "cross-env SERVERPORT=3002 node ./fiboserver --max_old_space_size 5000",
However, the FAQs also say that if you're running into maximum memory space problems, your application should probably be refactored. This goes back to the point we made earlier that there are several approaches to addressing performance problems, one of which is the algorithmic refactoring of your application.
Why go through the trouble of developing this REST server when we could just directly use fibonacciAsync?
The main advantage is the ability to push the CPU load for this heavyweight calculation to a separate server. Doing so preserves the CPU capacity on the frontend server so that it can attend to the web browsers. GPU coprocessors are now widely used for numerical computing and can be accessed via a simple network API. The heavy computation can be kept separate, and you can even deploy a cluster of backend servers sitting behind a load balancer, evenly distributing requests. Decisions such as this are made all the time to create multi-tier systems.
What we've demonstrated is that it's possible to implement simple multi-tier REST services in a few lines of Node.js and Express. This whole exercise gave us a chance to think about computationally intensive code in Node.js and the value of splitting a larger service into multiple services.
Of course, Express isn't the only framework that can help us create REST services.
Some RESTful modules and frameworks
Here are a few available packages and frameworks to assist your REST-based projects:
- Restify (>http://restify.com/): This offers both client-side and server-side frameworks for both ends of REST transactions. The server-side API is similar to Express.
- Loopback (http://loopback.io/): This is an offering from StrongLoop. It offers a lot of features and is, of course, built on top of Express.
In this section, we've done a big thing in creating a backend REST service.
Summary
You learned a lot in this chapter about Node.js's EventEmitter pattern, HTTPClient, and server objects, at least two ways to create an HTTP service, how to implement web applications, and even how to create a REST client and REST service integrated into a customer-facing web application. Along the way, we again explored the risks of blocking operations, the importance of keeping the event loop running, and a couple of ways to distribute work across multiple services.
Now, we can move on to implementing a more complete application: one for taking notes. We will use the Notes application in several upcoming chapters as a vehicle to explore the Express application framework, database access, deployment to cloud services or on your own server, user authentication, semi-real-time communication between users, and even hardening an application against several kinds of attacks. We'll end up with an application that can be deployed to cloud infrastructure.
There's still a lot to cover in this book, and it starts in the next chapter with creating a basic Express application.