
Now that we've got our feet wet building an Express application for Node.js, let's start developing an application that performs a useful function. The application we'll build will keep a list of notes and will eventually have users who can send messages to each other. Over the course of this book, we will use it to explore some aspects of real Express web applications.
In this chapter, we'll start with the basic structure of an application, the initial UI, and the data model. We'll also lay the groundwork for adding persistent data storage and all the other features that we will cover in later chapters.
The topics covered in this chapter include the following:
- Using Promises and async functions in Express router functions
- JavaScript class definitions and data hiding in JavaScript classes
- The architecture of an Express application using the MVC paradigm
- Building an Express application
- Implementing the CRUD paradigm
- Express application theming and Handlebars templates
To get started, we will talk about integrating Express router callbacks with async functions.
Exploring Promises and async functions in Express router functions
Before we get into developing our application, we need to take a deeper look at using the Promise class and async functions with Express because Express was invented before these features existed, and so it does not directly integrate with them. While we should be using async functions wherever possible, we have to be aware of how to properly use them in certain circumstances, such as in an Express application.
The rules in Express for handling asynchronous execution are as follows:
- Synchronous errors are caught by Express and cause the application to go to the error handler.
- Asynchronous errors must be reported by calling next(err).
- A successfully executing middleware function tells Express to invoke the next middleware by calling next().
- A router function that returns a result to the HTTP request does not call next().
In this section, we'll discuss three ways to use Promises and async functions in a way that is compatible with these rules.
Both Promises and async functions are used for deferred and asynchronous computation and can make intensely nested callback functions a thing of the past:
- A Promise class represents an operation that hasn't completed yet but is expected to be completed in the future. We've used Promises already, so we know that the .then or .catch functions are invoked asynchronously when the promised result (or error) is available.
- Inside an async function, the await keyword is available to automatically wait for a Promise to resolve. It returns the result of a Promise, or else throws errors, in the natural location at the next line of code, while also accommodating asynchronous execution.
The magic of async functions is that we can write asynchronous code that looks like synchronous code. It's still asynchronous code—meaning it works correctly with the Node.js event loop—but instead of results and errors landing inside callback functions, errors are thrown naturally as exceptions and results naturally land on the next line of code.
Because this is a new feature in JavaScript, there are several traditional asynchronous coding practices with which we must correctly integrate. You may come across some other libraries for managing asynchronous code, including the following:
- The async library is a collection of functions for various asynchronous patterns. It was originally completely implemented around the callback function paradigm, but the current version can handle async functions and is available as an ES6 package. Refer to https://www.npmjs.com/package/async for more information.
- Before Promises were standardized, at least two implementations were available: Bluebird (http://bluebirdjs.com/) and Q (https://www.npmjs.com/package/q). Nowadays, we focus on using the standard, built-in Promise object, but both of these packages offer additional features. What's more likely is that we will come across older code that uses these libraries.
These and other tools were developed to make it easier to write asynchronous code and to solve the pyramid of doom problem. This is named after the shape that the code takes after a few layers of nesting. Any multistage process written as callbacks can quickly escalate to code that is nested many levels deep. Consider the following example:
router.get('/path/to/something', (req, res, next) => {
  doSomething(req.query.arg1, req.query.arg2, (err, data1) => {
    if (err) return next(err);
    doAnotherThing(req.query.arg3, req.query.arg2, data1, (err2,
     data2) => {
      if (err2) return next(err2);
      somethingCompletelyDifferent(req.query.arg1, req.query.arg42,
                     (err3, data3) => {
        if (err3) return next(err3);
        doSomethingElse((err4, data4) => {
          if (err4) return next(err4);
          res.render('page', { data1, data2, data3, data4 });
        });
      });
    });
  });
});
We don't need to worry about the specific functions, but we should instead recognize that one callback tends to lead to another. Before you know it, you've landed in the middle of a deeply nested structure like this. Rewriting this as an async function will make it much clearer. To get there, we need to examine how Promises are used to manage asynchronous results, as well as get a deeper understanding of async functions.
A Promise is either in an unresolved or resolved state. This means that we create a Promise using new Promise, and initially, it is in the unresolved state. The Promise object transitions to the resolved state, where either its resolve or reject functions are called. If the resolve function is called, the Promise is in a successful state, and if instead its reject function is called, the Promise is in a failed state.
More precisely, Promise objects can be in one of three states:
- Pending: This is the initial state, which is neither fulfilled nor rejected.
- Fulfilled: This is the final state, where it executes successfully and produces a result.
- Rejected: This is the final state, where execution fails.
We generate a Promise in the following way:
function asyncFunction(arg1, arg2) {
  return new Promise((resolve, reject) => {
    // perform some task or computation that's asynchronous
    // for any error detected:
    if (errorDetected) return reject(dataAboutError);
    // When the task is finished
    resolve(theResult);
  });
};
A function like this creates the Promise object, giving it a callback function, within which is your asynchronous operation. The resolve and reject functions are passed into that function and are called when the Promise is resolved as either a success or failure state. A typical use of new Promise is a structure like this:
function readFile(filename) {
  return new Promise((resolve, reject) => {
    fs.readFile(filename, (err, data) => {
      if (err) reject(err);
      else resolve(data);
    });
  });
}
This is the pattern that we use when promisifying an asynchronous function that uses callbacks. The asynchronous code executes, and in the callback, we invoke either resolve or reject, as appropriate. We can usually use the util.promisify Node.js function to do this for us, but it's very useful to know how to construct this as needed.
Your caller then uses the function, as follows:
asyncFunction(arg1, arg2)
.then((result) => {
   // the operation succeeded
   // do something with the result
   return newResult;
})
.catch(err => {
   // an error occurred
});
The Promise object is fluid enough that the function passed in a .then handler can return something, such as another Promise, and you can chain the .then calls together. The value returned in a .then handler (if any) becomes a new Promise object, and in this way, you can construct a chain of .then and .catch calls to manage a sequence of asynchronous operations.
With the Promise object, a sequence of asynchronous operations is called a Promise chain, consisting of chained .then handlers, as we will see in the next section.
Promises and error handling in Express router functions
It is important that all errors are correctly handled and reported to Express. With synchronous code, Express will correctly catch a thrown exception and send it to the error handler. Take the following example:
app.get('/', function (req, res) {
 throw new Error('BROKEN');
});
Express catches that exception and does the right thing, meaning it invokes the error handler, but it does not see a thrown exception in asynchronous code. Consider the following error example:
app.get('/', (req, res) => {
   fs.readFile('/does-not-exist', (err, data) => {
     if (err) throw new Error(err);
     // do something with data, like
     res.send(data);
   });
});
This is an example of the error indicator landing in an inconvenient place in the callback function. The exception is thrown in a completely different stack frame than the one invoked by Express. Even if we arranged to return a Promise, as is the case with an async function, Express doesn't handle the Promise. In this example, the error is lost; the caller would never receive a response and nobody would know why.
It is important to reliably catch any errors and respond to the caller with results or errors. To understand this better, let's rewrite the pyramid of doom example:
router.get('/path/to/something', (req, res, next) => {
  let data1, data2, data3, data4;
  doSomething(req.query.arg1, req.query.arg2)
  .then(_data1 => {
    data1 = _data1;
    return doAnotherThing(req.query.arg3, req.query.arg2, data1);
  })
  .then(_data2 => {
    data2 = _data2;
    return somethingCompletelyDifferent(req.query.arg1, req.query.arg42);
  })
  .then(_data3 => {
    data3 = _data3;
    return doSomethingElse();
  })
  .then(_data4 => {
    data4 = _data4;
    res.render('page', { data1, data2, data3, data4 });
  })
  .catch(err => { next(err); });
});
This is rewritten using a Promise chain, rather than nested callbacks. What had been a deeply nested pyramid of callback functions is now arguably a little cleaner thanks to Promises.
The Promise class automatically captures all the errors and searches down the chain of operations attached to the Promise to find and invoke the first .catch function. So long as no errors occur, each .then function in the chain is executed in turn.
One advantage of this is that error reporting and handling is much easier. With the callback paradigm, the nature of the callback pyramid makes error reporting trickier, and it's easy to miss adding the correct error handling to every possible branch of the pyramid. Another advantage is that the structure is flatter and, therefore, easier to read.
To integrate this style with Express, notice the following:
- The final step in the Promise chain uses res.render or a similar function to return a response to the caller.
- The final catch function reports any errors to Express using next(err).
If instead we simply returned the Promise and it was in the rejected state, Express would not handle that failed rejection and the error would be lost.
Having looked at integrating asynchronous callbacks and Promise chains with Express, let's look at integrating async functions.
Integrating async functions with Express router functions
There are two problems that need to be addressed that are related to asynchronous coding in JavaScript. The first is the pyramid of doom, an unwieldily nested callback structure. The second is the inconvenience of where results and errors are delivered in an asynchronous callback.
To explain, let's reiterate the example that Ryan Dahl gives as the primary Node.js idiom:
db.query('SELECT ..etc..', function(err, resultSet) {
   if (err) {
      // Instead, errors arrive here
   } else {
      // Instead, results arrive here
    }
});
// We WANT the errors or results to arrive here
The goal here is to avoid blocking the event loop with a long operation. Deferring the processing of results or errors using callback functions is an excellent solution and is the founding idiom of Node.js. The implementation of callback functions led to this pyramid-shaped problem. Promises help flatten the code so that it is no longer in a pyramid shape. They also capture errors, ensuring delivery to a useful location. In both cases, errors and results are buried inside an anonymous function and are not delivered to the next line of code.
For the documentation for the iteration protocol, refer to https://developer.mozilla.org/en-US/docs/Web/JavaScript/Reference/Iteration_protocols.
For the documentation for the generator functions, refer to https://developer.mozilla.org/en-US/docs/Web/JavaScript/Reference/Global_Objects/Generator.
We've already used async functions and learned about how they let us write clean-looking asynchronous code. For example, the db.query example as an async function looks as follows:
async function dbQuery(params) {
  const resultSet = await db.query('SELECT ..etc..');
  // results and errors land here
  return resultSet;
}
This is much cleaner, with results and errors landing where we want them to.
However, to discuss integration with Express, let's return to the pyramid of doom example from earlier, rewriting it as an async function:
router.get('/path/to/something', async (req, res, next) => {
  try {
    const data1 = await doSomething(req.query.arg1, req.query.arg2);
    const data2 = await doAnotherThing(req.query.arg3,
                           req.query.arg2, data1);
    const data3 = await somethingCompletelyDifferent(req.query.arg1,
                           req.query.arg42);
    const data4 = await doSomethingElse();
    res.render('page', { data1, data2, data3, data4 });
  } catch(err) {
    next(err);
  }
});
Other than try/catch, this example is very clean compared to its earlier forms, both as a callback pyramid and as a Promise chain. All the boilerplate code is erased, and the intent of the programmer shines through clearly. Nothing is lost inside a callback function. Instead, everything lands on the next line of code where it is convenient.
The await keyword looks for a Promise. Therefore, doSomething and the other functions are expected to return a Promise, and await manages its resolution. Each of these functions could be an async function, and thereby automatically returns a Promise, or it could explicitly create a Promise to manage an asynchronous function call. A generator function is also involved, but we don't need to know how that works. We just need to know that await manages the asynchronous execution and the resolution of the Promise.
More importantly, each statement with an await keyword executes asynchronously. That's a side effect of await—managing asynchronous execution to ensure the asynchronous result or error is delivered correctly. However, Express cannot catch an asynchronous error and requires us to notify it of asynchronous results using next().
The try/catch structure is needed for integration with Express. For the reasons just given, we must explicitly catch asynchronously delivered errors and notify Express with next(err).
In this section, we discussed three methods for notifying Express about asynchronously delivered errors. The next thing to discuss is some architectural choices to structure the code.
Architecting an Express application in the MVC paradigm
Express doesn't enforce an opinion on how you should structure the Model, View, and Controller (MVC) modules of your application, or whether you should follow any kind of MVC paradigm at all. The MVC pattern is widely used and involves three main architectural pieces. The controller accepts inputs or requests from the user, converting that into commands sent to the model. The model contains the data, logic, and rules by which the application operates. The view is used to present results to the user.
As we learned in the previous chapter, the blank application created by the Express generator provides two aspects of the MVC model:
- The views directory contains template files, controlling the display portion, corresponding to the view.
- The routes directory contains code implementing the URLs recognized by the application and coordinates the data manipulation required to generate the response to each URL. This corresponds to the controller.
Since the router functions also call the function to generate the result using a template, we cannot strictly say that the router functions are the controller and that the views templates are the view. However, it's close enough to the MVC model for it to be a useful analogy.
This leaves us with a question of where to put the model code. Since the same data manipulation can be used by multiple router functions, clearly the router functions should use a standalone module (or modules) containing the model code. This will also ensure a clean separation of concerns—for example, to ease the unit testing of each.
The approach we'll use is to create a models directory as a sibling of the views and routes directories. The models directory will hold modules to handle data storage and other code that we might call business logic. The API of the modules in the models directory will provide functions to create, read, update, or delete data items—a Create, Read, Update, and Delete/Destroy (CRUD) model—and other functions necessary for the view code to do its thing.
The CRUD model includes the four basic operations of persistent data storage. The Notes application is structured as a CRUD application to demonstrate the implementation each of these operations.
We'll use functions named create, read, update, and destroy to implement each of the basic operations.
With that architectural decision in mind, let's proceed with creating the Notes application.
Creating the Notes application
Since we're starting a new application, we can use the Express generator to give us a starting point. It is not absolutely necessary to use this tool since we can definitely write the code ourselves. The advantage, however, is that it gives us a fully fleshed out starting point:
$ mkdir notes
$ cd notes
$ npx [email protected] --view=hbs --git .
destination is not empty, continue? [y/N] y

   create : .
   create : ./package.json
   create : ./app.js
   create : ./.gitignore
   create : ./public
   create : ./routes
   create : ./routes/index.js
   create : ./routes/users.js
   create : ./views
   create : ./views/index.hbs
   create : ./views/layout.hbs
   create : ./views/error.hbs
   create : ./bin
   create : ./bin/www
   create : ./public/stylesheets
   create : ./public/stylesheets/style.css

   install dependencies:
     $ cd . && npm install

   run the app:
     $ DEBUG=notes:* npm start

   create : ./public/javascripts
   create : ./public/images
$ npm install
added 82 packages and removed 5 packages in 97.188s
As in the previous chapter, we will use cross-env to ensure that the scripts run cross-platform. Start by changing package.json to have the following scripts section:
"scripts": {
    "start": "cross-env DEBUG=notes:* node ./app.mjs"
}
The supplied script uses bin/www, but shortly, we'll restructure the generated code to put everything into a single ES6 script named app.mjs.
Then, install cross-env, as follows:
$ npm install cross-env --save
With cross-env, the scripts are executable on either Unix-like systems or Windows.
If you wish, you can run npm start and view the blank application in your browser. Instead, let's rewrite this starting-point code using ES6 modules, and also combine the contents of bin/www with app.mjs.
Rewriting the generated router module as an ES6 module
Let's start with the routes directory. Since we won't have a Users concept right now, delete users.js. We need to convert the JavaScript files into ES6 format, and we can recall that the simplest way for a module to be recognized as an ES6 module is to use the .mjs extension. Therefore, rename index.js to index.mjs, rewriting it as follows:
import { default as express } from 'express';
export const router = express.Router();

router.get('/', async (req, res, next) => {
  //... placeholder for Notes home page code
  res.render('index', { title: 'Notes' });
});
We'll finish this up later, but what we've done is restructured the code we were given. We can import the Express package, and then export the router object. Adding router functions is, of course, the done in the same way, whether it is a CommonJS or an ES6 module. We made the router callback an async function because it will be using async code.
We'll need to follow the same pattern for any other router modules we create.
Having converted this to an ES6 module, the next step is to merge code from bin/www and app.js into an ES6 module named app.mjs.
Creating the Notes application wiring – app.mjs
Since the express-generator tool gives us a slightly messy application structure that does not use ES6 modules, let's reformulate the code it gave us appropriately. The first, app.mjs, contains the wiring of the application, meaning it configures the objects and functions from which the application is built while not containing any functions of its own. The other code, appsupport.mjs, contains the callback functions that appeared in the generated app.js and bin/www modules.
In app.mjs, start with this:
import { default as express } from 'express';
import { default as hbs } from'hbs';
import * as path from 'path';
// import * as favicon from 'serve-favicon';
import { default as logger } from 'morgan';
import { default as cookieParser } from 'cookie-parser';
import { default as bodyParser } from 'body-parser';
import * as http from 'http';
import { approotdir } from './approotdir.mjs';
const __dirname = approotdir;
import {
 normalizePort, onError, onListening, handle404, basicErrorHandler
} from './appsupport.mjs';

import { router as indexRouter } from './routes/index.mjs';
// import { router as notesRouter } from './routes/notes.mjs';
The generated app.js code had a series of require statements. We have rewritten them to use corresponding import statements. We also added code to calculate the __filename and __dirname variables, but presented a little differently. To support this, add a new module, approotdir.mjs, containing the following:
import * as path from 'path';
import * as url from 'url';
const __filename = url.fileURLToPath(import.meta.url);
const __dirname = path.dirname(__filename);
export const approotdir = __dirname;
In the dirname-fixed.mjs example in Chapter 3, Exploring Node.js Modules, we imported specific functions from the path and url core modules. We have used that code and then exported the value for __dirname as approotdir. Other parts of the Notes application simply need the pathname of the root directory of the application in order to calculate the required pathnames.
Return your attention to app.mjs and you'll see that the router modules are imported as indexRouter and notesRouter. For the moment, notesRouter is commented out, but we'll get to that in a later section.
Now, let's initialize the express application object:
export const app = express();

// view engine setup
app.set('views', path.join(__dirname, 'views'));
app.set('view engine', 'hbs');
hbs.registerPartials(path.join(__dirname, 'partials'));

// uncomment after placing your favicon in /public
//app.use(favicon(path.join(__dirname, 'public', 'favicon.ico')));
app.use(logger('dev'));
app.use(bodyParser.json());
app.use(bodyParser.urlencoded({ extended: false }));
app.use(cookieParser());
app.use(express.static(path.join(__dirname, 'public')));

// Router function lists
app.use('/', indexRouter);
// app.use('/notes', notesRouter);

// error handlers
// catch 404 and forward to error handler
app.use(handle404);
app.use(basicErrorHandler);

export const port = normalizePort(process.env.PORT || '3000');
app.set('port', port);
This should look familiar to the app.js code we used in the previous chapter. Instead of inline functions, however, they're pushed into appsupport.mjs.
The app and port objects are exported in case some other code in the application needs those values.
This section of code creates and configures the Express application instance. To make it a complete running server, we need the following code:
export const server = http.createServer(app);

server.listen(port);
server.on('error', onError);
server.on('listening', onListening);
This section of code wraps the Express application in an HTTP server and gets it listening to HTTP requests. The server object is also exported in case other code wants to access it.
Compare app.mjs with the generated app.js and bin/www code and you will see that we've covered everything in those two modules except for the inline functions. These inline functions could be written at the end of app.mjs, but we've elected instead to create a second module to hold them.
Create appsupport.mjs to hold the inline functions, starting with the following:
import { port } from './app.mjs';

export function normalizePort(val) {
    const port = parseInt(val, 10);
    if (isNaN(port)) {
      return val;
     }
    if (port >= 0) {
      return port;
     }
    return false;
}
This function handles safely converting a port number string that we might be given into a numerical value that can be used in the application. The isNaN test is used to handle cases where instead of a TCP port number, we want to use a named pipe. Look carefully at the other functions and you'll see that they all accommodate either a numerical port number or a string described as a pipe:
export function onError(error) {
 if (error.syscall !== 'listen') {
   throw error;
 }
 const bind = typeof port === 'string'
            ? 'Pipe ' + port
            : 'Port ' + port;

 switch (error.code) {
   case 'EACCES':
     console.error(`${bind} requires elevated privileges`);
     process.exit(1);
     break;
   case 'EADDRINUSE':
     console.error(`${bind} is already in use`);
     process.exit(1);
     break;
   default:
     throw error;
 }
}
The preceding code handles errors from the HTTP server object. Some of these errors will simply cause the server to exit:
import { server } from './app.mjs';
export function onListening() {
  const addr = server.address();
  const bind = typeof addr === 'string'
             ? 'pipe ' + addr
             : 'port ' + addr.port;
 console.log(`Listening on ${bind}`);
}
The preceding code prints a user-friendly message saying where the server is listening for HTTP connections. Because this function needs to reference the server object, we have imported it:
export function handle404(req, res, next) {
  const err = new Error('Not Found');
  err.status = 404;
  next(err);
}

export function basicErrorHandler(err, req, res, next) {
    // Defer to built-in error handler if headersSent
    // See: http://expressjs.com/en/guide/error-handling.html
    if (res.headersSent) {
      return next(err)
    }
    // set locals, only providing error in development
    res.locals.message = err.message;
    res.locals.error = req.app.get('env') === 'development' ?
     err : {};

    // render the error page
    res.status(err.status || 500);
    res.render('error');
}
These were previously inline functions implementing error handling for the Express application.
The result of these changes is that app.mjs is now clean of distracting code, and it instead focuses on connecting together the different parts that make up the application. Since Express is not opinionated, it does not care that we restructured the code like this. We can structure the code in any way that makes sense to us and that correctly calls the Express API.
Since this application is about storing data, let's next talk about the data storage modules.
Implementing the Notes data storage model
Remember that we decided earlier to put data model and data storage code into a directory named models to go along with the views and routes directories. Together, these three directories will separately store the three sides of the MVC paradigm.
The idea is to centralize the implementation details of storing data. The data storage modules will present an API for storing and manipulating application data, and over the course of this book, we'll make several implementations of this API. To switch between one storage engine to another, we will just require a configuration change. The rest of the application will use the same API methods, regardless of the storage engine being used.
To start, let's define a pair of classes to describe the data model. Create a file named models/Notes.mjs with the following code in it:
const _note_key = Symbol('key');
const _note_title = Symbol('title');
const _note_body = Symbol('body');

export class Note {
    constructor(key, title, body) {
        this[_note_key] = key;
        this[_note_title] = title;
        this[_note_body] = body;
    }

    get key() { return this[_note_key]; }
    get title() { return this[_note_title]; }
    set title(newTitle) { this[_note_title] = newTitle; }
    get body() { return this[_note_body]; }
    set body(newBody) { this[_note_body] = newBody; }
}

export class AbstractNotesStore {
    async close() { }
    async update(key, title, body) { }
    async create(key, title, body) { }
    async read(key) { }
    async destroy(key) { }
    async keylist() { }
    async count() { }
}
This defines two classes—Note and AbstractNotesStore—whose purpose is as follows:
- The Note class describes a single note that our application will manage.
- The AbstractNotesStore class describes methods for managing some note instances.
In the Note class, key is how we look for the specific note, and title and body are the content of the note. It uses an important data hiding technique, which we'll discuss in a minute.
The AbstractNotesStore class documents the methods that we'll use for accessing notes from a data storage system. Since we want the Notes application to implement the CRUD paradigm, we have the create, read, update, and destroy methods, plus a couple more to assist in searching for notes. What we have here is an empty class that serves to document the API, and we will use this as the base class for several storage modules that we'll implement later.
The close method is meant to be used when we're done with a datastore. Some datastores keep an open connection to a server, such as a database server, and the close method should be used to close that connection.
This is defined with async functions because we'll store data in the filesystem or in databases. In either case, we need an asynchronous API.
Before implementing our first data storage model, let's talk about data hiding in JavaScript classes.
Data hiding in ES-2015 class definitions
In many programming languages, class definitions let us designate some data fields as private and others as public. This is so that programmers can hide implementation details. However, writing code on the Node.js platform is all about JavaScript, and JavaScript, in general, is very lax about everything. So, by default, fields in an instance of a JavaScript class are open to any code to access or modify.
One concern arises if you have several modules all adding fields or functions to the same object. How do you guarantee that one module won't step on fields added by another module? By default, in JavaScript, there is no such guarantee.
Another concern is hiding implementation details so that the class can be changed while knowing that internal changes won't break other code. By default, JavaScript fields are open to all other code, and there's no guarantee other code won't access fields that are meant to be private.
The technique used in the Note class gates access to the fields through getter and setter functions. These in turn set or get values stored in the instance of the class. By default, those values are visible to any code, and so these values could be modified in ways that are incompatible with the class. The best practice when designing classes is to localize all manipulation of class instance data to the member functions. However, JavaScript makes the fields visible to the world, making it difficult to follow this best practice. The pattern used in the Note class is the closest we can get in JavaScript to data hiding in a class instance.
The technique we use is to name the fields using instances of the Symbol class. Symbol, another ES-2015 feature, is an opaque object with some interesting attributes that make it attractive for use as keys for private fields in objects. Consider the following code:
$ node
Welcome to Node.js v12.13.0.
Type ".help" for more information.
> Symbol('a') === Symbol('a')
false
> let b = Symbol('b')
undefined
> console.log(b)
Symbol(b)
undefined
> let b1 = Symbol('b')
undefined
> console.log(b1)
Symbol(b)
undefined
> b === b1
false
> b === b
true
Creating a Symbol instance is done with Symbol('symbol-name'). The resulting Symbol instance is a unique identifier, and even if you call Symbol('symbol-name') again, the uniqueness is preserved. Each Symbol instance is unique from all other Symbol instances, even ones that are formed from the same string. In this example, the b and b1 variables were both formed by calling Symbol('b'), but they are not equivalent.
Let's see how we can use a Symbol instance to attach fields to an object:
> const obj = {};
undefined
> obj[Symbol('b')] = 'b';
'b'
> obj[Symbol('b')] = 'b1';
'b1'
> obj
{ [Symbol(b)]: 'b', [Symbol(b)]: 'b1' }
>
We've created a little object, then used those Symbol instances as field keys to store data in the object. Notice that when we dump the object's contents, the two fields both register as Symbol(b), but they are two separate fields.
With the Note class, we have used the Symbol instances to provide a small measure of data hiding. The actual values of the Symbol instances are hidden inside Notes.mjs. This means the only code that can directly access the fields is the code running inside Notes.mjs:
> let note = new Note('key', 'title', 'body')
undefined
> note
Note {
  [Symbol(key)]: 'key',
  [Symbol(title)]: 'title',
  [Symbol(body)]: 'body'
}
> note[Symbol('key')] = 'new key'
'new key'
> note
Note {
  [Symbol(key)]: 'key',
  [Symbol(title)]: 'title',
  [Symbol(body)]: 'body',
  [Symbol(key)]: 'new key'
}
With the Note class defined, we can create a Note instance, and then dump it and see the resulting fields. The keys to these fields are indeed Symbol instances. These Symbol instances are hidden inside the module. The fields themselves are visible to code outside the module. As we can see here, an attempt to subvert the instance with note[Symbol('key')] = 'new key' does not overwrite the field but instead adds a second field.
With our data types defined, let's start implementing the application, beginning with a simple in-memory datastore.
Implementing an in-memory Notes datastore
Eventually, we will create a Notes data storage module that persists the notes to long-term storage. But to get us started, let's implement an in-memory datastore so that we can get on with implementing the application. Because we designed an abstract base class, we can easily create new implementations of that class for various storage services.
Create a file named notes-memory.mjs in the models directory with the following code:
import { Note, AbstractNotesStore } from './Notes.mjs';

const notes = [];

export class InMemoryNotesStore extends AbstractNotesStore {

     async close() { }

     async update(key, title, body) {
         notes[key] = new Note(key, title, body);
         return notes[key];
     }

     async create(key, title, body) {
         notes[key] = new Note(key, title, body);
         return notes[key];
     }

     async read(key) {
         if (notes[key]) return notes[key];
         else throw new Error(`Note ${key} does not exist`);
     }

     async destroy(key) {
         if (notes[key]) {
             delete notes[key];
         } else throw new Error(`Note ${key} does not exist`);
     }

     async keylist() {
         return Object.keys(notes);
     }

     async count() {
         return notes.length;
     }
}
This should be fairly self-explanatory. The notes are stored in a private array, named notes. The operations, in this case, are defined in terms of adding or removing items in that array. The key object for each Note instance is used as the index to the notes array, which in turn holds the Note instance. This is simple, fast, and easy to implement. It does not support any long-term data persistence, and any data stored in this model will disappear when the server is killed.
We need to initialize an instance of NotesStore so that it can be used in the application. Let's add the following to app.mjs, somewhere near the top:
import { InMemoryNotesStore } from './models/notes-memory.mjs';
export const NotesStore = new InMemoryNotesStore();
This creates an instance of the class and exports it as NotesStore. This will work so long as we have a single NotesStore instance, but in Chapter 7, Data Storage and Retrieval, we will change this around to support dynamically selecting a NotesStore instance.
We're now ready to start implementing the web pages and associated code for the application, starting with the home page.
The Notes home page
We're going to modify the starter application to support creating, editing, updating, viewing, and deleting notes. Let's start by changing the home page to show a list of notes, and have a top navigation bar linking to an ADD Note page so that we can always add a new note.
There's no change required in app.mjs because the home page is generated in routes controlled in this router module:
import { router as indexRouter } from './routes/index.mjs';
..
app.use('/', indexRouter);
In app.mjs, we configured the Handlebars template engine to use the partials directory to hold partial files. Therefore, make sure you create that directory.
To implement the home page, update routes/index.mjs to the following:
import * as express from 'express';
import { NotesStore as notes } from '../app.mjs';
export const router = express.Router();

/* GET home page. */
router.get('/', async (req, res, next) => {
  try {
    const keylist = await notes.keylist();
    // console.log(`keylist ${util.inspect(keylist)}`);
    const keyPromises = keylist.map(key => {
      return notes.read(key);
    });
    const notelist = await Promise.all(keyPromises);
    // console.log(util.inspect(notelist));
    res.render('index', { title: 'Notes', notelist: notelist });
  } catch (err) {
      next(err); }
});
We showed the outline for this earlier, and having defined the Notes data storage model, we can fill in this function.
This uses the AbstractNotesStore API that we designed earlier. The keylist method returns a list of the key values for notes currently stored by the application. Then, it uses the read method to retrieve each note and pass that list to a template that renders the home page. This template will render a list of the notes.
What's the best way to retrieve all the notes? We could have written a simple for loop, as follows:
const keylist = await notes().keylist();
const notelist = [];
for (key of keylist) {
    let note = await notes.read(key);
    notelist.push({ key: note.key, title: note.title });
}
This has the advantage of being simple to read since it's a simple for loop. The problem is that this loop reads the notes one at a time. It's possible that reading the notes in parallel is more efficient since there's an opportunity to interweave the processing.
The Promise.all function executes an array of Promises in parallel, rather than one at a time. The keyPromises variable ends up being an array of Promises, each of which is executing notes.read to retrieve a single note.
The map function in the arrays converts (or maps) the values of an input array to produce an output array with different values. The output array has the same length as the input array, and the entries are a one-to-one mapping of the input value to an output value. In this case, we map the keys in keylist to a Promise that's waiting on a function that is reading each note. Then, Promise.all waits for all the Promises to resolve into either success or failure states.
The output array, notelist, will be filled with the notes once all the Promises succeed. If any Promises fail, they are rejected—in other words, an exception will be thrown instead.
The notelist array is then passed into the view template that we're about to write.
But first, we need a page layout template. Create a file, views/layout.hbs, containing the following:
<!DOCTYPE html>
<html>
 <head>
    <title>{{title}}</title>
    <link rel='stylesheet' href='/stylesheets/style.css' />
 </head>
  <body>
    {{> header }}
    {{{body}}}
  </body>
</html>
This is the file generated by express-generator, with the addition of a header partial for the page header.
Remember that in the Fibonacci application, we used a partial to store the HTML snippet for the navigation. Partials are just that—HTML template snippets that can be reused in one or more templates. In this case, the header partial will appear on every page and serve as a common navigation bar across the application. Create partials/header.hbs, containing the following:
<header>
 <h1>{{ title }}</h1>
  <div class='navbar'>
  <p><a href='/'>Home</a> | <a href='/notes/add'>ADD Note</a></p>
  </div>
</header>
This simply looks for a variable, title, which should have the page title. It also outputs a navigation bar containing a pair of links—one to the home page and another to /notes/add, where the user will be able to add a new note.
Now, let's rewrite views/index.hbs to this:
<ul>
{{#each notelist}}
 <li>{{ key }}:
 <a href="/notes/view?key={{ key }}">{{ title }}</a>
 </li>
{{/each}}
</ul>
This simply steps through the array of note data and formats a simple listing. Each item links to the /notes/view URL with a key parameter. We have yet to write code to handle that URL, but will obviously display the note. Another thing to note is that no HTML for the list is generated if notelist is empty.
There is, of course, a whole lot more that could be put into this. For example, it's easy to add jQuery support to every page just by adding the appropriate script tags here.
We have now written enough to run the application, so let's view the home page:
$ DEBUG=notes:* npm start

> [email protected] start /Users/David/chap05/notes
> node ./bin/www

  notes:server Listening on port 3000 +0ms
GET / 200 87.300 ms - 308
GET /stylesheets/style.css 200 27.744 ms - 111
If we visit http://localhost:3000, we will see the following page:

Because there aren't any notes (yet), there's nothing to show. Clicking on the Home link just refreshes the page. Clicking on the ADD Note link throws an error because we haven't (yet) implemented that code. This shows that the provided error handler in app.mjs is performing as expected.
Having implemented the home page, we need to implement the various pages of the application. We will start with the page for creating new notes, and then we will implement the rest of the CRUD support.
Adding a new note – create
If we click on the ADD Note link, we get an error because the application doesn't have a route configured for the /notes/add URL; we need to add one. To do that, we need a controller module for the notes that defines all the pages for managing notes in the application.
In app.mjs, uncomment the two lines dealing with notesRouter:
import { router as indexRouter } from './routes/index.mjs';
import { router as notesRouter } from './routes/notes.mjs';
...
app.use('/', indexRouter);
app.use('/notes', notesRouter);
We'll end up with this in app.mjs. We import both routers and then add them to the application configuration.
Create a file named routes/notes.mjs to hold notesRouter, starting with the following content:
// const util = require('util');
import { default as express } from 'express';
import { NotesStore as notes } from '../app.mjs';
export const router = express.Router();

// Add Note.
router.get('/add', (req, res, next) => {
 res.render('noteedit', {
    title: "Add a Note",
    docreate: true,
    notekey: '',
    note: undefined
  });
});
This handles the /notes/add URL corresponding to the link in partials/header.hbs. It simply renders a template, noteedit, using the provided data.
In the views directory, add the corresponding template, named noteedit.hbs, containing the following:
<form method='POST' action='/notes/save'>
<input type='hidden' name='docreate' value='<%=
     docreate ? "create" : "update"%>'>
<p>Key:
{{#if docreate }}
    <input type='text' name='notekey' value=''/>
{{else}}
    {{#if note }}{{notekey}}{{/if}}
    <input type='hidden' name='notekey'
        value='{{#if note }}{{notekey}}{{/if}}'/>
{{/if}}
</p>
<p>Title: <input type='text' name='title'
     value='{{#if note }}{{note.title}}{{/if}}' /></p>
<br/><textarea rows=5 cols=40 name='body'>
     {{#if note }}{{note.body}}{{/if}}</textarea>
<br/><input type='submit' value='Submit' />
</form>
This template supports both creating new notes and updating existing notes. We'll reuse this template to support both scenarios via the docreate flag.
Notice that the note and notekey objects passed to the template are empty in this case. The template detects this condition and ensures that the input areas are empty. Additionally, a flag, docreate, is passed in so that the form records whether it is being used to create or update a note. At this point, we're adding a new note, so no note objects exist. The template code is written defensively to not throw errors.
When creating HTML forms like this, you have to be careful with using whitespace in the elements holding the values. Consider a scenario where the <textarea> element was instead formatted like this:
<br/><textarea rows=5 cols=40 name='body'>
  {{#if note }}{{note.body}}{{/if}}
</textarea>
By normal coding practices, this looks alright, right? It's nicely indented, with the code arranged for easy reading. The problem is that extra whitespace ends up being included in the body value when the form is submitted to the server. That extra whitespace is added because of the nicely indented code. To avoid that extra whitespace, we need to use the angle brackets in the HTML elements that are directly adjacent to the Handlebars code to insert the value. Similar care must be taken with the elements with the value= attributes, ensuring no extra whitespace is within the value string.
This template is a form that will post its data to the /notes/save URL. If you were to run the application now, it would give you an error message because no route is configured for that URL.
To support the /notes/save URL, add it to routes/notes.mjs:
// Save Note (update)
router.post('/save', async (req, res, next) => {
  try {
    let note;
    if (req.body.docreate === "create") {
      note = await notes.create(req.body.notekey,
      req.body.title, req.body.body);
    } else {
      note = await notes.update(req.body.notekey,
      req.body.title, req.body.body);
    }
    res.redirect('/notes/view?key='+ req.body.notekey);
  } catch (err) { next(err); }
});
Because this URL will also be used for both creating and updating notes, we check the docreate flag to call the appropriate model operation.
Both notes.create and notes.update are async functions, meaning we must use await.
This is an HTTP POST handler. Because of the bodyParser middleware, the form data is added to the req.body object. The fields attached to req.body correspond directly to elements in the HTML form.
In this, and most of the other router functions, we use the try/catch construct that we discussed earlier to ensure errors are caught and forwarded correctly to Express. The difference between this and the preceding /notes/add router function is whether the router uses an async callback function. In this case, it is an async function, whereas for /notes/add, it is not async. Express knows how to handle errors in non-async callbacks, but it does not know how to handle errors in async callback functions.
Now, we can run the application again and use the Add a Note form:

However, upon clicking on the Submit button, we get an error message. This is because there isn't anything (yet) to implement the /notes/view URL.
You can modify the URL in the Location box to revisit http://localhost:3000, and you'll see something similar to the following screenshot on the home page:

The note is actually there; we just need to implement /notes/view. Let's get on with that.
Viewing notes – read
Now that we've looked at how to create notes, we need to move on to reading them. This means implementing controller logic and view templates for the /notes/view URL.
Add the following router function to routes/notes.mjs:
// Read Note (read)
router.get('/view', async (req, res, next) => {
  try {
    let note = await notes.read(req.query.key);
    res.render('noteview', {
      title: note ? note.title : "",
      notekey: req.query.key, note: note
    });
  } catch (err) { next(err); }
});
Because this route is mounted on a router handling, /notes, this route handles /notes/view.
The handler simply calls notes.read to read the note. If successful, the note is rendered with the noteview template. If something goes wrong, we'll instead display an error to the user through Express.
Add the noteview.hbs template to the views directory, referenced by the following code:
{{#if note}}<h3>{{ note.title }}</h3>{{/if}}
{{#if note}}<p>{{ note.body }}</p>{{/if}}
<p>Key: {{ notekey }}</p>
{{#if notekey }}
    <hr/>
    <p><a href="/notes/destroy?key={{notekey}}">Delete</a>
     | <a href="/notes/edit?key={{notekey}}">Edit</a></p>
{{/if}}
This is straightforward; we are taking data out of the note object and displaying it using HTML. At the bottom are two links—one to /notes/destroy to delete the note and the other to /notes/edit to edit it.
Neither of these corresponding codes exists at the moment, but that won't stop us from going ahead and executing the application:
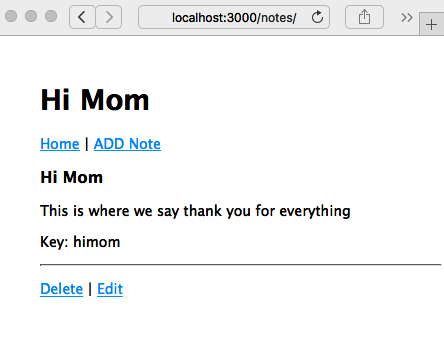
As expected, with this code, the application correctly redirects to /notes/view, and we can see our handiwork. Also, as expected, clicking on either the Delete or Edit links will give us an error because the code hasn't yet been implemented.
We'll next create the code to handle the Edit link and later, one to handle the Delete link.
Editing an existing note – update
Now that we've looked at the create and read operations, let's look at how to update or edit a note.
Add the following router function to routes/notes.mjs:
// Edit note (update)
router.get('/edit', async (req, res, next) => {
  try {
    const note = await notes.read(req.query.key);
    res.render('noteedit', {
      title: note ? ("Edit " + note.title) : "Add a Note",
      docreate: false,
      notekey: req.query.key, note: note
    });
  } catch (err) { next(err); }
});
This handles the /notes/edit URL.
We're reusing the noteedit.hbs template because it can be used for both the create and update/edit operations. Notice that we pass false for docreate, informing the template that it is to be used for editing.
In this case, we first retrieve the note object and then pass it through to the template. This way, the template is set up for editing, rather than note creation. When the user clicks on the Submit button, we end up in the same /notes/save route handler shown in the preceding screenshot. It already does the right thing—calling the notes.update method in the model, rather than notes.create.
Because that's all we need to do, we can go ahead and rerun the application:

Click on the Submit button here and you will be redirected to the /notes/view screen, where you will then be able to read the newly edited note. Back at the /notes/view screen, we've just taken care of the Edit link, but the Delete link still produces an error.
Therefore, we next need to implement a page for deleting notes.
Deleting notes – destroy
Now, let's look at how to implement the /notes/destroy URL to delete notes.
Add the following router function to routes/notes.mjs:
// Ask to Delete note (destroy)
router.get('/destroy', async (req, res, next) => {
  try {
    const note = await notes.read(req.query.key);
    res.render('notedestroy', {
      title: note ? note.title : "",
      notekey: req.query.key, note: note
    });
  } catch (err) { next(err); }
});
Destroying a note is a significant step, if only because there's no trash can to retrieve it from if the user makes a mistake. Therefore, we need to ask the user whether they're sure that they want to delete the note. In this case, we retrieve the note and then render the following page, displaying a question to ensure they definitely want to delete the note.
Add a notedestroy.hbs template to the views directory:
<form method='POST' action='/notes/destroy/confirm'>
<input type='hidden' name='notekey' value='{{#if note}}{{notekey}}{{/if}}'>
<p>Delete {{note.title}}?</p>
<br/><input type='submit' value='DELETE' />
<a href="/notes/view?key={{#if note}}{{notekey}}{{/if}}">Cancel</a>
</form>
This is a simple form that asks the user to confirm by clicking on the button. The Cancel link just sends them back to the /notes/view page. Clicking on the Submit button generates a POST request on the /notes/destroy/confirm URL.
This URL needs a request handler. Add the following code to routes/notes.mjs:
// Really destroy note (destroy)
router.post('/destroy/confirm', async (req, res, next) => {
  try {
    await notes.destroy(req.body.notekey);
    res.redirect('/');
  } catch (err) { next(err); }
});
This calls the notes.destroy function in the model. If it succeeds, the browser is redirected to the home page. If not, an error message is shown to the user. Rerunning the application, we can now view it in action:

Now that everything is working in the application, you can click on any button or link and keep all the notes you want.
We've implemented a bare-bones application for managing notes. Let's now see how to change the look, since in the next chapter, we'll implement a mobile-first UI.
Theming your Express application
The Express team has done a decent job of making sure Express applications look okay out of the gate. Our Notes application won't win any design awards, but at least it isn't ugly. There's a lot of ways to improve it, now that the basic application is running. Let's take a quick look at theming an Express application. In Chapter 6, Implementing the Mobile-First Paradigm, we'll take a deeper dive into this, focusing on that all-important goal of addressing the mobile market.
If you're running the Notes application using the recommended method, npm start, a nice log of activity is being printed in your console window. One of these is the following:
GET /stylesheets/style.css 304 0.702 ms - -
This is due to the following line of code, which we put into layout.hbs:
<link rel='stylesheet' href='/stylesheets/style.css' />
This file was autogenerated for us by the Express generator at the outset and was dropped in the public directory. The public directory is managed by the Express static file server, using the following line in app.mjs:
app.use(express.static(path.join(__dirname, 'public')));
Therefore, the CSS stylesheet is at public/stylesheets/style.css, so let's open it and take a look:
body {
  padding: 50px;
  font: 14px "Lucida Grande", Helvetica, Arial, sans-serif;
}

a {
  color: #00B7FF;
}
Something that leaps out is that the application content has a lot of whitespace at the top and left-hand sides of the screen. The reason for this is that the body tags have the padding: 50px style. Changing it is a quick business.
Since there is no caching in the Express static file server, we can simply edit the CSS file and reload the page, and the CSS will be reloaded as well.
Let's make a couple of tweaks:
body {
  padding: 5px;
  ..
}
..
header {
    background: #eeeeee;
    padding: 5px;
}
This changes the padding and also adds a gray box around the header area.
As a result, we'll have the following:

We're not going to win any design awards with this either, but there's the beginning of some branding and theming possibilities. More importantly, it proves that we can make edits to the theming.
Generally speaking, through the way that we've structured the page templates, applying a site-wide theme is just a matter of adding appropriate code to layout.hbs, along with appropriate stylesheets and other assets.
In Chapter 6, Implementing the Mobile-First Paradigm, we will look at a simple method to add these frontend libraries to your application.
Before closing out this chapter, we want to think ahead to scaling the application to handle multiple users.
Scaling up – running multiple Notes instances
Now that we've got ourselves a running application, you'll have played around a bit and created, read, updated, and deleted many notes.
Suppose for a moment that this isn't a toy application, but one that is interesting enough to draw millions of users a day. Serving a high load typically means adding servers, load balancers, and many other things. A core part of this is to have multiple instances of the application running at the same time to spread the load.
Let's see what happens when you run multiple instances of the Notes application at the same time.
The first thing is to make sure the instances are on different ports. In app.mjs, you'll see that setting the PORT environment variable controls the port being used. If the PORT variable is not set, it defaults to http://localhost:3000, or what we've been using all along.
Let's open up package.json and add the following lines to the scripts section:
"scripts": {
    "start": "cross-env DEBUG=notes:* node ./app.mjs",
    "server1": "cross-env DEBUG=notes:* PORT=3001 node ./app.mjs",
    "server2": "cross-env DEBUG=notes:* PORT=3002 node ./app.mjs"
},
The server1 script runs on PORT 3001, while the server2 script runs on PORT 3002. Isn't it nice to have all of this documented in one place?
Then, in one command window, run the following:
$ npm run server1

> [email protected] server1 /Users/David/chap05/notes
> cross-env DEBUG=notes:* PORT=3001 node ./bin/www

  notes:server Listening on port 3001 +0ms
In another command window, run the following:
$ npm run server2

> [email protected] server2 /Users/David/chap05/notes
> cross-env DEBUG=notes:* PORT=3002 node ./bin/www

  notes:server Listening on port 3002 +0ms
This gives us two instances of the Notes application. Use two browser windows to visit http://localhost:3001 and http://localhost:3002. Enter a couple of notes, and you might see something like this:

After editing and adding some notes, your two browser windows could look as in the preceding screenshot. The two instances do not share the same data pool; each is instead running in its own process and memory space. You add a note to one and it does not show on the other screen.
Additionally, because the model code does not persist data anywhere, the notes are not saved. You might have written the greatest Node.js programming book of all time, but as soon as the application server restarts, it's gone.
Typically, you run multiple instances of an application to scale performance. That's the old throw more servers at it trick. For this to work, the data, of course, must be shared, and each instance must access the same data source. Typically, this involves a database, and when it comes to user identity information, it might even entail armed guards.
All that means databases, more data models, unit testing, security implementation, a deployment strategy, and much more. Hold on—we'll get to all of that soon!
Summary
We've come a long way in this chapter.
We started by looking at the pyramid of doom and how Promise objects and async functions can help us tame asynchronous code. Because we're writing an Express application, we looked at how to use async functions in Express. We'll be using these techniques throughout this book.
We quickly moved on to writing the foundation of a real application with Express. At the moment, our application keeps its data in memory, but it has the basic functionality of what will become a note-taking application that supports real-time collaborative commenting on notes.
In the next chapter, we'll dip our toes into the water of responsive, mobile-friendly web design. Due to the growing popularity of mobile computing devices, it's become necessary to address mobile devices first before desktop computer users. In order to reach those millions of users a day, the Notes application users need a good user experience when using their smartphones.
In the following chapters, we'll keep growing the capabilities of the Notes application, starting with database storage models. But first, we have an important task in the next chapter—implementing a mobile-first UI using Bootstrap.