
Now that our Notes application can save its data in a database, we can think about the next phase of making this a real application—namely, authenticating our users.
It's so natural to log in to a website to use its services. We do it every day, and we even trust banking and investment organizations to secure our financial information through login procedures on a website. The HyperText Transfer Protocol (HTTP) is a stateless protocol, and a web application cannot tell much about one HTTP request compared with another. Because HTTP is stateless, HTTP requests do not natively know the user's identity, whether the user driving the web browser is logged in, or even whether the HTTP request was initiated by a human being.
The typical method for user authentication is to send a cookie containing a token to the browser, to carry the user's identity, and indicate whether that browser is logged in.
With Express, the best way to do this is with the express-session middleware, which handles session management with a cookie. It is easy to configure but is not a complete solution for user authentication since it does not handle user login/logout.
The package that appears to be leading the pack in user authentication is Passport (http://passportjs.org/). In addition to authenticating users against local user information, it supports a long list of third-party services against which to authenticate. With this, a website can be developed that lets users sign up with credentials from another website—Twitter, for example.
We will use Passport to authenticate users against either a locally stored database or a Twitter account. We'll also take this as an opportunity to explore a representational state transfer (REST)-based microservice with Node.js.
The rationale is the greater opportunity to increase security by storing user information in a highly protected enclave. Many application teams store user information in a well-protected barricaded area with a strictly controlled application programming interface (API), and even physical access to the user information database, implementing as many technological barriers as possible against unapproved access. We're not going to go quite that far, but by the end of the book, the user information service will be deployed in its own Docker container.
In this chapter, we'll discuss the following three aspects of this phase:
- Creating a microservice to store user profile/authentication data.
- Authenticating a user with a locally stored password.
- Using OAuth2 to support authentication via third-party services. Specifically, we'll use Twitter as a third-party authentication service.
Let's get started!
The first thing to do is to duplicate the code used for the previous chapter. For example, if you kept that code in the chap07/notes directory, create a new directory, chap08/notes.
Creating a user information microservice
We could implement user authentication and accounts by simply adding a user model and a few routes and views to the existing Notes application. While that's easy, is this what is done in a real-world production application?
Consider the high value of user identity information and the super-strong need for robust and reliable user authentication. Website intrusions happen regularly, and it seems the item most frequently stolen is user identities. To that end, we declared earlier an intention to develop a user information microservice, but we must first discuss the technical rationale for doing so.
Microservices are not a panacea, of course, meaning we shouldn't try to force-fit every application into the microservice box. By analogy, microservices fit with the Unix philosophy of small tools, each doing one thing well, which we mix/match/combine into larger tools. Another word for this is composability. While we can build a lot of useful software tools with that philosophy, does it work for applications such as Photoshop or LibreOffice?
This is why microservices are popular today among application teams. Microservice architectures are more agile if used well. And, as we noted earlier, we're aiming for a highly secured microservice deployment.
With that decision out of the way, there are two other decisions to be made with regard to security implications. They are as follows:
- Do we create our own REST application framework?
- Do we create our own user login/authentication framework?
In many cases, it is better to use a well-regarded existing library where the maintainers have already stomped out lots of bugs, just as we used the Sequelize ORM (Object-Relational Mapping) library in the previous chapter, because of its maturity. We have identified two libraries for this phase of the Notes project.
We already mentioned using Passport for user login support, as well as authenticating Twitter users.
For REST support, we could have continued using Express, but instead will use Restify (http://restify.com/), which is a popular REST-centric application framework.
To test the service, we'll write a command-line tool for administering user information in the database. We won't be implementing an administrative user interface in the Notes application, and will instead rely on this tool to administer the users. As a side effect, we'll have a tool for testing the user service.
Once this service is functioning correctly, we'll set about modifying the Notes application to access user information from the service, while using Passport to handle authentication.
The first step is to create a new directory to hold the user information microservice. This should be a sibling directory to the Notes application. If you created a directory named chap08/notes to hold the Notes application, then create a directory named chap08/users to hold the microservice.
Then, in the chap08/users directory, run the following commands:
$ cd users
$ npm init
.. answer questions
.. name - user-auth-server
$ npm install debug@^4.1.x fs-extra@^9.x js-yaml@^3.14.x  restify@^8.5.x restify-clients@^2.6.x sequelize@^6.x  sqlite3@^5.x commander@^5.x [email protected] --save
This gets us ready to start coding. We'll use the debug module for logging messages, js-yaml to read the Sequelize configuration file, restify for its REST framework, and sequelize/sqlite3 for database access.
In the sections to come, we will develop a database model to store user information, and then create a REST service to manage that data. To test the service, we'll create a command-line tool that uses the REST API.
Developing the user information model
We'll be storing the user information using a Sequelize-based model in a SQL database. We went through that process in the previous chapter, but we'll do it a little differently this time. Rather than go for the ultimate flexibility of using any kind of database, we'll stick with Sequelize since the user information model is very simple and a SQL database is perfectly adequate.
The project will contain two modules. In this section, we'll create users-sequelize.mjs, which will define the SQUser schema and a couple of utility functions. In the next section, we'll start on user-server.mjs, which contains the REST server implementation.
First, let's ponder an architectural preference. Just how much should we separate between the data model code interfacing with the database from the REST server code? In the previous chapter, we went for a clean abstraction with several implementations of the database storage layer. For a simple server such as this, the REST request handler functions could contain all database calls, with no abstraction layer. Which is the best approach? We don't have a hard rule to follow. For this server, we will have database code more tightly integrated to the router functions, with a few shared functions.
Create a new file named users-sequelize.mjs in users containing the following code:
import Sequelize from "sequelize";
import { default as jsyaml } from 'js-yaml';
import { promises as fs } from 'fs';
import * as util from 'util';
import DBG from 'debug';
const log = DBG('users:model-users');
const error = DBG('users:error');

var sequlz;

export class SQUser extends Sequelize.Model {}

export async function connectDB() {

    if (sequlz) return sequlz;

    const yamltext = await fs.readFile(process.env.SEQUELIZE_CONNECT,
                                                             'utf8');
    const params = await jsyaml.safeLoad(yamltext, 'utf8');

    if (typeof process.env.SEQUELIZE_DBNAME !== 'undefined'
            && process.env.SEQUELIZE_DBNAME !== '') {
        params.dbname = process.env.SEQUELIZE_DBNAME;
    }
    if (typeof process.env.SEQUELIZE_DBUSER !== 'undefined'
            && process.env.SEQUELIZE_DBUSER !== '') {
        params.username = process.env.SEQUELIZE_DBUSER;
    }
    if (typeof process.env.SEQUELIZE_DBPASSWD !== 'undefined'
            && process.env.SEQUELIZE_DBPASSWD !== '') {
        params.password = process.env.SEQUELIZE_DBPASSWD;
    }
    if (typeof process.env.SEQUELIZE_DBHOST !== 'undefined'
            && process.env.SEQUELIZE_DBHOST !== '') {
        params.params.host = process.env.SEQUELIZE_DBHOST;
    }
    if (typeof process.env.SEQUELIZE_DBPORT !== 'undefined'
            && process.env.SEQUELIZE_DBPORT !== '') {
        params.params.port = process.env.SEQUELIZE_DBPORT;
    }
    if (typeof process.env.SEQUELIZE_DBDIALECT !== 'undefined'
            && process.env.SEQUELIZE_DBDIALECT !== '') {
        params.params.dialect = process.env.SEQUELIZE_DBDIALECT;
    }

    log('Sequelize params '+ util.inspect(params));

    sequlz = new Sequelize(params.dbname, params.username,
                 params.password, params.params);


     SQUser.init({
        username: { type: Sequelize.STRING, unique: true },
        password: Sequelize.STRING,
        provider: Sequelize.STRING,
        familyName: Sequelize.STRING,
        givenName: Sequelize.STRING,
        middleName: Sequelize.STRING,
        emails: Sequelize.STRING(2048),
        photos: Sequelize.STRING(2048)
    }, {
        sequelize: sequlz,
        modelName: 'SQUser'
    });
    await SQUser.sync();
}
As with our Sequelize-based model for Notes, we will use a YAML Ain't Markup Language (YAML) file to store connection configuration. We're even using the same environment variable, SEQUELIZE_CONNECT, and the same approach to overriding fields of the configuration. The approach is similar, with a connectDB function setting up the connection and initializing the SQUsers table.
With this approach, we can use a base configuration file in the SEQUELIZE_CONNECT variable and then use the other environment variables to override its fields. This will be useful when we start deploying Docker containers.
The Passport project developed this object by harmonizing the user information given by several third-party services into a single object definition. To simplify our code, we're simply using the schema defined by Passport.
There are several functions to create that will be an API to manage user data. Let's add them to the bottom of users-sequelize.mjs, starting with the following code:
export function userParams(req) {
 return {
   username: req.params.username,
   password: req.params.password,
   provider: req.params.provider,
   familyName: req.params.familyName,
   givenName: req.params.givenName,
   middleName: req.params.middleName,
   emails: JSON.stringify(req.params.emails),
   photos: JSON.stringify(req.params.photos)
 };
}
In Restify, the route handler functions supply the same sort of request and response objects we've already seen. We'll go over the configuration of the REST server in the next section. Suffice to say that REST parameters arrive in the request handlers as the req.params object, as shown in the preceding code block. This function simplifies the gathering of those parameters into a simple object that happens to match the SQUser schema, as shown in the following code block:
export function sanitizedUser(user) {
 var ret = {
   id: user.username,
   username: user.username,
   provider: user.provider,
   familyName: user.familyName,
   givenName: user.givenName,
   middleName: user.middleName
 };
 try {
   ret.emails = JSON.parse(user.emails);
 } catch(e) { ret.emails = []; }
 try {
   ret.photos = JSON.parse(user.photos);
 } catch(e) { ret.photos = []; }
 return ret;
}
When we fetch an SQUser object from the database, Sequelize obviously gives us a Sequelize object that has many extra fields and functions used by Sequelize. We don't want to send that data to our callers. Furthermore, we think it will increase security to not provide the password data beyond the boundary of this server. This function produces a simple, sanitized, anonymous JavaScript object from the SQUser instance. We could have defined a full JavaScript class, but would that have served any purpose? This anonymous JavaScript class is sufficient for this simple server, as illustrated in the following code block:
export async function findOneUser(username) {
 let user = await SQUser.findOne({ where: { username: username } });
 user = user ? sanitizedUser(user) : undefined;
 return user;
}

export async function createUser(req) {
 let tocreate = userParams(req);
 await SQUser.create(tocreate);
 const result = await findOneUser(req.params.username);
 return result;
}
The pair of functions shown in the preceding code block provides some database operations that are used several times in the user-server.mjs module.
In findOneUser, we are looking up a single SQUser, and then returning a sanitized copy. In createUser, we gather the user parameters from the request object, create the SQUser object in the database, and then retrieve that newly created object to return it to the caller.
If you refer back to the connectDB function, there is a SEQUELIZE_CONNECT environment variable for the configuration file. Let's create one for SQLite3 that we can name sequelize-sqlite.yaml, as follows:
dbname: users
username:
password:
params:
  dialect: sqlite
  storage: users-sequelize.sqlite3
This is just like the configuration files we used in the previous chapter.
That's what we need for the database side of this service. Let's now move on to creating the REST service.
Creating a REST server for user information
The user information service is a REST server to handle user information data and authentication. Our goal is, of course, to integrate that with the Notes application, but in a real project, such a user information service could be integrated with several web applications. The REST service will provide functions we found useful while developing the user login/logout support in Notes, which we'll show later in the chapter.
In the package.json file, change the main tag to the following line of code:
"main": "user-server.mjs",
This declares that the module we're about to create, user-server.mjs, is the main package of this project.
Make sure the scripts section contains the following script:
"start": "cross-env DEBUG=users:* PORT=5858 SEQUELIZE_CONNECT=sequelize-sqlite.yaml node ./user-server.mjs"
Clearly, this is how we'll start our server. It uses the configuration file from the previous section and specifies that we'll listen on port 5858.
Then, create a file named user-server.mjs containing the following code:
import restify from 'restify';
import * as util from 'util';
import { SQUser, connectDB, userParams, findOneUser,
    createUser, sanitizedUser } from './users-sequelize.mjs';

import DBG from 'debug';
const log = DBG('users:service');
const error = DBG('users:error');

///////////// Set up the REST server

var server = restify.createServer({
    name: "User-Auth-Service",
    version: "0.0.1"
});

server.use(restify.plugins.authorizationParser());
server.use(check);
server.use(restify.plugins.queryParser());
server.use(restify.plugins.bodyParser({
    mapParams: true
}));

server.listen(process.env.PORT, "localhost", function() {
    log(server.name +' listening at '+ server.url);
});

process.on('uncaughtException', function(err) {
    console.error("UNCAUGHT EXCEPTION - "+ (err.stack || err));
    process.exit(1);
});

process.on('unhandledRejection', (reason, p) => {
    console.error(`UNHANDLED PROMISE REJECTION: ${util.inspect(p)} reason: ${reason}`);
    process.exit(1);
});
We're using Restify, rather than Express, to develop this server. Obviously, the Restify API has similarities with Express, since both point to the Ruby framework Sinatra for inspiration. We'll see even more similarities when we talk about the route handler functions.
What we have here is the core setup of the REST server. We created the server object and added a few things that, in Express, were called middleware, but what Restify simply refers to as handlers. A Restify handler function serves the same purpose as an Express middleware function. Both frameworks let you define a function chain to implement the features of your service. One calls it a middleware function and the other calls it a handler function, but they're almost identical in form and function.
We also have a collection of listener functions that print a startup message and handle uncaught errors. You do remember that it's important to catch the uncaught errors?
An interesting thing is that, since REST services are often versioned, Restify has built-in support for handling version numbers. Restify supports semantic versioning (SemVer) version matching in the Accept-Version HTTP header.
In the handlers that were installed, they obviously have to do with authorization and parsing parameters from the Uniform Resource Locator (URL) query string and from the HTTP body. The handlers with names starting with restify.plugins are maintained by the Restify team, and documented on their website.
That leaves the handler simply named check. This handler is in user-server.mjs and provides a simple mechanism of token-based authentication for REST clients.
Add the following code to the bottom of user-server.mjs:
// Mimic API Key authentication.

var apiKeys = [
  { user: 'them', key: 'D4ED43C0-8BD6-4FE2-B358-7C0E230D11EF' } ];

function check(req, res, next) {
  if (req.authorization && req.authorization.basic) {
    var found = false;
    for (let auth of apiKeys) {
      if (auth.key === req.authorization.basic.password
       && auth.user === req.authorization.basic.username) {
         found = true;
         break;
      }
    }
    if (found) next();
    else {
      res.send(401, new Error("Not authenticated"));
      next(false);
    }
  } else {
     res.send(500, new Error('No Authorization Key'));
     next(false);
  }
}
This handler executes for every request and immediately follows restify.plugins.authorizationParser. It looks for authorization data—specifically, HTTP basic authorization—to have been supplied in the HTTP request. It then loops through the list of keys in the apiKeys array, and if the Basic Auth parameters supplied matched, then the caller is accepted.
This should not be taken as an example of a best practice since HTTP Basic Auth is widely known to be extremely insecure, among other issues. But it demonstrates the basic concept, and also shows that enforcing token-based authorization is easily done with a similar handler.
This also shows us the function signature of a Restify handler function—namely, that it is the same signature used for Express middleware, the request and result objects, and the next callback.
There is a big difference between Restify and Express as to how the next callback is used. In Express, remember that a middleware function calls next unless that middleware function is the last function on the processing chain—for example if the function has called res.send (or equivalent) to send a response to the caller. In Restify, every handler function calls next. If a handler function knows it should be the last function on the handler chain, then it uses next(false); otherwise, it calls next(). If a handler function needs to indicate an error, it calls next(err), where err is an object where instanceof Error is true.
Consider the following hypothetical handler function:
server.use((req, res, next) => {
    // ... processing
    if (foundErrorCondition) {
      next(new Error('Describe error condition'));
    } else if (successfulConclusion) {
      res.send(results);
      next(false);
    } else {
      // more processing must be required
      next();
    }
});
This shows the following three cases:
- Errors are indicated with next(new Error('Error description')).
- Completion is indicated with next(false).
- The continuation of processing is indicated with next().
We have created the starting point for a user information data model and the matching REST service. The next thing we need is a tool to test and administer the server.
What we want to do in the following sections is two things. First, we'll create the REST handler functions to implement the REST API. At the same time, we'll create a command-line tool that will use the REST API and let us both test the server and add or delete users.
Creating a command-line tool to test and administer the user authentication server
To give ourselves assurance that the user authentication server works, let's write a tool with which to exercise the server that can also be used for administration. In a typical project, we'd create not only a customer-facing web user interface, but also an administrator-facing web application to administer the service. Instead of doing that here, we'll create a command-line tool.
The tool will be built with Commander, a popular framework for developing command-line tools in Node.js. With Commander, we can easily build a command-line interface (CLI) tool supporting the program verb --option optionValue parameter pattern.
Any command-line tool looks at the process.argv array to know what to do. This array contains strings parsed from what was given on the command line. The concept for all this goes way back to the earliest history of Unix and the C programming language.
By using Commander, we have a simpler path of dealing with the command line. It uses a declarative approach to handling command-line parameters. This means we use Commander functions to declare the options and sub-commands to be used by this program, and then we ask Commander to parse the command line the user supplies. Commander then calls the functions we declare based on the content of the command line.
Create a file named cli.mjs containing the following code:
import { default as program } from 'commander';
import { default as restify } from 'restify-clients';
import * as util from 'util';

var client_port;
var client_host;
var client_version = '*';
var client_protocol;
var authid = 'them';
var authcode = 'D4ED43C0-8BD6-4FE2-B358-7C0E230D11EF';

const client = (program) => {
 if (typeof process.env.PORT === 'string')
      client_port = Number.parseInt(process.env.PORT);
 if (typeof program.port === 'string')
      client_port = Number.parseInt(program.port);
 if (typeof program.host === 'string') client_host = program.host;
 if (typeof program.url === 'string') {
   let purl = new URL(program.url);
   if (purl.host && purl.host !== '') client_host = purl.host;
   if (purl.port && purl.port !== '') client_port = purl.port;
   if (purl.protocol && purl.protocol !== '') client_protocol =
    purl.protocol;
 }
 let connect_url = new URL('http://localhost:5858');
 if (client_protocol) connect_url.protocol = client_protocol;
 if (client_host) connect_url.host = client_host;
 if (client_port) connect_url.port = client_port;
 let client = restify.createJsonClient({
   url: connect_url.href,
   version: client_version
 });
 client.basicAuth(authid, authcode);
 return client;
}

program
 .option('-p, --port <port>',
      'Port number for user server, if using localhost')
 .option('-h, --host <host>',
      'Port number for user server, if using localhost')
 .option('-u, --url <url>',
      'Connection URL for user server, if using a remote server');
This is just the starting point of the command-line tool. For most of the REST handler functions, we'll also implement a sub-command in this tool. We'll take care of that code in the subsequent sections. For now, let's focus on how the command-line tool is set up.
The Commander project suggests we name the default import program, as shown in the preceding code block. As mentioned earlier, we declare the command-line options and sub-commands by calling methods on this object.
In order to properly parse the command line, the last line of code in cli.mjs must be as follows:
program.parse(process.argv);
The process.argv variable is, of course, the command-line arguments split out into an array. Commander, then, is processing those arguments based on the options' declarations.
For the REST client, we use the restify-clients package. As the name implies, this is a companion package to Restify and is maintained by the Restify team.
At the top of this script, we declare a few variables to hold connection parameters. The goal is to create a connection URL to access the REST service. The connect_url variable is initialized with the default value, which is port 5858 on the localhost.
The function named client looks at the information Commander parses from the command line, as well as a number of environment variables. From that data, it deduces any modification to the connect_url variable. The result is that we can connect to this service on any server from our laptop to a faraway cloud-hosted server.
We've also hardcoded the access token and the use of Basic Auth. Put on the backlog a high-priority task to change to a stricter form of authentication.
Where do the values of program.port, program.host, and program.url come from? We declared those variables—that's where they came from.
Consider the following line of code:
program.option('-p, --port <port>', 'Long Description of the option');
This declares an option, either -p or --port, that Commander will parse out of the command line. Notice that all we do is write a text string and, from that, Commander knows it must parse these options. Isn't this easy?
When it sees one of these options, the <port> declaration tells Commander that this option requires an argument. It will parse that argument out of the command line, and then assign it to program.port.
Therefore, program.port, program.host, and program.url were all declared in a similar way. When Commander sees those options, it will create the matching variables, and then our client function will take that data and modify connect_url appropriately.
One of the side effects of these declarations is that Commander can generate help text automatically. The result we'll achieve is being able to type the following code:
$ node cli.mjs --help
Usage: cli.mjs [options] [command]

Options:
 -p, --port <port> Port number for user server, if using localhost
 -h, --host <host> Port number for user server, if using localhost
 -u, --url <url> Connection URL for user server, if using a remote
  server
 -h, --help output usage information

Commands:
 add [options] <username> Add a user to the user server
 find-or-create [options] <username> Add a user to the user server
 update [options] <username> Add a user to the user server
 destroy <username> Destroy a user on the user server
 find <username> Search for a user on the user server
 list-users List all users on the user server
The text comes directly from the descriptive text we put in the declarations. Likewise, each of the sub-commands also takes a --help option to print out corresponding help text.
With all that out of the way, let's start creating these commands and REST functions.
Creating a user in the user information database
We have the starting point for the REST server, and the starting point for a command-line tool to administer the server. Let's start creating the functions—and, of course, the best place to start is to create an SQUser object.
In user-server.mjs, add the following route handler:
server.post('/create-user', async (req, res, next) => {
 try {
   await connectDB();
   let result = await createUser(req);
   res.contentType = 'json';
   res.send(result);
   next(false);
 } catch(err) {
   res.send(500, err);
   next(false);
 }
});
This handles a POST request on the /create-user URL. This should look very similar to an Express route handler function, apart from the use of the next callback. Refer back to the discussion on this. As we did with the Notes application, we declare the handler callback as an async function and then use a try/catch structure to catch all errors and report them as errors.
The handler starts with connectDB to ensure the database is set up. Then, if you refer back to the createUser function, you see it gathers up the user data from the request parameters and then uses SQUser.create to create an entry in the database. What we will receive here is the sanitized user object, and we simply return that to the caller.
Let's also add the following code to user-server.mjs:
server.post('/find-or-create', async (req, res, next) => {
 try {
   await connectDB();
   let user = await findOneUser(req.params.username);
   if (!user) {
     user = await createUser(req);
     if (!user) throw new Error('No user created');
   }
   res.contentType = 'json';
   res.send(user);
   return next(false);
 } catch(err) {
   res.send(500, err);
   next(false);
 }
});
This is a variation on creating an SQUser. While implementing login support in the Notes application, there was a scenario in which we had an authenticated user that may or may not already have an SQUser object in the database. In this case, we look to see whether the user already exists and, if not, then we create that user.
Let's turn now to cli.mjs and implement the sub-commands to handle these two REST functions, as follows:
program
 .command('add <username>')
 .description('Add a user to the user server')
 .option('--password <password>', 'Password for new user')
 .option('--family-name <familyName>',
        'Family name, or last name, of the user')
 .option('--given-name <givenName>', 'Given name, or first name,
            of the user')
 .option('--middle-name <middleName>', 'Middle name of the user')
 .option('--email <email>', 'Email address for the user')
 .action((username, cmdObj) => {
   const topost = {
     username, password: cmdObj.password, provider: "local",
     familyName: cmdObj.familyName,
     givenName: cmdObj.givenName,
     middleName: cmdObj.middleName,
     emails: [], photos: []
   };
   if (typeof cmdObj.email !== 'undefined')
    topost.emails.push(cmdObj.email);
   client(program).post('/create-user', topost,
         (err, req, res, obj) => {
     if (err) console.error(err.stack);
     else console.log('Created '+ util.inspect(obj));
   });
 });
By using program.command, we are declaring a sub-command—in this case, add. The <username> declaration says that this sub-command takes an argument. Commander will provide that argument value in the username parameter to the function passed in the action method.
The structure of a program.command declaration is to first declare the syntax of the sub-command. The description method provides user-friendly documentation. The option method calls are options for this sub-command, rather than global options. Finally, the action method is where we supply a callback function that will be invoked when Commander sees this sub-command in the command line.
Any arguments declared in the program.command string end up as parameters to that callback function.
Any values for the options for this sub-command will land in the cmdObj object. By contrast, the value for global options is attached to the program object.
With that understanding, we can see that this sub-command gathers information from the command line and then uses the client function to connect to the server. It invokes the /create-user URL, passing along the data gathered from the command line. Upon receiving the response, it will print either the error or the result object.
Let's now add the sub-command corresponding to the /find-or-create URL, as follows:
program
 .command('find-or-create <username>')
 .description('Add a user to the user server')
 .option('--password <password>', 'Password for new user')
 .option('--family-name <familyName>',
         'Family name, or last name, of the user')
 .option('--given-name <givenName>', 'Given name, or first name,
          of the user')
 .option('--middle-name <middleName>', 'Middle name of the user')
 .option('--email <email>', 'Email address for the user')
 .action((username, cmdObj) => {
    const topost = {
      username, password: cmdObj.password, provider: "local",
     familyName: cmdObj.familyName,
     givenName: cmdObj.givenName,
     middleName: cmdObj.middleName,
     emails: [], photos: []
   };
   if (typeof cmdObj.email !== 'undefined')
    topost.emails.push(cmdObj.email);
   client(program).post('/find-or-create', topost,
           (err, req, res, obj) => {
    if (err) console.error(err.stack);
    else console.log('Found or Created '+ util.inspect(obj));
  });
 });
This is very similar, except for calling /find-or-create.
We have enough here to run the server and try the following two commands:
$ npm start

> [email protected] start /home/david/Chapter08/users
> DEBUG=users:* PORT=5858 SEQUELIZE_CONNECT=sequelize-sqlite.yaml node ./user-server.mjs

 users:service User-Auth-Service listening at http://127.0.0.1:5858 +0ms
We run this in one command window to start the server. In another command window, we can run the following command:
$ node cli.mjs add --password w0rd --family-name Einarrsdottir --given-name Ashildr --email [email protected] me
Created {
 id: 'me',
 username: 'me',
 provider: 'local',
 familyName: 'Einarrsdottir',
 givenName: 'Ashildr',
 middleName: null,
 emails: [ '[email protected]' ],
 photos: []
}
Over in the server window, it will print a trace of the actions taken in response to this. But it's what we expect: the values we gave on the command line are in the database, as shown in the following code block:
$ node cli.mjs find-or-create --password foooo --family-name Smith --given-name John --middle-name Snuffy --email [email protected] snuffy-smith
Found or Created  {
 id: 'snuffy-smith',
 username: 'snuffy-smith',
 provider: 'local',
 familyName: 'Smith',
 givenName: 'John',
 middleName: 'Snuffy',
 emails: [ '[email protected]' ],
 photos: []
}
Likewise, we have success with the find-or-create command.
That gives us the ability to create SQUser objects. Next, let's see how to read from the database.
Reading user data from the user information service
The next thing we want to support is to look for users in the user information service. Instead of a general search facility, the need is to retrieve an SQUser object for a given username. We already have the utility function for this purpose; it's just a matter of hooking up a REST endpoint.
In user-server.mjs, add the following function:
server.get('/find/:username', async (req, res, next) => {
 try {
   await connectDB();
   const user = await findOneUser(req.params.username);
   if (!user) {
     res.send(404, new Error("Did not find "+ req.params.username));
   } else {
     res.contentType = 'json';
     res.send(user);
   }
   next(false);
 } catch(err) {
   res.send(500, err);
   next(false);
 }
});
And, as expected, that was easy enough. For the /find URL, we need to supply the username in the URL. The code simply looks up the SQUser object using the existing utility function.
A related function retrieves the SQUser objects for all users. Add the following code to user-server.mjs:
server.get('/list', async (req, res, next) => {
 try {
   await connectDB();
   let userlist = await SQUser.findAll({});
   userlist = userlist.map(user => sanitizedUser(user));
   if (!userlist) userlist = [];
   res.contentType = 'json';
   res.send(userlist);
   next(false);
 } catch(err) {
   res.send(500, err);
   next(false);
 }
});
We know from the previous chapter that the findAll operation retrieves all matching objects and that passing an empty query selector such as this causes findAll to match every SQUser object. Therefore, this performs the task we described, to retrieve information on all users.
Then, in cli.mjs, we add the following sub-command declarations:
program
 .command('find <username>')
 .description('Search for a user on the user server')
 .action((username, cmdObj) => {
   client(program).get(`/find/${username}`,
             (err, req, res, obj) => {
     if (err) console.error(err.stack);
     else console.log('Found '+ util.inspect(obj));
   });
 });

program
    .command('list-users')
    .description('List all users on the user server')
    .action((cmdObj) => {
        client(program).get('/list', (err, req, res, obj) => {
            if (err) console.error(err.stack);
            else console.log(obj);
        });
    });
This is similarly easy. We pass the username provided on our command line in the /find URL and then print out the result. Likewise, for the list-users sub-command, we simply call /list on the server and print out the result.
After restarting the server, we can test the commands, as follows:
$ node cli.mjs find me
Found {
 id: 'me',
 username: 'me',
 provider: 'local',
 familyName: 'Einarrsdottir',
 givenName: 'Ashildr',
 middleName: null,
 emails: [ '[email protected]' ],
 photos: []
}
$ node cli.mjs list-users
[
  {
    id: 'snuffy-smith',
    username: 'snuffy-smith',
    provider: 'local',
    familyName: 'Smith',
    givenName: 'John',
    middleName: 'Snuffy',
    emails: [ '[email protected]' ],
    photos: []
  },
  {
    id: 'me',
    username: 'me',
    provider: 'local',
    familyName: 'Einarrsdottir',
    givenName: 'Ashildr',
    middleName: null,
    emails: [ '[email protected]' ],
    photos: []
  }
]
And, indeed, the results came in as we expected.
The next operation we need is to update an SQUser object.
Updating user information in the user information service
The next functionality to add is to update user information. For this, we can use the Sequelize update function, and simply expose it as a REST operation.
To that end, add the following code to user-server.mjs:
server.post('/update-user/:username', async (req, res, next) => {
 try {
   await connectDB();
   let toupdate = userParams(req);
   await SQUser.update(toupdate, { where: { username:
    req.params.username }});
   const result = await findOneUser(req.params.username);
   res.contentType = 'json';
   res.send(result);
   next(false);
 } catch(err) {
   res.send(500, err);
   next(false);
 }
});
The caller is to provide the same set of user information parameters, which will be picked up by the userParams function. We then use the update function, as expected, and then retrieve the modified SQUser object, sanitize it, and send it as the result.
To match that function, add the following code to cli.mjs:
program
 .command('update <username>')
 .description('Add a user to the user server')
 .option('--password <password>', 'Password for new user')
 .option('--family-name <familyName>',
                 'Family name, or last name, of the user')
 .option('--given-name <givenName>', 'Given name, or first name,
          of the user')
 .option('--middle-name <middleName>', 'Middle name of the user')
 .option('--email <email>', 'Email address for the user')
 .action((username, cmdObj) => {
   const topost = {
     username, password: cmdObj.password,
     familyName: cmdObj.familyName,
     givenName: cmdObj.givenName,
     middleName: cmdObj.middleName,
     emails: [], photos: []
   };
   if (typeof cmdObj.email !== 'undefined')
    topost.emails.push(cmdObj.email);
   client(program).post(`/update-user/${username}`, topost,
                  (err, req, res, obj) => {
     if (err) console.error(err.stack);
     else console.log('Updated '+ util.inspect(obj));
   });
 });
As expected, this sub-command must take the same set of user information parameters. It then bundles those parameters into an object, posting it to the /update-user endpoint on the REST server.
Then, to test the result, we run the command, like so:
$ node cli.mjs update --password fooooey --family-name Smith --given-name John --middle-name Snuffy --email [email protected] snuffy-smith
Updated {
 id: 'snuffy-smith',
 username: 'snuffy-smith',
 provider: 'local',
 familyName: 'Smith',
 givenName: 'John',
 middleName: 'Snuffy',
 emails: [ '[email protected]' ],
 photos: []
}
And, indeed, we managed to change Snuffy's email address.
The next operation is to delete an SQUser object.
Deleting a user record from the user information service
Our next operation will complete the create, read, update, and delete (CRUD) operations by letting us delete a user.
Add the following code to user-server.mjs:
server.del('/destroy/:username', async (req, res, next) => {
 try {
   await connectDB();
   const user = await SQUser.findOne({
                   where: { username: req.params.username } });
   if (!user) {
     res.send(404,
        new Error(`Did not find requested ${req.params.username}
         to delete`));
   } else {
     user.destroy();
     res.contentType = 'json';
     res.send({});
   }
   next(false);
 } catch(err) {
   res.send(500, err);
   next(false);
 }
});
This is simple enough. We first look up the user to ensure it exists, and then call the destroy function on the SQUser object. There's no need for any result, so we send an empty object.
To exercise this function, add the following code to cli.mjs:
program
 .command('destroy <username>')
 .description('Destroy a user on the user server')
 .action((username, cmdObj) => {
     client(program).del(`/destroy/${username}`,
          (err, req, res, obj) => {
       if (err) console.error(err.stack);
       else console.log('Deleted - result= '+ util.inspect(obj));
     });
 });
This is simply to send a DELETE request to the server on the /destroy URL.
And then, to test it, run the following command:
$ node cli.mjs destroy snuffy-smith
Deleted - result= {}
$ node cli.mjs find snuffy-smith
finding snuffy-smith
NotFoundError: {}
  at Object.createHttpErr (/home/david/Chapter08/users/node_modules/restify-clients/lib/helpers/errors.js:91:26)
  at ClientRequest.onResponse (/home/david/Chapter08/users/node_modules/restify-clients/lib/HttpClient.js:309:26)
  at Object.onceWrapper (events.js:428:26)
  at ClientRequest.emit (events.js:321:20)
  at HTTPParser.parserOnIncomingClient [as onIncoming] (_http_client.js:602:27)
  at HTTPParser.parserOnHeadersComplete (_http_common.js:116:17)
  at Socket.socketOnData (_http_client.js:471:22)
  at Socket.emit (events.js:321:20)
  at addChunk (_stream_readable.js:305:12)
  at readableAddChunk (_stream_readable.js:280:11)
First, we deleted Snuffy's user record, and it gave us an empty response, as expected. Then, we tried to retrieve his record and, as expected, there was an error.
While we have completed the CRUD operations, we have one final task to cover.
Checking the user's password in the user information service
How can we have a user login/logout service without being able to check their password? The question is: Where should the password check occur? It seems, without examining it too deeply, that it's better to perform this operation inside the user information service. We earlier described the decision that it's probably safer to never expose the user password beyond the user information service. As a result, the password check should occur in that service so that the password does not stray beyond the service.
Let's start with the following function in user-server.mjs:
server.post('/password-check', async (req, res, next) => {
  try {
    await connectDB();
    const user = await SQUser.findOne({
                     where: { username: req.params.username } });
    let checked;
    if (!user) {
      checked = {
        check: false, username: req.params.username,
        message: "Could not find user"
      };
    } else if (user.username === req.params.username
            && user.password === req.params.password) {
      checked = { check: true, username: user.username };
    } else {
      checked = {
         check: false, username: req.params.username,
         message: "Incorrect password"
      };
    }
    res.contentType = 'json';
    res.send(checked);
    next(false);
 } catch(err) {
    res.send(500, err);
    next(false);
 }
});
This lets us support the checking of user passwords. There are three conditions to check, as follows:
- Whether there is no such user
- Whether the passwords matched
- Whether the passwords did not match
The code neatly determines all three conditions and returns an object indicating, via the check field, whether the user is authenticated. The caller is to send username and password parameters that will be checked.
To check it out, let's add the following code to cli.mjs:
program
 .command('password-check <username> <password>')
 .description('Check whether the user password checks out')
 .action((username, password, cmdObj) => {
    client(program).post('/password-check', { username, password },
    (err, req, res, obj) => {
      if (err) console.error(err.stack);
      else console.log(obj);
  });
 });
And, as expected, the code to invoke this operation is simple. We take the username and password parameters from the command line, send them to the server, and then print the result.
To verify that it works, run the following command:
$ node cli.mjs password-check me w0rd
{ check: true, username: 'me' }
$ node cli.mjs password-check me w0rdy
{ check: false, username: 'me', message: 'Incorrect password' }
Indeed, the correct password gives us a true indicator, while the wrong password gives us false.
We've done a lot in this section by implementing a user information service. We successfully created a REST service while thinking about architectural choices around correctly handling sensitive user data. We were also able to verify that the REST service is functioning using an ad hoc testing tool. With this command-line tool, we can easily try any combination of parameters, and we can easily extend it if the need arises to add more REST operations.
Now, we need to start on the real goal of the chapter: changing the Notes user interface to support login/logout. We will see how to do this in the following sections.
Providing login support for the Notes application
Now that we have proved that the user authentication service is working, we can set up the Notes application to support user logins. We'll be using Passport to support login/logout, and the authentication server to store the required data.
Among the available packages, Passport stands out for simplicity and flexibility. It integrates directly with the Express middleware chain, and the Passport community has developed hundreds of so-called strategy modules to handle authentication against a long list of third-party services.
Let's start this by adding a module for accessing the user information REST server we just created.
Accessing the user authentication REST API
The first step is to create a user data model for the Notes application. Rather than retrieving data from data files or a database, it will use REST to query the server we just created. Recall that we created this REST service in the theory of walling off the service since it contains sensitive user information.
Earlier, we suggested duplicating Chapter 7, Data Storage and Retrieval, code for Notes in the chap08/notes directory and creating the user information server as chap08/users.
Earlier in this chapter, we used the restify-clients module to access the REST service. That package is a companion to the Restify library; the restify package supports the server side of the REST protocol and restify-clients supports the client side.
However nice the restify-clients library is, it doesn't support a Promise-oriented API, as is required to play well with async functions. Another library, SuperAgent, does support a Promise-oriented API and plays well in async functions, and there is a companion to that package, SuperTest, that's useful in unit testing. We'll use SuperTest in Chapter 13, Unit Testing and Functional Testing when we talk about unit testing.
To install the package (again, in the Notes application directory), run the following command:
$ npm install superagent@^5.2.x --save
Then, create a new file, models/users-superagent.mjs, containing the following code:
import { default as request } from 'superagent';
import util from 'util';
import url from 'url';
const URL = url.URL;
import DBG from 'debug';
const debug = DBG('notes:users-superagent');
const error = DBG('notes:error-superagent');

var authid = 'them';
var authcode = 'D4ED43C0-8BD6-4FE2-B358-7C0E230D11EF';

function reqURL(path) {
    const requrl = new URL(process.env.USER_SERVICE_URL);
    requrl.pathname = path;
    return requrl.toString();
}
The reqURL function is similar in purpose to the connectDB functions that we wrote in earlier modules. Remember that we used connectDB in earlier modules to open a database connection that will be kept open for a long time. With SuperAgent, we don't leave a connection open to the service. Instead, we open a new server connection on each request. For every request, we will formulate the request URL. The base URL, such as http://localhost:3333/, is to be provided in the USER_SERVICE_URL environment variable. The reqURL function modifies that URL, using the new Web Hypertext Application Technology Working Group (WHATWG) URL support in Node.js, to use a given URL path.
We also added the authentication ID and code required for the server. Obviously, when the backlog task comes up to use a better token authentication system, this will have to change.
To handle creating and updating user records, run the following code:
export async function create(username, password,
            provider, familyName, givenName, middleName,
            emails, photos) {
    var res = await request
        .post(reqURL('/create-user'))
        .send({ username, password, provider,
            familyName, givenName, middleName, emails, photos
        })
        .set('Content-Type', 'application/json')
        .set('Acccept', 'application/json')
        .auth(authid, authcode);
    return res.body;
}

export async function update(username, password,
            provider, familyName, givenName, middleName,
            emails, photos) {
    var res = await request
        .post(reqURL(`/update-user/${username}`))
        .send({ username, password, provider,
            familyName, givenName, middleName, emails, photos
        })
        .set('Content-Type', 'application/json')
        .set('Acccept', 'application/json')
        .auth(authid, authcode);
    return res.body;
}
These are our create and update functions. In each case, they take the data provided, construct an anonymous object, and POST it to the server. The function is to be provided with the values corresponding to the SQUser schema. It bundles the data provided in the send method, sets various parameters, and then sets up the Basic Auth token.
The SuperAgent library uses an API style called method chaining. The coder chains together method calls to construct a request. The chain of method calls can end in a .then or .end clause, either of which takes a callback function. But leave off both, and it will return a Promise, and, of course, Promises let us use this directly from an async function.
The res.body value at the end of each function contains the value returned by the REST server. All through this library, we'll use the .auth clause to set up the required authentication key.
In this case, we've purposely chosen variable names for the parameters to match the field names of the object with parameter names used by the server. In doing so, we can use this shortened notation for anonymous objects, and our code is a little cleaner by using consistent variable names from beginning to end.
Now, add the following function to support the retrieval of user records:
export async function find(username) {
    var res = await request
        .get(reqURL(`/find/${username}`))
        .set('Content-Type', 'application/json')
        .set('Acccept', 'application/json')
        .auth(authid, authcode);
    return res.body;
}
This is following the same pattern as before. The set methods are, of course, used for setting HTTP headers in the REST call. This means having at least a passing knowledge of the HTTP protocol.
The Content-Type header says the data sent to the server is in JavaScript Object Notation (JSON) format. The Accept header says that this REST client can handle JSON data. JSON is, of course, easiest for a JavaScript program—such as what we're writing—to utilize.
Let's now create the function for checking passwords, as follows:
export async function userPasswordCheck(username, password) {
    var res = await request
        .post(reqURL(`/password-check`))
        .send({ username, password })
        .set('Content-Type', 'application/json')
        .set('Acccept', 'application/json')
        .auth(authid, authcode);
    return res.body;
}
One point about this method is worth noting. It could have taken the parameters in the URL instead of the request body, as is done here. But since request URLs are routinely logged to files, putting the username and password parameters in the URL means user identity information would be logged to files and be part of activity reports. That would obviously be a very bad choice. Putting those parameters in the request body not only avoids that bad result but if an HTTPS connection to the service were used, the transaction would be encrypted.
Then, let's create our find-or-create function, as follows:
export async function findOrCreate(profile) {
    var res = await request
        .post(reqURL('/find-or-create'))
        .send({
            username: profile.id, password: profile.password,
            provider: profile.provider,
            familyName: profile.familyName,
            givenName: profile.givenName,
            middleName: profile.middleName,
            emails: profile.emails, photos: profile.photos
        })
        .set('Content-Type', 'application/json')
        .set('Acccept', 'application/json')
        .auth(authid, authcode);
    return res.body;
}
The /find-or-create function either discovers the user in the database or creates a new user. The profile object will come from Passport, but take careful note of what we do with profile.id. The Passport documentation says it will provide the username in the profile.id field, but we want to store it as username instead.
Let's now create a function to retrieve the list of users, as follows:
export async function listUsers() {
    var res = await request
        .get(reqURL('/list'))
        .set('Content-Type', 'application/json')
        .set('Acccept', 'application/json')
        .auth(authid, authcode);
    return res.body;
}
As before, this is very straightforward.
With this module, we can interface with the user information service, and we can now proceed with modifying the Notes user interface.
Incorporating login and logout routing functions in the Notes application
What we've built so far is a user data model, with a REST API wrapping that model to create our authentication information service. Then, within the Notes application, we have a module that requests user data from this server. As yet, nothing in the Notes application knows that this user model exists. The next step is to create a routing module for login/logout URLs and to change the rest of Notes to use user data.
The routing module is where we use passport to handle user authentication. The first task is to install the required modules, as follows:
$ npm install passport@^0.4.x [email protected] --save
The passport module gives us the authentication algorithms. To support different authentication mechanisms, the passport authors have developed several strategy implementations—the authentication mechanisms, or strategies, corresponding to the various third-party services that support authentication, such as using OAuth to authenticate against services such as Facebook, Twitter, or GitHub.
Passport also requires that we install Express Session support. Use the following command to install the modules:
$ npm install [email protected] [email protected] --save
The strategy implemented in the passport-local package authenticates solely using data stored locally to the application—for example, our user authentication information service. Later, we'll add a strategy module to authenticate the use of OAuth with Twitter.
Let's start by creating the routing module, routes/users.mjs, as follows:
import path from 'path';
import util from 'util';
import { default as express } from 'express';
import { default as passport } from 'passport';
import { default as passportLocal } from 'passport-local';
const LocalStrategy = passportLocal.Strategy;
import * as usersModel from '../models/users-superagent.mjs';
import { sessionCookieName } from '../app.mjs';

export const router = express.Router();

import DBG from 'debug';
const debug = DBG('notes:router-users');
const error = DBG('notes:error-users');
This brings in the modules we need for the /users router. This includes the two passport modules and the REST-based user authentication model.
In app.mjs, we will be adding session support so our users can log in and log out. That relies on storing a cookie in the browser, and the cookie name is found in this variable exported from app.mjs. We'll be using that cookie in a moment.
Add the following functions to the end of routes/users.mjs:
export function initPassport(app) {
  app.use(passport.initialize());
  app.use(passport.session());
}

export function ensureAuthenticated(req, res, next) {
  try {
    // req.user is set by Passport in the deserialize function
    if (req.user) next();
    else res.redirect('/users/login');
  } catch (e) { next(e); }
}
The initPassport function will be called from app.mjs, and it installs the Passport middleware in the Express configuration. We'll discuss the implications of this later when we get to app.mjs changes, but Passport uses sessions to detect whether this HTTP request is authenticated. It looks at every request coming into the application, looks for clues about whether this browser is logged in, and attaches data to the request object as req.user.
The ensureAuthenticated function will be used by other routing modules and is to be inserted into any route definition that requires an authenticated logged-in user. For example, editing or deleting a note requires the user to be logged in and, therefore, the corresponding routes in routes/notes.mjs must use ensureAuthenticated. If the user is not logged in, this function redirects them to /users/login so that they can log in.
Add the following route handlers in routes/users.mjs:
router.get('/login', function(req, res, next) {
  try {
    res.render('login', { title: "Login to Notes", user: req.user, });
  } catch (e) { next(e); }
});

router.post('/login',
  passport.authenticate('local', {
    successRedirect: '/', // SUCCESS: Go to home page
    failureRedirect: 'login', // FAIL: Go to /user/login
  })
);
Because this router is mounted on /users, all these routes will have /user prepended. The /users/login route simply shows a form requesting a username and password. When this form is submitted, we land in the second route declaration, with a POST on /users/login. If passport deems this a successful login attempt using LocalStrategy, then the browser is redirected to the home page. Otherwise, it is redirected back to the /users/login page.
Add the following route for handling logout:
router.get('/logout', function(req, res, next) {
  try {
    req.session.destroy();
    req.logout();
    res.clearCookie(sessionCookieName);
 res.redirect('/');
 } catch (e) { next(e); }
});
When the user requests to log out of Notes, they are to be sent to /users/logout. We'll be adding a button to the header template for this purpose. The req.logout function instructs Passport to erase their login credentials, and they are then redirected to the home page.
This function deviates from what's in the Passport documentation. There, we are told to simply call req.logout, but calling only that function sometimes results in the user not being logged out. It's necessary to destroy the session object, and to clear the cookie, in order to ensure that the user is logged out. The cookie name is defined in app.mjs, and we imported sessionCookieName for this function.
Add the LocalStrategy to Passport, as follows:
passport.use(new LocalStrategy(
  async (username, password, done) => {
    try {
      var check = await usersModel.userPasswordCheck(username,
      password);
      if (check.check) {
        done(null, { id: check.username, username: check.username });
      } else {
        done(null, false, check.message);
      }
    } catch (e) { done(e); }
  }
));
Here is where we define our implementation of LocalStrategy. In the callback function, we call usersModel.userPasswordCheck, which makes a REST call to the user authentication service. Remember that this performs the password check and then returns an object indicating whether the user is logged in.
A successful login is indicated when check.check is true. In this case, we tell Passport to use an object containing username in the session object. Otherwise, we have two ways to tell Passport that the login attempt was unsuccessful. In one case, we use done(null, false) to indicate an error logging in, and pass along the error message we were given. In the other case, we'll have captured an exception, and pass along that exception.
You'll notice that Passport uses a callback-style API. Passport provides a done function, and we are to call that function when we know what's what. While we use an async function to make a clean asynchronous call to the backend service, Passport doesn't know how to grok the Promise that would be returned. Therefore, we have to throw a try/catch around the function body to catch any thrown exception.
Add the following functions to manipulate data stored in the session cookie:
passport.serializeUser(function(user, done) {
  try {
    done(null, user.username);
  } catch (e) { done(e); }
});

passport.deserializeUser(async (username, done) => {
  try {
    var user = await usersModel.find(username);
    done(null, user);
  } catch(e) { done(e); }
});
The preceding functions take care of encoding and decoding authentication data for the session. All we need to attach to the session is the username, as we did in serializeUser. The deserializeUser object is called while processing an incoming HTTP request and is where we look up the user profile data. Passport will attach this to the request object.
Login/logout changes to app.mjs
A number of changes are necessary in app.mjs, some of which we've already touched on. We did carefully isolate the Passport module dependencies to routes/users.mjs. The changes required in app.mjs support the code in routes/users.mjs.
Add an import to bring in functions from the User router module, as follows:
import { router as indexRouter } from './routes/index.mjs';
import { router as notesRouter } from './routes/notes.mjs';
import { router as usersRouter, initPassport } from './routes/users.mjs';
The User router supports the /login and /logout URLs, as well as using Passport for authentication. We need to call initPassport for a little bit of initialization.
And now, let's import modules for session handling, as follows:
import session from 'express-session';
import sessionFileStore from 'session-file-store';
const FileStore = sessionFileStore(session);
export const sessionCookieName = 'notescookie.sid';
Because Passport uses sessions, we need to enable session support in Express, and these modules do so. The session-file-store module saves our session data to disk so that we can kill and restart the application without losing sessions. It's also possible to save sessions to databases with appropriate modules. A filesystem session store is suitable only when all Notes instances are running on the same server computer. For a distributed deployment situation, you'll need to use a session store that runs on a network-wide service, such as a database.
We're defining sessionCookieName here so that it can be used in multiple places. By default, express-session uses a cookie named connect.sid to store the session data. As a small measure of security, it's useful when there's a published default to use a different non-default value. Any time we use the default value, it's possible that an attacker might know a security flaw, depending on that default.
Add the following code to app.mjs:
app.use(session({
  store: new FileStore({ path: "sessions" }),
  secret: 'keyboard mouse',
  resave: true,
  saveUninitialized: true,
  name: sessionCookieName
}));
initPassport(app);
Here, we initialize the session support. The field named secret is used to sign the session ID cookie. The session cookie is an encoded string that is encrypted in part using this secret. In the Express Session documentation, they suggest the keyboard cat string for the secret. But, in theory, what if Express has a vulnerability, such that knowing this secret can make it easier to break the session logic on your site? Hence, we chose a different string for the secret, just to be a little different and—perhaps—a little more secure.
Similarly, the default cookie name used by express-session is connect.sid. Here's where we change the cookie name to a non-default name.
FileStore will store its session data records in a directory named sessions. This directory will be auto-created as needed.
In case you see errors on Windows that are related to the files used by session-file-store, there are several alternate session store packages that can be used. The attraction of the session-file-store is that it has no dependency on a service like a database server. Two other session stores have a similar advantage, LokiStore, and MemoryStore. Both are configured similarly to the session-file-store package. For example, to use MemoryStore, first use npm to install the memorystore package, then use these lines of code in app.mjs:
import sessionMemoryStore from 'memorystore';
const MemoryStore = sessionMemoryStore(session);
...
app.use(session({
 store: new MemoryStore({}),
 secret: 'keyboard mouse',
 resave: true,
 saveUninitialized: true,
 name: sessionCookieName
}));
This is the same initialization, but using MemoryStore instead of FileStore.
Mount the User router, as follows:
app.use('/', indexRouter);
app.use('/notes', notesRouter);
app.use('/users', usersRouter);
These are the three routers that are used in the Notes application.
Login/logout changes in routes/index.mjs
This router module handles the home page. It does not require the user to be logged in, but we want to change the display a little if they are logged in. To do so, run the following code:
router.get('/', async (req, res, next) => {
  try {
    let keylist = await notes.keylist();
    let keyPromises = keylist.map(key => { return notes.read(key) });
    let notelist = await Promise.all(keyPromises);
    res.render('index', {
      title: 'Notes', notelist: notelist,
      user: req.user ? req.user : undefined
    });
  } catch (e) { next(e); }
});
Remember that we ensured that req.user has the user profile data, which we did in deserializeUser. We simply check for this and make sure to add that data when rendering the views template.
We'll be making similar changes to most of the other route definitions. After that, we'll go over the changes to the view templates, in which we use req.user to show the correct buttons on each page.
Login/logout changes required in routes/notes.mjs
The changes required here are more significant but still straightforward, as shown in the following code snippet:
import { ensureAuthenticated } from './users.mjs';
We need to use the ensureAuthenticated function to protect certain routes from being used by users who are not logged in. Notice how ES6 modules let us import just the function(s) we require. Since that function is in the User router module, we need to import it from there.
Modify the /add route handler, as shown in the following code block:
router.get('/add', ensureAuthenticated, (req, res, next) => {
    try {
        res.render('noteedit', {
            title: "Add a Note",
            docreate: true, notekey: "",
            user: req.user, note: undefined
        });
    } catch (e) { next(e); }
});
We'll be making similar changes throughout this module, adding calls to ensureAuthenticated and using req.user to check whether the user is logged in. The goal is for several routes to ensure that the route is only available to a logged-in user, and—in those and additional routes—to pass the user object to the template.
The first thing we added is to call usersRouter.ensureAuthenticated in the route definition. If the user is not logged in, they'll be redirected to /users/login thanks to that function.
Because we've ensured that the user is authenticated, we know that req.user will already have their profile information. We can then simply pass it to the view template.
For the other routes, we need to make similar changes.
Modify the /save route handler, as follows:
router.post('/save', ensureAuthenticated, (req, res, next) => {
  ..
});
The /save route only requires this change to call ensureAuthenticated in order to ensure that the user is logged in.
Modify the /view route handler, as follows:
router.get('/view', (req, res, next) => {
    try {
        var note = await notes.read(req.query.key);
        res.render('noteview', {
            title: note ? note.title : "",
            notekey: req.query.key,
            user: req.user ? req.user : undefined,
            note: note
        });
    } catch (e) { next(e); }
});
For this route, we don't require the user to be logged in. We do need the user's profile information, if any, sent to the view template.
Modify the /edit and /destroy route handlers, as follows:
router.get('/edit', ensureAuthenticated, (req, res, next) => {
    try {
        var note = await notes.read(req.query.key);
        res.render('noteedit', {
            title: note ? ("Edit " + note.title) : "Add a Note",
            docreate: false,
            notekey: req.query.key,
            user: req.user,
            note: note
        });
    } catch (e) { next(e); }
});
router.get('/destroy', ensureAuthenticated, (req, res, next) => {
    try {
        var note = await notes.read(req.query.key);
        res.render('notedestroy', {
            title: note ? `Delete ${note.title}` : "",
            notekey: req.query.key,
            user: req.user,
            note: note
        });
    } catch (e) { next(e); }
});
router.post('/destroy/confirm', ensureAuthenticated, (req, res, next) => {
  ..
});
Remember that throughout this module, we have made the following two changes to router functions:
- We protected some routes using ensureAuthenticated to ensure that the route is available only to logged-in users.
- We passed the user object to the template.
For the routes using ensureAuthenticated, it is guaranteed that req.user will contain the user object. In other cases, such as with the /view router function, req.user may or may not have a value, and in case it does not, we make sure to pass undefined. In all such cases, the templates need to change in order to use the user object to detect whether the user is logged in, and whether to show HTML appropriate for a logged-in user.
Viewing template changes supporting login/logout
So far, we've created a backend user authentication service, a REST module to access that service, a router module to handle routes related to logging in and out of the website, and changes in app.mjs to use those modules. We're almost ready, but we've got a number of changes left that need to be made to the templates. We're passing the req.user object to every template because each one must be changed to accommodate whether the user is logged in.
This means that we can test whether the user is logged in simply by testing for the presence of a user variable.
In partials/header.hbs, make the following additions:
...
<nav class="navbar navbar-expand-md navbar-dark bg-dark">
  <a class="navbar-brand" href='/'><i data-feather="home"></i></a>
  <button class="navbar-toggler" type="button"
         data-toggle="collapse" data-target="#navbarLogIn"
         aria-controls="navbarLogIn"
         aria-expanded="false"
         aria-label="Toggle navigation">
     <span class="navbar-toggler-icon"></span>
  </button>
  {{#if user}}
  <div class="collapse navbar-collapse" id="navbarLogIn">
     <span class="navbar-text text-dark col">{{ title }}</span>
     <a class="btn btn-dark col-auto" href="/users/logout">
            Log Out <span class="badge badge-light">{{ user.username
                }}
     </span></a>
     <a class="nav-item nav-link btn btn-dark col-auto"
         href='/notes/add'>ADD Note</a>
  </div>
  {{else}}
  <div class="collapse navbar-collapse" id="navbarLogIn">
     <a class="btn btn-primary" href="/users/login">Log in</a>
  </div>
  {{/if}}
</nav>
...
What we're doing here is controlling which buttons to display at the top of the screen, depending on whether the user is logged in. The earlier changes ensure that the user variable will be undefined if the user is logged out; otherwise, it will have the user profile object. Therefore, it's sufficient to check the user variable, as shown in the preceding code block, to render different user interface elements.
A logged-out user doesn't get the ADD Note button and gets a Log in button. Otherwise, the user gets an ADD Note button and a Log Out button. The Log in button takes the user to /users/login, while the Log Out button takes them to /users/logout. Both of those buttons are handled in routes/users.js and perform the expected function.
The Log Out button has a Bootstrap badge component displaying the username. This adds a little visual splotch in which we'll put the username that's logged in. As we'll see later, it will serve as a visual clue to the user as to their identity.
Because nav is now supporting login/logout buttons, we have changed the navbar-toggler button so that it controls a <div> with id="navbarLogIn".
We need to create views/login.hbs, as follows:
<div class="container-fluid">
  <div class="row">
    <div class="col-12 btn-group-vertical" role="group">

        <form method='POST' action='/users/login'>
        <div class="form-group">
        <label for="username">User name:</label>
        <input class="form-control" type='text' id='username'
               name='username' value='' placeholder='User Name'/>
        </div>
        <div class="form-group">
        <label for="password">Password:</label>
        <input class="form-control" type='password' id='password'
               name='password' value='' placeholder='Password'/>
        </div>
        <button type="submit" class="btn btn-default">Submit</button>
        </form>

    </div>
  </div>
</div>
This is a simple form decorated with Bootstrap goodness to ask for the username and password. When submitted, it creates a POST request to /users/login, which invokes the desired handler to verify the login request. The handler for that URL will start the Passport process to decide whether the user is authenticated.
In views/notedestroy.hbs, we want to display a message if the user is not logged in. Normally, the form to cause the note to be deleted is displayed, but if the user is not logged in, we want to explain the situation, as illustrated in the following code block:
<form method='POST' action='/notes/destroy/confirm'>
<div class="container-fluid">
  {{#if user}}
  <input type='hidden' name='notekey' value='{{#if
    note}}{{notekey}}{{/if}}'>
 <p class="form-text">Delete {{note.title}}?</p>

 <div class="btn-group">
 <button type="submit" value='DELETE'
 class="btn btn-outline-dark">DELETE</button>
 <a class="btn btn-outline-dark"
 href="/notes/view?key={{#if note}}{{notekey}}{{/if}}"
 role="button">Cancel</a>
 </div>
 {{else}}
 {{> not-logged-in }}
 {{/if}}
</div>
</form>
That's straightforward—if the user is logged in, display the form; otherwise, display the message in partials/not-logged-in.hbs. We determine which of these to display based on the user variable.
We could insert something such as the code shown in the following block in partials/not-logged-in.hbs:
<div class="jumbotron">
 <h1>Not Logged In</h1>
 <p>You are required to be logged in for this action, but you are not.
 You should not see this message. It's a bug if this message appears.
 </p>
 <p><a class="btn btn-primary" href="/users/login">Log in</a></p>
</div>
As the text says, this will probably never be shown to users. However, it is useful to put something such as this in place since it may show up during development, depending on the bugs you create.
In views/noteedit.hbs, we require a similar change, as follows:
..
<div class="container-fluid">
{{#if user}}
..
{{else}}
{{> not-logged-in }}
{{/if}}
</div>
..
That is, at the bottom we add a segment that, for non-logged-in users, pulls in the not-logged-in partial.
The Bootstrap jumbotron component makes a nice and large text display that stands out nicely and will catch the viewer's attention. However, the user should never see this because each of those templates is used only when we've pre-verified the fact that the user is logged in.
A message such as this is useful as a check against bugs in your code. Suppose that we slipped up and failed to properly ensure that these forms were displayed only to logged-in users. Suppose that we had other bugs that didn't check the form submission to ensure it's requested only by a logged-in user. Fixing the template in this way is another layer of prevention against displaying forms to users who are not allowed to use that functionality.
We have now made all the changes to the user interface and are ready to test the login/logout functionality.
Running the Notes application with user authentication
We have created the user information REST service, created a module to access that service from Notes, modified the router modules to correctly access the user information service, and changed other things required to support login/logout.
The final task that is necessary is to change the scripts section of package.json, as follows:
"scripts": {
    "start": "cross-env DEBUG=notes:*
      SEQUELIZE_CONNECT=models/sequelize-
    sqlite.yaml NOTES_MODEL=sequelize
     USER_SERVICE_URL=http://localhost:5858
     node ./app.mjs",
    "dl-minty": "mkdir -p minty && npm run dl-minty-css && npm run dl-
     minty-min-css",
    "dl-minty-css": "wget https://bootswatch.com/4/minty/bootstrap.css
     -O minty/bootstrap.css",
    "dl-minty-min-css": "wget
      https://bootswatch.com/4/minty/bootstrap.min.css
     -O minty/bootstrap.min.css"
},
In the previous chapters, we built up quite a few combinations of models and databases for running the Notes application. Since we don't need those, we can strip most of them out from package.json. This leaves us with one, configured to use the Sequelize model for Notes, using the SQLite3 database, and to use the new user authentication service that we wrote earlier. All the other Notes data models are still available, just by setting the environment variables appropriately.
USER_SERVICE_URL needs to match the port number that we designated for that service.
In one window, start the user authentication service, as follows:
$ cd users
$ npm start

> [email protected] start /Users/david/chap08/users
> DEBUG=users:* PORT=5858 SEQUELIZE_CONNECT=sequelize-sqlite.yaml node user-server

users:server User-Auth-Service listening at http://127.0.0.1:5858 +0ms
Then, in another window, start the Notes application, as follows:
$ cd notes
$ DEBUG=notes:* npm start

> [email protected] start /Users/david/chap08/notes
> cross-env DEBUG=notes:* SEQUELIZE_CONNECT=models/sequelize-
    sqlite.yaml NOTES_MODEL=sequelize
       USER_SERVICE_URL=http://localhost:5858 node ./app.mjs

  notes:server Listening on port 3000 +0ms
You'll be greeted with the following message:
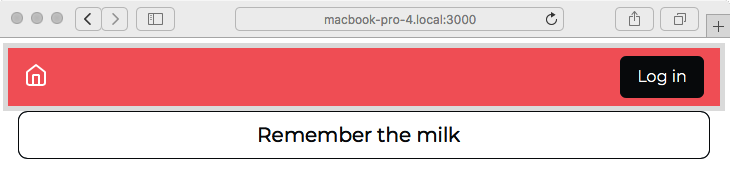
Notice the new button, Log in, and the lack of an ADD Note button. We're not logged in, and so partials/header.hbs is rigged to show only the Log in button.
Click on the Log in button, and you will see the login screen, as shown in the following screenshot:

This is our login form from views/login.hbs. You can now log in, create a note or three, and you might end up with the following messages on the home page:

You now have both Log Out and ADD Note buttons. You'll notice that the Log Out button has the username (me) shown. After some thought and consideration, this seemed the most compact way to show whether the user is logged in, and which user is logged in. This might drive the user experience team nuts, and you won't know whether this user interface design works until it's tested with users, but it's good enough for our purpose at the moment.
In this section, we've learned how to set up a basic login/logout functionality using locally stored user information. This is fairly good, but many web applications find it useful to allow folks to log in using their Twitter or other social media accounts for authentication. In the next section, we'll learn about that by setting up Twitter authentication.
Providing Twitter login support for the Notes application
If you want your application to hit the big time, it's a great idea to ease the registration process by using third-party authentication. Websites all over the internet allow you to log in using accounts from other services such as Facebook or Twitter. Doing so removes hurdles to prospective users signing up for your service. Passport makes it extremely easy to do this.
Authenticating users with Twitter requires installation of TwitterStrategy from the passport-twitter package, registering a new application with Twitter, adding a couple of routes to routes/user.mjs, and making a small change in partials/header.hbs. Integrating other third-party services requires similar steps.
Registering an application with Twitter
Twitter, as with every other third-party service, uses OAuth to handle authentication. OAuth is a standard protocol through which an application or a person can authenticate with one website by using credentials they have on another website. We use this all the time on the internet. For example, we might use an online graphics application such as draw.io or Canva by logging in with a Google account, and then the service can save files to our Google Drive.
Any application author must register with any sites you seek to use for authentication. Since we wish to allow Twitter users to log in to Notes using Twitter credentials, we have to register our Notes application with Twitter. Twitter then gives us a pair of authentication keys that will validate the Notes application with Twitter. Any application, whether it is a popular site such as Canva, or a new site such as Joe's Ascendant Horoscopes, must be registered with any desired OAuth authentication providers. The application author must then be diligent about keeping the registration active and properly storing the authentication keys.
The authentication keys are like a username/password pair. Anyone who gets a hold of those keys could use the service as if they were you, and potentially wreak havoc on your reputation or business.
Our task in this section is to register a new application with Twitter, fulfilling whatever requirements Twitter has.
As you go through this process, you may be shown the following message:

Recall that in recent years, concerns began to arise regarding the misuse of third-party authentication, the potential to steal user information, and the negative results that have occurred thanks to user data being stolen from social networks. As a result, social networks have increased scrutiny over developers using their APIs. It is necessary to sign up for a Twitter developer account, which is an easy process that does not cost anything.
As we go through this, realize that the Notes application needs a minimal amount of data. The ethical approach to this is to request only the level of access required for your application, and nothing more.
Once you're registered, you can log in to developer.twitter.com/apps and see a dashboard listing the active applications you've registered. At this point, you probably do not have any registered applications. At the top is a button marked Create an App. Click on that button to start the process of submitting a request to register a new application.
Every service offering OAuth authentication has an administrative backend similar to developer.twitter.com/apps. The purpose is so that certified application developers can administer the registered applications and authorization tokens. Each such service has its own policies for validating that those requesting authorization tokens have a legitimate purpose and will not abuse the service. The authorization token is one of the mechanisms to verify that API requests come from approved applications. Another mechanism is the URL from which API requests are made.
In the normal case, an application will be deployed to a regular server, and is accessed through a domain name such as MyNotes.xyz. In our case, we are developing a test application on our laptop, and do not have a public IP address, nor is there a domain name associated with our laptop. Not all social networks allow interactions from an application on an untrusted computer—such as a developer's laptop—to make API requests; however, Twitter does.
At the time of writing, there are several pieces of information requested by the Twitter sign-up process, listed as follows:
- Name: This is the application name, and it can be anything you like. It would be a good form to use "Test" in the name, in case Twitter's staff decide to do some checking.
- Description: Descriptive phrase—and again, it can be anything you like. The description is shown to users during the login process. It's good form to describe this as a test application.
- Website: This would be your desired domain name. Here, the help text helpfully suggests If you don't have a URL yet, just put a placeholder here but remember to change it later.
- Allow this application to be used to sign in with Twitter: Check this, as it is what we want.
- Callback URL: This is the URL to return to following successful authentication. Since we don't have a public URL to supply, this is where we specify a value referring to your laptop. It's been found that http://localhost:3000 works just fine. macOS users have another option because of the .local domain name that is automatically assigned to their laptop.
- Tell us how this app will be used: This statement will be used by Twitter to evaluate your request. For the purpose of this project, explain that it is a sample app from a book. It is best to be clear and honest about your intention.
The sign-up process is painless. However, at several points, Twitter reiterated the sensitivity of the information provided through the Twitter API. The last step before granting approval warned that Twitter prohibits the use of its API for various unethical purposes.
The last thing to notice is the extremely sensitive nature of the authentication keys. It's bad form to check these into a source code repository or otherwise put them in a place where anybody can access the key. We'll tackle this issue in Chapter 14, Security in Node.js Applications.
Storing authentication tokens
The Twitter recommendation is to store configuration values in a .env file. The contents of this file are to somehow become environment variables, which we can then access using process.env, as we've done before. Fortunately, there is a third-party Node.js package to do just this, called dotenv.
First, install the package, as follows:
$ npm install [email protected] --save
The documentation says we should load the dotenv package and then call dotenv.config() very early in the start up phase of our application, and that we must do this before accessing any environment variables. However, reading the documentation more closely, it seems best to add the following code to app.mjs:
import dotenv from 'dotenv/config.js';
With this approach, we do not have to explicitly call the dotenv.config function. The primary advantage is avoiding issues with referencing environment variables from multiple modules.
The next step is to create a file, .env, in the notes directory. The syntax of this file is very simple, as shown in the following code block:
VARIABLE1=value for variable 1
VARIABLE2=value for variable 2
This is exactly the syntax we'd expect since it is the same as for shell scripts. In this file, we need two variables to be defined, TWITTER_CONSUMER_KEY and TWITTER_CONSUMER_SECRET. We will use these variables in the code we'll write in the next section. Since we are putting configuration values in the scripts section of package.json, feel free to add those environment variables to .env as well.
The next step is to avoid committing this file to a source code control system such as Git. To ensure that this does not happen, you should already have a .gitignore file in the notes directory, and make sure its contents are something like this:
notes-fs-data
notes.level
chap07.sqlite3
notes-sequelize.sqlite3
package-lock.json
data
node_modules
.env
These values mostly refer to database files we generated in the previous chapter. In the end, we've added the .env file, and because of this, Git will not commit this file to the repository.
This means that when deploying the application to a server, you'll have to arrange to add this file to the deployment without it being committed to a source repository.
With an approved Twitter application, and with our authentication tokens recorded in a configuration file, we can move on to adding the required code to Notes.
Implementing TwitterStrategy
As with many web applications, we have decided to allow our users to log in using Twitter credentials. The OAuth protocol is widely used for this purpose and is the basis for authentication on one website using credentials maintained by another website.
The application registration process you just followed at developer.twitter.com generated for you a pair of API keys: a consumer key, and a consumer secret. These keys are part of the OAuth protocol and will be supplied by any OAuth service you register with, and the keys should be treated with the utmost care. Think of them as the username and password your service uses to access the OAuth-based service (Twitter et al.). The more people who can see these keys, the more likely it becomes that a miscreant can see them and then cause trouble. Anybody with those secrets can access the service API as if they are you.
Let's install the package required to use TwitterStrategy, as follows:
$ npm install [email protected] --save
In routes/users.mjs, let's start making some changes, as follows:
import passportTwitter from 'passport-twitter';
const TwitterStrategy = passportTwitter.Strategy;
This imports the package, and then makes its Strategy variable available as TwitterStrategy.
Let's now install the TwitterStrategy, as follows:
const twittercallback = process.env.TWITTER_CALLBACK_HOST
    ? process.env.TWITTER_CALLBACK_HOST
    : "http://localhost:3000";
export var twitterLogin;

if (typeof process.env.TWITTER_CONSUMER_KEY !== 'undefined'
 && process.env.TWITTER_CONSUMER_KEY !== ''
 && typeof process.env.TWITTER_CONSUMER_SECRET !== 'undefined'
 && process.env.TWITTER_CONSUMER_SECRET !== '') {
    passport.use(new TwitterStrategy({
      consumerKey: process.env.TWITTER_CONSUMER_KEY,
      consumerSecret: process.env.TWITTER_CONSUMER_SECRET,
      callbackURL: `${twittercallback}/users/auth/twitter/callback`
    },
    async function(token, tokenSecret, profile, done) {
      try {
        done(null, await usersModel.findOrCreate({
          id: profile.username, username: profile.username, password:
           "",
          provider: profile.provider, familyName: profile.displayName,
          givenName: "", middleName: "",
          photos: profile.photos, emails: profile.emails
        }));
      } catch(err) { done(err); }
    }));

    twitterLogin = true;
} else {
    twitterLogin = false;
}
This registers a TwitterStrategy instance with passport, arranging to call the user authentication service as users register with the Notes application. This callback function is called when users successfully authenticate using Twitter.
If the environment variables containing the Twitter tokens are not set, then this code does not execute. Clearly, it would be an error to set up Twitter authentication without the keys, so we avoid the error by not executing the code.
To help other code know whether Twitter support is enabled, we export a flag variable - twitterLogin.
We defined the usersModel.findOrCreate function specifically to handle user registration from third-party services such as Twitter. Its task is to look for the user described in the profile object and, if that user does not exist, to create that user account in Notes.
The callbackURL setting in the TwitterStrategy configuration is a holdover from Twitter's OAuth1-based API implementation. In OAuth1, the callback URL was passed as part of the OAuth request. Since TwitterStrategy uses Twitter's OAuth1 service, we have to supply the URL here. We'll see in a moment where that URL is implemented in Notes.
The callbackURL, consumerKey, and consumerSecret settings are all injected using environment variables. Earlier, we discussed how it is a best practice to not commit the values for consumerKey and consumerSecret to a source repository, and therefore we set up the dotenv package and a .env file to hold those configuration values. In Chapter 10, Deploying Node.js Applications to Linux Servers, we'll see that these keys can be declared as environment variables in a Dockerfile.
Add the following route declaration:
router.get('/auth/twitter', passport.authenticate('twitter'));
To start the user logging in with Twitter, we'll send them to this URL. Remember that this URL is really /users/auth/twitter and, in the templates, we'll have to use that URL. When this is called, the passport middleware starts the user authentication and registration process using TwitterStrategy.
Once the user's browser visits this URL, the OAuth dance begins. It's called a dance because the OAuth protocol involves carefully designed redirects between several websites. Passport sends the browser over to the correct URL at Twitter, where Twitter asks the user whether they agree to authenticate using Twitter, and then Twitter redirects the user back to your callback URL. Along the way, specific tokens are passed back and forth in a very carefully designed dance between websites.
Once the OAuth dance concludes, the browser lands at the URL designated in the following router declaration:
router.get('/auth/twitter/callback',
  passport.authenticate('twitter', { successRedirect: '/',
                       failureRedirect: '/users/login' }));
This route handles the callback URL, and it corresponds to the callbackURL setting configured earlier. Depending on whether it indicates a successful registration, Passport will redirect the browser to either the home page or back to the /users/login page.
Because router is mounted on /user, this URL is actually /user/auth/twitter/callback. Therefore, the full URL to use in configuring the TwitterStrategy, and to supply to Twitter, is http://localhost:3000/user/auth/twitter/callback.
In the process of handling the callback URL, Passport will invoke the callback function shown earlier. Because our callback uses the usersModel.findOrCreate function, the user will be automatically registered if necessary.
We're almost ready, but we need to make a couple of small changes elsewhere in Notes.
In partials/header.hbs, make the following changes to the code:
...
{{else}}
<div class="collapse navbar-collapse" id="navbarLogIn">
    <span class="navbar-text text-dark col"></span>
    <a class="nav-item nav-link btn btn-dark col-auto" href="/users/login">
                                Log in</a>
    {{#if twitterLogin}}
    <a class="nav-item nav-link btn btn-dark col-auto"
       href="/users/auth/twitter">
    <img width="15px"
    src="/assets/vendor/twitter/Twitter_SocialIcon
       _Rounded_Square_Color.png"/>
         Log in with Twitter</a>
    {{/if}}
</div>
{{/if}}
This adds a new button that, when clicked, takes the user to /users/auth/twitter, which—of course—kicks off the Twitter authentication process. The button is enabled only if Twitter support is enabled, as determined by the twitterLogin variable. This means that the router functions must be modified to pass in this variable.
For the URL shown here, the corresponding project directory is named public/assets/vendor/twitter. Notice that we force the size to be small enough for the navigation bar.
In routes/index.mjs, make the following change:
...
import { twitterLogin } from './users.mjs';
...
router.get('/', async (req, res, next) => {
    ...
        res.render('index', {
            title: 'Notes', notelist: notelist,
            user: req.user ? req.user : undefined,
            twitterLogin: twitterLogin
        });
    ...
});
This imports the variable, and then, in the data passed to res.render, we add this variable. This will ensure that the value reaches partials/header.hbs.
In routes/notes.mjs, we have a similar change to make in several router functions:
...
import { twitterLogin } from './users.mjs';
...
router.get('/add', ensureAuthenticated, (req, res, next) => {
    res.render('noteedit', {
        ... twitterLogin: twitterLogin, ...
    });
});

router.get('/view', (req, res, next) => {
    res.render('noteview', {
        ... twitterLogin: twitterLogin, ...
    });
});

router.get('/edit', ensureAuthenticated, (req, res, next) => {
    res.render('noteedit', {
        ... twitterLogin: twitterLogin, ...
    });
});

router.get('/destroy', ensureAuthenticated, (req, res, next) => {
    res.render('notedestroy', {
        ... twitterLogin: twitterLogin, ...
    });
});
This is the same change, importing the variable and passing it to res.render.
With these changes, we're ready to try logging in with Twitter.
Start the user information server as shown previously, and then start the Notes application server, as shown in the following code block:
$ npm start

> [email protected] start /Users/David/chap08/notes
> DEBUG=notes:* SEQUELIZE_CONNECT=models/sequelize-sqlite.yaml NOTES_MODEL=sequelize USER_SERVICE_URL=http://localhost:5858 node --experimental-modules ./app.mjs

  notes:server-debug Listening on port 3000 +0ms
Then, use a browser to visit http://localhost:3000, as follows:
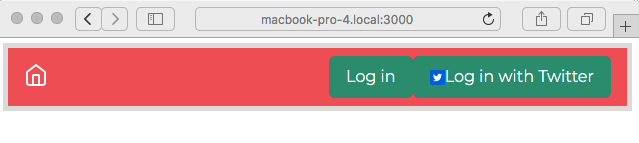
Notice the new button. It looks about right, thanks to having used the official Twitter branding image. The button is a little large, so maybe you want to consult a designer. Obviously, a different design is required if you're going to support dozens of authentication services.
Run it while leaving out the Twitter token environment variables, and the Twitter login button should not appear.
Clicking on this button takes the browser to /users/auth/twitter, which is meant to start Passport running the OAuth protocol transactions necessary to authenticate. Instead, you may receive an error message that states Callback URL not approved for this client application. Approved callback URLs can be adjusted in your application settings. If this is the case, it is necessary to adjust the application configuration on developer.twitter.com. The error message is clearly saying that Twitter saw a URL being used that was not approved.
On the page for your application, on the App Details tab, click the Edit button. Then, scroll down to the Callback URLs section and add the following entries:
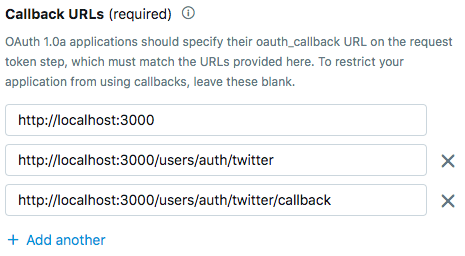
As it explains, this box lists the URLs that are allowed to be used for Twitter OAuth authentication. At the moment, we are hosting the application on our laptop using port 3000. If you are accessing it from other base URLs, such as http://MacBook-Pro-4.local, then that base URL should be used in addition.
Once you have the callback URLs correctly configured, clicking on the Login with Twitter button will take you to a normal Twitter OAuth authentication page. Simply click for approval, and you'll be redirected back to the Notes application.
And then, once you're logged in with Twitter, you'll see something like the following screenshot:
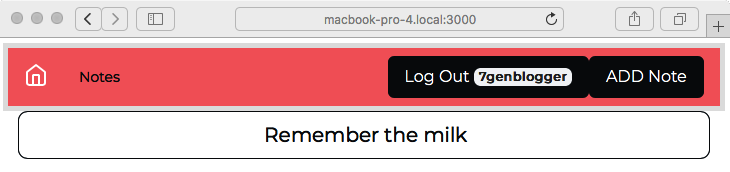
We're now logged in, and will notice that our Notes username is the same as our Twitter username. You can browse around the application and create, edit, or delete notes. In fact, you can do this to any note you like, even ones created by others. That's because we did not create any sort of access control or permissions system, and therefore every user has complete access to every note. That's a feature to put on the backlog.
By using multiple browsers or computers, you can simultaneously log in as different users, one user per browser.
You can run multiple instances of the Notes application by doing what we did earlier, as follows:
  "scripts": {
    "start": "cross-env DEBUG=notes:* SEQUELIZE_CONNECT=models/sequelize-sqlite.yaml NOTES_MODEL=models/notes-sequelize USERS_MODEL=models/users-rest USER_SERVICE_URL=http://localhost:5858 node ./bin/www",
    "start-server1": "SEQUELIZE_CONNECT=models/sequelize-sqlite.yaml NOTES_MODEL=models/notes-sequelize USERS_MODEL=models/users-rest USER_SERVICE_URL=http://localhost:5858 PORT=3000 node ./bin/www",
    "start-server2": "SEQUELIZE_CONNECT=models/sequelize-sqlite.yaml NOTES_MODEL=models/notes-sequelize USERS_MODEL=models/users-rest USER_SERVICE_URL=http://localhost:5858 PORT=3002 node ./bin/www",
    "dl-minty": "mkdir -p minty && npm run dl-minty-css && npm run dl-minty-min-css",
    "dl-minty-css": "wget https://bootswatch.com/4/minty/bootstrap.css -O minty/bootstrap.css",
    "dl-minty-min-css": "wget https://bootswatch.com/4/minty/bootstrap.min.css -O minty/bootstrap.min.css"
  },
Then, in one command window, run the following command:
$ npm run start-server1

> [email protected] start-server1 /Users/David/chap08/notes
> DEBUG=notes:* SEQUELIZE_CONNECT=models/sequelize-sqlite.yaml NOTES_MODEL=sequelize USER_SERVICE_URL=http://localhost:5858 PORT=3000 node --experimental-modules ./app.mjs

  notes:server-debug Listening on port 3000 +0ms
In another command window, run the following command:
$ npm run start-server2

> [email protected] start-server2 /Users/David/chap08/notes
> DEBUG=notes:* SEQUELIZE_CONNECT=models/sequelize-sqlite.yaml NOTES_MODEL=sequelize USER_SERVICE_URL=http://localhost:5858 PORT=3002 node --experimental-modules ./app.mjs

  notes:server-debug Listening on port 3002 +0ms
As previously, this starts two instances of the Notes server, each with a different value in the PORT environment variable. In this case, each instance will use the same user authentication service. As shown here, you'll be able to visit the two instances at http://localhost:3000 and http://localhost:3002. As before, you'll be able to start and stop the servers as you wish, see the same notes in each, and see that the notes are retained after restarting the server.
Another thing to try is to fiddle with the session store. Our session data is being stored in the sessions directory. These are just files in the filesystem, and we can take a look with normal tools such as ls, as shown in the following code block:
$ ls -l sessions/
total 32
-rw-r--r-- 1 david wheel 139 Jan 25 19:28 -QOS7eX8ZBAfmK9CCV8Xj8v-3DVEtaLK.json
-rw-r--r-- 1 david wheel 139 Jan 25 21:30 T7VT4xt3_e9BiU49OMC6RjbJi6xB7VqG.json
-rw-r--r-- 1 david wheel 223 Jan 25 19:27 ermh-7ijiqY7XXMnA6zPzJvsvsWUghWm.json
-rw-r--r-- 1 david wheel 139 Jan 25 21:23 uKzkXKuJ8uMN_ROEfaRSmvPU7NmBc3md.json $ cat sessions/T7VT4xt3_e9BiU49OMC6RjbJi6xB7VqG.json
{"cookie":{"originalMaxAge":null,"expires":null,"httpOnly":true,"path":"/"},"__lastAccess":1516944652270,"passport":{"user":"7genblogger"}}
This is after logging in using a Twitter account. You can see that the Twitter account name is stored here in the session data.
What if you want to clear a session? It's just a file in the filesystem. Deleting the session file erases the session, and the user's browser will be forcefully logged out.
The session will time out if the user leaves their browser idle for long enough. One of the session-file-store options, ttl, controls the timeout period, which defaults to 3,600 seconds (an hour). With a timed-out session, the application reverts to a logged-out state.
In this section, we've gone through the full process of setting up support for login using Twitter's authentication service. We created a Twitter developer account and created an application on Twitter's backend. Then, we implemented the required workflow to integrate with Twitter's OAuth support. To support this, we integrated the storage of user authorizations from Twitter in the user information service.
Our next task is extremely important: to keep user passwords encrypted.
Keeping secrets and passwords secure
We've cautioned several times about the importance of safely handling user identification information. The intention to handle that data safely is one thing, but it is important to follow through and actually do so. While we're using a few good practices so far, as it stands, the Notes application would not withstand any kind of security audit for the following reasons:
- User passwords are kept in clear text in the database.
- The authentication tokens for Twitter et al. are in clear text.
- The authentication service API key is not a cryptographically secure anything; it's just a clear text universally unique identifier (UUID).
If you don't recognize the phrase clear text, it simply means unencrypted. Anyone could read the text of user passwords or the authentication tokens. It's best to keep both encrypted to avoid information leakage.
Keep this issue in the back of your mind because we'll revisit these—and other—security issues in Chapter 14, Security in Node.js Applications.
Before we leave this chapter, let's fix the first of those issues: storing passwords in plain text. We made the case earlier that user information security is extremely important. Therefore, we should take care of this from the beginning.
The bcrypt Node.js package makes it easy to securely store passwords. With it, we can easily encrypt the password right away, and never store an unencrypted password.
To install bcrypt in both the notes and users directories, execute the following command:
$ npm install [email protected] --save
The bcrypt documentation says that the correct version of this package must be used precisely for the Node.js version in use. Therefore, you should adjust the version number appropriately to the Node.js version you are using.
The strategy of storing an encrypted password dates back to the earliest days of Unix. The creators of the Unix operating system devised a means for storing an encrypted value in /etc/passwd, which was thought sufficiently safe that the password file could be left readable to the entire world.
Let's start with the user information service.
Adding password encryption to the user information service
Because of our command-line tool, we can easily test end-to-end password encryption. After verifying that it works, we can implement encryption in the Notes application.
In cli.mjs, add the following code near the top:
import { default as bcrypt } from 'bcrypt';
const saltRounds = 10;
This brings in the bcrypt package, and then we configure a constant that governs the CPU time required to decrypt a password. The bcrypt documentation points to a blog post discussing why the algorithm of bcrypt is excellent for storing encrypted passwords. The argument boils down to the CPU time required for decryption. A brute-force attack against the password database is harder, and therefore less likely to succeed if the passwords are encrypted using strong encryption, because of the CPU time required to test all password combinations.
The value we assign to saltRounds determines the CPU time requirement. The documentation explains this further.
Next, add the following function:
async function hashpass(password) {
 let salt = await bcrypt.genSalt(saltRounds);
 let hashed = await bcrypt.hash(password, salt);
 return hashed;
}
This takes a plain text password and runs it through the encryption algorithm. What's returned is the hash for the password.
Next, in the commands for add, find-or-create, and update, we make this same change, as follows:
.action(async (username, cmdObj) => {
  const topost = {
    username,
    password: await hashpass(cmdObj.password),
    ...
  };
  ...
 })
That is, in each, we make the callback function an async function so that we can use await. Then, we call the hashpass function to encrypt the password.
This way, we are encrypting the password right away, and the user information server will be storing an encrypted password.
Therefore, in user-server.mjs, the password-check handler must be rewritten to accommodate checking an encrypted password.
At the top of user-server.mjs, add the following import:
import { default as bcrypt } from 'bcrypt';
Of course, we need to bring in the module here to use its decryption function. This module will no longer store a plain text password, but instead, it will now store encrypted passwords. Therefore, it does not need to generate encrypted passwords, but the bcrypt package also has a function to compare a plain text password against the encrypted one in the database, which we will use.
Next, scroll down to the password-check handler and modify it, like so:
server.post('/password-check', async (req, res, next) => {
  try {
    const user = await SQUser.findOne({
                     where: { username: req.params.username } });
    let checked;
    if (!user) {
      checked = {
        check: false, username: req.params.username,
        message: "Could not find user"
      };
    } else {
      let pwcheck = false;
      if (user.username === req.params.username) {
        pwcheck = await bcrypt.compare(req.params.password,
         user.password);
      }
      if (pwcheck) {
        checked = { check: true, username: user.username };
      } else {
        checked = {
          check: false, username: req.params.username,
          message: "Incorrect username or password"
        };
      }
    }
    ...
  } catch (e) { .. }
});
The bcrypt.compare function compares a plain text password, which will be arriving as req.params.password, against the encrypted password that we've stored. To handle encryption, we needed to refactor the checks, but we are testing for the same three conditions. And, more importantly, this returns the same objects for those conditions.
To test it, start the user information server as we've done before, like this:
$ npm start

> [email protected] start /home/david/Chapter08/users
> DEBUG=users:* PORT=5858 SEQUELIZE_CONNECT=sequelize-sqlite.yaml node ./user-server.mjs

 users:service User-Auth-Service listening at http://127.0.0.1:5858 +0ms
In another window, we can create a new user, as follows:
$ node cli.mjs add --password w0rd --family-name Einarsdottir --given-name Ashildr --email [email protected] me
Created {
 id: 'me',
 username: 'me',
 provider: 'local',
 familyName: 'Einarsdottir',
 givenName: 'Ashildr',
 middleName: null,
 emails: [ '[email protected]' ],
 photos: []
}
We've done both these steps before. Where it differs is what we do next.
Let's check the database to see what was stored, as follows:
$ sqlite3 users-sequelize.sqlite3
SQLite version 3.31.1 2020-01-27 19:55:54
Enter ".help" for usage hints.
sqlite> select * from SQUsers;
1|me|$2b$10$stjRlKjSlQVTigPkRmRfnOhN7uDnPA56db0lUTgip8E6/n4PP7Jje|local|Einarsdottir|Ashildr||["[email protected]"]|[]|2020-02-05 20:59:21.042 +00:00|2020-02-05 20:59:21.042 +00:00
sqlite> ^D
Indeed, the password field no longer has a plain text password, but what is—surely—encrypted text.
Next, we should check that the password-check command behaves as expected:
$ node cli.mjs password-check me w0rd
{ check: true, username: 'me' }
$ node cli.mjs password-check me w0rdy
{
 check: false,
 username: 'me',
 message: 'Incorrect username or password'
}
We performed this same test earlier, but this time, it is against the encrypted password.
We have verified that a REST call to check the password will work. Our next step is to implement the same changes in the Notes application.
Implementing encrypted password support in the Notes application
Since we've already proved how to implement encrypted password checking, all we need to do is duplicate some code in the Notes server.
In users-superagent.mjs, add the following code to the top:
import { default as bcrypt } from 'bcrypt';
const saltRounds = 10;

async function hashpass(password) {
  let salt = await bcrypt.genSalt(saltRounds);
  let hashed = await bcrypt.hash(password, salt);
  return hashed;
}
As before, this imports the bcrypt package and configures the complexity that will be used, and we have the same encryption function because we will use it from multiple places.
Next, we must change the functions that interface with the backend server, as follows:
export async function create(username, password,
         provider, familyName, givenName, middleName, emails, photos) {
 var res = await request.post(reqURL('/create-user')).send({
    username, password: await hashpass(password), provider,
    familyName, givenName, middleName, emails, photos
 })
 ...
}

export async function update(username, password,
         provider, familyName, givenName, middleName, emails, photos) {
 var res = await request.post(reqURL(`/update-user/${username}`))
 .send({
    username, password: await hashpass(password), provider,
    familyName, givenName, middleName, emails, photos
 })
 ...
}

export async function findOrCreate(profile) {
  var res = await request.post(reqURL('/find-or-create')).send({
    username: profile.id,
    password: await hashpass(profile.password),
          ...
  })
...
}
In those places where it is appropriate, we must encrypt the password. No other change is required.
Because the password-check backend performs the same checks, returning the same object, no change is required in the frontend code.
To test, start both the user information server and the Notes server. Then, use the application to check logging in and out with both a Twitter-based user and a local user.
We've learned how to use encryption to safely store user passwords. If someone steals our user database, cracking the passwords will take longer thanks to the choices made here.
We're almost done with this chapter. The remaining task is simply to review the application architecture we've created.
Running the Notes application stack
Did you notice earlier when we said to run the Notes application stack? It's time to explain to the marketing team what's meant by that phrase. They may want to put an architecture diagram on marketing brochures or websites. It's also useful for developers such as us to take a step back and draw a picture of what we've created, or are planning to create.
Here's the sort of diagram that an engineer might draw to show the marketing team the system design (the marketing team will, of course, hire a graphics artist to clean it up):

The box labeled Notes Application in the preceding diagram is the public-facing code implemented by the templates and the router modules. As currently configured, it's visible from our laptop on port 3000. It can use one of several data storage services. It communicates with the User Authentication Service backend over port 5858 (or port 3333, as shown in the preceding diagram).
In Chapter 10, Deploying Node.js Applications to Linux Servers, we'll be expanding this picture a bit as we learn how to deploy on a real server.
Summary
You've covered a lot of ground in this chapter, looking at not only user authentication in Express applications, but also microservices development.
Specifically, you covered session management in Express, using Passport for user authentication—including Twitter/OAuth, using router middleware to limit access, creating a REST service with Restify, and when to create a microservice. We've even used an encryption algorithm to ensure that we only store encrypted passwords.
Knowing how to handle login/logout, especially OAuth login from third-party services, is an essential skill for web application developers. Now that you've learned this, you'll be able to do the same for your own applications.
In the next chapter, we'll take the Notes application to a new level with semi-real-time communication between application users. To do this, we'll write some browser-side JavaScript and explore how the Socket.io package can let us send messages between users.