5
Voiceover Narration and Story
Narration sometimes gets a bad rep. We have all heard a video—possibly in the training or educational genre—where the narrator puts us to sleep. The script may be the culprit. Or the choice of reader. Or the style of the reading. Or possibly all of the above. In fairness, the narrator or copy may not be to blame. Other critical audio elements may be missing—things such as compelling interviews, provocative music, authentic sound design—and so the production leans too heavily on the narration to do all its storytelling work. In many instances, narration isn’t called for at all. We both work on many productions where we intercut interviews to tell a story without relying on any “outside” voice to connect the threads. But for many nonfiction projects, narration is an important story element. Choosing the right voice for your story, and then guiding that talent through the narration process, is an art unto itself. This voice is most likely the backbone of your story, so you need to give selecting and directing a narrator the proper time and resources. We know that sometimes this process gets shortchanged, so we will try to shed light on a few of our experiences and best practices.
Choosing a Narrator
When you are cutting a story, you may hear a certain type of voice in your head that you feel will work best for the narration. Of course, another approach to narration is to not have voiceover at all. Weaving the story with archival footage, sound on tape, and interviews is challenging, but a rewarding way to create a story. Not all stories lend themselves to verité though. You can try using character voices as reenactments or reading in the first person, but this can come across as gimmicky if not woven into the story well. If you decide to go the route of voiceover, it’s never too early to start listening to options for the voice of your story. Thankfully, this is easy to do with many online collections of voiceover talent. Decisions about narration often center around budget, which sometimes means deciding between union and non-union talent. Voiceover professionals who are union are members of the Screen Actors Guild and the American Federation of Television and Radio Artists (SAG-AFTRA), two collective bargaining entities who joined together. The union negotiates and publishes standard fees for all acting work, including voiceovers, with fees based on distribution platform, length of recording session, and other factors. Included in the fee is a small percentage known as “P&W” (Pension & Welfare) so that these actors can have access to healthcare and retirement funds. The big difference between the union and non-union voice talent used to be experience and cost, with non-union talent costing less but generally having less experience. However, the internet has changed the landscape for voice talent. At one time, a voice professional would join the union as soon as they garnered the necessary credits because union membership could offer better access to jobs and secure pay and benefits. Today, voiceover artists do their own marketing and can still make a good living even if they are non-union. However, they have to manage their own healthcare and retirement planning. For some broadcast work, you are required to use union talent because of agreements signed by the broadcaster. To do so, you must be a union “signatory”—a party to the union agreement. If you are not, which many independent producers aren’t, you can hire an intermediary talent agency who can handle the pay-mastering for you. The term pay-mastering means that for a fee, an entity you hire handles all the payments to subcontractors. (By the way, there are pay-mastering firms who handle crew payments, too.) Union members can tell you which pay-mastering firms they like to work with, so this is not a barrier to booking a session quickly.
The choice between hiring union and non-union talent is yours alone. We know people who only choose union talent because they believe in the union to provide tested and seasoned talent, while also believing in the union as a protector of the worker (for the health insurance and pension benefits mentioned). I know others who will only consider non-union talent because they don’t want what they consider to be the hassle of paperwork and strict fee structure. In the end, what’s most important is that you ensure you are getting the talent you want that will deliver a strong story element for your production. Paying a little more also generally gets you good will for the occasional “pick up” or correction, once you start editing. (This privilege should not be abused. If you have more than one or two, you should pay an additional session fee for the voice actor to record them for you.) Hire the best you can afford.
Once you’ve decided whether to go the union or non-union route, what comes next? With literally thousands of voices to choose from, how do you make your selection? Sometimes, you know up front that you prefer a particular gender and a specific age bracket. These choices may be dictated by the target audience for the piece. One producer I work with casts for both male and female voices each time, even if the story seems to lend itself one way or the other. This gives her the option to test out choices and perhaps decide against a stereotype. That could mean, for instance, choosing a female voice rather than a male voice to narrate a “traditionally male” genre such as a military training film or a documentary on the history of motorcycles. Using a female voice with a distinctive tone could be just the right call.
When choosing a narrator, consider the dialogue in your story. If the interviews are primarily with women, consider a male voice to give the story a tonal balance, and vice versa. Voice range and tone in a narration track can offer needed contrast to both the other voices in the story and the music. If you plan to interview many young children, then you might select a lower-pitched female voice to contrast with the children’s higher-pitched voices. Or, if you are planning a score that includes some heavy brass instrumentation, you might choose a big, low “Darth Vader” voice to cut through those broad wavelengths. Remember, the narrator is a character in the story, too, and should be given his or her own place and identity. Emmy-winning voice artist Melissa Leebaert explains,
As an actor you are trained to embody a character and a role. And I need to convey the pictures I see in my head, so the listener does too. No one wants to hear you read. They want to hear you tell the story. So, whether it’s a 30-second commercial or a one-hour documentary, you are telling a story.
Even if you select a voice with a subdued tonality, that choice still must support the style and content of the whole story. For example, Amy decided to hire a female narrator with a very calm, smooth tone for an animated production that would play in a hospital for parents with a child in the Intensive Care Unit (ICU). We can’t imagine anything worse than having a child in the ICU. So this calming presence was intended to convey confidence to parents who are distressed, so they can focus on the information contained in the film about how to be the best advocates for their child during a hospital stay (Figure 5.1).
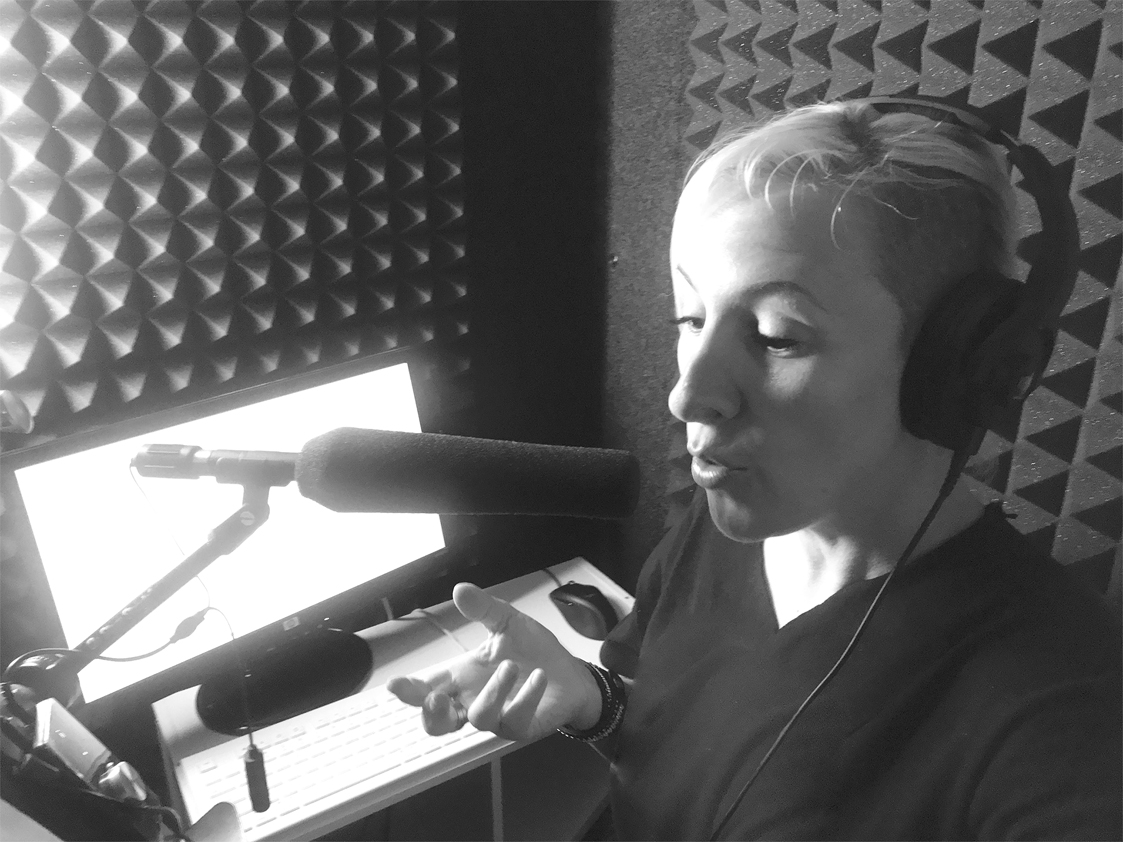
FIGURE 5.1 Voiceover talent Vanessa Richardson records a narration in her home studio.
The creative decisions surrounding narration are often easier to make when your edit is taking shape. To help you with this process, ask your prospective talent to read and send you a few lines of script as part of your audition process. It is customary to request these as mp3 files, with the understanding that those are not of sufficient quality to be used in a final program. In some cases, talent will “watermark” these files so that they cannot be used in a final version without payment. (Unfortunately, some people try to use auditions to get around paying voiceover artists.) We recommend requesting a few lines from the opening or “tease” of your script, plus another section from the middle. If your end-product will be short, such as a 30-second spot, asking for a complete read as an audition is not uncommon. Requesting a custom audition not only lets you test the timbre of the voice and style of reading by a particular talent, it also lets you test the quality of the studio in which they are recording.
While once they used professional sound studios, today a majority of voiceover professionals have set up home studios from which to record. This practice reduces your costs since you don’t have to pay a separate recording studio and engineer fee. Some talent will rightly add a small charge for managing the recording process since this usually requires them to spend some time doing file management and even some limited editing after your session ends. Unfortunately, the use of home studios has also resulted in some inferior recordings. When working with a narrator you haven’t used in the past, or when you are not asking for a customized audition reading, you can still ask for a test recording before booking your session. We recommend it. Send this test along to your sound mixer to be sure the microphone and recording environment don’t pose any problems. Don’t worry, your audio engineer will be thrilled to check it out for you. Because they will be the ones dealing with problems, or potentially having to give you the bad news that parts of the recording aren’t usable, good engineers would prefer to head those problems off before you are under deadline to mix. When interviewing potential voiceover talent, ask for the software, equipment, and microphones they use to get an idea of their setup. A home studio doesn’t need to be elaborate. But it does need to deliver the quality you require. So, it is important to consider the studio as you conduct your audition process.
Preparing for Narration Session
Once you’ve selected your voice talent, it’s important to spend some time in advance of your recording session discussing your script with them. They are not just reading your script—they are performing it. And the more they know about it, the better the performance. It’s a great idea to send your script in advance of your session so your narrator can understand your film and jot down some questions to discuss prior to your recording session. Even better, send them a link to your cut. Even if you are putting the finishing touches on it before the date of the session, seeing the cut helps your talent start to prepare mentally for their delivery.
Most voiceover professionals would like to know the answers to these key questions:
![]() Who is the audience for this video?
Who is the audience for this video?
![]() What kind of tempo do you want for this piece?
What kind of tempo do you want for this piece?
![]() Will I be reading to picture or given certain timings I must come in at for each section?
Will I be reading to picture or given certain timings I must come in at for each section?
![]() What kind of music are you using, and is it different for different sections of the film?
What kind of music are you using, and is it different for different sections of the film?
![]() Is there a particular tone you want to strike (or avoid)?
Is there a particular tone you want to strike (or avoid)?
![]() Can you provide a pronunciation guide to any names, places or organizations? (Be sure to include how you want acronyms pronounced)
Can you provide a pronunciation guide to any names, places or organizations? (Be sure to include how you want acronyms pronounced)
You can and should plan to play an active role during the voiceover recording session, even if your script contains some notes of direction. In fact, most voice actors want the participation of the director to help them shape the read. The process should be collaborative without being complicated. Give the voice actor some idea of what you’re going for in style and approach to the story. Listen to them deliver a few lines and offer constructive feedback. Sometimes it’s useful just before the start of the session to let the actor give you one set of lines a few different ways, so they can show you how they can interpret the material in nuanced ways. You’d be surprised the impact of changing pacing or tone.
Even if you choose your narrator early in your production or post-production process, use a scratch track in place of final voiceover until the cut is near completion. The script may change slightly each time you make revisions to your edit. Plus, the script usually needs to be a vetted by other producers and/or lawyers before you receive a final approval. You want to avoid the time and cost of rerecording when possible, so waiting until you have picture lock is wise.
Managing Your Voiceover Recording Session
If your talent is making the recording from a home studio, or from a studio not located where you are, then it is likely you will direct the recording session from the phone or a computer feed. A studio engineer should know to mute your director’s line before recording, but sometimes a talent making their own recording will forget this because they are managing a number of different details as well as preparing to perform. Be sure the talent mutes that feed or has it totally separated from their microphone feed when recording the takes. It’s really disappointing when a great take is ruined by mixing in the phone, computer noise, or voice of you, the producer. Remember, too, that the voice is an instrument. When possible, try to schedule recording sessions in the morning (in the talent’s time zone), but not too early. You want enough time for the talent’s vocal cords to warm up, but not have them deliver a tired read at the end of the day.
A note about including timings for your voiceover session: Timings on the script can help keep the correct pace of the edit and are essential for closely timed pieces. But talent can get obsessed with timings, which may affect their reading style. So, we suggest not putting timings on the script itself, unless you are working with a seasoned professional who specializes in this type of work. You can keep a version of the script with timings and run a stop-watch as you direct the session and then make subtle suggestions to accelerate or decelerate certain sections. A veteran audio engineer can usually tell right away if a long take will be workable for your final mix. It’s a good idea to understand where your cut could have some flexibility, and where it cannot as some reads will not be precisely what you estimated. In the non-broadcast world, exact total running time is not as important, so you have the ability to go with the best read, even if it runs a bit longer than you expected. In the broadcast world, precision is required. I sometimes ask for slower reads, just to get the right approach. Often, that slow pace is really only a few seconds longer than needed and is totally usable.
As we discussed in Chapter 1, Sound Basics, sample rate and bit depth matter for recording quality. Request that your narration recording be made at no less than 44.1kHz and 16 bit. 48kHz/24 bit is the standard for digital video. Often voice recordings are made at 96K and above. Also request that the recordings are originated as WAV or AIFF files and not mp3. Mp3s are convenient, but they derive their smaller data size by filtering out frequencies and range. Recordings made as mp3s do not improve suddenly when transcoded to WAV or AIFF. When recording, ask that the takes be labeled with a project code, the talent name, and the date. This will come in handy later if you need to switch to a different talent or record more lines on another date.

As previously mentioned, when working with voiceover talent it is important to get a sample of their recording quality prior to engaging them if you can. Many voiceover artists use a home recording studio, and while many have invested the time and money to outfit these with proper tools, such as quality microphones and sound dampening on walls, every now and then you will discover problems that will cost you time and money to fix in post. Two common issues are having other sounds bleeding into the recording or poor microphone placement. Things to listen for include outside noises, such as dogs, lawn mowers, and sirens, as well as inside sounds, such as printers and phones. When directing a voiceover through a phone patch, be sure you don’t hear the phone feed mixed in. When discussing what deliverable you want for the recording, ask for as “flat” a recording as possible. Flat means there is no EQ or compression added. Even after requesting flat, when we are in the sound mix studio we’ll often discover a small roll-off and compression in the narrator’s voice. A roll-off at 50Hz is usually a safe way to attenuate noise, without much effect on the voice. Remember to request audio files from narrators to be recorded at 44.1K 16 bit mono WAV or AIFF or 48K 24 bit mono WAV or AIFF files, never mp3s. The record sample rate is the most important.
When directing talent, there are many techniques for getting a “good read.” If there is a particular phrase or tagline that you want to use, and you’re not quite sure what emphasis you will prefer, try asking for a “triple.” This means the artist will say that line three time in a row, with just a small break in between each line. Triples are an excellent way to get different approaches to sentences or groups of sentences, especially for difficult sentences or ones that you want to emphasize. It’s also an excellent way to get a rookie, or non-professional who must read, comfortable with the process.
It’s important to get the right tone and pace for the read at the beginning of the session. Having a relaxed conversation prior to the start of the official record can go a long way to achieving your goals. However, during the session, try not to over-direct or interrupt the talent. This can cause your reader to lose their train of thought and give a poor performance. The same goes for stopping the talent too much along the way. You will prevent them from getting into a rhythm. It’s better to make small check marks on your script for any sections that could use a second pass. You can return to these later, once you have gotten through a longer section of the script. Often, we call these rereads “pickups,” and audio mix engineers are accustomed to finding them at the end of the larger chunks of the recording session.
One common technique we both use at the end of our narration sessions is to go back and record the beginning of the script one more time. Often, the narrator has relaxed and become more familiar with the material and has gotten “in the zone” by this point in the session. We often find we use this version of the opening more often than the initial take. This strategy works especially well with non-professionals who may be required to become voiceover artists for certain types of non-fiction videos, such as training and educational content. Once, I asked the talent, a renowned scientist who struggled a bit in the recording session, to go back to the top and rerecord the first two pages. Much to mine and the director’s surprise, she kept on reading. We let her go. She read the whole script again without stopping! That last take was the “keeper” for the whole piece.
It is not uncommon for longer documentaries to need some pick-up lines for altered text after a show has been through some reviews. If you do need to record some pick-up lines, try to have the talent use the same set-up as they did for your first recording. You can even send them a short sample of the original. Talent will sound differently on different days, even on the same microphone. While you will never get an exact match (especially if the recording studio is different), if you have the same set-up, the two reads will sound closer. When prepping to send your files off to mix, place those pickups on the timeline on their own track under the original track of narration. Since (hopefully) the dates are on the clips, this may seem like an extra step, but it will signal to the mixer to be extra careful about matching the audio from different recording sessions.
Tips for Narration
![]() Consider carefully the options you have for union and non-union talent. Regardless of union membership, you are likely to have fewer and better reads with a more experienced voice actor, which can reduce your editing costs.
Consider carefully the options you have for union and non-union talent. Regardless of union membership, you are likely to have fewer and better reads with a more experienced voice actor, which can reduce your editing costs.
![]() When auditioning voiceover talent, request a few sample lines to be emailed to you as mp3 files so that you can test them with the visuals of your cut. A few lines from the opening and another few from the middle of the script are helpful.
When auditioning voiceover talent, request a few sample lines to be emailed to you as mp3 files so that you can test them with the visuals of your cut. A few lines from the opening and another few from the middle of the script are helpful.
![]() When you record your voiceover narration, consider rerecording the opening few sentences once you’ve gotten to the end of your session. Sometimes the pace and vibe has changed along the way, and it’s a good idea to be sure the open and the ending match well.
When you record your voiceover narration, consider rerecording the opening few sentences once you’ve gotten to the end of your session. Sometimes the pace and vibe has changed along the way, and it’s a good idea to be sure the open and the ending match well.
![]() Request that your narration recording be made at no less than 44.1K and 16 bit, with 48K/24 bit being the standard for digital video. Some voice recordings are even made at 96K and above. Request that the recording is originated as a WAV or AIFF, not as an mp3.
Request that your narration recording be made at no less than 44.1K and 16 bit, with 48K/24 bit being the standard for digital video. Some voice recordings are even made at 96K and above. Request that the recording is originated as a WAV or AIFF, not as an mp3.