6
Preparing for Your Sound Mix
Now we turn to the post-production phase of your project (which in the business we know as “post”). Just as we emphasized the importance of planning to incorporate sound elements into your production plan, we will focus here on the value of planning ahead for your audio post sessions. The audio post-production process is critical; yet because it is usually one of the last elements of a production, it can get rushed. Complicating this further is the fact that we now work in a world of multi-platform distribution of content. Knowing how to approach the audio post-production process can save you much time and aggravation, leaving more time for the creative story design process. In this chapter we will discuss how to choose your mixer and move your project forward from the field to audio post. This includes decisions that need to be made about music and sound effects prior to the mix and how to budget for the audio post process.
Choosing Your Mixer
Finding someone to mix and sound design your project is an important task. This person’s job is not just to clean up your audio tracks. You are handing off your “baby” and asking another creative to bring their ideas and their input to your story. When selecting your mixer and sound designer for a project, one place to start is to ask other producers who they like to work with. You can do this through professional associations and online production communities. You can also look for projects that are similar to yours and check the credits. Doing a little further research can open up other options as well. When reaching out to prospective collaborators, give a short synopsis of the project and ask for samples of their work. Set up a call to narrow down your choices. Keep an open mind as you search for the right sound person for your project.
I am often on the other side of these requests and conversations and find that discussions center around budget, schedule, workflow, and creative. Budget is certainly important, but hourly rate should not be your only deciding factor. Expertise and experience with your type of content can affect your bottom line since one mixer might be able to work through your project at a considerably faster speed than another. Be prepared to give as much information on the project as possible to get an accurate estimate of hours needed and budget. Script, storyboard, or even a rough cut are all helpful to a mixer when assessing the time and budget a project will need. It’s also a good idea to provide your technical specifications for delivery. Certain types of deliverables may take extra time, and a good mixer can help you economize the process.
As is the case in every aspect of video production, budget and schedule are intertwined. Think about it like finding the best airfare. If the project has a very tight turnaround and will require long days and weekends to deliver, be prepared for the sound house or mixer to give you a higher quote, as they don’t have much flexibility (similar to how airfare is often more expensive when your travel dates aren’t flexible). If you have the ability to slide the deadline by a few days or longer, that might lower your “fare” (much like how airfare is often lower if your dates and destination are flexible). Offering flexibility in schedule allows a mixer to take on projects that they may enjoy but may not be at their full rate.
I recently took on a documentary touching on suicide and its aftermath. Mental health and this topic meant something to me, so I took the project on at a lower rate than I normally would. Its flexible schedule allowed me to fit it in around other projects, which gave me the opportunity to say yes when I otherwise would have had to say no.
It is common sense that not all experiences, workflows, or tools will produce the same results in the same amount of time from different sound engineers. Each sound designer knows their own tools and how fast they can work on certain types of sound challenges. In general, it’s a good idea when working with anyone new to add in extra time for getting to know each other’s processes.
Keep in mind when discussing rates that you usually get what you pay for. Sometimes your project may offer a perfect opportunity to try out someone new to the business at a lower rate. Giving a job to a person you never worked with or someone just breaking into the business is always a risk. But it’s a calculated risk and one that can deliver rich rewards. Working with different people can often refresh the creative process and introduce new workflows, technology, and techniques. I enjoy mentoring and working with new talent for that reason. Giving a new mixer a chance to flex their burgeoning skills can make the process exhilarating and add a new perspective to productions. Of course, there are times when you have a high-stakes production that needs to be perfect. In those instances, you may want to stick with a mixer who has done this type of production many times before or with whom you have a close working relationship. For instance, you may not want to take the 80-minute feature documentary on bees in North America that you’ve spent the last three years filming and editing to the mixer that has only movie trailers in their portfolio. Likewise, if you are doing a highly stylized spot, the sound designer who has worked only on natural history documentaries is not the right choice. I’m not encouraging you to get too narrow in your search as audio skills do translate across many genres and styles. So, if the sound person clicks with you and your project, perhaps that overrides the exact experience match. However, in such instances, it’s a good idea to build in a little extra time to compensate for the crossover in expertise.
When getting acquainted with a mixer, you should ask about tools but center the conversation on workflow and the creative process. Ask questions about how media will be received, managed, delivered, and archived. Ask if that mixer will work on your project alone or with other (often more junior) staff. Especially for longer-form projects, discuss the collaboration process and how you will handle reviews and milestones. Location doesn’t have to dictate your decision. The many tools that exist for online reviews and remote collaboration open up a world of choices. That might feel overwhelming, but it allows your choice to be based on the right fit, not proximity. After considering your project, your audience, your timeline, and your budget, you alone will make the decision of who to join you in the audio mixing phase of your storytelling process. It’s an exciting collaboration that requires creativity, skills, and a little mutual faith.
Budget and Scheduling
To start your budgeting process, share a written description of your finished piece (a short paragraph) as well as your script and/or rough cut, along with any special sound ideas you might have. This will help a prospective mixer put together a realistic estimate of time and budget needed for your mix. Once you’ve decided on a mixer and agreed on a budget, keep in touch as your project evolves. Send along the fine cut when it’s available so you can discuss what might have changed in your content or approach. This is also a good time to confirm the schedule and budget with your sound team. In addition to making sure you are on target with your schedule, being able to see and hear your fine cut helps the sound team start envisioning your mix and come up with creative ideas to solve any sound issues. When I first started freelancing, one of the hardest things for me to do was quote how long something would take and, thus, how much it would cost. I found it especially tough if I was asked to give numbers blind, without any storyboard or cut to review. Would my time estimate be considered too slow or too fast, or somehow indicate that I did not care about the job enough? It was quite stressful. Taking notes during my mix sessions and recording how long each phase of the work actually took helped me do a better job both of properly invoicing and accurately estimating bids for new projects. All this is to say that an experienced sound engineer can probably give you a solid estimate for your production. One item to remember when discussing budget with a mixer is the licensing of sound effects or samples. While most producers have a line-item for music, many fail to consider the cost of additional sound effects. Most sound design studios own collections of effects and can include these licenses in your project estimate.
Budgets for sound mixing can vary quite widely. The hourly rate of your mix studio certainly plays a role. But the key variables are the length of the end-product (TRT or Total Runtime) and the style and complexity of the production being mixed. A good rule of thumb is 30 minutes to one hour of audio post-production work for every minute of content. Of course, this is a generalization. But it’s a good place to start. The next item to consider is complexity of your sound design needs. If you have produced a four-minute music video with a modest amount of editing and no narration or sound effects, that job can be completed in two to three hours. If the same length piece has a lot of b-roll with sync sound to be adjusted, plus scenes with archival footage that requires sound sweetening and sound design, then that five-minute video might take a day to mix. In the case of heavy dialogue editing, such as a film with multiple interviews shot by different teams in different locations with a variety of microphones, the noise reduction work and meshing of tracks will likely take more than a day accomplish. A final consideration when making your budget and schedule is how drawn out you expect your review process to be. For example, if you have several executive producers who will need to review and bless each version of your film, then you can add several hours for each pass on the mix and the various discussions about those adjustments.
Longer-format show mixes range more widely in budget than short-form mixes. Interview-driven scripted reality programs often feature little sound design and have music only during the bumpers in and out of commercial breaks. These can be finished much faster than more complex shows. The speed of the mix also depends on the quality of the recording of the voices and how much editing of their dialogue is involved. An hour-long broadcast program, which typically runs 46 minutes, can take thirty to forty hours to finish, including reviews and final output. However, when on a tight schedule our studio has finished these type of shows in twelve hours, working in teams. That was possible when the sound production quality was high, the editor organized, and the audio material not overly edited. The average for scripted reality TV is about eight to twelve hours per episode, although budgeting for some episodic programming has gotten really tight. (We will discuss workflows that will help ease that crunch in Chapter 7, Your Mix Session.) For the best outcome, give a little breathing room in your schedule between the time you turn in a cut to a mix house and the time you expect a polished mix. Any additional time you can provide will give your mixer an opportunity to step back and truly listen to and absorb the project before launching into your mix. This allows your engineer to be more creative in problem-solving in the midst of a tight turnaround scenario.
Documentary is one of the most prevalent forms of long format for nonfiction storytelling. Depending on the depth of the sound textures, demands on sound design, and dialogue editing, a standard fifty-two minute program could easily take 60 hours in audio post. Often, this type of programming has two versions. The first is usually a longer, seamless version for digital streaming, and the second is cut down into a version for traditional broadcast, with breaks for commercials. Mixing both versions and all the deliverables for both masters adds time to the schedule and budget. The additional time for the extra deliverables can range from four to ten hours, depending on the complexity of the changes between the seamless and the ad break masters.
In the budgeting and planning stages for hour-long documentaries, 40 hours split between sound design and mix, review, and outputs seems to be the de facto number that is slugged into the budget by networks. It’s not unheard of that when the story is in rough cut, or even fine cut, that the executive producers will realize the audio budget is not sufficient for the needs of the project. If, as the filmmaker, you foresee more work may be needed on certain parts of the audio storytelling than the standard budget will allow, try to get your budget adjusted as early in the process as you can. Reallocating time and funds late in the game usually short-changes some other part of the creative process.
Planning for Different Distribution Platforms
Video content now plays on a multitude of platforms and on various screen sizes. That means audiences are hearing your soundtracks on speakers large and small, delivering sound of good and mediocre quality. Thinking ahead to the distribution and consumption of your story will help you plan and inform the sound team. As a mixer, I know that everything I touch will end up on the small screen somehow, somewhere. Even the biggest of museum pieces, 22.4 (22 speakers, 4 LFE channels) needs to be mixed down to stereo or 2.0 for distribution online. It’s mission-critical for the producer to find out all the platforms the piece will live on and pass that information to their editorial and sound teams in advance of any mix. As a mixer, I need to know where and how the media will be played. This information guides how the mix session should be set up and how to approach the mix for the best results. There are also some important questions to answer regardless of playback medium. For example, it’s important for me to know the demographic of the target audience. Baby boomers have some of the highest levels of hearing loss among adults. That affects how they hear certain tones and sounds. So, if I’m mixing for this age group I will make certain adjustments to be sure any voiceover or interviews can be heard above the music.
More and more often, we are mixing sound for small screen and mobile viewing. There are several considerations when you are preparing to mix these shows. The first is that we plan for what we call the “mono-compatible” mix. Have you ever watched two people share earbuds to watch a video (Figure 6.1)? Then you know what we’re talking about. They are each only receiving half of the audio story. And in a true stereo mix, that might mean one person hears louder music than voices, or one person can’t hear narration at all. To solve this scenario, we sum to mono the mix to the center and check our mixes on small speakers and our own earbuds. Creating a beautiful mix and only listening out of high-end speakers may result in a client calling and complaining they can’t hear something in the soundtrack. For the small screen, we also recommend planning your music selection accordingly. Chamber music—literally written for listening in small rooms—or acoustic instruments like guitar work well for shows that will be viewed in a more intimate, personal viewing environment like a mobile device or laptop.
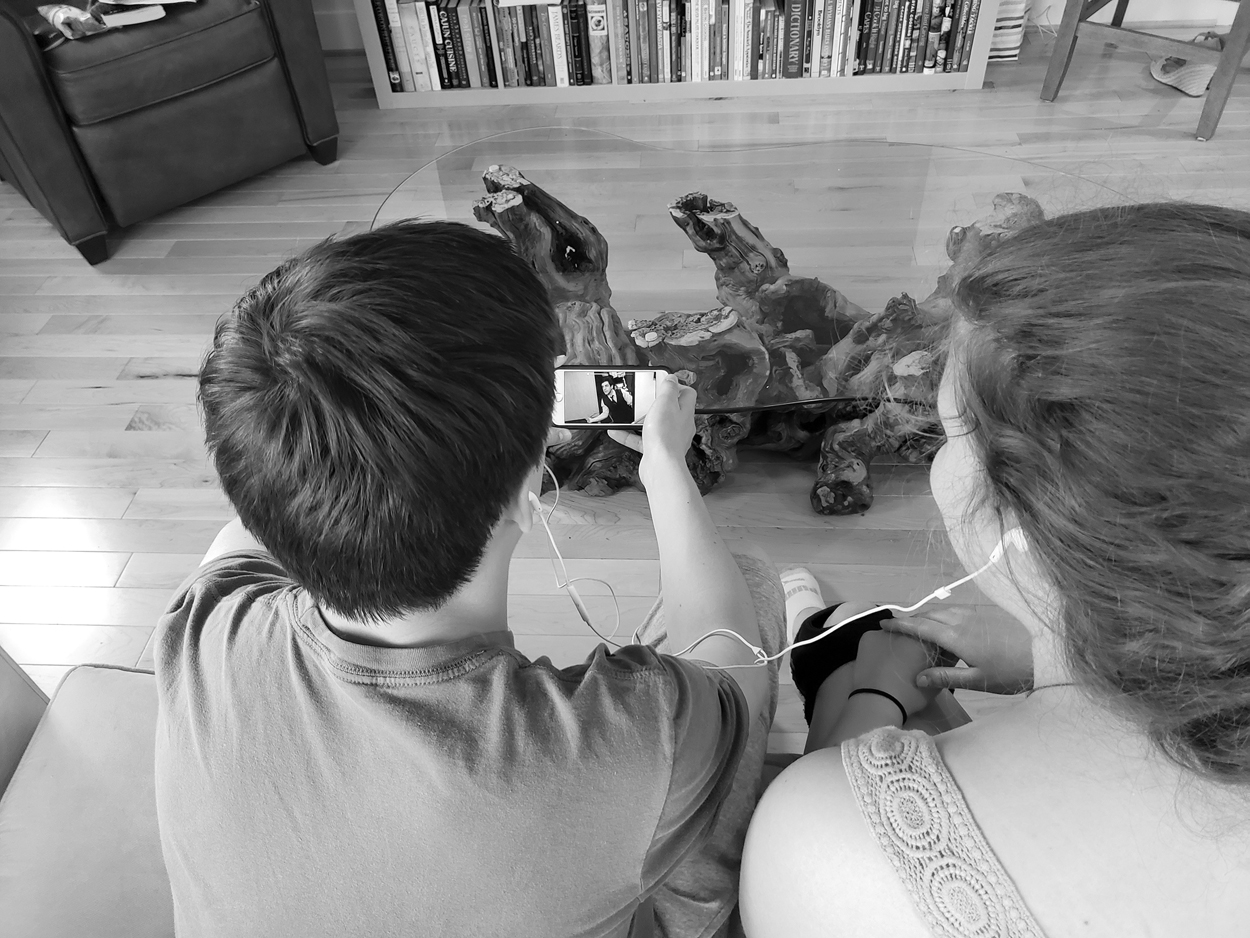
FIGURE 6.1 Two young people share a single set of earbuds to watch a video.
For large screen delivery, which for us is often large live events or theatrical spaces and museum auditoriums, find out in advance what type of speakers will be set up in the space and how large the crowd is expected to be. We like to do a “big room mix” or even surround sound for these settings. Because these mixes can include more textured soundtracks with music and effects, you’ll want to be sure you have all your elements organized and ready for the edit. You can also select more cinematic cuts of music with a wide range of instrumentation. The speakers can handle the range, and we can make it sing during post-production.
Planning for Music and Sound Effects
One of the most fun parts of the creative process occurs when planning for music and the layering of different sound elements, known as sound design. The end result is your Music and Effects track (known colloquially as the M&E track). Since music decisions can be overwhelming, with options ranging from stock music libraries to indie bands that license their cuts to original score compositions, we discuss these opportunities in Chapter 9, Music Scores. Here we will simply say, as you wrap up your edit and get ready for your sound mix, take the opportunity to listen—not view—your final cut. Consider your M&E track holistically. Do the musical styles and rhythms make the most sense for this story? Have you included some wild sound or effects that can propel the story or add a rhythmic, non-music element? Is there a strong and driving pace from beginning to end? Or have you created twists and turns for different story lines and characters to emerge? The goal of the M&E track is to reinforce your characters, your locations, and your story line. So, it is important to also listen for stereotypes and try to avoid them. For example, I won’t use a classical music track under an interview simply because the person is over 80. Perhaps their style would be better evoked by a completely modern track. Nor would I want to choose ethnic or Bollywood-type sounds simply because the on-camera subject comes from India. What is more important than those individual components is the story you are trying to tell. Listening to the entire film without watching, hard as that may be, is great preparation for a sound mix.
As you prepare for your mix session, also consider providing those wild sounds and sync sounds we encouraged you to record in the field. You can use a sound to help introduce an idea for the audience before they see it on the screen. These “split edits,” where sound precedes picture by a few frames, are worth it. Take good notes with timecode of any sound effects or sound ideas you want to share with your mixer. Be sure you have some pauses built into your final cut, to allow for moments of sound design to emerge out of the background.
One word of caution: editors often place sound effects in the timeline to help propel the cut forward. While this can work well, be aware that you may not have a license for these effects and they may need to be replaced by properly licensed library effects during your mix session. The licensing could include sounds that have been sampled from other sounds, such as music. It’s common to hear music samples being used as sound effects. Once, in the beginning of my career, I had to replace a clock sound sample in more than 300 versions of a national spot because the producer discovered—too late—that the sound had been sampled by the editor without permission. The music artist who owned the sound sued, costing more than a million dollars, plus the expense of one very young sound engineer replacing and remastering the 300 plus versions of the commercial. So, if you have used placeholder sound effects in your timeline, be sure to inform your sound designer that these are not licensed and must be replaced. If not all the sound effects need to be swapped out, put the “keepers” on a separate track and identify which track must be replaced in your notes to your sound team. If time allows, you could even give your sound designer time to research and select sound effects for you and your editor to listen to and experiment with prior to picture lock.
This brings up an interesting question: is it better to have a “clean” cut go to sound design with little work done on the M&E track? Or is it better to have the editor spend time weaving sound into the story? On the one hand, a sound designer may work much faster and have better tools for certain types of sound edits than your editor. On the other hand, it’s important that a soundtrack not simply be added to a cut. And while most sound designers and mixers are excellent at placing and building a soundtrack around a cut, not all have the vision and confidence to suggest a change to the cut to advance the story through sound. Ideally, your editor and sound designer develop a partnership, with some interplay and suggestions going back and forth between them. We have made this work even in tight timeframes, and the projects benefit from the collaboration.
Preparing Your Mix Elements
Organization is key to getting your audio from the field to edit and then into audio post. Before even starting the edit (or even production), have a discussion with the sound editor, mixer or sound supervisor on workflow. Better yet, have the location sound mixer, editor, and audio post person all have a conversation. In larger productions, the sound supervisor coordinates and wrangles all of these people and all of this information. Sometimes planning workflow is not possible before the project starts and is left until the end when the edit is being passed along to audio post. There are standard expectations, presented here, but fine tuning the process is well worth a discussion, no matter when. Each NLE organizes clips and handles tracks in different ways. Adobe Premiere and Avid Media Composer employ tracks, though there are different options to consider. Final Cut Pro X doesn’t use tracks, so it organizes sound into roles held in containers that attach to the video. Organizing the clips on tracks or roles as you go can help the edit go more smoothly and assist in an easier transition to audio post. Placing clips on tracks and into roles designated for that audio element is most helpful. Audio elements are split into narration, dialogue, music, sound effects, and b-roll, which may include sync sound footage or archival footage with or without sync sound. A typical breakdown is as follows (Figure 6.2):
Track 1 – Narration
Tracks 2–4 – Dialogue
Tracks 5–8 Sync Sound
Tracks 9–12 Music
Tracks 13–18 Sound design

FIGURE 6.2 Screenshot track layout suggestion.
Organizing Your Clips
Organizing the clips onto the proper tracks is the first step in audio post. Editors often delete clips of mics that they aren’t using in the timeline to keep track or clip countdown to a minimum. This is especially true for larger productions and is a common practice in features. This is understandable. The value of metadata really comes into focus in the handoff to audio post. The information embedded in the file allows the editor or sound editor to sync up original sound files with clips in their timeline. The sound mixer can now access these files during audio post in order to make final decisions about which mic tracks sound best. The “conform,” as we call it, can happen either in video edit before export to audio post or in audio post. If the metadata has been carried through the production and edit process, then it’s a straightforward process. An Advanced Authoring Format (AAF) is not embedded—but it is linked when exported. These files are then relinked and conformed to the edit, usually by an online editor or the sound team.
If your video editor does a lot of sound design, then have her organize the sound effects by mono and stereo sound effects, as well as by type. Keeping ambiances and like sound effects together and on similar tracks will save the sound designer or mixer quite a bit of time as they move forward with finishing the sound design and mix. In Chapter 7, we discuss sound design and explain how to break your sound elements into different chunks. Remember, if you need to swap out sound effects, place them on their own tracks so the mixer can easily identify them.
Conforming Your Audio
When the metadata has been compromised, performing the audio conform in video edit is necessary. If your post team needs to manually conform audio when the metadata has been compromised, this can add a significant amount of time and expense to your budget. Nesting and disabling audio clips are the biggest reasons metadata is stripped from audio clips though it is important to recognize that NLEs are constantly updating their features, and the preservation of metadata is becoming a top priority.
Often in nonfiction productions there are only two mics used—a lav and a boom (Figure 6.3). Group or keep them together on their own mono tracks in the timeline and skip the audio conform process. Bring down the gain or volume on the unwanted clips instead of muting or disabling them. If in Final Cut Pro X, maintain the audio in the container. Merging, disabling, muting, or nesting clips is not suggested at this time as this needs to be reversed before any embedded AAF or Open Media Framework (OMF) can be properly exported with all the clips.

FIGURE 6.3 Screenshot of lav and boom in their respective channels in a timeline.
Exporting Your Audio Files for Mix
Audio assets are sent to the sound team through OMF or Advanced Authoring Format (AAF) export. OMF is the original and older protocol and does not transfer as much metadata and information over. OMF also has a 2 gig limit. AAF is a newer protocol that transfers much more information and does not have a size limit. OMFs and AAFs can either be created with embedded audio or linked audio. The embedded audio method gathers all the audio, truncates the clip handles as directed, and places it within a single wrapped file with the timeline information. Embedded files are much larger, but can be easier to open by some DAWs (Digital Audio Workstations). The linked audio method creates a file much like an EDL (Edit Decision List) from a video editing system, but links to the audio files. More recent NLEs actually gather and create a special folder that contains the audio files, truncated with handles if requested (Figures 6.4 and 6.5).

FIGURE 6.4 Screenshot of unexpanded audio container in Final Cut Pro X.

FIGURE 6.5 Screenshot of expanded audio container in Final Cut Pro X.
Recently I got a call from an editor I’ve known for years asking me about this very thing. He had exported a non-embedded OMF and sent both the OMF and folder with the linked media over for mix. This took considerably less time than the procedure for embedded OMF or AAF, which he has been doing for the majority of his career. He asked, “Have I been doing this wrong all this time?” The answer is no. The linked media, or non-embedded OMF or AAF, used to be extremely buggy until the process included creating the audio file folder. This is relatively recent, and it has been more stable. Technology changes very quickly these days. Updates to both NLEs and DAWs happen all the time and at any point what was the way to do things can change. It is even more important now to chat with your sound team prior to preparing elements for mix. Often, I ask clients to send test OMFs or AAFs, so we can see what is working or not working.
Before creating the OMF or AAF, make sure the NLE tracks are organized. Organizing by type as suggested above will allow the mixer to get started more quickly since they do not need to organize the assets. The mixer has to organize their tracks so they can deliver to the client not just the full mix but whatever final deliverables are needed by the network, distributor, or streaming company.
Planning Your Music Mix
Planning ahead for music in your post workflow makes a big impact on your finished product. Don’t expect, for example, that your sound engineer will be able to stop mixing and go hunt for new music tracks when they didn’t plan for this in time or budget. But if you are stumped for music in a particular section of your project, give your sound designer a heads up so they can be prepared and audition some options for you. Be sure to tell your mixer or sound designer if you are going to be delivering an original score to layback and introduce your sound post team to the composer so they, can plan the delivery of the music files. Typically, full mix and mixed stems of the composed music will be delivered to the editor who will place them on the timeline. Often, being up against a deadline or receiving revised cues, the mixer will place them in the mix. If the composer is delivering individual files, request timecode be in the file name. The timecode should refer to where the first frame of the file is placed on the timeline. Sometimes the composer delivers the cues already placed in an NLE or DAW. This is handy but make sure their system is compatible with your editor or mixer.
Music is traditionally mastered at 44.1K 16 bit, though is often recorded and outputted at higher sample rates and bit depths. Request music cues at 48K 24 bit for picture. Most NLEs will playback and convert different sample rates and bit depths, but music will play at different speeds in some audio mixing programs. Convert sample rates during your video edit to maintain the highest quality and proper speed throughout the process.
Music should be placed on the timeline on music-only tracks. If you want any of the cues to be replaced during the mix, let your mixer know. As with temporary sound effects, keep temp music on its own tracks. This makes these tracks easy to recognize and swap out for final versions of music (Figure 6.6).

FIGURE 6.6 Music File Name with Cue Name, Timecode, and Version number in the name.
Music should be mixed in the native sound field that the mix will be delivered in. So, if your mix will be in surround sound, get your music cuts delivered in surround (Figure 6.7). This will offer a truer sound experience and eliminate some technical challenges for your mixer. However, it is extremely common for stereo music cues to be “up-mixed” to surround during a mix session. Composers often do not have the resources to mix and master in surround. Plus, budgets and schedules rarely support a music mix and master in 5.1 (or above) surround. I know I’m starting to sound like a broken record here (appropriate audio reference, right?), but it’s best during your mix planning phase to discuss in advance your plan for mixing and mastering music. On a recent project, I was surprised to find out that the client expected me to create a mix for the composer as well as do my work to mix that piece of music in with the other elements of the film. The composer did not have the resources to properly mix and master the music in 5.1 surround. This was never mentioned and was not addressed in the schedule or budget. We worked through this hiccup and I was able to assist the composer. Fortunately, both the budget and schedule could accommodate this additional work.
FIGURE 6.7 Screenshot of 5.1 surround music file with music stems stacked underneath for easy access in mix.
Preparing Your Backup Plan
Your post-production planning should include a conversation about file backups. These days, digital formats are changing so rapidly, it is difficult to know the best way to assure your project could be “brought back to life” if you wanted to remix or remaster it. Redundancy is the best solution. Be sure your audio post house has a way to back up your project and determine if there is a time-limit on that backup or a fee for long-term backup. Use mezzanine files so your project can be brought back online easily. Ask that the mixes and split deliverables be maintained in a separate backup of the session. I have found that this ensures that the mix can be replicated, even without the mix session. This is especially true in these days of rapidly changing technology, not just with DAWs, but with audio plugins. Remember that hard drives aren’t a permanent solution. Most hard drives last one to five years. DVDs last only three to seven years. LTO is still our best option whenever possible, as it lasts 30–50 years.
Tips on Prepping for Mix
![]() Shoot using time of day timecode, then provide an annotated shoot schedule to your editor. This file should be saved as a PDF with your source media, in case your mixer also wants to take a look and locate a piece of audio.
Shoot using time of day timecode, then provide an annotated shoot schedule to your editor. This file should be saved as a PDF with your source media, in case your mixer also wants to take a look and locate a piece of audio.
![]() Take good notes with timecode of any sound effects or wild sound you recorded, and ensure that your mixer has these files.
Take good notes with timecode of any sound effects or wild sound you recorded, and ensure that your mixer has these files.
![]() Make sure you send entire interview source audio and transcripts, not just those clips in the timeline. Your mixer may need to replace a mumbled word or adjust an edit, using a portion of the audio not contained in your timeline.
Make sure you send entire interview source audio and transcripts, not just those clips in the timeline. Your mixer may need to replace a mumbled word or adjust an edit, using a portion of the audio not contained in your timeline.
![]() Make a list of sound concerns and their timecode in your picture-locked video, and be sure this list goes with your audio files uploaded for your mix. Examples of sound concerns might be an airplane that flew overhead during a key interview soundbite, or a transition that you think needs some kind of sound element.
Make a list of sound concerns and their timecode in your picture-locked video, and be sure this list goes with your audio files uploaded for your mix. Examples of sound concerns might be an airplane that flew overhead during a key interview soundbite, or a transition that you think needs some kind of sound element.
![]() If you want the same sound effect placed each time throughout a timeline (for example, at section title headings), make sure they all live on the same track to make it easy to identify them and swap them out with other options.
If you want the same sound effect placed each time throughout a timeline (for example, at section title headings), make sure they all live on the same track to make it easy to identify them and swap them out with other options.
![]() When planning a mix for small screens and mobile devices, request a mono-compatible mix that could be understood through just one earbud. Consider lighter musical elements such as acoustic instruments.
When planning a mix for small screens and mobile devices, request a mono-compatible mix that could be understood through just one earbud. Consider lighter musical elements such as acoustic instruments.
![]() When planning a mix for big screen delivery, be sure you have all your elements lined up, including textured sound elements, music, and effects. The big screen allows you to select more cinematic scores.
When planning a mix for big screen delivery, be sure you have all your elements lined up, including textured sound elements, music, and effects. The big screen allows you to select more cinematic scores.
![]() Discuss the backup plan for your audio media and how your project could be brought back online for future updates and revisions.
Discuss the backup plan for your audio media and how your project could be brought back online for future updates and revisions.