
First, let's install react. Earlier, installing and getting react set up on your machine needed a bunch of dependencies to be taken care of. However, we will use a relatively faster way to get react up and running. We will use create-react-app to which we can install react without any build configuration. Installation is done via npm which is as follows:
npm install -g create-react-app
Here, we are installing the create-react-app node module globally. Once create-react-app is installed, you can set up the directory for your application. Consider the following commands:
    create-react-app react-app
    cd react-app/
    npm start
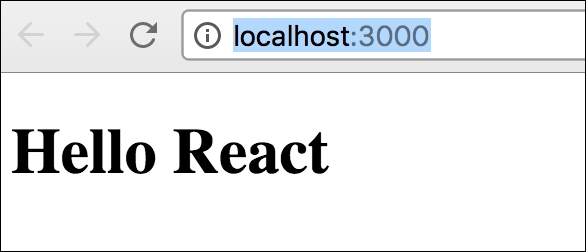
Then, open http://localhost:3000/ to see your app. You should see something like the following screenshot:

If you open the directory in an editor, you will see several files created for you, as you can see in the following screenshot:

In this project, node_modules are the dependencies required to run this project and dependencies of react itself. The important directory is src, where the source code is kept. For this example, let's keep only two files-App.js and index.js. The /public/index.html file should contain just the root div, which will be used as a target for our react components. Consider the following code snippet:
    <!doctype html>
    <html lang="en">
      <head>
        <title>React App</title>
      </head>
      <body>
        <div id="root"></div>
      </body>
    </html>
The moment you make this change, you will see the following error:

Beauty of developing with react is that the code changes are live-reloaded, and you can get immediate feedback.
Next, clear off all content of App.js, and replace it with the following lines of code:
    import React from 'react';
    const App = () => <h1>Hello React</h1>
    export default App
Now, go to index.js and remove the import ./index.css; line. Without you doing anything, such as restarting server and refreshing browser, you will see the modified page on the browser. Consider the following screenshot:
Before we create a HelloWorld react component, a couple of important things to notice so far.
In App.js and index.js, we are importing two libraries necessary to create react components. Consider the following lines of code:
    import React from 'react';
    import ReactDOM from 'react-dom';
Here, we're importing React, which is the library that allows us to build react components. We're also importing ReactDOM, which is the library that allows us to place our components and work with them in the context of the DOM. Then, we're importing the component that we just worked on-the App component.
We also created our first component in App.js. Consider the following line of code:
const App = () => <h1>Hello React</h1>
This is a stateless function component. The other way to create a component is to create a class component. We can replace the preceding component with the following class component:
    class App extends React.Component {
      render(){
        return <h1>Hello World</h1>
      }
    }
There are a bunch of interesting things going on here. First, we are creating a class component with the class keyword that extends from the superclass React.Component.
Our component App is a react component class or react component type. A component takes in parameters, also called props, and returns a hierarchy of views to display via the render function.
The render method returns a description of what you want to render, and then react takes that description and renders it to the screen. In particular, render returns a react element, which is a lightweight description of what to render. Most react developers use a special syntax called JSX, which makes it easier to write these structures. The <div /> syntax is transformed at build time to React.createElement('div'). The JSX expression, <h1>Hello World</h1>, is transformed at build time into the following:
return React.createElement('h1', null, 'Hello World'),
The difference between the class component and stateless function component is that the class component can contain a state while the stateless (hence the name) function component cannot.
The render method of the react component is allowed to return only a single node. If you do something like the following:
return <h1>Hello World</h1><p>React Rocks</p>
You will get the following error:
    Error in ./src/App.js
    Syntax error: Adjacent JSX elements must be wrapped in
      an enclosing tag (4:31)
This is because you are essentially returning two React.createElement functions, and that is not valid JavaScript. While this may seem like a deal breaker, this is easy to solve. We can wrap our nodes into a parent node and return that parent node from the render function. We can create a parent div and wrap other nodes under it. Consider the following example:
    render(){
        return (
          <div>
            <h1>Hello World</h1>
            <p>React Rocks</p>
          </div>
          )
    }
Components can be conceptually considered as JavaScript functions. They take arbitrary number of inputs like normal functions. These inputs are called props. To illustrate this, let's consider the following function:
    function Greet(props) {
      return <h1>Hello, {props.name}</h1>;
    }
This is a normal function and also a valid react component. It takes an input called props and returns a valid JSX. We can use the props inside JSX using curly braces and properties such as name using a standard object notation. Now that Greet is a first class react component, let's use it in the render() function as follows:
    render(){
      return (
       return <Greet name="Joe"/>
      )
    }
We are calling Greet() as a normal component and passing this.props to it. It is required to capitalize your own components. React considers component names starting with a lowercase as standard HTML tags and expects custom component names to start with a capital letter. As we saw earlier, we can create a class component using ES6 class. This component is a subclass of React.component. An equivalent component to our Greet function is as follows:
    class Greet extends React.Component {
      render(){
          return <h1>Hello, {this.props.name}</h1>
      }
    }
For all practical purposes, we will use this method of creating components. We will soon know why.
One important point to note is that a component cannot modify its own props. This may seem like a limitation because, in almost all non-trivial applications, you will want user interactions where the UI component state is changed in react, for example, update date of birth in a form, props are read-only but there is a much robust mechanism to handle UI updates.
State is similar to props, but it is private and fully controlled by the component. As we saw earlier that both functional and class components are equivalent in react, one important distinction is that the state is available only in class components. Hence, for all practical purposes, we will use class components.
We can change our existing greeting example to use state, and whenever the state changes, we will update our Greet component to reflect the changed value.
First, we will set up the state inside our App.js, as follows:
    class Greet extends React.Component {
        constructor(props) {
    super(props);

        this.state = {
greeting: "this is default greeting text"
}

        }
      render(){
          return <h1>{this.state.greeting}, {this.props.name} </h1>
      }
    }
There are a few important things to notice in this example. First, we are calling class constructor to initialize this.state. We also call the base class constructor, super(), and pass props to it. After calling super(), we initialize our default state by setting this.state to an object. For example, we assign a greeting property with a value here. In the render method, we will use this property using {this.state.greeting}. Having setup our initial state, we can add UI elements to update this state. Let's add an input box, and on change of that input box, we will update our state and the greeting element. Consider the following lines of code:
    class Greet extends React.Component {
      constructor(props) {
        super(props);
        this.state = {
          greeting: "this is default greeting text"
        }
      }
    updateGreeting(event){
this.setState({
greeting:
      event.target.value,
    })
  }
      render(){
          return (
          <div>
            <input type="text" onChange={this.updateGreeting.bind(this)}/>
            <h1>{this.state.greeting}, {this.props.name} </h1>
           </div>
          )
        }
    }
Here, we add an input box and update the state of the component when the onChange method of the input box is invoked. We use a custom updateGreeting() method to update the state by calling this.setState and updating the property. When you run this example, you will notice that as you type something on the text box, only the greeting element is updated and not the name. Take a look at the following screenshot:

An important feature of react is the fact that a react component can output or render other react components. We've got a very simple component here. It has a state with a value of text. It's got an update method which will update that value of text from an event. What we'll do is create a new component. This will be a stateless function component. We'll call it widget. It will take in props. We'll return this JSX input right here. Consider the following code snippet:
    render(){
        return (
          <div>
          <Widget update={this.updateGreeting.bind(this)} />

          <Widget update={this.updateGreeting.bind(this)} />

          <Widget update={this.updateGreeting.bind(this)} />
          <h1>{this.state.greeting}, {this.props.name} </h1>
          </div>
        )
      }
    }
    const Widget = (props) => <input type="text"
      onChange={props.update}/>
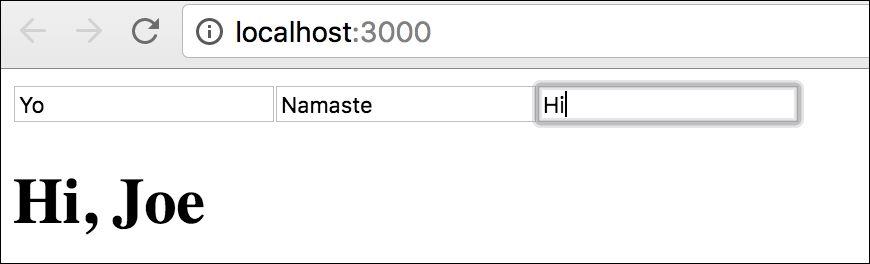
First, we extract our input element into a stateless function component and call it a Widget. We pass props to this component. Then, we change onChange to use props.update. Now, inside our render method, we use the Widget component and pass a prop update that binds the updateGreeting() method. Now that Widget is a component, we can reuse it anywhere in the Greet component. We are creating three instances of the Widget, and when any of the Widget is updated, the greeting text is updated, as shown in the following screenshot:
When you have a bunch of components with several state changes and events, the housekeeping becomes important. React provides you with several component life cycle hooks to handle life cycle events of components. Understanding the component life cycle will enable you to perform certain actions when a component is created or destroyed. Furthermore, it gives you the opportunity to decide if a component should be updated in the first place, and to react to props or state changes accordingly.
There are three phases that the component goes through-mounting, updating, and unmouting. For each of these stages, we have hooks. Take a look at the following diagram:

Two methods are called when a component is initially rendered, getDefaultProps and getInitialState, and, as their names suggest, we can set default props and initial state of a component in these methods.
The componentWillMount is called before the render method is executed. We already know render to be the place where we return the component to be rendered. As soon as the render method finishes, the componentDidMount method is invoked. You can access DOM in this method, and it is recommended to perform any DOM interactions in this method.
State changes invoke a few methods. The shouldComponentUpdate method is invoked before the render method, and it lets us decide if we should allow rerendering or skip it. This method is never called on the initial rendering. The componentWillUpdate method gets called immediately once the shouldComponentUpdate method returns true. The componentDidUpdate method is rendered after render finishes.
Any change to the props object triggers similar methods as a state change. One additional method called is componentWillReceiveProps; it is called only when the props have changed, and it is not initial rendering. You can update state based on new and old props in this method.
When a component is removed from DOM, componentWillUnmount is called. This is a useful method to perform cleanups.
Great thing about react is that when you start using it, the framework feels very natural to you. There are very few moving parts you will need to learn, and the abstraction is just right.