
Now that you understand why you can use PHP (especially the latest release, version 7) for your next project, it is time to talk about other requirements for the success of your microservices project.
You probably have the importance of the scalability of your application in mind, but how can you do it within a budget? The response is virtualization. With this technology, you will be wasting less resources. In the past, only one Operating System (OS) could be executed at a time on the same hardware, but with the birth of virtualization, you can have multiple OSes running concurrently. The greatest achievement in your project will be that you will be running more servers dedicated to your microservices but using less hardware.
Given the advantages provided by the virtualization and containerization, nowadays using containers in the development of an application based on microservices is a default standard. There are multiple containerization projects, but the most used and supported is Docker. For this reason, this is the main requirement to start working with microservices.
The following are the different tools/software that we will be using in our Docker environment:
- PHP 7
- Data storage: Percona, MySQL, PostgreSQL
- Reverse proxy: NGINX, Fabio, Traefik,
- Dependency management: composer
- Testing tools: PHPUnit, Behat, Selenium
- Version control: Git
In Chapter 5, Microservices Development, we will explain how to add each one to our project.
Due to the fact that our main requirement is a containerization suite, we will explain how to install and test Docker in the following sections.
Docker can be installed from two different channels, each one with advantages and disadvantages:
- Stable channel: As the name indicates, everything you install from this channel is fully tested and you will have the latest GA version of the Docker engine. This is the most reliable platform and therefore, suitable for production environments. Through this channel, the releases follow a version schedule with long testing and beta times, only to ensure that everything should work as expected.
- Beta channel: If you need to have the latest features, this is your channel. All the installers come with the experimental version of the Docker engine where bugs can be found, so it is not recommended for production environments. This channel is a continuation of the Docker beta program where you can provide feedback and there is no version schedule, so you will have more frequent releases.
We will be developing for a stable production environment, so you can forget about the beta channel for now as all you need is on the stable releases.
Docker was born in Linux, so the best implementation was done for this OS. With other OSes, such as Windows or macOS, you have two options: a native implementation and a toolbox installation if you cannot use the native implementation.
On macOS, you have two options to install Docker depending on whether your machine matches the minimum requirements or not. With relatively new machines (OS X 10.10 Yosemite and higher), you can install the native implementation that uses Hyperkit, a lightweight OS X virtualization solution built on top of Hypervisor.Framework. If you have an older machine that does not match the minimum requirements, you can install the Docker Toolbox.
The Docker Toolbox was the first implementation of Docker on macOS and it does not have a deep OS integration. It uses VirtualBox to spin a Linux virtual machine where Docker will be running. Using a Virtual Machine (VM) where you will be running all your containers has numerous problems, the most noticeable being the poor performance. However, it is the desired choice if your machine does not match the requirements for the native implementation.
Docker for Mac is a native Mac application with a native user interface and auto-update capability, and it is deeply integrated with OS X native virtualization (Hypervisor.Framework), networking, and filesystem. This version is faster, easier to use, and more reliable than the Docker Toolbox.
- Mac must be a 2010 or newer model, with Intel's hardware support for Memory Management Unit (MMU) virtualization; that is, Extended Page Tables (EPT)
- OS X 10.10.3 Yosemite or newer
- At least 4 GB of RAM
- VirtualBox prior to version 4.3.30 must not be installed (it is incompatible with Docker for Mac)
If your machine passes the requirements, you can download the Docker for Mac from the official page, that is https://www.docker.com/products/docker.
Once you have the image downloaded on your machine, you can carry out the following steps:
- Double-click on the downloaded image (called
Docker.dmg) to open the installer. Once the image is mounted, you need to drag and drop the Docker app into theApplicationsfolder: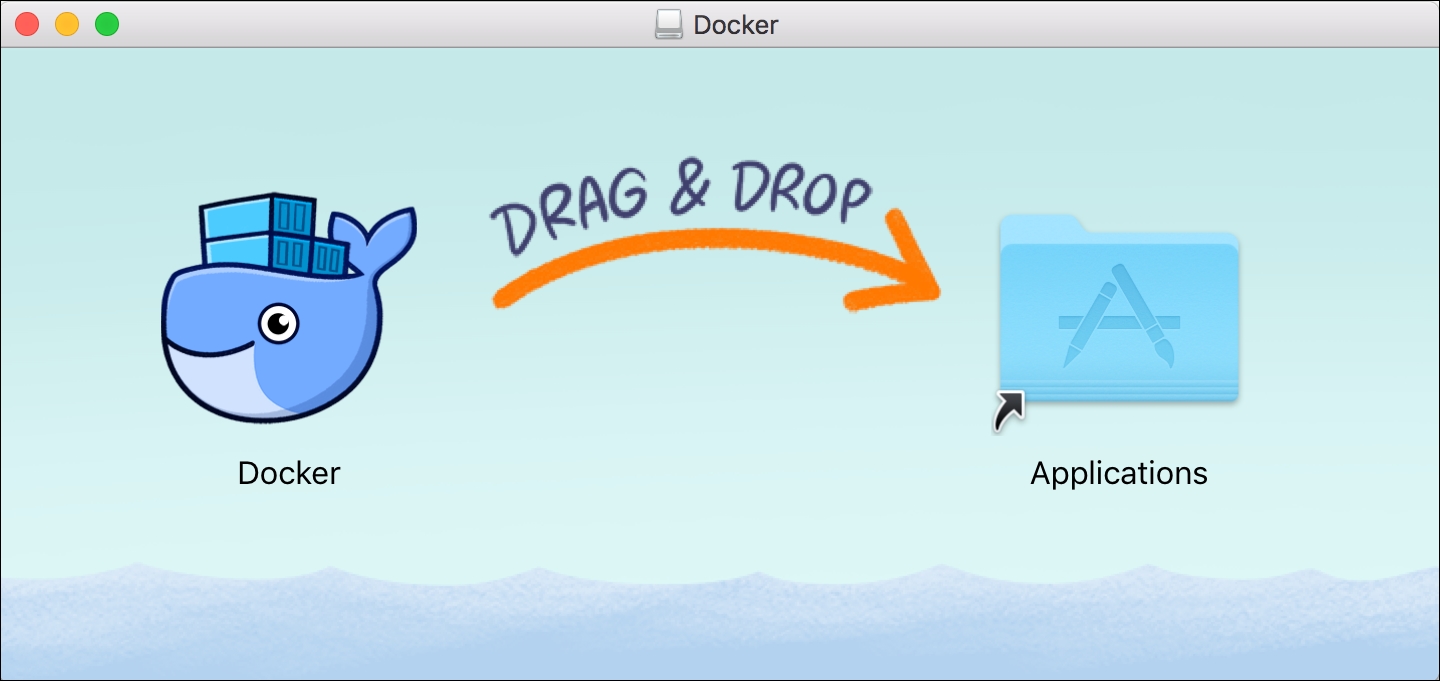
The
Docker.appmay ask you for your password during the installation process to install and set up network components in the privileged mode. - Once the installation is complete, Docker will be available on your Launchpad and in your
Applicationsfolder. Execute the application to start Docker. Once Docker starts up, you will see the whale icon in your toolbar. This will be your quick access to settings. - Click on the toolbar whale for Preferences... and other options:
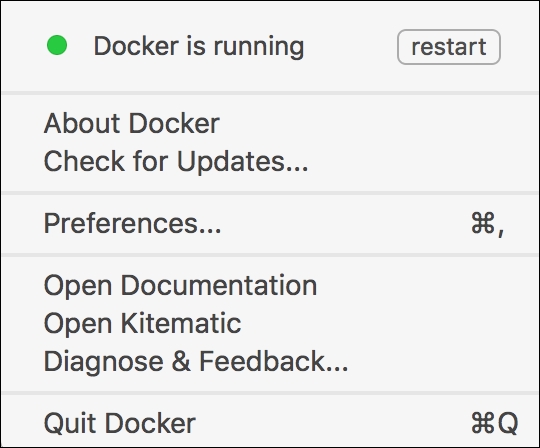
- Click on About Docker to find out if you are running the latest version.
The Docker ecosystem was developed on top of Linux, so the installation process on this OS is easier. In the following pages, we will only cover the installation on Community ENTerprise Operating System (CentOS)/Red Hat Enterprise Linux (RHEL) (they use yum as the package manager) and Ubuntu (uses apt as the package manager).
Docker can be executed on CentOS 7 and on any other binary compatible EL7 distribution but Docker is not tested or supported on these compatible distributions.
The minimum requirement to install and execute Docker is to have a 64-bit OS and a kernel version 3.10 or higher. If you need to know your current version, you can open a terminal and execute the following command:
$ uname -r
3.10.0-229.el7.x86_64
Note that it's recommended to have your OS up to date as it will avoid any potential kernel bugs.
First of all, you need to have a user with root privileges; you can log in on your machine as this user or use a sudo command on the terminal of your choice. In the following steps, we assume that you are using a root or privileged user (add sudo to the commands if you are not using a root user).
First of all, ensure that all your existing packages are up to date:
yum update
Now that your machine has the latest packages available, you need to add the official Docker yum repository:
# tee /etc/yum.repos.d/docker.repo <<-'EOF'
[dockerrepo]
name=Docker Repository
baseurl=https://yum.dockerproject.org/repo/main/centos/7/
enabled=1
gpgcheck=1
gpgkey=https://yum.dockerproject.org/gpg
EOF
After adding the yum repository to your CentOS/RHEL, you can easily install the Docker package with the following command:
yum install docker-engine
You can add the Docker service to the startup of your OS with the systemctl command (this step is optional):
systemctl enable docker.service
The same systemctl command can be used to start the service:
systemctl start docker
Now you have everything installed and running, so you can start testing and playing with Docker.
Docker is executed as a daemon that binds to a Unix socket. This socket is owned by root, so the only way for other users to access it is with the sudo command. Using the sudo command every time you use any Docker command can be painful, but you can create a Unix group, called docker, and assign users to this group. By making this small change, the Docker daemon will start and assign the ownership of the Unix socket to this new group.
Listed are the commands to create a Docker group:
groupadd docker
usermod -aG docker my_username
After these commands, you need to log out and log in again to refresh your permissions.
Ubuntu is officially supported and the main recommendation is to use an LTS (the last version is always recommended):
- Ubuntu Xenial 16.04 (LTS)
- Ubuntu Trusty 14.04 (LTS)
- Ubuntu Precise 12.04 (LTS)
Just as in the previous Linux installation steps, we are assuming that you are using a root or privileged user to install and set up Docker.
As with other Linux distributions, a 64-bit version is required and your kernel version needs to be at least a 3.10. Older kernel versions have known bugs that cause data loss and frequent kernel panics.
To check your current kernel version, open your favorite terminal and run:
$ uname -r
3.11.0-15-generic
First of all, ensure that you have your apt sources pointing to the Docker repository, especially if you have previously installed Docker from the apt. In addition to this, update your system:
apt-get update
Now that you have your system up to date, it is time to install some required packages and the new GPG key:
apt-get install apt-transport-https ca-certificates
apt-key adv --keyserver hkp://p80.pool.sks-keyservers.net:80 --recv-keys  58118E89F3A912897C070ADBF76221572C52609D
With Ubuntu, it is very easy to add the official Docker repository; you only need to create (or edit) the /etc/apt/sources.list.d/docker.list file in your favorite editor.
In the case of having the previous lines from old repositories, delete all the content and add one of the following entries. Ensure that you match your current Ubuntu version:
    Ubuntu Precise 12.04 (LTS):
    deb https://apt.dockerproject.org/repo ubuntu-precise main
    Ubuntu Trusty 14.04 (LTS):
    deb https://apt.dockerproject.org/repo ubuntu-trusty main
    Ubuntu Xenial 16.04 (LTS):
    deb https://apt.dockerproject.org/repo ubuntu-xenial main
After saving the file, you need to update the apt package index:
apt-get update
In the case of having a previous Docker repo on your Ubuntu, you need to purge the old repo:
apt-get purge lxc-docker
On Trusty and Xenial, it is recommended that you install the linux-image-extra-* kernel package that allows you to use the AFUS storage driver. To install them, run the following command:
apt-get update && apt-get install linux-image-extra-$(uname -r) linux-image-extra-virtual
On Precise, Docker requires a 3.13 kernel version, so ensure that you have the correct kernel; if your version is older, you must upgrade it.
At this point, your machine will be more than ready to install Docker. It can be done with a single command, as with yum:
apt-get install docker-engine
Now that you have everything installed and running, you can start playing and testing Docker.
If you see errors related to swap limits while you are using Docker, you need to enable memory and swap on your system. It can be done on GNU GRUB by following the given steps:
- Edit the
/etc/default/grubfile. - Set the
GRUB_CMDLINE_LINUXas follows:GRUB_CMDLINE_LINUX="cgroup_enable=memory swapaccount=1"
- Update grub:
update-grub - Reboot the system.
Ubuntu comes with Uncomplicated Firewall (UFW) and if it is enabled on the same host as the one where you run Docker, you will need to make some adjustments because, by default, UFW will drop any forwarding traffic. Also, UFW will deny any incoming traffic, making the reach of your containers from a different host impossible. The Docker default port is 2376 when TLS is enabled and 2375 in other cases. On a clean installation, Docker runs without TLS enabled. Let's configure UFW!
First, you can check if UFW is installed and enabled:
ufw status
Now that you are sure that UFW is installed and running, you can edit the config file, /etc/default/ufw, with your favorite editor and set up the DEFAULT_FORWARD_POLICY:
    vi /etc/default/ufw
    DEFAULT_FORWARD_POLICY="ACCEPT"
You can now save and close the config file and, after the restart of the UFW, your changes will be available:
ufw reload
Allowing incoming connections to the Docker port can be done with the ufw command:
ufw allow 2375/tcp
Ubuntu and its derivatives use 127.0.0.1 as the default name server in the /etc/resolv.conf file, so when you start containers with this configuration, you will see warnings because Docker can't use the local DNS nameserver.
If you want to avoid these warnings you need to specify a DNS server to be used by Docker or disable dnsmasq in the NetworkManager. Note that disabling dnsmasq will make DNS resolutions a little bit slower.
To specify a DNS server, you can open the /etc/default/docker file with your favorite editor and add the following setting:
DOCKER_OPTS="--dns 8.8.8.8"
Replace 8.8.8.8 with your local DNS server. If you have multiple DNS servers, you can add multiple --dns records separated with spaces. Consider the following example:
DOCKER_OPTS="--dns 8.8.8.8 --dns 9.9.9.9"
As soon as you have your changes saved, you need to restart the Docker daemon:
service docker restart
If you don't have a local DNS server and you want to disable dnsmasq, open the /etc/NetworkManager/NetworkManager.conf file with your editor and comment out the following line:
dns=dnsmasq
Save the changes and restart the NetworkManager and Docker:
restart network-manager
restart docker
Docker is executed as a daemon that binds to a Unix socket. This socket is owned by root, so the only way for other users to access it is with the sudo command. Using the sudo command every time you use any docker command can be painful, but you can create a Unix group, called docker, and assign users to this group. Making this small change, the Docker daemon will start and assign the ownership of the Unix socket to this new group.
Perform the following steps to create a Docker group:
groupadd docker
usermod -aG docker my_username
After these steps, you need to log out and log in again to refresh your permissions.
Ubuntu 15.04 onwards uses the systemd system as its boot and service manager, while for versions 14.10 and the previous ones, it uses the upstart system.
For the 15.04 and up systems, you can configure the Docker daemon to start on boot by running the given command:
systemctl enable docker
In the case of using older versions, the installation method automatically configures upstart to start the Docker daemon on boot.
The Docker team has made a huge effort to bring their entire ecosystem to any OS and they didn't forget about Windows. As on macOS, you have two options to install Docker on this OS: a toolbox and a more native option.
Docker for Windows requires a 64-bit Windows 10 Pro, Enterprise, and Education (1511 November update, Build 10586 or later), and the Hyper-V package must be enabled.
In case your machine is running a different version, you can install the Toolbox that requires a 64-bit OS running at least Windows 7 and with virtualization enabled on the machine. As you can see, it has lighter requirements.
Due to the fact that Docker for Windows requires at least a Pro/Enterprise/Education version and the majority of computers are sold with a different version, we will explain how to install Docker with the toolbox.
The Docker tools use VirtualBox to spin a virtual machine that will run the Docker engine. The installation package can be downloaded from https://www.docker.com/products/docker-toolbox.
Once you have the installer, you only need to double-click on the downloaded executable to start the installation process.
The first window shown by the installer allows you to send debug information to Docker to improve the ecosystem. Allowing the Docker engine to send debug information from your development environment can help the community to find bugs and improve the ecosystem. The recommendation on this option is to have it enabled at least in your development environment:

Just like any other Windows installer, you can choose where it will be installed. In most cases, the default will be fine for your development environment.
By default, the installer will add all the required packages and some extras to your machine. In this step of the installation, you can purge some non-required software. Some of the optional packages are as follows:
- Docker compose for Windows:In our opinion, this is a must as we will be using the package in our book.
- Kitematic for Windows: This application is a GUI to manage your containers easily. If you are not comfortable with the command line, you can install this package.
- Git for Windows: This is another must-install package; we will be using Git to store and manage our project.
After choosing the packages we want to install, it is time for some additional tasks. The default selected tasks will be fine for your dev environment.
Now, you only need to confirm all the setup you have done in the previous steps before the installation starts.
The installation can take several minutes to complete, so be patient.
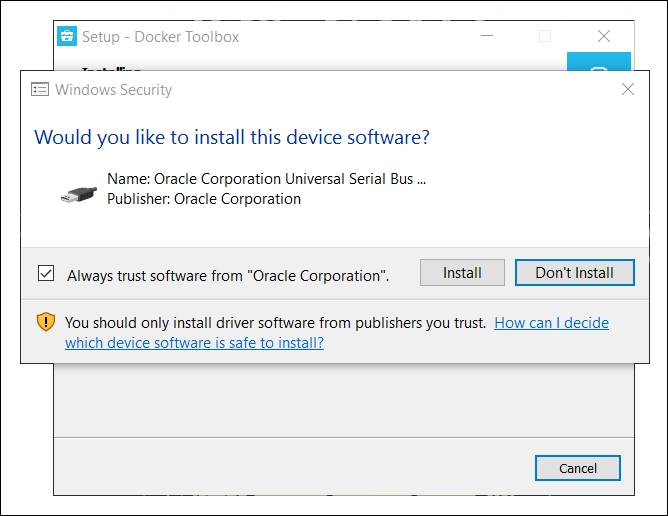
While the installation progresses, you may be alerted about the installation of an Oracle device. This is due to the fact that the tools are using VirtualBox to spin up a virtual machine to run the Docker engine. Install this device to avoid future headaches:
Congratulations! You have Docker installed on your Windows machine. Don't waste another minute and start testing and playing with your Docker ecosystem.
Now that you have Docker installed, you only need to open your favorite terminal and type in the following command:
$ docker --version && docker-compose --version && docker-machine --version
You should have the Docker running and execute the following command:
$ docker run -d -p 8080:80 --name webserver-test nginx
The preceding command will do the following things:
- Execute the container in the background with
-d - Map the 8080 port of your machine to the 80 port of the container with
-p 8080:80 - Assign a name to your container with
--name webserver-test - Get the NGINX Docker image and make the container to run this image.
Now, open your favorite browser and navigate to http://localhost:8080, where you will see a default NGINX page.
By executing docker ps on your terminal, you can see the running containers.
The preceding command gives us a deeper view of the containers that are running on your machine, the image they are using, when they were created, the status, and the port mapping or the assigned name.
Once you finish playing with your container, it's time to stop it. Execute docker stop webserver-test and the container will end its life.
Oops! You need the same container again. No problem, because a simple docker start webserver-test will again spin up the container for you.
Now, it is time to stop and remove the container because you are not going to use it anymore. Executing docker rm -f webserver-test on your terminal will do the trick. Note that this command will remove the container but not the downloaded image we have used. For this last step, you can do a docker rmi nginx.