
13. Working with Text
When you think about all of the sophisticated photo retouching, painting, and drawing you can do in Photoshop Elements, manipulating type may not be a priority on your to-do list. However, you can create some amazing projects with the type tools, including greeting cards, posters, announcements, and invitations—and you don’t have to fire up another software application.
This chapter covers the text formatting options and special type effects you can create with Photoshop Elements. If you’ve had any experience with word processing programs, the basic text formatting options will be familiar to you. But unlike a word processor, Photoshop Elements lets you create myriad special effects, using the type warping and masking tools and layer styles.
Creating and Editing Text
When you use the type tools, your text is automatically placed on a new, unique layer. Since the text exists on its own layer, you can modify your text every way layers allow, including moving, applying blending modes, and changing the opacity. Also, having text on its own layer allows you to go back and edit it whenever you want.
You’ll likely want to adjust the position of your text, and this is done just as easily as moving an object on any other layer. If you want to paint on your text or apply filters or effects to it, you’ll need to simplify the layer by converting it to a standard bitmap. But remember: After a type layer has been simplified, it becomes part of the image, which means you can no longer edit the text. Fortunately, as long as you don’t close the file, the Undo History panel will let you go back to the state your type was in before it was simplified. And you can always save a separate version of your file prior to simplifying the type layer.
To add text to an image
1. Click to select the Type tool on the Tools pane (or press T) ![]() . By default, the Horizontal Type Tool is selected
. By default, the Horizontal Type Tool is selected ![]() .
.

![]() The Type tool.
The Type tool.

![]() Choose one of the Type tools from the Tool Options bar.
Choose one of the Type tools from the Tool Options bar.
Your pointer changes to an I-beam, as in many other text-editing programs ![]() .
.

![]() When using one of the type tools, your pointer changes appearance to look like an I-beam. The text entry point is indicated by a vertical line whose height is based on the type size.
When using one of the type tools, your pointer changes appearance to look like an I-beam. The text entry point is indicated by a vertical line whose height is based on the type size.
2. In the image window, move the pointer to the area where you want to insert your text, and then do one of the following:
• Click to create a text insertion point. This method is perfect if you’re setting just a single line of text, or a simple two- or three-line title or heading.
• If you want to set a long text paragraph, click and drag to create a paragraph text box ![]() .
.
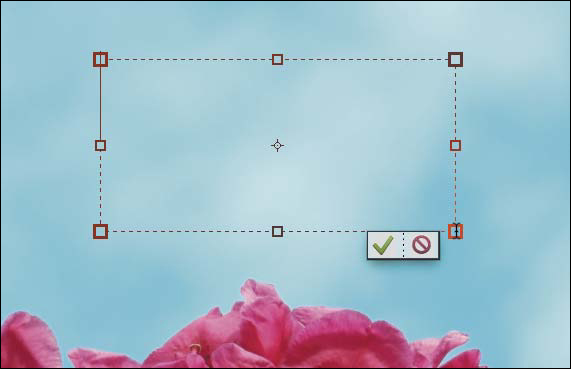
![]() Alternatively, drag the I-beam to create a paragraph text box.
Alternatively, drag the I-beam to create a paragraph text box.
3. Type your text ![]() . If you want to start a new line, press Enter.
. If you want to start a new line, press Enter.
![]() After you click once to establish the insertion point of your type, just start entering text. Press the Enter key to move to a new line.
After you click once to establish the insertion point of your type, just start entering text. Press the Enter key to move to a new line.
If you’ve created a paragraph text box, the text automatically flows to a new line when it bumps up against the border of the text box.
4. To confirm the text you’ve entered, do one of the following:
• Press the Enter key on the numeric keypad (or the equivalent on laptops).
• Click anywhere in your image, click a panel, or click a tool on the Tools pane.
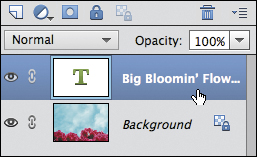
A new type layer is created and is visible on the Layers panel. The layer name is the text you entered.
To edit text
1. Click a type layer on the Layers panel to make it active ![]() .
.
![]() To make changes to existing text, click the appropriate layer on the Layers panel.
To make changes to existing text, click the appropriate layer on the Layers panel.
2. In the image window, click in the text and edit as you would in any basic word processor.
3. Confirm your edits by clicking anywhere in your image.
Consider changing the font size before you begin typing (which I describe shortly); 12-point text is easily lost in a high-resolution photo.
If you want to add more text to a different part of your image, simply click elsewhere in the image and start typing. The new text is added to its own separate layer.
Your image must be in grayscale or RGB mode if you want to add type to it. Elements’ two other image modes, bitmap and indexed, don’t support type layers.
To move text
1. On the Layers panel, click the type layer you want to move.
2. Click the Move tool on the Tools pane.
When you click the Move tool, your type is surrounded by a selection bounding box, allowing you to move the type as a single object anywhere on your image.
3. In the image window, drag your text to a new location ![]() .
.

![]() Because text exists on its own separate layer, you can move it to different areas in the image by using the Move tool.
Because text exists on its own separate layer, you can move it to different areas in the image by using the Move tool.
To simplify a type layer
1. Choose a type layer on the Layers panel by clicking on it.
2. From the Layer menu or from the Layers panel menu, choose Simplify Layer.
The layer ceases to be a type layer and the text is treated as pixels instead.
You can also move a type layer while the Type tool is selected: Hold Ctrl/Command and click the layer; then drag it into position.
When you simplify a type layer, does its icon in the Layers panel look empty? The tiny thumbnail may not appear to display your text if the type is small in relation to the full image size. Try this: Click the More drop-down menu and choose Panel Options. In the dialog that appears, click Layer Bounds in the Thumbnail Contents section, and then click OK. The layer’s thumbnail icon displays only the text, not the entire image.
Changing the Look of Your Text
You should be comfortable using the type formatting tools—font family, font style, and font size—because they’re very similar to those found in most word processing programs. You can also change the text alignment and text color. All of these options are available on the Tool Options bar ![]() .
.
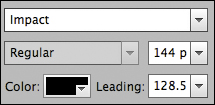
![]() The type formatting tools are all available on the text Tool Options bar.
The type formatting tools are all available on the text Tool Options bar.
To change any of these attributes, you first need to select the text characters you want to change. Most of the time, you’ll want to select and apply changes to an entire line of text, but you can also select individual words or even individual characters.
To select text
1. Click the type layer you want to edit on the Layers panel, or click on the type itself with the Move tool.
2. Select a type tool.
3. To select the text, drag across the characters to highlight them ![]() , or do one of the following:
, or do one of the following:
![]() Drag across text with the text pointer.
Drag across text with the text pointer.
• Double-click within a word to select the whole word ![]() .
.

![]() Double-click within a word to select it.
Double-click within a word to select it.
• Triple-click to select an entire line of text ![]() .
.

![]() Triple-click anywhere in a line of type to select the entire line.
Triple-click anywhere in a line of type to select the entire line.
• Quadruple-click to select an entire paragraph of text ![]() .
.

![]() Quadruple-click anywhere in a paragraph to select the entire paragraph.
Quadruple-click anywhere in a paragraph to select the entire paragraph.
You can select all the text on a layer without even touching the text with your pointer. Just select the type layer on the Layers panel and double-click the T icon.
To choose the font family and style
1. Select the text you want to change.
2. From the Tool Options bar, choose a font from the font family menu ![]() .
.

![]() All available fonts are listed on the font family menu.
All available fonts are listed on the font family menu.
3. Still in the Tool Options bar, choose a style from the font style menu ![]() .
.
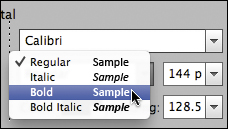
![]() Many fonts allow you to select a style from the font style menu.
Many fonts allow you to select a style from the font style menu.
If the font family you selected doesn’t include a particular style, you can click the Faux Bold or Faux Italic button to change the look of your text ![]() .
.

![]() If a font doesn’t include style options, you can apply a bold or italic format with the icons in the Tool Options bar.
If a font doesn’t include style options, you can apply a bold or italic format with the icons in the Tool Options bar.
If you haven’t memorized the look of each and every font on your computer (and who has?), Photoshop Elements’ font family menu displays an example of each font next to its font name. You can change the size of font samples or turn the display of the samples off by choosing Edit > Preferences > Type and then using the drop-down menu in the Type Options section of the Type Preferences dialog ![]() .
.
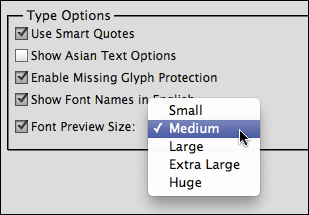
![]() Options in the Type Preferences dialog let you control the display of font previews in the font family menu.
Options in the Type Preferences dialog let you control the display of font previews in the font family menu.
To change the font size
1. Select the text you want to change.
2. Choose a size from the type size menu in the Tool Options bar ![]() .
.

![]() Use the type size menu to adjust the size of your type. To use a size not listed, just enter it in the text field.
Use the type size menu to adjust the size of your type. To use a size not listed, just enter it in the text field.
To change to a type size not listed on the menu, just enter a new value in the type size text field.
Quickly adjust the type size up and down using keyboard shortcuts. Just select your text and then press Ctrl+Shift+. (period)/Command-Shift-. (period) to increase the size in 2-point increments. To reduce the size of the text, press Ctrl+Shift+, (comma)/Command-Shift-, (comma).
You can also adjust the type size up and down in 1- or 10-point increments. Select your text and then select the type size in the type size menu in the Tool Options bar. Next, use the up and down keys on your keypad to size the type up and down in 1-point increments. If you hold down the Shift key while pressing the up or down keys, the type will adjust in 10-point increments ![]() .
.

![]() Hold down the Shift key to quickly increase your type size in 10-point increments.
Hold down the Shift key to quickly increase your type size in 10-point increments.
To change the default measurement unit for type, go to the Photoshop Elements Preferences and choose Units and Rulers. Here you can select among pixels, points, and millimeters (mm).
To change the line spacing
1. Select the lines of text you want to change.
2. Choose a value from the line space menu in the Tool Options bar ![]() .
.

![]() Use the line space menu to select line spacing for your type. You can also enter a line spacing value in the menu text field.
Use the line space menu to select line spacing for your type. You can also enter a line spacing value in the menu text field.
To change to a line spacing value not listed on the menu, enter a new value in the line space text field.
To apply underline or strikethrough
1. Select the text you want to change.
2. Click either the Underline or Strikethrough icon in the Tool Options bar to apply that style to your text ![]() .
.

![]() Apply underline and strikethrough from the Tool Options bar.
Apply underline and strikethrough from the Tool Options bar.
The default line spacing value for any type size (Auto) serves as a good starting point, but it’s surprising that something as simple as increasing or decreasing line spacing can have a dramatic visual impact ![]() .
.
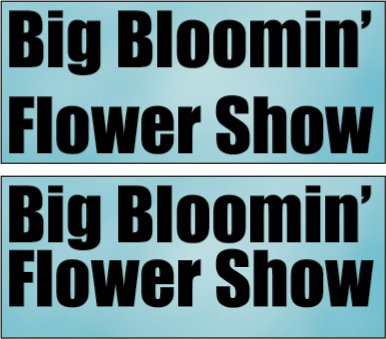
![]() Default line spacing (top), and the same type size but with smaller line spacing (bottom).
Default line spacing (top), and the same type size but with smaller line spacing (bottom).
If your type layer is set to a vertical orientation, the underline appears on the left side of the type.
To change the alignment
1. Select the text you want to change.
2. From the Tool Options bar, choose an alignment option ![]() .
.
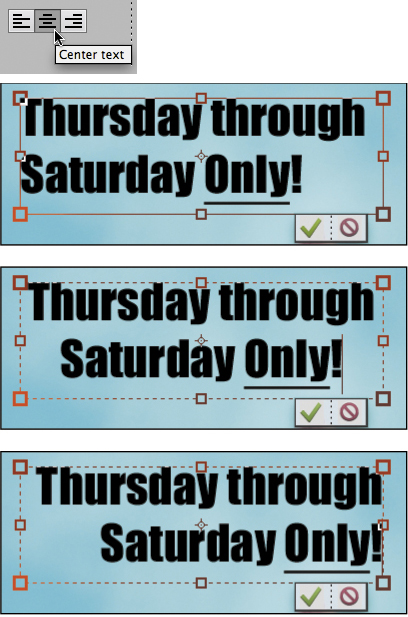
![]() Aligning text within a paragraph box: Left Align (top); Center (middle); Right Align (bottom).
Aligning text within a paragraph box: Left Align (top); Center (middle); Right Align (bottom).
The type shifts in relation to the origin of the line of text, or in the case of paragraph text, in relation to one side of the text box or the other. For point and click type, the origin is the place in your image where you first clicked before entering the type.
• Left Align positions the left edge of each line of type at the origin, or on the left edge of the paragraph text box.
• Center positions the center of each line of type at the origin, or in the center of the paragraph text box.
• Right Align positions the right edge of each line of type at the origin, or on the right edge of the paragraph text box.
To change the text color
1. Select the text you want to change.
2. Click the Color drop-down menu in the Tool Options bar and choose a color swatch ![]() . Or, click the Color Picker button at the lower-right corner to view more color options.
. Or, click the Color Picker button at the lower-right corner to view more color options.
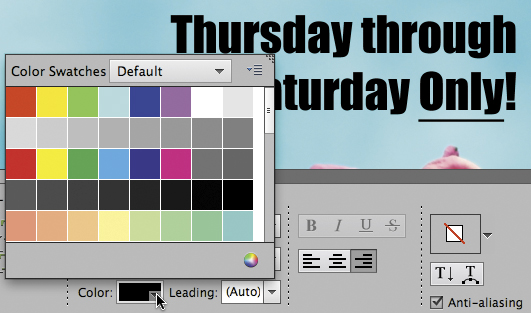
![]() Change the text color by clicking the color selection drop-down menu.
Change the text color by clicking the color selection drop-down menu.
3. Click OK to apply the color to your text.
You can also change the color of all text on a text layer without selecting the text itself. With the Text tool active, click to select a text layer in the Layers panel to make it the active layer, then follow the procedure to change the text color.
Working with Vertical Text
Most of the time, you’ll use the standard Horizontal Type tool. But you can also change your type to a vertical orientation whenever you want. One of the reasons Elements includes both horizontal and vertical types is to accommodate the needs of the Asian-language versions of the product, such as Korean, Japanese, and Chinese.
To create vertical text
1. Click the Type tool on the Tools pane and then choose the Vertical Type tool in the Tool Options bar ![]() .
.

![]() The Vertical Type tool is located on the Tool Options bar.
The Vertical Type tool is located on the Tool Options bar.
The pointer changes to an I-beam.
2. Move the pointer to the area where you want to insert your text, and then do one of the following:
• Click to create a text insertion point.
• Click and drag to create a paragraph text box.
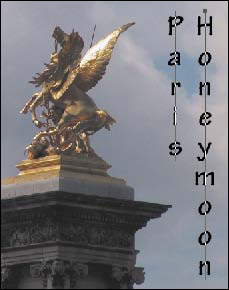
3. Type your text on the image ![]() . The characters appear in descending order on your image.
. The characters appear in descending order on your image.

![]() When you use the Vertical Type tool, your text appears in descending order (from the top down) on your image.
When you use the Vertical Type tool, your text appears in descending order (from the top down) on your image.
4. To start a new line that will appear to the left of the first line, press Enter ![]() .
.
![]() When you press Enter, another line of vertical type is added to the left of the first line.
When you press Enter, another line of vertical type is added to the left of the first line.
If you’ve created a paragraph text box, the text automatically flows to a new line when it bumps up against the bottom of the text box.
To create and control the position of another line of vertical text, reselect the Vertical Type tool and create a separate, independent vertical type layer.
To change the orientation of the text
1. Select a type layer on the Layers panel.
2. Select the Type tool on the Tools pane and then click the Change text orientation icon in the Tool Options bar ![]() .
.

![]() Switch between horizontal and vertical type by clicking the Change text orientation icon in the Tool Options bar.
Switch between horizontal and vertical type by clicking the Change text orientation icon in the Tool Options bar.
The text changes to the opposite orientation: If your text is horizontal, it flips to vertical orientation—and vice versa.
If you have Asian language fonts installed on your computer and you want to use the Asian type formatting options, choose Edit > Preferences > Type and select Show Asian Text Options ![]() .
.
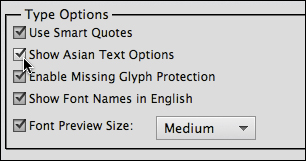
![]() If your system supports Asian text options, you can work with them by selecting this feature in the Preferences > Type dialog.
If your system supports Asian text options, you can work with them by selecting this feature in the Preferences > Type dialog.
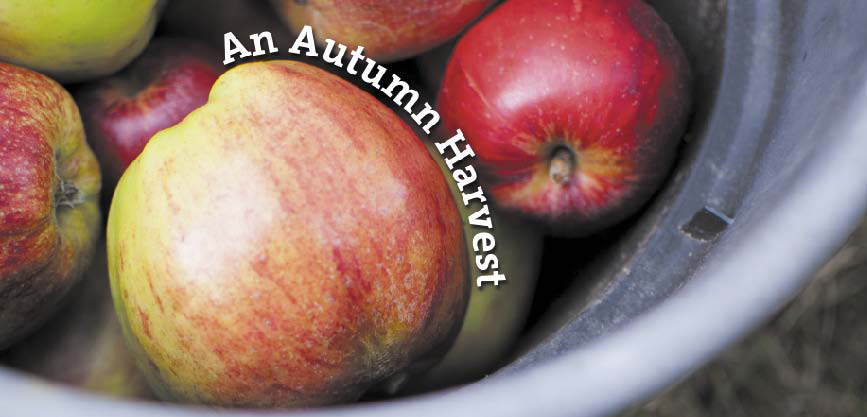
Creating Text on Paths
Text can be much more dynamic when it interacts with the imagery it’s built upon. You can add text that follows the edge of a selection, a shape, or a custom path using three text tools. Once the text is created, you can resize, reposition, and restyle it as you wish.
To create text on a selection
1. Select the Text on Selection tool ![]() .
.
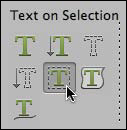
![]() The text on path tools appear in the Tool Options bar.
The text on path tools appear in the Tool Options bar.
2. Define the selected area: the tool acts like the Quick Selection tool, grabbing areas based on color and contrast.
To change the size of the selection brush, switch to the Quick Selection tool and adjust the size there. Then, choose the Text on Selection tool again.
3. Optionally drag the Offset slider in the Tool Options bar to enlarge or retract the selection.
4. Click the Commit button to complete the selection; the edge becomes the path.
5. Position the mouse pointer over part of the path where you want to start typing; the cursor changes to an I-beam ![]() .
.
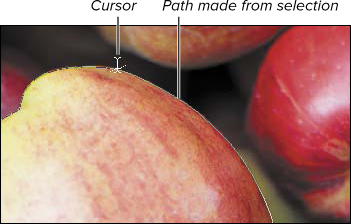
![]() Click where you want the text to begin.
Click where you want the text to begin.
6. Type the text, which follows the path ![]() .
.
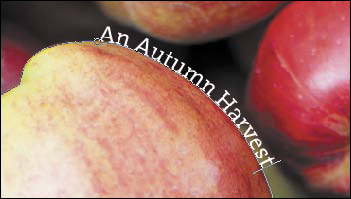
![]() Type the text.
Type the text.
7. Click the Commit button or press Enter to apply the text.
To create text on a shape
1. Select the Text on Shape tool.
2. In the Tool Options bar, choose a shape from the first drop-down menu.
If you want to change the appearance of a shape, you need to specify the settings using the corresponding shape’s tool. For example, to change the number of sides of a polygon, select the Polygon tool (the tool itself, not the option in the Text on Shape tool) and change the value in the Sides field. The same goes for the curves of the Rounded Rectangle.
3. Draw the shape on your image and commit it.
4. Click the path and type your text ![]() .
.

![]() Text flows around a polygon.
Text flows around a polygon.
5. Click the Commit button or press Enter to apply the text.
To create text on a custom path
1. Select the Text on Custom Path tool.
2. Click and drag to draw a line ![]() , and commit it when you’re done.
, and commit it when you’re done.
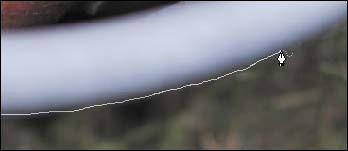
![]() Draw a freehand path.
Draw a freehand path.
3. Click the path and type your text ![]() .
.

![]() Text on a custom path can be less than smooth.
Text on a custom path can be less than smooth.
Don’t be concerned if the text appears as if it went through an earthquake; Elements is placing the letters over a bumpy path. (The Editor doesn’t offer full-blown Beziér curves to smooth the path; Adobe wanted to simplify the path-creation process.) You can modify the path as described below.
4. In the Tool Options bar, click the Modify button). The path’s control points appear.
5. Drag the control points to alter the shape of the path ![]() .
.

![]() Use the Refine Path tool to move control points.
Use the Refine Path tool to move control points.
6. Click the Draw button to stop editing the path.
I won’t sugarcoat it. Editing control points on custom paths can be fiddly, time consuming, and frustrating. Depending on the shape you need, you may be better off creating text on a shape or selection instead.
Even if you don’t make custom paths, the tool is still useful: You can use the Refine Path mode to adjust control points on paths created using selections or shapes.
To edit the text formatting
1. In the Layers panel, click the text layer you want to edit.
2. With any of the text on path tools active, click the type to insert your cursor, and then select the text.
3. Use the formatting controls in the Tool Options bar to choose typeface, size, and other formatting ![]() .
.

![]() The formatting settings appear in the Tool Options bar when text is selected.
The formatting settings appear in the Tool Options bar when text is selected.
4. Click the Commit button or press Enter to apply the edits.
To reposition the text
1. With any of the text on path tools active, click the type to insert your cursor.
2. Locate the origin point, a small circle where you started to enter your text ![]() .
.
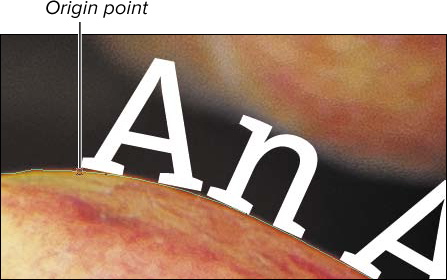
![]() The origin point can be hard to spot at first.
The origin point can be hard to spot at first.
3. Hold Ctrl/Command and drag to slide the text away from the origin point; the cursor appears with an arrow icon.
The behavior of the text as you drag depends on a couple factors:
• If you drag above the text baseline, the letters remain on top of the line ![]() . Pulling the mouse pointer below the baseline causes the text to flow along the inside of the shape.
. Pulling the mouse pointer below the baseline causes the text to flow along the inside of the shape.

![]() Drag to reposition the text on the path.
Drag to reposition the text on the path.
• Dragging behind the origin point makes the text disappear. To position the first letters further left, Ctrl/Command-click the origin point and move it before you slide the letters.
Apply modifications such as drop shadows using the options in the Effects panel ![]() . See “Applying Layer Styles to Text,” later in this chapter.
. See “Applying Layer Styles to Text,” later in this chapter.
![]() Apply effects to text on path layers.
Apply effects to text on path layers.
Anti-aliasing Text
You can choose to smooth the edges of, or anti-alias, your text, just as you can with image selections as discussed in Chapter 6. In most cases, you’ll use Photoshop Elements to create fairly large, display-size text. For this reason, you’ll normally want to anti-alias your text so it doesn’t appear to be jagged ![]() .
.
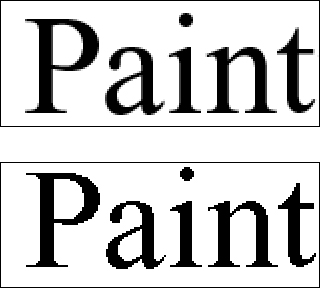
![]() You’ll usually want to anti-alias your text, especially when using larger type sizes. This example shows 60-point type viewed at 200 percent.
You’ll usually want to anti-alias your text, especially when using larger type sizes. This example shows 60-point type viewed at 200 percent.
The exception is when you use smaller font sizes, such as 14 points or less, and are planning to use the image for onscreen viewing on the Web. At smaller sizes, anti-aliasing actually makes your text less readable, and the smoothing effect looks more like blurring ![]() . Also, in the process of anti-aliasing, many more colors are generated, and not all Web browsers support all of these colors, so some unwanted color artifacts may appear around the edges of your type. By default, anti-aliasing is turned on.
. Also, in the process of anti-aliasing, many more colors are generated, and not all Web browsers support all of these colors, so some unwanted color artifacts may appear around the edges of your type. By default, anti-aliasing is turned on.
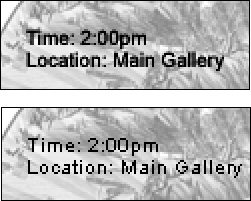
![]() When using type sizes of about 14 points or less, you may want to turn off anti-aliasing so your text doesn’t become blurry. This example shows 10-point type viewed at 200 percent.
When using type sizes of about 14 points or less, you may want to turn off anti-aliasing so your text doesn’t become blurry. This example shows 10-point type viewed at 200 percent.
To turn anti-aliasing off and on
1. Select a type layer on the Layers panel.
2. Do one of the following:
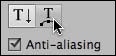
• Click the Anti-aliasing icon in the Tool Options bar. To reselect anti-aliasing, click the icon again ![]() .
.
![]() Turn anti-aliasing off and on with this icon in the Tool Options bar.
Turn anti-aliasing off and on with this icon in the Tool Options bar.
• From the main menu, choose Layer > Type > Anti-Alias Off, or Layer > Type > Anti-Alias On.
Warping Text
Photoshop Elements lets you distort text easily using the Warp tool. You can choose from 15 different warping options in the Warp Text dialog. In this dialog, you can adjust the amount of the bend in the type, as well as the horizontal and vertical distortion.
Even after you’ve warped your text, it’s still completely editable, and you can make additional formatting changes to it at any time. But because the warp effect is applied to the entire type layer, you can’t warp individual characters—it’s all or nothing.
To warp text
1. Select a type layer on the Layers panel.
2. From the Tools pane, select a type tool (so that the type options appear in the Tool Options bar) and click the Create Warped Text icon ![]() .
.
![]() Click the Create Warped Text icon in the Tool Options bar to experiment with distortions.
Click the Create Warped Text icon in the Tool Options bar to experiment with distortions.
The Warp Text dialog appears.
3. Choose a warp style from the drop-down menu.
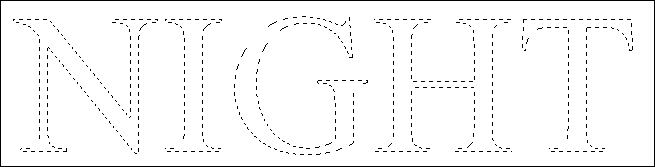
4. Choose either Horizontal or Vertical orientation for the effect ![]() .
.
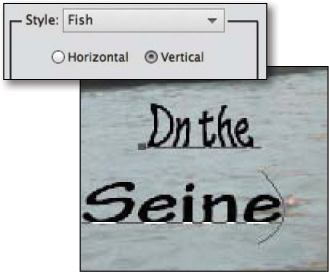
![]() The Horizontal and Vertical orientation options create radically different results.
The Horizontal and Vertical orientation options create radically different results.
5. You can also modify the amount of Bend and Horizontal or Vertical distortion using the sliders ![]() .
.

![]() In this example, the Bend slider helps to dramatically exaggerate the fish shape.
In this example, the Bend slider helps to dramatically exaggerate the fish shape.
6. Click OK to apply the effect.
To remove text warp
1. On the Layers panel, select a type layer that’s been warped.
2. Select a type tool and click the Create Warped Text icon in the Tool Options bar.
3. Choose None from the Style drop-down menu ![]() .
.

![]() To remove text warp, select None from the Style drop-down menu.
To remove text warp, select None from the Style drop-down menu.
4. Click OK to remove the effect.
As you experiment with the various warping options, your text can undergo some pretty dramatic changes. For this reason, you might want to move your text around to see how it looks in different parts of your image. Luckily, you can do this without closing the Warp Text dialog. If you move your pointer into the image area, you’ll see that it automatically changes to the Move tool so you can move your text around while adjusting the warping effect.
Creating Text Effects Using Type Masks
Sometimes the text effects you want to create are better done with a type selection, not the actual, editable type. The Horizontal and Vertical Type Mask tools let you enter text, which is automatically converted to a selection in the shape of type. Since it’s a selection, you can do everything you can do to any other selection—you can paint or fill the type or transform its geometry by skewing it or applying perspective. Unlike the previous type tools discussed, the type mask tools do not create a unique layer. The type selection appears on whichever layer is active at the time you use the tool. The bottom line: A type selection is just like any other selection, but in the shape of text.
To create a selection with the type mask tools
1. Make sure your active layer is the one where you want the text selection to appear ![]() .
.

![]() To create a type mask, first select the layer on which you want it to appear.
To create a type mask, first select the layer on which you want it to appear.
2. Select either the Horizontal or Vertical Type Mask tool ![]() .
.
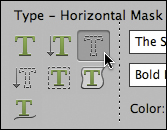
![]() Choose either the Horizontal or Vertical Type Mask tool.
Choose either the Horizontal or Vertical Type Mask tool.
3. Set the type options (such as font, style, or size) in the Tool Options bar.
4. Enter text on the image by either clicking or clicking and dragging and then typing your text.
The text appears reversed out of the colored mask overlay ![]() .
.

![]() Your type appears reversed out of the colored mask.
Your type appears reversed out of the colored mask.
5. Commit your text selection by clicking outside the selection or pressing Enter.
Your text area is selected ![]() .
.
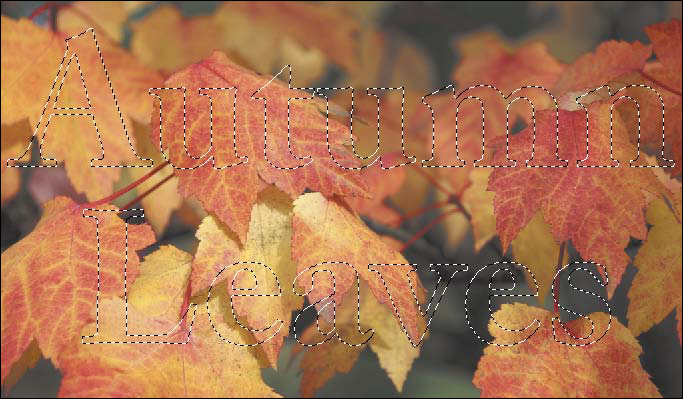
![]() After you commit the type, it appears as a selection with the typical selection border.
After you commit the type, it appears as a selection with the typical selection border.
You can now apply additional changes to the selection.
To fill a text selection with an image
1. Create a text selection following the steps in the preceding task.
Be sure to position the selection over the image you want to show through the text.
2. Copy the selection to the clipboard by choosing Copy from the Edit menu, or by pressing Ctrl+C/Command-C.
3. From the File menu, choose New > Image from Clipboard.
Your text selection appears in its own file, with the image peeking through ![]() .
.

![]() You can create all sorts of interesting text effects by filling type with images.
You can create all sorts of interesting text effects by filling type with images.
To apply a gradient to a text selection
1. Create a text selection following the steps in the task “To create a selection with the type mask tools” ![]() .
.
![]() To fill text with a gradient, start by making a type selection.
To fill text with a gradient, start by making a type selection.
2. Click the Gradient tool on the Tools pane and choose any gradient style in the Tool Options bar ![]() .
.

![]() Click the Gradient tool on the Tools pane and then choose a gradient.
Click the Gradient tool on the Tools pane and then choose a gradient.
3. Drag across your text selection to establish the direction of the gradient ![]() .
.

![]() Drag in the direction you want the gradient to appear inside your type.
Drag in the direction you want the gradient to appear inside your type.
4. Deselect the text selection.
Your text appears with the gradient fill ![]() .
.

![]() This example uses the Linear gradient.
This example uses the Linear gradient.
Up until the moment you commit the text, you can edit your type masks (change their font, size, line spacing, and alignment) just as you would any other line or paragraph of type.
You can move a text selection around in the image window as if it were any other selection. Once you click the Commit icon, select any of the marquee selection tools from the Tools pane. Move the cursor over your text selection until it becomes the Move Selection icon. Then you can click and drag to reposition your text selection.
Applying Layer Styles to Text
Since the Horizontal and Vertical Type tools create a unique text layer, you can use layer styles to make all sorts of unusual and interesting changes to your type. The significant advantage of using layer styles with your text (as opposed to using type masks) is that your text remains editable.
To apply a layer style to text
1. Enter text in your image using either the Horizontal or Vertical Type tool ![]() .
.

![]() To use layer styles with your type, first enter text with one of the type tools.
To use layer styles with your type, first enter text with one of the type tools.
2. Make sure the appropriate type layer is selected on the Layers panel; then, on the Effects panel, choose a style from the Layer Styles panel list ![]() .
.

![]() You can use any of Photoshop Elements’ dozens of layer styles on your type.
You can use any of Photoshop Elements’ dozens of layer styles on your type.
3. Click the Apply button to apply the style to your text ![]() .
.

![]() Sophisticated effects that would be difficult to create manually are easily applied to text.
Sophisticated effects that would be difficult to create manually are easily applied to text.
When choosing a font, it’s a good idea to go with bolder sans-serif typefaces. This way, your type is more likely to remain readable after you’ve applied the style.