
You’ve recorded a new song and you can’t wait for people to hear it. You might want to distribute it on the Web, in addition to (or instead of) CDs.
Why put your music online? Web excerpts of your songs can entice listeners to buy your CDs or download your songs. Songs on the Web cost less than CDs. Also, distributing online is much quicker than distributing CDs. Keep in mind, though, that it’s hard to get your songs noticed among the millions of other titles that are online. Many books and websites offer suggestions on marketing your music.
STREAMING VERSUS DOWNLOADING
There are two basic ways to transmit music on the Internet: streaming files and downloading files. A streaming file plays as soon as you click on its title. A downloaded file doesn’t play until you copy the entire file to your hard disk. Streaming audio is heard almost instantly (after the buffer memory fills), but often sounds muffled and can be interrupted by net congestion.
The sound quality of streaming audio depends on the speed of the modem and ranges from funky AM radio (with a 56 K modem) to near-CD quality (with a cable modem). With downloaded audio you must wait a few seconds to several minutes to download the song. But when it plays, the sound is high-fidelity and continuous.
DATA COMPRESSION
Audio files that you record on your computer are usually WAV or AIFF files. They have no data reduction (data compression), so they take up lots of memory. A 3-minute song recorded at 16 bits, 44.1 kHz consumes about 32 MB. Downloading a 32 MB WAV file on the Web would take several hours using a 56 K modem. So, audio WAV files intended for Web download are usually data-reduced or data-compressed by encoding them as MP3, WMA, or other formats. For example, if you compressed a 3-minute song by 10:1 it would consume about 3.2 MB and would download 10 times faster than the equivalent WAV file.
Most types of data compression tend to degrade sound quality. The sound quality of a compressed-data format depends on its bitrate, measured in kilobits per second (kbps). The higher the bitrate, the better the sound, but the greater the file size. A bitrate of 128 kbps for stereo MP3 files is considered to be a good compromise between sound quality and file size. At low bitrates (at and below 128 kbps), you can hear artifacts such as “swirly” cymbals, smeared transients such as drum hits, a general “phasey” effect, and less treble. At higher bitrates above 192 kbps, the artifacts start to disappear, and to most listeners the sound is CD quality.
In short, data compression reduces the file size and the download time at the expense of sound quality.
A stereo MP3 file encoded at 128 kbps is 64 kbps per channel. A mono MP3 file encoded at 64 kbps is equal in quality to a stereo MP3 file encoded at 128 kbps. Mono files consume half the file space of stereo files if both are the same bitrate.
Table 19.1 relates MP3 stereo bitrate to sound quality.
Table 19.1 Data Compression Ratio and Sound Quality of Various MP3 Bitrates

WEB-RELATED AUDIO FILES
You can put audio on the Web in several file formats. Let’s look at some of the file types in current use.
WAV (.wav): A standard PC format for audio files. It encodes sound without any data reduction by using pulse code modulation. WAV files that are used to make audio CDs are 16-bit, 44.1 kHz. Because WAV files consume a lot of memory (about 32 MB for a 3-minute song in stereo), they are seldom used on the Internet for songs because they take so long to download.
However, an Internet connection by fiber-optic cable (such as Verizon’s FiOS) is much faster than a standard copper-wire connection. FiOS is claimed to offer up to 50 or 30 Mbps downloads and up to 20 or 5 Mbps uploads. With FiOS, it’s possible to transfer wave files—even hi-res ones—in a short time. For example, www.itrax.com offers songs for sale online that are surround files or 24-bit/96 kHz stereo files.
AIFF (.aif): Audio Interchange File Format, a standard Mac format for audio files. Use this format to transfer audio files between a PC and a Mac. Like WAV files, AIFF files are not data-compressed.
MID (MIDI, or Musical Instrument Digital Interface): This is a MIDI sequence, not an audio file. A .mid file is a string of numbers that represent performance gestures, such as note on/off, which note is played, key velocity, and so on. Chapter 16 on MIDI describes how to create MIDI files. Because MIDI files do not include audio, they are very compact. The user downloads the MIDI file and imports it into a MIDI sequencer or MIDI/audio DAW. The sequence generates instrumental music in a synth, sound module, or soft synth when played. To ensure that the proper instrument sounds play, most people use a General MIDI file format.
The following formats use data compression.
MP3 (MPEG Level-1 Layer-3): The most popular format. You can choose a low bitrate to make a small file with lower sound quality, or choose a high bitrate to make a larger file with higher quality.
When encoding an MP3 file, you have a choice of constant bitrate (CBR) or variable bitrate (VBR). VBR uses more bits on complex musical passages and fewer bits on simpler passages. CBR encodes every frame at the same bitrate, so it is less efficient. Use VBR to get a fixed level of quality at the lowest possible bitrate and file size. CBR is recommended only for streaming where the bitrate must be fixed. Average bitrate (ABR) is a compromise between CBR and VBR modes. Use ABR when you need to know the size of the encoded file but still allow some variation in the bitrate.
MP3PRO: An improvement over MP3. Songs encoded at 64 kbps with MP3PRO are said to sound as good as songs encoded at 128 kbps with MP3. MP3PRO offers faster downloads and nearly doubles the amount of music you can put on a flash memory player. MP3 and MP3PRO files are compatible with each others’ players, but a free MP3PRO player is needed to hear MP3PRO’s improvement in sound quality. See www.mp3prozone.com.
WMA (Windows Media Audio): This popular Microsoft format provides digital rights management (DRM), which is a technology that provides copy protection. It’s useful for online music stores. For more information see www.microsoft.com/windows/windowsmedia. WMA Pro also supports multichannel and high-resolution audio.
Suppose you want to download a 3-minute song. We’ll assume that the download speed is 90 kilobytes per second (typical of DSL).
• The original WAV file of the song is 30.3 MB, CD quality or better, and downloads in about 5.6 minutes.
• An MP3 or WMA file at 128 kbps is 3.0 MB, cassette quality, and downloads in about 33 seconds.
• An MP3 or WMA file at 320 kbps is 6.9 MB, CD quality, and downloads in about 1.3 minutes.
RealAudio: This format is used for streaming audio and for music downloads from RealAudio’s music store. The streaming fidelity depends on modem speed and the current Internet bandwidth. RealAudio files (.ra or. rm) are often used as short excerpts or previews of songs.
OGG (Ogg Vorbis): License-free open software. For a given file size, Vorbis sounds better than MP3. Vorbis takes up less file size than MP3 files of equal quality. For more information see www.xiph.org and www.vorbis.com.
AAC (MPEG Advanced Audio Coding): AAC offers better sound quality than MP3 at the same bitrate. Many listeners claim that AAC files made at 128 kbps sound like the original uncompressed audio source. What’s more, AAC supports multichannel audio and a wide range of sample rates and bit depths. Digital rights management technology is also used with this format to help control the copying and distributing of music.
HD-AAC combines MPEG-4 AAC lossy compression with MPEG-4 SLS lossless coding. It provides a single file which can be scaled anywhere from audiophile quality to low-bitrate quality. From a single HD-AAC encoded file, you can play a lossless, highquality version on your home stereo, and play a lossy, small file size version on an iPod.
FLAC (Free Lossless Audio Codec): A codec that keeps the sound quality of your mix, but reduces file size by about half. It’s lossless: the audio is compressed (data-reduced) without any loss in sound quality. Unlike WAV files, FLAC lets you embed metadata into the file, which is displayed by a music player—artist, album, song, ISRC, and so on. See http://flac.sourceforge.net/.
Currently, WMA and MP3 are the most popular types. Audio clip 41 at www.taylorandfrancis.com/cw/bartlett-9780240821535/ demonstrates MP3 and WMA data compression.
WHAT YOU NEED
To put your music on the Web, you need to download a few pieces of software, which are low cost or free:
• Ripper: Also called a grabber, this program converts audio from a CD or CD-R to a WAV file. Examples are Exact Audio Copy (www.exactaudiocopy.de), CDex (http://cdexos.sourceforge.net), AltoMP3 from www.yuansoft.com, and FreeRip3 (www.mgshareware.com). Windows Media Player 12 rips to MP3 and other formats. Not all CD-ROM drives support ripping. Most DAWs can export MP3 files.
• MP3 encoder: A program that converts a WAV or AIFF file to an MP3 file. Examples of freeware are RazorLame 1.1.5a (www.free-codecs.com/download/RazorLame.htm) and Lame MP3 Encoder (www.free-codecs.com/download/Lame_Encoder.htm). You need both. Get Lame version 3.98 or later. Another option is Wave to mp3 from www.softpedia.com. In Google, search for WAV to MP3 converter. Some recording software includes an MP3 encoder, and so does Winamp, FreeRip3, CDex, dBpowerAmp, foobar2000, Audio MP3 Editor, and Exact Audio Copy.
• ID3 tag editor: This program lets you add song title, artist, genre, and other metadata information to an MP3 file. This information displays on screen when the MP3 file plays. You can add studio contact information in a comments field. Two freeware programs are Stamp ID3 Tag Editor and Mp3tag. Several MP3 playback programs include a tag editor. If you create Broadcast WAV files for download, use this utility to create the appropriate metadata: http://sourceforge.net/projects/bwfmetaedit/.
• WMA encoder: A program that converts a WAV or AIFF file to a WMA file. Several are at www.team-mp3.com/wma/wma_encoder.htm. Windows Media Technologies has digital rights management, which limits copies or format conversions.
• Ogg Vorbis encoder (optional) from www.vorbis.com: Converts CD tracks or WAV files to Vorbis format. For a given file size, Vorbis sounds better than MP3. Vorbis takes up less file size than MP3 files of equal quality.
To listen to your music that you put on the Web, you need:
• MP3 player: A program or a device that plays MP3 files. Some software player examples are Winamp from www.winamp.com, Windows Media Player from http://www.microsoft.com/windows/windowsmedia, RealPlayer from www.real.com, and QuickTime in Apple’s OS or www.apple.com/quicktime/. Portable MP3 players play MP3 files downloaded from the Web.
• Windows Media Player: Although intended to play mainly Windows Media files, this free program plays many file types:.avi,.asf,.asc,.rmf,.wav,.wma,.wax,.mpg,.mpeg,.m1v, .mp2,.mp3,.mpa,.mpe,.ra,.mid,.rmi,.qt,.aif,.aifc,.aiff,.mov,.au,.snd, and .vod. This player is a free download from www.microsoft.com/windows/windowsmedia/.
A source for players, rippers, and encoders is www.team-mp3.com. Some digital audio editing programs can output MP3, WMA, and RealAudio files.
HOW TO UPLOAD COMPRESSED AUDIO FILES
Got everything you need? Let’s go. Basically, here’s what you will be doing:
1. Start with a WAV file of a song on your computer. Or convert your song from a CD to a WAV file by using a ripper.
2. Edit and process the WAV file to optimize it for the Internet.
3. Then use an encoder to convert the WAV file to an MP3 or WMA file.
4. Finally, send (upload) the converted file to a website that features music in the MP3 or WMA format.
Let’s go over the procedure in more detail. You can substitute WMA for MP3 in the procedure below.
1. Start with a WAV file of the song. Edit the start and stop points of the song. You might want to edit a 30-second excerpt of a song to use as a preview of your music. If so, add a fade-in and fade-out to the preview.
2. Next, you might want to process the audio so that it will sound louder and clearer when played on the Web. To do this, reduce the bandwidth: apply low cut below 40 Hz and high cut above 15 kHz. You might want to try a higher-frequency low cut and a lower-frequency high cut. Apply a little compression or multiband compression, apply peak limiting, and then normalize the song to maximize its level. Save the edited, processed song as a WAV file (PC) or AIFF file (Mac) on your hard drive.
3. Use an MP3 encoder to convert the song’s WAV or AIFF file to an MP3 file on your hard drive. You might want to use a bitrate of 128 kbps, which many websites require. It’s a good compromise between file size and sound quality.
4. If you want, add the song’s title, artist, and comments using an ID3 tag editor.
5. Next you will upload your MP3 files to an MP3 server—a website that accepts MP3 files for distribution on the Web. Examples include www.soundcloud.com, www.bandcamp.com, www.reverbnation.com, and www.digstation.com (for independents only). The CD duplicator Disc Makers will upload your songs quickly to a variety of services for a small fee. Also see the MP3 Sites page at www.team-mp3.com. Some sites offer free downloads of their music files; others charge the listener so that you make some income.
As an alternative, you can send your physical CD to CD Baby (www.cdbaby.com), and they will convert it to data-compressed files for you (Figure 19.1). They are a popular, affordable way for independent artists to sell CDs.
FIGURE 19.1 CD Baby website.
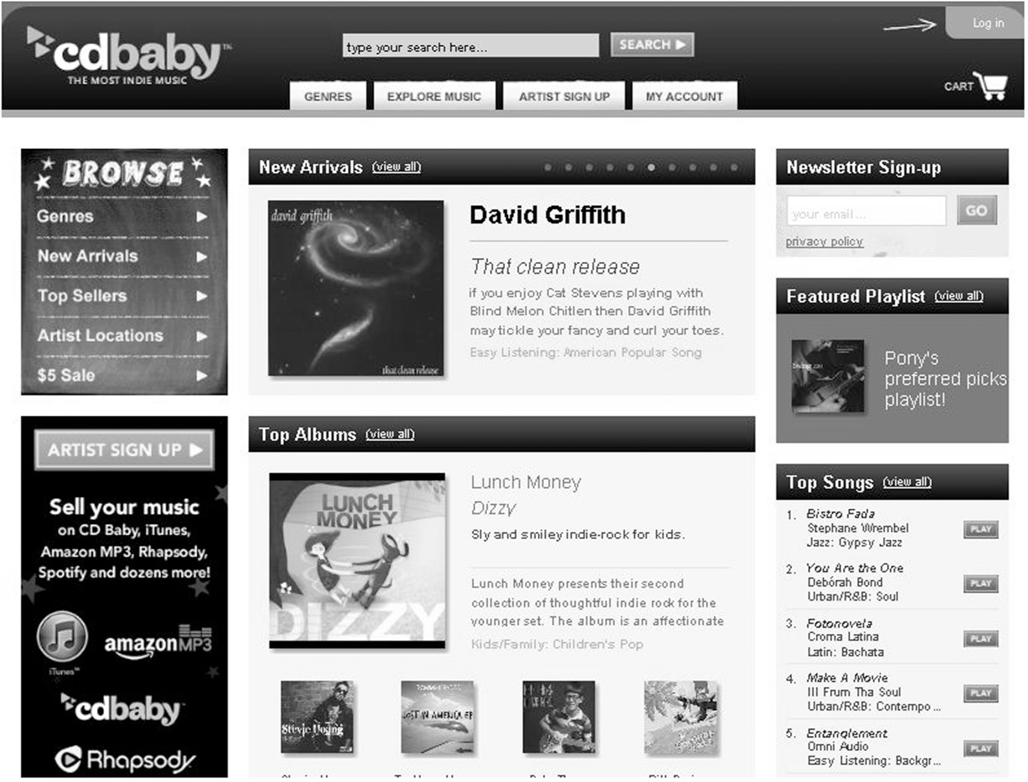
CD Baby’s MusicStore on Facebook is a free, easy way to stream and sell your music from the Facebook page for your band. You can also upload photos and videos, customize your store’s design, and more. Create a CD Baby account at www.members.cdbaby.com. Then you can sell your music on Facebook, as well as iTunes, Amazon, Spotify, and many other online music stores. CD Baby will handle all the transactions and accounting for you.
ReverbNation is another digital distributor worth checking out. With it you can build an online store for your music and integrate it with Facebook. Bandcamp, Nimbit, and Topspin also provide that service.
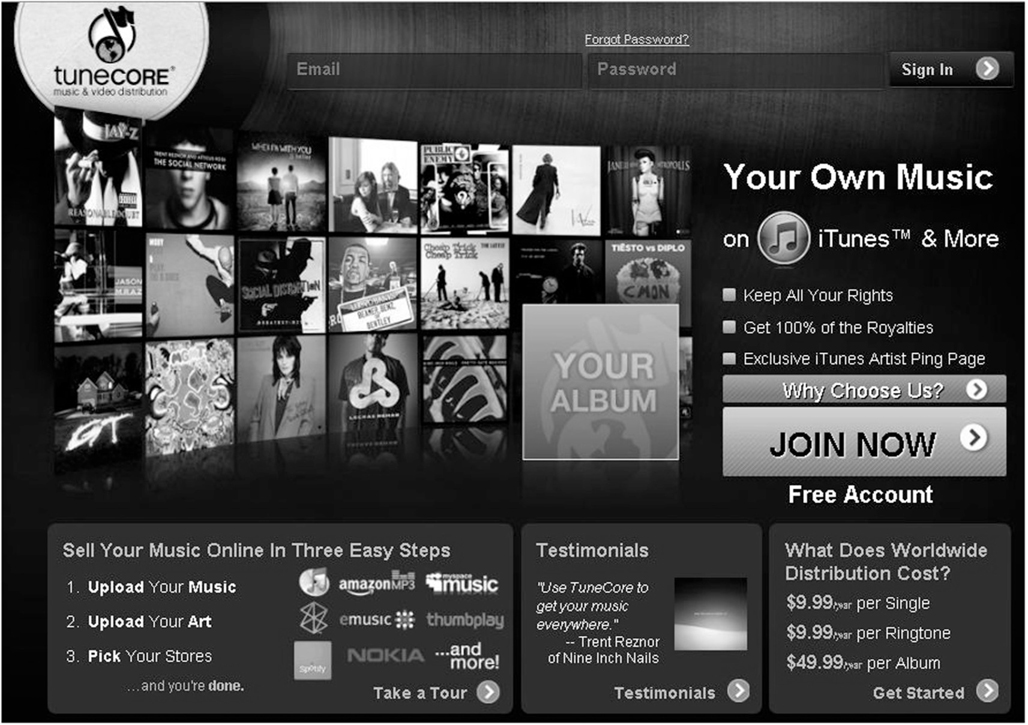
eMusic (www.emusic.com) does not work with unsigned artists, but they do accept music from independent labels. Usually this is done through a service such as The Orchard (www.theorchard.com), INgrooves (www.ingrooves.com), or TuneCore (www.tunecore.com) (Figure 19.2). They can compress and deliver a label’s CD catalog to all digital music stores. All income from digital sales is combined and reported to you.
FIGURE 19.2 TuneCore website.
Once you have chosen a site, go there and click on the button labeled “Artists only,” “Submit your music,” “Sell your music,” or something similar. This is where you upload your MP3 files.
Once you sign up and fill out some forms, click on “Upload” (or whatever). You can also upload scanned photos of your band, your album cover, and text describing your band and its music. Some sites take a few days or weeks to approve your songs.
Congratulations—you’re on the Web!
PUTTING YOUR MUSIC ON YOUR WEBSITE
So far I’ve covered how to upload your songs to an MP3 server. Now I’ll explain how to put your songs on your own website. People visiting your site can click on a song title to hear a streaming song preview, or to download an entire song.
You might upload your MP3 files to SoundCloud, and use a SoundCloud player on your website or Facebook page. Or upload them directly to your website’s server as described below.
Let’s start by creating a webpage link to each MP3 file. It’s easy. You can create the link with webpage design software or with one line of HTML code.
Again, you can substitute WMA for MP3 in the procedure below.
1. Suppose you have a song called “Blues Bash” on a CD or on your hard drive as a wave file. If the song is on a CD, use ripper software to transfer that song to your hard drive as a WAV file (PC) or AIFF file (Mac). In this example, we’ll call the file blues.wav.
2. Use an MP3 encoder to convert the WAV file to an MP3 file. I recommend a setting of 160 kbps bitrate, VBR, stereo. This setting gives pretty good sound with a relatively small file, so it’s fairly quick to download. You now have an MP3 file called blues.mp3.
3. You can add song-title and artist information with an ID3 tag editor.
4. In your computer, move blues.mp3 to the same directory on your hard drive that your webpage is in.
5. Use webpage design software to open your band’s webpage. Here we’ll call it bandpage.htm.
6. On that page, where you want the song title to appear, type in the title of the song. In this example it’s “Blues Bash.” Link that title to blues.mp3.
When you left-click on the song title, blues.mp3 should load and play. When you right-click on the song title, you can select “Save Target As” to copy the MP3 file to a directory on your hard drive.
If you want to use HTML code:
1. Open your webpage with a browser such as Windows Explorer.
2. Select View > Source. You’ll see the HTML code for that page in plain text format.
3. Find a spot on the page where you want the song title to appear. Type in the title of the song and the link to its MP3 file. In HTML it would look something like this:
• <a href=“blues.mp3”>Blues Bash</a>
• For a WMA file it would be
• <a href=“blues.wma”>Blues Bash</a>
4. Save and close the text file, go to Windows Explorer, and select View > Refresh. You should see the link to the MP3 or WMA song. When you left-click on the link, you should hear the song. When you right-click on it, you can select “Save Target As” to copy the MP3 file to a directory on your hard drive.
Now that your song links are working correctly on your computer, it’s time to upload them.
1. Using an FTP app, upload (send) bandpage.html and blues.mp3 to your Web server. Make sure that both files go to the same directory. Some Web servers have an upload page for this purpose. Note: Some Web servers do not allow MP3 files. Find the page on the Web server site that details what files they permit.
2. Now start your Web browser and go to bandpage.html on your site. Click “Refresh” in your browser so that you see the bandpage.html that you just uploaded.
3. Left-click the song title (in this case, “Blues Bash”), and it should play after the buffer fills. Or right-click the song title and select “Save Target As.” The song should download over a few minutes. Then you can play it with your MP3 player or WMA player in glorious hi-fi stereo.
Other good information on marketing your music online is in the article “Music’s New Messiahs: You!” by Gary Mraz in the April 2008 issue of EQ magazine. Also see http://newmusicstrategies.com/ebook/. CD Baby offers marketing advice after you create an account. Disc Makers and Distrophonix publish many articles about this topic online.
The future of music consumption seems to be streaming audio. Facebook is partnering with streaming sites—such as Spotify, MOG, turntable.fm, and Pandora—to stream music for free. Spotify and others also offer a subscription services for a monthly fee. It doesn’t generate much income for artists—fractions of a cent per stream—but the exposure can be huge, especially on Facebook.
COLLABORATING BY SHARING FILES
Recording engineers and musicians in different cities can work together on a common project by sharing files—sending digital audio files to others in WAV, MP3, or WMA format.
For example, you can send a song mix to a studio musician in another city, who overdubs their part and sends it back to you as a WAV file to import back into your multitrack project. Here’s the procedure:
1. Export a WAV file of the song’s stereo mix.
2. Copy that WAV file to a data CD-R.
3. Mail or FedEx the CD-R to the musician.
Then the musician follows these steps:
1. Import the mix into their recording program.
2. Overdub their part.
3. Export their part as a WAV file.
4. Copy that WAV file to a data CD-R.
5. Send the CD-R back to the recording engineer.
6. The engineer imports the WAV file on that CD-R into the multitrack project for mixing and editing.
You could e-mail MP3 or WMA files instead. If you want to use those compressed-data formats, encode the MP3 or WMA files at 256 kbps or higher, VBR, for best sound quality.
Sending WAV, MP3, or WMA files by e-mail can be cumbersome because some e-mail programs limit attachments to 10 MB. Also, the person receiving the file attachment will have to wait a long time for the e-mail to download. A better arrangement is to upload the audio files to a file-sharing website such as www.yousendit.com. When the recipient is ready to download the file, they simply click on a link.
Rogue Amoeba makes Nicecast software, which broadcasts audio in real time over the Internet. That lets a musician or producer in another location hear your mix with high quality and comment back to you via phone or iChat.
Record at Home, Mix in a Commercial Studio
This can be a great way to make an album. You track all the instruments and vocals in your home studio. Later, when all the tracks are recorded, you take them to a commercial studio for mixing and mastering.
What are the benefits of working this way? You can take all the time you need to create music and record it without spending money. You’re more relaxed because you’re not watching the clock. When your tracks are ready, a competent mixing engineer can make your tracks sound really good, and probably will take much less time to create a good mix than you could.
What are the drawbacks of recording at home? Compared to a commercial studio, your home studio might not have the best mics, studio acoustics, or recording techniques. You are likely to get a better sound with a pro recording.
Some musicians thrive on the discipline of recording efficiently in a commercial studio. Others need the lack of time pressure when recording at home.
How to Record and Prepare Your Tracks
Let’s say you want to record in your own studio and have a pro do the mixes. Of course, you want your tracks to sound as clean as possible before handing them over to an outside recording engineer. Here are some tips:
During recording:
• Avoid clipping your recorded tracks—distortion usually can’t be fixed during mixdown. Record each track at −6 dBFS maximum in peak meter mode.
• Avoid recording room reverb—it can’t be removed during mixdown. Mount acoustic material on the walls to reduce reverb. Use acoustic foam or dense fiberglass insulation from atsacoustics.com. Place dense fiberglass panels across room corners to reduce boomy-sounding standing waves. Put a 3-foot square piece of acoustic foam on the ceiling over singers and their mics. Mike close and record direct when possible.
• Prevent noise—it’s difficult or impossible to remove during mixdown. Close doors and windows, and turn off air conditioning or the furnace while tracking.
• Delete unused tracks and delete unused audio files from the session. Some recording software has a tool called “Consolidate audio files” that puts all the audio files used in a project in a common folder.
When exporting your tracks:
• Turn off pitch correction; don’t use time correction. Let the mixing engineer do it with better tools.
• Turn off compression, EQ, reverb, and other effects. Again, the mixing engineer is likely to have better-sounding effects, and probably knows how to use them more effectively.
• Set each track’s fader to 0 dB. Save (export) each track as a soloed WAV file, 24-bit, 44.1 kHz or higher. Each exported file should be the mix with one track soloed, played from time zero to the end of the song. The exported tracks will be continuous but will include your edits, and will have automation moves embedded in the audio. Name each track’s file according to the song and instrument. For example, “On the Edge-bass.wav.” You might also export each track with its effects turned on if you really like them and they are hard to duplicate. If so, add -fx to the filename of each track exported with effects.
• Bounce any MIDI soft-synth tracks into audio tracks, or export the MIDI tracks in Standard MIDI File format.
• Do NOT burn an audio CD of your tracks. Instead copy the tracks’ WAV files to a USB thumb drive, USB hard drive, or data DVD-R.
• Many DAWs can read OMF (Open Media Format). If you want to export your entire session via OMF, first follow the steps above. Then export your audio mix file using File > Export > OMF or something similar. In Pro Tools check the “Include audio” option. Recent alternatives to OMF are Advanced Authoring Format (AAF) and Material eXchange Format (MXF). See www.aafassociation.org.
• Cakewalk SONAR saves its projects as a .bun (bundle) file, which includes all the track recordings, edits, balances, and plug-ins. Another studio with SONAR Producer can import and reproduce that project except for plug-ins that they don’t have.
Take or send the track files to the mixing studio. There, the engineer will import your WAV or AIFF files, put each file on its own track, and start mixing. Bring notes on the plug-ins you used, along with any presets.
At the mixing session, you might bring some commercial CDs whose sound you admire so that the mixing engineer can get an idea for the sound you want. Make sure the genre of the commercial CDs is the same as your music. Also bring some rough mixes that you made at home.
You might be delighted to hear how good your mixes can sound when handled by a pro. And your album can have a relaxed vibe because you tracked it at home, on your own time.
For more information, read the “NARAS DAW Guidelines for Music Production” at http://www.grammy.org/recording-academy/producers-and-engineers/guidelines. Also read the “Pro Tools Guidelines for Music Production” at www.charlesdye.com/ptguidelines2.0.pdf.
You might want to read AES31-3-2008: AES standard for network and file transfer of audio -Audio-file transfer and exchange -Part 3: Simple project interchange. This standard provides a way to express audio-edit data in readable text form. Edit precision is sample-accurate and SMPTE time code is displayed. All AES standards documents are available at www.aes.org/publications/standards. Enter “aes31-3” into the Quick Search window and click “Search.”
When sending out your mixes for mastering for CD release, a good format is one stereo WAV file per song recorded at 24 bits/44.1 kHz. Many studios can handle higher sample rates. Ideally your stereo mixes are recorded without overall compression or limiting, and with a recorded level of −6 dBFS to −3 dBFS maximum in peak meter mode.
FINDING STUDIO MUSICIANS, PRODUCERS, AND ENGINEERS
At many websites you can find online session work, or find online session musicians to enhance your projects. Using their services, you can work with people all over the world from the comfort of your own studio. Some sites accept only musicians who are with major labels, or they divide their services into major-label musicians and minorlabel or indie musicians.
For example, sessionplayers.com seeks major-label musicians, singers, and engineers to join their group of available studio professionals. In their Player’s Network, they also offer directories of professional but more affordable session musicians for recording work and musical collaborations.
Here are some websites where session players and engineers can do online collaboration and find musical jobs: sessionplayers.com, ejamming.com, esession.com, kompoz.com, riffworld.com, musiciansjunction.com, bandmix.com, studiopros.com, and shenandoahmusic.com.
Also, search Google for these terms: music collaboration technology, musician finder, musician’s forum, online recording session, and online session musicians.