© Adam Freeman 2018
Adam FreemanPro Angular 6https://doi.org/10.1007/978-1-4842-3649-9_13

13. Using the Built-in Directives

Adam Freeman1 
(1)
London, UK
 
In this chapter, I describe the built-in directives that are responsible for some of the most commonly required functionality for creating web applications: selectively including content, choosing between different fragments of content, and repeating content. I also describe some limitations that Angular puts on the expressions that are used for one-way data bindings and the directives that provide them. Table 13-1 puts the built-in template directives in context.
Table 13-1

Putting the Built-in Directives in Context

Question

Answer

What are they?

The built-in directives described in this chapter are responsible for selectively including content, selecting between fragments of content, and repeating content for each item in an array. There are also directives for setting an element’s styles and class memberships, as described in Chapter 13.

Why are they useful?

The tasks that can be performed with these directives are the most common and fundamental in web application development, and they provide the foundation for adapting the content shown to the user based on the data in the application.

How are they used?

The directives are applied to HTML elements in templates. There are examples throughout this chapter (and in the rest of the book).

Are there any pitfalls or limitations?

The syntax for using the built-in template directives requires you to remember that some of them (including ngIf and ngFor) must be prefixed with an asterisk, while others (including ngClass, ngStyle, and ngSwitch) must be enclosed in square brackets. I explain why this is required in the “Understanding Micro-Template Directives” sidebar, but it is easy to forget and get an unexpected result.

Are there any alternatives?

You could write your own custom directives—a process that I described in Chapters 15 and 16—but the built-in directives are well-written and comprehensively tested. For most applications, using the built-in directives is preferable, unless they cannot provide exactly the functionality that is required.

Table 13-2 summarizes the chapter.
Table 13-2

Chapter Summary

Problem

Solution

Listing

Conditionally display content based on a data binding expression

Use the ngIf directive

1–3

Choose between different content based on the value of a data binding expression

Use the ngSwitch directive

4, 5

Generate a section of content for each object produced by a data binding expression

Use the ngFor directive

6–12

Repeat a block of content

Use the ngTemplateOutlet directive

13–14

Prevent template errors

Avoid modifying the application state as a side effect of a data binding expression

15–19

Avoid context errors

Ensure that data binding expressions use only the properties and methods provided by the template’s component

20–22

Preparing the Example Project

This chapter relies on the example project that was created in Chapter 11 and modified in Chapter 12. To prepare for the topic of this chapter, Listing 13-1 shows changes to the component class that remove features that are no longer required and adds new methods and a property.

Tip

You can download the example project for this chapter—and for all the other chapters in this book—from https://github.com/Apress/pro-angular-6 .

import { ApplicationRef, Component } from "@angular/core";
import { Model } from "./repository.model";
import { Product } from "./product.model";
@Component({
    selector: "app",
    templateUrl: "template.html"
})
export class ProductComponent {
    model: Model = new Model();
    constructor(ref: ApplicationRef) {
        (<any>window).appRef = ref;
        (<any>window).model = this.model;
    }
    getProductByPosition(position: number): Product {
        return this.model.getProducts()[position];
    }
    getProduct(key: number): Product {
        return this.model.getProduct(key);
    }
    getProducts(): Product[] {
        return this.model.getProducts();
    }
    getProductCount(): number {
        return this.getProducts().length;
    }
    targetName: string = "Kayak";
}
Listing 13-1

Changes in the component.ts File in the src/app Folder

Listing 13-2 shows the contents of the template file, which displays the number of products in the data model by calling the component’s new getProductCount method.
<div class="text-white m-2">
  <div class="bg-info p-2">
    There are {{getProductCount()}} products.
  </div>
</div>
Listing 13-2

The Contents of the template.html File in the src/app Folder

Run the following command from the command line in the example folder to start the TypeScript compiler and the development HTTP server:
ng serve
Open a new browser window and navigate to http://localhost:4200 to see the content shown in Figure 13-1.
../images/421542_3_En_13_Chapter/421542_3_En_13_Fig1_HTML.jpg
Figure 13-1

Running the example application

Using the Built-in Directives

Angular comes with a set of built-in directives that provide features commonly required in web applications. Table 13-3 describes the directives that are available, which I demonstrate in the sections that follow (except for the ngClass and ngStyle directives, which are covered in Chapter 12).
Table 13-3

The Built-in Directives

Example

Description

<div *ngIf="expr"></div>

The ngIf directive is used to include an element and its content in the HTML document if the expression evaluates as true. The asterisk before the directive name indicates that this is a micro-template directive, as described in the “Understanding Micro-Template Directives” sidebar.

<div [ngSwitch]="expr">

  <span *ngSwitchCase="expr"></span>

  <span *ngSwitchDefault></span>

</div>

The ngSwitch directive is used to choose between multiple elements to include in the HTML document based on the result of an expression, which is then compared to the result of the individual expressions defined using ngSwitchCase directives. If none of the ngSwitchCase values matches, then the element to which the ngSwitchDefault directive has been applied will be used. The asterisks before the ngSwitchCase and ngSwitchDefault directives indicate they are micro-template directives, as described in the “Understanding Micro-Template Directives” sidebar.

<div *ngFor="#item of expr"></div>

The ngFor directive is used to generate the same set of elements for each object in an array. The asterisk before the directive name indicates that this is a micro-template directive, as described in the “Understanding Micro-Template Directives” sidebar.

<ng-template [ngTemplateOutlet]="myTempl">

</ngtemplate>

The ngTemplateOutlet directive is used to repeat a block of content in a template.

<div ngClass="expr"></div>

The ngClass directive is used to manage class membership, as described in Chapter 12.

<div ngStyle="expr"></div>

The ngStyle directive is used to manage styles applied directly to elements (as opposed to applying styles through classes), as described in Chapter 12.

Using the ngIf Directive

The ngIf is the simplest of the built-in directives and is used to include a fragment of HTML in the document when an expression evaluates as true, as shown in Listing 13-3.
<div class="text-white m-2">
  <div class="bg-info p-2">
    There are {{getProductCount()}} products.
  </div>
  <div *ngIf="getProductCount() > 4" class="bg-info p-2 mt-1">
    There are more than 4 products in the model
  </div>
  <div *ngIf="getProductByPosition(0).name != 'Kayak'" class="bg-info p-2 mt-1">
    The first product isn't a Kayak
  </div>
</div>
Listing 13-3

Using the ngIf Directive in the template.html File in the src/app Folder

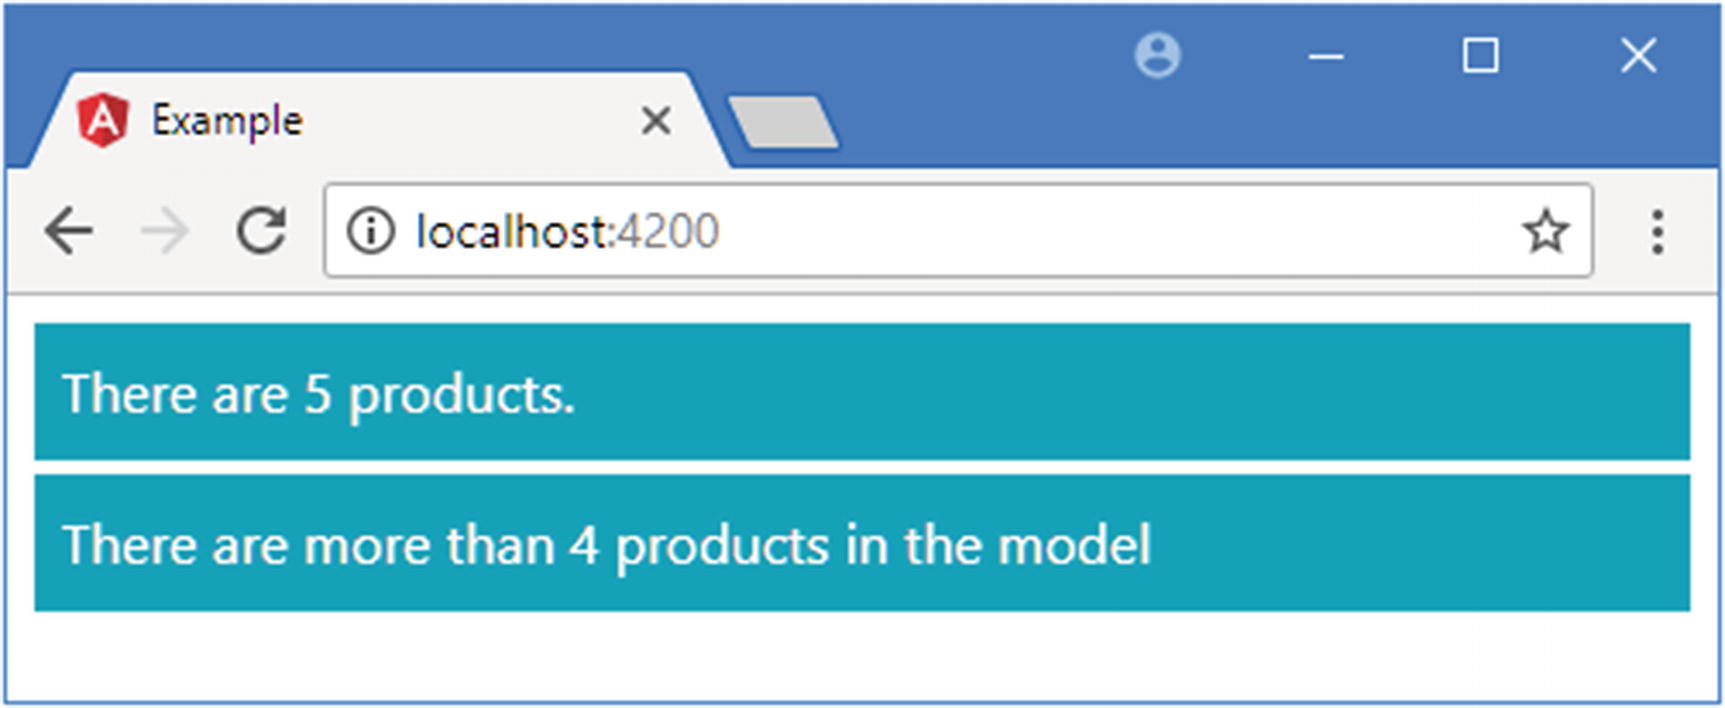
The ngIf directive has been applied to two div elements, with expressions that check the number of Product objects in the model and whether the name of the first Product is Kayak.

The first expression evaluates as true, which means that div element and its content will be included in the HTML document; the second expression evaluates as false, which means that the second div element will be excluded. Figure 13-2 shows the result.

Note

The ngIf directive adds and removes elements from the HTML document, rather than just showing or hiding them. Use the property or style bindings, described in Chapter 12, if you want to leave elements in place and control their visibility, either by setting the hidden element property to true or by setting the display style property to none.
../images/421542_3_En_13_Chapter/421542_3_En_13_Fig2_HTML.jpg
Figure 13-2

Using the ngIf directive

Understanding Micro-Template Directives

Some directives, such as ngFor, ngIf, and the nested directives used with ngSwitch are prefixed with an asterisk, as in *ngFor, *ngIf, and *ngSwitch. The asterisk is shorthand for using directives that rely on content provided as part of the template, known as a micro-template. Directives that use micro-templates are known as structural directives, a description that I revisit in Chapter 16 when I show you how to create them.

Listing 13-3 applied the ngIf directive to div elements, which tells the directive to use the div element and its content as the micro-template for each of the objects that it processes. Behind the scenes, Angular expands the micro-template and the directive like this:
...
<ng-template ngIf="model.getProductCount() > 4">
    <div class="bg-info p-2 mt-1">
        There are more than 4 products in the model
    </div>
</ng-template>
...

You can use either syntax in your templates, but if you use the compact syntax, then you must remember to use the asterisk. I explain how to create your own micro-template directives in Chapter 14.
Like all directives, the expression used for ngIf will be re-evaluated to reflect changes in the data model. Run the following statements in the browser’s JavaScript console to remove the first data object and to run the change detection process:
model.products.shift()
appRef.tick()
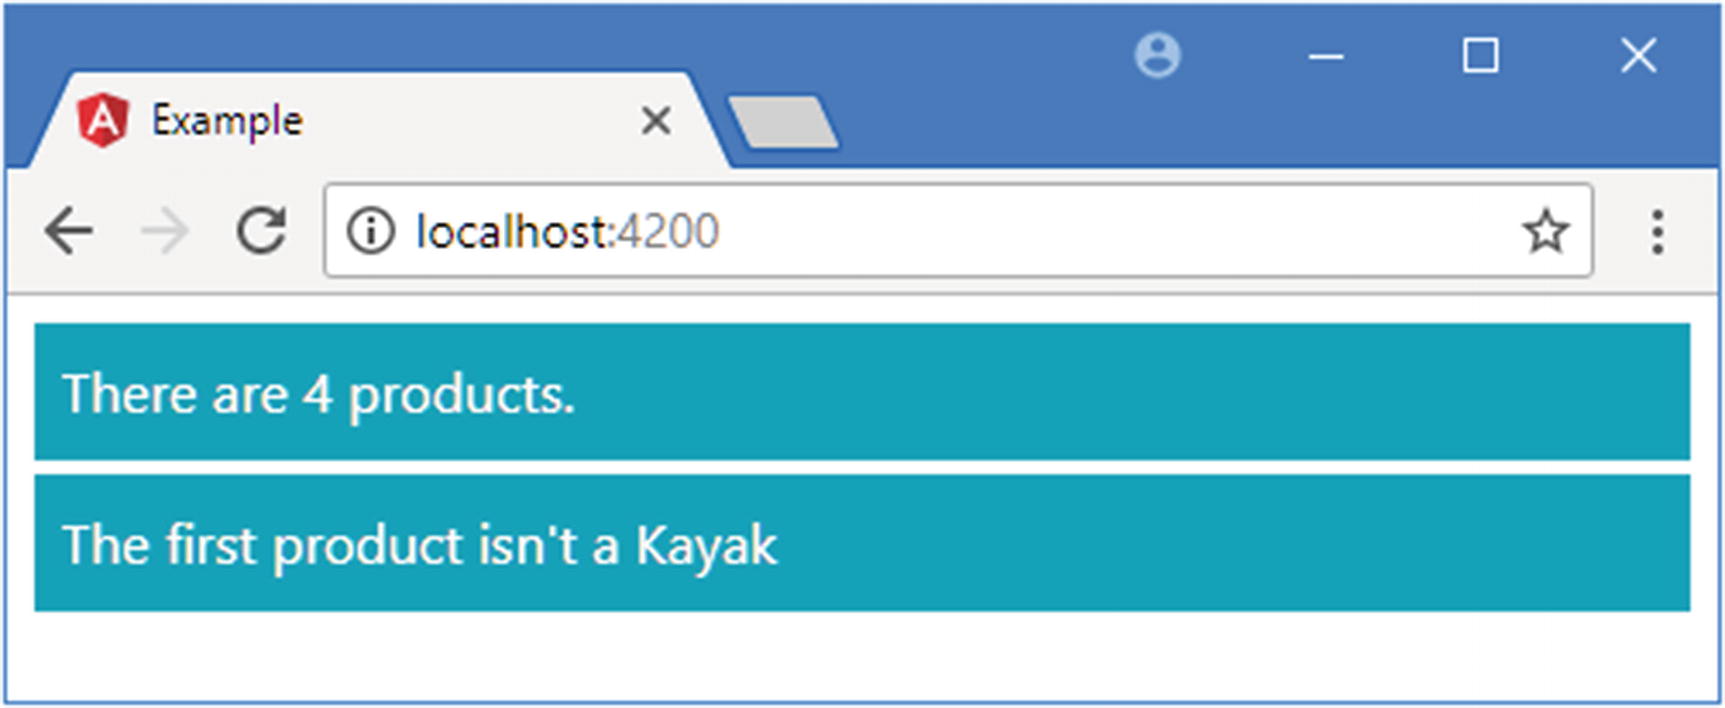
The effect of modifying the model is to remove the first div element because there are too few Product objects now and to add the second div element because the name property of the first Product in the array is no longer Kayak. Figure 13-3 shows the change.
../images/421542_3_En_13_Chapter/421542_3_En_13_Fig3_HTML.jpg
Figure 13-3

The effect of reevaluating directive expressions

Using the ngSwitch Directive

The ngSwitch directive selects one of several elements based on the expression result, similar to a JavaScript switch statement. Listing 13-4 shows the ngSwitch directive being used to choose an element based on the number of objects in the model.
<div class="text-white m-2">
  <div class="bg-info p-2">
    There are {{getProductCount()}} products.
  </div>
  <div class="bg-info p-2 mt-1" [ngSwitch]="getProductCount()">
    <span *ngSwitchCase="2">There are two products</span>
    <span *ngSwitchCase="5">There are five products</span>
    <span *ngSwitchDefault>This is the default</span>
  </div>
</div>
Listing 13-4

Using the ngSwitch Directive in the template.html File in the src/app Folder

The ngSwitch directive syntax can be confusing to use. The element that the ngSwitch directive is applied to is always included in the HTML document, and the directive name isn’t prefixed with an asterisk. It must be specified within square brackets, like this:
...
<div class="bg-info p-2 mt-1" [ngSwitch]="getProductCount()">
...
Each of the inner elements, which are span elements in this example, is a micro-template, and the directives that specify the target expression result are prefixed with an asterisk, like this:
...
<span *ngSwitchCase="5">There are five products</span>
...

The ngSwitchCase directive is used to specify a particular expression result. If the ngSwitch expression evaluates to the specified result, then that element and its contents will be included in the HTML document. If the expression doesn’t evaluate to the specified result, then the element and its contents will be excluded from the HTML document.

The ngSwitchDefault directive is applied to a fallback element—equivalent to the default label in a JavaScript switch statement—which is included in the HTML document if the expression result doesn’t match any of the results specified by the ngSwitchCase directives.
For the initial data in the application, the directives in Listing 13-4 produce the following HTML:
...
<div class="bg-info p-2 mt-1" ng-reflect-ng-switch="5">
    <span>There are five products</span>
</div>
...
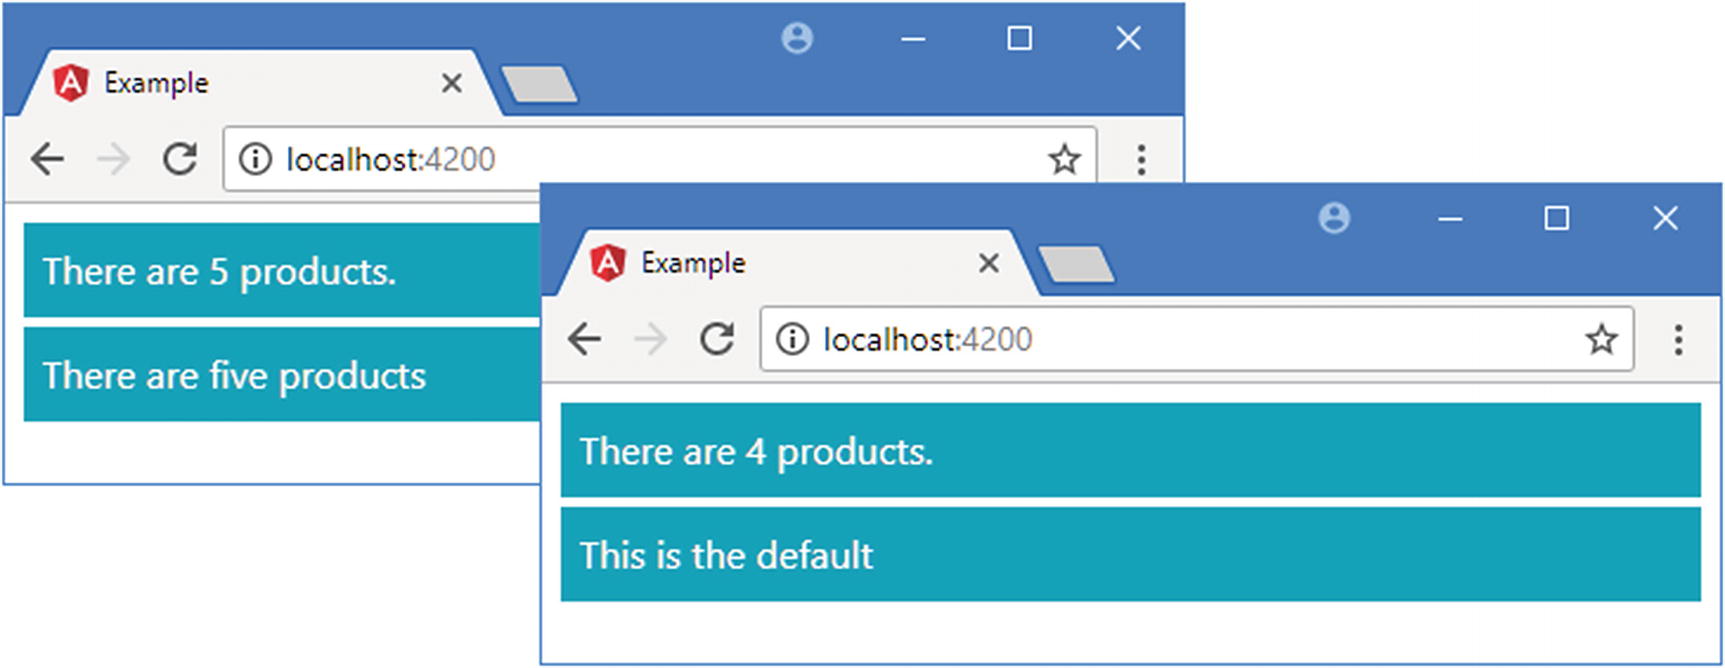
The div element, to which the ngSwitch directive has been applied, is always included in the HTML document. For the initial data in the model, the span element whose ngSwitchCase directive has a result of 5 is also included, producing the result shown on the left of Figure 13-4.
../images/421542_3_En_13_Chapter/421542_3_En_13_Fig4_HTML.jpg
Figure 13-4

Using the ngSwitch directive

The ngSwitch binding responds to changes in the data model, which you can test by executing the following statements in the browser’s JavaScript console:
model.products.shift()
appRef.tick()

These statements remove the first item from the model and force Angular to run the change detection process. Neither of the results for the two ngSwitchCase directives matches the result from the getProductCount expression, so the ngSwitchDefault element is included in the HTML document, as shown on the right of Figure 13-4.

Avoiding Literal Value Problems

A common problem arises when using the ngSwitchCase directive to specify literal string values, and care must be taken to get the right result, as shown in Listing 13-5.
<div class="text-white m-2">
  <div class="bg-info p-2">
    There are {{getProductCount()}} products.
  </div>
  <div class="bg-info p-2 mt-1" [ngSwitch]="getProduct(1).name">
    <span *ngSwitchCase="targetName">Kayak</span>
    <span *ngSwitchCase="'Lifejacket'">Lifejacket</span>
    <span *ngSwitchDefault>Other Product</span>
  </div>
</div>
Listing 13-5

Component and String Literal Values in the template.html File in the src/app Folder

The values assigned to the ngSwitchCase directives are also expressions, which means that you can invoke methods, perform simple inline operations, and read property values, just as you would for the basic data bindings.
As an example, this expression tells Angular to include the span element to which the directive has been applied when the result of evaluating the ngSwitch expression matches the value of the targetName property defined by the component:
...
<span *ngSwitchCase="targetName">Kayak</span>
...
If you want to compare a result to a specific string, then you must double quote it, like this:
...
<span *ngSwitchCase="'Lifejacket'">Lifejacket</span>
...
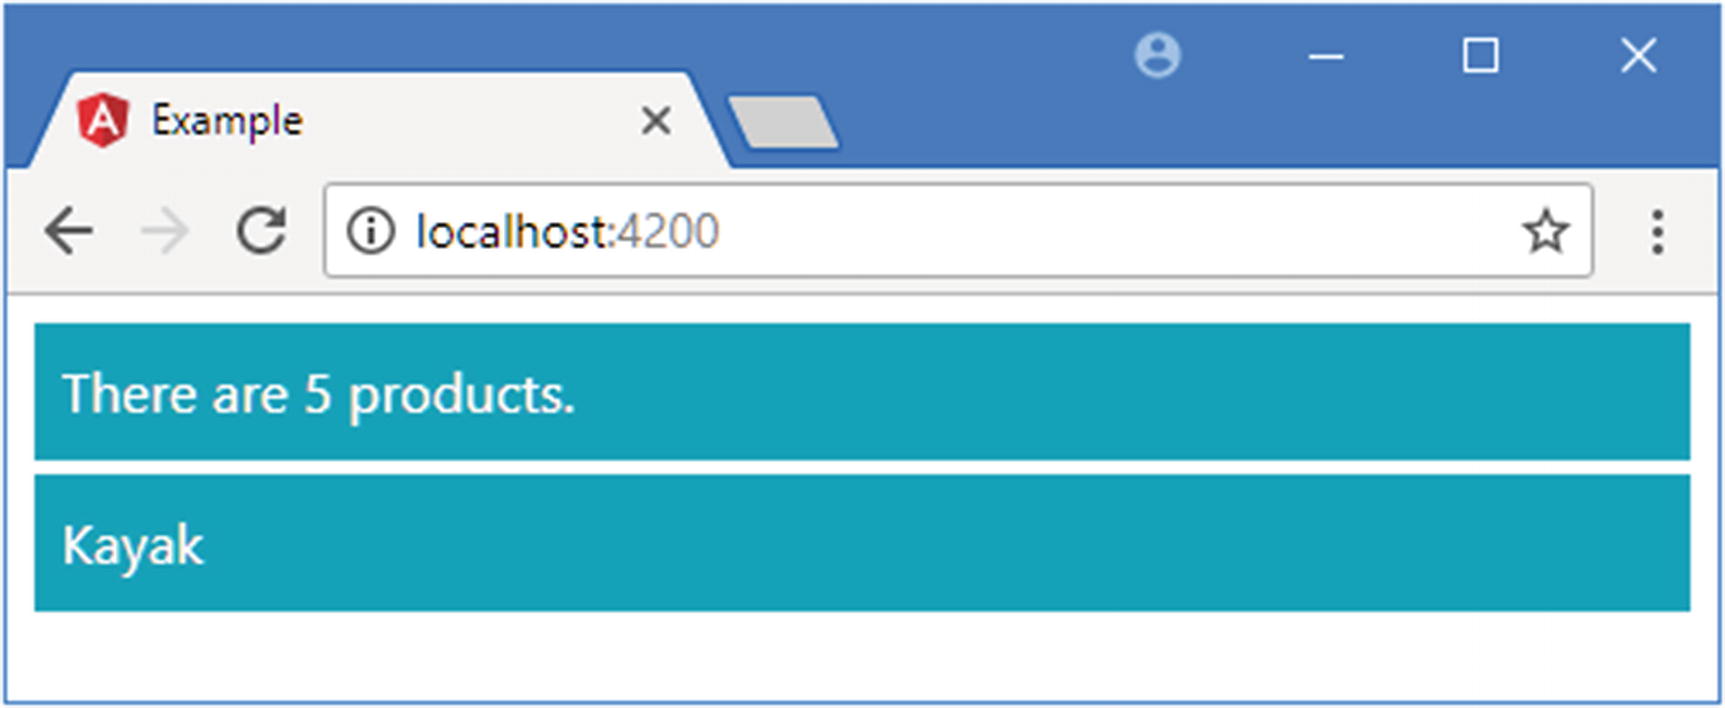
This expression tells Angular to include the span element when the value of the ngSwitch expression is equal to the literal string value Lifejacket, producing the result shown in Figure 13-5.
../images/421542_3_En_13_Chapter/421542_3_En_13_Fig5_HTML.jpg
Figure 13-5

Using expressions and literal values with the ngSwitch directive

Using the ngFor Directive

The ngFor directive repeats a section of content for each object in an array, providing the template equivalent of a foreach loop. In Listing 13-6, I have used the ngFor directive to populate a table by generating a row for each Product object in the model.
<div class="text-white m-2">
  <div class="bg-info p-2">
    There are {{getProductCount()}} products.
  </div>
  <table class="table table-sm table-bordered mt-1 text-dark">
    <tr><th>Name</th><th>Category</th><th>Price</th></tr>
    <tr *ngFor="let item of getProducts()">
      <td>{{item.name}}</td>
      <td>{{item.category}}</td>
      <td>{{item.price}}</td>
    </tr>
  </table>
</div>
Listing 13-6

Using the ngFor Directive in the template.html File in the src/app Folder

The expression used with the ngFor directive is more complex than for the other built-in directives, but it will start to make sense when you see how the different parts fit together. Here is the directive that I used in the example:
...
<tr *ngFor="let item of getProducts()">
...

The asterisk before the name is required because the directive is using a micro-template, as described in the “Understanding Micro-Template Directives” sidebar. This will make more sense as you become familiar with Angular, but at first, you just have to remember that this directive requires an asterisk to use (or, as I often do, forget until you see an error displayed in the browser’s JavaScript console and then remember).

For the expression itself, there are two distinct parts, joined together with the of keyword. The right-hand part of the expression provides the data source that will be enumerated.
...
<tr *ngFor="let item of getProducts()">
...

This example specifies the component’s getProducts method as the source of data, which allows content to be for each of the Product objects in the model. The right-hand side is an expression in its own right, which means you can prepare data or perform simple manipulation operations within the template.

The left-hand side of the ngFor expression defines a template variable, denoted by the let keyword, which is how data is passed between elements within an Angular template.
...
<tr *ngFor="let item of getProducts()">
...
The ngFor directive assigns the variable to each object in the data source so that it is available for use by the nested elements. The local template variable in the example is called item, and it is used to access the Product object’s properties for the td elements, like this:
...
<td>{{item.name}}</td>
...

Put together, the directive in the example tells Angular to enumerate the objects returned by the component’s getProducts method, assign each of them to a variable called item, and then generate a tr element and its td children, evaluating the template expressions they contain.
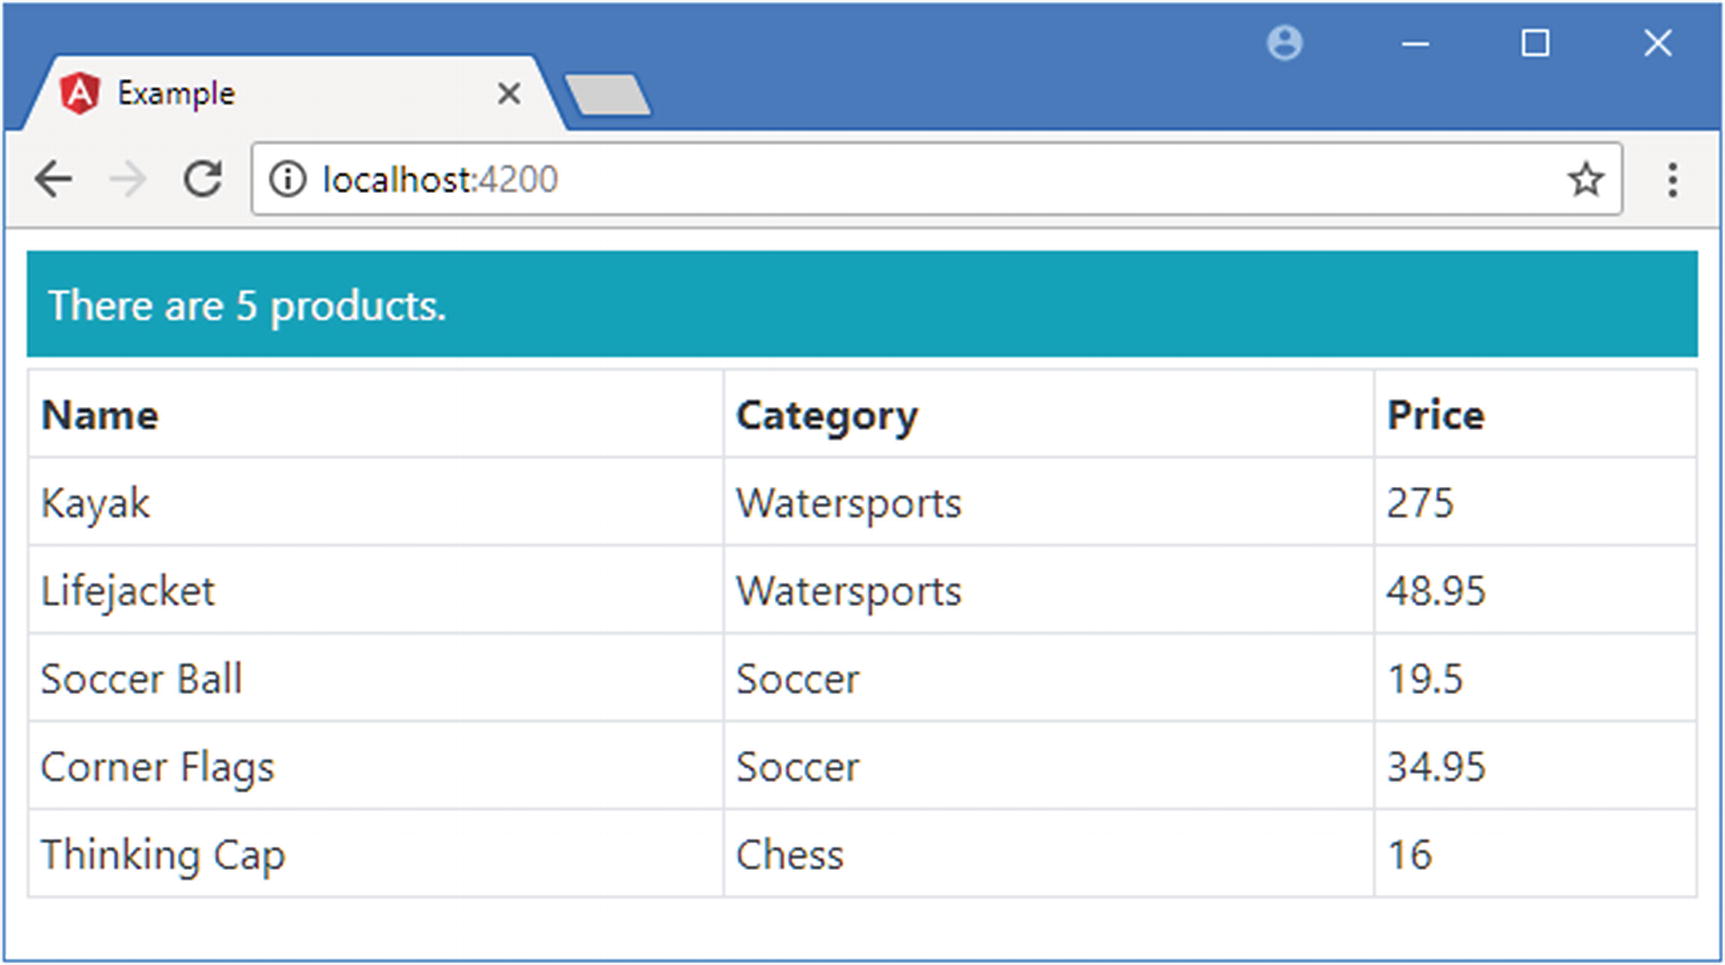
For the example in Listing 13-6, the result is a table where the ngFor directive is used to generate table rows for each of the Product objects in the model and where each table row contains td elements that display the value of the Product object’s name, category, and price properties, as shown in Figure 13-6.
../images/421542_3_En_13_Chapter/421542_3_En_13_Fig6_HTML.jpg
Figure 13-6

Using the ngFor directive to create table rows

Using Other Template Variables

The most important template variable is the one that refers to the data object being processed, which is item in the previous example. But the ngFor directive supports a range of other values that can also be assigned to variables and then referred to within the nested HTML elements, as described in Table 13-4 and demonstrated in the sections that follow.
Table 13-4

The ngFor Local Template Values

Name

Description

index

This number value is assigned to the position of the current object.

odd

This boolean value returns true if the current object has an odd-numbered position in the data source.

even

This boolean value returns true if the current object has an even-numbered position in the data source.

first

This boolean value returns true if the current object is the first one in the data source.

last

This boolean value returns true if the current object is the last one in the data source.

Using the Index Value
The index value is set to the position of the current data object and is incremented for each object in the data source. In Listing 13-7, I have defined a table that is populated using the ngFor directive and that assigns the index value to a local template variable called i, which is then used in a string interpolation binding.
<div class="text-white m-2">
  <div class="bg-info p-2">
    There are {{getProductCount()}} products.
  </div>
  <table class="table table-sm table-bordered mt-1 text-dark">
    <tr><th></th><th>Name</th><th>Category</th><th>Price</th></tr>
    <tr *ngFor="let item of getProducts(); let i = index">
      <td>{{i +1}}</td>
      <td>{{item.name}}</td>
      <td>{{item.category}}</td>
      <td>{{item.price}}</td>
    </tr>
  </table>
</div>
Listing 13-7

Using the Index Value in the template.html File in the src/app Folder
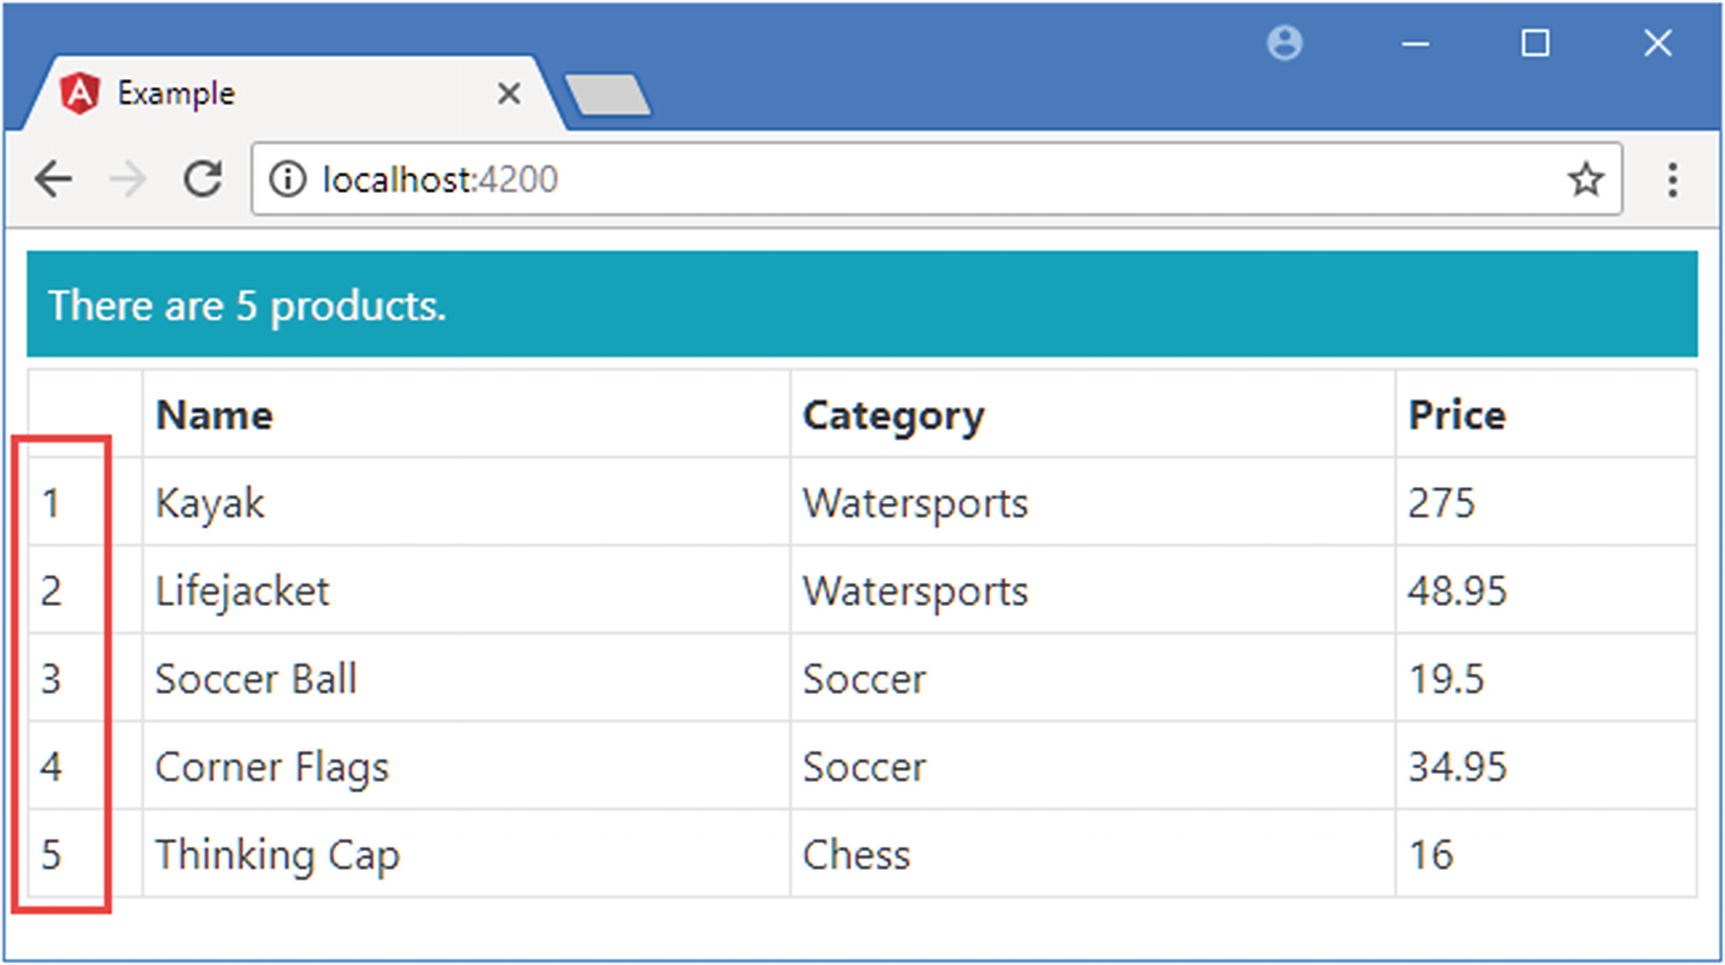
A new term is added to the ngFor expression, separated from the existing one using a semicolon (the ; character). The new expression uses the let keyword to assign the index value to a local template variable called i, like this:
...
<tr *ngFor="let item of getProducts(); let i = index">
...
This allows the value to be accessed within the nested elements using a binding, like this:
...
<td>{{i + 1}}</td>
...
The index value is zero-based, and adding 1 to the value creates a simple counter, producing the result shown in Figure 13-7.
../images/421542_3_En_13_Chapter/421542_3_En_13_Fig7_HTML.jpg
Figure 13-7

Using the index value

Using the Odd and Even Values
The odd value is true when the index value for a data item is odd. Conversely, the even value is true when the index value for a data item is even. In general, you only need to use either the odd or even value since they are boolean values where odd is true when even is false, and vice versa. In Listing 13-8, the odd value is used to manage the class membership of the tr elements in the table.
<div class="text-white m-2">
  <div class="bg-info p-2">
    There are {{getProductCount()}} products.
  </div>
  <table class="table table-sm table-bordered mt-1">
    <tr><th></th><th>Name</th><th>Category</th><th>Price</th></tr>
    <tr *ngFor="let item of getProducts(); let i = index; let odd = odd"
        [class.bg-primary]="odd" [class.bg-info]="!odd">
      <td>{{i + 1}}</td>
      <td>{{item.name}}</td>
      <td>{{item.category}}</td>
      <td>{{item.price}}</td>
    </tr>
  </table>
</div>
Listing 13-8

Using the odd Value in the template.html File in the src/app Folder

I have used a semicolon and added another term to the ngFor expression that assigns the odd value to a local template variable that is also called odd.
...
<tr *ngFor="let item of getProducts(); let i = index; let odd = odd"
    [class.bg-primary]="odd" [class.bg-info]="!odd">
...
This may seem redundant, but you cannot access the ngFor values directly and must use a local variable even if it has the same name. I used the class binding to assign alternate rows to the bg-primary and bg-info classes, which are Bootstrap background color classes that stripe the table rows, as shown in Figure 13-8.
../images/421542_3_En_13_Chapter/421542_3_En_13_Fig8_HTML.jpg
Figure 13-8

Using the odd value

Expanding the *Ngfor Directive

Notice that in Listing 13-8, I am able to use the template variable in expressions applied to the same tr element that defines it. This is possible because ngFor is a micro-template directive—denoted by the * that precedes the name—and so Angular expands the HTML so that it looks like this:
...
<table class="table table-sm table-bordered mt-1">
    <tr><th></th><th>Name</th><th>Category</th><th>Price</th></tr>
    <ng-template ngFor let-item [ngForOf]="getProducts()"
            let-i="index" let-odd="odd">
        <tr [class.bg-primary]="odd" [class.bg-info]="!odd">
            <td>{{i + 1}}</td>
            <td>{{item.name}}</td>
            <td>{{item.category}}</td>
            <td>{{item.price}}</td>
        </tr>
    </ng-template>
</table>
...

You can see that the ng-template element defines the variables, using the somewhat awkward let-<name> attributes, which are then accessed by the tr and td elements within it. As with so much in Angular, what appears to happen by magic turns out to be straightforward once you understand what is going on behind the scenes, and I explain these features in detail in Chapter 16. A good reason to use the *ngFor syntax is that it provides a more elegant way to express the directive expression, especially when there are multiple template variables.

Using the First and Last Values
The first value is true only for the first object in the sequence provided by the data source and is false for all other objects. Conversely, the last value is true only for the last object in the sequence. Listing 13-9 uses these values to treat the first and last objects differently from the others in the sequence.
<div class="text-white m-2">
  <div class="bg-info p-2">
    There are {{getProductCount()}} products.
  </div>
  <table class="table table-sm table-bordered mt-1">
    <tr class="text-dark">
      <th></th><th>Name</th><th>Category</th><th>Price</th>
    </tr>
    <tr *ngFor="let item of getProducts(); let i = index; let odd = odd;
            let first = first; let last = last"
        [class.bg-primary]="odd" [class.bg-info]="!odd"
        [class.bg-warning]="first || last">
      <td>{{i + 1}}</td>
      <td>{{item.name}}</td>
      <td>{{item.category}}</td>
      <td *ngIf="!last">{{item.price}}</td>
    </tr>
  </table>
</div>
Listing 13-9

Using the first and last Values in the template.html File in the src/app Folder

The new terms in the ngFor expression assign the first and last values to template variables called first and last. These variables are then used by a class binding on the tr element, which assigns the element to the bg-warning class when either is true, and used by the ngIf directive on one of the td elements, which will exclude the element for the last item in the data source, producing the effect shown in Figure 13-9.
../images/421542_3_En_13_Chapter/421542_3_En_13_Fig9_HTML.jpg
Figure 13-9

Using the first and last values

Minimizing Element Operations

When there is a change to the data model, the ngFor directive evaluates its expression and updates the elements that represent its data objects. The update process can be expensive, especially if the data source is replaced with one that contains different objects representing the same data. Replacing the data source may seem like an odd thing to do, but it happens often in web applications, especially when the data is retrieved from a web service, like the ones I describe in Chapter 24. The same data values are represented by new objects, which present an efficiency problem for Angular. To demonstrate the problem, I added a method to the component that replaces one of the Product objects in the data model, as shown in Listing 13-10.
import { Product } from "./product.model";
import { SimpleDataSource } from "./datasource.model";
export class Model {
    private dataSource: SimpleDataSource;
    private products: Product[];
    private locator = (p:Product, id:number) => p.id == id;
    constructor() {
        this.dataSource = new SimpleDataSource();
        this.products = new Array<Product>();
        this.dataSource.getData().forEach(p => this.products.push(p));
    }
    // ...other methods omitted for brevity...
    swapProduct() {
        let p = this.products.shift();
        this.products.push(new Product(p.id, p.name, p.category, p.price));
    }
}
Listing 13-10

Replacing an Object in the repository.model.ts File in the src/app Folder

The swapProduct method removes the first object from the array and adds a new object that has the same values for the id, name, category, and price properties. This is an example of data values being represented by a new object.

Run the following statements using the browser’s JavaScript console to modify the data model and run the change-detection process:
model.swapProduct()
appRef.tick()

When the ngFor directive examines its data source, it sees it has two operations to perform to reflect the change to the data. The first operation is to destroy the HTML elements that represent the first object in the array. The second operation is to create a new set of HTML elements to represent the new object at the end of the array.

Angular has no way of knowing that the data objects it is dealing with have the same values and that it could perform its work more efficiently by simply moving the existing elements within the HTML document.

This problem affects only two elements in this example, but the problem is much more severe when the data in the application is refreshed from an external data source using Ajax, where all the data model objects can be replaced each time a response is received. Since it is not aware that there have been few real changes, the ngFor directive has to destroy all of its HTML elements and re-create them, which can be an expensive and time-consuming operation.

To improve the efficiency of an update, you can define a component method that will help Angular determine when two different objects represent the same data, as shown in Listing 13-11.
import { ApplicationRef, Component } from "@angular/core";
import { Model } from "./repository.model";
import { Product } from "./product.model";
@Component({
    selector: "app",
    templateUrl: "template.html"
})
export class ProductComponent {
    model: Model = new Model();
    // ...constructor and methods omitted for brevity...
    getKey(index: number, product: Product) {
        return product.id;
    }
}
Listing 13-11

Adding the Object Comparison Method in the component.ts File in the src/app Folder

The method has to define two parameters: the position of the object in the data source and the data object. The result of the method uniquely identifies an object, and two objects are considered to be equal if they produce the same result.

Two Product objects will be considered equal if they have the same id value. Telling the ngFor expression to use the comparison method is done by adding a trackBy term to the expression, as shown in Listing 13-12.
<div class="text-white m-2">
  <div class="bg-info p-2">
    There are {{getProductCount()}} products.
  </div>
  <table class="table table-sm table-bordered mt-1">
    <tr class="text-dark">
      <th></th><th>Name</th><th>Category</th><th>Price</th>
    </tr>
    <tr *ngFor="let item of getProducts(); let i = index; let odd = odd;
            let first = first; let last = last; trackBy:getKey"
        [class.bg-primary]="odd" [class.bg-info]="!odd"
        [class.bg-warning]="first || last">
      <td>{{i + 1}}</td>
      <td>{{item.name}}</td>
      <td>{{item.category}}</td>
      <td *ngIf="!last">{{item.price}}</td>
    </tr>
  </table>
</div>
Listing 13-12

Providing an Equality Method in the template.html File in the src/app Folder
With this change, the ngFor directive will know that the Product that is removed from the array using the swapProduct method defined in Listing 13-12 is equivalent to the one that is added to the array, even though they are different objects. Rather than delete and create elements, the existing elements can be moved, which is a much simpler and quicker task to perform.

Changes can still be made to the elements—such as by the ngIf directive, which will remove one of the td elements because the new object will be the last item in the data source, but even this is faster than treating the objects separately.

Testing the Equality Method

Checking whether the equality method has an effect is a little tricky. The best way that I have found requires using the browser’s F12 developer tools, in this case using the Chrome browser.

Once the application has loaded, right-click the td element that contains the word Kayak in the browser window and select Inspect from the pop-up menu. This will open the Developer Tools window and show the Elements panel.

Click the ellipsis button (marked ...) in the left margin and select Add Attribute from the menu. Add an id attribute with the value old. This will result in an element that looks like this:
<td id="old">Kayak</td>
Adding an id attribute makes it possible to access the object that represents the HTML element using the JavaScript console. Switch to the Console panel and enter the following statement:
window.old
When you hit Return, the browser will locate the element by its id attribute value and display the following result:
<td id="old">Kayak</td>
Now execute the following statements in the JavaScript console, hitting Return after each one:
model.swapProduct()
appRef.tick()
Once the change to the data model has been processed, executing the following statement in the JavaScript console will determine whether the td element to which the id attribute was added has been moved or destroyed:
window.old
If the element has been moved, then you will see the element shown in the console, like this:
<td id="old">Kayak</td>

If the element has been destroyed, then there won’t be an element whose id attribute is old, and the browser will display the word undefined.

Using the ngTemplateOutlet Directive

The ngTemplateOutlet directive is used to repeat a block of content at a specified location, which can be useful when you need to generate the same content in different places and want to avoid duplication. Listing 13-13 shows the directive in use.
<ng-template #titleTemplate>
  <h4 class="p-2 bg-success text-white">Repeated Content</h4>
</ng-template>
<ng-template [ngTemplateOutlet]="titleTemplate"></ng-template>
<div class="bg-info p-2 m-2 text-white">
  There are {{getProductCount()}} products.
</div>
<ng-template [ngTemplateOutlet]="titleTemplate"></ng-template>
Listing 13-13

Using the ngTemplateOutlet Directive in the template.html File in the src/app Folder
The first step is to define the template that contains the content that you want to repeat using the directive. This is done using the ng-template element and assigning it a name using a reference variable, like this:
...
<ng-template #titleTemplate let-title="title">
  <h4 class="p-2 bg-success text-white">Repeated Content</h4>
</ng-template>
...
When Angular encounters a reference variable, it sets its value to the element to which it has been defined, which is the ng-template element in this case. The second step is to insert the content into the HTML document, using the ngTemplateOutlet directive, like this:
...
<ng-template [ngTemplateOutlet]="titleTemplate"></ng-template>
...
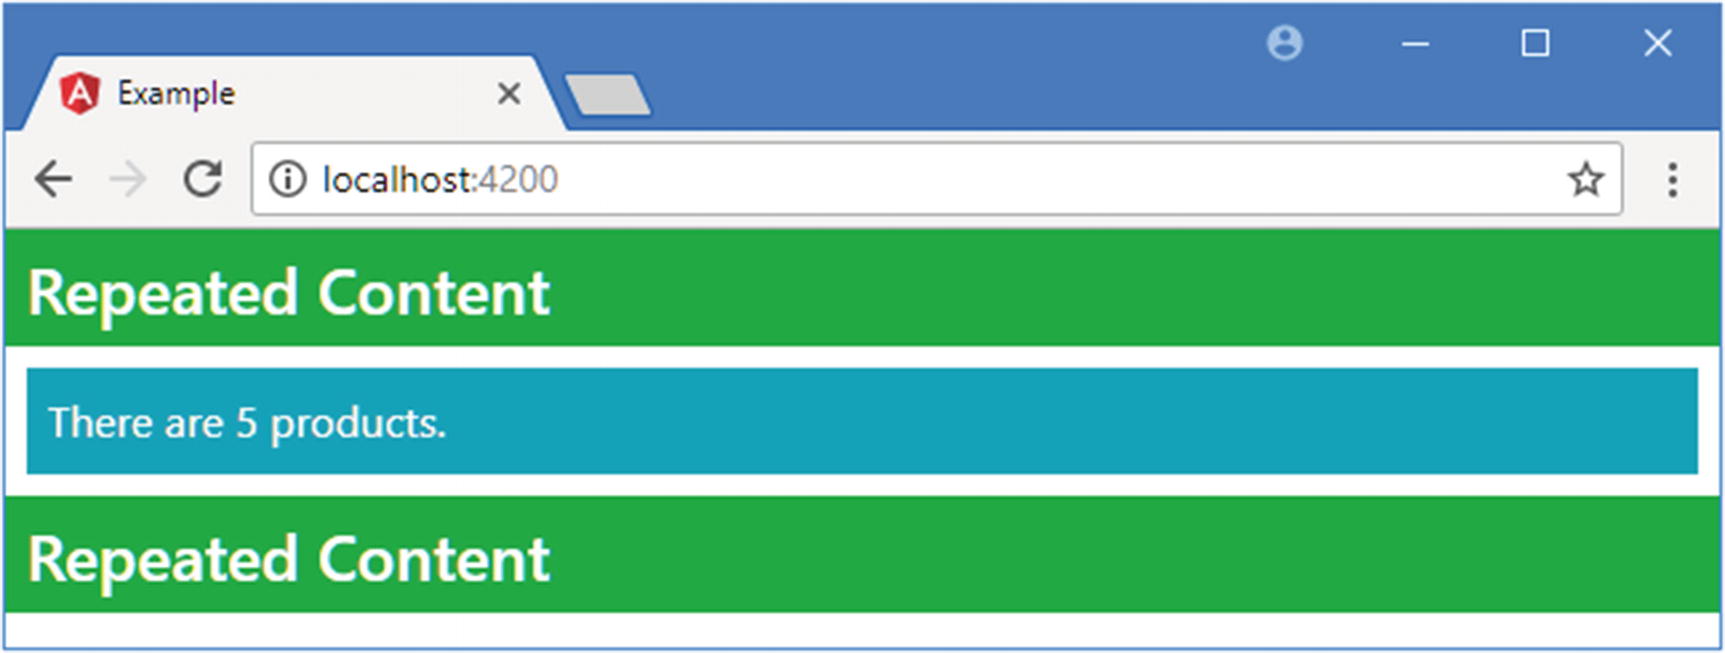
The expression is the name of the reference variable that was assigned to the content that should be inserted. The directive replaces the host element with the contents of the specified ng-template element. Neither the ng-template element that contains the repeated content nor the one that is the host element for the binding is included in the HTML document. Figure 13-10 shows how the directive has used the repeated content.
../images/421542_3_En_13_Chapter/421542_3_En_13_Fig10_HTML.jpg
Figure 13-10

Using the ngTemplateOutlet directive

Providing Context Data

The ngTemplateOutlet directive can be used to provide the repeated content with a context object that can be used in data bindings defined within the ng-template element, as shown in Listing 13-14.
<ng-template #titleTemplate let-text="title">
  <h4 class="p-2 bg-success text-white">{{text}}</h4>
</ng-template>
<ng-template [ngTemplateOutlet]="titleTemplate"
             [ngTemplateOutletContext]="{title: 'Header'}">
</ng-template>
<div class="bg-info p-2 m-2 text-white">
  There are {{getProductCount()}} products.
</div>
<ng-template [ngTemplateOutlet]="titleTemplate"
             [ngTemplateOutletContext]="{title: 'Footer'}">
</ng-template>
Listing 13-14

Providing Context Data in the template.html File in the src/app Folder

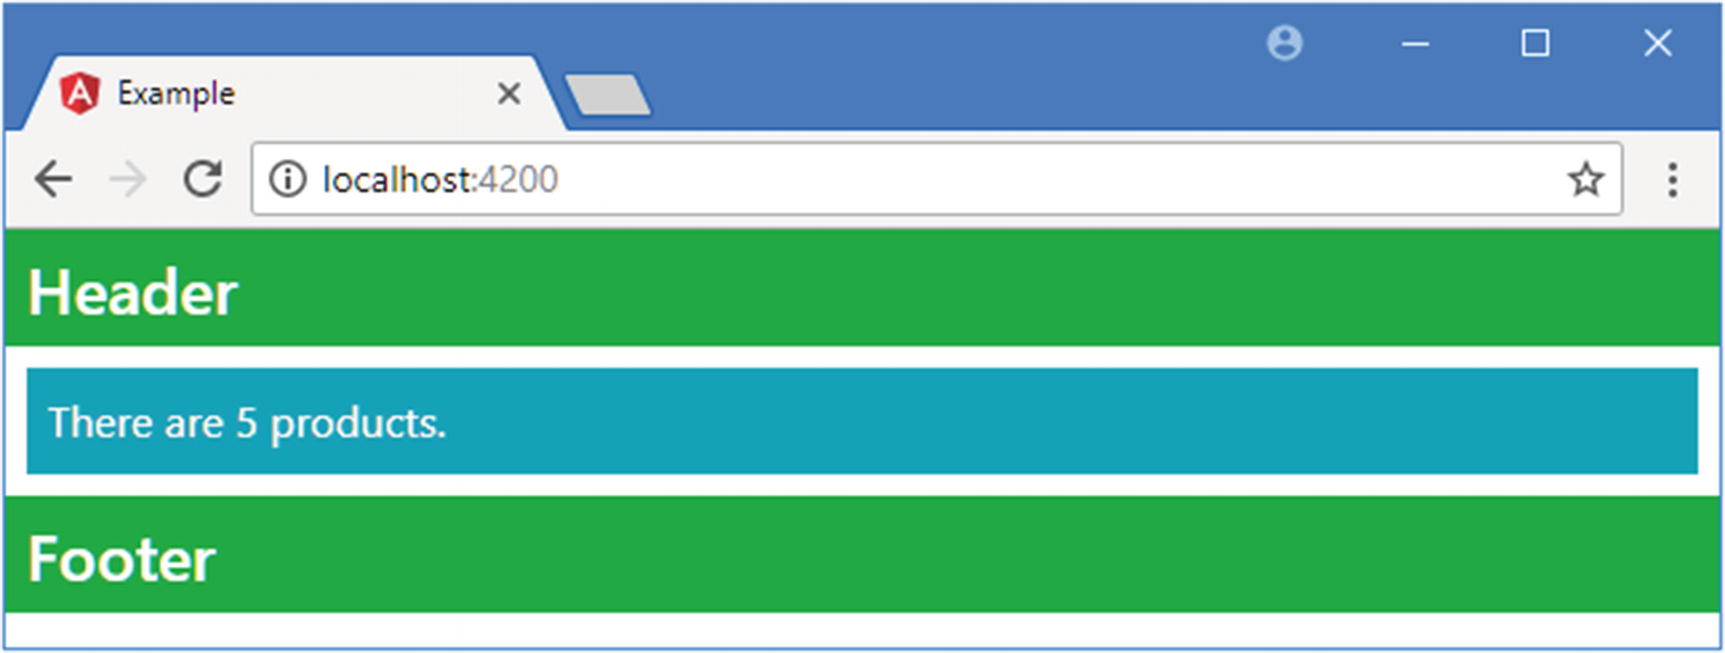
To receive the context data, the ng-template element that contains the repeated content defines a let- attribute that specifies the name of a variable, similar to the expanded syntax used for the ngFor directive. The value of the expression assigns the let- variable a value, like this:
...
<ng-template #titleTemplate let-text="title">
...
The let- attribute in this example creates a variable called text, which is assigned a value by evaluating the expression title. To provide the data against which the expression is evaluated, the ng-template element to which the ngTemplateOutletContext directive has been applied provides a map object, like this:
...
<ng-template [ngTemplateOutlet]="titleTemplate"
          [ngTemplateOutletContext]="{title: 'Footer'}">
</ng-template>
...
The target of this new binding is ngTemplateOutletContext, which looks like another directive but is actually an example of an input property, which some directives use to receive data values and that I describe in detail in Chapter 15. The expression for the binding is a map object whose property name corresponds to the let- attribute on the other ng-template element. The result is that the repeated content can be tailored using bindings, as shown in Figure 13-11.
../images/421542_3_En_13_Chapter/421542_3_En_13_Fig11_HTML.jpg
Figure 13-11

Providing context data for repeated content

Understanding One-Way Data Binding Restrictions

Although the expressions used in one-way data binding and directives look like JavaScript code, you can’t use all the JavaScript—or TypeScript—language features. I explain the restrictions and the reasons for them in the sections that follow.

Using Idempotent Expressions

One-way data bindings must be idempotent, meaning that they can be evaluated repeatedly without changing the state of the application. To demonstrate why, I added a debugging statement to the component’s getProductCount method, as shown in Listing 13-15.

Note

Angular does support modifying the application state, but it must be done using the techniques I describe in Chapter 14.

...
getProductCount(): number {
    console.log("getProductCount invoked");
    return this.getProducts().length;
}
...
Listing 13-15

Adding a Statement in the component.ts File in the src/app Folder

When the changes are saved and the browser reloads the page, you will see a long series of messages like these in the browser’s JavaScript console:
...
getProductCount invoked
...
As the messages show, Angular evaluates the binding expression several times before displaying the content in the browser. If an expression modifies the state of an application, such as removing an object from a queue, you won’t get the results you expect by the time the template is displayed to the user. To avoid this problem, Angular restricts the way that expressions can be used. In Listing 13-16, I added a counter property to the component to help demonstrate.
import { ApplicationRef, Component } from "@angular/core";
import { Model } from "./repository.model";
import { Product } from "./product.model";
@Component({
    selector: "app",
    templateUrl: "template.html"
})
export class ProductComponent {
    model: Model = new Model();
    // ...constructor and methods omitted for brevity...
    targetName: string = "Kayak";
    counter: number = 1;
}
Listing 13-16

Adding a Property in the component.ts File in the src/app Folder

In Listing 13-17, I added a binding whose expression increments the counter when it is evaluated.
<ng-template #titleTemplate let-text="title">
  <h4 class="p-2 bg-success text-white">{{text}}</h4>
</ng-template>
<ng-template [ngTemplateOutlet]="titleTemplate"
             [ngTemplateOutletContext]="{title: 'Header'}">
</ng-template>
<div class="bg-info p-2 m-2 text-white">
  There are {{getProductCount()}} products.
</div>
<ng-template [ngTemplateOutlet]="titleTemplate"
             [ngTemplateOutletContext]="{title: 'Footer'}">
</ng-template>
<div class="bg-info p-2">
  Counter: {{counter = counter + 1}}
</div>
Listing 13-17

Adding a Binding in the template.html File in the src/app Folder

When the browser loads the page, you will see an error in the JavaScript console, like this:
...
EXCEPTION: Template parse errors:
Parser Error: Bindings cannot contain assignments at column 11 in [
        Counter: {{counter = counter + 1}}
in ng:///AppModule/ProductComponent.html@16:25 ("]
...
Angular will report an error if a data binding expression contains an operator that can be used to perform an assignment, such as =, +=, -+, ++, and --. In addition, when Angular is running in development mode, it performs an additional check to make sure that one-way data bindings have not been modified after their expressions are evaluated. To demonstrate, Listing 13-18 adds a property to the component that removes and returns a Product object from the model array.
import { ApplicationRef, Component } from "@angular/core";
import { Model } from "./repository.model";
import { Product } from "./product.model";
@Component({
    selector: "app",
    templateUrl: "template.html"
})
export class ProductComponent {
    model: Model = new Model();
    // ...constructor and methods omitted for brevity...
    counter: number = 1;
    get nextProduct(): Product {
        return this.model.getProducts().shift();
    }
}
Listing 13-18

Modifying Data in the component.ts File in the src/app Folder

In Listing 13-19, you can see the data binding that I used to read the nextProduct property.
<ng-template #titleTemplate let-text="title">
  <h4 class="p-2 bg-success text-white">{{text}}</h4>
</ng-template>
<ng-template [ngTemplateOutlet]="titleTemplate"
             [ngTemplateOutletContext]="{title: 'Header'}">
</ng-template>
<div class="bg-info p-2 m-2 text-white">
  There are {{getProductCount()}} products.
</div>
<ng-template [ngTemplateOutlet]="titleTemplate"
             [ngTemplateOutletContext]="{title: 'Footer'}">
</ng-template>
<div class="bg-info p-2 text-white">
  Next Product is {{nextProduct.name}}
</div>
Listing 13-19

Binding to a Property in the template.html File in the src/app Folder

When you save the changes and Angular processes the template, you will see that the attempt to change the application data in the data binding produces the following error in the JavaScript console:
...
Error: ExpressionChangedAfterItHasBeenCheckedError: Expression has changed after it was checked. Previous value: 'null: 4'. Current value: 'null: 3'.
...

Understanding the Expression Context

When Angular evaluates an expression, it does so in the context of the template’s component, which is how the template is able to access methods and properties without any kind of prefix, like this:
...
<div class="bg-info p-2">
    There are {{getProductCount()}} products.
</div>
...

When Angular processes these expressions, the component provides the getProductCount method, which Angular invokes with the specified arguments and then incorporates the result into the HTML document. The component is said to provide the template’s expression context.

The expression context means you can’t access objects defined outside of the template’s component and, in particular, templates can’t access the global namespace. The global namespace is used to define common utilities, such as the console object, which defines the log method I have been using to write out debugging information to the browser’s JavaScript console. The global namespace also includes the Math object, which provides access to some useful arithmetical methods, such as min and max.

To demonstrate this restriction, Listing 13-20 adds a string interpolation binding to the template that relies on the Math.floor method to round down a number value to the nearest integer.
<ng-template #titleTemplate let-text="title">
  <h4 class="p-2 bg-success text-white">{{text}}</h4>
</ng-template>
<ng-template [ngTemplateOutlet]="titleTemplate"
             [ngTemplateOutletContext]="{title: 'Header'}">
</ng-template>
<div class="bg-info p-2 m-2 text-white">
  There are {{getProductCount()}} products.
</div>
<ng-template [ngTemplateOutlet]="titleTemplate"
             [ngTemplateOutletContext]="{title: 'Footer'}">
</ng-template>
<div class='bg-info p-2'>
  The rounded price is {{Math.floor(getProduct(1).price)}}
</div>
Listing 13-20

Accessing the Global Namespace in the template.html File in the src/app Folder

When Angular processes the template, it will produce the following error in the browser’s JavaScript console:
EXCEPTION: TypeError: Cannot read property 'floor' of undefined

The error message doesn’t specifically mention the global namespace. Instead, Angular has tried to evaluate the expression using the component as the context and failed to find a Math property.

If you want to access functionality in the global namespace, then it must be provided by the component, acting as on behalf of the template. In the case of the example, the component could just define a Math property that is assigned to the global object, but template expressions should be as clear and simple as possible, so a better approach is to define a method that provides the template with the specific functionality it requires, as shown in Listing 13-21.
import { ApplicationRef, Component } from "@angular/core";
import { Model } from "./repository.model";
import { Product } from "./product.model";
@Component({
    selector: "app",
    templateUrl: "template.html"
})
export class ProductComponent {
    model: Model = new Model();
    // ...constructor and methods omitted for brevity...
    counter: number = 1;
    get nextProduct(): Product {
        return this.model.getProducts().shift();
    }
    getProductPrice(index: number): number {
        return Math.floor(this.getProduct(index).price);
    }
}
Listing 13-21

Defining a Method in the component.ts File in the src/app Folder

In Listing 13-22, I have changed the data binding in the template to use the newly defined method.
<ng-template #titleTemplate let-text="title">
  <h4 class="p-2 bg-success text-white">{{text}}</h4>
</ng-template>
<ng-template [ngTemplateOutlet]="titleTemplate"
             [ngTemplateOutletContext]="{title: 'Header'}">
</ng-template>
<div class="bg-info p-2 m-2 text-white">
  There are {{getProductCount()}} products.
</div>
<ng-template [ngTemplateOutlet]="titleTemplate"
             [ngTemplateOutletContext]="{title: 'Footer'}">
</ng-template>
<div class="bg-info p-2 text-white">
  The rounded price is {{getProductPrice(1)}}
</div>
Listing 13-22

Access Global Namespace Functionality in the template.html File in the src/app Folder

When Angular processes the template, it will call the getProductPrice method and indirectly take advantage of the Math object in the global namespace, producing the result shown in Figure 13-12.
../images/421542_3_En_13_Chapter/421542_3_En_13_Fig12_HTML.jpg
Figure 13-12

Accessing global namespace functionality

Summary

In this chapter, I explained how to use the built-in template directives. I showed you how to select content with the ngIf and ngSwitch directives and how to repeat content using the ngFor directive. I explained why some directive names are prefixed with an asterisk and described the limitations that are placed on template expressions used with these directives and with one-way data bindings in general. In the next chapter, I describe how data bindings are used for events and form elements.

..................Content has been hidden....................

You can't read the all page of ebook, please click here login for view all page.
Reset
18.221.41.214