
Chapter 5
Working with Data Objects
The ability to easily interact with data in a database ranks high among the features that drive the success of most new programming languages and frameworks. This chapter talks about working with the data objects you create and store in your Core Data models. You’ll find Core Data provides an abstraction from the complexities of Structured Query Language (SQL) and database programming that allows you to quickly and efficiently read and write data to your persistent stores.
Understanding CRUD
Whether you claim the R stands for Read or Retrieve and whether you side with Destroy over Delete for the D, the acronym CRUD describes the four operations you perform on a persistent data store:
- Create
- Retrieve (Read)
- Update
- Delete (Destroy)
These four operations apply to all persistent store interaction, whether you’re working with Core Data in an iOS application, an Oracle database in a Java Enterprise Web application, a Virtual Storage Access Method (VSAM) file in a COBOL program, or any other situation in which you have a program that works with data. In fact, the CRUD concept has been extended to describe other situations in which you create, retrieve, update, and delete data. For example, the latest approach to providing services over the Web, Representational State Transfer (REST), has been called CRUD for the Web; the HTTP verbs map to the CRUD operations like this:
In this chapter, you’ll build one application twice: once working directly with NSManagedObject instances and the second time with custom classes that extend NSManagedObject. This section builds the raw NSManagedObject version. With a nod to Scott Hanselman’s Baby Smash! (www.hanselman.com/babysmash/), this application, called Shapes, has the following requirements and characteristics:
- Each time someone taps the screen, a random shape appears where the screen was tapped.
- The shape is randomly a circle or a polygon.
- If a polygon, the shape has a random number of sides and can be concave, convex, or mixed.
- If a circle, the shape has a random radius.
- Shapes appear in random colors.
- Shaking the device deletes all the shapes.
- Rotating the device updates all the shapes to random colors.
- The screen splits down the middle, and each shape appears twice, once on each screen half.
- One of the screen halves is zoomed at 2x magnification (meaning some shapes won’t appear, because they’ll fall outside the screen’s boundaries).
- Shapes is built for the iPad to take advantage of the extra screen space.
From a Core Data perspective, Shapes illustrates the following:
- Create: Each time you tap the screen, Shapes creates a shape object in the persistent store.
- Retrieve: Each time the screen draws the shapes, Shapes retrieves the shapes from the persistent store.
- Update: Each time you rotate the device, Shapes updates all the shapes in the persistent store with different random colors.
- Delete: Each time you shake the device, Shapes deletes all the shapes from the persistent store.
- Inheritance: The
PolygonandCircleentities inherit from a common parent,Shape. - One-to-many: One
Polygoninstance relates to manyVertexinstances. - Many-to-many: Many
Shapeinstances relate to manyCanvasinstances. - One-to-one: One
Canvasinstance relates to oneTransforminstance, which controls scaling.
The finished application will look like Figure 5–1.

Figure 5–1. The finished Shapes application
Shapes probably can’t compete with the fun of BabySmash!, but we don’t want to encourage smashing iPads anyway. Shapes illustrates a wide range of Core Data fundamentals. You’ll notice, however, that Shapes doesn’t filter or sort results, which Chapter 6 covers.
In Xcode, create a new project and select a Single View Application under iOS. Call it Shapes, enter book.coredata for the Company Identifier, and set Device Family to iPad (as Figure 5–2 shows). Save the project to open it in Xcode.
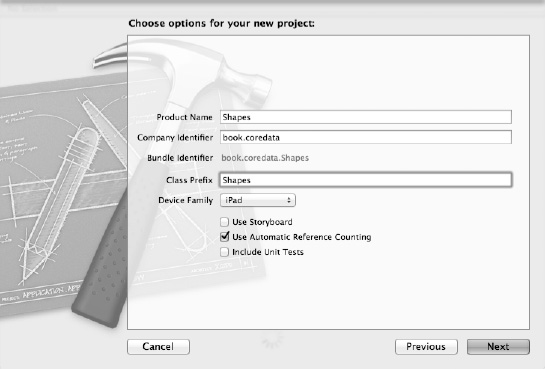
Figure 5–2. New iPad project called Shapes
Notice that you had no opportunity in the Single View Application template to add Core Data to your application, so add Core Data now. You learned how to do that in Chapter 1, but to recap, select the Shapes project on the left, go to the Build Phases tab, and expand the Link Binary with Libraries section, as Figure 5–3 shows. Click the + button under that section, select CoreData.framework, and click Add. CoreData.framework appears in your project’s file tree on the left side of Xcode. Drag it to the Frameworks folder.
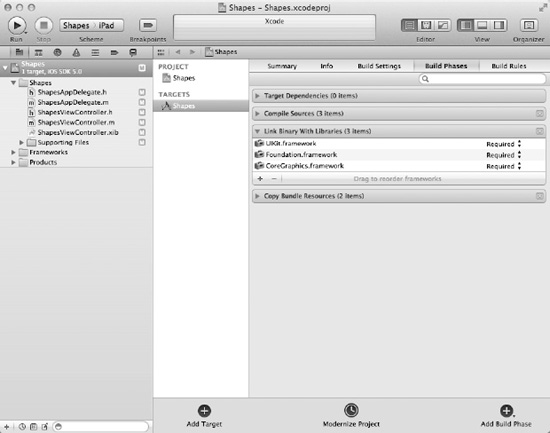
Figure 5–3. Preparing to add Core Data to the Shapes application
Creating the Shape Application Data Model
Before writing the code for the application, create your data model. Select File ![]() New
New ![]() New File, select Core Data under iOS on the left and Data Model on the right, and click Next. Call the model file
New File, select Core Data under iOS on the left and Data Model on the right, and click Next. Call the model file Shapes.xcdatamodel and save it to the Shapes folder in the Shapes group, as shown in Figure 5–4.
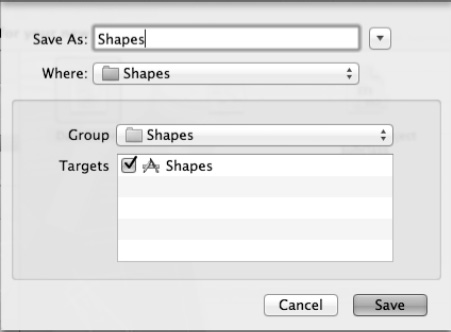
Figure 5–4. Creating your Shapes data model
Select Shapes.xcdatamodeld to edit your data model, and follow these steps to finalize the model:
- Add an entity called
Shape, and give it a nonoptional attribute calledcolorof type String. - Add an entity called
Circle, and give it three nonoptional attributes, all of type Float:radius,x, andy. Set its Parent Entity toShape. - Add an entity called
Polygonwith no attributes, and set its Parent Entity toShape. - Add an entity called
Vertexwith a nonoptional attribute calledindexof type Integer 16. Give it two nonoptionalFloatattributes calledxandy. Add a relationship called polygon, and set Destination to Polygon. Make it optional, and leave the Delete Rule as Nullify. - Add a relationship to the
Polygonentity called vertices, and set its Destination to Vertex and Inverse to polygon. Uncheck the Optional check box, check the To-Many Relationship check box, set Min Count to 3, and set Delete Rule to Cascade. - Add an entity called
Transform, and give a nonoptional attribute calledscaleof type Float. - Add an entity called
Canvas, and give it a relationship called transform. Set Destination to Transform, uncheck the Optional check box, and set Delete Rule to Cascade. Add another relationship called shapes. Set Destination to Shape, leave Optional checked, and check the To-Many Relationship check box. Leave Delete Rule as Nullify. - Select the
Shapeentity, and add a relationship called canvases. Set Destination to Canvas and Inverse to shapes. Check Optional and To-Many Relationship, and set Delete Rule to Nullify. - Select the
Transformentity, and add a relationship called canvas. Set Destination to Canvas and Inverse to transform. Uncheck Optional, and set Delete Rule to Deny.
When you finish, your data model layout should look like Figure 5–5.
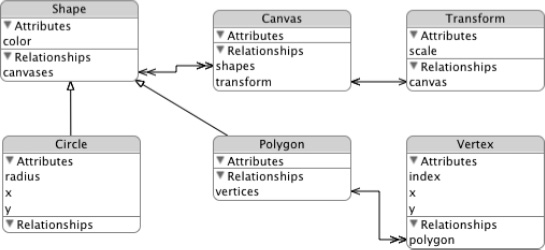
Figure 5–5. The Shapes application data model
With your data model in place, you’re ready to add Core Data support to your application delegate. Open ShapesAppDelegate.h, import the Core Data headers, and add properties for your managed object context, managed object model, and persistent store coordinator. Also, add declarations for two methods: one to save the managed object context, and one to return your application’s document directory. When you’re done, your file should look like the following, with the added lines in bold:
#import <UIKit/UIKit.h>

#import <CoreData/CoreData.h>


@class ShapesViewController;


@interface ShapesAppDelegate : NSObject <UIApplicationDelegate>

@property (strong, nonatomic) IBOutlet UIWindow *window;

@property (strong, nonatomic) IBOutlet ShapesViewController *viewController;

@property (nonatomic, retain, readonly) NSManagedObjectContext *managedObjectContext;

@property (nonatomic, retain, readonly) NSManagedObjectModel *managedObjectModel;
@property (nonatomic, retain, readonly) NSPersistentStoreCoordinator

*persistentStoreCoordinator;


- (void)saveContext;

- (NSURL *)applicationDocumentsDirectory;


@end
Next, open ShapesAppDelegate.m, and add @synthesize lines for the three Core Data-related properties you just added. Also add accessors for the same three Core Data–related properties. Finally, add implementations for your methods to save the managed object context and to return the application’s document directory. Your ShapesAppDelegate.m file should match Listing 5–1.
Listing 5–1. ShapesAppDelegate.m
#import "ShapesAppDelegate.h"

#import "ShapesViewController.h"


@implementation ShapesAppDelegate


@synthesize window=_window;

@synthesize viewController=_viewController;

@synthesize managedObjectContext=__managedObjectContext;

@synthesize managedObjectModel=__managedObjectModel;

@synthesize persistentStoreCoordinator=__persistentStoreCoordinator;


- (BOOL)application:(UIApplication *)application didFinishLaunchingWithOptions:(NSDictionary *)launchOptions {

    self.window = [[UIWindow alloc] initWithFrame:[[UIScreen mainScreen] bounds]];

  // Override point for customization after application launch.

  self.viewController = [[ShapesViewController alloc] initWithNibName:@"ShapesViewController" bundle:nil];

  self.window.rootViewController = self.viewController;

  [self.window makeKeyAndVisible];

  return YES;

}


#pragma mark - Core Data stack


- (NSManagedObjectContext *)managedObjectContext {

  if (__managedObjectContext != nil) {

    return __managedObjectContext;

  }


  NSPersistentStoreCoordinator *coordinator = [self persistentStoreCoordinator];

  if (coordinator != nil) {

    __managedObjectContext = [[NSManagedObjectContext alloc] init];

    [__managedObjectContext setPersistentStoreCoordinator:coordinator];

  }

  return __managedObjectContext;

}
- (NSManagedObjectModel *)managedObjectModel {

  if (__managedObjectModel != nil) {

    return __managedObjectModel;

  }

  NSURL *modelURL = [[NSBundle mainBundle] URLForResource:@"Shapes" withExtension:@"momd"];

  __managedObjectModel = [[NSManagedObjectModel alloc] initWithContentsOfURL:modelURL];

  return __managedObjectModel;

}


- (NSPersistentStoreCoordinator *)persistentStoreCoordinator {

  if (__persistentStoreCoordinator != nil) {

    return __persistentStoreCoordinator;

  }


  NSURL *storeURL = [[self applicationDocumentsDirectory] URLByAppendingPathComponent:@"Shapes.sqlite"];


  NSError *error = nil;

  __persistentStoreCoordinator = [[NSPersistentStoreCoordinator alloc] initWithManagedObjectModel:[self managedObjectModel]];

  if (![__persistentStoreCoordinator addPersistentStoreWithType:NSSQLiteStoreType configuration:nil URL:storeURL options:nil error:&error]) {

    NSLog(@"Unresolved error %@, %@", error, [error userInfo]);

    abort();

  }

  return __persistentStoreCoordinator;

}


- (void)saveContext {

  NSError *error = nil;

  NSManagedObjectContext *managedObjectContext = self.managedObjectContext;

  if (managedObjectContext != nil) {

    if ([managedObjectContext hasChanges] && ![managedObjectContext save:&error]) {

      NSLog(@"Unresolved error %@, %@", error, [error userInfo]);

      abort();

    }

  }

}


#pragma mark - Application's Documents directory


- (NSURL *)applicationDocumentsDirectory {

  return [[[NSFileManager defaultManager] URLsForDirectory:NSDocumentDirectory inDomains:NSUserDomainMask] lastObject];

}


@end
According to the requirements, the Shapes application divides the screen in half and shows the same shapes on both halves, with the shapes doubled in size on one half. The Canvas entity represents these screen halves in the Core Data data model, but you need corresponding user interface elements to actually draw the shapes on the screen. To accomplish this, you’ll create a class derived from UIView and then add two of these views to your existing XIB file. Start by creating the class: select File ![]() New
New ![]() New File, select Cocoa Touch Class on the left and Objective-C class on the right, and click Next. Call the class
New File, select Cocoa Touch Class on the left and Objective-C class on the right, and click Next. Call the class BasicCanvasUIView and make it a subclass of UIView, as shown in Figure 5–6. You should see the two files for the class, BasicCanvasUIView.h and BasicCanvasUIView.m, listed in the files for your project. Open the BasicCanvasUIView.h file.
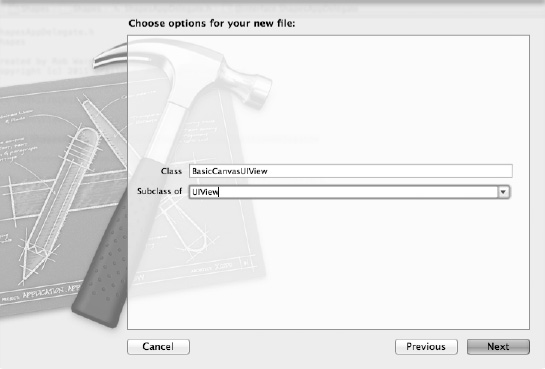
Figure 5–6. Deriving the BasicCanvasUIView class from UIView
In BasicCanvasUIView, you want a reference to the corresponding Canvas entity that this view will display, as well as a way to scale the view (one instance will have a 1x scale, while the other will have a 2x). Change BasicCanvasUIView.h to look like the following:
#import <UIKit/UIKit.h>

#import <CoreData/CoreData.h>


@interface BasicCanvasUIView : UIView {

  NSManagedObject *canvas;

}

@property (nonatomic, retain) NSManagedObject *canvas;


-(float)scale;


@end
In the implementation file for your class, BasicCanvasUIView.m, you need an accessor and a mutator for the canvas property, so add this line:
@synthesize canvas;
The scale: method returns the value stored for the scale attribute in the Transform entity that relates to the Canvas entity that this view represents. Remember that Canvas has a one-to-one relationship with Transform ; each Canvas instance has a corresponding Transform instance. To get the value for scale, you use the Retrieve action of CRUD. You first retrieve the Transform managed object from the Canvas managed object that this BasicCanvasUIView class points to using this code:
NSManagedObject *transform = [canvas valueForKey:@"transform"];
Notice the absence of any Structured Query Language (SQL) code. Notice, also, that you retrieve the value for a relationship using the same syntax you’d use to retrieve the value of an attribute. Core Data doesn’t differentiate among the types of properties in an entity.
Once you have a reference to the Transform managed object, you can retrieve its value for scale using code like this:
[transform valueForKey:@"scale"]
The valueForKey: method returns an object, so use the floatValue method to get the stored value as a float type. The scale: method, in its entirety, looks like this:
- (float)scale {

  NSManagedObject *transform = [canvas valueForKey:@"transform"];

  return [[transform valueForKey:@"scale"] floatValue];

}
The method that does the actual drawing of shapes looks a little more complex, and drawing and graphics lie outside the scope of this book. Read through the code carefully, however, and you’ll find it’s not as bad as it looks. Since this book covers Core Data, though, you can just type this in without understanding it. The parts relevant to Core Data are the Retrieve operations: the method retrieves all the shapes to draw using the relationship between the Canvas entity and the Shape entity and then retrieves the relevant properties for the shape to draw. In the case of Circle instances, the code retrieves the x, y, and radius attributes to construct the circle on the screen. In the case of Polygon instances, the code retrieves all the related Vertex instances using Polygon’s vertices relationship, sorts them on the index attribute, and draws a polygon that matches the vertices. Listing 5–2 shows the entire drawRect: method.
Listing 5–2. The drawRect: Method
- (void)drawRect:(CGRect)rect {

  // Check to make sure we have data

  if (canvas == nil) {

    return;

  }


  // Get the current graphics context for drawing

  CGContextRef context = UIGraphicsGetCurrentContext();
  // Store the scale in a local variable so we don’t hit the data store twice

  float scale = self.scale;


  // Scale the context according to the stored value

  CGContextScaleCTM(context, scale, scale);


  // Retrieve all the shapes that relate to this canvas and iterate through them

  NSSet* shapes = [canvas valueForKey:@"shapes"];

  for (NSManagedObject *shape in shapes) {

    // Get the entity name to determine whether this is a Circle or a Polygon

    NSString *entityName = [[shape entity] name];


    // Get the color, stored as RGB values in a comma-separated string, and set it into the context

    NSString *colorCode = [shape valueForKey:@"color"];

    NSArray *colorCodes = [colorCode componentsSeparatedByString:@","];

    CGContextSetRGBFillColor(context, [[colorCodes objectAtIndex:0] floatValue] / 255,

                             [[colorCodes objectAtIndex:1] floatValue] / 255,

                             [[colorCodes objectAtIndex:2] floatValue] / 255, 1.0);


    // If this shape is a circle . . .

    if ([entityName compare:@"Circle"] == NSOrderedSame) {

      // Get the x, y, and radius from the data store and draw the circle

      float x = [[shape valueForKey:@"x"] floatValue];

      float y = [[shape valueForKey:@"y"] floatValue];

      float radius = [[shape valueForKey:@"radius"] floatValue];

      CGContextFillEllipseInRect(context, CGRectMake(x-radius, y-radius, 2*radius, 2*radius));

    } else if ([entityName compare:@"Polygon"] == NSOrderedSame) {

      // This is a polygon

      // Use a sort descriptor to order the vertices using the index value

      NSSortDescriptor *sortDescriptor = [[NSSortDescriptor alloc] initWithKey:

@"index" ascending:YES];

      NSArray *sortDescriptors = [[NSArray alloc] initWithObjects:sortDescriptor, nil];

      NSArray* vertices = [[[shape mutableSetValueForKey:@"vertices"] allObjects]

sortedArrayUsingDescriptors:sortDescriptors];


      // Begin drawing the polygon

      CGContextBeginPath(context);


      // Place the current graphic context point on the last vertex

      NSManagedObject *lastVertex = [vertices lastObject];

      CGContextMoveToPoint(context, [[lastVertex valueForKey:@"x"] floatValue],

[[lastVertex valueForKey:@"y"] floatValue]);


      // Iterate through the vertices and link them together

      for (NSManagedObject *vertex in vertices) {

        CGContextAddLineToPoint(context, [[vertex valueForKey:@"x"] floatValue],

[[vertex valueForKey:@"y"] floatValue]);

      }

      // Fill the polygon

      CGContextFillPath(context);

    }

  }
}
That completes the BasicCanvasUIView class. You still must add two instances of this class to the main view in your application, however, which is controlled by the ShapesViewController class. Open ShapesViewController.h, add an import for BasicCanvasUIView.h, and add two BasicCanvasUIView instances to the interface (one to represent the top half of the screen and the other to represent the bottom half), like so:
#import <UIKit/UIKit.h>

#import "BasicCanvasUIView.h"


@interface ShapesViewController : UIViewController {

  IBOutlet BasicCanvasUIView *topView;

  IBOutlet BasicCanvasUIView *bottomView;

}

@property (nonatomic, retain) BasicCanvasUIView *topView;

@property (nonatomic, retain) BasicCanvasUIView *bottomView;


@end
Add two @synthesize directives to ShapesViewController.m, like this:
@synthesize topView;

@synthesize bottomView;
Building the Shape Application User Interface
Now you are going to create the top and bottom views inside your shapes view. Select ShapesViewController.xib to open it in Interface Builder, which should also open the view associated with the ShapesViewController class. Drag a View object onto the view, and go to the Size tab to place and size it. Set X to 0, Y to 0, Width to 768, and Height to 502. In the Autosizing section, select all but the bottom band. See Figure 5–7 for a guide on what you’re trying to accomplish.

Figure 5–7. Top view sized and positioned
Select the view you just created and resized to the top half of the screen, and select the Identity Inspector tab. Here, you can change the class from UIView to BasicCanvasUIView by selecting it from the Class drop-down in the Class section, as Figure 5–8 shows.
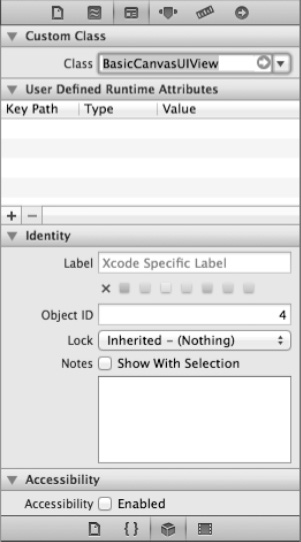
Figure 5–8. Top view changed to BasicCanvasUIView
Now you can Ctrl+click the File’s Owner icon and drag your pointer into the view you created. When you release the mouse button, you should see a pop-up displaying the available outlets you can bind to. Select topView. Go to the Attributes inspector, and click the background to select a different color for the background for this view. Feel free to choose your own; we chose Blueberry.
Now create the bottom view by dragging another View object onto the screen and resizing it using these values: X = 0, Y = 502, Width = 768, and Height = 502. In the Autosizing section, select all but the top band. Go to the Identity inspector, and change Class to BasicCanvasUIView. Ctrl+click and drag from the File’s Owner icon to this new view and bind it to the bottomView outlet. Change the color; we selected Tangerine.
Even though the application doesn’t draw any shapes yet because you’ve as yet provided no mechanism to create them in the persistent store, now is a good time to build and run the application to verify that it compiles and runs. You should be able to run the application and see the views on the screen as in Figure 5–9. Rotating the device should cause the views to resize and remain on the top and bottom halves of the screen, as in Figure 5–10. If the application compiles and runs but the views don’t properly display when the screen rotates, check the Autosizing settings for the views.
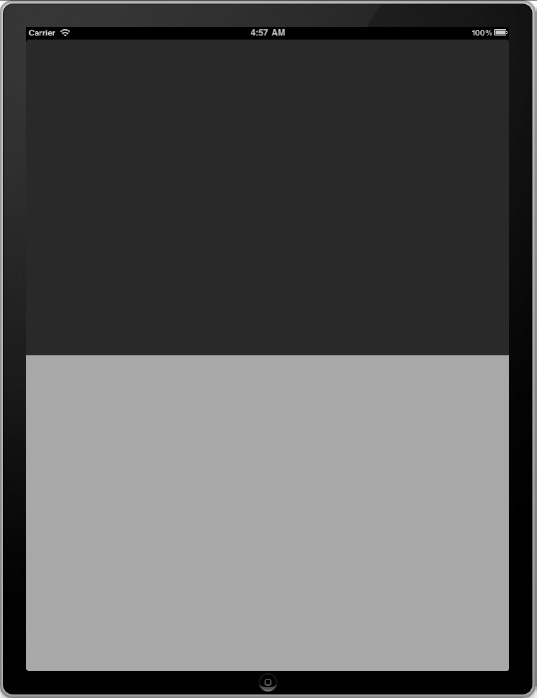
Figure 5–9. Shapes without shapes in portrait mode
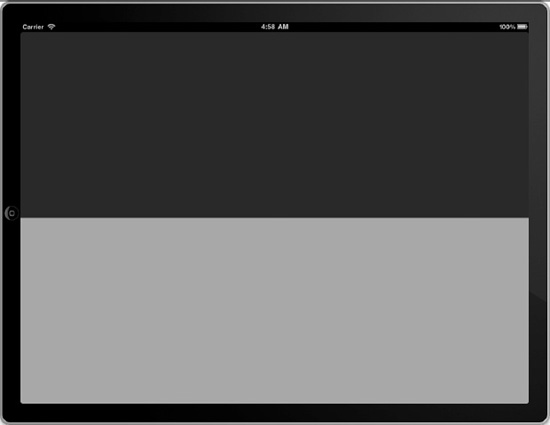
Figure 5–10. Shapes without shapes in landscape mode
The next step is to make the ShapesViewController class Core Data–aware and then add the user interfaces to create, update, and delete shapes. Go back to the ShapesViewController.h file and add a property to point to the managed object context. ShapesViewController.h should look like the following, with the added lines in bold:
#import <UIKit/UIKit.h>

#import <CoreData/CoreData.h>

#import "BasicCanvasUIView.h"


@interface ShapesViewController : UIViewController {

  NSManagedObjectContext *managedObjectContext;

  IBOutlet BasicCanvasUIView *topView;

  IBOutlet BasicCanvasUIView *bottomView;

}

@property (nonatomic, retain) NSManagedObjectContext *managedObjectContext;

@property (nonatomic, retain) BasicCanvasUIView *topView;

@property (nonatomic, retain) BasicCanvasUIView *bottomView;


@end
Now open ShapesViewController.m, where you have several tasks remaining to finish the Shapes application. Start with adding a synthesize line for the managed object context.
@synthesize managedObjectContext;
Next, create methods to create a shape, update all shapes, and delete all shapes. These methods are part of ShapeViewController’s private interface, which you declare in ShapeViewController.m. The other method to add to the private interface is a helper method that returns a random color. The lines to add to ShapeViewController.m above where the implementation begins look like this:
@interface ShapesViewController (private)

- (void)createShapeAt:(CGPoint)point;

- (void)updateAllShapes;

- (void)deleteAllShapes;

- (NSString *)makeRandomColor;

@end


@implementation ShapesViewController

...
The implementation for the method that creates a shape receives a parameter that describes where on the screen to create the shape. The method creates an NSManagedObject of entity type Shape and then randomly creates either a Circle type or a Polygon type. If a circle, it generates a random value for the radius attribute and uses the x and y values from the passed CGPoint instance. If a polygon, it creates a random number of vertices arranged around the passed CGPoint and stores them as Vertex types, creating relationships back to the Polygon instance just created. The implementation looks like that in Listing 5–3.
Listing 5–3. Creating a Shape
- (void)createShapeAt:(CGPoint)point {

  // Create a managed object to store the shape

  NSManagedObject *shape = nil;


  // Randomly choose a Circle or a Polygon

  int type = arc4random() % 2;

  if (type == 0) { // Circle

    // Create the Circle managed object

    NSEntityDescription *entity = [NSEntityDescription entityForName:@"Circle"

inManagedObjectContext:self.managedObjectContext];

    NSManagedObject *circle = [NSEntityDescription

insertNewObjectForEntityForName:[entity name]

inManagedObjectContext:self.managedObjectContext];

    shape = circle;


    // Randomly create a radius and set the attributes of the circle

    float radius = 10 + (arc4random() % 90);

    [circle setValue:[NSNumber numberWithFloat:point.x] forKey:@"x"];

    [circle setValue:[NSNumber numberWithFloat:point.y] forKey:@"y"];

    [circle setValue:[NSNumber numberWithFloat:radius] forKey:@"radius"];
    NSLog(@"Made a new circle at (%f,%f) with radius %f", point.x, point.y, radius);

  } else {  // Polygon

    // Create the Polygon managed object

    NSEntityDescription *entity = [NSEntityDescription entityForName:@"Polygon"

inManagedObjectContext:self.managedObjectContext];

    NSManagedObject *polygon = [NSEntityDescription

insertNewObjectForEntityForName:[entity name]

inManagedObjectContext:self.managedObjectContext];

    shape = polygon;


    // Get the vertices. At this point, no Vertex objects for this Shape exist.

    // Anything you add to the set, however, will be added to the Vertex entity.

    NSMutableSet *vertices = [polygon mutableSetValueForKey:@"vertices"];


    // Create a random number of vertices

    int nVertices = 3 + (arc4random() % 20);

    float angleIncrement = (2 * M_PI) / nVertices;

    int index = 0;

    for (float i = 0; i < nVertices; i++) {

      // Generate random values for each vertex

      float a = i * angleIncrement;

      float radius = 10 + (arc4random() % 90);

      float x = point.x + (radius * cos(a));

      float y = point.y + (radius * sin(a));


      // Create the Vertex managed object

      NSEntityDescription *vertexEntity = [NSEntityDescription entityForName:@"Vertex"

inManagedObjectContext:self.managedObjectContext];

      NSManagedObject *vertex = [NSEntityDescription

insertNewObjectForEntityForName:[vertexEntity name]

inManagedObjectContext:self.managedObjectContext];


      // Set the values for the vertex

      [vertex setValue:[NSNumber numberWithFloat:x] forKey:@"x"];

      [vertex setValue:[NSNumber numberWithFloat:y] forKey:@"y"];

      [vertex setValue:[NSNumber numberWithInt:index++] forKey:@"index"];


      // Add the Vertex object to the relationship

      [vertices addObject:vertex];

    }

    NSLog(@"Made a new polygon with %d vertices", nVertices);

  }

  // Set the shape’s color

  [shape setValue:[self makeRandomColor] forKey:@"color"];


  // Add the same shape to both canvases

  [[topView.canvas mutableSetValueForKey:@"shapes"] addObject:shape];

  [[bottomView.canvas mutableSetValueForKey:@"shapes"] addObject:shape];


  // Save the context

  NSError *error = nil;

  if (![self.managedObjectContext save:&error]) {

    NSLog(@"Unresolved error %@, %@", error, [error userInfo]);

    abort();

  }
  // Tell the views to repaint themselves

  [topView setNeedsDisplay];

  [bottomView setNeedsDisplay];

}
Though the method is long, read through it; between the codes and the comments, you should be able to see what it’s doing. It uses some methods from the C standard library, so include the required headers, like so:
#include <stdlib.h>
It also calls the makeRandomColor: method to create a random color for this shape, whether circle or polygon, so implement that method. It creates three random color values, one each for red, green, and blue, and formats them as a comma-separated string, like this:
- (NSString *)makeRandomColor {

  // Generate three color values

  int red = arc4random() % 256;

  int green = arc4random() % 256;

  int blue = arc4random() % 256;


  // Put them in a comma-separated string

  return [NSString stringWithFormat:@"%d,%d,%d", red, green, blue];

}
The method that updates all the shapes to new random colors uses this method as well. It retrieves all the shapes from the persistent store and updates them with new random colors. The method looks like this:
- (void)updateAllShapes {

  // Retrieve all the shapes

  NSFetchRequest *fetchRequest = [[NSFetchRequest alloc] init];

  NSEntityDescription *entity = [NSEntityDescription entityForName:@"Shape"

inManagedObjectContext:self.managedObjectContext];

  [fetchRequest setEntity:entity];

  NSArray *shapes = [managedObjectContext executeFetchRequest:fetchRequest error:nil];


  // Go through all the shapes and update their colors randomly

  for (NSManagedObject *shape in shapes) {

    [shape setValue:[self makeRandomColor] forKey:@"color"];

  }


  // Save the context

  NSError *error = nil;

  if (![self.managedObjectContext save:&error]) {

    NSLog(@"Unresolved error %@, %@", error, [error userInfo]);

    abort();

  }


  // Tell the views to repaint themselves

  [topView setNeedsDisplay];

  [bottomView setNeedsDisplay];

}
The method that deletes all the shapes looks eerily similar. In fact, this would be a good opportunity to use the new block support in Objective-C and iOS 4, but for simplicity’s sake, it again retrieves all the shapes from the persistent store, but this time, instead of updating them with new colors, it deletes them. Note that the Delete Rules set in the model handles what to do with any related entities. Here is the deleteAllShapes: method:
- (void)deleteAllShapes {

  // Retrieve all the shapes

  NSFetchRequest *fetchRequest = [[NSFetchRequest alloc] init];

  NSEntityDescription *entity = [NSEntityDescription entityForName:@"Shape"

inManagedObjectContext:self.managedObjectContext];

  [fetchRequest setEntity:entity];

  NSArray *shapes = [managedObjectContext executeFetchRequest:fetchRequest error:nil];


  // Delete each shape.

  for (NSManagedObject *shape in shapes) {

    [managedObjectContext deleteObject:shape];

  }


  // Save the context

  NSError *error = nil;

  if (![self.managedObjectContext save:&error]) {

    NSLog(@"Unresolved error %@, %@", error, [error userInfo]);

    abort();

  }


  // Tell the views to repaint themselves

  [topView setNeedsDisplay];

  [bottomView setNeedsDisplay];

}
You might notice that the ShapesViewController class has a member for the managed object context, but you haven’t yet set any value into that member. Open ShapesAppDelegate.m and add code to set that value. The method definition, with the added line in bold, looks like this:
- (BOOL)application:(UIApplication *)application didFinishLaunchingWithOptions:(NSDictionary *)launchOptions {

  self.window = [[UIWindow alloc] initWithFrame:[[UIScreen mainScreen] bounds]];

  // Override point for customization after application launch.

  self.viewController = [[ShapesViewController alloc] initWithNibName:@"ShapesViewController" bundle:nil];

  self.viewController.managedObjectContext = self.managedObjectContext;

  self.window.rootViewController = self.viewController;

  [self.window makeKeyAndVisible];

  return YES;

}
One final Core Data–related piece remains to build into the Shapes application: the code to create the Canvas instances and tie them to the views and to create the Transform instances, one for each Canvas. This code should go into the viewDidLoad: method of ShapesViewController.m.
- (void)viewDidLoad {

  // Create the Canvas entities

  NSManagedObject *canvas1 = nil;

  NSManagedObject *canvas2 = nil;


  // Load the canvases

  NSFetchRequest *fetchRequest = [[NSFetchRequest alloc] init];

  NSEntityDescription *entity = [NSEntityDescription entityForName:@"Canvas"

inManagedObjectContext:self.managedObjectContext];

  [fetchRequest setEntity:entity];

  NSArray *canvases = [managedObjectContext executeFetchRequest:fetchRequest error:nil];


  // If the canvases already exist in the persistent store, load them

  if([canvases count] >= 2) {

    NSLog(@"Loading existing canvases");

    canvas1 = [canvases objectAtIndex:0];

    canvas2 = [canvases objectAtIndex:1];

  } else { // No canvases exist in the persistent store, so create them

    NSLog(@"Making new canvases");

    canvas1 = [NSEntityDescription insertNewObjectForEntityForName:[entity name]

inManagedObjectContext:self.managedObjectContext];

    canvas2 = [NSEntityDescription insertNewObjectForEntityForName:[entity name]

inManagedObjectContext:self.managedObjectContext];


    // Create the Transform instance for each canvas. The first has a scale of 1

    NSManagedObject *transform1 = [NSEntityDescription

insertNewObjectForEntityForName:@"Transform"

inManagedObjectContext:self.managedObjectContext];

    [transform1 setValue:[NSNumber numberWithFloat:1] forKey:@"scale"];

    [canvas1 setValue:transform1 forKey:@"transform"];


    // The second Transform for the second Canvas has a scale of 0.5

    NSManagedObject *transform2 = [NSEntityDescription

insertNewObjectForEntityForName:@"Transform"

inManagedObjectContext:self.managedObjectContext];

    [transform2 setValue:[NSNumber numberWithFloat:0.5] forKey:@"scale"];

    [canvas2 setValue:transform2 forKey:@"transform"];


    // Save the context

    NSError *error = nil;

    if (![self.managedObjectContext save:&error]) {

      NSLog(@"Unresolved error %@, %@", error, [error userInfo]);

      abort();

    }

  }

  // Set the Canvas instances into the views

  topView.canvas = canvas1;

  bottomView.canvas = canvas2;

}
Enabling User Interactions with the Shapes Application
That completes the Core Data parts of the application. You could build and run it, but nothing visible has changed. You need to add user interface elements to create, update, and delete shapes. Start with creation. The user interface for creating a shape is to tap the screen, so add a method to ShapesViewController.m to capture any screen taps, determine the location of the tap, scale the location appropriately according to the canvas, and call the createShapeAt: method, passing in the tapped point.
#pragma mark - Touch events handling


- (void)touchesBegan:(NSSet *)touches withEvent:(UIEvent *)event {

  UITouch *touch = [touches anyObject];


  // Where did the view get touched?

  CGPoint location = [touch locationInView: touch.view];


  // Scale according to the canvas’ transform

  float scale = [(BasicCanvasUIView *)touch.view scale];

  location = CGPointMake(location.x / scale, location.y / scale);


  // Create the shape

  [self createShapeAt:location];

}
Now the application merits building and running. You haven’t finished yet—you can’t update or delete shapes—but you deserve some gratification for having worked this long. Build and run the application, and tap the screen a few times. Notice that you can tap either screen half, and the shapes appear on both, with the shapes twice as big on the top half. Rotate the screen, and see that the shapes still display. See Figure 5–11 for an example of what your screen should look like.
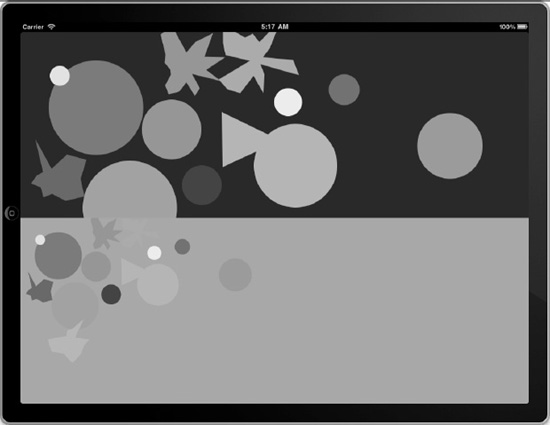
Figure 5–11. Some shapes on your screen
Stop the running application, and add the user interface elements to update and delete the shapes. The user interface for updating the shapes is rotating the device, so add a method to detect any device rotation, and call the updateAllShapes method from within it.
- (void) willRotateToInterfaceOrientation:(UIInterfaceOrientation)toInterfaceOrientation

duration:(NSTimeInterval)duration {

  [self updateAllShapes];

}
Adding support for detecting whether the device is shaken, so the application can delete all the shapes, is slightly more complicated. ShapeViewController must become the first responder when its view displays, so add the method that makes it eligible to be a first responder, and then make it become the first responder in the viewDidAppear method.
- (BOOL)canBecomeFirstResponder {

  return YES;

}


- (void)viewDidAppear:(BOOL)animated {

  [super viewDidAppear:animated];

  [self becomeFirstResponder];

}
Now, add the method to detect any shakes, and call the deleteAllObjects method from within it.
#pragma mark - Shake events handling


- (void)motionEnded:(UIEventSubtype)motion withEvent:(UIEvent *)event {

  if (event.subtype == UIEventSubtypeMotionShake) {

    [self deleteAllShapes];

  }

}
This completes the Shapes application. Build it, run it, tap it, rotate it, shake it. You should see shapes appear, change colors, and disappear. Through the easy Core Data interface, you can create, retrieve, update, and delete data from your persistent store.
If you have any problems building or running the Shapes application, check the accuracy of your data model and also of your code. The complete source code of the Shapes application is available online on this book’s page at http://apress.com/.
The next section enhances the Shapes application by adding custom data objects instead of using NSManagedObject instances. In the typical life cycle of a Core Data–enabled application, you will likely start by using NSManagedObject. As your application evolves, you will eventually feel the need to introduce custom data objects for code clarity and maintainability.
Generating Classes
This is the first time in this book that you are on the verge of enhancing your managed objects to a level that makes them truly blend with the rest of your code. Core Data gives you so much flexibility to implement your own managed objects that you can almost completely hide the fact that they are backed by the framework. In this section, you rework the Shapes application in order to use custom managed objects. You can make the changes either to your existing Shapes project, or make a copy of the project and make changes to that. In the downloadable source code for this book, we made a copy of the Shapes project in a directory called Shapes2 and made the changes there.
The first step in enhancing the Shapes application is to create the data object classes themselves. You can create them manually or let Xcode generate them for you. Generating classes for your model’s entities in Xcode 4 dispenses with the trickery that Xcode 3 required (open your model file, click somewhere in the background, select File ![]() New File, and only then do you have the option to create classes to represent your entities).
New File, and only then do you have the option to create classes to represent your entities).
To generate classes for your model’s entities, select File ![]() New
New ![]() New File, and select Core Data under iOS on the left and NSManagedObject subclass on the right, as shown in Figure 5–12. Click Next, and in the ensuing dialog, select the Shapes data model, as shown in Figure 5–13, and click Next. The next dialog lets you select the entities in your data model for which you’d like to generate classes. Select all of them, as shown in Figure 5–14, and click Next. Click the Create button in the next dialog to save your generated classes.
New File, and select Core Data under iOS on the left and NSManagedObject subclass on the right, as shown in Figure 5–12. Click Next, and in the ensuing dialog, select the Shapes data model, as shown in Figure 5–13, and click Next. The next dialog lets you select the entities in your data model for which you’d like to generate classes. Select all of them, as shown in Figure 5–14, and click Next. Click the Create button in the next dialog to save your generated classes.
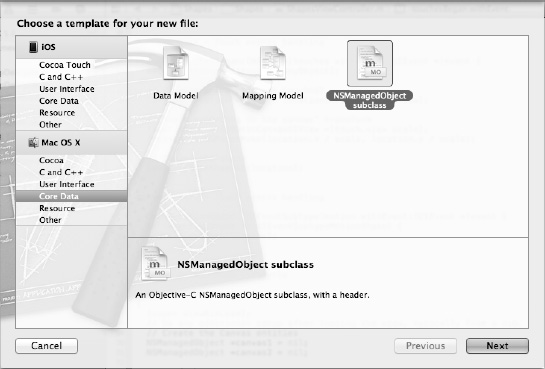
Figure 5–12. Creating a new NSManagedObject subclass
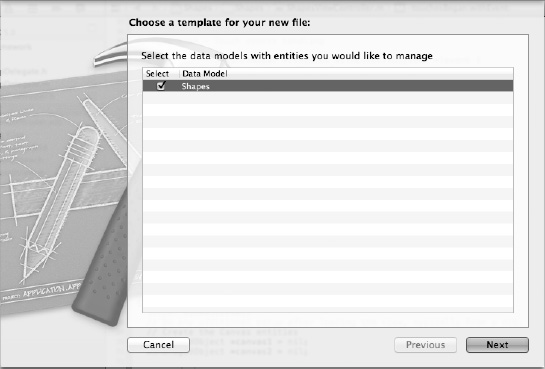
Figure 5–13. Selecting the Shapes data model
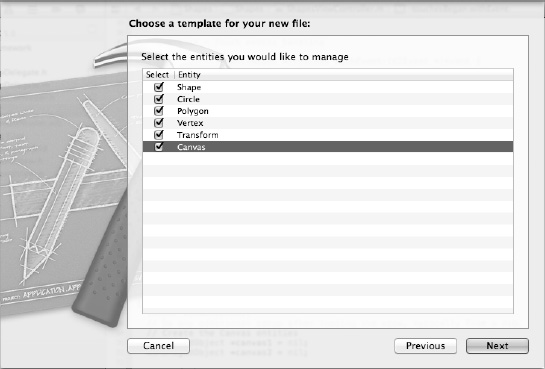
Figure 5–14. Selecting which entities need classes generated
To keep the code organized, a good practice is to create a group of classes where you will store your data objects. In Xcode, select all the generated classes, Ctrl+click, and select New Group from Selection. Rename the new group to Managed Objects. Figure 5–15 shows what your source tree should look like.
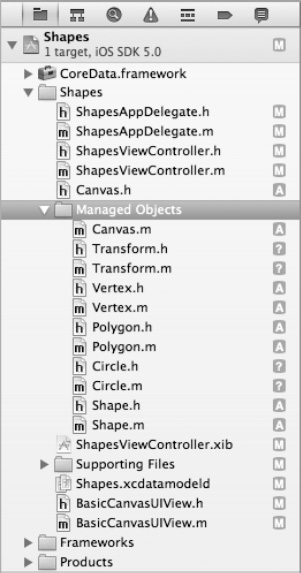
Figure 5–15. Source tree with the Managed Object classes in a group
Xcode updates your model to use the generated classes for your entities. To verify, display the attributes of any of your entities in the Data Model inspector. For the Class field, the name of your generated class should display instead of NSManagedObject. Figure 5–16 shows an example using the Canvas entity; note that Xcode has changed the entry for Class from NSManagedObject to Canvas, the new class you generated.
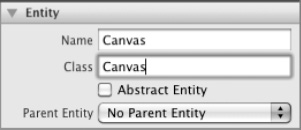
Figure 5–16. The Canvas entity updated to use the Canvas class
You don’t have to use Xcode’s generator to create model classes, however. To perform the same task manually, without having Xcode generate your classes, you would do two things:
- Create the code for the class (open any of the new files to see examples).
- Update the Class field for the entity in your data model to point to the new class.
That’s good information to know, in case you ever have to create those classes manually, but it’s nice to have Xcode do the work for you.
Now, let’s look at some of these classes. Open Vertex.h. You can see that it imports the Foundation and Core Data framework header files, that it derives from NSManagedObject, and that it exposes the properties (both attributes and relationships) of the Vertex entity as Objective-C properties, like so:
#import <Foundation/Foundation.h>

#import <CoreData/CoreData.h>


@class Polygon;


@interface Vertex : NSManagedObject


@property (nonatomic, retain) NSNumber * y;

@property (nonatomic, retain) NSNumber * x;

@property (nonatomic, retain) NSNumber * index;

@property (nonatomic, retain) Polygon * polygon;


@end
Check your classes, though; you may notice that some generated classes use NSManagedObject instances, instead of your generated classes, for relationships. Your generated Transform class, for example, uses an NSManagedObject instance instead of a Canvas image to represent its canvas relationship, as seen here:
#import <Foundation/Foundation.h>

#import <CoreData/CoreData.h>


@interface Transform : NSManagedObject


@property (nonatomic, retain) NSNumber * scale;

@property (nonatomic, retain) NSManagedObject * canvas;


@end
If you find anomalies like this in your generated classes, update the files to use the generated classes. The following code shows Transform.h updated to use a Canvas instance instead of an NSManagedObject instance:
#import <Foundation/Foundation.h>

#import <CoreData/CoreData.h>


@class Canvas;
@interface Transform : NSManagedObject

@property (nonatomic, retain) NSNumber * scale;

@property (nonatomic, retain) Canvas * canvas;


@end
For any header files that you update, be sure to add the appropriate header to the corresponding implementation file. For the previous example, you add this line to Transform.m:
#import "Canvas.h"
Next, let’s look at how these generated classes are implemented. The following code shows the implementation file for the Vertex class, Vertex.m. You probably can’t help but notice how light this implementation is. The magic happens when using the @dynamic directive in the code. You already know the more common @synthesize directive, which tells the compiler to generate basic stubs for property accessors in order to fulfill the API contract with @property directives in the header file. The @dynamic directive is used to tell the compiler that even though it can’t find the methods that fulfill the contract, they will be there by the time the runtime needs to invoke them. In essence, you are telling the compiler to trust you. Of course, if you break your promise and do not provide the accessors at runtime, you will be punished with an application crash. Because your class extends NSManagedObject, the accessors are generated for you so you don’t have to worry about any punishment. It is safe to use the @dynamic directive for entity properties.
#import "Vertex.h"

#import "Polygon.h"


@implementation Vertex

@dynamic y;

@dynamic x;

@dynamic index;

@dynamic polygon;


@end
Again, you could have written this code yourself, but it’s nice to have Xcode do the work for you.
You can start the application, and it still runs even though the rest of the code doesn’t use the newly generated classes. It still, for example, accesses the properties of any vertices using the valueForKey: method. Since Vertex is an instance of NSManagedObject, accessing its properties through valueForKey: is still valid.
Next, open the header file for Circle. Because you made the Circle entity a subentity of Shape in the data model, the Circle class extends Shape. Circle is still an NSManagedObject by inheritance since Shape extends NSManagedObject.
#import <Foundation/Foundation.h>

#import <CoreData/CoreData.h>

#import "Shape.h"
@interface Circle : Shape


@property (nonatomic, retain) NSNumber * x;

@property (nonatomic, retain) NSNumber * y;

@property (nonatomic, retain) NSNumber * radius;


@end
Next in line to review is Polygon. Polygons are slightly different from the other objects created so far because they have a to-many relationship to another class.
Because a Polygon is a subclass of NSManagedObject, it benefits from its Key-Value Coding (KVC) compliance. Core Data provides accessor methods for attributes and relationships you modeled in your data model. For attributes, you have seen that it provides simple get/set methods. For to-many relationships, it automatically creates KVC mutable proxy methods for the NSSet. The methods are named after the key:
- (void)add<Key>Object:(id)value;

- (void)remove<Key>Object:(id)value;

- (void)add<Key>:(NSSet *)value;

- (void)remove<Key>:(NSSet *)value;
This feature means that it is possible to call addVerticesObject:(Vertex*) where before you called [[managedObject mutableSetValueForKey:key] addObject:value].
#import <Foundation/Foundation.h>

#import <CoreData/CoreData.h>

#import "Shape.h"


@interface Polygon : Shape


@property (nonatomic, retain) NSSet *vertices;

@end


@interface Polygon (CoreDataGeneratedAccessors)


- (void)addVerticesObject:(NSManagedObject *)value;

- (void)removeVerticesObject:(NSManagedObject *)value;

- (void)addVertices:(NSSet *)values;

- (void)removeVertices:(NSSet *)values;


@end
You don’t need implementations for these methods in Polygon.m, however, because they’re automatically provided by the KVC mechanism. If Xcode generated these methods, you can leave them or delete them.
Feel free to peruse the rest of the code for the generated classes. Armed with your knowledge of Core Data and the previous information, you should understand what’s happening with this code.
Now that you have your custom objects, you can go back to the application code to use their properties directly, rather than going through valueForKey:. Open ShapesViewController.m, and add import statements for all the new objects you’ve created, as shown here:
#import "Polygon.h"

#import "Circle.h"

#import "Shape.h"

#import "Canvas.h"

#import "Vertex.h"

#import "Transform.h"
Next, update the createShapeAt: method to use your new classes. The revised implementation of createShapeAt: is slightly cleaner; see Listing 5–4. In this first wave of cleanup, you’ve removed all references to NSManagedObject and put the actual type instead. This allows you to then set the properties directly instead of calling setValue:forKey:. Later in this chapter, you’ll run a second wave of cleanup that illustrates how to get rid of all references to Core Data in the code to make the framework even more seamless.
Listing 5–4. Revised Implementation of createShapeAt:
- (void)createShapeAt:(CGPoint)point {

  // Create a managed object to store the shape

  Shape *shape = nil;


  // Randomly choose a Circle or a Polygon

  int type = arc4random() % 2;

  if (type == 0) { // Circle

    // Create the Circle managed object

    NSEntityDescription *entity = [NSEntityDescription entityForName:@"Circle"

inManagedObjectContext:self.managedObjectContext];

    Circle *circle = [NSEntityDescription insertNewObjectForEntityForName:[entity name]

inManagedObjectContext:self.managedObjectContext];

    shape = circle;


    // Randomly create a radius and set the attributes of the circle

    float radius = 10 + (arc4random() % 90);

    circle.x = [NSNumber numberWithFloat:point.x];

    circle.y = [NSNumber numberWithFloat:point.y];

    circle.radius = [NSNumber numberWithFloat:radius];


    NSLog(@"Made a new circle at (%f,%f) with radius %f", point.x, point.y, radius);

  } else {  // Polygon

    // Create the Polygon managed object

    NSEntityDescription *entity = [NSEntityDescription entityForName:@"Polygon"

inManagedObjectContext:self.managedObjectContext];

    Polygon *polygon = [NSEntityDescription insertNewObjectForEntityForName:[entity

name] inManagedObjectContext:self.managedObjectContext];

    shape = polygon;


    // Create a random number of vertices

    int nVertices = 3 + (arc4random() % 20);

    float angleIncrement = (2 * M_PI) / nVertices;

    int index = 0;

    for (float i = 0; i < nVertices; i++) {

      // Generate random values for each vertex

      float a = i * angleIncrement;

      float radius = 10 + (arc4random() % 90);

      float x = point.x + (radius * cos(a));

      float y = point.y + (radius * sin(a));
      // Create the Vertex managed object

      NSEntityDescription *vertexEntity = [NSEntityDescription entityForName:@"Vertex"

inManagedObjectContext:self.managedObjectContext];

      Vertex *vertex = [NSEntityDescription

insertNewObjectForEntityForName:[vertexEntity name]

inManagedObjectContext:self.managedObjectContext];


      // Set the values for the vertex

      vertex.x = [NSNumber numberWithFloat:x];

      vertex.y = [NSNumber numberWithFloat:y];

      vertex.index = [NSNumber numberWithInt:index++];


      // Add the Vertex object to the relationship

      [polygon addVerticesObject:vertex];

    }

    NSLog(@"Made a new polygon with %d vertices", nVertices);

  }

  // Set the shape’s color

  shape.color = [self makeRandomColor];


  // Add the same shape to both canvases

  [[topView.canvas mutableSetValueForKey:@"shapes"] addObject:shape];

  [[bottomView.canvas mutableSetValueForKey:@"shapes"] addObject:shape];


  // Save the context

  NSError *error = nil;

  if (![self.managedObjectContext save:&error]) {

    NSLog(@"Unresolved error %@, %@", error, [error userInfo]);

    abort();

  }


  // Tell the views to repaint themselves

  [topView setNeedsDisplay];

  [bottomView setNeedsDisplay];

}
Note how each vertex is added to the polygon by calling addVerticesObject:.
There still isn’t anything groundbreaking at this point because you have simply removed references to NSManagedObject and calls to the key/value store. The resulting code is still slightly better because it enforces stronger typing with the managed objects and their properties. The real value of custom managed objects comes from enhancing them with more specialized methods. The next section explains how to do that.
Modifying Generated Classes
Now that the application is outfitted with custom objects, it’s time to exhibit the real power of custom managed objects. Having to constantly refer to the Core Data framework or key/value store for everything that relates to managed objects gets distracting very quickly when building an application. The framework should assist, not hinder, the developers in building data store–driven applications. With custom objects, you’ve gone halfway to a better place and have created an anemic object model and a set of objects that have a state but no behavior. Martin Fowler, chief scientist at ThoughtWorks and self-labeled general loudmouth on software development, first identified the anemic domain model antipattern as well as the antidote. The injection of business logic into objects has been proven to rapidly cure anemia. The next step in refactoring the Core Data managed objects is to add the business logic that will make your objects useful and easier to use.
Adding a static managed object initializer method is a usual way to further detach Core Data from the rest of the code. In ShapesViewController, you create a canvas and its transform by doing the following:
canvas1 = [NSEntityDescription insertNewObjectForEntityForName:[entity name] inManagedObjectContext:self.managedObjectContext];

...

NSManagedObject *transform1 = [NSEntityDescription insertNewObjectForEntityForName:@"Transform" inManagedObjectContext:self.managedObjectContext];

[transform1 setValue:[NSNumber numberWithFloat:1] forKey:@"scale"];

[canvas1 setValue:transform1 forKey:@"transform"];
The application code still reeks of Core Data. A better way to create a Canvas and its Transform is to define methods for creating transforms and canvases inside the appropriate objects: Transform and Canvas. You first declare an initializer in Transform.h, shown in bold here:
#import <Foundation/Foundation.h>

#import <CoreData/CoreData.h>


@class Canvas;


@interface Transform : NSManagedObject


@property (nonatomic, retain) NSNumber * scale;

@property (nonatomic, retain) Canvas * canvas;


+ (Transform *)initWithScale:(float)scale inContext:(NSManagedObjectContext *)context;


@end
The implementation for the new initializer goes in Transform.m, shown in bold here:
#import "Transform.h"

#import "Canvas.h"


@implementation Transform

@dynamic scale;

@dynamic canvas;


+ (Transform *)initWithScale:(float)scale inContext:(NSManagedObjectContext *)context {

  Transform *transform = [NSEntityDescription

insertNewObjectForEntityForName:@"Transform" inManagedObjectContext:context];

  transform.scale = [NSNumber numberWithFloat:scale];

  return transform;
}


@end
You do the same for Canvas, which can be initialized with its Transform instead of setting it later. This is a better design since the transform attribute of the Canvas entity is required. Canvas.h can be modified to look this:
#import <Foundation/Foundation.h>

#import <CoreData/CoreData.h>


@class Transform;


@interface Canvas :  NSManagedObject


@property (nonatomic, retain) NSSet* shapes;

@property (nonatomic, retain) Transform * transform;


+ (Canvas *)initWithTransform:(Transform *)transform inContext:(NSManagedObjectContext

*)context;


@end


@interface Canvas (CoreDataGeneratedAccessors)

- (void)addShapesObject:(NSManagedObject *)value;

- (void)removeShapesObject:(NSManagedObject *)value;

- (void)addShapes:(NSSet *)value;

- (void)removeShapes:(NSSet *)value;


@end
And you can then add the code in the implementation file, Canvas.m, shown here:
#import "Canvas.h"

#import "Transform.h"


@implementation Canvas

@dynamic shapes;

@dynamic transform;


+ (Canvas *)initWithTransform:(Transform *)transform inContext:(NSManagedObjectContext

*)context {

  Canvas *canvas = [NSEntityDescription insertNewObjectForEntityForName:@"Canvas"

inManagedObjectContext:context];

  canvas.transform = transform;

  return canvas;

}


@end
Finally, you are ready to alter the viewDidLoad: method in the ShapesViewController implementation, like so:
- (void)viewDidLoad {

  // Create the Canvas entities

  Canvas *canvas1 = nil;

  Canvas *canvas2 = nil;


  // Load the canvases

  NSFetchRequest *fetchRequest = [[NSFetchRequest alloc] init];

  NSEntityDescription *entity = [NSEntityDescription entityForName:@"Canvas"

inManagedObjectContext:self.managedObjectContext];

  [fetchRequest setEntity:entity];

  NSArray *canvases = [managedObjectContext executeFetchRequest:fetchRequest error:nil];

  [fetchRequest release];


  // If the canvases already exist in the persistent store, load them

  if([canvases count] >= 2) {

    NSLog(@"Loading existing canvases");

    canvas1 = [canvases objectAtIndex:0];

    canvas2 = [canvases objectAtIndex:1];

  } else { // No canvases exist in the persistent store, so create them

    NSLog(@"Making new canvases");

    Transform *transform1 = [Transform initWithScale:1

inContext:self.managedObjectContext];

    canvas1 = [Canvas initWithTransform:transform1 inContext:self.managedObjectContext];


    Transform *transform2 = [Transform initWithScale:0.5

inContext:self.managedObjectContext];

    canvas2 = [Canvas initWithTransform:transform2 inContext:self.managedObjectContext];


    // Save the context

    NSError *error = nil;

    if (![self.managedObjectContext save:&error]) {

      NSLog(@"Unresolved error %@, %@", error, [error userInfo]);

      abort();

    }

  }

  // Set the Canvas instances into the views

  topView.canvas = canvas1;

  bottomView.canvas = canvas2;

}
The code is getting a lot cleaner, and using the managed objects is becoming more and more like using regular objects because the ties to Core Data get encapsulated in the classes themselves.
Turn your attention now to the creation of the shapes. The shapes view controller has code that will create a random circle. In the context of your application, this is business logic that could be encapsulated in the Circle class. Instead of building a circle yourself, you could ask the Circle class to give you a random instance of itself based on a given origin. You could then create a circle by calling [Circle randomInstance:origin inContext:managedObjectContext].
To do this, you add a static initializer method in the Circle class
+ (Circle *)randomInstance:(CGPoint)origin inContext:(NSManagedObjectContext *)context;
and provide an implementation in Circle.m
+ (Circle *)randomInstance:(CGPoint)origin inContext:(NSManagedObjectContext *)context {

  Circle *circle = [NSEntityDescription insertNewObjectForEntityForName:@"Circle"

inManagedObjectContext:context];


  float radius = 10 + (arc4random() % 90);

  circle.x = [NSNumber numberWithFloat:origin.x];

  circle.y = [NSNumber numberWithFloat:origin.y];

  circle.radius = [NSNumber numberWithFloat:radius];


  return circle;

}
Do the same for Polygon by adding a similar method to Polygon.h
+ (Polygon *)randomInstance:(CGPoint)origin inContext:(NSManagedObjectContext *)context;
and provide an implementation in Polygon.m:
+ (Polygon *)randomInstance:(CGPoint)origin inContext:(NSManagedObjectContext *)context

{

  Polygon *polygon = [NSEntityDescription insertNewObjectForEntityForName:@"Polygon"

inManagedObjectContext:context];


  // Set the vertices

  int nVertices = 3 + (arc4random() % 20);

  float angleIncrement = (2 * M_PI) / nVertices;

  int index = 0;

  for (float i = 0; i < nVertices; i++) {

    float a = i * angleIncrement;

    float radius = 10 + (arc4random() % 90);

    float x = origin.x + (radius * cos(a));

    float y = origin.y + (radius * sin(a));


    Vertex *vertex = [NSEntityDescription insertNewObjectForEntityForName:@"Vertex"

inManagedObjectContext:context];

    vertex.x = [NSNumber numberWithFloat:x];

    vertex.y = [NSNumber numberWithFloat:y];

    vertex.index = [NSNumber numberWithFloat:index++];


    [polygon addVerticesObject:vertex];

  }

  return polygon;

}
You can now modify the implementation of createShapeAt: in ShapesViewController.m as follows:
- (void)createShapeAt:(CGPoint)point {

  // Create a managed object to store the shape

  Shape *shape = nil;


  // Randomly choose a Circle or a Polygon

  int type = arc4random() % 2;
  if (type == 0) { // Circle

    shape = [Circle randomInstance:point inContext:self.managedObjectContext];

  } else {  // Polygon

    shape = [Polygon randomInstance:point inContext:self.managedObjectContext];

  }

  // Set the shape’s color

  shape.color = [self makeRandomColor];


  // Add the same shape to both canvases

  [(Canvas *)topView.canvas addShapesObject:shape];

  [(Canvas *)bottomView.canvas addShapesObject:shape];


  // Save the context

  NSError *error = nil;

  if (![self.managedObjectContext save:&error]) {

    NSLog(@"Unresolved error %@, %@", error, [error userInfo]);

    abort();

  }


  // Tell the views to repaint themselves

  [topView setNeedsDisplay];

  [bottomView setNeedsDisplay];

}
The tidiness of the application code speaks for itself at this point. Most of the logic has been encapsulated into the custom managed objects.
Using the Transformable Type
Despite all the efforts to hide Core Data, it is likely that some properties of the custom objects just feel like they are using the “wrong” type simply to satisfy Core Data. For this type of situation, the framework allows you to use the Transformable type (NSTransformableAttributeType). In your Shapes application, the color property of the Shape object gives this sensation of type misuse. In the current implementation, the color is represented by a comma-delimited string so that you could use the NSStringAttributeType in the data model. It works well, but it makes using the object more complicated because you find yourself having to decode the value back and forth between a string and a color. The first step is to change the data model. Select the Shape entity, pick the color attribute, and change its type to Transformable. In the Transformer field, put the name of the custom transformer you’ll be writing: UIColorTransformer.
NOTE: Value transformers are part of the Foundation framework in Cocoa. As the name indicates, they facilitate the transformation of data from one format to another. In Core Data, it is typical to use NSKeyedUnarchiveFromDataTransformerName, which converts objects into NSData. Alternatively, you may extend NSValueTransformer in order to provide a custom transformer, as you do in this chapter.
In the code, you now edit Shape.h to change the property type from NSString to UIColor.
@property (nonatomic, retain) UIColor *color;
Naturally, using the Transformable type isn’t all good news. Because the transformer creates an NSData representation of the color property, the data store will use a binary field. In the case of SQLite, for example, a BLOB column will be created to store your data. This means that you can no longer use the data in the query. For instance, you would no longer be able to query for all red shapes. Note that with the string encoding you used before, it wasn’t trivial either, but it was at least possible.
Since you changed the attribute type, you need to go back to the application code to make it use the new type. First, alter ShapesViewController.m to change the implementation of the makeRandomColor: method, like so:
- (UIColor *)makeRandomColor {

  // Set the shape’s color

  float red = (arc4random() % 256) / 255.0;

  float green = (arc4random() % 256) / 255.0;

  float blue = (arc4random() % 256) / 255.0;


  return [UIColor colorWithRed:red green:green blue:blue alpha:1.0];

}
Don’t forget to change the return type in the method definition in the category at the top of the file, like so:
@interface ShapesViewController (private)

- (void)createShapeAt:(CGPoint)point;

- (void)updateAllShapes;

- (void)deleteAllShapes;

- (UIColor *)makeRandomColor;

@end
The next place to modify is the implementation of the drawRect: method in BasicCanvasUIView.m. Be sure to import Shape.h, Circle.h, Polygon.h, and Vertex.h in BasicCanvasUIView.m and then update the drawRect: method as shown in Listing 5–5.
Listing 5–5. Modifying the drawRect: Method in BasicCanvasUIView.m.
- (void)drawRect:(CGRect)rect {

  // Check to make sure we have data

  if (canvas == nil) {

    return;

  }


  // Get the current graphics context for drawing

  CGContextRef context = UIGraphicsGetCurrentContext();


  // Store the scale in a local variable so we don’t hit the data store twice

  float scale = self.scale;


  // Scale the context according to the stored value

  CGContextScaleCTM(context, scale, scale);
  // Retrieve all the shapes that relate to this canvas and iterate through them

  NSSet* shapes = [canvas valueForKey:@"shapes"];

  for (Shape *shape in shapes) {

    // Get the entity name to determine whether this is a Circle or a Polygon

    NSString *entityName = [[shape entity] name];


    // Get the color

    const CGFloat *rgb = CGColorGetComponents(shape.color.CGColor);

    CGContextSetRGBFillColor(context, rgb[0], rgb[1], rgb[2], 1.0);


    // If this shape is a circle . . .

    if ([entityName compare:@"Circle"] == NSOrderedSame) {

      // Get the x, y, and radius from the data store and draw the circle

      Circle *circle = (Circle *)shape;

      float x = [circle.x floatValue];

      float y = [circle.y floatValue];

      float radius = [circle.radius floatValue];

      CGContextFillEllipseInRect(context, CGRectMake(x-radius, y-radius, 2*radius,

2*radius));

    } else if ([entityName compare:@"Polygon"] == NSOrderedSame) {

      // This is a polygon

      Polygon *polygon = (Polygon *)shape;


      // Use a sort descriptor to order the vertices using the index value

      NSSortDescriptor *sortDescriptor = [[NSSortDescriptor alloc] initWithKey:

                                          @"index" ascending:YES];

      NSArray *sortDescriptors = [[NSArray alloc] initWithObjects:sortDescriptor, nil];

      NSArray* vertices = [polygon.vertices

sortedArrayUsingDescriptors:sortDescriptors];


      // Begin drawing the polygon

      CGContextBeginPath(context);


      // Place the current graphic context point on the last vertex

      Vertex *lastVertex = [vertices lastObject];

      CGContextMoveToPoint(context, [lastVertex.x floatValue], [lastVertex.y

floatValue]);


      // Iterate through the vertices and link them together

      for (Vertex *vertex in vertices) {

        CGContextAddLineToPoint(context, [vertex.x floatValue], [vertex.y floatValue]);

      }

      // Fill the polygon

      CGContextFillPath(context);


      // Clean up

      [sortDescriptors release];

      [sortDescriptor release];

    }

  }

}
We’ve noted that it is possible to use an alternate value transformer. You must use an alternate value transformer for objects that can’t be naturally serialized to NSData, and you can use one for any of your attributes.
TIP: If a class conforms to the NSCoding protocol, then NSKeyedUnarchiveFromDataTransformerName can be used.
You are now implementing a custom value transformer for your UIColor object. In Xcode, add a new class called UIColorTransformer that extends NSValueTransformer, as shown:
#import <Foundation/Foundation.h>


@interface UIColorTransformer : NSValueTransformer


@end
NSValueTransformer has several methods that must be implemented in UIColorTransformer.m in order to provide the functionality that Core Data requires. You first must make sure the transformer is reversible, which means it can transform a UIColor object into an NSData as well as transform the NSData back into a UIColor. This is critical in order to be able to store and retrieve the color attribute. For this, open the UIColorTransformer.m file, and override the allowsReverseTransformation: method, like so:
+ (BOOL)allowsReverseTransformation {

  return YES;

}
You also indicate that the transformed object will be represented as an NSData.
+ (Class)transformedValueClass {

  return [NSData class];

}
Finally, you provide the two transformation methods. One will transform from UIColor to NSData, and the reverse method does the opposite. Note that this is a simplified implementation for color transformation that assumes that the UIColor object was created in the RGB color space, which is the case in the Shapes application. Color spaces fall outside the scope of this book, but we encourage you to read further about colors and transformers if you want to implement a more complete color value transformer.
- (id)transformedValue:(id)value {

  UIColor* color = (UIColor *)value;

  const CGFloat *components = CGColorGetComponents(color.CGColor);


  NSString* result = [NSString stringWithFormat:@"%f,%f,%f", components[0], components[1], components[2]];

  return [result dataUsingEncoding:[NSString defaultCStringEncoding]];

}


- (id)reverseTransformedValue:(id)value {

  NSString *string = [[NSString alloc] initWithData:value

 encoding:[NSString defaultCStringEncoding]];
  NSArray *components = [string componentsSeparatedByString:@","];

  CGFloat red = [[components objectAtIndex:0] floatValue];

  CGFloat green = [[components objectAtIndex:1] floatValue];

  CGFloat blue = [[components objectAtIndex:2] floatValue];


  return [UIColor colorWithRed:red green:green blue:blue alpha:1.0];

}
The last step for using your custom attribute transformer is to register the transformer in ShapesAppDelegate.m. This can be done simply by importing UIColorTransformer.h and adding the following two lines at the beginning of the application:didFinishLaunchingWithOptions: method so that they are called before the Core Data stack is initialized:
UIColorTransformer* transformer = [[UIColorTransformer alloc] init];

[UIColorTransformer setValueTransformer:transformer forName:(NSString

*)@"UIColorTransformerName"];
You’ll have to delete your existing Shapes database, but then you can build and run the Shapes application to see your color transformer being used. You can also open the shapes SQLite database and look at the ZCOLOR column in the ZSHAPE table, which is now of type BLOB. If you look at any of the values there, you see that they are in the format created by the transformedValue: method of the UIColorTransformer class you created: three comma-separated float values that represent the components of the CGColor.
In this section, you have seen how to take advantage of your custom objects to hide Core Data from your application code as much as possible in order to make the persistence layer as transparent as possible.
Validating Data
Core Data won’t allow you to stuff data that doesn’t fit into any of the attributes in your model. Try, for example, to put a string like “Books for Professionals by Professionals,” the Apress tag line, into an attribute of type Integer 16, and you’ll raise an NSInvalidArgumentException that looks something like this:
'NSInvalidArgumentException', reason: 'Unacceptable type of value for attribute:

property = "x"; desired type = NSNumber; given type = NSCFString; value = Books for

Professionals by Professionals.'
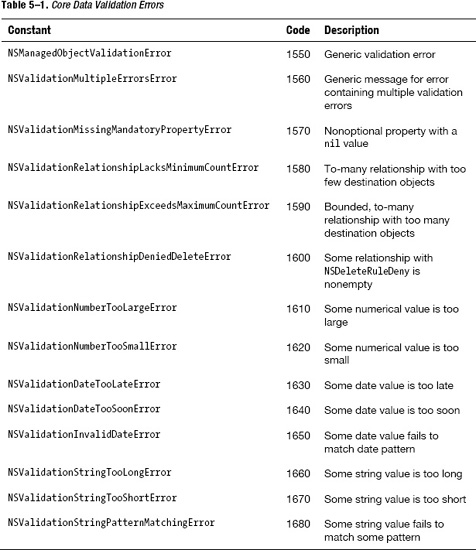
Core Data enforces data integrity, but sometimes you want more than that. Sometimes you want to enforce what corporate-speak terms business rules, though they might or might not have anything to do with business. Take, for example, the Polygon instances in the Shapes application and their relationships with Vertex instances. A real-world polygon with no vertices doesn’t exist, so you set the “vertices” relationship to nonoptional. A polygon with one vertex isn’t a polygon, either. It’s a point. And a two-vertex polygon is a line. A polygon must have at least three vertices to make the club. For that reason, you set the value for Min Count in the “vertices” relationship to three. Relating a Polygon instance to only one or two Vertex instances prevents the managed object context from saving successfully. Instead, you get an error that looks like this: “Operation could not be completed. (Cocoa error 1580.)” The error codes come from the header file CoreDataErrors.h and are listed, along with descriptions, in Table 5–1. Note that the descriptions are lifted directly from the header file. Checking this table reveals that error code 1580 means “to-many relationship with too few destination objects,” which describes exactly what you tried to do.
The table of error codes gives you some clues about what Core Data will validate for you. The Core Data modeling tool for defining attributes and relationships gives you the same clues. For relationships, you can validate that to-many relationships have a valid number of destination objects—not too many and not too few. For attributes, however, you have a larger number of parameters you can validate, depending on the attribute type. For all the number types, you can specify a Min value and a Max value:
- Integer 16
- Integer 32
- Integer 64
- Decimal
- Double
- Float
Violating the acceptable range gives you an NSValidationNumberTooSmallError or an NSValidationNumberTooLargeError, depending on which is appropriate. If, for example, you set the Min value to 7.0 and the Max value to 10.0 for the radius attribute of the Circle entity, random circles that don’t fall within that radius range would not save to the persistent store.
For the String type, you can specify values for the Min Length and Max Length of the string, as well as provide a regular expression to which the value must conform. The Date attribute is a little more tricky, however, because the Core Data modeling tool provides only text entry fields to enter Min and Max values, with no hint for how to format the values or whether any “magic” values like Today, Yesterday, 3 Days Ago, or 1 Year From Now are available. Scouring Apple’s documentation yields nothing, but a little Google work uncovers blog posts by Shane Crawford (http://shanecrawford.org/2008/57/coredatas-default-date-value/) and Jeff LaMarche (http://iphonedevelopment.blogspot.com/2009/07/core-data-default-dates-in-data-model.html) that make Date Min and Max values (and Default values; see the “Default Values” section) sound really cool: you can specify natural-language strings like “now,” “today,” or “last Saturday.” Just as the thrill factor hits, you read in the posts that the natural-language strings are interpreted at compile time, not runtime, so they’re not updated to reflect the current date, ever. This renders them useless.
You can put specific dates in these fields, however, like 1/1/1900, but it’s difficult to find much use for that. The next section, “Custom Validation,” covers how to validate relative dates.
Custom Validation
If you’ve generated your own NSManagedObject-derived classes for your data model, you can easily create your own validation routines that Core Data automatically invokes when customizing your objects. One option is to edit your NSManagedObject implementation (*.m) file and override the validateValue:forKey:error method, which has this signature:
- (BOOL)validateValue:(id *)ioValue forKey:(NSString *)key error:(NSError **)outError
It returns YES for valid and NO for not valid. This method gets called for each of the properties of your object, with the key value holding the property’s name for each invocation. You are responsible for validating all the properties of your object by determining which key has been passed and doing appropriate validation for the property with that key.
Core Data offers a second, cleaner option that allows you to write individual validation routines for any or all of your properties and allows the default validation to process for any properties you haven’t explicitly written validation routines for. To use this validation option, you write methods in your NSManagedObject-derived class’s implementation file that take this form:
- (BOOL)validate<AttributeName>:(id *)ioValue error:(NSError **)outError
Substitute the name of the attribute you’re trying to validate for <AttributeName>. For example, remove any validation you have on the radius attribute of the Circle entity in the Core Data modeler, and create a method in Circle.m that looks like this:
- (BOOL)validateRadius:(id *)ioValue error:(NSError **)outError {

  NSLog(@"Validating radius using custom method");


  if ([*ioValue floatValue] < 7.0 || [*ioValue floatValue] > 10.0) {

    // Fill out the error object

    if (outError != NULL) {

      NSString *msg = @"Radius must be between 7.0 and 10.0";

      NSDictionary *dict = [NSDictionary dictionaryWithObject:msg

forKey:NSLocalizedDescriptionKey];

      NSError *error = [[NSError alloc] initWithDomain:@"Shapes" code:10 userInfo:

dict];

      *outError = error;

    }

    return NO;

  }

  return YES;

}
This code retrieves the value passed in the ioValue parameter as a float and then compares it to the acceptable boundaries: 7.0 and 10.0. If the comparison fails, the code fills out an NSError object, if one was passed, with an arbitrary error code of 10. The code then returns NO to fail the validation. If the comparison passes, the code returns YES.
If you run this code and create a few shapes that include some circles, eventually the application will crash. You’ll see messages in the log that look something like this:
2011-03-24 04:57:59.948 Shapes[65076:207] Validating radius using custom method
If any shapes fail validation, you’ll see log messages that look like this:
2011-03-24 04:57:59.949 Shapes[65076:207] Unresolved error Error Domain=Shapes Code=10

"Radius must be between 7.0 and 10.0" UserInfo=0x590f5a0
Use this same mechanism to create date validations that validate date ranges relative to the current date. The following example validates that a date called myDate in the Core Data model falls between a week ago and a week from now:
- (BOOL)validateMyDate:(id *)ioValue error:(NSError **)outError {

  // 1 week = 60 sec/min * 60 min/hr * 24 hr/day * 7 day/week

  static int SECONDS_IN_A_WEEK = 60 * 60 * 24 * 7;


  NSLog(@"Validating myDate using custom method");


  // Get the passed date and calculate the valid dates

  NSDate *myDate = (NSDate *)(*ioValue);

  NSDate *minDate = [NSDate dateWithTimeIntervalSinceNow:-SECONDS_IN_A_WEEK];

  NSDate *maxDate = [NSDate dateWithTimeIntervalSinceNow:SECONDS_IN_A_WEEK];


  // Check if it’s valid

  if ([myDate earlierDate:minDate] == myDate || [myDate laterDate:maxDate] == myDate) {

    // The date isn’t valid, so construct an NSError if one was passed and return NO

    if (outError != NULL) {

      NSString *msg = @"myDate must fall between a week ago and a week from now";

      NSDictionary *dict = [NSDictionary dictionaryWithObject:msg

forKey:NSLocalizedDescriptionKey];

      NSError *error = [[NSError alloc] initWithDomain:@"Shapes" code:20 userInfo:

dict];

      *outError = error;

    }

    return NO;

  }

  return YES;

}
Although ioValue is a pointer to an object reference, which would allow you to change the input value in the object graph, Apple’s documentation strongly discourages you from doing this because it could create memory management issues.
The first method of validation, validateValue:forKey:error, trumps the validate<AttributeName> way. If you’ve provided a validateValue implementation, none of your validate<AttributeName> methods get called, and Core Data uses the answer that validateValue returns to determine the validity of an object.
You can also override the three other validation methods offered by NSManagedObject:
validateForInsertvalidateForUpdatevalidateForDelete
Core Data calls these methods to invoke validation before inserting, updating, or deleting an object, respectively. These are the methods that call the validateValue methods, whether yours or the default NSManagedObject implementation. You can override these to do your own custom validation, but be sure to call the superclass implementation first so that you get all the appropriate validation. One tricky piece to doing this is that if your code detects an error, it shouldn’t override any existing errors from the validation in the superclass. Instead, it should combine any errors. Apple’s documentation offers a method, errorFromOriginalError, that you can write in your own classes to combine errors. You can use this method, listed here, or you can write your own. Either way, be sure to combine errors and not overwrite them.
- (NSError *)errorFromOriginalError:(NSError *)originalError error:(NSError

*)secondError

{

  NSMutableDictionary *userInfo = [NSMutableDictionary dictionary];

  NSMutableArray *errors = [NSMutableArray arrayWithObject:secondError];


  if ([originalError code] == NSValidationMultipleErrorsError) {

    [userInfo addEntriesFromDictionary:[originalError userInfo]];

    [errors addObjectsFromArray:[userInfo objectForKey:NSDetailedErrorsKey]];

  } else {

    [errors addObject:originalError];

  }


  [userInfo setObject:errors forKey:NSDetailedErrorsKey];


  return [NSError errorWithDomain:NSCocoaErrorDomain

                             code:NSValidationMultipleErrorsError

                         userInfo:userInfo];

}
You typically override one of the validateFor... methods to perform validation that depends on multiple properties. Each property might be valid on its own, but some combinations may not be valid. Consider, for instance, that you want to make a circle invalid for insertion if the x value is more than twice the y value. You create a method in Circle.m that first calls the superclass implementation of validateForInsert and then does its validation to make sure x isn’t more than twice y. It could look like this:
- (BOOL)validateForInsert:(NSError **)outError {

  BOOL valid = [super validateForInsert:outError];


  // x can’t be more than twice as much as y

  float fx = [self.x floatValue], fy = [self.y floatValue];

  if (fx >= (2 * fy)) {

    // Create the error if one was passed

    if (outError != NULL) {

      NSString *msg = @"x can’t be more than twice as much as y";

      NSDictionary *dict = [NSDictionary dictionaryWithObject:msg

forKey:NSLocalizedDescriptionKey];

      NSError *error = [[NSError alloc] initWithDomain:@"Shapes" code:30 userInfo:

dict]];


      // Check to see if [super validateForInsert] returned errors

      if (*outError == nil) {

        *outError = error;

      } else {

        // Combine this error with any existing ones
        *outError = [self errorFromOriginalError:*outError error:error];

      }

    }

    valid = NO;

  }

  return valid;

}
Note that it calls the errorFromOriginalError method listed earlier to combine any existing errors.
Test this method by running Shapes and clicking in the upper right quadrant of the top view. As soon as Shapes generates a circle in that upper right quadrant, where x is more than twice the value of y, the application crashes when it tries to save that circle.
Invoking Validation
Core Data allows you to create objects with invalid attributes and invokes the validation routines when you save the managed object context. Objects with invalid values in their attributes or incorrect numbers of relationships can live comfortably in the managed object context. The validation doesn’t occur until you try to save the managed object, at which time the save fails with the appropriate error codes.
If you don’t want to wait for the save: method to be invoked, however, you can invoke validation manually. To do so, simply call any of the validation methods that you just learned about.
Default Values
Core Data allows you to set default values for each of your attributes. You might have noticed that setting validation rules in your attributes without setting default values that pass those rules nets you compiler warnings that look something like this:
Misconfigured Property. Circle.radius has default value smaller than minimum value.
The compiler tries to protect you from creating attributes that violate your validation rules. You can safely ignore them and make sure to set valid values yourself, or you can take advantage of Core Data’s offer to help.
Setting default values works exactly as you’d suppose: you type a valid default value into the Default field, and any new instance of that entity type will begin life with that value for that attribute. Try setting the default value for radius to 8.0, for example, and comment out the code that sets a random radius. You’ll find that all created circles have a radius of 8.0.
The one oddity for default values is an attribute of type Date, as noted earlier. You can use an explicit date or a natural-language string like “today,” but that string evaluates at compile time, not runtime, so doesn’t do what you probably want (unless you want your dates to all commemorate your application’s ship day by default). To create a default date that’s based on the runtime date, add a method to your NSManagedObject-derived class that overrides NSManagedObject’s awakeFromInsert: method. In this method, called when the object is inserted into the managed object context, you can provide your own default value for any fields. The following implementation inserts today’s date into the attribute myDate so that any new instances of this object automatically have today’s date:
- (void)awakeFromInsert {

  [super awakeFromInsert];

  [self setValue:[NSDate date] forKey:@"myDate"];

}
Undoing and Redoing
Golfers call it a mulligan. School-yard children call it a do-over. Computer users call it Edit ![]() Undo. Whatever you call it, you’ve realized that you’ve blundered and want to take back your last action. Not all scenarios afford you that opportunity, to which many broken-hearted lovers will attest, but Core Data forgives and allows you to undo what you’ve done using the standard Cocoa
Undo. Whatever you call it, you’ve realized that you’ve blundered and want to take back your last action. Not all scenarios afford you that opportunity, to which many broken-hearted lovers will attest, but Core Data forgives and allows you to undo what you’ve done using the standard Cocoa NSUndoManager mechanism. This section instructs you how to use it to allow your users to undo their Core Data changes.
The Core Data undo manager, an object of type NSUndoManager, lives in your managed object context, and NSManagedObjectContext provides a getter and a setter for the undo manager. Unlike Core Data on Mac OS X, however, the managed object context in iOS’s Core Data doesn’t provide an undo manager by default for performance reasons. If you want undo capabilities for your Core Data objects, you must set the undo manager in your managed object context yourself.
NOTE: Core Data on iOS doesn’t provide an undo manager by default. You must set it yourself.
If you want to support undoing actions in your iOS application, you typically create the undo manager when you set up your managed object context, which usually happens in the getter for the managed object context. The Shapes application, for example, sets up the managed object context in the application delegate, as shown here. Note the code in bold, which adds an undo manager to the managed object context.
- (NSManagedObjectContext *)managedObjectContext {

  if (__managedObjectContext != nil) {

    return __managedObjectContext;

  }


  NSPersistentStoreCoordinator *coordinator = [self persistentStoreCoordinator];

  if (coordinator != nil) {

    __managedObjectContext = [[NSManagedObjectContext alloc] init];

    [__managedObjectContext setPersistentStoreCoordinator:coordinator];


    NSUndoManager *undoManager = [[NSUndoManager alloc] init];

    [__managedObjectContext setUndoManager:undoManager];

}

  return __managedObjectContext;

}
As you can see, the code allocates and initializes the undo manager and sets it into the managed object.
Once the undo manager is set into the managed object context, it tracks any changes in the managed object context and adds them to the undo stack. You can undo those changes by calling the undo: method of NSUndoManager, and each change (actually, each undo group, as explained in the section “Undo Groups”) is rolled back from the managed object context. You can also replay changes that have been undone by calling NSUndoManager’s redo: method.
The undo: and redo: methods perform their magic only if the managed object context has any change to undo or redo, so calling them when no changes can be undone or redone does nothing. You can check, however, if the undo manager can undo or redo any changes by calling the canUndo: and canRedo: methods, respectively.
Undo Groups
By default, the undo manager groups all changes that happen during a single pass through the application’s run loop into a single change that can be undone or redone as a unit. This means, for example, that in the Shapes application, each shape creation can be undone or redone individually, because each shape is created in response to a touch event. When you shake the device, however, a single shake event occurs, and all the shapes are deleted in the method you call in response to that event. You can undo the deletion of all the shapes or call redo: to undo the deletion of all the shapes, but by default you can’t undo the deletion or redo the creation of single shapes.
You alter this behavior by turning off automatic grouping completely and managing the undo groups yourself. To accomplish this, pass NO to setGroupsByEvent. You become responsible, then, for creating all undo groups, because the undo manager will no longer create them for you. You create the undo group by calling beginUndoGrouping: to start creating the group and endUndoGrouping: to complete the undo group. These calls must be matched, or an exception of type NSInternalInconsistencyException is raised. You could, for example, create an undo group for each shape deletion in Shapes so that you can undo the deletion one shape at a time. You can also span undo groups across events, so you could, for example, group three shape creations and undo the three shapes with a single call to undo.
Limiting the Undo Stack
By default, the undo manager tracks an unlimited number of changes for you to undo and redo. This can cause memory issues, especially on iOS devices. You can limit the size of the undo stack by calling NSUndoManager’s setLevelsOfUndo: method, passing an unsigned integer that represents the number of undo groups to retain on the undo stack. You can inspect the current undo stack size, measured in the number of undo groups, by calling levelsOfUndo:, which returns an unsigned integer. A value of 0 represents no limit. If you’ve imposed a limit on the size of the undo stack, the oldest undo groups roll off the stack to accommodate the newer groups.
Disabling Undo Tracking
Once you create an undo manager and set it into the managed object context, any changes you make to the managed object context are tracked and can be undone. You can disable undo tracking, however, by calling NSUndoManager’s disableUndoRegistration: method. To reenable undo tracking, call NSUndoManager’s enableUndoRegistration: method. Disabling and enabling undo tracking uses a reference counting mechanism, so multiple calls to disableUndoRegistration: require an equal number of calls to enableUndoRegistration: before undo tracking becomes enabled again.
Calling enableUndoRegistration: when undo tracking is already enabled raises an exception of type NSInternalInconsistencyException, which will likely crash your application. To avoid this embarrassment, you can call NSUndoManager’s isUndoRegistrationEnabled:, which returns a BOOL, before calling enableUndoRegistration:. For example, the following code checks whether undo tracking is enabled before enabling it:
if (![undoManager isUndoRegistrationEnabled]) {

  [undoManager enableUndoRegistration];

}
You can clear the undo stack entirely by calling the removeAllActions: method. This method has the side effect of reenabling undo tracking.
Adding Undo to Shapes
The rest of this section puts into practice the concepts explained about undo managers by adding undo and redo support to the Shapes application. To begin, change the accessor for the managed object context in the application delegate to create an undo manager for the context. Set the undo stack to an arbitrary size of 10, as this code shows:
- (NSManagedObjectContext *)managedObjectContext {

    if (__managedObjectContext != nil) {

        return __managedObjectContext;

    }


    NSPersistentStoreCoordinator *coordinator = [self persistentStoreCoordinator];

    if (coordinator != nil) {

        __managedObjectContext = [[NSManagedObjectContext alloc] init];

        [__managedObjectContext setPersistentStoreCoordinator:coordinator];


        // Set up the undo manager

        NSUndoManager *undoManager = [[NSUndoManager alloc] init];

        [undoManager setLevelsOfUndo:10];

        [__managedObjectContext setUndoManager:undoManager];

}

    return managedObjectContext_;

}
The typical interface for undoing actions on an iOS device is to shake the device, but Shapes already uses that to delete all the shapes from the persistent store. Instead, Shapes will provide two buttons, one to undo the last change and one to redo it. Open the ShapesViewController.h file, and add members for the two buttons, methods to invoke when the buttons are pressed, and a method that hides the buttons when the managed object context has no changes to undo or redo. The code should look like this, with the added lines in bold:
#import <UIKit/UIKit.h>

#import <CoreData/CoreData.h>

#import "BasicCanvasUIView.h"


@interface ShapesViewController : UIViewController {

  NSManagedObjectContext *managedObjectContext;

  IBOutlet BasicCanvasUIView *topView;

  IBOutlet BasicCanvasUIView *bottomView;

  IBOutlet UIButton *undoButton;

  IBOutlet UIButton *redoButton;

}

@property (nonatomic, retain) NSManagedObjectContext *managedObjectContext;

@property (nonatomic, retain) BasicCanvasUIView *topView;

@property (nonatomic, retain) BasicCanvasUIView *bottomView;

@property (nonatomic, retain) UIButton *undoButton;

@property (nonatomic, retain) UIButton *redoButton;


- (IBAction)undo:(id)sender;

- (IBAction)redo:(id)sender;

- (void)updateUndoAndRedoButtons:(NSNotification *)notification;


@end
Add @synthesize directives to ShapesViewController.m for undoButton and redoButton. Add implementations for the undo:, redo:, and updateUndoAndRedoButtons: methods. The undo method should get the undo manager from the managed object context and call the undo: method and then tell the views to repaint themselves, like this:
- (IBAction)undo:(id)sender {

  [[self.managedObjectContext undoManager] undo];

  [topView setNeedsDisplay];

  [bottomView setNeedsDisplay];

}
The redo: method should do the same thing but call the undo manager’s redo: method instead of its undo: method:
- (IBAction)redo:(id)sender {

  [[self.managedObjectContext undoManager] redo];

  [topView setNeedsDisplay];

  [bottomView setNeedsDisplay];

}
To show the Undo button only when the user can undo a change and the Redo button only when the user can redo a change, you could insert code everywhere you make data changes to update the buttons. Take advantage of Cocoa Touch’s notification mechanism, however, and have the managed object context notify you whenever its managed data changes. In the viewDidLoad: method, add code to call your updateUndoAndRedoButtons: method any time the data changes. You also want to call the updateUndoAndRedoButtons: method when the view first loads, so tack on a call to that method. This is the code you should add to viewDidLoad:, after setting the canvas instances into the views:
...

  // Set the Canvas instances into the views

  topView.canvas = canvas1;

  bottomView.canvas = canvas2;


  // Register for changes to the managed object context

  NSNotificationCenter *notificationCenter = [NSNotificationCenter defaultCenter];

  [notificationCenter addObserver:self selector:@selector(updateUndoAndRedoButtons:) name:NSManagedObjectContextObjectsDidChangeNotification object:nil];

  [self updateUndoAndRedoButtons:nil];
In the viewDidUnload: method, undo the notifications, like so:
- (void)viewDidUnload {

  [super viewDidUnload];

  [[NSNotificationCenter defaultCenter] removeObserver:self];

}
The updateUndoAndRedoButtons: method hides the buttons appropriately when the application has nothing to undo or redo. It looks like this:
- (void)updateUndoAndRedoButtons:(NSNotification *)notification {

  NSUndoManager *undoManager = [self.managedObjectContext undoManager];

  undoButton.hidden = ![undoManager canUndo];

  redoButton.hidden = ![undoManager canRedo];

}
Next, open ShapesViewController.xib, and drag two Round Rect Button instances to the top corners of the screen—one on the left and one on the right. Change the label on the one on the left to Undo and the one on the right to Redo. Set the Autosizing appropriately for each button. The Undo button should have the bands on the top and left only, and the Redo button should have the bands on the top and right only. Ctrl+drag from the File’s Owner icon to the Undo button, and wire it to undoButton; repeat the process to wire the Redo button to redoButton. Wire the Touch Up Inside events for each button to the methods you created—the Undo button to the undo: method and the Redo button to the redo: method.
After making these changes, build and run the Shapes application. As you add shapes and undo changes, you should see the Undo and Redo buttons as in Figure 5–17. Add shapes, change the colors of shapes by rotating the device, and delete the shapes. Click Undo and Redo and see the data changes undo and redo themselves.
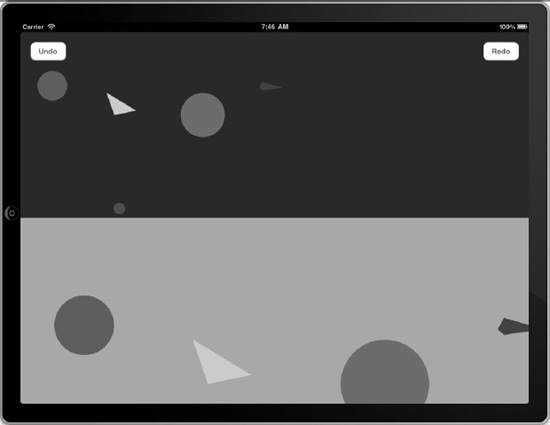
Figure 5–17. The Undo and Redo buttons
For a small amount of work, you can support undoing and redoing actions in your Core Data applications. Users expect mulligans, so make the small effort to give them to your users.
Summary
This chapter covered the heart of the purpose of Core Data: to create, retrieve, update, and delete data in a persistent store. Like Ruby on Rails, Core Data provides simple yet powerful mechanisms to carry out these CRUD operations. Whether talking directly to your NSManagedObject instances or using custom classes to represent your data objects, you can perform CRUD operations through the interfaces Core Data provides you without getting into the messy details of SQL or other data storage details.
One area where Core Data trumps Ruby on Rails is its native support for undoing data operations. Although efforts continue to add Undo/Redo support for Rails, no solution built into Rails provides an easy way to undo data-related operation like Core Data does.
Although now you know almost all you need for writing usable Core Data applications, don’t stop here. The next chapter talks about how to refine result sets so that you can filter, sort, and aggregate the data you retrieve from your persistent store.