![]()
DIY DR
Until now, this book has focused on disaster recovery and backup from the point of view of the business stakeholders and the infrastructure owners. A full farm backup will recover content databases, farm settings, solutions, and service applications. These solutions are only useful if the entire farm is lost; they don’t address recovery from a user’s perspective. Users sometimes only need to recover smaller parts of the farm, as their focus is just on their content. SharePoint provides options for recovering the following elements of interest to users:
- List items
- Documents
- Lists
- Libraries
- Sites
- Site collections
The following low-level configuration and structuring elements can also be preserved:
- Lists of who has access to one library or site
- Site columns and content types
- Web Part pages
SharePoint puts more and more of the options for preserving content into the hands of the users themselves. This makes sense: they can preserve a site or list immediately without having to ask the IT department to do it for them. The focus of this book so far has been what the architects, farm owners, and SharePoint strategists can do to deliver a high availability and disaster recovery strategy. This chapter shows that the means to back up and restore content are increasingly becoming available to the user community. Knowing the information contained in this chapter means you can plan for training and processes to ensure that users can Do It Themselves. Specifically, with Service Pack 1 for SharePoint 2010, users can now restore deleted sites from the Recycle Bin. This is a sure sign that the trend is toward users owning recovery of data, not IT.
Even an enterprise architect occasionally needs a few small tools in their box for backing up and recovering these small parts of the farm. Knowing how to use the big tools to back up the entire farm is only part of the range of options you should have in the event an individual content owner requests a solution to maintain their own disaster recovery strategy. If some of the smaller parts of the farm are lost, you can recommend the options covered in this chapter to restore them. It shouldn’t be necessary to restore a copy of a whole farm to get one list back.
Again, the purpose of this chapter is to show these Do It Yourself (DIY) options to put some of the tasks of maintaining backups of valuable content and settings in the hands of the users. I am using DIY in the sense that these are tools the users themselves can use without requiring farm administrator rights. Some require Site Collection Administrator rights, like saving a site as a template, but others, like recovering a file from a Recycle Bin, only require site membership. If you have focused most of your energy on looking at SharePoint from the 10,000-foot architecture level, you may have missed some of the small, handy options available to your users, so I have focused this chapter on detailing them for you.
One of the reasons SharePoint, and indeed Microsoft in general, is successful is that it puts the control in the hands of the users. Technology is complicated, but tools can use simple metaphors to make them more accessible. SharePoint allows users to back up and recover some of their own content; in this way, it not only saves resources on the infrastructure side, but it also saves the users’ time because they can restore what they need more quickly.
Screenshots here are from SharePoint 2010, but they are for illustrative purposes only; later versions have the same functionality.
This chapter will focus on the following recovery options:
- The Recycle Bin
- Versioning in SharePoint
- Recovery of sites and site collections
- Office as a DR tool
- Templates
Let’s start with the simplest scenario: accidental deletion of a document.
Despite appearances, every SharePoint site doesn’t fully delete a document or list item if you select that option. It actually hides the item from the List view and displays it instead in the Recycle Bin. It is not moved until it is really deleted. Until then, if you restore it from the Recycle Bin, it appears again in the list with all the same permissions, version history, and list item ID because it was not actually deleted at all. That happens later depending on the settings for the site.
Recycle Bin Settings
The settings for the Recycle Bin are set by the Farm Administrator, and these determine if there is a Recycle Bin and how it functions. First I’ll recap some terminology. Web applications in logical terms are the settings for the web site SharePoint resides in. The settings include the type of authentication used and general settings that apply to all the site collections within it, such as the regional time zone. Site collections consist of a root site based on a specific template and all the subsites under it. These also share some settings, like groups and content types. In code, the subsites are referred to as webs, while the site collection is referred to as the site.
You turn on and configure Recycle Bins at the web application level. By default, Recycle Bins are turned on in all the site collections in a web application. Here are the steps to configure Recycle Bin settings for a web application:
- Verify that the user account performing this procedure is a member of the Farm Administrators SharePoint group.
- On the SharePoint Central Administration web site, click Application Management.
- On the Application Management page, click Manage Web Applications.
- Click the web application for which you want to configure Recycle Bin settings. The ribbon becomes active.
- On the ribbon, click the General Settings drop-down menu, and then click General Settings (Figure 8-1).
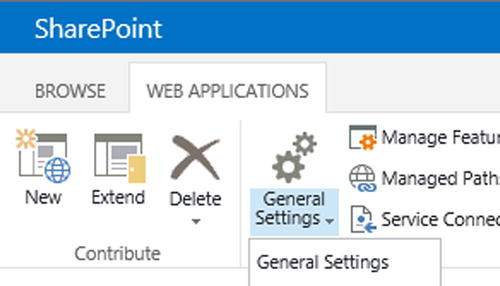
Figure 8-1. Select the web application and the General Setting option appears
- On the Web Application General Settings page, in the Recycle Bin section, you can configure certain settings (Figure 8-2).
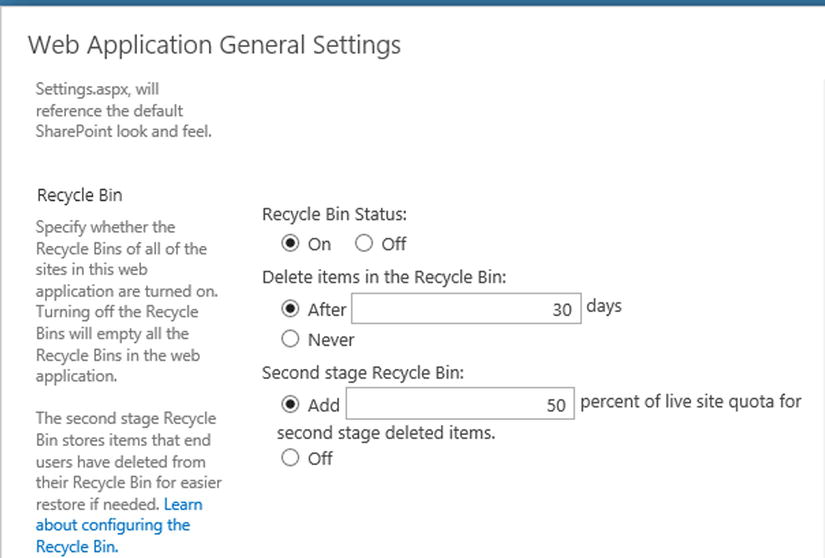
Figure 8-2. Options for the Recycle Bin
The options refer to the first- and second-stage Recycle Bin. Each site in the site collection has a Recycle Bin, but if an item is deleted from there, it is then shown in the second-stage Recycle Bin. Think if this as the large bin behind the building. The document hasn’t been taken away yet, but it’s no longer in the bin under your desk. This bin is only accessible to site collection administrators, and most users are not aware of it. I once had a situation where a pompous manager e-mailed all the staff in his department trying to find out who had deleted an important document. The funny thing was, after he realized it was him, he tried to cover his tracks by deleting it from the Recycle Bin. When I restored it from the second stage (Site Collection) Recycle Bin, I made sure some of his staff knew what he’d done because I knew he wasn’t going to tell them!
Accessing the Second-Stage Recycle Bin
Because the second-stage Recycle Bin can use a large portion of your site quota (the default is 50%; see Figure 8-2) you should know how and where to manage it. This is not something you can rely on your site collection administrators to know about unless they have had thorough training. Its size would have been planned and decided on doing the configuration of your farm. From a farm capacity management perspective, you can keep the site Recycle Bin only and turn off the second-stage Recycle Bin if you wish. You may do this to allow users to maintain their site quota without needing site collection administrator rights. If they empty their site Recycle Bins, they can reclaim space from their quota immediately without needing the content to then be deleted from the site collection Recycle Bin. As a high-level farm owner, you may not be aware of how to access the site collection Recycle Bin, so here are the steps:
- First go to Site Settings logged in as a site collection administrator or higher (see Figure 8-3).
Figure 8-3. Site collection settings are accessed via Site Settings
- Then click the Recycle Bin link under Site Collection Administration (Figure 8-4). This section will not be there if you are not logged in with site collection administrator rights, even though you can access the page with site administrator rights.
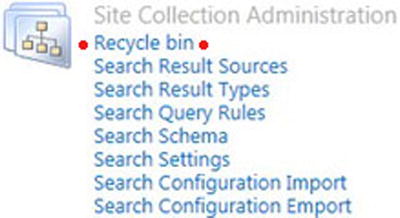
Figure 8-4. How to access the second-stage Recycle Bin settings
- You can now find out a few things about the deleted items, such as their original location, who deleted them, and at what time (Figure 8-5).

Figure 8-5. Deletion history
- You can filter the bin by these columns. You can also only view items that were explicitly deleted from the site Recycle Bins, also known as the first-stage Recycle Bins (Figure 8-6). By default you see everything in the first-stage Recycle Bins also.

Figure 8-6. View options
Note the default 30 days applies to the total time after the item was first deleted and not the time spent in either Recycle Bin stage.
When a second-stage Recycle Bin is enabled for a web application, Microsoft recommends that you designate how much disk space is available to the second-stage Recycle Bin as a percentage of the quota allotted to the web application (Figure 8-3). Items stored in the second-stage Recycle Bin don’t count toward the site quota; however, the size that is specified for the second-stage Recycle Bin increases the total size of the site and the content database that hosts it. If no site quota has been set, there is no limit on the size of the second-stage Recycle Bin. As a result, the user could be within her quota but actually using far more capacity in SQL Server.
For example, if you have allotted 100MB of space for the web application, allotting a 50% quota for the second-stage Recycle Bin allows for 50MB for the second-stage Recycle Bin and 150MB for the web application as a whole. You can specify up to 100% for the second-stage Recycle Bin quota.
There are exceptions and reasons why content may not be in the Recycle Bin. The main point to note is that content deleted via the Datasheet view is not preserved in the Recycle Bin. The Datasheet view is an Excel-like interface for a list to allow fast editing of multiple rows and columns.
You should also note that the Recycle Bin still enforces the item’s security. The user who has deleted the content will be able to see the content in the Recycle Bin. Other users will not be able to see the items in the Recycle Bin if they don’t have access to the location the item is in. Otherwise, the Recycle Bin would be a serious security hole. Every user who has access to the site, even viewer level, can open the Recycle Bin, but they will only be able to see content they otherwise have access to. This is because the item is still in its original location—just hidden from there and shown in the Recycle Bin. If you have deleted a top-level item like a folder or a list, and you try to find a document available at an inner location, the item will not be viewable. By default, the Recycle Bin shows the top level content and doesn’t have the capability to show the items in a tree structure or drill-down mode. Also, if the item was deleted before the default 30-day limit or if it was pushed beyond the second-stage Recycle Bin quota, it will not be in the bin.
Versioning As a Recovery Tool
Versioning is the functionality that keeps each previous iteration of a document as a separate file; you can open a copy of the file as it looked in the past without losing the current iteration. In the context of DIY DR, it means that if a user overwrites or deletes part of a document, she can recover it from the previous version of the document. This is often overlooked as a means of recovering lost content. But it must be configured by the site administrator, and the user must diligently create versions of the document—not just keep pressing Save. Setting the versioning for an individual library is done via the Library Settings page (Figure 8-7).
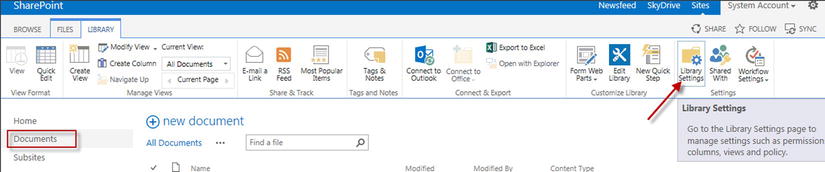
Figure 8-7. Accessing library settings
Figure 8-8 shows the settings page.
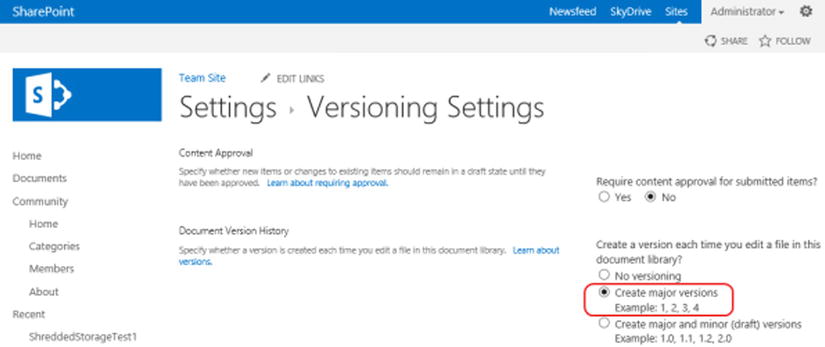
Figure 8-8. Library settings include versioning settings
It is wise to set a limit on the number of versions kept because each version takes up the same amount of space as the main file in SharePoint 2010. SharePoint 2013 introduces shredded storage, and while this greatly improves the I/O characteristics when saving incremental changes to SharePoint, it has a net negative impact on upload and download speeds. This can really add up. I once had a situation where 400 versions of a 3MB Excel spreadsheet were using up all of a site collection’s quota: 1,200MB is about 1.2GB.
Requiring checkout ensures users create a “hard” version of the document each time they want to edit it. If a user opens a file and starts to edit it, this is called a “soft” version. This is because a new version is not created until he explicitly checks it back in. It is checked out to him behind the scenes and locked, but there is no new version yet even though changes are saved. This option can slow down access to files, however, so it should only be enabled if the documents must have this level of control. User training should explain the value of versioning as a DIY DR option.
If you wanted to set this all across your sites, you would have to create a site template with these options set. What constitutes the best settings here will require consultation with your users. Best practices would be to ensure versioning is turned off if it’s not needed. A good threshold is 10 versions. This is reasonable when there are 3 to 5 people collaborating on a document, as each of them will have around 2 to 3 versions of the document. When an 11th version is added, it becomes number 10 and the first is removed. There is no hard and fast rule, however. Training users to know about and adjust these settings themselves is the ideal solution here. They are not meant to be controlled centrally, which is why they are available at the Library level.
Recovering Sites and Site Collections
The philosophy behind SharePoint has always been to delegate decisions to users, like with versioning. Deleting a whole site collection and all its content is quite easy for the owner of that site collection to do. From a user point of view, after clicking the option to delete a site collection, the owner is presented with the message shown in Figure 8-9, which warns them of the ramifications. Even after they click Delete, another prompt appears to ensure they want to do this (see Figure 8-10). But occasionally mistakes are made.
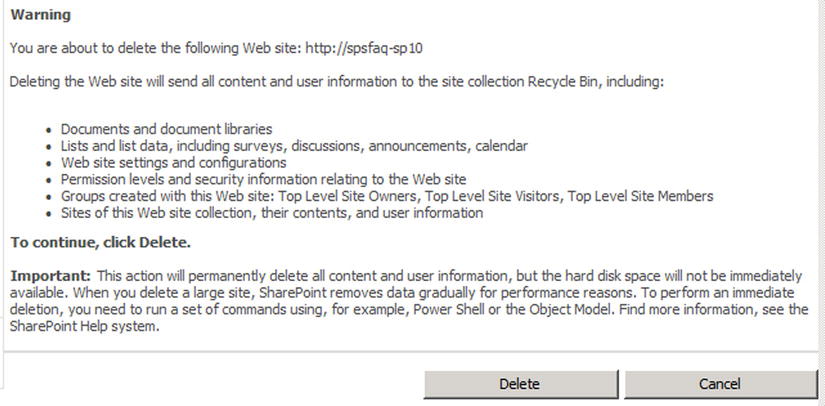
Figure 8-9. Deleting a site collection: first chance to turn back
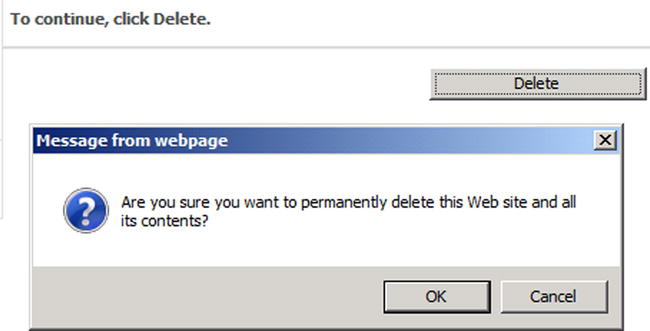
Figure 8-10. Deleting a site collection: the last chance dialog box
Previous to Service Pack 1 of SharePoint 2010, the only way to restore the site collection was for the site collection administrator to ask the farm administrator to take the backup of the content database and restore it to the night before, thus restoring the site collection—and many other site collections in the same content database. This was not a satisfactory solution as in most cases it lost more content than was deleted. Deleting subsites also gave similar dialogs, but if the site had to be restored, again the only option was to bring it back from a backup of the whole content database.
However, Service Pack 1 for SharePoint Server 2010 added the facility to place subsites in the second-stage Recycle Bin (Figure 8-11). This is the clearest indication that backup and restoring have become more user-centric.
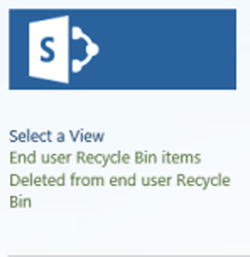
Figure 8-11. Restoring a site with SP1 installed
For site collections to be restorable via PowerShell, you must have at minimum SharePoint 2010 with Service Pack 1 installed on your farm to add this functionality. It’s a significant improvement on the previous situation as now a site collection administrator can recover a site, not just a farm administrator. The deleted site collections are stored in the SPDeletedSite object. The Get-SPDeletedSite cmdlet lists all the deleted site collections. Get-SPDeletedSite returns an array if SPDeletedSite is greater than one. Use the following command to get the count:
(Get-SPDeletedSite).Count
All you need to do now is bind this with the Restore-SPDeletedSite cmdlet.
Get-SPDeletedSite | where{$_.SiteId -eq "xxxxxxxx-xxxx-xxxx-xxxx-xxxxxxxxxxxx"} | Restore-SPDeletedSite
It is worth mentioning, even though it’s not strictly SharePoint, that Word also helps preserve your users’ content by auto-saving and using something called the Backstage view. This is the default view when you click the File tab in Office. Documenting, training, and presenting this to users is the likeliest route for this information to get to them. I am presenting it here as another method for recovering lost content in the interest of completeness. It’s part of your organization’s disaster recovery processes in the sense that it’s a way to recover data. In prior versions of Office, Word would periodically save your document in the background when you were editing it. This file was retained so the user could use it to recover their work if the application crashed. For Word, Excel, and PowerPoint, Office 2010 (and Office 365) improves on this idea. In the Backstage view, Microsoft exposes the periodic auto-saved files from your current editing session and allows you to compare or restore them as the newest document (see Figure 8-12). Even if you don’t save a file, these are kept for five days.

Figure 8-12. Versioning inside Office: a view of Backstage of this chapter
These unsaved versions are purged when you save and close your editing session. The settings for how documents are saved are found in File ![]() Word Options
Word Options ![]() Save (Figure 8-13).
Save (Figure 8-13).

Figure 8-13. The Save options in Word
Even if you close an editing session without saving the file, Office will now keep the last auto-saved version. When you open the document again, the unsaved version will appear in the Versions section of the Backstage view’s Info window (see Figure 8-14). Office also lets you access it directly from the Backstage view by clicking Manage Versions in the Info window and selecting Recover Unsaved Documents (see Figure 8-15). The Recover Unsaved Documents link also is available at the bottom of the Backstage view’s Recent window.
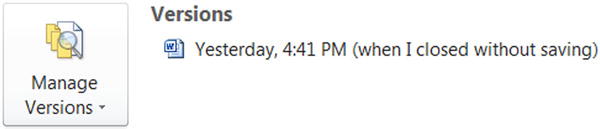
Figure 8-14. The Versions section after reopening a file that wasn’t resaved after a Word auto-save

Figure 8-15. In Backstage view, select Info and then Manage Versions to see the link to recover unsaved documents
![]() Note When you click the Recover Unsaved Documents link, Office takes you to the default UnSavedFiles folder. However, your AutoRecover file location may be different. If you don’t see the auto-saved files, check your Save options (Figure 8-13) and then navigate to the appropriate location.
Note When you click the Recover Unsaved Documents link, Office takes you to the default UnSavedFiles folder. However, your AutoRecover file location may be different. If you don’t see the auto-saved files, check your Save options (Figure 8-13) and then navigate to the appropriate location.
Content Backup Using Templates
Another way in which SharePoint is putting content retention in the hands of users, albeit as an indirect benefit, is in the use of the SharePoint template process. Templates in SharePoint Server are intended to allow you to reuse content by making a copy of a list or site, including its content if required, and allowing you to make a new list or site in a new location with that same content. This functionality can also be used to make a quick backup of a list or site at any time by any user who has only site owner rights, even though this is not its stated purpose. So if a site owner desires an extra level of security, this can be achieved without the intervention of the farm-level administration staff. This can be useful if an instant snapshot is required.
It should be noted this method will not preserve the Created By and Created time, nor will it preserve the access rights on the site or list. It will, however, preserve the content and views, which would likely take more time to recreate. Another caveat: Microsoft has restricted the maximum size of list and site templates to 10MB (10,485,760 bytes). If you try to save site/list templates that are larger than 10MB in size, you will get a “The list is too large to save as a template. The size of a template cannot exceed 10485760 bytes.” error. To resolve this issue, I have seen it suggested you can run this command in the command prompt:
stsadm -o setproperty -propertyname max-template-document-size -propertyvalue 524288000
However, I don’t recommend you do this. It can lead to errors in the restore process of the site; sometimes the command completes successfully, but the limit stays in place. With these warnings in mind, templates are still a useful way to make a quick backup of content, so I will show you how to do it. If your site is too large to be preserved this way, using Central Administration is your only fallback—and one that is not available to the average user.
First, browse to the list or library you wish to back up, then click the Library tab (Figure 8-16).

Figure 8-16. Accessing Library settings
Second, click List or Library Settings, and then under Permissions and Management, click “Save list as template” (Figure 8-17).
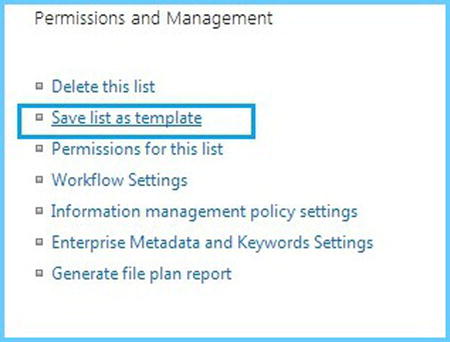
Figure 8-17. Save list as template
![]() Note The procedure is the same for a list or library. For example, if you browse to a Document Library, the link to the Settings page is called “Library Settings.” In the case of a list, it is called “List Settings.” Following this idea, the links to save a template are called “Save document library as template” and “Save list as template,” respectively.
Note The procedure is the same for a list or library. For example, if you browse to a Document Library, the link to the Settings page is called “Library Settings.” In the case of a list, it is called “List Settings.” Following this idea, the links to save a template are called “Save document library as template” and “Save list as template,” respectively.
Once you have clicked the “Save list as template” link, the form shown in Figure 8-18 opens.
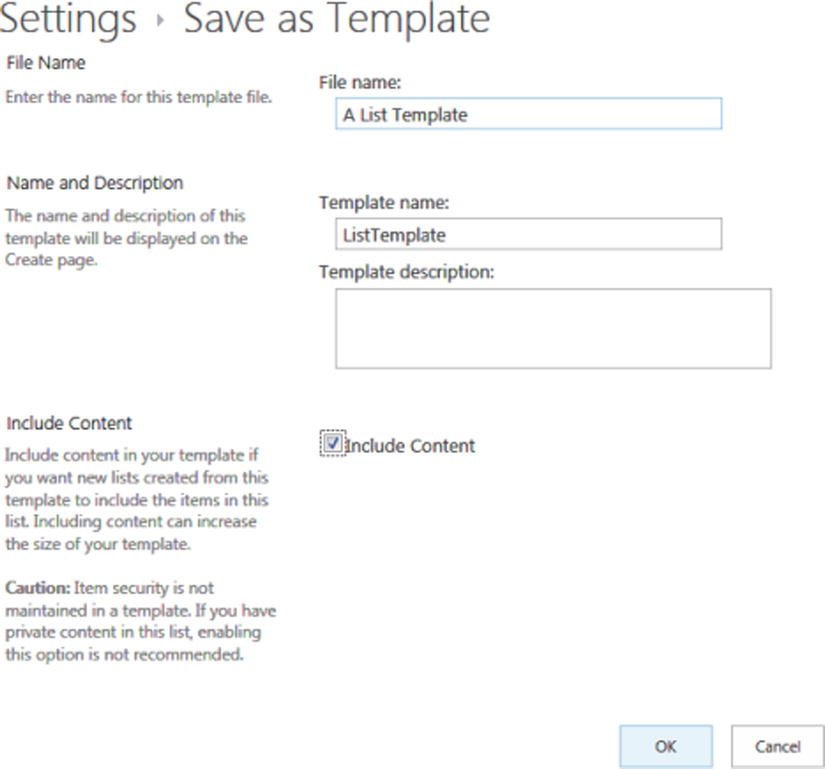
Figure 8-18. Creating your template
When completing this form, make sure you check the box that says Include Content. Otherwise, you are only preserving the columns and views. After completing the form, click OK; you should see the message in Figure 8-19. Then click the “list template gallery” link.
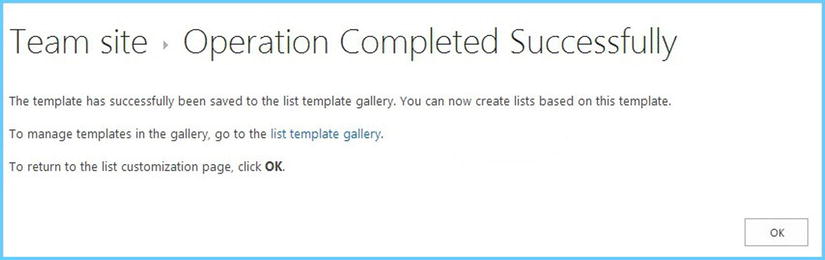
Figure 8-19. Click the list template gallery link
Once you click on the “list template gallery” link, you will be on a page like that in Figure 8-20. Selecting the list template you just created and clicking the Files tab will change the ribbon to the one shown in Figure 8-20.

Figure 8-20. Select the template to change the ribbon
Click “Download a Copy” and copy the file (which has an .stp extension) to a location where you can access it easily. This file (see Figure 8-21) now contains all of the content from your list.
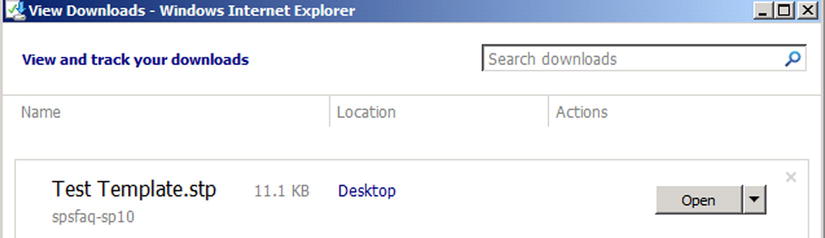
Figure 8-21. Your backup of the list
If you want to just find the template again, browse to Site Actions ![]() Site Settings
Site Settings ![]() Galleries
Galleries ![]() List templates. With this .stp file, you have a backup of your list. You can now import that into any list template gallery and use it to recreate your list and its content. Just click Upload Document (see Figure 8-22) to add the template and use it in that site collection. I uploaded mine and called it “Book Template Test.”
List templates. With this .stp file, you have a backup of your list. You can now import that into any list template gallery and use it to recreate your list and its content. Just click Upload Document (see Figure 8-22) to add the template and use it in that site collection. I uploaded mine and called it “Book Template Test.”
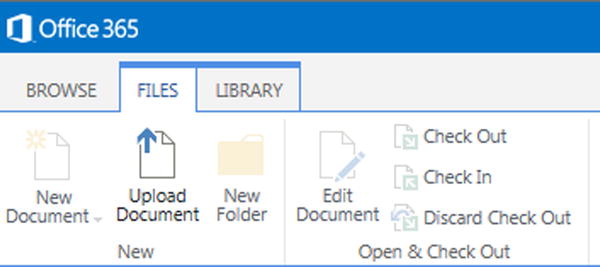
Figure 8-22. Upload a template to a Template Gallery.
Now the most important step: you can now use this template to restore the list. You can even restore it alongside the existing one by giving it a different name, just to recover something from it. This would only be necessary if it was not in the Recycle Bin, like the example of something deleted via Datasheet view, or if you had to restore something that was older than the time limit on the primary or secondary Recycle Bins. This could be useful in the case of SharePoint Online.
To do this, from your site’s home page click “Add lists, libraries and other apps,” then browse until you see your newly added template in the list, as shown in Figure 8-23.
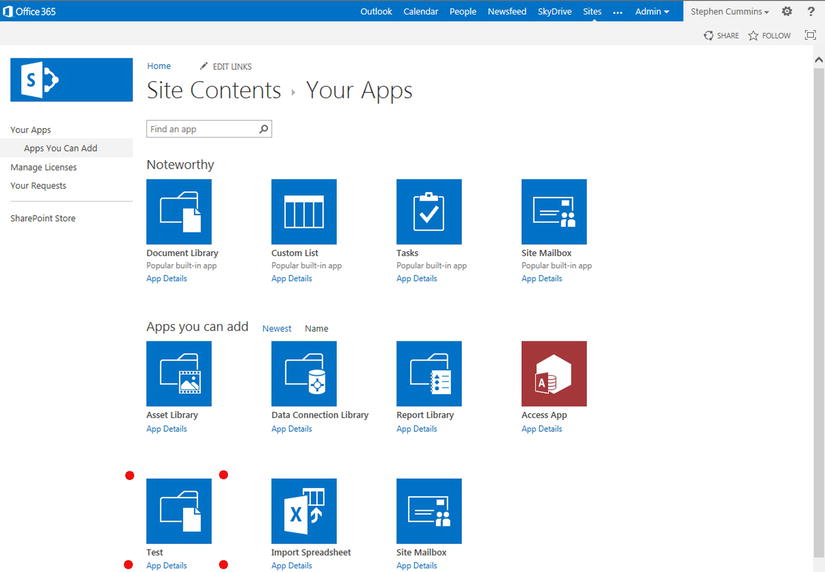
Figure 8-23. Create a new list or library to recreate your content.
As you can see from Figure 8-24, your list maintains the same list type it was based on. Mine was based on the Document Library, so it has the same icon and structure.
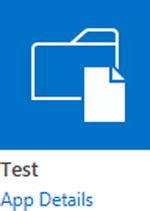
Figure 8-24. Book template test: the new list template including the content
Create your list and you will see you have all the content and views again.
The process of creating a site template is similar to that of creating a list template. First, click the Gear icon, then Site Settings. Under the Site Actions heading click “Save site as template” (Figure 8-25).
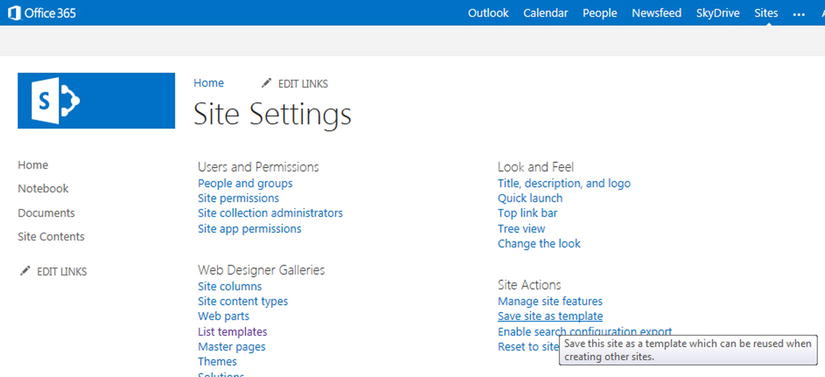
Figure 8-25. “Save site as template” link under Site Actions
Once you have clicked this link, the form in Figure 8-26 opens.

Figure 8-26. Creating your template
When completing this form, make sure you check the box that says Include Content. Otherwise, you are only preserving the lists, libraries, and web part page layouts. Click OK and the message in Figure 8-27 should display. Then click the “solution gallery” link.
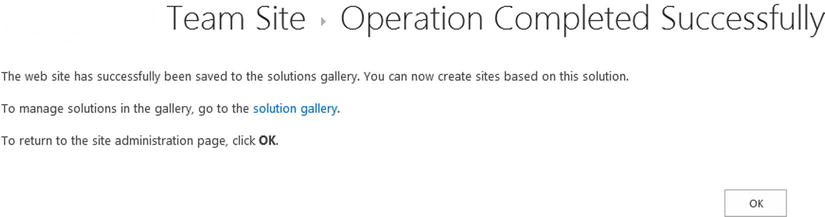
Figure 8-27. Click the “solution gallery” link.
Once you click on the “solution gallery” link, you will be on a page like the one in Figure 8-28. Right-click the site template you just created and select “Save target as” to copy the file (which has a .wsp extension) to a location where you can access it easily.

Figure 8-28. Right-click to save the solution separately
This file now contains all of the content from your site. With this .wsp file, you have a backup of your site. You can now import that into any solution gallery in any site collection and use it to recreate your site and its content. Just click “Upload Solution” to add the template and use it in that site collection (Figure 8-29).
Figure 8-29. Upload a site template to a solution gallery
Now the most important step: you can now use this template to restore the site. You can even restore it alongside the existing one by giving it a different name, just to recover something from it. This would only be necessary if it were not in the Recycle Bin, like if you had to restore something that was older than the time limit on the primary or secondary Recycle Bins. This could be useful in the case of SharePoint Online.
If you want to find the template again, browse Gear Icon ![]() Site Settings
Site Settings ![]() Web Designer Galleries
Web Designer Galleries ![]() Solutions. You can now use this template to restore the site if it is deleted. To do this, click on the gear in the upper right corner, then choose Site Contents. At the bottom of the next page is a link “new subsite” (Figure 8-30).
Solutions. You can now use this template to restore the site if it is deleted. To do this, click on the gear in the upper right corner, then choose Site Contents. At the bottom of the next page is a link “new subsite” (Figure 8-30).

Figure 8-30. Create a new site to recreate your content
Find your template under the Custom tab, then create your site, and you will see you have all the content and views again (see Figure 8-31).

Figure 8-31. Create your site based on your template.
In both cases, this is a way to recreate the site or list in another place, either in the same site collection or just in another site. Remember not to leave the template in the Gallery, as users may use it and make another copy.
Summary
This chapter shows that the task of maintaining backups of valuable content need not be the exclusive domain of the IT staff. Giving users the responsibility for and means to back up their own content is an excellent idea from an organizational point of view, as it is likely to save resources in both backup space and IT person-hours. IT usually has to back up everything that users produce because IT has no idea what’s important and what isn’t. If something goes wrong, the pressure is on IT to have preserved the right content and to be able to recover it. If users own these processes themselves, they will have a greater sense of control and ownership of the platform and a sense that they can create reassurances for themselves. This has the added benefit of freeing up resources in the IT department for other tasks. It not only saves resources in the form of people; a quick backup of a site or list using these methods means that large amounts of unnecessary data doesn’t need to be duplicated in multiple locations. This way, there is a duplicate but it’s for a good reason. Users can think of it as their own personal lifeboat in case of disaster.