
Magic words and templates provide advanced methods for including content that is dynamic or needs to be standardized across pages. Skins determine the overall look and feel of MediaWiki, as well as standard navigation features, and user tools. All three tools can be customized. This chapter will show you how to create your own templates, and how to modify the default MediaWiki skin to change the look and feel of your wiki. In Chapter 9, you will learn how to install and write extensions to MediaWiki, including how to create your own magic words.
This chapter assumes the reader knows what Cascading Stylesheets (CSS) are and how they work. It also assumes a basic understanding of programming languages, ideally PHP. If you are not familiar with CSS, you should familiarize yourself with it prior to reading the section on MediaWiki skins. An excellent introduction is available on Wikipedia at http://en.wikipedia.org/wiki/CSS. Another good source is Richard York's Beginning CSS: Cascading Style Sheets for Web Design, Second Edition (Wrox, 2004).
Magic Words are special words that serve as placeholders for other content that will appear on a wiki page. Some magic words were introduced in Chapter 4, but they weren't called magic words. The XML-style tags <nowiki> and <ref> are both examples of magic words because they are not raw HTML, and both have an impact on the way the content of the page is parsed and displayed.
There are several different styles of magic words, whose syntax is slightly different. Some magic words are surrounded by a pair of curly brackets ({{and}}), while others are perched between a double underscore character (___), and even others are tagged using XML constructs (such as the <nowiki> example already mentioned). The following sections document the most commonly used magic words and provide you with examples of how they are used.
The first group of magic words is not displayed directly on the page. Instead, they adjust the formatting or display of the page. They are always uppercase, and are surrounded by underscores, like so: _NOTOC_.
These magic words, described in the following table, are typed onto the page when it is being edited. The impact of using the words can be previewed when the page content is previewed.
Magic Word | Description |
|---|---|
| Causes the table of contents to appear where you want it on the page |
| Keeps the table of contents from appearing, regardless of the number of sections in the page |
| Forces the table of contents to appear when there are fewer than four sections, or when the user has set preferences so that no tables of content are displayed |
| Removes the "Edit" links that appear next to section headings on wiki pages |
| New section code ads a " + " tab next to the "edit" tab of a page. This is the default procedure on talk pages, because it allows the reader to automatically create a new section, separate from all the others, gently encouraging posters in talk sections to confine their comments to a section, rather than edit someone else's. The section is appended to the other sections before it, so the most recent posts on a talk page are at the bottom of the page, much like forum or message board words, and not at all the way a blog works, where the latest content appears at the top of the page. |
| When used on a page that contains a gallery, the page displays links to the images in the gallery, rather than display the images themselves. |
Variables are magic words that serve as placeholders whose values are replaced when the text is parsed. The replacement value itself varies, depending on the context. There are two basic groups of variables. The first group relates to date and time, and the replacement values are localized, depending on the language used in the site. The second group consists of variables that display information about a page or the wiki itself, such as the total number of articles, and so on. Variables are always in uppercase, and are surrounded by a pair of curly brackets, like so: {{CURRENTMONTH}}.
The following magic words all apply to dates and times, and the output is dependent upon the setting of $wgLanguageCode in LocalSettings.php. This setting determines the language that the wiki uses for all system messages, which are items such as user-interface elements, and so on.
Local times are based on the local time for the wiki and not what is configured in the user's preferences. All other times are based on UTC, otherwise known as Greenwich Mean Time.
The following table shows the relevant magic words and their sample output, based upon an arbitrary date of Tuesday, July 1, 2007, at 20:14 UTC and a four-hour difference between Greenwich and this location.
Magic Word | Output |
|---|---|
|
|
|
|
|
|
|
|
|
|
|
|
|
|
|
|
|
|
|
|
|
|
|
|
|
|
|
|
|
|
|
|
|
|
|
|
|
|
|
|
|
|
|
|
The following group of magic words causes information about the page to be displayed. It serves as a way to refer back and forth between related pages with the same title as the article, but in a different namespace. The sample output is based on a fictitious page called "Magic words that show information about the page." The words come in pairs, such as {{PAGENAME}} and {{PAGENAMEE}}. The extra E at the end means that the output has been escaped and can be used in external links or other places where escaped text is required.
Magic Word | Output |
|---|---|
| Returns the page name. If the page is a subpage, then the complete title is returned, such as The unescaped version returns: Magic words that show information about the page The escaped version returns: |
| Returns an empty string when in the default namespace; otherwise, returns the appropriate namespace. |
| Returns the name of the next odd namespace. If the page is in the default names, then it returns the namespace Talk. If the page is in the Help namespace (number 12), then the title of the namespace 13 is returned, which, in this case, would be |
| Returns the name of the previous even-numbered namespace. For example, if this magic word is used on a page in the |
| Returns the namespace and the name of the page. Unescaped: Escaped: |
| Only returns the name of the subpage, and does not return the parent pages, unlike |
| Only returns the name of the parent page of a subpage. |
| Unescaped: Escaped: |
| Returns the full page name in the subject namespace. In other words, if you are on the Help page, then you can enter
|
These magic words return information about the revision status of the containing page.
Magic Word | Output |
|---|---|
| The revision ID of the page. |
| The day of the month of the last revision. If the revision was made on August, 1, then the output would be |
| The same as before, but with preceding zeros. August, 1 would be represented as |
| The number of the month the revision took place. If the revision was made in August, it would be |
| Returns the year the revision was made: |
| A timestamp in ISO 8601 format. For the date/time of July 11, 2007, at 12:05:35 P.M., it will return |
The following magic words provide statistical information about the wiki itself. You will notice that these often occur in pairs as well, such as {{NUMBEROFPAGES}} and {{NUMBEROFPAGES:R}}. The words that end with :R are actually examples of parser functions, rather than variables because the R is a parameter that tells the parser to return raw data, which, in practice, means returning numbers without thousands separators.
Magic Word | Output |
|---|---|
| |
| Returns the language code: en for English, and so on. |
| These parser functions are self-descriptive. They return the number of articles in the wiki, the number of pages, files, users, and so on. |
| The parser function version of these magic words returns the same value as the variable versions, except without any thousands separator. For example, if there are 10,000 articles in a wiki, |
| Returns the count for the number of pages in a given namespace. Replace " |
| Same as above, except without thousands separators. |
| For example, |
According to the MediaWiki documentation, parser functions were originally called colon functions by those who first documented them, presumably because of the presence of a colon character separating the function name from the function arguments. In any event, the term colon functions was quickly dumped in favor of the more amenable (and descriptive) phrase "parser functions." There are core parser functions, that are part of the basic MediaWiki distribution, and there are a number of parser functions developed as extensions that can be added to MediaWiki. Whether a core parser function, or an extension, both adhere to the same underlying interface.
This group of functions is used to change the case of words on the page, as shown in the following table.
Magic Word | Output |
|---|---|
|
|
|
|
|
|
|
|
The following functions are used to build links to other pages. They work with wikilinks as well as intrawiki links. Note that both fullurl and localurl have escaped versions, but there is no difference in the output.
Magic Word | Output |
|---|---|
|
|
|
|
|
|
|
|
|
|
|
|
|
|
|
|
| This returns an encoded string of text so that it is suitable for use in a URL. The output in this example would be |
| This function is used to reference named anchors that are generated for page sections. For example, the wikitext
This function takes the name of the section and returns the string to use to reference the anchor: |
The ns parser function provides a way to generate namespace text by referring to the namespace number or the name of the namespace itself.
Magic Word | Output |
|---|---|
|
|
|
|
|
|
|
|
| The default content namespace does not return a value. |
|
|
|
|
|
|
|
|
|
|
|
|
|
|
|
|
|
|
|
|
|
|
|
|
|
|
|
|
|
|
|
|
|
|
|
|
These variables and parser functions are commonly used to create links to other pages in the wiki, and can be used inside of wikilinks. For example, if you want to refer to the Talk page for a given article from within that article, you could use the following:
[[{{TALKPAGENAMEE}}]]Templates embed the content from one page in another, a process called transclusion. Most often, the page that is being embedded is in the Template namespace (although it doesn't have to be).
To see an example of how templates work, create a page called Template:Test in your wiki, edit it, and add the following text:
This is a sample template page, and it will be transcluded in another page.

<noinclude>None of the text here will be displayed</noinclude>
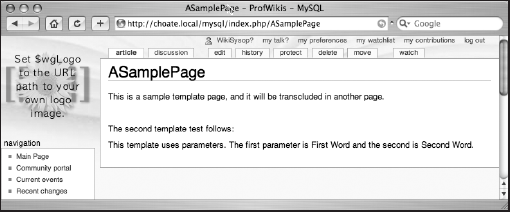
Next, create another page called ASamplePage, and edit it as well, entering only {{Test}}.
The page ASamplePage now refers to the Template:Test page, and the content of the Template:Test page will be included in ASamplePage. Figure 8-1 shows the output of ASamplePage. Note that only the first sentence is displayed, and nothing inside the <noinclude> tags is displayed. The <noinclude> tags are used to display instructions about how to use the template.

You can use parameters with templates, too. By defining a template that takes parameters, you are able to define a standard way of displaying information. For example, suppose you want people to review websites on your site, and you want to make sure that they all include the same basic kinds of information. A parameterized template works perfectly.
When parameters are used, they can be referred to by their name or by their position. Create another template called Template:SecondTest and include the following content:
This template uses parameters. The first parameter is {{{1}}}
and the second is {{{2}}}.
Note that the numbers surrounded by three curly brackets are numbered sequentially, which corresponds to their position in the template tag when it is called from another page. In the following example, the phrase "First Word" is in the first position, and the phrase "Second Word" is in the second position. This means that First Word will replace {{{1}}} in the template, and Second Word will replace {{{2}}} in the template:
{{Test}}

The second template test follows:

{{SecondTest|First Word|Second Word}}
Figure 8-2 shows the output of this new, parameterized template.
In addition to using parameter position to determine what is replaced, MediaWiki also supports named parameters. Instead of using numbers, you can use words to create placeholders for the information that will be passed to the template. In the following example, the template is expecting two parameters, one named First and the other named Second. Otherwise, the following is identical to the previous example:
This template uses parameters. The first parameter is {{{first}}}
and the second is {{{second}}}.
When this template is called, you need to add the name of the parameter to the template tag, as parameter position is no longer being used, as shown in the following example:
{{Test}}

The second template test follows:

{{SecondTest|first=First Word|second=Second Word}}
The output for this template is identical to the output displayed in the previous example.
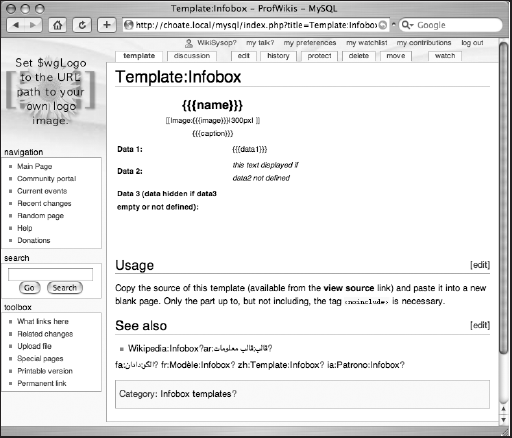
Wikipedia uses a lot of templates, and you'll find references to the templates in the help sections on Wikipedia and MediaWiki. Unfortunately, those templates aren't installed by default when you install MediaWiki. It's easy enough to copy a template, however. One common template used on Wikipedia is the Infobox template, which is used to organize related information on a given page. You can see the source of the template by going to http://en.wikipedia.org/wiki/Template:Infobox. A screen shot of the Infobox template is shown in Figure 8-3.

To access the source, click the Source tab. This is a slightly more complicated template than the previous examples, but the basic structure is the same. Note that this template uses named parameters, which makes it easy for people to remember when dealing with templates with several parameters:
{| class="infobox bordered" style="width: 25em; text-align: left; font-size: 90%;"
|-
| colspan="2" style="text-align:center; font-size: large;" | '''{{{name}}}'''
|-
| colspan="2" style="text-align:center;" | [[Image:{{{image}}}|300px| ]]<br>
   {{{caption}}}
|-
! Data 1:
| {{{data1}}}
|-
! Data 2:
| {{{data2|"this text displayed if data2 not defined"}}}
|-
! Data 3 (data hidden if data3 empty or not defined):
| {{{data3|}}}
|-
| colspan="2" style="font-size: smaller;" | {{{footnotes|}}}
|}
<noinclude> <!-- TO MAKE A NEW TEMPLATE: copy the source up to, but not including, the "noinclude" line into a new page. --> <br style="clear:both" /> == Usage == Copy the source of this template (available from the '''view source''' link) and paste it into a new blank page. Only the part up to, but not including, the tag <code><noinclude></code> is necessary. ==See also== *[[Wikipedia:Infobox]] [[Category:infobox templates| ]] [[ar:]] [[fa:]] [[fr:Modele:Infobox]] [[zh:Template:Infobox]] [[ia:Patrono:Infobox]] </noinclude>
Cut and paste this text into a page of your wiki called Template:Infobox and you will immediately be able to use that template on your site. There is a caveat, however. The CSS used in the default MediaWiki distribution does not know about this particular template, causing it to look like it appears in Figure 8-4. In order to make the infobox look the way you want it to look, you need to customize the CSS, which is covered in detail in the "Skins" section.
When a template is transcluded in a page, it is normally refreshed every time the page is rebuilt, which varies depending on your caching policies. This means that when the template is changed, the pages that include the template will reflect the changes as well. Sometimes you won't want this to happen; to ensure that, use the template modified by subst. The first time a template is included in a page, the content of the template is embedded in the page, so that it will not be changed if the original template is changed later. To substitute our Test template, you would simply change your wikitext to {{subst:Test}} instead of {{Test}}.
Magic words, variables, and parser functions are all used in wikitext, primarily in the main content area of each page, but this is not the only place where you can use wikitext. In addition to the article content, other elements on each wiki page make up the user interface, including navigation boxes, sidebars, copyright notices, and so on, and the text of these elements can be changed as well.
There are two ways to change the overall user interface. Minor changes to the text used in the interface can be changed with interface messages. Large-scale changes to the user interface require modification of the wiki's skin. Both techniques are explained in the following sections.
Interface messages are a kind of system message. MediaWiki handles system messages in a unique way in order to be able to localize the user interface of the wiki and present the interface in the appropriate language for that wiki.
Generally speaking, interface messages consist of all the navigation elements and related text that appear on all the pages. For example, the Sidebar interface message is how the navigation links in the left-hand column of a MediaWiki page are defined (when using the Monospace skin). Specifically, an interface message is a page in the MediaWiki namespace, and this page is used to determine what text to display in different elements of the page.
In order to customize interface messages, $wgUseDatabaseMessages should be set to True in LocalSettings.php. You also must be logged in as an administrator. When logged in as such, the interface message pages are edited just like any other page, and can include wikitext, magic words, parser functions, and so on.
All interface messages are in the MediaWiki namespace. Therefore, the following is the URL for the Sidebar interface message:
http://127.0.0.1/mysql/index.php/MediaWiki:Sidebar
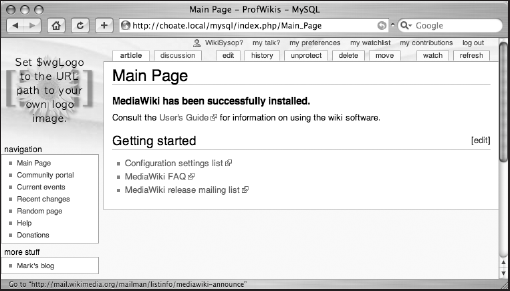
The Sidebar interface message is responsible for the navigation box in the left-hand column of the Monospace skin.
The navigation elements are defined using a customized version of wikitext in order to specify links. The default content follows:
* navigation
** mainpage|mainpage
** portal-url|portal
** currentevents-url|currentevents
** recentchanges-url|recentchanges
** randompage-url|randompage
** helppage|help
** sitesupport-url|sitesupport
The first item is the label. It can be another system message, a wiki link, or an external link. MediaWiki checks first to whether a system message with the same name exists. If it does, then the content of the system page is used for the label. In this case, if you visit the page MediaWiki:Mainpage, you will find that it contains the text "Main Page," and that is what is displayed for that link.
The second element (the part after the "|" character) defines the link for that item. It, too, can be an interface message. The interface messages are converted to the appropriate text prior to the wikitext being parsed by the parser. That's why the line ** mainpage|mainpage can be used to define a link to the main page of the wiki. In effect, mainpage is converted to "Main Page", and "Main Page" is then converted to a wiki link to the page titled "Main Page."
The asterisks work similarly to the way they work when creating lists in wikitext, with a few notable differences. First, a single asterisk at the start of a line denotes a new section and causes a new box to be displayed on the page, with the text that follows the asterisk as the label. You can nest items in the list by adding additional asterisks, just as you can with lists. The following example shows how to add a new section to the navigation list, as well as how to use an external link in the navigation list. Note that when you preview the changes, MediaWiki displays the external link incorrectly, but when it is saved, the link is displayed as it should on the page.
* navigation
** mainpage|mainpage
** portal-url|portal
** currentevents-url|currentevents
** recentchanges-url|recentchanges
** randompage-url|randompage
** helppage|help
** sitesupport-url|sitesupport
* More stuff
** http://choate.info/|Mark's blog
Figure 8-5 shows how the page looks with this modified sidebar.
Another commonly used interface message is the Sitenotice interface message, which is used to display messages that you want all users to see. It is displayed at the top of the page, as shown in Figure 8-6.

The MediaWiki:Sitenotice page must be edited, just like the MediaWiki:Sidebar page was edited. Once done, the notice is displayed sitewide.
The copyright warning that is displayed on editing pages is defined in MediaWiki:Copyrightwarning. This interface message is different from the previous two examples in that it uses parameters to customize the message for a given context. Go to the MediaWiki:Copyrightwarning page and edit it and you will see the following text:
Please note that all contributions to {{SITENAME}} are considered to be released
   under the $2 (see $1 for details). If you don't want your writing to be edited
   mercilessly and redistributed at will, then don't submit it here.<br/>
You are also promising us that you wrote this yourself, or copied it from
   a public domain or similar free resource.
<strong>DO NOT SUBMIT COPYRIGHTED WORK WITHOUT PERMISSION!</strong>
There are two variables, $1 and $2, and these values are determined based on the settings of the wiki. $1 refers to the name of the license used by the wiki, if that has been configured in LocalSettings.php. $2 refers to the link to the wiki page that describes the copyright policy (again, if it has been configured).
An up-to-date list of available interface messages can be found at
www.mediawiki.org/wiki/Category:Interface_messages.
Skins are a collection of resources used to define the overall look and feel of your wiki. The goal of good content management system design is to achieve a separation of application logic and content design. It's never possible to completely separate the two, of course, and a significant amount of application logic in the skin classes shouldn't be meddled with unless you want to change the actual functionality of your wiki.
Skins include a few PHP classes, CSS, JavaScript scripts, and graphical resources. All modern MediaWiki skins are a subclass of the SkinTemplate class, and the QuickTemplate class, both of which are defined in /includes/SkinTemplate.php. The default template for MediaWiki is Monobook, and the Monobook subclasses are defined in /skins/Monobook.php. All of the related graphics, CSS, and JavaScript scripts are in the directory /skins/monobook/ or /skins/common.
If you create your own skin, you will create your own directory for these files, and you should never overwrite anything in
/skins/common.
The wiki's logo is defined by assigning a URL to the $wgLogo variable in LocalSettings.php. The default size of the logo should be 135 pixels high and 135 pixels wide. Because you are using a URL, the logo can be a file on a different server, or it can be an image file uploaded into the wiki itself. In order to customize the size of the logo, you need to modify the Main.css file in the Monobook skin.
The following excerpt from Main.css shows how logo size is defined for the #p-logo selector. In order to change the size of the logo, you need to change the values for height and width to match that of the logo you plan to display. You do not want to change the original Main.css stylesheet, because it may be overwritten when you upgrade MediaWiki. See the section "Customizing CSS and JavaScript" later in this chapter to learn how to change stylesheets in an upgrade-proof way. Here is the code defining logo size:
#p-logo {
    z-index: 3;
    position:absolute; /*needed to use z-index */
    top: 0;
    left: 0;
    height: 155px;
    width: 12em;
    overflow: visible;
}The default skin is Monobook, but other skins are available, which the user can select if you have not changed the default values. You can change the default skin by setting the $wgDefaultSkin global variable in LocalSettings.php. When you do, use the lowercase version of the skin name. For example, if you wanted to change the default skin to CologneBlue, you would enter the following:
$wgDefaultSkin = cologneblue;
You can also limit the skins from which users can choose on their preferences page by populating the $wgSkinSkins array in LocalSettings.php. If you do so, every skin listed in this array will be skipped and will not be shown as an option to the user.
$wgSkipSkins = array("chick", "cologneblue", "myskin", "nostalgia", "simple", "standard");If you want to remove all skin options from the user, as well as any trace that it's possible for other skins to exist, then you need to remove the Skins tab in the user's preferences page. In order to do this, edit the /includes/SpecialPreferences.php file. This file is responsible for building the preferences page for the user. Comment out the code that builds the Skin tab (in other words, start each line that refers to the tab with a # character). The code in question is as follows:
# Skin
#
$wgOut->addHTML( "<fieldset>
<legend>
" . wfMsg('skin') . "</legend>
" );
$mptitle = Title::newMainPage();
$previewtext = wfMsg('skinpreview'),
# Only show members of Skin::getSkinNames() rather than
# $skinNames (skins is all skin names from Language.php)
$validSkinNames = Skin::getSkinNames();
# Sort by UI skin name. First though need to update validSkinNames as sometimes
# the skinkey & UI skinname differ (e.g. "standard" skinkey is "Classic" in the UI).
foreach ($validSkinNames as $skinkey => & $skinname ) {
 if ( isset( $skinNames[$skinkey] ) )  {
         $skinname = $skinNames[$skinkey];
         }
 }
 asort($validSkinNames);
foreach ($validSkinNames as $skinkey => $sn ) {
if ( in_array( $skinkey, $wgSkipSkins ) ) {
continue;
}
$checked = $skinkey == $this->mSkin ? ' checked="checked"' : ";
$mplink = htmlspecialchars($mptitle->getLocalURL("useskin=$skinkey"));
$previewlink = "<a target='_blank' href="$mplink">$previewtext</a>";
if( $skinkey == $wgDefaultSkin )
$sn .= ' (' . wfMsg( 'default' ) . ')';
$wgOut->addHTML( "<input type='radio' name='wpSkin' id="wpSkin$skinkey"
value="$skinkey"$checked /> <label for="wpSkin$skinkey">{$sn}</label>
$previewlink<br />
" );
}
$wgOut->addHTML( "</fieldset>
" );After the preceding code is commented out, users will only be able to use the default skin, as specified by the wiki administrator.
The CSS files for Monobook are in /skins/monobook/main.css. If you want to customize the look and feel of your site, you do not want to change this file directly, because it may be overwritten when upgrading to a later version of MediaWiki. In order to work around this potential problem, MediaWiki provides ways to generate site-specific and user-specific CSS that will not be overwritten during an upgrade.
Users in the sysop group can define a new CSS document that will be applied to the entire wiki but that won't overwrite the original CSS files. The same is true for JavaScript files as well. The first step is to enable this feature by entering the following code into LocalSettings.php:
$wgUseSiteCss = true;
$wgUseSiteJs = true;
Once it is enabled, the sysop should create the following pages in the MediaWiki namespace:
MediaWiki:Monobook.css
MediaWiki.Monobook.js
After this is done, the sysop can enter style information into the CSS file (or code into the JavaScript file).
In the previous section, the template copied from Wikipedia did not display correctly because the customized CSS required to do so was missing. Using MediaWiki's CSS customization features, it's possible to go to Wikipedia and view the customized CSS. Type the following URL in your browser and you will be taken to the appropriate page:
http://en.wikipedia.org/wiki/MediaWiki:Monobook.css
In the previous example, the table element used in the Infobox was in the infobox class. You can scroll through the CSS on this page until you find a reference to the infobox class, which, at the time of writing, was as follows:
/* Infobox template style */

.infobox {
   border: 1px solid #aaa;
   background-color: #f9f9f9;
   color: black;
}

.infobox.bordered td,
.infobox.bordered th {
   border: 1px solid #aaa;
}

/* styles for bordered infobox with merged rows */
.infobox.bordered .mergedtoprow td,
.infobox.bordered .mergedtoprow th {
   border-top: 1px solid #aaa;
   border-right: 1px solid #aaa;
}

.gallerybox .thumb img {
  background: #F9F9F9;
}

.infobox.bordered .mergedrow td,
.infobox.bordered .mergedrow th {
   border-right: 1px solid #aaa;
}
You can copy the preceding CSS and then go back to your wiki and paste it into the MediaWiki:Monobook.css page so that the infoboxes that appear on your page now look exactly like the ones on Wikipedia.
When Monobook.css is customized, it does not eliminate the other CSS files used by the site. If the style is new, and not represented in the default CSS file, then the style is simply added. If the style already exists, then it is overridden by the new style in Monobook.css. This means that you can override the setting for #p-logo in the MediaWiki:Monobook.css page. Simply add the selector to that page and change any of the values you want to change, and that change will then be reflected in the site.
The sitewide CSS and JavaScript can only be modified by a sysop, but the same functionality can be implemented for users as well. If you want to let users create their own CSS or JavaScript for the site, you need to enable the following variables in LocalSettings.php:
$wgAllowUserCss=true;
$wgAllowUserJs=true;
Once the site is configured, users can create their own stylesheets and JavaScript scripts by creating the following pages:
Special:Mypage/monobook.css
Special:Mypage/monobook.js
The special page Mypage creates a subpage to your user page. Once created, you can now customize to your heart's content.
While there may be some legitimate reasons to let users customize their stylesheets, it is usually better to disable this feature altogether. This is because if you don't know exactly what you are doing, you can make your site unusable. While it's true that any problems would be limited to users who customizes their own CSS, you can avoid the support headache by avoiding the feature altogether. Bear in mind that users can usually override a site's stylesheet in their own browser, which is the best solution for customization.
The following code listing is a sample of a MediaWiki page as generated by the Monobook skin, with most of the content stripped out to make it more legible. References to CSS files and to element classes and IDs are in bold.
The Monobook skin makes liberal use of HTML element IDs, which means that you can easily customize the display of just about every element on the page. The boxes that appear on the left side of the page (when using left-to-right languages) are called portlets, and the <div> element that contains them is in the portlets class. Look in the sample HTML and you will see that every list item inside the various portlets contains a unique ID.
Refer to this if you want to customize your site, so that you will know the names of the IDs and classes that you will need to create in your own CSS:
<body class="mediawiki ns-0 ltr page-Main_Page">
<div id="globalWrapper">
  <div id="column-content">
    <div id="content">
      <a name="top" id="top"></a>
      <h1 class="firstHeading">Main Page</h1>

      <div id="bodyContent">
        <h3 id="siteSub">From ProfWikis - MySQL</h3>

        <div id="contentSub"></div>

        <div id="jump-to-nav">
          Jump to: <a href="#column-one">navigation</a>, <a
   href="#searchInput">search</a>
        </div>

        <!-- Content goes here -->

        <div class="visualClear"></div>
      </div>
</div>
</div>
<div id="column-one">
<div id="p-cactions" class="portlet">
<h5>Views</h5>
<div class="pBody">
<ul>
<li id="ca-nstab-main" class="selected"><a
href="/wiki/index.php/Main_Page">Article</a></li>
<li id="ca-talk" class="new"><a
href="/wiki/index.php?title=Talk:Main_Page&action=edit">Discussion</a></li>
<li id="ca-edit"><a
href="/wiki/index.php?title=Main_Page&action=edit">Edit</a></li>
<li id="ca-history"><a
href="/wiki/index.php?title=Main_Page&action=history">History</a></li>
<li id="ca-unprotect"><a
href="/wiki/index.php?title=Main_Page&action=unprotect">unprotect</a></li>
<li id="ca-delete"><a
href="/wiki/index.php?title=Main_Page&action=delete">Delete</a></li>
<li id="ca-move"><a
href="/wiki/index.php/Special:Movepage/Main_Page">Move</a></li>
<li id="ca-watch"><a
href="/wiki/index.php?title=Main_Page&action=watch">Watch</a></li>
</ul>
</div>
</div>
<div class="portlet" id="p-personal">
<h5>Personal tools</h5>
<div class="pBody">
<ul>
<li id="pt-userpage"><a
href="/wiki/index.php/User:WikiSysop" class="new">WikiSysop</a></li>
<li id="pt-mytalk"><a
href="/wiki/index.php/User_talk:WikiSysop" class="new">My talk</a></li>
<li id="pt-preferences"><a
href="/wiki/index.php/Special:Preferences">My preferences</a></li>
<li id="pt-watchlist"><a
href="/wiki/index.php/Special:Watchlist">My watchlist</a></li>
<li id="pt-mycontris"><a
href="/wiki/index.php/Special:Contributions/WikiSysop">
My contributions</a></li>
<li id="pt-logout"><a
href="/wiki/index.php?title=Special:Userlogout&returnto=Main_Page">
Log out</a></li>
</ul>
</div>
</div>
<div class="portlet" id="p-logo">
<a style="background-image: url(/wiki/skins/common/images/wiki.png);"href="/wiki/index.php/Main_Page" title="Main Page"></a> </div> <div class='portlet' id='p-navigation'> <h5>Navigation</h5> <div class='pBody'> <ul> <li id="n-mainpage"><a href="/wiki/index.php/Main_Page"> Main Page</a></li> <li id="n-portal"><a href="/wiki/index.php/ProfWikis_-_MySQL:Community_Portal"> Community portal</a></li> <li id="n-currentevents"><a href="/wiki/index.php/Current_events">Current events</a></li> <li id="n-recentchanges"><a href="/wiki/index.php/Special:Recentchanges">Recent changes</a></li> <li id="n-randompage"><a href="/wiki/index.php/Special:Random">Random page</a></li> <li id="n-help"><a href="/wiki/index.php/Help:Contents">Help</a></li> <li id="n-sitesupport"><a href="/wiki/index.php/ProfWikis_-_MySQL:Site_support">Donations</a></li> </ul> </div> </div> <div id="p-search" class="portlet"> <h5><label for="searchInput">Search</label></h5> <div id="searchBody" class="pBody"> <form action="/wiki/index.php/Special:Search" id="searchform" name="searchform"> <div> <input id="searchInput" name="search" type="text" accesskey="f" value="" /> <input type='submit' name="go" class="searchButton"id="searchGoButton"value="Go" /> <input type='submit' name="fulltext"class="searchButton" id="mw-searchButton"value="Search" /> </div> </form> </div> </div> <div class="portlet" id="p-tb"> <h5>Toolbox</h5> <div class="pBody"> <ul> <li id="t-whatlinkshere"><a href="/wiki/index.php/Special:Whatlinkshere/Main_Page"> What links here</a></li>
<li id="t-recentchangeslinked"><a
href="/wiki/index.php/Special:Recentchangeslinked/Main_Page">
Related changes</a></li>
<li id="t-upload"><a
href="/wiki/index.php/Special:Upload">Upload file</a></li>
<li id="t-specialpages"><a
href="/wiki/index.php/Special:Specialpages">Special pages</a></li>
<li id="t-print"><a
href="/wiki/index.php?title=Main_Page&printable=yes">
Printable version</a></li>
<li id="t-permalink"><a
href="/wiki/index.php?title=Main_Page&oldid=150">Permanent link</a></li>
</ul>
</div>
</div>
</div><!-- end of the left (by default at least) column -->
<div class="visualClear"></div>
<div id="footer">
<div id="f-poweredbyico">
<a href="http://www.mediawiki.org/"><img src="/wiki/skins/common/
images/poweredby_mediawiki_88x31.png" alt="Powered by MediaWiki" /></a>
</div>
<div id="f-copyrightico"></div>
<ul id="f-list">
<li id="lastmod"></li>
<li id="viewcount"></li>
<li id="copyright"></li>
<li id="privacy"></li>
<li id="about"></li>
<li id="disclaimer"></li>
</ul>
</div>
</div>
</body>You create a new skin by subclassing SkinTemplate and QuickTemplate, both of which are defined in /includes/SkinTemplate.php. The easiest way to create your new skin is to use an existing skin as the basis for your own. To create a new skin, follow these steps:
Copy the
/skins/monobookdirectory to a new directory with a name based on your skin, such as/skins/profwiki. This directory containsmain.css, plus a handful of graphics that are used in the skin.Copy
/skins/Monobook.phpto/skins/ProfWiki.php.Two classes are defined in
Monobook.php. Changeclass SkinMonoBook extends SkinTemplatetoclass SkinProfWiki extends SkinTemplate. Then changeclass MonoBookTemplate extends QuickTemplatetoclass ProfWikiTemplate extends QuickTemplate.The class now named
SkinProfWikicontains the following three lines:$this->skinname = 'monobook'; $this->stylename = 'monobook';
$this->template =  'MonoBookTemplate';
      These values should be changed to reflect the new skin name:
$this->skinname = 'profwiki';
$this->stylename = 'profwiki';
$this->template =  'ProfWikiTemplate';
Set
$wgDefaultSkin='profwiki'inLocalSettings.php.
With these steps finished, the skin is ready to be customized.
In this chapter, you learned how magic words, templates, and skins provide advanced editing capability to users, and provide a means of standardizing the look and feel of your wiki. You learned how to use the most commonly used magic words, and how to create templates, as well as how to customize the skin currently used on your wiki. These customizations are just the start of what you can do with MediaWiki. In Chapter 9, you will learn how to install and use extensions and how to create your own magic words to extend the functionality of your wiki.