
Chapter 10. ASP.NET Security
An old adage among developers is that building security into software is like paying taxes. You know it’s important and you know you must do it sooner or later, but you put it off as long as you can and when you finally do it, you do so only because you have to. You might not go to jail for building insecure applications, but security is no less important because of it. In many applications—Web applications in particular—security isn’t a luxury; it’s a necessity.
Security is a Big Deal in network applications because by nature those applications are available to (and vulnerable to misuse by and outright attacks from) a larger population of users. When the network an application is deployed on is the Internet, security becomes even more important because the list of potential users grows to about 4 billion. Web security is a broad and complicated subject. Much of the ongoing research in the field has to do with hardening Web servers against attacks. Administrators who work on networks where IIS is deployed are all too aware of the security holes in IIS and of the constant stream of patches and security updates from Redmond. But this chapter isn’t about protecting servers from buffer overruns and other hack attacks; it’s about using ASP.NET to build secure sites that serve up pages only to authorized users.
Most sites built with ASP.NET fall into one of three categories:
Sites whose content is freely available to everyone.
Internet sites that serve the general population but require a login before displaying certain pages. eBay is a great example of such a site. Anyone can browse eBay and view the ongoing auctions, but when you place a bid, eBay requires a user name and password. eBay also has a feature named “My eBay” that lets you review the auctions you’ve bid on. Because My eBay pages are personalized for individual users and because they contain private information such as maximum bid prices, you must log in before viewing them.
Intranet sites that expose content to a controlled population of users—a company’s employees, for example—who have accounts in a Windows domain (or set of domains). Sometimes these sites support a limited degree of Internet access too, so authorized users can access them from anywhere an Internet connection is available.
Sites that fall into the first category require no special protection beyond what the Web server provides. Sites in the second and third categories require some form of application-level security to identify authorized users and prevent illicit accesses. ASP.NET provides that application-level security. It works in conjunction with IIS and the Windows security subsystem to provide a solid foundation for building secure sites. And ASP.NET builds on what IIS has to offer to make deploying secure sites as easy as possible.
Understanding Web Security
At the application level, Web security is first and foremost about securing pages so that they can’t be retrieved by unauthorized users—for example, preventing nonmanagers from viewing pages containing salary data and performance evaluations on the company intranet or preventing other people from viewing your My eBay pages. At a slightly deeper level, you might want to know who requested a page so that you can personalize it for that individual. Either form of protection requires two overt actions on the part of the application:
Identify the originator of each request
Define rules that govern who can access which pages
A Web server identifies callers using a mechanism known as authentication. Once a caller is identified, authorization determines which pages that caller is allowed to view. ASP.NET supports a variety of authentication and authorization models. Understanding the options that are available and how they interrelate is an important first step in designing a site that restricts access to some or all of its resources or that personalizes content for individual users.
Authentication
Authentication enables the recipient of a request to ascertain the caller’s identity. The caller might claim to be Bob, but you don’t know he’s Bob unless you authenticate him. ASP.NET supports three types of authentication:
Windows authentication
Passport authentication
Forms authentication
When Windows authentication is selected, ASP.NET looks to IIS for help. IIS does the hard part by authenticating the caller. Then it makes the caller’s identity available to ASP.NET. Let’s say Windows authentication is enabled and Bob requests an ASPX file. IIS authenticates Bob and forwards the request to ASP.NET along with an access token identifying Bob. ASP.NET uses the token to make sure Bob has permission to retrieve the page he requested. ASP.NET also makes the token available to the application that handles the request so that at its discretion, the application can impersonate Bob—that is, temporarily assume Bob’s identity—to prevent code executed within the request from accessing resources that Bob lacks permission to access.
For Web applications, Windows authentication is typically used in the following scenarios:
Your application is deployed on a company’s intranet and everyone who uses it has an account that they can use to log in and access network resources.
Your application is primarily intended for use on a company intranet, but you’d also like employees to be able to log in and use the application remotely—that is, from outside the firewall.
The overarching goal of Windows authentication is to map incoming requests to user accounts on your Web server (or in the Web server’s domain). In addition to preventing users who lack the proper login credentials from accessing parts of your site that require authenticated access, Windows authentication lets you use the operating system’s built-in security mechanisms to protect files and other resources from unauthorized access by authenticated users.
Passport authentication relies on Microsoft Passport to authenticate users. Passport is a Web service that serves as a front end to a massive database of user names and passwords maintained by Microsoft. Users who register with Passport can be authenticated anywhere on the Internet by applications that present login credentials to Passport. If Passport determines that the credentials are valid, it returns an authentication ticket that the application can encode in a cookie to prevent the user from having to log in time and time again. Further information about Passport can be found in the Passport SDK, which you can download for no charge from Microsoft’s Web site.
Forms authentication relies on login forms in Web pages to authenticate users. Example 10-11 shows an example of forms authentication in action on eBay. You can surf most of eBay’s site without logging in, but to bid on an item or go to My eBay, you have to enter a user name and password to let eBay know who you are. Windows authentication isn’t very practical in this scenario because eBay doesn’t want to assign each of its millions of users a Windows account on its servers. Forms authentication fits the bill nicely because it doesn’t require users to have Windows accounts. It’s perfect for Internet sites designed to serve the general population but that have to know who a user is before allowing him or her access to certain pages. Forms authentication is as old as the Web, but ASP.NET makes it incredibly easy. You’ll see what I mean later in this chapter.

You tell ASP.NET what type of authentication, if any, to use through Web.config files. The following Web.config file enables forms authentication for the corresponding application:
<configuration>
  <system.web>
    <authentication mode="Forms" />
  </system.web>
</configuration>
Other valid mode values include None, Windows, and Passport. The default, defined in Machine.config, is Windows. The authentication mode is an application-wide setting that can be set only in the application root and can’t be overridden in subordinate Web.config files. You can’t use Windows authentication in one part of an application and forms authentication in another.
Authorization
Authentication is an important element of Web security—indeed, of network security in general—because it establishes trust. You can’t trust a user if you don’t know who he or she is.
Authorization is the other half of the security equation. Once you know who a user is, authorization determines what resources that person can access. On a company intranet, for example, you might want to prevent rank-and-file employees from accessing files and directories containing payroll data. That’s what authorization is for. ASP.NET supports two forms of authorization:
ACL (access control list) authorization, also known as file authorization
URL authorization
ACL authorization is based on file system permissions. Most Web servers that run IIS and ASP.NET use the NTFS file system. NTFS uses ACLs to protect file system resources—that is, files and directories. It’s trivial, for example, to tag a file with an ACL that permits only system administrators to read it. You simply pop up the file’s property sheet, go to the Security page, remove the security principals (users and groups) that are currently listed, and add administrators. If you don’t want Bob to view a particular ASPX file, you can deny Bob read access to the file in an ACL and Bob will be greeted with an access denied error when he tries to view the page. Because ACL checks are performed against access tokens representing Windows security principals, ACL authorization is typically used in scenarios in which Windows authentication is used too.
URL authorization works differently. Rather than rely on NTFS permissions to protect resources, it relies on configuration directives in Web.config files. URL authorization is wholly a function of ASP.NET and does not require the complicity of IIS. It’s most often used with forms authentication, but it can be used with other authentication types as well.
IIS Security
IIS is a Web server. Its primary job is to accept connections from remote clients and respond to HTTP requests arriving through those connections. Most of the requests are HTTP GET and POST commands requesting HTML files, JPEG files, ASPX files, and other file system resources. Obviously, you don’t want someone who connects to your Web server to be able to retrieve just any file that resides there. IIS protects a server’s content in four ways:
Web applications are deployed in virtual directories that are URL-addressable on the server. Remote clients can’t arbitrarily grab files outside virtual directories and their subdirectories.
IIS assigns every request an access token representing a Windows security principal. The access token enables the operating system to perform ACL checks on resources targeted by the request. If the request runs as Bob and Bob isn’t allowed to read Hello.html, the request will fail when it attempts to read Hello.html. In addition, IIS makes Bob’s access token available to ASP.NET so that ASP.NET can perform access checks of its own.
IIS supports IP address and domain name restrictions, enabling requests to be granted and denied based on the IP address or domain of the requestor.
IIS supports encrypted HTTP connections using the Secure Sockets Layer (SSL) family of protocols. SSL doesn’t protect resources on the server per se, but it does prevent eavesdropping on conversations between Web servers and remote clients.
All of these protection mechanisms are important to ASP.NET programmers, but item number 2 merits special consideration because ACL checks are entirely dependent upon the identity assigned to a request, and when Windows authentication is the chosen form of authentication, ASP.NET works closely with IIS to resolve issues involving identity.
IIS runs in a process named Inetinfo.exe. Inetinfo.exe typically runs using the identity of the built-in SYSTEM account, which is highly privileged on the host machine. Requests forwarded to ASP.NET by IIS don’t run as SYSTEM, however. They’re assigned the identity of a specific user. Which user depends on the configuration of the requested resource.
Through the IIS configuration manager found under Administrative Tools, IIS permits authentication control to be applied to individual files and directories. A given file or directory can be configured to allow anonymous access (access by unauthenticated users), authenticated access, or both. Let’s say a request comes in for a file that allows anonymous access. By default, the request executes as IUSR_machinename, where machinename is the Web server’s machine name. IUSR_machinename is a special account that’s created when IIS is installed. You can use the IIS configuration manager to map anonymous requests to other accounts, but assuming you don’t change the defaults, requests from anonymous users are tagged with IUSR_machinename’s access token. It follows that Web pages intended for anonymous users should not be tagged with ACLs that deny access to IUSR_machinename.
If, on the other hand, the requested file requires authenticated access, IIS assigns the request the identity of the account whose credentials the requestor supplies. If the user is Bob and can prove as much to IIS, then the request is tagged with Bob’s access token.
How does IIS ascertain a requestor’s identity for authenticated accesses? How, for example, does it know that Bob is Bob? It depends on the type of authentication used. IIS supports four different forms of authentication. As far as ASP.NET is concerned, all four fall under the category of Windows authentication:
Basic authentication
Digest authentication
Integrated Windows authentication
SSL client certificates
Basic and digest authentication rely on user names and passwords to authenticate users. When the client is a browser, the browser prompts the user for a user name and password and transmits them to the Web server. Basic and digest authentication work well over the Internet because they piggyback on HTTP. Integrated Windows authentication uses Windows login credentials to authenticate users. It’s ill-suited to general Internet use, in part because both client and server must support Windows security protocols, and also because the client must validate against a domain controller that it can’t get to through a firewall. SSL client certificates are also limited primarily to intranet use because they require clients to be outfitted with digital certificates.
ASP.NET Security
Figure 10-2 diagrams the relationship between IIS and ASP.NET. When IIS receives a request for a file registered to ASP.NET (for example, an ASPX file), it hands off the request to an ISAPI DLL named Aspnet_isapi.dll. Aspnet_isapi.dll runs in the same process as IIS—that is, inside Inetinfo.exe. ASP.NET applications run in a separate process named Aspnet_wp.exe. Aspnet_isapi.dll forwards requests to Aspnet_wp.exe using a named pipe. When the request reaches the worker process, it is assigned to a specific application executing in a specific application domain. Once inside an application domain, the request travels through ASP.NET’s HTTP pipeline, where it is examined by various HTTP modules and ultimately processed by the HTTP handler that corresponds to the resource type requested. Machine.config contains the master list that maps file types to HTTP handlers.

The architecture shown in Figure 10-2 changes somewhat when ASP.NET is paired with IIS 6.0. Slated for release in 2002, IIS 6.0 features a more robust security model that gives IIS administrators the ability to segregate applications into surrogate processes that are very much like Aspnet_wp.exe. In IIS 6.0, there is no Aspnet_wp.exe; instead, IIS provides the worker process. At the time of this writing, Microsoft planned to connect Inetinfo.exe to worker processes using local procedures calls (LPCs) rather than named pipes.
What does all this have to do with security? When Aspnet_isapi.dll forwards an HTTP request to Aspnet_wp.exe, it also forwards the access token that it obtained from IIS. That access token is typically one of the following:
An IUSR_machinename token representing an unauthenticated user
A token representing an authenticated security principal (for example, Bob)
Before processing the request by sending it through the targeted application’s HTTP pipeline, Aspnet_wp.exe does the following:
It performs an ACL check on the requested resource using the access token presented to it. If, for example, the request is a GET command asking for Foo.aspx, the access token represents Bob, and Foo.aspx has an ACL that denies read permission to Bob, then ASP.NET fails the request with an access denied error. Significantly, ASP.NET performs this ACL check regardless of whether impersonation is enabled in ASP.NET.
It makes the access token available to the application that handles the request so that, if desired, the application can impersonate the caller and protect resources guarded by ACLs from code executed during the request.
The importance of these actions cannot be overstated. The ACL check that ASP.NET performs before processing the request means that you can deny Bob access to an ASPX file simply by tagging that file with an ACL that denies Bob read access. The fact that ASP.NET makes the caller’s access token available for impersonation purposes means you, the developer, have some latitude in deciding which identity to use when processing the request. The right choice depends on what the application is designed to do and how it’s designed to do it. Here’s some background to enrich your understanding.
By default, Aspnet_wp.exe runs as ASPNET, a special account that’s set up when ASP.NET is installed. ASPNET is a member of the Users group, so it’s privileged enough to perform most of the actions a legitimate application might want to perform, but it is restricted enough to prevent certain kinds of attacks. Unless you specify otherwise, requests executed by ASP.NET use Aspnet_wp.exe’s identity. Therefore, by default, requests run as ASPNET. Among other things, this means that, barring configuration changes, an ASP.NET application can’t perform certain actions, such as modifying entries in the HKEY_LOCAL_MACHINE section of the registry.
The other option is to execute the request using the access token provided by IIS, a technique known as impersonation. Impersonation is enabled by including the following statement in the system.web section of a top-level Web.config file or modifying the identity element already present in Machine.config:
<identity impersonate="true" />
If IIS assigns a request the identity IUSR_machinename, impersonation won’t buy you much because IUSR_machinename is a weak account that enjoys few privileges on the host machine. But if Windows authentication is enabled and IIS presents ASP.NET with a token representing the actual requestor, impersonation ensures that the application can’t do anything on the Web server that the requestor isn’t allowed to do.
To further complicate matters, Aspnet_wp.exe can be configured to run as a principal other than ASPNET. Suppose you write an ASP.NET application that must have wider-ranging permissions than those afforded ASPNET—for example, the freedom to write to any part of the registry. You can configure Aspnet_wp.exe to run as SYSTEM by changing the statement
<processModel userName="machine" ... />
in Machine.config to read
<processModel userName="SYSTEM" ... />
This change enables your application to do almost anything it wants on the host machine, but it also makes ASP.NET less resistant to attacks. SYSTEM was the default when ASP.NET was in beta, but that was changed shortly before the product shipped.
Another possible complication arises from the fact that in IIS 6.0, ASP.NET requests will default to Network Service rather than ASPNET. If you use ACLs to allow access to the ASPNET account while denying access to other security principals and find that requests mysteriously fail with access denied errors after you install IIS 6.0, modify your ACLs to allow access to Network Service rather than ASPNET.
Clearly, the identities assigned to the ASP.NET worker process and to the requests that it executes play crucial roles in determining how successful an application is in carrying out its appointed mission. If your head is spinning right now trying to make sense of it all, don’t fret; ASP.NET security will be far easier to grasp once you’ve experienced it first-hand. In the meantime, here are some guidelines to help you sort through the options and figure out which of them really matter for a given deployment scenario:
If your application requires no special protection—that is, if all of its pages can be freely browsed by anyone and none are personalized for individual users—you needn’t bother with application-level security. Just grant Everyone access to the application’s files and be done with it.
If you’re building an intranet application or any application for which permissions are based on mapping incoming requests to Windows accounts on your server, you’ll probably use Windows authentication and ACL authorization. In that case, you’ll use operating system ACLs to restrict access to pages that aren’t intended for everyone. You may or may not enable impersonation, depending on the needs of the application.
If you’re building an Internet application that serves the general public but want to secure access to certain pages, you’ll most likely use forms authentication and URL authorization. In that case, you’ll leave impersonation disabled and rely on credentials entered in login forms as the basis for authorizations. Many of the aforementioned issues regarding IIS and access tokens fall by the wayside in this scenario because you grant Everyone access to the application’s files and rely on URL authorizations in Web.config to protect them.
A final thought to keep in mind is that if you use ACLs to limit access to directories in an ASP.NET application, always grant the ASPNET account—or whatever account Aspnet_wp.exe runs as—read access to them. Otherwise, ASP.NET itself will be unable to retrieve files from the directories and you’ll experience all kinds of access denied errors that you probably didn’t expect.
Windows Authentication
Windows authentication is one of the options that ASP.NET gives you for identifying callers. Because Windows authentication maps incoming requests to accounts on the Web server or in the Web server’s domain, you don’t use it to generically expose content to all comers over the Internet. Instead, you use it to serve content to a well-defined populace—a populace that you control through Windows user accounts. Windows authentication on the front end is typically paired with ACL authorization on the back end to control access to the resources that your application exposes. But it works with URL authorization, too.
Recall that Windows authentication comes in four forms: basic, digest, integrated, and certificate. All four forms map incoming requests to accounts on your network, but each does so in a different way. The next several sections describe the inner workings of basic, digest, and integrated Windows authentication and the user experiences that they convey. After that, you’ll put Windows authentication to work in a real ASP.NET application.
Basic Authentication
Basic authentication is an HTTP standard. It’s documented in RFC 2617, which you can read online at ftp://ftp.isi.edu/in-notes/rfc2617.txt. Basic authentication transmits a user name and password in each request. IIS maps the user name and password to an account on the Web server, producing an access token that can be used to perform ACL-based security checks.
It sounds simple, and it is. To demonstrate how basic authentication works, suppose that your company deploys a series of Web pages containing information that only employees should be able to see. The IT staff places the files in a virtual directory on your Web server and configures IIS to disallow anonymous access to that directory and to require basic authentication. The first time you attempt to retrieve a page from that directory, the Web server returns a 401 status code indicating that authentication is required. It also includes in the response a WWW-Authenticate header identifying the type (or types) of authentication that it accepts. (The details differ slightly when a proxy server is involved, but the principle is valid nonetheless.) Here’s a portion of a response returned by IIS 5.0 indicating that access to the requested resource requires basic authentication:
HTTP/1.1 401 Access Denied
Server: Microsoft IIS-5.0
  .
  .
  .
WWW-Authenticate: Basic realm="jupiter"
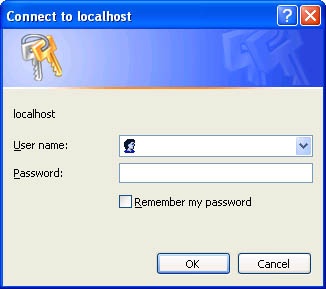
Your browser responds by popping up a dialog box asking for a user name and password (Figure 10-3). It then concatenates the user name and password to a string that identifies the authentication type, base-64-encodes the result, and transmits it to the browser in the Authorization header of an HTTP request. Here’s the Authorization header transmitted by Internet Explorer 6.0 following a login with the user name “Jeff” and the password “imbatman”:
Authorization: Basic SmVmZjppbWJhdG1hbg==
And here are the contents of the base-64-encoded portion of the header after decoding:
Jeff:imbatman
To prevent you from having to log in again and again, the browser includes the same Authorization header in future requests to the same realm. A realm is simply a logical security space that encompasses all or part of a Web site.
All authentication mechanisms have pros and cons. Here’s what’s good about basic authentication:
It works with virtually all browsers.
It provides an easily used and understood means to solicit user names and passwords.
It works well with firewalls.
And here’s what’s bad:
Basic authentication transmits user names and passwords in clear text. If used over an unencrypted channel, nothing prevents requests from being intercepted and used to gain access to your server (or other servers on which the caller’s credentials are valid).
Some users consider pop-up user name and password dialogs intrusive.
If you use basic authentication and the lines to your Web server aren’t physically secured, be sure you use it over HTTPS, not HTTP. Otherwise, you’ll secure access to honest (or technically unsophisticated) users but leave yourself vulnerable to attacks by others.
Digest Authentication
Digest authentication is similar to basic authentication. When you attempt to access a resource guarded by digest authentication, the browser solicits a user name and password by popping up a dialog box. The Web server uses the credentials that you enter to assign an identity to the request. The big difference between basic and digest authentication is that digest doesn’t transmit clear-text passwords. Instead, it passes an authentication token that is cryptographically secure. As a result, you can use it over unencrypted channels without fear of compromising your Web server.
The inner workings of digest authentication are documented in RFC 2617 (ftp://ftp.isi.edu/in-notes/rfc2617.txt). When the client first requests a resource guarded by digest authentication, the server returns a 401 error and includes a “nonce”—a string of 1s and 0s—in a WWW-Authenticate header. The browser responds by prompting for a user name and password. It then transmits the user name back to the server, along with a hash or “digest” computed from the combined user name, password, and nonce. The server authenticates the request by performing its own hash on the user name, password, and nonce. The password the server uses doesn’t come from the client; it comes from the server itself (or from a connected server). If the hashes match, the user is authenticated. Significantly, digest authentication never requires a plain-text password to be transmitted over an HTTP connection. It’s also compatible with proxy servers.
Digest authentication offers the following advantages:
Like basic authentication, it provides an easily understood means for identifying callers, and it works with firewalls.
It’s far more secure over ordinary HTTP than basic authentication.
But it has disadvantages, too:
Digest authentication requires a modern browser that supports digest authentication. For Internet Explorer users, Internet Explorer 5.0 or later is required.
Digest authentication requires passwords to be stored in plain text (or in a reversible encrypted form that can be converted to plain text). This is contrary to the normal Windows security model, which stores one-way password hashes in lieu of plain-text or encrypted passwords to protect the passwords if the server is compromised.
Like basic authentication, digest authentication uses pop-up dialog boxes to prompt for user names and passwords.
Because of these restrictions, and because digest authentication doesn’t support delegation (the ability to make a call from one machine to another and have the call execute as the caller on the remote machine) on Windows 2000 servers, digest authentication is not widely used.
Integrated Windows Authentication
Integrated Windows authentication uses Windows login credentials to authenticate users. Rather than prompt a user for a user name and password and transmit them over HTTP, a browser asked to identify the user through integrated Windows authentication carries on a conversation with the Web server and identifies the user by using that person’s login identity on the client. In other words, if Bob logs in to his Windows PC, starts Internet Explorer, and requests a resource protected by integrated Windows authentication, a handshake ensues between Internet Explorer and the Web server, and Bob’s request executes as Bob on the server. Obviously, Bob has to be a valid account on the server (or in a domain that the server can authenticate against) or else access will be denied. Unless configured to do otherwise, the browser asks for a user name and password only if Bob is not a valid account on the server.
Integrated Windows authentication isn’t an Internet standard; rather, it is a proprietary authentication protocol that permits Windows login credentials to travel over HTTP. Its inner workings haven’t been fully documented by Microsoft, although some details have been published by third parties. The details vary somewhat depending on the security provider being used, which can be either NTLM or Kerberos. In essence, however, the client and server negotiate a trust in a series of exchanges that involve user names, domain names, nonces, and hashes.
Here are the positives regarding integrated Windows authentication:
It provides a better user experience because it doesn’t force users who have already logged in to Windows to provide a user name and password again.
Integrated Windows authentication is secure, even over unencrypted channels, because plain-text passwords are never transmitted.
And here are the negatives:
It works in Internet Explorer 2.0 and later but is unsupported by other browsers.
It’s stopped dead in its tracks by firewalls because it relies on ports orthogonal to those that carry HTTP traffic.
Integrated Windows authentication is a great solution for in-house networks that sit behind firewalls and whose browser clients can be carefully controlled—that is, restricted to Internet Explorer. It is poorly suited for general Internet use.
Getting Information About Authenticated Users
ASP.NET exposes information about callers via an HttpContext property named User. HttpContext objects accompany each and every request and are exposed to application code through the Context properties of various ASP.NET classes such as Page, WebService, and HttpApplication. Pages (ASPX files) access User through Page.Context.User or simply Page.User.
User’s type is IPrincipal. IPrincipal is an interface defined in the System.Security.Principal namespace. It’s implemented by the WindowsPrincipal and GenericPrincipal classes. When a user is authenticated using Windows authentication, Page.User refers to a WindowsPrincipal object. When a user is authenticated using another form of authentication (for example, forms authentication), Page.User refers to a GenericPrincipal object. IPrincipal has a method named IsInRole that you can use to test role memberships. (For users authenticated using Windows authentication, roles correspond to groups. For users authenticated using forms authentication, roles do not exist unless they’re programmatically assigned. You’ll learn how to use role-based security with forms authentication near the end of this chapter.) IPrincipal also has a property named Identity that exposes information regarding an authenticated user’s identity. Identity is actually a reference to an IIdentity interface. IIdentity has the following members:
|
Property |
Description |
|
AuthenticationType |
Reveals which form of authentication was used |
|
IsAuthenticated |
Reveals whether the user is authenticated |
|
Name |
Reveals an authenticated user’s name |
All this sounds confusing, but in practice, User makes getting information about callers trivially easy. If you want to find out whether a caller is authenticated from code in an ASPX file, do this:
if (User.Identity.IsAuthenticated) {
    // The caller is authenticated
}
You can also find out whether a caller is authenticated by checking the Request object’s IsAuthenticated property, which under the hood consults User.Identity.IsAuthenticated. If you want to know the caller’s name (assuming the caller is authenticated), do this:
string name = User.Identity.Name;
For a user authenticated using Windows authentication, the name is of the form domainnameusername, where domainname is the name of the domain in which the user is registered (or the machine name if the account is a local account instead of a domain account), and username is the user’s name. For forms authentication, the name is normally the one that the user typed into a login form. One use for the user name is to personalize pages for individual users. The application in the next section demonstrates how.
Windows Authentication in Action
The application shown in Example 10-6, which I’ll refer to as “CorpNet” since it models a simple intranet-type application, uses Windows authentication and ACL authorization to restrict access to some of its pages and to personalize content for individual users. It contains three pages:
General.aspx, which provides general information about the company
Salaries.aspx, which lists the salary of the employee who views the page
Bonuses.aspx, which lists this year’s employee bonuses
You’ll deploy CorpNet such that anyone in the company can view General.aspx but only selected individuals can view Salaries.aspx and Bonuses.aspx.
Before testing can begin, you need to deploy the application on your Web server and configure it to provide the desired level of security. Here are the steps:
Create a directory named Basic somewhere—anywhere—on your Web server.
Use the IIS configuration manager to transform Basic into a virtual directory named “Basic.”
While in the IIS configuration manager, configure Basic to require basic authentication and to disallow anonymous access. How? Right-click Basic in the IIS configuration manager and select Properties from the ensuing context menu. Go to the Directory Security page of the property sheet that pops up and click the Edit button under “Anonymous access and authentication control.” In the ensuing dialog box, uncheck “Anonymous access” and check “Basic authentication,” as shown in Figure 10-4. OK the changes, and then close the configuration manager.
Create two user accounts on your Web server for testing purposes. Name the accounts “Bob” and “Alice.” It doesn’t matter what passwords you assign, only that Bob and Alice are valid accounts on the server.
Copy General.aspx, Salaries.aspx, Bonuses.aspx, Bonuses.xml, and Web.config to the Basic directory.
Change the permissions on Salaries.aspx so that only Bob and the ASPNET account are allowed access. At the very least, grant them read permission. Other permissions are optional.
Change the permissions on Bonuses.xml (not Bonuses.aspx) to grant access to Everyone but specifically deny access to Alice.

Now give the application a try by performing the following exercises:
Type http://localhost/basic/general.aspx into your browser’s address bar to call up General.aspx. Because the Basic directory requires callers to be authenticated using basic authentication, a dialog box will pop up. Enter Bob’s user name and password. When General.aspx appears, observe that it knows your login name. (See Figure 10-5.)
Restart your browser and repeat the previous exercise, but this time enter Alice’s user name and password rather than Bob’s. General.aspx still displays just fine because both Bob and Alice have permission to access it.
Without restarting your browser, call up Salaries.aspx. Because you’re logged in as Alice and Alice isn’t allowed to read Salaries.aspx, the server reports that access is denied. (If you’re using Internet Explorer, you may have to type Alice’s user name and password a few times before being told access is denied.)
Restart your browser and try again to call up Salaries.aspx. This time, log in as Bob when prompted for a user name and password. Because Bob is permitted to read Salaries.aspx, the page comes up and Bob’s salary appears. Salaries.aspx is capable of displaying salaries for other employees, too, but it uses the caller’s login name to personalize the information that it displays.
Without restarting your browser, call up Bonuses.aspx. A list of employee bonuses appears.
Restart your browser and call up Bonuses.aspx again. This time, log in as Alice. What do you think will happen? Anyone can access Bonuses.aspx, but Bonuses.aspx calls DataSet.ReadXml to read Bonuses.xml, and Alice isn’t permitted to read Bonuses.xml. You’re logged in as Alice. Will Bonuses.aspx report an error?

As you can see, Bonuses.aspx comes up just fine and even shows a list of bonuses. Clearly Bonuses.aspx succeeded in reading Bonuses.xml. How can that happen if Alice lacks permission to read Bonuses.xml? The answer is simple, but also subtle.
IIS tagged the request with Alice’s access token, and it passed that access token to ASP.NET. ASP.NET knows that the caller is Alice and won’t allow Alice to retrieve an ASPX file (or any other ASP.NET file type) for which Alice lacks access permission. But because Web.config lacks a statement enabling impersonation, any code executed inside the request executes as ASPNET, not as Alice. ASPNET has permission to read Bonuses.xml, so Alice wasn’t prevented from viewing employee bonuses.
I purposely laid this trap for you to drive home an important point. ASP.NET performs ACL checks on ASPX files and other ASP.NET file types using the caller’s identity, regardless of whether impersonation is enabled. That means you can prevent any caller from retrieving an ASPX file simply by denying that caller permission to read the file. However, if a caller pulls up an ASPX file and the ASPX file programmatically reads another file, you must tell ASP.NET to impersonate the caller if you want the read to be subject to an ACL check using the caller’s identity.
You can prevent Alice from seeing the data in Bonuses.xml by modifying Web.config to read as follows. The new line is highlighted in bold:
<configuration>
  <system.web>
    <authentication mode="Windows" />
    <identity impersonate="true" />
  </system.web>
</configuration>
After making the change to Web.config, restart your browser, log in as Alice, and try to view Bonuses.aspx again. This time, you’re greeted with an error message reporting that an error occurred while processing the page. That message is displayed by the exception handler in Bonuses.aspx’s Page_Load method, which catches the XmlException thrown when ReadXml can’t read Bonuses.xml. Restart your browser and log in as Bob, however, and you can once again view Bonuses.aspx.
CorpNet demonstrates several important principles that you should keep in mind when writing ASP.NET applications that use Windows authentication:
Windows authentication is enabled in ASP.NET by including an <authentication mode="Windows” /> statement in Web.config.
ASP.NET applications that use Windows authentication can prevent users from viewing files by using ACLs to deny access to selected security principals.
ASP.NET applications that use Windows authentication must enable impersonation if they want resources protected by ACLs to be protected from programmatic accesses by code executed within a request.
ASP.NET applications that use Windows authentication can personalize content for individual users by reading user names from Page.User.Identity.Name.
Remember, too, that directories containing ASPX files and other ASP.NET files must grant read permission to the account that Aspnet_wp.exe runs as (ASPNET by default) or else ASP.NET itself can’t access resources in those directories. To prove it, temporarily deny ASPNET permission to read from the Basic directory. Now even Bob can’t view Salaries.aspx.
General.aspx
<%@ Page Language="C#" %>

<html>
  <body>
    <h1>Welcome to CorpNet!</h1>
    <hr>
Welcome to the corporate intranet! We don’t have a lot to offer
right now, but check back in a few days and we’ll have information
regarding the massive layoff that has been the subject of so many
rumors. Do remember, though, that we’re watching you all the time.
We even know who you are because you had to provide a user name
and password to see this page. To prove it, your user name is
shown below.<br>
    <h3>
      <%
        if (User.Identity.IsAuthenticated)
            Response.Write (User.Identity.Name);
      %>
    </h3>
  </body>
</html>
Salaries.aspx
<%@ Page Language="C#" %>

<html>
  <body>
    <h1>Salaries</h1>
    <hr>
    <%
      if (!User.Identity.IsAuthenticated)
          Response.Write ("Sorry, but no salary information " +
              "is available for unauthenticated users.");
      else {
          if (User.Identity.Name.IndexOf ("Jeff") != -1)
              Response.Write ("Jeff’s salary is $10,000.");
          else if (User.Identity.Name.IndexOf ("John") != -1)
              Response.Write ("John’s salary is $20,000.");
          else if (User.Identity.Name.IndexOf ("Bob") != -1)
              Response.Write ("Bob’s salary is $30,000.");
          else if (User.Identity.Name.IndexOf ("Alice") != -1)
              Response.Write ("Alice’s salary is $40,000.");
          else if (User.Identity.Name.IndexOf ("Mary") != -1)
              Response.Write ("Mary’s salary is $50,000.");
          else
              Response.Write ("No salary information is " +
                  "available for " + User.Identity.Name);
      }
    %>
  </body>
</html>
Bonuses.aspx
<%@ Import Namespace="System.Data" %>

<html>
  <body>
    <asp:DataGrid ID="MyDataGrid" Width="40%" RunAt="server" />
    <asp:Label ID="Output" RunAt="server" />
  </body>
</html>

<script language="C#" runat="server">
  void Page_Load (Object sender, EventArgs e)
  {
      try {
          DataSet ds = new DataSet ();
          ds.ReadXml (Server.MapPath ("Bonuses.xml"));
          MyDataGrid.DataSource = ds;
          MyDataGrid.DataBind ();
      }
      catch (Exception) {
          Output.Text = "An error occurred processing this page.";
      }
  }
</script>
Bonuses.xml
<?xml version="1.0" encoding="UTF-8"?>
<Bonuses>
  <Bonus>
    <Name>Jeff</Name>
    <Amount>1000</Amount>
  </Bonus>
  <Bonus>
    <Name>John</Name>
    <Amount>2000</Amount>
  </Bonus>
  <Bonus>
    <Name>Bob</Name>
    <Amount>3000</Amount>
  </Bonus>
  <Bonus>
    <Name>Alice</Name>
    <Amount>4000</Amount>
  </Bonus>
  <Bonus>
    <Name>Mary</Name>
    <Amount>5000</Amount>
  </Bonus>
</Bonuses>
Web.config
<configuration>
  <system.web>
    <authentication mode="Windows" />
  </system.web>
</configuration>
Windows Authentication and URL Authorizations
CorpNet currently uses ACL authorizations to restrict access to its pages. But ASP.NET also supports URL authorizations. To demonstrate, create a subdirectory named Secret in the Basic directory and move Salaries.aspx, Bonuses.aspx, and Bonuses.xml into it. Then place the following Web.config file in the Secret directory (and be sure to replace domainname with the appropriate machine name or domain name for the Bob account):
<configuration>
  <system.web>
    <authorization>
      <allow users="domainnameBob" />
      <deny users="*" />
    </authorization>
  </system.web>
</configuration>
Log in as Bob and you’ll be able to access Salaries.aspx and Bonuses.aspx just fine. But log in as anyone else, and it’ll be as if the files don’t exist.
The chief drawback to URL authorizations is that they only protect files registered to ASP.NET. You can’t use them to protect ordinary HTML files, for example. Another limitation is that URL authorizations are based on stringified names rather than Windows security IDs (SIDs). For these reasons, ACL authorizations are typically used in lieu of URL authorizations when Windows authentication is used too.
Windows Authentication and Role-Based Security
Role-based security is a powerful concept in Web applications. Rather than restrict access to callers based on user names, role-based security restricts access based on “roles”—CEO, manager, developer, clerk, or whatever—that those users belong to. If you modify the permissions on the Secret directory to allow access only to members of a group named Managers, for example, you’re exercising role-based security. Only users that belong to that group can call up Salaries.aspx and Bonuses.aspx.
Role-based security can also be applied using URL authorizations. The following Web.config file restricts access to the host directory to members of the Managers group. Behind the scenes, ASP.NET handles the chore of mapping the groups to which the caller belongs to roles named in allow and deny elements:
<configuration>
  <system.web>
    <authorization>
      <allow roles="domainnameManagers" />
      <deny users="*" />
    </authorization>
  </system.web>
</configuration>
Role-based security applied through URL authorizations suffers from the same limitations as user-based security applied through URL authorizations and is therefore rarely used outside forms authentication.
Forms Authentication
Forms authentication is one of ASP.NET’s coolest new features. Simply put, forms authentication is a security mechanism that authenticates a user by asking him or her to type credentials (typically a user name and a password) into a Web form. Through entries in Web.config, you identify the login page and tell ASP.NET which resources the login page protects. The first time a user attempts to access a protected resource, ASP.NET transparently redirects him or her to your login page. If the login is successful, ASP.NET then issues the user an authentication ticket in the form of a cookie and redirects the user to the page originally requested. The ticket allows that user to revisit protected portions of your site without having to log in again and again. You control the ticket’s lifetime, so you decide how long the login is good for.
Forms authentication replaces reams of code in ASP applications that checks (often at the top of every page) to see whether a user has logged in, manually redirects the user to a login page if the answer is negative, and then redirects the user to the page originally requested following a successful login. It’s perfect for enacting the kind of authentication featured on sites like eBay, where you have to type in a user name and password before viewing personalized pages or placing bids on auction items. It also plays well on the Internet, where Windows authentication is seldom practical.
A First Look at Forms Authentication
Just how easy is forms authentication? Check out the application in Example 10-9 and you be the judge. The application’s user interface consists of two pages: PublicPage.aspx, which can be viewed by anyone, and ProtectedPage.aspx, which is available only to authenticated users. “Authenticated users” means anyone who has logged in through a third page, LoginPage.aspx, which asks for a user name and a password. Valid user names and passwords are stored in Web.config.
Before you dive into the source code, take the application for a test drive. Here’s how:
Copy PublicPage.aspx, LoginPage.aspx, and Web.config (application root) to wwwroot or the virtual directory of your choice.
Create a subdirectory named Secret in the virtual root, and then copy ProtectedPage.aspx and Web.config (Secret subdirectory) to the Secret subdirectory.
Call up PublicPage.aspx in your browser. If you copied it to wwwroot, the proper URL is http://localhost/publicpage.aspx.
Click the View Secret Message button.
View Secret Message uses Response.Redirect to go to Secret/ProtectedPage.aspx. But because ProtectedPage.aspx is viewable only by authenticated users, ASP.NET displays the login form in LoginPage.aspx (Figure 10-7).
Type “Jeff” into the user name field and “imbatman” into the password field.
ProtectedPage.aspx appears. Because you’re now an authenticated user, you’ve been issued an authentication ticket that accompanies subsequent requests as a cookie.
Go back to PublicPage.aspx.
Click the View Secret Message button again.
ProtectedPage.aspx appears again, this time without asking you for a user name and password. Why? Because the authentication cookie transmitted with the request identified you to ASP.NET’s forms authentication module (which listens in on every request) as an authenticated user and even identified you as “Jeff.” Note the personalized greeting on the page (Figure 10-8).
Close your browser. Start it again, and then call up PublicPage.aspx.
Click View Secret Message once more. You’re asked to log in again because the cookie containing your authentication ticket is a session cookie, which means it’s destroyed when you close your browser.


What did it take to prevent unauthenticated users from seeing ProtectedPage.aspx and to direct them to our login form when they attempt to call it up? Not a lot, really. The secret lies in Web.config—to be specific, in the two Web.config files that accompany this application. The Web.config file in the application root enables forms authentication and identifies the login page:
<authentication mode="Forms">
  <forms loginUrl="LoginPage.aspx">
    .
    .
    .
  </forms>
</authentication>
It also contains a credentials section listing valid user names and passwords:
<credentials passwordFormat="Clear">
  <user name="Jeff" password="imbatman" />
  <user name="John" password="redrover" />
  <user name="Bob" password="mxyzptlk" />
  <user name="Alice" password="nomalice" />
  <user name="Mary" password="contrary" />
</credentials>
The Web.config file in the Secret subdirectory plays an equally important role in securing the application. In it, the statements
<authorization>
  <deny users="?" />
</authorization>
denote a URL authorization. They instruct ASP.NET’s URL authorization module (System.Web.Security.UrlAuthorizationModule) to deny unauthenticated users access to any ASP.NET files in the host directory. The “?” stands for anonymous users, which is another way of saying unauthenticated users. When someone attempts to view a file in this directory, ASP.NET checks to see whether a valid authentication cookie is attached to the request. If the cookie exists, ASP.NET unencrypts it, validates it to ensure that it hasn’t been tampered with, and extracts identity information that it assigns to the current request. (Encryption and validation can be turned off but are enabled by default.) If the cookie doesn’t exist, ASP.NET redirects the request to the login page.
The actual authentication—soliciting a user name and password and checking their validity—is performed by LoginPage.aspx. The following statement passes the user name and password that the user entered to the static System.Web.Security.FormsAuthentication method named Authenticate, which returns true if the user name and password are valid (that is, if they appear in the credentials section of Web.config) and false if they’re not:
if (FormsAuthentication.Authenticate (UserName.Text, Password.Text))
If Authenticate returns true, the next statement creates an authentication cookie, attaches it to the outgoing response, and redirects the user to the page that he or she originally requested:
FormsAuthentication.RedirectFromLoginPage (UserName.Text, false);
The second parameter passed to RedirectFromLoginPage specifies whether the authentication should be a session cookie (false) or a persistent cookie (true). Many sites that use forms authentication present the user with a check box that lets him or her decide which type of cookie to issue. If you see a check box labeled “Keep me logged in on this site” or something to that effect, checking the box generally issues an authentication cookie whose lifetime is independent of the browser session.
ProtectedPage.aspx is the only ASPX file in the Secret subdirectory, but if there were others, they too would be protected by the login form. Protection is applied on a directory-by-directory basis. Applying two different protection levels to two sets of files requires hosting those files in separate directories. Web.config files in each directory specify exactly how the files are to be protected.
PublicPage.aspx
<html>
  <body>
    <h1>Public Page</h1>
    <hr>
    <form runat="server">
      <asp:Button Text="View Secret Message" OnClick="OnViewSecret"
        RunAt="server" />
    </form>
  </body>
</html>

<script language="C#" runat="server">
  void OnViewSecret (Object sender, EventArgs e)
  {
      Response.Redirect ("Secret/ProtectedPage.aspx");
  }
</script>
ProtectedPage.aspx
<%@ Page Language="C#" %>

<html>
  <body>
    <h1>Protected Page</h1>
    <hr><br>
    <% Response.Write (Context.User.Identity.Name + ": "); %>
    Be careful investing your money in dot-coms.
  </body>
</html>
LoginPage.aspx
<html>
  <body>
    <h1>Please Log In</h1>
    <hr>
    <form runat="server">
      <table cellpadding="8">
        <tr>
          <td>
            User Name:
          </td>
          <td>
            <asp:TextBox ID="UserName" RunAt="server" />
          </td>
        </tr>
        <tr>
          <td>
            Password:
          </td>
          <td>
            <asp:TextBox ID="Password" TextMode="password"
              RunAt="server" />
          </td>
        </tr>
        <tr>
          <td>
            <asp:Button Text="Log In" OnClick="OnLogIn"
              RunAt="server" />
          </td>
          <td>
          </td>
        </tr>
      </table>
    </form>
    <hr>
    <h3><asp:Label ID="Output" RunAt="server" /></h3>
  </body>
</html>

<script language="C#" runat="server">
  void OnLogIn (Object sender, EventArgs e)
  {
      if (FormsAuthentication.Authenticate (UserName.Text,
          Password.Text))
          FormsAuthentication.RedirectFromLoginPage (UserName.Text,
              false);
      else
          Output.Text = "Invalid login";
  }
</script>
Web.config (Application Root)
<configuration>
  <system.web>
    <authentication mode="Forms">
      <forms loginUrl="LoginPage.aspx">
        <credentials passwordFormat="Clear">
          <user name="Jeff" password="imbatman" />
          <user name="John" password="redrover" />
          <user name="Bob" password="mxyzptlk" />
          <user name="Alice" password="nomalice" />
          <user name="Mary" password="contrary" />
        </credentials>
      </forms>
    </authentication>
  </system.web>
</configuration>
Web.config (Secret Subdirectory)
<configuration>
  <system.web>
    <authorization>
      <deny users="?" />
    </authorization>
  </system.web>
</configuration>
Real-World Forms Authentication
The application in the previous section isn’t very realistic for a couple of reasons. First, it’s unreasonable to store passwords in clear text. ASP.NET has a fix for that, but I won’t even mention it here because it becomes a moot point in light of problem number two—namely, that storing thousands (or hundreds of thousands) of names and passwords in Web.config is completely unrealistic. In the real world, you’d store that information in a database. Storing user names and passwords in a database and still leveraging forms authentication is precisely what this section is about.
Example 10-11 lists a modified version of the application that stores user names and passwords in a Microsoft SQL Server database named WebLogin. The database’s “Users” table contains a list of user names and passwords (Figure 10-10). Only two source code files—LoginPage.aspx and Web.config (the one in the application root)—changed; the others are exactly the same, so they don’t appear in the listing. Web.config no longer has a credentials section containing user names and passwords. LoginPage.aspx no longer uses FormsAuthentication.Authenticate to validate user credentials. Instead, it calls a local method named CustomAuthenticate, which uses an SQL query to determine whether the credentials are valid. If the user types “Jeff” into the user name field and “imbatman” into the password field, the query looks like this:
select count (*) from users where username = ’Jeff’ and
cast (rtrim (password) as varbinary) = cast (‘imbatman’ as varbinary)
This query returns a count of the number of records containing “Jeff” in the “UserName” field and “imbatman” in the “Password” field. A return value of 1 means the credentials are valid. A 0 return means they’re invalid because no such record exists in the database.
The purpose of the CAST operators in the query is to make the password comparison case-sensitive. By default, most SQL databases ignore case when performing string comparisons. Casting strings to varbinaries has SQL treat them as binary values rather than strings and is a commonly used trick for making string comparisons case-sensitive. The RTRIM operator applied to the Password field strips trailing spaces from the string. SQL ignores trailing spaces when comparing strings but not when performing binary comparisons. Casting the password to varbinary also prevents spoofing with passwords that are actually SQL commands. (At least I think it prevents spoofing; you never know what clever work-arounds evildoers might devise. To be certain, slap RegularExpressionValidators on the TextBox controls to reject input containing anything besides letters and numbers. For good form, throw in a couple of RequireFieldValidators too.)

This version of LoginPage.aspx has one other feature that the previous version did not: a check box that lets the user decide whether the authentication cookie issued to him or her is temporary or persistent. LoginPage.aspx passes the value of the check box’s Checked property to RedirectFromLoginPage:
FormsAuthentication.RedirectFromLoginPage (UserName.Text,
    Persistent.Checked);
Checking the box produces a persistent authentication cookie by passing true to RedirectFromLoginPage, and leaving the box unchecked produces a temporary (session) authentication cookie by passing false. Check the box before logging in and you’ll be able to get back to ProtectedPage.aspx without logging in again, even if you shut down your machine and don’t come back until days later.
Before testing the new version of the application, you must create the WebLogin database. The CD included with this book contains a script named WebLogin.sql that creates it for you. Simply open a command prompt window, go to the directory where WebLogin.sql is stored, and type
osql -U sa -P -i weblogin.sql
The installation script will work, of course, only if Microsoft SQL Server is installed on your PC.
LoginPage.aspx
<%@ Import NameSpace="System.Data.SqlClient" %>

<html>
  <body>
    <h1>Please Log In</h1>
    <hr>
    <form runat="server">
      <table cellpadding="8">
        <tr>
          <td>
            User Name:
          </td>
          <td>
            <asp:TextBox ID="UserName" RunAt="server" />
          </td>
        </tr>
        <tr>
          <td>
            Password:
          </td>
          <td>
            <asp:TextBox ID="Password" TextMode="password"
              RunAt="server" />
          </td>
        </tr>
        <tr>
          <td>
            <asp:Button Text="Log In" OnClick="OnLogIn"
              RunAt="server" />
          </td>
          <td>
            <asp:CheckBox Text="Keep me signed in" ID="Persistent"
              RunAt="server" />
          </td>
        </tr>
      </table>
    </form>
    <hr>
    <h3><asp:Label ID="Output" RunAt="server" /></h3>
  </body>
</html>

<script language="C#" runat="server">
  void OnLogIn (Object sender, EventArgs e)
  {
      if (CustomAuthenticate (UserName.Text, Password.Text))
          FormsAuthentication.RedirectFromLoginPage (UserName.Text,
              Persistent.Checked);
      else
          Output.Text = "Invalid login";
  }

  bool CustomAuthenticate (string username, string password)
  {
      SqlConnection connection = new SqlConnection
          ("server=localhost;database=weblogin;uid=sa;pwd=");

      try {
          connection.Open ();

          StringBuilder builder = new StringBuilder ();
          builder.Append ("select count (*) from users " +
              "where username = ’");
          builder.Append (username);
          builder.Append ("’ and cast (rtrim (password) as " +
              "varbinary) = cast (’");
          builder.Append (password);
          builder.Append ("’ as varbinary)");
          SqlCommand command = new SqlCommand (builder.ToString (),
              connection);

          int count = (int) command.ExecuteScalar ();
          return (count > 0);
      }
      catch (SqlException) {
          return false;
      }
      finally {
          connection.Close ();
      }
  }
</script>
Web.config (Application Root)
<configuration>
  <system.web>
    <authentication mode="Forms">
      <forms loginUrl="LoginPage.aspx" />
    </authentication>
  </system.web>
</configuration>
Authentication Cookie Lifetime
When you call RedirectFromLoginPage and pass false in the second parameter, ASP.NET issues a session authentication cookie containing a time stamp that limits the cookie’s validity to 30 minutes, even if the browser session extends longer than that. The time-out value of 30 minutes is controlled by the timeout attribute attached to the <forms> element in Machine.config:
<forms ... timeout="30">
You can change the time-out by editing Machine.config or including a timeout attribute in a local Web.config file. The following Web.config file enables forms authentication and extends the validity of the authentication cookie to 7 days (10,080 minutes):
<configuration>
  <system.web>
    <authentication mode="Forms">
      <forms loginUrl="/LoginPage.aspx" timeout="10080" />
    </authentication>
  </system.web>
</configuration>
When a session time-out cookie is returned to ASP.NET in a subsequent request, ASP.NET automatically renews it (updates the time stamp) if the cookie’s lifetime is more than half over. Thus, even the default time-out of 30 minutes enables you to access a protected page indefinitely as long as the browser remains open and you submit the cookie to ASP.NET at least once every 15 minutes.
If the user checks the “Keep me signed in” box in the login page of the application in the previous section, LoginPage.aspx issues a persistent authentication cookie by passing true to RedirectFromLoginPage. Here’s that statement again:
FormsAuthentication.RedirectFromLoginPage (UserName.Text,
    Persistent.Checked);
One drawback to issuing a persistent authentication cookie this way is that the cookie remains valid for 50 years. Furthermore, there is no configuration setting that lets you change this. The timeout attribute has no effect on a persistent authentication cookie. Suppose you’d like to issue a persistent authentication cookie but you’d also like to limit its lifetime to, say, 7 days. How do you go about it?
The solution is to programmatically modify the authentication cookie before returning it in the response. Here’s a modified version of OnLogIn (the handler that’s called when the user clicks LoginPage.aspx’s Log In button) that sets the authentication cookie’s lifetime to 7 days—provided, of course, the cookie is a persistent cookie:
void OnLogIn (Object sender, EventArgs e)
{
    if (CustomAuthenticate (UserName.Text, Password.Text)) {
        string url = FormsAuthentication.GetRedirectUrl
            (UserName.Text, Persistent.Checked);

        FormsAuthentication.SetAuthCookie (UserName.Text,
            Persistent.Checked);

        if (Persistent.Checked) {
            HttpCookie cookie =
                Response.Cookies[FormsAuthentication.FormsCookieName];
            cookie.Expires = DateTime.Now + new TimeSpan (7, 0, 0, 0);
        }

        Response.Redirect (url);
    }
    else
        Output.Text = "Invalid login";
}
If CustomAuthenticate returns true, indicating that the user entered valid credentials, this version of OnLogIn uses FormsAuthentication.GetRedirectUrl to grab the URL of the page that the user originally requested. Then it calls FormsAuthentication.SetAuthCookie to create an authentication cookie and add it to the cookies going out in the response. Before calling Response.Redirect to go to the requested page, however, OnLogIn modifies the cookie by retrieving it from the response’s Cookies collection and setting its Expires property to a date 7 days hence. This simple modification ensures that the user will have to go through your login page again after 7 days. Of course, you can set the lifetime to any length you want by modifying the TimeSpan value. You’ll see this technique used in the chapter’s final sample program. But first, there’s one more topic we need to cover: role-based security.
Forms Authentication and Role-Based Security
The last sample program demonstrated how to combine forms authentication with user names and passwords stored in a SQL Server database. The next one demonstrates how to use role membership to allow some users to view ProtectedPage.aspx while hiding it from others.
The following statement in the Secret directory’s Web.config file prevents unauthenticated users from accessing ASPX files in that directory:
<deny users="?" />
The only problem with this statement is that it allows any authenticated user to view ProtectedPage.aspx. It’s not unrealistic to imagine that in some scenarios, you might want to allow some authenticated users to view ProtectedPage.aspx without permitting all authenticated users to view it. Suppose John and Alice are managers who should be able to call up ProtectedPage.aspx, but Jeff, Bob, and Mary are mere developers who should not. One way to keep Jeff, Bob, and Mary out is to deny access to all users (users="*”) but specifically allow access to John and Alice. Here’s a Web.config file that does just that:
<configuration>
  <system.web>
    <authorization>
      <allow users="John, Alice" />
      <deny users="*" />
    </authorization>
  </system.web>
</configuration>
Another way to do it is to specifically deny access to Jeff, Bob, and Mary:
<configuration>
  <system.web>
    <authorization>
      <deny users="Jeff, Bob, Mary" />
      <allow users="*" />
    </authorization>
  </system.web>
</configuration>
Be aware that when you use <allow> and <deny> in this manner, the entries are order-sensitive. The statements
<deny users="*" />
<allow users="John, Alice" />
are not equivalent to
<allow users="John, Alice" />
<deny users="*" />
because ASP.NET will stop at <deny users="*"> and ignore any statements that appear after it.
These Web.config files work just fine, but they’re not very practical for sites that serve large volumes of users. Just imagine what a nightmare it would be to edit multimegabyte Web.config files every time someone enters or leaves your company or gets a promotion. For large sites, roles provide a practical solution to the problem of granting access to some authenticated users without granting access to all of them. And roles work well with forms authentication provided you’re willing to write a little code to help out.
Look again at the WebLogin database that serves our site. In addition to storing user names and passwords, the “Users” table has a field named “Role” that stores each user’s role membership, if any. John and Alice are assigned manager roles, while Jeff, Bob, and Mary are assigned the role of developer. Is it possible to use these role memberships to grant John and Alice—and anyone else assigned the role of manager—access to ProtectedPage.aspx while keeping others away? You bet. All it requires is two simple modifications to the code you’ve already written.
The first step is the easy one. It involves editing the Secret directory’s Web.config file to grant access to managers or deny access to developers. Here’s a Web.config file that does the former:
<configuration>
  <system.web>
    <authorization>
      <allow roles="Manager" />
      <deny users="*" />
    </authorization>
  </system.web>
</configuration>
The roles attribute takes the place of the users attribute and grants or denies access not to individual users, but to groups of users based on the role or roles that they’ve been assigned.
The second step is more involved. Somehow we have to map the roles stored in the database to user accounts in each and every request so that ASP.NET can determine whether the requestor is a manager or a developer. The best place to do the mapping is in the AuthenticateRequest events that fire at the beginning of every request. You can process AuthenticateRequest events in a custom HTTP module or in Global.asax. Here’s a Global.asax file that layers roles onto forms authentication:
<%@ Import Namespace="System.Security.Principal" %>

<script language="C#" runat="server">
  void Application_AuthenticateRequest (Object sender, EventArgs e)
  {
      HttpApplication app = (HttpApplication) sender;
      if (app.Request.IsAuthenticated &&
          app.User.Identity is FormsIdentity) {
          FormsIdentity identity = (FormsIdentity) app.User.Identity;
          if (identity.Name == "Jeff")
              app.Context.User = new GenericPrincipal (identity,
                  new string[] { "Developer" });
      }
  }
</script>
How does it work? After verifying that the user has indeed been authenticated (for forms authentication, “is authenticated” means a valid authentication cookie is attached to the request) and that the authentication was performed using forms authentication, Application_AuthenticateRequest extracts the user name from the cookie. It doesn’t touch the cookie directly; instead, it casts User.Identity to FormsIdentity, which works fine as long as the user was authenticated using forms authentication, and reads the user name from the FormsIdentity object’s Name property.
If the user name is “Jeff,” Application_AuthenticateRequest creates a new GenericPrincipal object containing the role name “Developer” and assigns it to the current request by writing it to the User property of the request’s HttpContext. GenericPrincipal is a device for representing user identities independent of the authentication protocol being used. When code executed in this request attempts to redirect to ProtectedPage.aspx, ASP.NET compares the role name in the GenericPrincipal to the roles granted access through Web.config. Since Jeff is a developer but the Secret directory’s Web.config file allows access only to managers, Jeff is denied access to ProtectedPage.aspx. But change the statement
app.Context.User = new GenericPrincipal (identity,
    new string[] { "Developer" });
to
app.Context.User = new GenericPrincipal (identity,
    new string[] { "Manager" });
and Jeff is able to view ProtectedPage.aspx just fine.
Example 10-12 contains the third and final version of our PublicPage/ProtectedPage application. It includes three features that the previous version did not:
It retrieves roles from the WebLogin database and assigns them to incoming requests (assuming the requests are authenticated and that they were authenticated using forms authentication).
Its Web.config file (the one in the Secrets directory) allows access to managers but not to anyone else.
It returns an authentication cookie whose lifetime is 7 days rather than 50 years if the login page’s “Keep me signed in” box is checked.
To experience role-based security in action, click PublicPage.aspx’s View Secret Message button and type “Jeff” and “imbatman” into the login form. Because Jeff is identified as a developer in the database, you won’t be able to view ProtectedPage.aspx. But log in as John (password “redrover”), and you’ll pull up ProtectedPage.aspx just fine. Why? Because John’s role is manager, and managers are specifically allowed to access resources in the Secrets directory.
By the way, if clicking the View Secret Message button bypasses the login form and goes straight to ProtectedPage.aspx, that’s because the cookie you were issued when you tested the previous version of the application still identifies you as an authenticated user. If it’s a session cookie, simply restarting your browser will destroy the cookie and let you see the login page again. If it’s a persistent cookie, you’ll have to delete it. The easiest way to do that is to use your browser’s delete cookies command. In Internet Explorer 6.0, you’ll find it under Tools/Internet Options.
LoginPage.aspx
<%@ Import NameSpace="System.Data.SqlClient" %>

<html>
  <body>
    <h1>Please Log In</h1>
    <hr>
    <form runat="server">
      <table cellpadding="8">
        <tr>
          <td>
            User Name:
          </td>
          <td>
            <asp:TextBox ID="UserName" RunAt="server" />
          </td>
        </tr>
        <tr>
          <td>
            Password:
          </td>
          <td>
            <asp:TextBox ID="Password" TextMode="password"
              RunAt="server" />
          </td>
        </tr>
        <tr>
          <td>
            <asp:Button Text="Log In" OnClick="OnLogIn"
              RunAt="server" />
          </td>
          <td>
            <asp:CheckBox Text="Keep me signed in" ID="Persistent"
              RunAt="server" />
          </td>
        </tr>
      </table>
    </form>
    <hr>
    <h3><asp:Label ID="Output" RunAt="server" /></h3>
  </body>
</html>

<script language="C#" runat="server">
  void OnLogIn (Object sender, EventArgs e)
  {
      if (CustomAuthenticate (UserName.Text, Password.Text)) {
          string url = FormsAuthentication.GetRedirectUrl
              (UserName.Text, Persistent.Checked);

          FormsAuthentication.SetAuthCookie (UserName.Text,
              Persistent.Checked);

          if (Persistent.Checked) {
              HttpCookie cookie =
                Response.Cookies[FormsAuthentication.FormsCookieName];
              cookie.Expires = DateTime.Now +
                  new TimeSpan (7, 0, 0, 0);
          }

          Response.Redirect (url);
      }
      else
          Output.Text = "Invalid login";
  }

  bool CustomAuthenticate (string username, string password)
  {
      SqlConnection connection = new SqlConnection
          ("server=localhost;database=weblogin;uid=sa;pwd=");

      try {
          connection.Open ();

          StringBuilder builder = new StringBuilder ();
          builder.Append ("select count (*) from users " +
              "where username = ’");
          builder.Append (username);
          builder.Append ("’ and cast (rtrim (password) as " +
              "varbinary) = cast (’");
          builder.Append (password);
          builder.Append ("’ as varbinary)");

          SqlCommand command = new SqlCommand (builder.ToString (),
              connection);
          int count = (int) command.ExecuteScalar ();
          return (count > 0);
      }
      catch (SqlException) {
          return false;
      }
      finally {
          connection.Close ();
      }
  }
</script>
Global.asax
<%@ Import Namespace="System.Data.SqlClient" %>
<%@ Import Namespace="System.Security.Principal" %>

<script language="C#" runat="server">
  void Application_AuthenticateRequest (Object sender, EventArgs e)
  {
      HttpApplication app = (HttpApplication) sender;

      if (app.Request.IsAuthenticated &&
          app.User.Identity is FormsIdentity) {
          FormsIdentity identity = (FormsIdentity) app.User.Identity;

          // Find out what role (if any) the user belongs to
          string role = GetUserRole (identity.Name);

          // Create a GenericPrincipal containing the role name
          // and assign it to the current request
          if (role != null)
              app.Context.User = new GenericPrincipal (identity,
                  new string[] { role });
      }
  }

  string GetUserRole (string name)
  {
      SqlConnection connection = new SqlConnection
          ("server=localhost;database=weblogin;uid=sa;pwd=");

      try {
          connection.Open ();

          StringBuilder builder = new StringBuilder ();
          builder.Append ("select role from users " +
              "where username = ’");
          builder.Append (name);
          builder.Append ("’");

          SqlCommand command = new SqlCommand (builder.ToString (),
              connection);

          object role = command.ExecuteScalar ();

          if (role is DBNull)
              return null;

          return (string) role;
      }
      catch (SqlException) {
          return null;
      }
      finally {
          connection.Close ();
      }
  }
</script>
Web.config (Secret Subdirectory)
<configuration>
  <system.web>
    <authorization>
      <allow roles="Manager" />
      <deny users="*" />
    </authorization>
  </system.web>
</configuration>
As a practical matter, you might prefer to consolidate all your URL authorizations in the top-level Web.config file rather than divide them among Web.config files in individual directories. ASP.NET supports that, too. The following Web.config file, which goes in the application root, enables forms authentication and specifies that only managers are allowed access to resources in the subdirectory named Secret:
<configuration>
  <!-- Configuration information for this directory -->
  <system.web>
    <authentication mode="Forms">
      <forms loginUrl="/LoginPage.aspx" />
    </authentication>
  </system.web>
  <!-- Configuration information for the Secret directory -->
  <location path="Secret">
    <system.web>
      <authorization>
        <allow roles="Manager" />
        <deny users="*" />
      </authorization>
    </system.web>
  </location>
</configuration>
The ability to specify configuration settings for multiple directories in one Web.config file isn’t limited to URL authorizations; it works for other configuration settings, too.
Multiple Roles
It’s not uncommon to encounter organizations in which employees are (or can be) assigned multiple roles. The requestor might be a manager, but he or she could be a developer also or at least want access to material that developers have access to. Does ASP.NET’s brand of role-based security support multiple role memberships? Yes it does. The second parameter passed to GenericPrincipal’s constructor isn’t a string; it’s an array of strings. To indicate that a given security principal (user) belongs to two or more roles, simply submit an array of role names, as shown here:
app.Context.User = new GenericPrincipal (identity,
    new string[] { "Developer", "Manager" });
Now the requestor can access any resources that managers or developers enjoy access to.
You can also use allow and deny elements to allow or deny access to multiple roles. For example, the statements
<allow roles="Manager, Developer" />
<deny users="*" />
in a Web.config file grant access to developers and managers while denying access to everyone else.
Signing Out
Many sites that rely on forms-style authentication allow users to sign out as well as sign in. Calling any FormsAuthentication method that attaches an authentication cookie to the response effectively signs in the user. The FormsAuthentication.SignOut method does the opposite: it signs out an authenticated user. It works by returning a Set-Cookie header that sets the cookie’s value to a null string and sets the cookie’s expiration date to a date in the past, effectively destroying the authentication cookie. Here’s a snippet of code from a Web form that logs out the current user when the Log Out button is clicked:
<asp:Button Text="Log Out" OnClick="OnLogOut" RunAt="server" />
  .
  .
  .
<script language="C#" runat="server">
  void OnLogOut (Object sender, EventArgs e)
  {
      FormsAuthentication.SignOut ();
  }
</script>
The practical effect is that the next time this user visits a protected portion of your site, he or she will have to log in again.
Authentication Cookie Security
The forms element in Web.config supports the following five attributes:
|
Attribute |
Description |
Default |
|
name |
Name assigned to authentication cookies |
.ASPXAUTH |
|
loginUrl |
URL of the login page |
login.aspx |
|
protection |
Level of protection (validation and encryption) applied to authentication cookies |
All |
|
timeout |
Lifetime of session authentication tickets in minutes |
30 |
|
path |
Scope of authentication cookies |
/ |
Most of these attributes are self-explanatory, but protection deserves special mention. It specifies the desired level of protection for the authentication cookies that ASP.NET uses to identify authenticated users. The default is “All,” which instructs ASP.NET to both encrypt and validate authentication cookies. Validation works exactly the same for authentication cookies as it does for view state: the machineKey element’s validationKey is appended to the cookie, the resulting value is hashed, and the hash is appended to the cookie. When the cookie is returned in a request, ASP.NET verifies that it wasn’t tampered with by rehashing the cookie and comparing the new hash to the one accompanying the cookie. Encryption works by encrypting the cookie—hash value and all—with machineKey’s decryptionKey attribute.
Validation consumes less CPU time than encryption and prevents tampering. It does not, however, prevent someone from intercepting an authentication cookie and reading its contents. Nonetheless, if you want ASP.NET to validate but not encrypt authentication cookies, set the forms element’s protection attribute as follows:
<forms ... protection="Validation" />
Encryption provides a double dose of insurance against tampering and prevents the cookie’s contents from being read, too. If you’d like ASP.NET to encrypt authentication cookies but skip the validation procedure, do this:
<forms ... protection="Encryption" />
Finally, if you want neither validation nor encryption performed, do this:
<forms ... protection="None" />
The “None” option is useful when authentication cookies travel over HTTPS. After all, there’s no need to encrypt them twice.
Speaking of HTTPS: encrypted cookies can’t be read or altered, but they can be stolen and used illicitly. Time-outs are the only protection a cookie offers against replay attacks, and they apply to session cookies only. The most reliable way to prevent someone from spoofing your site with a stolen authentication cookie is to use an encrypted communications link. If you’d prefer not to encrypt communications to all parts of your site, consider at least submitting user names and passwords over HTTPS. (When you see buttons on commercial sites that say “Sign in using a secure link,” that’s exactly what they’re doing.) The following forms element protects plain-text user names and passwords from prying eyes by connecting to the login form over a secure link:
<forms ... loginUrl="https://www.wintellect.com/secure/login.aspx" />
This assumes, of course, that your server supports HTTPS and that Login.aspx is stored in a directory configured to use HTTPS.
The path attribute can also play a role in securing authentication cookies. Say you place public files in the virtual root and protected files in a subdirectory configured for HTTPS. If you accept the default path of /, the authentication cookie you acquire is transmitted in all requests to the Web site, not just the ones directed to the Secret directory. An intruder can intercept the cookie on its way to a public page and use it to gain access to protected pages. Here’s the solution:
<forms path="/Secret" />
Now the cookie will be transmitted only in requests for resources in the Secret subdirectory and its subdirectories, meaning it’s transmitted only over secure channels.
Caveat Emptor
I’ll close this chapter with a word of warning regarding forms authentication—something that’s vitally important to understand but easily overlooked.
Forms authentication protects only ASP.NET files. I’ll say it again: forms authentication protects only ASP.NET files. It guards ASPX files, ASMX files, and other file types registered to ASP.NET, but it doesn’t protect files that don’t belong to ASP.NET—for example, files with .htm or .html extensions. Try it: put a ProtectedPage.html file in the Secret directory used in this chapter’s forms authentication samples. You have to go through the login page to get to ProtectedPage.aspx, but ProtectedPage.html requires no login. That’s because ASP.NET never sees (and therefore can’t intercept and redirect) requests for file types that aren’t registered to it.
One solution is to assign HTML files and other non-ASP.NET files that you want to protect with forms authentication the file name extension .aspx. You’ll incur additional overhead when accessing the files, but at least you won’t leave them alone and unprotected.