
Chapter 12. Sending email
- Sending email with Action Mailer and the mail gem
- Subscribing via email to specific events within the system
- Connecting to a real-world email server to send emails
- Receiving emails using Action Mailer
In the previous chapter, you implemented tagging for your application, which allows users to easily categorize and search for tickets.
In this chapter, you’ll begin to send emails to your users. When a user signs up to Ticketee, they use their email address as a way for the system to uniquely identify them. You then verify that the address is valid by sending the user a confirmation email. With a user’s validated email address, you’re able to send them updates for important events in the system, such as a ticket being updated.
Back in chapter 6, you changed a setting for the authentication engine Devise that would send a confirmation email to a new user when they signed up. To test this setting, you used a gem called email_spec, which only tested that the emails were delivered in a test environment, and not in the real world. This is how Action Mailer (the Rails component responsible for email) acts[1] during a test environment.
1 It defaults to not truly sending out the emails, but rather keeping track of them in a variable that you can access by using ActionMailer::Base.deliveries, or by using the methods found in email_spec.
Before you go about configuring your application to send emails into the real world, you’ll add two more features to Ticketee. The first feature automatically subscribes a user to a watchers list whenever that user creates a ticket. Every time this ticket is updated by another user, the creator of the ticket should receive an email. This is helpful, because it allows users to keep up-to-date with the tickets that they have created. The second feature will allow users to add themselves to or remove themselves from the watching list for a given ticket.
With these features in place, all users who are watching a ticket will be notified via email that a comment has been posted to the ticket, what that comment was, and any state change that took place. This email message will additionally contain a link to the ticket and a link to unsubscribe from further notifications regarding the ticket. If a user posts a comment to a ticket and they’re not watching it, then they will automatically begin to watch it. They can unsubscribe later if they wish by following the unsubscribe link in the email. Email is a tried-and-true solution to receiving notifications of events such as this.
Once that’s all said and done, you’ll work on sending emails through an actual server—Gmail—which will test that your application is able to send out emails into the real world and that you’re doing everything you can to let your users receive them. Gmail is great for low-volume sending,[2] but if you needed something with a larger capacity, other services such as SendGrid[3] and MailChimp[4] are acceptable alternatives. Although we don’t look at how to use large-volume services in this chapter, it’s always great to be aware of alternatives, should you ever need to scale up. To check for the emails on a Gmail account, you’ll be using the (unofficial)[5]gmail gem.
2 Gmail has a daily send limit of 200 emails.
5 As in, not sponsored by Google.
After spending most of the chapter looking at how to send emails, you’ll take a look at how to receive them using the gmail gem and Action Mailer. When a user receives an email notifying them that a comment has been posted to a ticket, they will be able to send a reply that you can read using both the gmail gem and Action Mailer. You’ll also be able to create a new comment from their reply’s text. Nifty stuff.
The first thing you’re going to do is set up a way for users to receive notifications when a comment is posted to a ticket they’ve created. Let’s dive into creating the feature and code for this functionality now.
12.1. Sending ticket notifications
The next feature of your application will provide users with the ability to watch a ticket. You’ll build off this functionality to notify users by email that a ticket has been updated any time somebody posts a comment to it. This email will contain the name of the user who updated the ticket, the comment text, a URL to the ticket, and finally a link to unsubscribe from all future ticket updates.
To test all this, you’ll use the email_spec gem, which you first used back in chapter 6. This gem provides very useful Cucumber steps (and RSpec helpers!) that allow you to easily verify that an email was sent during a test, and you’ll be taking full advantage of these steps in the feature that you’ll be writing right now.
12.1.1. Automatically watching a ticket
This feature will initially test that a user automatically watches a ticket when they create it. Whenever someone else updates this ticket, the user who created it (and later, anybody else watching the ticket) will receive an email notification. You put this new feature in features/ticket_notifications.feature and fill it with the content from the following listing.
Listing 12.1. features/ticket_notifications.feature
You use the “Given a clear email queue” step ![]() near the top of your Background, which will clear out any received emails from ActionMailer::Base.deliveries where the test deliveries are stored. This is important because two confirmation emails get sent out when you create the
users, and you don’t want your “should receive an email” step in the scenario to retrieve those instead.
near the top of your Background, which will clear out any received emails from ActionMailer::Base.deliveries where the test deliveries are stored. This is important because two confirmation emails get sent out when you create the
users, and you don’t want your “should receive an email” step in the scenario to retrieve those instead.
These emails aren’t actually sent to these addresses in the real world, but captured by Action Mailer and stored in ActionMailer::Base.deliveries. You then access these emails using the helpers provided by email_spec. There’s a setting inside config/environments/test.rb that goes like this:
config.action_mailer.delivery_method = :test
By default, this setting is set to :smtp, which means that Action Mailer will attempt to connect to an SMTP server that is running on localhost. You don’t have one of these set up yet, nor will you. Later on, we’ll look at how you can send real-world emails from your application using a Gmail account.
The setting in config/environments/test.rb will tell Action Mailer to store all sent emails internally in ActionMailer::Base.deliveries.
In this feature, you’ll sign in as the second user and create a comment on the ticket that the first user created. After the comment has been created, the ticket creator should receive an email and click the View This Ticket Online Here link that will take them to the updated ticket’s page to see the latest comment. When you run this feature using bin/cucumber features/ticket_notifications.feature, you see that everything up to the “should receive an email” step passes, because you’ve already implemented it all:
Then "[email protected]" should receive an email
  expected: 1,
       got: 0 (using ==) ...
When [email protected] updates the ticket, [email protected] doesn’t receive an email, yet. That’s why you wrote the feature: so you can test the behavior that you’re about to create!
To make [email protected] receive an email, you’re going to use what’s known as an observer.
12.1.2. Using observers
An observer is a class that sits outside the model, watching it for specific actions such as a save to the database. If new instances of the model are created, then the before_create and after_create methods in the observer will be called. Observers are handy if you have complex logic for your callbacks, or for sending out email. Hey, isn’t that what you want to do? Indeed it is!
In this instance, your observer will be called CommentObserver. It’s named like that because it will observe the Comment model. Observers watch a model for specific changes and allow you to implement callback-like methods in them to order your application to do something when an action takes place in the model. Although you could use a callback in a model, abstracting out code such as this to an observer is much better because it can lead to reduced code clutter in the model.
Let’s now create a new folder at app/observers so that you can also reduce clutter in the app/models folder. All the files inside the app directory are added to the load path, so they will be require’able by your application. Inside the app/observers folder you create a new file called comment_observer.rb that will hold the code for the observant observer. In this file, put this:
class CommentObserver < ActiveRecord::Observer
  def after_create(comment)
   (comment.ticket.watchers - [comment.user]).each do |user|
      Notifier.comment_updated(comment, user).deliver
    end
  end
end
This defines the observer that watches the Comment model and defines a method that will be called after a new Comment is saved to the database, more commonly known as the after_create callback.
At the top of the after_create method, you get the list of watchers for a ticket and remove the user who has just made the comment from that list, because they shouldn’t receive an email for a comment they just created!
The Notifier referenced inside the after_create is something you’ll create in a little while. Consider it similar to an Active Record object, but for handling emails instead. The comment_updated method will build an email for each of the users watching this ticket, and deliver will send it out.
There’s a little bit of configuration you must do before this observer is used, however. You must open config/application.rb and put this line inside the Ticketee ::Application class definition:
config.active_record.observers = :comment_observer
By calling this method, you are telling Rails to load the CommentObserver class, which it will find without your help, because Rails will infer the name of the observer from the symbol passed in. When you run bin/cucumber features/ticket_notifications.feature, you’re told this:
And I press "Create Comment"
  undefined method `watchers' for #<Ticket:0x...> (NoMethodError)
In this after_create method in your observer, you’re calling the watchers method to get at the watchers for this ticket. It’s failing because you haven’t defined this association yet, so let’s go ahead and do that now.
12.1.3. Defining the watchers association
The watchers method should return a collection of users who are watching a ticket, including (by default) the user who has created the ticket in the first place, so that in your feature [email protected] receives the email triggered by [email protected]’s comment.
Here you must do two things: define the watchers association and add the ticket owner to the watchers list when the ticket is created.
You use another has_and_belongs_to_many association to define the watchers collection, this time in your Ticket model. To define it, put this code inside the Ticket model, along with the other has_and_belongs_to_many for tags:
has_and_belongs_to_many :watchers, :join_table => "ticket_watchers",
                                   :class_name => "User"
Here you pass the :join_table option to specify a custom table name for your has_and_belongs_to_many. If you didn’t do this, then the table name would be inferred by Rails to be ticket_users, which doesn’t really explain the purpose of this table as much as ticket_watchers does. You pass another option too, :class_name, which tells your model that the objects from this association are User objects. If you left this option out, Active Record would imply that you wanted the Watcher class instead, which doesn’t exist.
You can create a migration that can be used to create this table by using this command:
rails g migration create_ticket_watchers_table
Unfortunately, the migration won’t read your mind in this instance, so you need to open it and change it to resemble the following listing.
Listing 12.2. db/migrate/[timestamp]_create_ticket_watchers_table.rb
class CreateTicketWatchersTable < ActiveRecord::Migration
  def change
    create_table :ticket_watchers, :id => false do |t|
      t.integer :user_id, :ticket_id
    end
  end
end
Remember: you need to specify the id option here so that your join table doesn’t have a primary key.
Let’s save and then run this file using rake db:migrate, and let’s not forget to run rake db:test:prepare either.
Now that you have your watchers method defined, you need to add the user who creates a ticket to the list of watchers for that ticket. You can do this by using an after_create callback on your Ticket model like this:
after_create :creator_watches_me
To define the creator_watches_me method, you put the following code at the bottom of the Ticket class definition:
private
  def creator_watches_me
    self.watchers << user
  end
Now that you have the user who created the ticket watching it, your CommentObserver will have something to act on. Let’s see what happens when you run bin/cucumber features/ticket_notifications.feature:
And I press "Create Comment"
  uninitialized constant CommentObserver::Notifier (NameError)
This time, your feature is failing because it can’t find the constant Notifier, which is actually going to be the class that you use to send out the notifications of new activity to your users. To create this class, you’ll use Action Mailer.
12.1.4. Introducing Action Mailer
You need to define the Notifier mailer to send out ticket-update notifications using your fresh-out-of-the-oven CommentObserver’s after_create method. You can do this by running the mailer generator.
A mailer is a class defined for sending out emails. To define your mailer, you run this command:
rails g mailer notifier
When running this command, you see this output:
create  app/mailers/notifier.rb
invoke  erb
create    app/views/notifier
invoke  rspec
create    spec/mailers/notifier_spec.rb
The first thing the command generates is the Notifier class itself, defining it in a new file at app/mailers/notifier.rb. This is done to keep the models and mailers separate. In previous versions of Rails, mailers used to live in the app/models directory, which led to clutter. By separating mailers out into their own folder, the codebase becomes easier to manage. Inside this class, you define (as methods) your different notifications that you’ll send out, beginning with the comment notification. You’ll get to that in just a minute.
The second thing that is generated is the app/views/notifier directory, which is used to store all the templates for your emails. The methods in the Notifier class will correspond to each of the files in this directory.
The final thing that is generated is the spec/mailers/notifier_spec.rb, which you won’t use because you’ve got your feature testing this notifier anyway.
In app/mailers/notifier.rb you see this code:
class Notifier < ActionMailer::Base
  default from: "[email protected]"
end
ActionMailer::Base defines helpful methods such as the default one, which you can use to send out your emails.[6] The default method here configures default options for this mailer and will set the “from” address on all emails to be the one specified. Let’s change this to be [email protected].
6 Action Mailer had a revamp with Rails 3, switching to be based on the new mail gem rather than the old tmail gem. mail’s syntax is much nicer and won’t crash when it parses a spam email, unlike tmail.
Now that you have the Notifier class defined, what happens when you run your feature? Let’s run it using bin/cucumber features/ticket_notifications.feature and find out:
undefined method `comment_updated' for Notifier:Class (NoMethodError)
  ./app/observers/comment_observer.rb:3:in `after_create'
In this class, you need to define the comment_updated method, which will build an email to send out when a comment is updated. This method needs to get the email address for all the watchers for comment’s ticket and send an email to each of them. To do this, you can define the method like this:
def comment_updated(comment, user)
  @comment = comment
  @user = user
  mail(:to => user.email,
       :subject => "[ticketee] #{comment.ticket.project.name} -
      #{comment.ticket.title}")
end
Even though you’re defining this as an instance method (the error complains about a class method), the comment_updated method is truly the method that is used by Action Mailer to set up your email. This is a little bit of magic performed by Action Mailer for your benefit.[7]
7 By calling the method on the class, it’s caught by method_missing, which initializes a new instance of this class and then eventually ends up calling your comment_update method.
When this method is called, it will attempt to render a plain-text template for the email, which should be found at app/views/notifier/comment_updated.text.erb. You’ll define this template after you’ve got the method working. You define a @comment instance variable as the first line of your method so that the object in comment will be available to your template.
You use the mail method to generate a new email, passing it a hash containing to and subject keys, which define where the email goes to as well as the subject for the email.
When you run bin/cucumber features/ticket_notifications.feature, you see that the user now receives an email and therefore is able to open it, but the content you’re looking for is not there:
Then "[email protected]" should receive an email
When "[email protected]" opens the email
Then they should see "updated the Release date ticket" in the email body
  expected "" to include "updated the Release date ticket" ...
But why is this not seeing the content? Because you don’t have a template set up just at the moment! It’s good to know at this point that if you ever wanted to debug an email’s content, there’s a “Then show me the page” inspired step that you can use called “Then save and open current email.” Let’s add this on a new line right before the email body checking line in your scenario and rerun your feature. You should see the following:
Date: [date]
From: [email protected]
To: [email protected]
Message-ID: [message_id]@[you].mail
Mime-Version: 1.0
Content-Type: text/plain;
 charset=UTF-8
Content-Transfer-Encoding: 7bit
This is a raw version of the email that [email protected] will receive when [email protected] updates the ticket. As you can see from this raw version, there’s nothing else to this email, and therefore there’s no content that will be displayed. To make this final step pass, you must define some content for your email, which you can do by defining a template.
12.1.5. An Action Mailer template
Templates for Action Mailer classes go in app/views because they serve an identical purpose as the controller views: they display a final, dynamic result to the users. Once you have this template in place, the plain-text email a user receives will look like figure 12.1.
Figure 12.1. Your first email

As shown in the figure, you need to mention who updated the ticket, what they updated it with, and provide a link to the ticket. Let’s put the template for your comment_updated method at app/views/notifier/comment_updated.text.erb, as shown in the following listing.
Listing 12.3. app/views/notifier/comment_updated.text.erb
Hello!

<%= @comment.user %> has just updated the
<%= @comment.ticket.title %> ticket for
<%= @comment.ticket.project.name %>. They wrote:

<%= @comment.text %>

You can view this ticket on line by going to:
<%= project_ticket_url(@comment.ticket.project, @comment.ticket) %>
Wait, hold on! text.erb? Yes! This is the template for the plain-text version of this email, after all. Remember, the format of a view in Rails is the first part of the file extension, with the latter part being the actual file type. Because you’re sending a text-only email, you use the text format here. A little further down the email road, you’ll look at how you can send out HTML emails too.
The template is the final part for your feature: yay! When you run bin/cucumber features/ticket_notifications.feature, you see that it’s now all passing:
1 scenario (1 passed)
18 steps (18 passed)
When the email is opened for this final time, you see that it has the content you’re looking for:
Hello! [email protected] has just updated the Release date ticket for TextMate 2.They wrote: Is it out yet? You can view this ticket online by going to:
You’ve done quite a lot to get this little simple feature to pass.
In the beginning you created an observer called CommentObserver, which watches the Comment model for any specific changes. You defined an after_create method on this, which took the comment object that was being updated and then called Notifier.comment_updated, passing along the comment object.
Notifier is an Action Mailer class that is responsible for sending out emails to the users of your application, and in this file you defined the comment_updated method called in your CommentObserver and set the recipients up to use the comment object’s related ticket watchers.
To define the watchers method, you used a has_and_belongs_to_many join table again. Your first experience using these was back in chapter 10, when you linked the Ticket and Tag models by setting one up on both of them. Back then, you used the tags_tickets table to link the two. This is the default naming schema of a has_and_belongs_to_many join table in Rails. In the case of your ticket watchers, however, your method was called watchers, and so would look for a class called Watcher to determine where it should find your watchers. This was incorrect, so you told your association that your join table should be ticket_watchers and that the related model was User, not Watcher. You used the :join_table and :class_name methods for this.
Finally, you defined the template for the comment_updated email at app/views/notifier/comment_updated.html.erb and filled it with the content you’re expecting to see, including the link that you click to complete the final step of your scenario.
This scenario completes the first steps of sending email notifications to your users. You should now run all your tests to make sure you didn’t break anything by running rake cucumber:ok spec:
60 scenarios (60 passed)
676 steps (676 passed)
# and
40 examples, 0 failures, 19 pending
Great to see everything still passing! You’ve added email ticket notifications to your application, so you should now make a commit saying just that and push it:
git add .
git commit -m "Add email ticket notifications"
git push
Now that you’ve got your application sending plain-text emails, let’s bring it into the 21st century by getting it to send out HTML emails as well.
12.1.6. Delivering HTML emails
Emails can have multiple parts associated with them, which allows emails to have attachments and different content types. For instance, some email applications don’t read HTML emails and will fall back to the text version of the template instead. More modern applications will render the HTML, presenting a prettier, formatted email.
With HTML, you’re able to style your emails to include elements such as images, and HTML tags such as the a tag. By doing this, you can provide a much better-looking email than the plain-text version, as shown in figure 12.2.
Figure 12.2. A better-looking email

You need to make only a couple of small changes to this email, such as the image at the top and the link that now reads View This Ticket Online Here. You could do more, but this will suit your purposes for now.
Some email clients don’t support receiving HTML-only emails. Thankfully, Action Mailer has a solution to this problem. When you send your comment_updated email, it will arrive all in the same message, but that message will contain multiple parts. The first part of the email will be the text template that you set up earlier, and the second part will be the new HTML version that you’ll code up in just a tad. Modern email clients are smart enough to detect an email such as this, and if they’re capable of rendering the HTML version they’ll do so; if not they will fall back to the plain-text variant.
To test that this works, you add another couple of steps right after the check of the email body in the scenario inside features/ticket_notifications.feature. These steps will check that you receive an email that contains two parts, with one of them having the content type of text/plain and the other of text/html:
Then they should see "updated the Release date ticket" in the email body
And the email should contain 2 parts
And there should be a part with content type "text/plain"
And there should be a part with content type "text/html"
When you run this feature with bin/cucumber features/ticket_notifications.feature, you’re notified that the two steps you’ve just used are undefined:
Then /^the email should contain two parts$/ do
  pending # express the regexp above with the code you wish you had
end

Then /^there should be a part with content type "([^"]*)"$/ do | arg1 |
  pending # express the regexp above with the code you wish you had
end
The email_spec gem doesn’t provide any steps for this, so you must craft your own. The gem does provide some helper methods that you can use. You should define these steps in a file separate from features/step_definitions/email_steps.rb, because the next time you run the email_spec generator, it will overwrite this file. Let’s instead put them in features/step_definitions/app_email_steps.rb and define them like this:
Then /^the email should contain (d+) parts$/ do |num|
  current_email.parts.size.should eql(num.to_i)
end

Then /^there should be a part with content type "([^"]*)"$/
      do |content_type |
  current_email.parts.detect do |p|
    p.content_type == content_type
  end.should_not be_nil
end
In the first step here, the current_email method comes from email_spec and represents the currently opened email. You open this email with the “Then [email protected] opens the email” step in your scenario. This object is a Mail::Message object, which represents an email object. You check in this step that the email contains the number of parts you say it should contain, and convert the num variable to an integer using to_i because it comes in from the step definition as a String object.
In the second step, you iterate through the parts to the email, using detect to return the first part in parts, which matches the condition inside the block you specify. You don’t care at this stage what order the parts appear in (that’s something the different email clients will deal with), but you do care that there’s more than one part.
When you run your feature using bin/cucumber features/ticket_notifications.feature, you see that the first of your two newest steps fails:
And the email should contain 2 parts

  expected 2
       got 0
So your scenario expected to see two parts, but got none. Why not even one? Well, the normal flavor of emails don’t come with multiple parts, because the text is part of the message itself. For your multipart emails, the text and HTML versions will be split into two separate parts.
Defining a HTML version of your email is very easy. All you have to do is create another file that begins with comment_updated inside of app/views/notifier, and Action Mailer will automatically detect that you have a multipart message. If you use the html format in your template’s filename, Action Mailer will do some more automatic detection and work out that the parsed content of this file should be sent as text/html. Inside of this new file you want to put the content from the following listing.
Listing 12.4. app/views/notifier/comment_updated.html.erb
<img src='http://ticketeeapp.com/images/logo.png' alt='Ticketee' />

<p>
  Hello.
</p>

<p>
  <%= @comment.user %> has just updated the
  <%= @comment.ticket.title %> ticket for
  <%= @comment.ticket.project.name %>. They wrote:</p>

<blockquote><%= @comment.text %></blockquote>

<p>
  You can <%= link_to "view this ticket online here",
    project_ticket_url(@comment.ticket.project, @comment.ticket) %>
</p>
Now that you have an HTML template, Action Mailer will send a multipart email containing both the HTML and text version of the mail without having to configure anything, which is always nice!
When you run bin/cucumber features/ticket_notifications.feature, you see that the feature fails:
Then they click the first link in the email
  No route matches [GET] "/images/logo.png'" ...
This is because the scenario is attempting to click the first link it comes across, which is the link to the image at the top of the HTML version of your email. What you really want it to do is to click the View This Ticket Online Here link, and you can make it do just that by replacing this line in the scenario
Then they click the first link in the email
with this one:
Then they follow "view this ticket online here" in the email
This will now make the scenario click the correct link. Let’s re-run bin/cucumber features/ticket_notifications.feature to see that this feature is now passing:
1 scenario (1 passed)
21 steps (21 passed)
Great, so now your users will receive multipart emails; their email clients should attempt to render the HTML part of these first and, if they can’t, then fall back to the text part. Such is the beauty of email these days.
Now is the time to commit these changes, but not before running your tests by running rake cucumber:ok spec:
60 scenarios (60 passed)
679 steps (679 passed)
# and
40 examples, 0 failures, 20 pending
Awesome! Everything is still going. Commit this change:
git add .
git commit -m "Send HTML ticket notification emails"
git push
Your ticket notification email will be sent out with two parts: an HTML version and a text version. This provides a way for email applications of all ages to render your email. Hopefully, more people will see the HTML version than the text version.
You learned how to generate a mailer and create a mailer method to it, and now you’re going to move into how you can let people subscribe to receive these emails. You’re currently only subscribing the ticket’s author to the list of watchers associated with this ticket, but other people may also wish to be notified of ticket updates. You can do this in two separate ways: through a watch button and through automatic subscription.
12.2. Subscribing to updates
You’ll provide other users with two ways to stay informed of ticket updates. The first will be very similar to the automatic subscription of a user when they create the ticket, but this time you’ll automatically subscribe users who comment on a ticket. You’ll reuse the same code that you used in the previous section to achieve this, but not in the way you might think.
The second will be a watch button on the ticket page, which will display either Watch This Ticket or Stop Watching This Ticket, depending on if the user is watching the ticket or not, as shown in figure 12.3.
Figure 12.3. The watch button
We’ll first look at implementing the automatic subscription when a user posts a comment to a ticket.
12.2.1. Testing comment subscription
You’ll now implement a feature to make users automatically watch a ticket when they create a comment on it. This is useful because your users will want to keep up-to-date with tickets that they have commented on. Later on, you’ll implement a way for these users to opt out.
To automatically subscribe a user to a ticket of a new comment, use an after_create, just as you did in the Ticket model for only the author of that ticket. But first, you need to ensure that this works!
You’ll add another scenario to the “Ticket notifications” feature, but first let’s consider the current flow. A couple of diagrams help explain this process.
First, let’s look at figure 12.4. Here, [email protected] creates a ticket that will automatically subscribe her to be notified of any comments posted to it.
Figure 12.4. Alice creates a ticket.

Next, figure 12.5. Then [email protected] comes along and leaves a comment on the ticket, which should subscribe [email protected] to these ticket updates. This is the feature that you’ll code in a short while. After Bob has commented on the ticket, Alice receives a notification telling her just that. Now that Bob is subscribed to the ticket, he should receive comment notifications every time somebody else—such as Alice—comments on the ticket, as shown in figure 12.6.
Figure 12.5. Bob comments on the ticket.

Figure 12.6. Alice comments on the ticket, too.

In this case, [email protected] shouldn’t receive a notification about a comment if she’s the one posting it! With the scenario explained, you can write it in Cucumber-form at the bottom of the “Ticket notifications” feature, as shown in the following listing:
Listing 12.5. features/ticket_notifications.feature
Scenario: Comment authors are automatically subscribed to a ticket
  When I follow "TextMate 2"
  And I follow "Release date"
  And I fill in "Text" with "Is it out yet?"
  And I press "Create Comment"
  Then I should see "Comment has been created."
  When I follow "Sign out"

  Given a clear email queue

  Given I am signed in as "[email protected]"
  When I follow "TextMate 2"
  And I follow "Release date"
  And I fill in "Text" with "Not yet!"
  And I press "Create Comment"
  Then I should see "Comment has been created."
  Then "[email protected]" should receive an email
  Then "[email protected]" should have no emails
In this scenario, you’re already logged in as [email protected] (courtesy of the Background). With Bob, you create a comment on the “Release date” ticket, check that [email protected] receives an email, and then sign out. Then you clear the email queue to ensure that [email protected] receives no emails after this point. You sign in as [email protected] and create a comment, which should trigger an email to be sent to [email protected], but not to [email protected]. When you run this scenario using bin/cucumber features/ticket_notifications.feature:36, you see that Bob never receives an email:
expected: 1,
got: 0 (using ==) (RSpec::Expectations::ExpectationNotMetError)
...
features/ticket_notifications.feature:54
This is failing on the step that checks if [email protected] has an email. You can therefore determine that [email protected] isn’t subscribed to receive comment update notifications as he should have been when he posted a comment. You need to add any commenter to the watchers list when they post a comment so that they’re notified of ticket updates.
12.2.2. Automatically adding a user to a watchlist
To keep users up to date with tickets, you’ll automatically add them to the watchers list for that ticket when they post a comment. You currently do this when people create a new ticket, and so you can apply the same logic to adding them to the list when they create a comment.
You can define another after_create callback in the Comment model by using this line:
after_create :creator_watches_ticket
Next, you need to define the method that this callback calls, which you can do by placing this code at the bottom of your Comment model:
def creator_watches_ticket
  ticket.watchers << user
end
By using the tickets association, you can add the creator of this comment to the watchers for this ticket. This should mean that when a comment is posted to this ticket, any user who has posted a comment previously, and not only the ticket creator, will receive an email.
You can see if this is the case when you run this scenario again using bin/cucumber features/ticket_notifications.feature:36. You see that Bob is now receiving an email and the entire scenario is passing:
1 scenario (1 passed)
23 steps (23 passed)
Perfect! Now users who comment on tickets are added to the watchers list automatically and the user who posts the comment isn’t notified if they are already on that list.
Did you break anything by implementing this change? Let’s have a look by running rake cucumber:ok spec. You should have this:
61 scenarios (61 passed)
702 steps (702 passed)
# and
40 examples, 0 failures, 20 pending
Every test that you have thrown at this application is still passing, which is a great thing to see. Let’s commit this change:
git add .
git commit -m "Users are now automatically subscribed
               to a ticket when they comment on it"
You now have automatic subscription for ticket notifications when a user creates a ticket or posts a comment to one, but currently there is no way to switch notifications off. To implement this, you’ll add a Stop Watching This Ticket button that, when clicked, will remove the user from the list of watchers for that ticket.
12.2.3. Unsubscribing from ticket notifications
You’ll add a button to the ticket page to unsubscribe users from future ticket notifications. When you’re done here, the ticket page will look like figure 12.7.
Figure 12.7. The “stop watching” button

Along with implementing the ability to turn off the notifications by clicking this button, you’ll also add a way for the users to turn on notifications, using what will effectively be the same button with a different label. This button will toggle users’ watching status, which will allow them to subscribe to ticket notifications without 1) creating their own ticket or 2) posting a comment.
You implement the on and off functionality simultaneously by writing a new feature in a new file at features/watching_tickets.feature. Let’s start with the code from the following listing.
Listing 12.6. features/watching_tickets.feature
Feature: Watching tickets
  In order to keep up to date with tickets
  As a user
  I want to choose to subscribe to their updates

Background:
  Given there are the following users:
    | email             | password |
    | [email protected] | password |
  Given there is a project called "TextMate 2"
  And "[email protected]" can view the "TextMate 2" project
  And "[email protected]" has created a ticket for this project:
    | title        | description       |
    | Release date | TBA very shortly. |

  Given I am signed in as "[email protected]"
  Given I am on the homepage
In this example, you create a single user, a project, and a ticket. Because this user created the ticket, they’re automatically subscribed to watching this ticket and therefore they should see the Stop Watching This Ticket button on the ticket page. You test this by writing the scenario from the following listing underneath your Background.
Listing 12.7. features/watching_tickets.feature
Scenario: Ticket watch toggling
  When I follow "TextMate 2"
  And I follow "Release date"
  Then I should see "[email protected]" within "#watchers"
  And I press "Stop watching this ticket"
  Then I should see "You are no longer watching this ticket"
  And I should not see "[email protected]" within "#watchers"
To begin to watch a ticket again, all the user has to do is click the Watch This Ticket button, which you can also test by adding the following code to this scenario:
When I press "Watch this ticket"
Then I should see "You are now watching this ticket"
And I should see "[email protected]" within "#watchers"
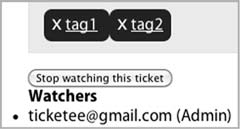
See? That’s how you test the watching/not watching function simultaneously! You don’t need to post a comment and test that a user is truly watching this ticket; you can instead check to see if a user’s name appears in a list of all the watchers on the right side of the ticket page, which will look like figure 12.8.
Figure 12.8. Who’s watching
As usual, you see what you need to code right now to get your feature on the road to passing by running bin/cucumber features/waching.feature. You see that it’s actually this watchers list, indicated by Capybara telling you that it can’t find that element:
Then I should see "[email protected]" within "#watchers"
  Unable to find css "#watchers" (Capybara::ElementNotFound)
To get this feature to continue, you’re going to need this element! You can add it to app/views/tickets/show.html.erb underneath the </div> tag for <div id='ticket'> by using the code from the following listing.
Listing 12.8. app/views/tickets/show.html.erb
<div id='watchers'>
  <h4>Watchers</h4>
  <ul>
   <% @ticket.watchers.each do |watcher| %>
      <li><%= watcher %></li>
    <% end %>
  </ul>
</div>
You’ve created another div with the id attribute set to watchers, which is the element that your scenario looks for. In this div you iterate through all the watchers of the ticket and output a li tag for each of them, which will output a list of watchers when wrapped in a ul tag.
When you have this element and you run your feature again with bin/cucumber features/watching_tickets.feature, you see that your feature gets one step closer to passing by locating [email protected] in the #watchers element, but it now can’t find the Stop Watching This Ticket button:
Then I should see "[email protected]" within "#watchers"
  And I press "Stop watching this ticket"
  no button with value or id or text 'Stop watching this ticket'
This button will toggle the watching status of the ticket of the current user, and the text will differ depending on if the user is or isn’t watching this ticket. In both cases, however, the button will go to the same action. To get this next scenario to pass, you add the button to the div#watchers element you just created by using a helper, changing the first few lines of the element to this:
<div id='watchers'>
  <%= toggle_watching_button %>
  <h4>Watchers</h4>
This toggle_watching_button helper will only appear in views for the TicketsController, and so you should put the method definition in app/helpers/tickets_helper.rb inside the TicketsHelper module, using the code from the following listing to define the method.
Listing 12.9. app/helpers/tickets_helper.rb
def toggle_watching_button
  text = if @ticket.watchers.include?(current_user)
    "Stop watching this ticket"
  else
    "Watch this ticket"
  end
  button_to(text, watch_project_ticket_path(@ticket.project, @ticket))
end
On the final line of this method, you use a new method: button_to. This method works in a similar fashion as link_to does, providing a user with an element to click to go somewhere. In this case, the element is a button wrapped in a form that points to the specified action. When the user clicks the button, it submits this form through a POST request, with the only parameter passed through being params[:commit], which contains the text of the button.
Inside the button_to, you use a new route helper that you haven’t defined yet. When you run bin/cucumber features/watching_tickets.feature, it will complain that this method is undefined when it tries to render the app/views/tickets/show.html.erb page:
And I follow "Release date"
  undefined method `watch_project_ticket_path' for ...
This route helper points to a specific action on a project’s ticket. You can define it in config/routes.rb inside the resources :tickets block, which itself is nested inside the resources :projects block, as shown in the following listing.
Listing 12.10. config/routes.rb

The button_to’s purpose is to toggle the watch status of a single ticket, meaning you want to define a member route ![]() for your ticket resource. You put it inside the tickets resource, nested under the projects resource, because for your watch action you want to confirm that the person has permission to view this project. You define the route to the watch action with post because button_to generates a form by default, and a form’s HTTP method will default to POST.
for your ticket resource. You put it inside the tickets resource, nested under the projects resource, because for your watch action you want to confirm that the person has permission to view this project. You define the route to the watch action with post because button_to generates a form by default, and a form’s HTTP method will default to POST.
When you run your feature again using bin/cucumber features/watching_tickets.feature, it will complain now because there is no watch action for your button to go to:
And I press "Stop watching this ticket"
  The action 'watch' could not be found for TicketsController
You’re almost done! Defining this watch action is the last thing you have to do. This action will add the user who visits it to a specific ticket’s watcher list if they aren’t already watching it, or remove them if they are. To define this action you open app/controllers/tickets_controller.rb and use the code found in the following listing.
Listing 12.11. app/controllers/tickets_controller.rb
def watch
  if @ticket.watchers.exists?(current_user)
    @ticket.watchers -= [current_user]
    flash[:notice] = "You are no longer watching this ticket."
  else
    @ticket.watchers << current_user
    flash[:notice] = "You are now watching this ticket."
  end

  redirect_to project_ticket_path(@ticket.project, @ticket)
end
The first thing to notice about this method is that you don’t define the @ticket variable before you use it on the first line of this method. This is because you can add this action to the list of actions that the before_filter :find_ticket runs on by changing these lines at the top of your controller
before_filter :find_ticket,
              :only => [:show,
                        :edit,
                        :update,
                        :destroy]
to these lines:
before_filter :find_ticket,
              :only => [:show,
                        :edit,
                        :update,
                        :destroy,
                        :watch]
In this method you use exists?, which will check if the given user is in the list of watchers. If they are, then you use watchers -= to remove a watcher from a ticket. If they aren’t on the watchers list, you use watchers << to add them to the list of watchers.
The watch action now defines the behavior for a user to start and stop watching a ticket by clicking the button above the watchers list. When you run bin/cucumber features/watching_tickets.feature, it will pass:
1 scenario (1 passed)
15 steps (15 passed)
Great! Now you have a way for users to toggle their watch status on any given ticket. Let’s make sure that everything is working by running rake cucumber:ok spec. You should see the following output:
62 scenarios (62 passed)
717 steps (717 passed)
# and
40 examples, 0 failures, 20 pending
Everything is still A-OK, which is good to see. Let’s commit this change:
git add .
git commit -m "Add button so users can toggle
               watching on a ticket"
git push
You’ve now got a way that a user can start or stop watching a ticket. By watching a ticket, a user will receive an email when a comment is posted to the ticket. You’re doing great in theoretically testing email, but you haven’t yet configured your application to send out emails in the real world. Let’s do that now.
12.3. Real-world email
You’ve just created the beginnings of a way to send email in your application, but there’s still a part missing: the SMTP server that receives your mail objects and then sends them out to their recipients. You could spend a lot of time configuring one yourself, but many companies offer a free SMTP service, such as Gmail.[8] You’ll use a Gmail account to send out tests of your emails, and you can use Action Mailer to connect to this service.
8 SendGrid offers one too that you would use, but you’re going to need to receive emails next, and having a Gmail account will allow you to do that.
Warning
You wouldn’t use Gmail to send or receive your emails if you were running a much larger application, but rather another web service such as SendGrid. This is because Gmail has a limit of about 200 sent emails a day, and if there are 200 tickets updated in a single day then it’s goodbye email cap. Gmail is great for light email usage, but if you want to scale up your usage, SendGrid is one of the best options out there.
Action Mailer has a setting that you can use to set up your SMTP connection:
ActionMailer::Base.smtp_settings = {
  :username = "[email protected]",
  :password = "yourpassword"
  ...
}
Before you dive into setting this up, you’re going to need a feature to ensure that it always works. When you set up your application to send emails in the real world, it may work from the get-go, and you can test it manually by sending out emails in your application through rails server. But how do you ensure that it works all the time? The feature will provide that insurance.
When you’re done here, you’ll have your application hooked up to Gmail’s SMTP server so that you can send emails in the real world, and you’ll have a Cucumber feature to ensure that it’s never broken.[9] Let’s jump into it.
9 That is to say, if you run all the tests and they all pass before you commit, then you know that your Gmail connection would be working, too.
12.3.1. Testing real-world email
In this section, you’ll create a feature in which you set up Action Mailer to send out emails to Gmail’s SMTP service. You’ll then update a ticket’s comment, which should trigger the emails to be sent to the real world. Finally, you’ll check the Gmail account (using the mail gem on which Action Mailer is based), to make sure that the email was received. If it wasn’t received, then the cause is most likely a configuration problem, such as an invalid password.
Let’s write this new feature in a new file called features/gmail.feature a bit at a time. You start with just these few lines:
Feature: Gmail
  In order to send real world emails
  As the application
  I want to ensure my configuration is correct

  Background:
    Given there are the following users:
      | email                   | password |
      | [email protected]      | password |
      | [email protected] | password |

    And Action Mailer delivers via SMTP
Here you have the standard feature setup on the first four lines, describing to any interested reader what this feature’s purpose is. The final few lines begin your feature’s Background, defining two users that you’ll use and an as-of-yet undefined step. The two users set up here are for setting up the ticket a little later on in your Background. The [email protected] should be your actual Gmail account’s address[10] for reasons that you’ll see later.[11]
10 And if you don’t have one, sign up! It’s free and will only take a minute.
11 We’d use [email protected] as the example here, but we don’t want to bombard the owner of this actual account with emails!
The current undefined step on the final line will be used to tell Action Mailer not to capture all emails that are being sent, but rather to send them out through the SMTP configuration that you’ll set up in a little while. When you run this feature using bin/cucumber features/gmail.feature, you’re given the step definition for this step:
Given /^Action Mailer delivers via SMTP$/ do
  pending # express the regexp above with the code you wish you had
end
In this step definition, you need to tell Action Mailer to use SMTP to deliver your emails rather than capture them. You can define this new step definition in features/step_definitions/app_email_steps.rb like this:
Given /^Action Mailer delivers via SMTP$/ do
  ActionMailer::Base.delivery_method = :smtp
end
Great! Now Action Mailer will set the delivery_method to :smtp before every scenario in this feature. The side effect of this setting is that it will be set for every scenario that runs after it, not only scenarios in this feature. This is a problem because you don’t want every scenario to send email in the real world, only the ones contained in this feature. To make it revert this setting back to :test after every scenario, you can create a new file at features/support/after_hook.rb and put this content inside it:
After do
  ActionMailer::Base.delivery_method = :test
end
The After method here is provided by Cucumber, and its purpose is to execute any given block after each scenario has finished running. With this code, the setting will be reverted back to :test and you’ll only be sending real-world emails in this particular scenario.
Let’s continue writing your new feature. You need to set up a project that both [email protected] and you can see, and create a ticket on that project that is posted by you. In a short while, you’ll get Alice to sign in and post a comment to this ticket, which should make an email appear in your inbox. You’ll then check this email using the mail gem. Set up the project and ticket with these steps:
Given there is a project called "TextMate 2"
And "[email protected]" can view the "TextMate 2" project
And "[email protected]" can view the "TextMate 2" project
And "[email protected]" has created a ticket for this project:
  | title        | description       |
  | Release date | TBA very shortly. |
Here’s another place where [email protected] should be substituted with your real Gmail account. In these steps, you set up that [email protected] and your email both have the “view” permission on the TextMate 2 project. After this, you need a ticket that you’ve created so that Alice can post a comment to it and you can receive an email notification informing you of what Alice has posted.
Now you can get to the meat of your feature: the scenario itself. In this scenario, you want to log in as [email protected], visit the “Release date” ticket inside the TextMate 2 project, and post a comment to it. After all that’s said and done, you need to assert that your [email protected] mailbox has one new message. The code for the scenario should therefore look like in the following listing.
Listing 12.12. features/gmail.feature
Scenario: Receiving a real-world email
  Given I am signed in as "[email protected]"
  Given I am on the homepage
  When I follow "TextMate 2"
  And I follow "Release date"
  And I fill in "Text" with "Posting a comment!"
  And I press "Create Comment"
  Then I should see "Comment has been created."

  When I log into gmail with:
    | username              | password      |
    | [email protected] | your_password |
  Then there should be an email from Ticketee in my inbox
When you run this feature using bin/cucumber features/gmail.feature, you see that your feature fails when [email protected] clicks the Create Comment button:
And I press "Create Comment"
  Connection refused - connect(2) (Errno::ECONNREFUSED)
  .../net/smtp.rb:551:in `initialize'
Remember before how it was mentioned that Action Mailer would (by default) try to connect to an SMTP server running on localhost? That’s what is happening here, because when a comment is updated a notification will be sent out. You didn’t see this previously because it’s only now that you’ve switched delivery_method to :smtp, You don’t have one running locally[12] so it’s unable to connect. You can tell that it’s now using SMTP, because the first line of the stacktrace points to net/smtp.rb in Ruby’s standard library, which is what Action Mailer (by way of Mail) uses to connect to SMTP servers. Therefore, you must change something in order to make this work once more.
12 Unless you’ve got it set up from some other place that’s not this book.
12.3.2. Configuring Action Mailer
To fix this error, you must tell Action Mailer to connect to your Gmail server so that it has a way to send out emails. You can create a new file in config/initializers that provides Action Mailer with the necessary information it needs. But what would this information be? Well, let’s hop on over to Google’s “Configuring other mail clients”[13] page, where you’ll see the table from figure 12.9.
13http://mail.google.com/support/bin/answer.py?hl=en&answer=13287.
Figure 12.9. Configuring other mail clients

You’re trying to send email, so you want to use the Outgoing Mail section, which tells you to use smtp.gmail.com as the server. You’ll connect to it using TLS, so you’ll connect on port 587. The account name and password should be the Gmail address and password for your email address. With these settings, create a config/initializers/mail.rb file that looks like the following listing.
Listing 12.13. config/initializers/mail.rb
ActionMailer::Base.smtp_settings = {
  :user_name => "[email protected]",
  :password => "password",
  :address => "smtp.gmail.com",
  :port => 587,
  :tls => true
}
With these settings in this file, you can rerun bin/cucumber features/gmail.feature to see that it passes now up to the last two steps, which are undefined:
When /^I log into gmail with:$/ do |table|
   # table is a Cucumber::Ast::Table
   pending # express the regexp above with the code you wish you had
 end

 Then /^there should be an email from Ticketee in my inbox$/ do
   pending # express the regexp above with the code you wish you had
 end
With these step definitions, you’ll be able to connect to Gmail using settings specified in a Cucumber table format and then check for the email, which should be sent by steps earlier in this feature. You need to define these now.
12.3.3. Connecting to Gmail
You’ve now sent the email to the server, but you don’t have any steps in place to read these emails from your Gmail account and check that one of the emails is from Ticketee. As you can almost anticipate, there’s a gem that can help you with this, called quite simply gmail. This gem will let you connect to a Gmail server using the username and password you just used to set up an SMTP connection, and also read the emails for that account. The code it uses looks like this:
Gmail.connect(username, password)
You’ll also use this gem in the next section, when we look at how you can receive emails into your application. It’s a pretty neat gem, and it’s got a great README, which can be seen at http://github.com/nu7hatch/gmail.
To install this gem, you must first add it to the Gemfile by adding this line inside the group block for development and test, because you only want this gem used in those environments:
group :test, :development do
  gem 'gmail'
  ...
end
Then you need to run bundle install to install this gem so that you can use it. When bundle install is finished running, let’s open features/step_definitions/app_email_steps.rb and add the “When I log into gmail with...” step by using this code:
When /^I log into gmail with:$/ do |table|
   details = table.hashes.first
   @gmail = Gmail.connect(details["username"], details["password"])
 end
In this step definition, you take only the first hash from the table (you’re only going to be logging into one Gmail account at a time) and then you use the Gmail.connect method, provided by the gmail gem that you just installed, to start a connection to Gmail’s servers using your username and password. By assigning this object to @gmail, you can use this connection in future steps to read emails from your Gmail account.
The second step you need to create will do precisely that, using the @gmail connection to read all the emails, find the emails that have a subject beginning with [ticketee] (there should only be one), and then delete the email after you’ve read it. The method you can use for this is the find_and_delete method, which will find emails matching a specific criteria, read them, and then delete them:

In this step, you use the @gmail variable defined in the “log into gmail with” step you just defined. The find method here will find emails using the Gmail connection you’ve opened and then locate all emails from [email protected]. The mail variable is an instance of the Mail::Message class, as are all messages parsed by the mail gem.
If there is an email with a subject that begins with “[ticketee]” ![]() then you set a @received_mail variable to true. You use this variable as the final line in this step, because it would only be set to true if the latest email’s subject was what you were looking for.
then you set a @received_mail variable to true. You use this variable as the final line in this step, because it would only be set to true if the latest email’s subject was what you were looking for.
When you run your feature using bin/cucumber features/gmail.feature, it will now pass:
1 scenario (1 passed)
15 steps (15 passed)
This feature checks that your real-world SMTP settings are valid by connecting to the real-world SMTP server, sending an email, and then checking that it arrived using Mail::POP3. Beautiful! If the password for this account were to change, however, then this feature would break.
Everything should still be working now. You haven’t changed anything that would have broken your existing features or specs, but it’s still great practice to run them just to make sure. Let’s do this by running rake cucumber:ok spec. You see the following output:
63 scenarios (63 passed)
732 steps (732 passed)
# and
40 examples, 0 failures, 20 pending
Indeed, nothing is broken. But if you made a commit now, it would cause potentially private Gmail account details to be committed to the repository. You probably don’t want to do this. To prevent this, you should copy config/initializers/mail.rb to config/initializers/mail.rb.example and change the details in it to be placeholders for real details. The same thing should be done for the features/sending_emails.feature feature.
After that, you must tell Git to ignore these files. You can do this by placing their names within a .gitignore file at the root of the Rails application, which is also the root of the Git repository. Create a new file called .gitignore now, and put these two lines in it:
config/initializers/mail.rb
features/sending_emails.feature
When you run git add . and then git status, the files with the real values should not appear in the “Changes to be committed” list. If they don’t, then you can make a commit and push it:
git commit -m "Set up application to connect to Gmail to send emails"
git push
You’ve now got your application sending out emails in the real world using Gmail as the server. With these settings, the emails notifying users that tickets have had new comments posted to them, as well as the confirmation emails sent from Devise for new user signups, will be sent out through Gmail.
You have the sending emails part of your application done, but what about if you wanted to let users reply to comments by replying to the email notification they receive in their inbox? That would be cool. To do this, you’re going to need to figure out how you can receive emails with Rails.
12.4. Receiving emails
You’d now like to add a feature to Ticketee where users can reply to the email notifications for a new comment on a ticket, and by replying create a new comment with their text. Many other applications do this by having an email such as this:
== ADD YOUR REPLY ABOVE THIS LINE ==
Bob has just updated the "Due date" ticket for "TextMate 2"
Text above the “ADD YOUR REPLY ABOVE THIS LINE” will be parsed out and turned into a new object. In Ticketee, this would be a comment.
In the previous section, you learned how you could connect to a Gmail account to check to see if there was an email that had a subject beginning with “[ticketee].” You can use the same method in order to check for replies to your emails too, but you need to make one small modification.
To determine what ticket and project the reply is directed at, you need to tag the emails in a certain way. The best way to do this is to add the tags to the email addresses themselves, so that an email address with a tag looks like [email protected], where the +tag part of the email is ignored and the email arrives in ticketee @gmail.com’s mailbox. For your emails, you’ll set a reply-to address such as [email protected], where the first number is the project ID and the second number is the ticket ID.
You’re not going to post comments straight from emails. You need to check to see if the user has permission to view the project where the ticket is, which means that they would be able to create a comment for that ticket too. If they’re unable to post a comment to that ticket, you assume the user is trying to do something malicious and just ignore their email.
To parse these emails, you’ll be using the receive method in an ActionMailer class, which takes an email object and allows you to process it.
A quick summary: you’re going to use the gmail gem to check for emails in your inbox that are replies to comment notifications and then parse them using Action Mailer into new Comment objects. If a user is restricted from viewing a project, then you’ll ignore their emails.
First, you want to check that the outgoing email contains the tag on the “from” address, so that when a user replies to it you know what project and ticket they’re replying to.
12.4.1. Setting a reply-to address
By having a different “from” address set on the outgoing email, you’ll be able to determine what project and ticket the user’s reply comment should be created on. To ensure that all outgoing emails from the comment_updated method in Notifier have this set, you’re going to write a simple test.
Let’s open spec/mailers/notifier_spec.rb and change this whole file to what’s shown in the following listing.
Listing 12.14. app/mailers/notifier_spec.rb
require "spec_helper"

describe Notifier do
  it "correctly sets the reply-to" do
    comment = Factory(:comment)
    mail = ActionMailer::Base.deliveries.last
    mail.from.should eql(["youraccount+#{comment.project.id}+" +
      "#{comment.ticket.id}@example.com"])
  end
end
Here you test that the from for the latest email sent out contains the ids of the project and ticket related to the comment you create. With this information contained in the email address, you’ll be able to know what project and ticket to create the comment for when a user replies to that email.
When you run this spec using bin/rspec spec/mailers/notifier_spec.rb, you see that you need to define the comment factory:
No such factory: comment (ArgumentError)
Let’s define this new factory in factories/comment_factory.rb like this:
Factory.define :comment do |comment|
  comment.text "A plain old boring comment."
  comment.ticket { |t| t.association(:ticket) }
  comment.user { |u| u.association(:user) }
end
Now when you run bin/rspec spec/mailers/notifier_spec.rb, you see that it fails with this error:
expected ["[email protected]"]
          got ["[email protected]"]
Right then! A failing test is a great place to begin, and now you need to fix it. Let’s open app/mailers/notifier.rb and add a :from option to the mail call inside the comment_updated method:
:from => "Ticketee <youraccount+
#{comment.project.id}+#{comment.ticket_id}@example.com>"
This will change the “from” address on emails that go out to your users by tagging the addresses with the project and ticket id. When the user replies to this email, you can use this tag to find the project and ticket that you need to create a new comment on. Let’s run bin/rspec spec/mailers/notifier_spec.rb again to see it pass:
1 example, 0 failures
Now you need to work on the actual receiving of replies directed at this tagged address!
12.4.2. Receiving a reply
With the correct reply-to set, you can implement the feature responsible for creating new comments from email replies. You create a new class for dealing with incoming email and call it Receiver, placing it in app/mailers by running this command:
rails g mailer receiver
This will generate the mailer you use for receiving email, as well as the RSpec file that you can use to write the tests for the class. To test this particular feature, you use a setup very similar to the spec/notifier_spec.rb test that you just wrote. This test needs to generate a comment and then a reply to the email you would receive from the comment. This new reply should have the same body as the original email, but prefixed with some text. This new text will become the new comment.
At this stage you only want to check that you can parse emails using this new class and a currently undefined method on it called parse. This method will take a Mail::Message object and create a new comment on a ticket. You’ll do permission checking later on, but for now let’s just get the basic functionality down.
You begin with these lines in spec/mailers/receiver_spec.rb:
require 'spec_helper'

describe Receiver do

  it "parses a reply from a comment update into a comment" do
    comment = Factory(:comment)
This will set up a comment and a ticket by using the factory, which will also cause a comment_updated notification to be delivered. You can retrieve this notification using this line:
comment_email = ActionMailer::Base.deliveries.last
This is possible because in the test environment, ActionMailer::Base.delivery_method is set to :test, which stores the emails that have been sent in ActionMailer::Base.deliveries. The last email that’s been sent out will be the notification for the comment. With this email object, you can build a new Mail::Message reply to this email using these lines:

With these lines, you’re constructing a new reply using the body ![]() from the original email to generate a multilined string with “This is a brand new comment” before the body of the first email.
The first line in this first email will eventually be “== ADD YOUR REPLY ABOVE THIS LINE ==”, which is how you distinguish
what should be the new content for the comment and what’s just from the old email.
from the original email to generate a multilined string with “This is a brand new comment” before the body of the first email.
The first line in this first email will eventually be “== ADD YOUR REPLY ABOVE THIS LINE ==”, which is how you distinguish
what should be the new content for the comment and what’s just from the old email.
The final step for this spec is to actually parse the thing using the Receiver class, and to check that it changes the related ticket’s comment count by 1:
lambda { Receiver.parse(mail) }.should(
   change(comment.ticket.comments, :count).by(1)
 )
The spec/mailers/receiver_spec.rb should now look like the following listing.
Listing 12.15. spec/mailers/receiver_spec.rb

In this spec, you build a comment and reference the ticket for it. By creating a comment, there will be an email going out
that you can access using ActionMailer::Base.deliveries.last ![]() because ActionMailer::Base.delivery_method is set to :test. Using this email, you can compile a new email using Mail.new
because ActionMailer::Base.delivery_method is set to :test. Using this email, you can compile a new email using Mail.new ![]() [14] and passing in some values using the original email’s methods. One of these values—:body—is way more important than the others. For this value, you want to take the original content of the email and then above
it put the new comment text. You use default_part_body
[14] and passing in some values using the original email’s methods. One of these values—:body—is way more important than the others. For this value, you want to take the original content of the email and then above
it put the new comment text. You use default_part_body ![]() . From this new text, a comment should be created. That’s exactly what you assert on the final few lines of this example
by using RSpec’s change
. From this new text, a comment should be created. That’s exactly what you assert on the final few lines of this example
by using RSpec’s change ![]() method. On these final lines, you only want to make sure that the comments count has increased by one and that the latest
comment has the text “This is a brand new comment.”
method. On these final lines, you only want to make sure that the comments count has increased by one and that the latest
comment has the text “This is a brand new comment.”
14 This functionality is provided by the mail gem, on which Action Mailer depends.
When you run this spec using bin/rspec spec/mailers/receiver_spec.rb, you’ll be told this:
Failure/Error: lambda { Receiver.parse(mail) }.should(
  undefined method `parse' for Receiver:Class
To make this spec parse, you need to define this method. This method should take a Mail::Message object, read out everything from the body of that object above the line “ADD YOUR REPLY ABOVE THIS LINE”, and create a comment from it. You can begin to define this method in app/mailers/receiver.rb like this:
def self.parse(email)
   reply_separator = /(.*?)s?== ADD YOUR REPLY ABOVE THIS LINE ==/m
   comment_text = reply_separator.match(email.body.to_s)
Here you match the body of the email with the expected reply separator, getting back either a MatchData object (indicating the email is a valid reply to a comment) or nil. If you get back a valid reply then you do this:
if comment_text

   to, project_id, ticket_id =
     email.to.first.split("@")[0].split("+")
Here you take the list of to addresses for the email, get the first of them, and then split it on the @ symbol. This separates the username and the domain name in your email. The username contains the project id and ticket id, which you get by calling split again, this time separating the individual elements by the + symbol.
Next, you need to find the relative project, ticket, and user for this email, which you can do using these lines inside the if that you just opened:
project = Project.find(project_id)
ticket = project.tickets.find(ticket_id)
user = User.find_by_email(email.from[0])
Finally, you need to create the comment from the email body (stripping all extra spaces from it) and close the if, which is done with the following lines:
    ticket.comments.create(:text => comment_text[1].strip,
                           :user => user)
  end
end
The [1] here will get the first match for the comment_text, which will be the new comment’s text, throwing strip on the end in case there are a couple of extra spaces /lines between the comment text and the separator. That’s the final bit of code you need in the app/mailers/receiver.rb file. When you run this spec again with bundle exec rspec spec/mailers/receiver_spec.rb, it will still fail:
Failure/Error: lambda { Receiver.parse(mail) }.should(
  count should have been changed by 1, but was changed by 0
This is because your original comment notification doesn’t have the reply separator, and therefore the if condition in the parse method you just wrote says “Oh, can’t find it, so I’ll just ignore this email,” or something to that effect. In order to get this to work, you must add that line to the comment notification. You can do this by opening app/views/notifier/comment_updated.text.erb and its HTML compatriot and adding this line to the beginning of both files:
== ADD YOUR REPLY ABOVE THIS LINE ==
Now when you run your spec once more with bundle exec rspec spec/mailers/receiver_spec.rb, it will pass because the parse method can find the separator:
1 example, 0 failures
Alright, now that you’ve got that feature passing, does everything else still work? Let’s find out by running rake cucumber:ok spec:
63 scenarios (63 passed)
732 steps (732 passed)
# and
41 examples, 0 failures, 19 pending
Good! Everything is still going great. Let’s commit the new feature:
git add .
git commit -m "Add Receiver class to receive emails"
git push
Right, this feature isn’t complete quite yet, because it only takes mail objects but doesn’t actually do any of the fetching itself. You’ll revisit this feature in chapter 15 and complete it there. This is a great start, however.
12.5. Summary
That completes chapter 12! In this chapter, you learned how to send out your own kind of emails. Before that, however, you added two ways that users can subscribe to a ticket.
The first of these ways was an automatic subscription that occurred when a user created a ticket. Here, every time a comment was posted to a ticket, the owner of the ticket was notified through either a plain-text or HTML email, depending on what that user’s email client supported.
The second of the two ways was to allow users to choose to subscribe or unsubscribe to a ticket. By doing this, all users, and not just those who created the ticket, can choose to receive emails when a ticket has had a comment posted to it. This way, all users can stay up to date on tickets they may be interested in.
Next, you made sure that you could actually send emails into the real world by connecting to a real Gmail account using Action Mailer’s SMTP settings. You also ensured that when you send an email using the STMP setting, you can read it from the server by using the gmail gem.
By sending emails into the real world, you’re bringing your application one step closer to being complete. Now you’ll be able to put the application on a server, and it should work just as it does in your tests. But you’re going to polish your application a little more before you do that.
The next chapter covers how you can use Rails to present your data to other developers so that they can create applications or libraries to parse it into new and interesting formats.