
In this section, you're going to write some React code that sets the state of components. First, you'll learn about the initial state—this is the default state of a component. Next, you'll learn how to change the state of a component, causing it to re-render itself. Finally, you'll see how new state is merged with existing state.
The initial state of the component isn't actually required, but if your component uses state, it should be set. This is because if the component JSX expects certain state properties to be there and they aren't, then the component will either fail or render something unexpected. Thankfully, it's easy to set the initial component state.
The initial state of a component should always be an object with one or more properties. For example, you might have a component that uses a single array as its state. This is fine, but just make sure that you set the initial array as a property of the state object. Don't use an array as the state. The reason for this is simple: consistency. Every react component uses a plain object as its state.
Let's turn our attention to some code now. Here's a component that sets an initial state object:
import React, { Component } from 'react';

export default class MyComponent extends Component {
  // The initial state is set as a simple property
  // of the component instance.
  state = {
    first: false,
    second: true,
  }

  render() {
    // Gets the "first" and "second" state properties
    // into constants, making our JSX less verbose.
    const { first, second } = this.state;

    // The returned JSX uses the "first" and "second"
    // state properties as the "disabled" property
    // value for their respective buttons.
    return (
      <main>
        <section>
          <button disabled={first}>First</button>
        </section>
        <section>
          <button disabled={second}>Second</button>
        </section>
      </main>
    );
  }
}
If you look at the JSX that's returned by render(), you can actually see the state values that this component depends on—first and second. Since we've set these properties up in the initial state, we're safe to render the component, and there won't be any surprises. For example, we could render this component only once, and it would render as expected, thanks to the initial state:
import React from 'react';
import { render } from 'react-dom';

import MyComponent from './MyComponent';

// "MyComponent" has an initial state, nothing is passed
// as a property when it's rendered.
render(
  (<MyComponent />),
  document.getElementById('app')
);
Here's what the rendered output looks like:
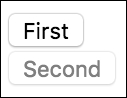
Setting the initial state isn't very exciting, but it's important nonetheless. Let's make the component re-render itself when the state is changed.
Let's create a component that has some initial state. We'll then render this component, and update its state. This means that the component will be rendered twice. Let's take a look at the component so that you can see what we're working with here:
import React, { Component } from 'react';

export default class MyComponent extends Component {
  // The initial state is used, until something
  // calls "setState()", at which point the state is
  // merged with this state.
  state = {
    heading: 'React Awesomesauce (Busy)',
    content: 'Loading...',
  }

  render() {
    const { heading, content } = this.state;

    return (
      <main>
        <h1>{heading}</h1>
        <p>{content}</p>
      </main>
    );
  }
}
As you can see, the JSX of this component depends on two state properties—heading and content. The component also sets the initial values of these two state properties, which means that it can be rendered without any unexpected gotchas. Now, let's look at some code that renders the component, and then re-renders it by changing the state:
import React from 'react';
import { render } from 'react-dom';

import MyComponent from './MyComponent';

// The "render()" function returns a reference to the
// rendered component. In this case, it's an instance
// of "MyComponent". Now that we have the reference,
// we can call "setState()" on it whenever we want.
const myComponent = render(
  (<MyComponent />),
  document.getElementById('app')
);

// After 3 seconds, set the state of "myComponent",
// which causes it to re-render itself.
setTimeout(() => {
  myComponent.setState({
    heading: 'React Awesomesauce',
    content: 'Done!',
  });
}, 3000);
The component is first rendered with it's default state. However, the interesting spot in this code is the setTimeout() call. After 3 seconds, it uses setState() to change the two state property values. Sure enough, this change is reflected in the UI. Here's what the initial state looks like when rendered:

Here's what the rendered output looks like after the state change:

Note
This example highlights the power of having declarative JSX syntax to describe the structure of the UI component. We declare it once, and update the state of the component over time to reflect changes in the application as they happen. All the DOM interactions are optimized and hidden from view. Pretty cool, huh?
In this example, we actually replaced the entire component state. That is, the call to setState() passed in the same object properties found in the initial state. But, what if we only want to update part of the component state?
When you set the state of a React component, you're actually merging the state of the component with the object that you pass to setState(). This is useful because it means that you can set part of the component state while leaving the rest of the state as it is. Let's look at an example now. First, a component with some state:
import React, { Component } from 'react';

export default class MyComponent extends Component {
  // The initial state...
  state = {
    first: 'loading...',
    second: 'loading...',
    third: 'loading...',
  }

  render() {
    const { state } = this;

    // Renders a list of items from the
    // component state.
    return (
      <ul>
        {Object.keys(state).map(i => (
          <li key={i}>
            <strong>{i}: </strong>{state[i]}
          </li>
        ))}
      </ul>
    );
  }
}
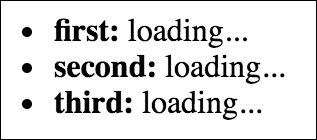
This component renders the keys and values of its state. Each value defaults to loading..., because we don't yet know the value. Let's write some code that sets the state of each state property individually:
import React from 'react';
import { render } from 'react-dom';

import MyComponent from './MyComponent';

// Stores a reference to the rendered component...
const myComponent = render(
  (<MyComponent />),
  document.getElementById('app')
);

// Change part of the state after 1 second...
setTimeout(() => {
  myComponent.setState({ first: 'done!' });
}, 1000);

// Change another part of the state after 2 seconds...
setTimeout(() => {
  myComponent.setState({ second: 'done!' });
}, 2000);

// Change another part of the state after 3 seconds...
setTimeout(() => {
  myComponent.setState({ third: 'done!' });
}, 3000);
The takeaway from this example is that you can set individual state properties on components. It will efficiently re-render itself. Here's what the rendered output looks like for the initial component state:
Here's what the output looks like after two of the setTimeout() callbacks have run:
