If you could implement just one component for any given feature, things would be quite simple, wouldn't they? At the very least, there wouldn't be many components to maintain, and there wouldn't be many communication paths for data to flow through, because everything would be internal to the component.
However, this idea doesn't work for a number of reasons. Having monolithic feature components makes it difficult to coordinate any kind of team development effort. Something I've noticed with monolithic components is that the bigger they become, the more difficult they are to refactor into something better later on.
There's also the problem of feature overlap and feature communication. Overlap happens because of similarities between features—it's unlikely that an application will have a set of features that are completely unique to one another. That would make the application very difficult to learn and use. Component communication essentially means that the state of something in one feature will impact the state of something in another feature. State is difficult to deal with, and even more so when there is a lot of state packaged up into a monolithic component.
The best way to learn how to avoid monolithic components is to experience one first hand. We'll spend the remainder of this section implementing a monolithic component. In the following section, you'll see how this component can be refactored into something a little more sustainable.
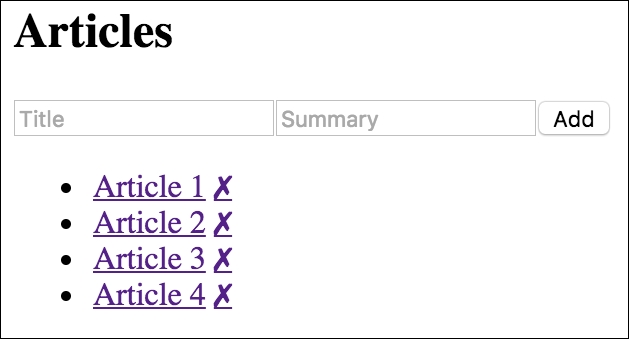
The monolithic component we're going to implement is a feature that lists articles. It's just for illustrative purposes, so we don't want to go overboard on the size of the component. It'll be simple, yet monolithic. The user can add new items to the list, toggle the summary of items in the list, and remove items from the list. Here is the render method of the component:
render() {
const {
articles,
title,
summary,
} = this.data.toJS();
return (
<section>
<header>
<h1>Articles</h1>
<input
placeholder="Title"
value={title}
onChange={this.onChangeTitle}
/>
<input
placeholder="Summary"
value={summary}
onChange={this.onChangeSummary}
/>
<button onClick={this.onClickAdd}>Add</button>
</header>
<article>
<ul>
{articles.map(i => (
<li key={i.id}>
<a
href="#"
onClick={this.onClickToggle.bind(null, i.id)}
>
{i.title}
</a>
<a
href="#"
onClick={this.onClickRemove.bind(null, i.id)}
>
✗
</a>
<p style={{ display: i.display }}>
{i.summary}
</p>
</li>
))}
</ul>
</article>
</section>
);
}
So, not a ton of JSX, but definitely more than necessary in one place. We'll improve on this in the following section, but for now, let's implement the initial state for this component.
Note
I strongly encourage you to download the companion code for this book from https://github.com/PacktPublishing/React-and-React-Native I can break apart the component code so that I can explain it on these pages. However, it's an easier learning experience if you can see the code modules in their entirety, in addition to running them.
Now let's look at the initial state of this component:
// The state of this component is consists of
// three properties: a collection of articles,
// a title, and a summary. The "fromJS()" call
// is used to build an "Immutable.js" Map. Also
// note that this isn't set directly as the component
// state - it's in a "data" property of the state -
// otherwise, state updates won't work as expected.
state = {
  data: fromJS({
    articles: [
      {
        id: cuid(),
        title: 'Article 1',
        summary: 'Article 1 Summary',
        display: 'none',
      },
      {
        id: cuid(),
        title: 'Article 2',
        summary: 'Article 2 Summary',
        display: 'none',
      },
      {
        id: cuid(),
        title: 'Article 3',
        summary: 'Article 3 Summary',
        display: 'none',
      },
      {
        id: cuid(),
        title: 'Article 4',
        summary: 'Article 4 Summary',
        display: 'none',
      },
    ],
    title: '',
    summary: '',
  }),
}
There's nothing extraordinary about the state itself; it's just a collection of objects. There are two interesting functions used to initialize the state. The first is cuid() from the cuid package—a useful tool for generating unique IDs. The second is fromJS() from the immutable package. Here are the imports that pull in these two dependencies:
// Utility for constructing unique IDs...
import cuid from 'cuid';

// For building immutable component states...
import { fromJS } from 'immutable';
As the name suggests, the fromJS() function is used to construct an immutable data structure. Immutable.js has very useful functionality for manipulating the state of React components. We'll be using Immutable.js throughout the remainder of the book, and you'll learn more of the specifics as you go, starting with this example.
You may remember from the previous chapter that the setState() method only works with plain objects. Well, Immutable.js objects aren't plain objects. If we want to use immutable data, we need to wrap them somehow in a plain object. Let's implement a helper getter and setter for this:
// Getter for "Immutable.js" state data...
get data() {
  return this.state.data;
}

// Setter for "Immutable.js" state data...
set data(data) {
  this.setState({ data });
}
Now, we can use our immutable component state inside of our event handlers.
At this point, we have the initial state, state helper properties, and the JSX of the component. Now it's time to implement the event handlers themselves:
// When the title of a new article changes, update the state
// of the component with the new title value, by using "set()"
// to create a new map.
onChangeTitle = (e) => {
  this.data = this.data.set(
    'title',
    e.target.value,
  );
}

// When the summary of a new article changes, update the state
// of the component with the new summary value, by using "set()"
// to create a new map.
onChangeSummary = (e) => {
  this.data = this.data.set(
    'summary',
    e.target.value
  );
}

// Creates a new article and empties the title
// and summary inputs. The "push()" method creates a new
// list and "update()" is used to update the list by
// creating a new map.
onClickAdd = () => {
  this.data = this.data
    .update(
      'articles',
      a => a.push(fromJS({
        id: cuid(),
        title: this.data.get('title'),
        summary: this.data.get('summary'),
        display: 'none',
      }))
    )
    .set('title', '')
    .set('summary', '');
}

// Removes an article from the list. Calling "delete()"
// creates a new list, and this is set in the new component
// state.
onClickRemove = (id) => {
  const index = this.data
    .get('articles')
    .findIndex(
      a => a.get('id') === id
    );

  this.data = this.data
    .update(
      'articles',
      a => a.delete(index)
    );
}

// Toggles the visibility of the article summary by
// setting the "display" state of the article. This
// state is dependent on the current state.
onClickToggle = (id) => {
  const index = this.data
    .get('articles')
    .findIndex(
      a => a.get('id') === id
    );

  this.data = this.data
    .update(
      'articles',
      articles => articles.update(
        index,
        a => a.set(
          'display',
          a.get('display') ? '' : 'none'
        )
      )
    );
}
Yikes! That's a lot of Immutable.js code! Not to worry, it's actually quite straightforward, especially compared to trying to implement these transformations using plain JavaScript. Here are some pointers to help you understand this code:
setState()is always called with a plain object as its argument. This is why we've introduced the data setter. When you assign a new value tothis.data, it will callsetState()with a plain object. You only need to worry aboutImmutable.jsdata. Likewise, the data getter returns theImmutable.jsobject instead of the whole state.- Immutable methods always return a new instance. When you see something like
article.set(...), it doesn't actually changearticle, it creates a new one. - In the
render()method, the immutable data structures are converted back to plain JavaScript arrays and objects for use in the JSX markup.
If necessary, take all the time you need to understand what is happening here. As you progress through the book, you'll see ways that immutable state can be exploited by React components. Something else worth pointing out here is that these event handlers can only change the state of this component. That is, they can't accidentally change the state of other components. As you'll see in the following section, these handlers are actually in pretty good shape as they are.
Here's a screenshot of the rendered output: