
Lesson 10. Sharing Videos
In this lesson, you learn how to share your own original video clips on Facebook. You’ll learn how to upload, play, and record videos, and how to edit video information.
Sharing Videos on Facebook
You’re not just limited to static images (that is, photos) on Facebook. You can also share videos. Whether you call them movies, videos, or multimedia clips, the result is still the same—a dynamic clip that you can play and watch. You can add videos to your timeline that, in turn, appear on the news feed of the Home page. You can also add videos to your notes and group pages, and even embed them on outside sites. As with photos, you can tag people in your videos, and add comments.
There are a few stipulations with using videos on Facebook, as follows:
• The video must be made by you or your friends.
• The video must be under 1024MB in size and less than 20 minutes in length. If you’re a brand-new user, the limits may be smaller for you until you verify your account.
• The video should contain you or a friend.
Basically, you’re not allowed to upload illegal copies of television shows, music videos, movies, or any content that’s not made by you or a friend. The video content should be yours and yours alone. You’re also expected to comply with Facebook’s terms of service regarding the content you post. In other words, don’t post copyrighted or pirated videos, or clips of questionable taste or subject matter. Facebook even makes you agree to this the first time you upload a video.
You can upload video clips you’ve previously recorded, such as videos from your camera or mobile device, or you can hook up your camera directly and record a new video. If your computer has a built-in camera and microphone, you can record directly from there. You can use Facebook’s Video application for all of these options.
Tip
To find out more about what’s in Facebook’s terms of service, you can click the Terms link at the very bottom of any Facebook page. To learn more, see Lesson 3, “Finding Help with Facebook Services and Etiquette.”
Adding a Video
Adding a video is as easy as adding photos. Facebook has even grouped the Video app with the Photos app on the Photos page. So, any time you’re looking for where your videos are located, start with the Photos link.
To add a previously recorded video to Facebook, follow these steps:
1. From your profile page, click the Photos link (it’s located below the cover photo and your name). Facebook opens the Photos page and you can see the Add Videos button, as shown in Figure 10.1.
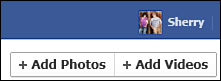
Figure 10.1 Look for the Add Videos button on the Photos page.
2. Click the Add Videos button. The Create a New Video page appears, as shown in Figure 10.2.
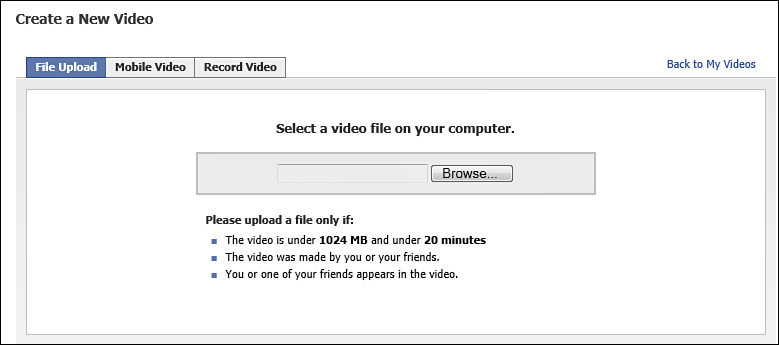
Figure 10.2 The first phase of uploading a video is locating it on your computer.
3. Click the File Upload tab, click the Browse or Choose File button, depending on your browser, and then navigate to and double-click the video file you want to upload.
4. If this is your first time uploading a video, Facebook displays an authorization box detailing the terms surrounding video use on Facebook. Click Agree.
Facebook displays an information form, as shown in Figure 10.3, and the uploading process begins. Depending on your connection speed and file size, the process may take a few minutes. While waiting for the upload to finish, you can fill out the rest of the form.

Figure 10.3 Fill out a title and description for the clip and set a privacy level.
5. Click in the Title box and type a title for the video.
Optionally, you can tag people who appear in the video using the In This Video box.
6. Click in the Description box and type a description for the video.
7. Click the Privacy drop-down menu and specify an audience level.
8. When the upload is complete, click the Save Info button. Note: the upload may take several moments or minutes, depending on size and connection speeds.
9. The video now appears on the Your Videos page, as shown in Figure 10.4, as well as on your profile page’s timeline and in the news feed on the Home page. To play the clip, move the mouse over the clip and click the Play button.
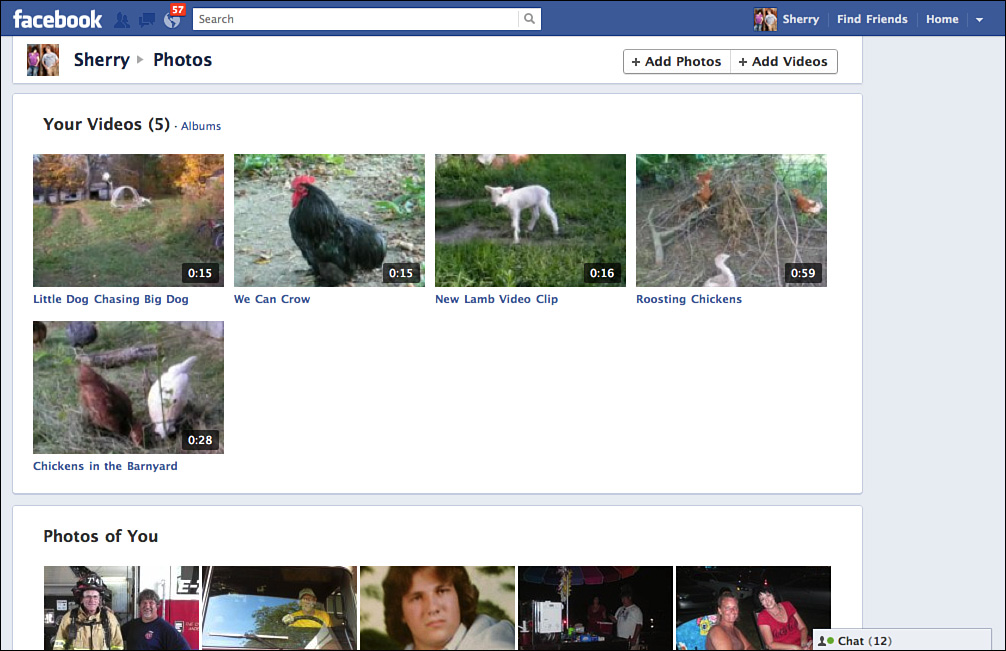
Figure 10.4 The new video appears on the Your Videos page.
You can also upload a video clip from your mobile device or record a clip using your computer’s built-in camera recorder. On the Create a New Video page, click the Mobile Video or Record Video tabs. Learn how to record a new video later in this lesson. Learn more about using Facebook’s mobile features in Lesson 16, “Making Facebook Mobile.”
Note
You can also upload videos using your Update Status box on the Home page or on your profile page. From the Home page, click the Add Photo/Video link above the status box. From your profile page, click the Photo link in the status box, and then click the Upload Photo/Video. The rest of the steps are the same as outlined here.
Viewing Videos
Videos your friends post appear out on the news feed on the Home page, as well as on their timelines. You can play a video clip directly in the news feed by clicking its Play button, as shown in Figure 10.5. This enables you to view the clip without opening it in its own window.

Figure 10.5 You can play videos directly in the news feed on the Home page by clicking the Play button on the video’s thumbnail image.
If you move your mouse pointer over the bottom of the video image while the clip is playing, a bar of player controls appears (see Figure 10.6). The player has controls for pausing the clip, muting the clip, or showing it full-screen size. The controls appear only when the clip is playing.
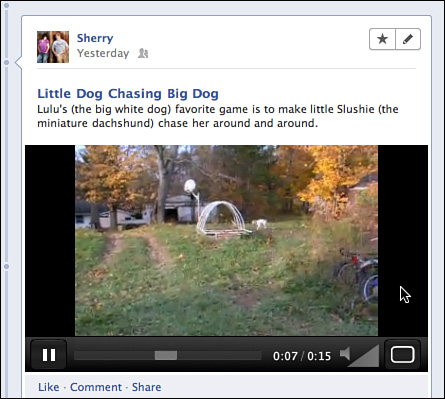
Figure 10.6 You can move your mouse over the bottom of a clip to view player controls.
Here’s how to use the player controls:
• Click the Pause button to stop the clip. When the pause action is in effect, the Play button appears in its place to start the clip again.
• To mute the clip, click the speaker icon.
• To adjust the sound, drag the audio level up or down.
• To view the clip in a full-size window, click the window icon on the far-right end of the player controls.
If you do want to play a video in its own window, click the video title link next to the thumbnail image.
If you’re viewing a friend’s profile page and she has a video clip, you can click the Play button to view the clip in her timeline. To share the video clip with someone else, click the Share link to open the Share box. You can choose to post the clip to your own profile for sharing, or send it as a message. You can find this same Share link on the news feed on the Home page, too.
You and your friends can add comments to your video clip in the same way comments are added to photos: using a Comment box. You can add comments directly to a clip on the news feed by clicking the Comment link to open a Comment box and typing in your text. You can also add a comment to a video from its video window by clicking in the Comment box below the video image and typing in your text.
To find your way back to your own videos, open your profile page and click the Photos link, and then click the Videos link on the Photos page. The page lists all the videos you’ve posted. To play one, click the video to open it in its own window and click the Play button.
Editing Your Videos
To edit a video and change the description or title, or tag the subjects, you need to open the video in its own window. One way to do this is to display the Your Videos page (click the Photos link on your profile page, and then click the Videos link). As you’ve previously learned, the Your Videos page, shown in Figure 10.7, lists your video postings. Click the video you want to edit, opening it into its own window as shown in Figure 10.8.

Figure 10.7 Your Videos page shows all your uploaded videos.
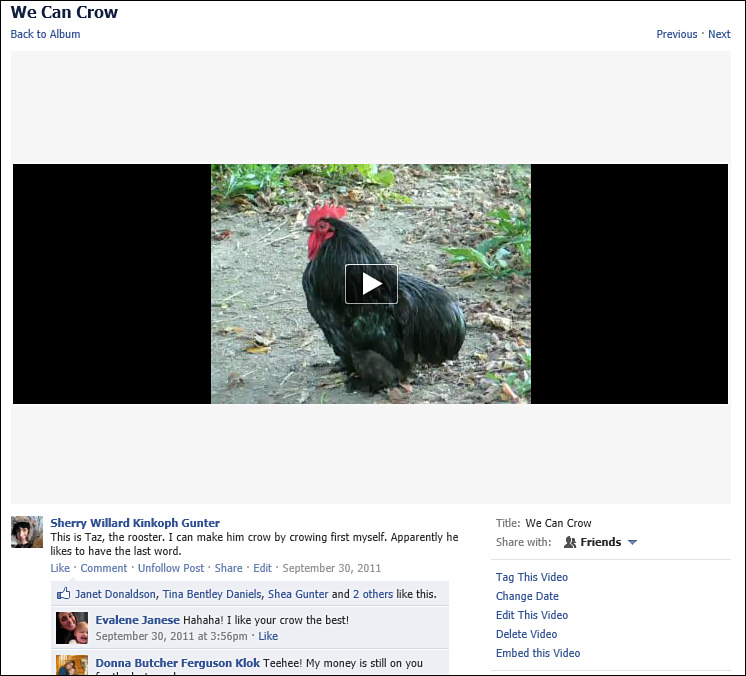
Figure 10.8 You can open a larger window to view a video clip and find controls for editing.
From the video window, you can do the following:
• Click the Edit This Video link below the video player and make changes to the information, such as give it a new title or description.
• Click the Tag This Video link to open a field below the player area where you can type in the name of the person you’re tagging. Click the Save button when you finish.
• Click the Delete Video link to remove the video entirely. You’ll have to confirm the removal by clicking the Delete button that appears when Facebook warns you that the deletion is permanent.
• You can use the rotation icons to rotate the video clockwise or counterclockwise, if needed.
• Click the Embed this Video link to open an Embed Your Video box containing the coding needed to embed the video on any web page. Just copy and paste the coding.
Recording a New Video
If your computer has a built-in camera and microphone, or if you have a digital video recorder you can hook up to your computer, you can record your own video clips to post on Facebook. With a little help from Adobe’s Flash Player, you can record and place the clips directly into Facebook, where they can be viewed on your profile page as well as the news feed out on the Home page.
Follow these steps to record a new video:
1. Display the Your Videos or Your Photos page and click the Add Videos button.
Facebook displays the Create a New Video form, which you learned about earlier (refer to Figure 10.3).
2. Click the Record Video tab.
Flash displays a tiny Flash Player Settings dialog box in the middle, as shown in Figure 10.9, requesting to allow Facebook access to your camera. If you’ve uploaded video before, you might not see this box.
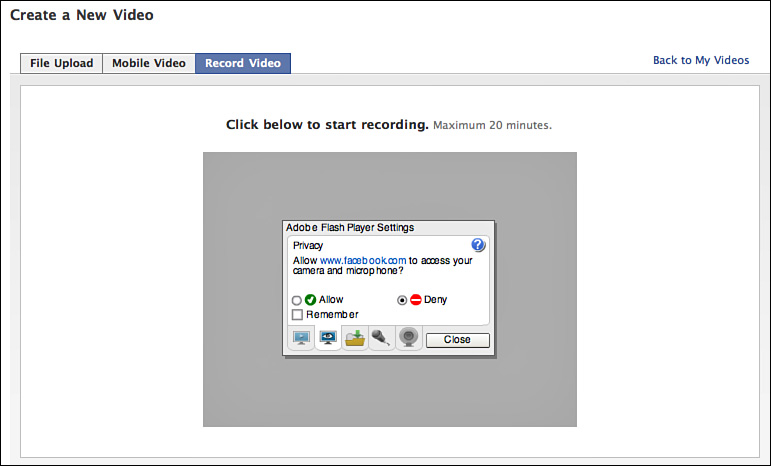
Figure 10.9 Before you start recording, you must allow Facebook access to your camera.
3. Depending on the box you see, which can vary based on your browser, click the Allow radio button or the Allow check box.
4. Depending on your prompt box, you might need to close it to continue; click Close.
5. When you’re ready to start recording, click the Record button, as shown in Figure 10.10.
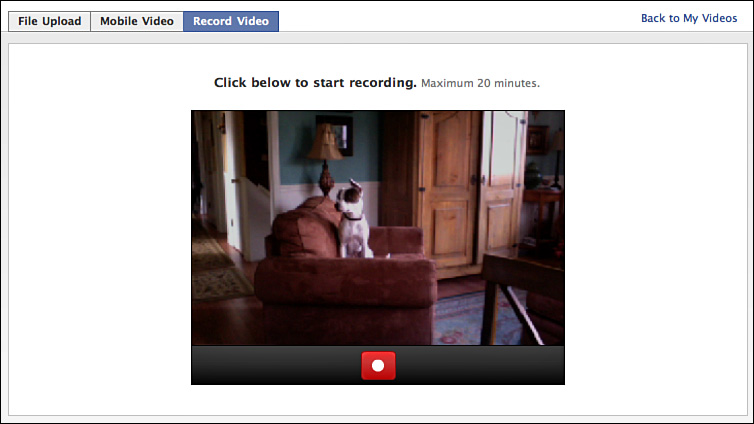
Figure 10.10 Click Record and yell “action,” and the movie is rolling, so to speak.
6. Click the Stop button to stop recording (see Figure 10.11). Facebook displays more video controls, as shown in Figure 10.12.
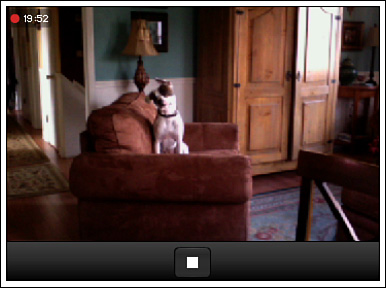
Figure 10.11 Click the Stop button to stop at any time.

Figure 10.12 When you stop recording, more video controls appear on the page, allowing you to reset and start over again, or to save what you’ve recorded.
If the recording did not go well, you can click the Reset button and try again.
7. If you’ve finished recording, click the Save button. Facebook displays a form for filling out details about the video recording, as shown in Figure 10.13.

Figure 10.13 Fill out details about your video recording using the form.
8. If applicable, enter any names of friends (or yourself) to tag people in the video using the In This Video box.
9. Type a name for the video in the Title box.
10. Type a description of the video in the Description box. Optionally, you can choose a different thumbnail image for the video’s “cover” to represent the video.
11. Click the Privacy drop-down arrow and choose an audience setting for the video.
12. Click the Save button, and Facebook saves the recording and adds it to your video list.
You can return to the Your Videos page to view the recording. Facebook also automatically adds it to your timeline and the news feed, too.
Summary
In this lesson, you learned how to share your video clips on Facebook. You learned how to upload existing clips, record new clips, and view clips found all over Facebook. In the next lesson, you’ll learn how to join Facebook groups and even start your own groups.