
Packaging and Deploying the Simple Web Service Using J2EE RI deploytool
This section shows how to deploy the simple Web Service to the J2EE RI. The packaging and deployment of this SAAJ servlet is similar to any other J2EE servlet.
As usual, start up the PointBase database server and J2EE RI server before starting deploytool.
By choosing File, Open, load up the Day21/examples/j2ee-ri/agency.ear enterprise application archive. This defines a single group of Entity beans called Entity. The contents of the enterprise archive have already been partially configured to contain the appropriate code and configuration for the entity beans. Highlight the Agency application in the explorer on the left side of the deploytool GUI and its contents will be shown on the right side, as shown in Figure 21.4.
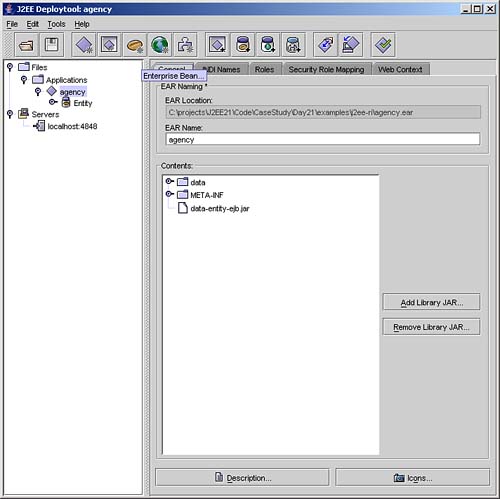
The agency.ear file you have just opened does not contain the Web archive for the SAAJ location information servlet.
NOTE
In the Day21/examples/j2ee-ri directory there is an agency.orig.ear file. This is a copy of the agency.ear file. Should you make a mistake in the following steps you can replace agency.ear with this file and start again.
You will now be guided through the process of creating the SAAJ Web Service using the deploytool wizard. If you prefer to view the complete application, you can use the agency.ear file in the Day21/agency/j2ee-ri directory on the Web site.
Creating the Web Service WAR
You will package up the SAAJ Web Service in a WAR file, so choose File, New, Web Component to create a new one. Click Next to skip the introduction screen and move onto the WAR file creation screen. You will be creating a New WAR Module in Application agency, so ensure that this option is selected. Next, under WAR Naming provide “wsagency” as the WAR Name.
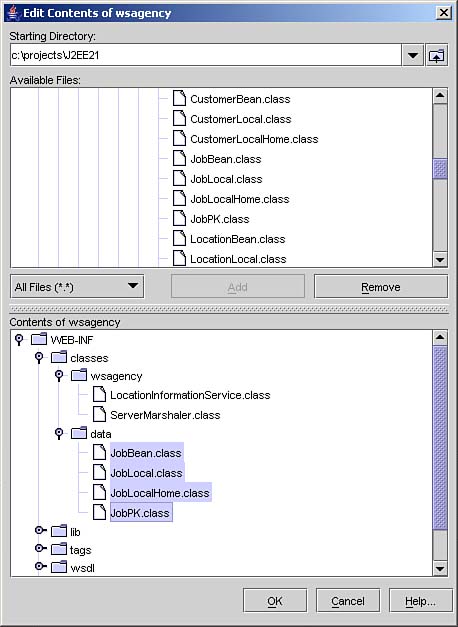
Now you can populate your WAR with the files you saw earlier. Under the Contents section, click the Edit button to display the Edit Contents of wsagency screen. Browse to the Day21/examples/classes directory to find the SAAJ servlet class files (LocationInformationService.class and ServerMarshaler.class), the entity bean interface definitions (all classes in the Day21/examples/classes/data directory), add them to the contents as shown in Figure 21.5 and click OK.
Figure 21.5. Adding class files to the WAR.
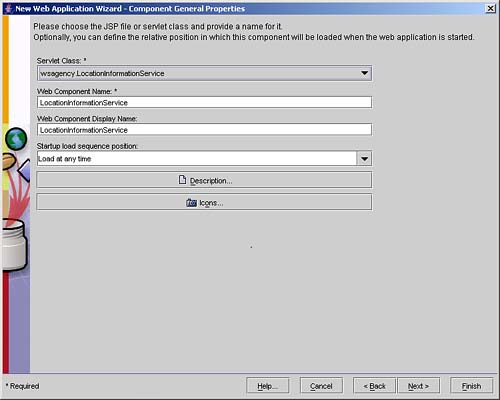
Back at the WAR file screen, click Next to move onto the Choose Component Type screen and select Servlet. Now click Next to move onto the Component General Properties screen. Select wsagency.LocationInformationService as your Servlet Class (this will be offered from the drop-down list). The other fields will be populated based on the servlet name as shown in Figure 21.6. Click Next and then Finish to create the WAR file.
During this process, deploytool has created the web.xml and sun-web.xml files discussed on Day 12. There are no entries in these files that specifically indicate that this servlet forms part of a Web Service.
Configuring the WAR and Component
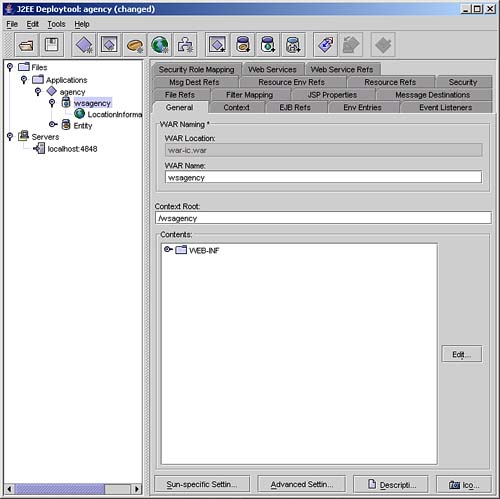
To complete the Web Service WAR configuration, you will need to define its context root, alias and EJB references for the Entity beans. First, select the General tab of the agency WAR file (as shown in Figure 21.7). Set the Context Root field to /wsagency.
Now select the LocationInformationService component in the left-hand pane. Select the Aliases tab and Add an alias of /LocationServices as shown in Figure 21.8.

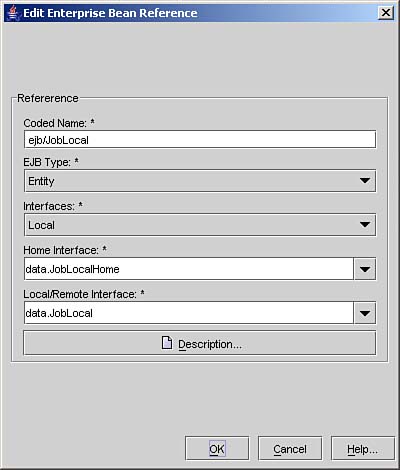
To complete the EJB configuration, highlight the wsagency JAR in the left-hand pane and select the EJB Refs tab. Click Add and add a reference to the JobBean setting the name to ejb/JobLocal, type to Entity, interfaces to Local, and the home and local interface names to data.JobLocalHome and data.JobLocal, respectively. This is shown in Figure 21.9. Once this is added, select the reference and change the Sun-specific settings for ejb/JobLocal to data-entity-ejb.jar#JobBean.
Figure 21.9. Adding entity references for the Web Service servlet.
Deploying the Service
Now you can deploy the service. Select the Agency EAR in the left-hand pane of deploytool and then select Tools, Deploy from the menus. Provide your administrator user name and password if prompted and ensure that the message “Operation Completed Successfully” is displayed on the Distribute Module screen.
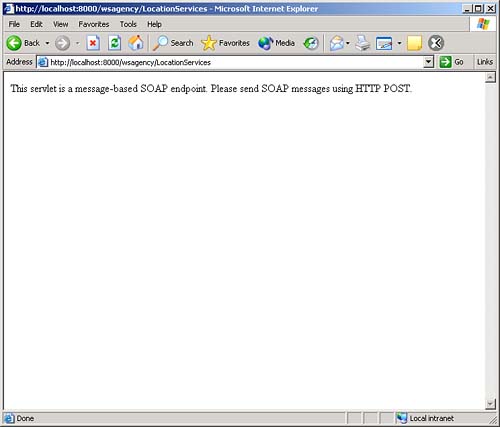
You can now access the SAAJ Web Service at the URL http://localhost:8000/wsagency/LocationServices. The HTTP GET handler for the servlet should give you a message as shown in Figure 21.10.
In the next section, you will run a standalone client application that exercises the SAAJ Web Service.