
Today, the gloves come off and we get down to some serious JSP programming—the kind that JSP was built for. In the previous two days, we've been gearing up our Java expertise, and now we'll put it to work as we create JSP programs that let the user send data to us.
Supporting HTML controls
Working with HTML forms
Submitting forms to the server
Using request objects
Using text fields and submit buttons
Using text areas, password controls, and hidden controls
Using buttons
Today's work will start by seeing how to place HTML controls in HTML Web pages, using HTML forms. As you probably know, HTML forms aren't visible in Web pages; they're purely HTML constructs that enclose HTML controls. We'll need forms to handle HTML controls in our Web pages, because browsers insist that controls be embedded in forms. You'll learn about creating HTML forms and configuring them as you need them.
When the user clicks a submit button in our Web pages, all the data in the various controls (such as text in the text fields) is sent back to the server. In JSP, you can get access to that data using the built-in request object (an object of the Java javax.servlet. http.HttpServletRequest class). You'll see the request object today and what it can do for you as we extract the data the user has sent.
That's what this and the next day are all about—adding HTML controls to Web pages and reading the data the user entered into those controls. Let's start with an overview of exactly what HTML controls are available to us.
It turns out that there are plenty of HTML controls available. Here's the list, including the HTML element you use to create them—note in particular that many HTML controls are created with the <INPUT> element, using a different value for the TYPE attribute to create the various different controls:
Text fields (
<INPUT TYPE="TEXT">)—. These controls let the user enter and edit a line of text. They're the most common text-oriented HTML controls.Buttons (
<INPUT TYPE="BUTTON">)—. The standard clickable buttons you see in so many Web pages these days.Check boxes (
<INPUT TYPE="CHECKBOX">)—. Usually displayed as a small box with a check mark in it. The user can toggle the check mark on or off by clicking the check box.Radio buttons (
<INPUT TYPE="RADIO">)—. Usually displayed as a circle that, when selected, displays a dot in the middle, these controls act much like check boxes, except that they work in mutually exclusive groups; only one radio button may be selected at a time.File uploading controls (
<INPUT TYPE="FILE">)—. Allow the user to upload files to the server.Hidden controls (
<INPUT TYPE="HIDDEN">)—. Hidden controls store data that is not visible to the user (unless she views the page's HTML source).Password controls (
<INPUT TYPE="PASSWORD">)—. Like a text field, but this control masks each typed character by simply displaying an asterisk (*) instead of the character itself. That means this control is good for typing in passwords, because if someone is peeking over your shoulder, he can't read your password on the screen. (Watching your fingers on the keyboard is, of course, another matter.)Reset buttons (
<INPUT TYPE="RESET">)—. Reset buttons are great for complex forms, because they let the users clear all the data they've entered to start over.Submit buttons (
<INPUT TYPE="SUBMIT">)—. The submit button is a very important control in forms, because when you click this button, all the data in the form (that is, all the data in the controls in the form) is sent to a Web server for more processing.Image controls (
<INPUT TYPE="IMAGE">)—. Just like submit buttons, except they are images the user can click. The actual location that the user clicked in the image is also sent to the server with the rest of the data from the form.Selection lists (
<SELECT>)—. Also called select controls, these controls work much like drop-down list boxes.Customizable Buttons (
<BUTTON>)—. This element is a button that can display images and other HTML inside itself.Text areas (
<TEXTAREA>)—. These controls are two-dimensional text fields, enabling the user to enter more than one line of text. Text areas can also support text wrapping.
The next step is to start adding these controls to Web pages and making use of them in JSP code. To place an HTML control in a Web page, you need to enclose it in an HTML form.
HTML controls must be enclosed in HTML forms, which you create with the <FORM> element. For example, if you want to add a text field to a Web page using the <INPUT TYPE="TEXT"> element, that element must be inside a form:
<HTML>
    <HEAD>
        <TITLE>Enter Your Data!</TITLE>
    </HEAD>

    <BODY>
        <H1>Enter Your Data!</H1>
        <FORM NAME="form1" ACTION="jsp1.jsp" METHOD="POST">
            <INPUT TYPE="TEXT" NAME="text">
            <INPUT TYPE="SUBMIT" VALUE="Click Me!">
        </FORM>
    </BODY>
</HTML>
Tip
The <FORM> element has been around since the first versions of both Internet Explorer and Netscape Navigator. Technically speaking, you don't need a form to display HTML controls for Internet Explorer. However, we'll need forms to indicate where the data in our HTML controls is to be sent. In Netscape Navigator, you need forms—the browser won't display controls unless they're in an HTML form.
The attributes of the <FORM> element are going to be very important to us, because they'll let us indicate where the data in our Web page is to be sent. Here are the attributes of the <FORM> element and what they do:
ACCEPT-CHARSET—. Indicates a list of possible language character sets for the form data. This attribute is supported by the World Wide Web Consortium (W3C) for the<FORM>element, but is not supported in Internet Explorer or Netscape Navigator yet.ACTION—. This attribute gives the URL that will handle the form data. Note that you can omit this attribute, in which case its default is the URL of the current document. Set to an URL.CLASS—. The style class of the element. Internet Explorer only.DIR—. Gives the direction of directionally-neutral text (text that doesn't have inherent direction, so you should read it). Possible values areLTR(left-to-right text or table), andRTL(right-to-left text or table). Internet Explorer only.ENCTYPE—. Sets the MIME (Multipurpose Internet Mail Extension) type used to encode the name/value pairs when sent to the action URL. We won't use this until later in the book, such as in Day 20, “Creating Images on the Server and Handling Internet Programming.” The default is"application/x-www-form-urlencoded", but you can also use"multipart/form-data", which creates multipart forms, as for<INPUT TYPE="FILE">elements.ID—. A unique alphanumeric identifier for the form element, which you can use to refer to it. Internet Explorer only.LANG—. Base language used for the form element. Internet Explorer only.LANGUAGE—. Scripting language used for the form element. Internet Explorer only.METHOD—. Specifies the method or protocol for sending data to the target action URL. TheGETmethod is the default. This method sends all form name/value pair information in an URL that looks likeURL?name=value&name=value&name=value, as we'll discuss today. On the other hand, using thePOSTmethod, the contents of the form are encoded, as with theGETmethod, but are sent in environment variables. Set toGET(the default) orPOST.NAME—. Holds a name for the form, so that you can reference it in client-side code (such as JavaScript). Set to an alphanumeric string.STYLE—. Inline style indicating how to render the contents of the<FORM>element.TARGET—. Indicates a named frame for the browser to display the form results in. See the section “Using Named Targets” tomorrow.TITLE—. Holds additional information (as might be displayed in tool tips) for the element. Internet Explorer only.
The important attributes of the <FORM> element are coming up next.
You use the ACTION attribute to specify where the data in the controls in a form are sent to when the form's submit button is clicked. For example, to send the data in a form to http://www.starpowder.com/jsps/jsp1.jsp, you would set the ACTION attribute to that URL:
<FORM NAME="form1" ACTION="http://www.starpowder.com/jsps/jsp1.jsp" METHOD="POST">
    <INPUT TYPE="TEXT" NAME="text">
    <INPUT TYPE="SUBMIT" VALUE="Click Me!">
</FORM>
You can also specify a URL relative to the directory the current document is in. For example, to send a form's data to jsp1.jsp in the same directory as the current document, you can set the ACTION attribute this way:
<FORM NAME="form1" ACTION="jsp1.jsp" METHOD="POST">
    <INPUT TYPE="TEXT" NAME="text">
    <INPUT TYPE="SUBMIT" VALUE="Click Me!">
</FORM>
You can also omit the ACTION attribute. If you do, the data in the form is sent back to the exact same URL as the current document.
The METHOD attribute enables you to specify the way you send the form's data back to the server. There are two possible settings for this attribute—GET and POST, and JSP can handle both.
If you use the GET method, the data in the form is treated as text and appended to the URL that the browser navigates to. The server will decode that data appended to the URL and pass it on to our JSP code.
For example, say that you have two text fields in a form, and that you've named these text fields (using the NAME attribute of the <INPUT TYPE="TEXT"> element) text1 and text2, to let the user enter his first and last names:
<FORM NAME="form1" ACTION="http://www.starpowder.com/jsps/jsp1.jsp" METHOD="GET">
    First Name:
    <INPUT TYPE="TEXT" NAME="text1">
    Last Name:
    <INPUT TYPE="TEXT" NAME="text2">
    <INPUT TYPE="SUBMIT" VALUE="Submit">
</FORM>
If the user enters Ralph in text1 and Kramden in text2, and then clicks the submit button, this is the kind of URL the browser will navigate to:
http://www.starpowder.com/jsps/jsp1.jsp?text1=Ralph&text2=Kramden
This way certainly works, but it's not exactly private—all your form's data is out in the open.
You can also use the POST method, which works just as well as GET as far as we are concerned, but encodes the data as part of the actual Hypertext Transfer Protocol (HTTP) request sent to the server. This means that the data is not visible to the user in the browser. There are no real disadvantages to using POST, except perhaps that you can't bookmark POST URLs and expect any needed form data to be sent when you open that bookmark (as will happen if you use a GET URL). As far as we're concerned, JSP can handle either GET or POST, so there's very little difference for our code here.
The <FORM> element's TARGET attribute enables you to specify where the results sent back by the server will appear. By default, when you click the submit button and the server sends back a new Web page, the new page replaces the current page. However, you can display the new Web page in a new window if you prefer, by setting the TARGET attribute to _blank. Here are the predefined values you can use for the TARGET attribute:
_blank—. Display a new page in a new blank window._parent—. Display a new page in the parent of the current frame._self—. Replaces the current window's content._top—. Replaces the current contents of the entire browser window.
You can also display the new Web page sent back by the server in a named HTML frame; you'll see an example of this tomorrow.
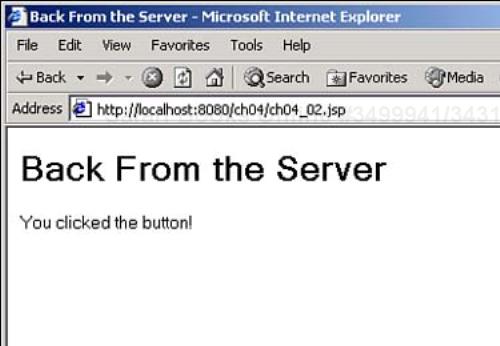
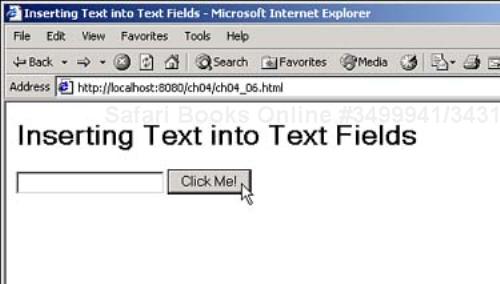
You can submit a form to the server now; this first example will just display a submit button (an <INPUT TYPE="SUBMIT"> element), which HTML uses to send a form's data to the server, as you see in Listing 4.1.
Note that submit buttons don't need to have the caption “Submit”—you can use any caption by setting the VALUE attribute. When the user clicks the submit button, an HTTP request is sent to ch04_02.jsp on the server, which will just acknowledge that the user clicked the submit button, as you see in Listing 4.2.
You can see the HTML page with the submit button in Figure 4.1. When the user clicks that button, an HTTP request is sent to ch04_02.jsp on the server, which returns the Web page you see in Figure 4.2.

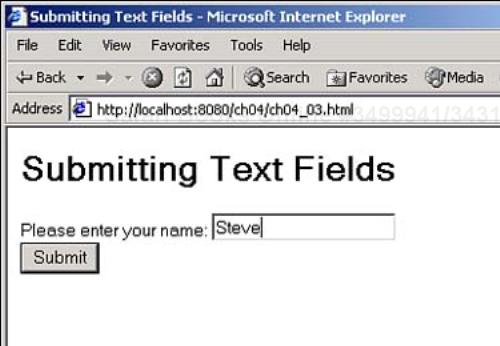
The next step is to send some data to the server and read it there. For example, say that you have a text field in a Web page that you want the user to enter his name in, as you see in Listing 4.3.
Example 4.3. Submitting Text Fields (ch04_03.html)
<HTML>
    <HEAD>
        <TITLE>Submitting Text Fields</TITLE>
    </HEAD>

    <BODY>
        <H1>Submitting Text Fields</H1>
        <FORM ACTION="ch04_05.jsp" METHOD="POST">
            Please enter your name:
            <INPUT TYPE="TEXT" NAME="text1">
            <BR>
            <INPUT TYPE="SUBMIT" value="Submit">
        </FORM>
    </BODY>
</HTML>
Note in particular that this code uses the NAME attribute to give the text field a name, text1. On the server, we'll be able to access the text in the text field using that name. You can see this Web page in Figure 4.3. When the user enters his name and clicks Submit, we'll read the text he has entered back on the server.
To read the data in the text field text1, we'll use the built-in JSP request object.
The request object gives us access to the data sent to us from HTML forms. It's an object of type javax.servlet.http.HttpServletRequest, which is built on top of javax.servlet.ServletRequest, which means the request object includes all the methods in both javax.servlet.http.HttpServletRequest and javax.servlet.ServletRequest.
You can see the methods of javax.servlet.http.HttpServletRequest in Table 4.1, and the methods of javax.servlet.ServletRequest in Table 4.2. Together, these two tables hold the methods available in the response object that we'll be using today. You can see all these methods for the sake of reference—this book will use many, but not all, of them in this and the coming days.
Note that we haven't seen some of the object types returned from these methods yet, such as java.util.Enumeration, but the details on these kinds of objects are coming up soon (we'll see how to use java.util.Enumeration in Day 5, “Reading Data from Web pages: Check Boxes, Radio Buttons, and Select Controls”). Note also the word deprecated in this table, in this sense meaning that an item is considered obsolete. Although still available, deprecated items will be replaced in coming Java versions.
Table 4.1. Methods of javax.servlet.http.HttpServletRequest
Method | Does This |
|---|---|
| Returns the value of the named attribute as an object. |
| Returns an enumeration containing the names of the attributes in this HTTP request. |
| Returns the name of the character encoding used in the body of this request. |
| Returns the length (in bytes) of the body of the HTTP request (or –1 if the length is not known). |
| Returns the MIME type of the body of the request, or |
| Returns the body of the request as binary data using a |
| Returns the preferred locale that the client uses; for example, |
| Returns an enumeration of |
| Returns the value of a request parameter as a |
| Returns a Java |
| Returns an enumeration of |
| Returns an array of |
| Returns the name and version of the protocol the request uses in this form:
|
| Returns the body of the request as character data using a Java |
| Deprecated. As of version 2.1 of the Java Servlet API, use |
| Returns the Internet Protocol (IP) address that the request comes from. |
| Returns the name of the client that sent the request. |
| Returns the name of the protocol used in this request; for example: HTTP, HTTPS, or FTP. |
| Returns the hostname of the server that received the request. |
| Returns the port number on which this request was received. |
| Returns |
| Removes an attribute from this request (more on request attributes later). |
| Stores an attribute in this request (more on request attributes later). |
| Overrides the name of the character encoding used in the body of this request. |
Table 4.2. Methods of javax.servlet.ServletRequest
The request object holds a great deal of information that is useful to JSP programmers. You can see a sample page that displays some of that information in Listing 4.4.
Example 4.4. Decoding an HTTP request (ch04_04.jsp)
<HTML>
    <HEAD>
        <TITLE>Decoding an HTTP Request</TITLE>
    </HEAD>

    <BODY>
        <H1> Request Information </H1>
        JSP request method: <%= request.getMethod() %>
        <BR>
        URL for the request: <%= request.getRequestURI() %>
        <BR>
        Protocol of the request: <%= request.getProtocol() %>
        <BR>
        Server name: <%= request.getServerName() %>
        <BR>
        Path: <%= request.getServletPath() %>
        <BR>
        Server port: <%= request.getServerPort() %>
        <BR>
        Remote address: <%= request.getRemoteAddr() %>
        <BR>
        Remote host: <%= request.getRemoteHost() %>
        <BR>
        Locale: <%= request.getLocale() %>
        <BR>
        User agent: <%= request.getHeader("User-Agent") %>
    </BODY>
</HTML>
You can see the results of this in Figure 4.4, displaying such information as the form method, server port, and so on.
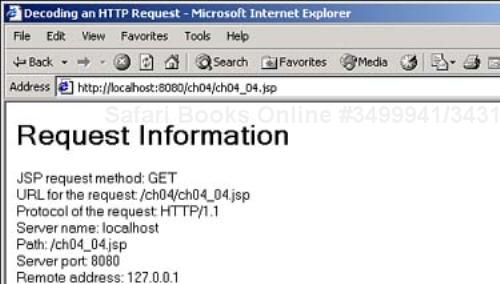
Note in particular the user agent information you see in Figure 4.4, which gives you access to the type of browser the user is using. In Figure 4.4, you see Internet Explorer 6.0, and you can see that in the text returned by the call to request.getHeader("User-Agent"):
Mozilla/4.0 (compatible; MSIE 6.0; Windows NT 5.0; COM+ 1.0.2204; .NET CLR 1.0.3512)
You can use Java String methods (see Table 2.3) to extract the type and version of the user's browser from this data. Because browsers have different capabilities, this information is often essential when you're creating Web pages to send back to the user—for example, you can tailor your Web page one way for Internet Explorer, and another for Netscape Navigator:
<HTML>
    <HEAD>
        <TITLE>Determining User Agent</TITLE>
    </HEAD>

    <BODY>
        <H1>Determining User Agent</H1>
        <%
        if(request.getHeader("User-Agent").indexOf("MSIE") >= 0){
            out.println("You're using Internet Explorer.");
            //Internet Explorer code.
        }
        if(request.getHeader("User-Agent").indexOf("Netscape") >= 0){
            out.println("You're using Netscape Navigator.");
            //Netscape Navigator code.
        }
        %>
    </BODY>
</HTML>
Tip
The user agent text is the same as in the userAgent property of the navigator object that you can access using JavaScript in the browser. In Internet Explorer, you'll always find "MSIE" followed by the version of the browser in this text. In Netscape Navigator, you'll find "Netscape" followed by the version number. In earlier versions of Netscape Navigator, you won't find "Netscape"—instead, use the version number, which you'll find right after the text "Mozilla/".
In JSP code, you use the request object's getParameter method to read data from HTML controls. For example, we named the text field in our example text1:
<HTML>
    <HEAD>
        <TITLE>Submitting Text Fields</TITLE>
    </HEAD>

    <BODY>
        <H1>Submitting Text Fields</H1>
        <FORM ACTION="ch04_05.jsp" METHOD="POST">
            Please enter your name:
            <INPUT TYPE="TEXT" NAME="text1">
            <BR>
            <INPUT TYPE="SUBMIT" value="Submit">
        </FORM>
    </BODY>
</HTML>
On the server, you can get the data that the user put in that text field by passing that name to request.getParameter, as you see in Listing 4.5.
Example 4.5. Reading Data from Text Fields (ch04_05.jsp)
<HTML>
  <HEAD>
    <TITLE>Reading Data From Text Fields</TITLE>
  </HEAD>

    <BODY>
        <H1>Reading Data From Text Fields</H1>
        Your name is
        <% out.println(request.getParameter("text1")); %>
   </BODY>
</HTML>
That's all it takes—using the expression request.getParameter("text1"), we can retrieve the text in the text field named text1, as you see in Figure 4.5.
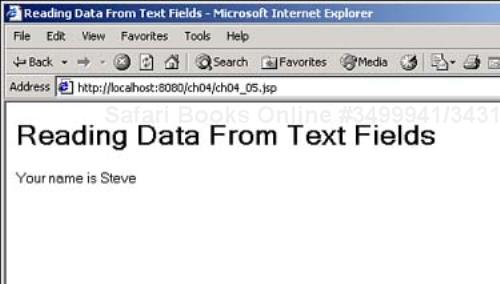
That's how it works in general—you can use the request.getParameter method to retrieve data from HTML controls, passing that method the name you've given to the control. In this case, the text field was named text1, and passing that name to request.getParameter returns the data that was in the text field (the data is returned as a Java string).
As we've seen, you can retrieve the data in a text field with the request.getParameter method. You can do more than just retrieve the data from controls like text fields; you can also insert data in those controls when you send them back from the server.
In this case, for example, the code will let the user click a button, and when he does, it will display a message in a text field. You can see the HTML page in Listing 4.6.
You see this page in Figure 4.6.
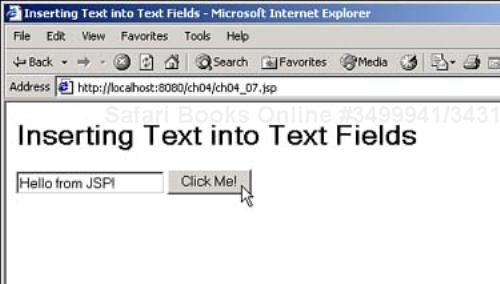
When the user clicks the Submit button, you can simply send back the same page from the server, except with the message in the text field, which you can set with the text field's VALUE attribute, as you see in Listing 4.7.
You can see the results in Figure 4.7—when the user clicks the button, the message "Hello from JSP!" appears in the text field. This gives your code the feel of client-side programming, but it's really server-side programming—to make that message appear takes a round-trip to the server, which can take time. If you need more immediate results without waiting and don't need to access Java on the server, use a scripting language such as JavaScript in the browser.
When the user enters text into a text field, you can read that text in your code and compare it against various text strings, and now that we're dealing with the text input, which brings up an important point about Java string handling. To compare two strings, you should use the String class's equals method, not the == relational operator we saw in Day 2. For example, here's how you can check whether the user has typed "JSP rules!" in a text field:
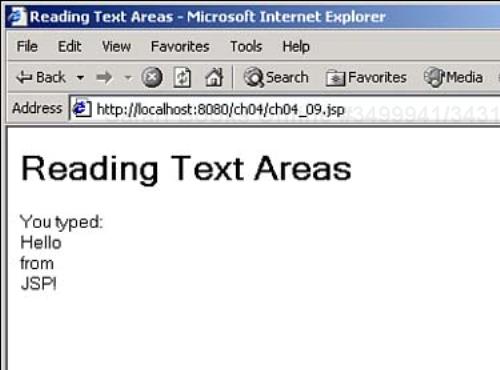
Text areas are like text fields, except that you can enter multiple lines of text. Also using text areas in code is much like using text fields as well; you can see an example that displays a text area named textarea1—the user can enter text and click the submit button to send that text back to the server—in Listing 4.8.
You can see this text area in Figure 4.8, along with some multi-line text in it.

You can handle that multiline text by displaying it with the line breaks intact in the JSP page, ch04_09.jsp. The line breaks in the text from the text area are represented by 'n' characters (see “Determining String Length” in Day 2). That character stands for a line break in text as Java handles it, but the browser will ignore it because it's not HTML. To create line breaks in the browser, we have to replace 'n' characters in the text from the text area with the string "<BR>".
The problem with doing that is that the String class replace method (see Table 2.3) only enables you to replace a single character with another single character (so that the string's length won't change). Instead, we can use the Java StringBuffer class (which you'll find documented in the Java documentation—see “Online JSP Resources” in Day 1), which supports strings you can modify, and whose replace method enables you to substitute one substring for another. On the other hand, the StringBuffer class doesn't have an indexOf method that enables you to search the text for 'n' characters (the StringBuffer methods are geared to modifying text, not searching it). So, to make what we want to happen actually happen, we can start by storing the text from the text area in a StringBuffer object named text:
<HTML>
    <HEAD>
        <TITLE>Reading Text Areas</TITLE>
    </HEAD>

    <BODY>
        <H1>Reading Text Areas</H1>
        You typed:
        <BR>
        <%
        StringBuffer text = new StringBuffer(request.getParameter("textarea1"));
        .
        .
        .
Then, to search for the character 'n', we can create a temporary String object based on text, and use this new object's indexOf method (which returns –1 if 'n' isn't found):
<HTML>
    <HEAD>
        <TITLE>Reading Text Areas</TITLE>
    </HEAD>

    <BODY>
        <H1>Reading Text Areas</H1>
        You typed:
        <BR>
        <%
        StringBuffer text = new StringBuffer(request.getParameter("textarea1"));

        int loc = (new String(text)).indexOf('
'),
        .
        .
        .
All that's left is to replace all 'n' characters with "<BR>" using the text object's replace method, and you can see what that looks like in the while loop in Listing 4.9.
Example 4.9. Reading Text from Text Areas (ch04_09.jsp)
<HTML>
    <HEAD>
        <TITLE>Reading Text Areas</TITLE>
    </HEAD>

    <BODY>
        <H1>Reading Text Areas</H1>
        You typed:
        <BR>
        <%
        StringBuffer text = new StringBuffer(request.getParameter("textarea1"));

        int loc = (new String(text)).indexOf('
'),
        while(loc > 0){
            text.replace(loc, loc+1, "<BR>");
            loc = (new String(text)).indexOf('
'),
       }
       out.println(text);
       %>
    </BODY>
</HTML>
Now you're able to display the multiline text from the text area in a Web page using <BR> elements, as you see in Figure 4.9.
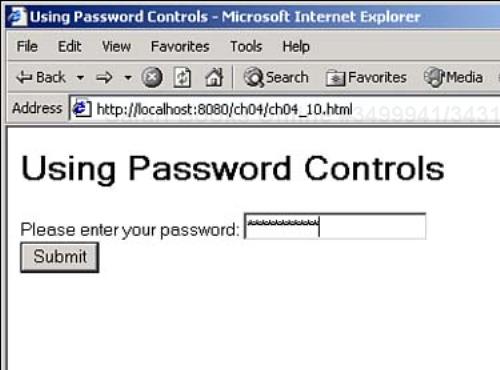
One of the reasons people use JSP is to authenticate users by checking passwords, and you can use password controls (<INPUT TYPE="PASSWORD">) to let the user enter a password. You can see an example in Listing 4.10.
You can see the password control at work in Figure 4.10.
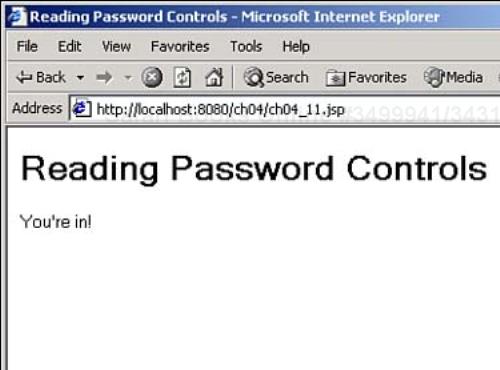
Now you can check the password and respond accordingly, as you see in Listing 4.11.
That's all there is to it, as you see in Figure 4.11, where we've read the password and verified the user.
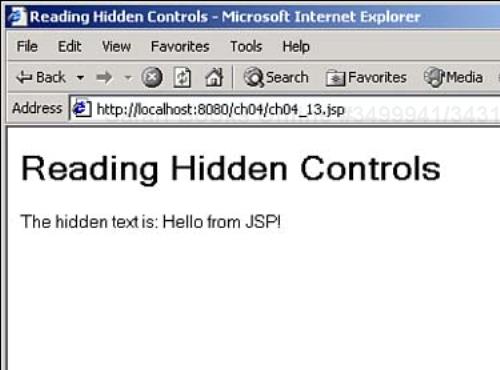
Hidden controls let you store text in a Web page that the user doesn't see (unless she specifically views the HTML source for the page). These controls are a good alternative to using cookies to store page-specific data. You can see an example where the code is storing some text in a hidden field in Listing 4.12.
And you can see a JSP page that reads the text in the hidden control in Listing 4.13.
You can see the results in Figure 4.12.
Hidden controls can be very useful in JSP programming, as we'll see in the next topic.
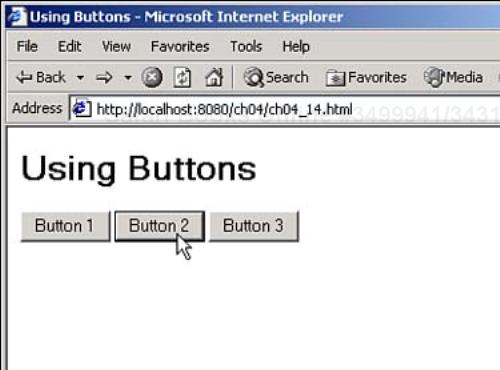
Besides submit buttons, you can use standard HTML buttons with JSP. Here's an example that uses three standard buttons. When the user clicks one of the buttons, our JSP code will indicate what button was clicked.
This example works using some JavaScript in the browser (we'll take a more in-depth look at using JavaScript with JSP in Day 21, “Client-Side Programming and Deploying Your Projects”). When the user clicks a button, a JavaScript function is called that sets a hidden field with the name of the button clicked (such as Button 1), and then submits the form using the JavaScript submit method. You can see what the code looks like in Listing 4.14.
Example 4.14. Using Buttons (ch04_14.html)
<HTML>
    <HEAD>
        <TITLE>Using Buttons</TITLE>
    </HEAD>

    <BODY>
        <H1>Using Buttons</H1>
        <FORM NAME="form1" ACTION="ch04_15.jsp" METHOD="POST">
            <INPUT TYPE="HIDDEN" NAME="buttonName">
            <INPUT TYPE="BUTTON" VALUE="Button 1" ONCLICK="button1()">
            <INPUT TYPE="BUTTON" VALUE="Button 2" ONCLICK="button2()">
            <INPUT TYPE="BUTTON" VALUE="Button 3" ONCLICK="button3()">
        </FORM>

        <SCRIPT LANGUAGE="JavaScript">
            <!--
               function button1()
               {
                   document.form1.buttonName.value = "button 1"
                   form1.submit()
               }
               function button2()
               {
                   document.form1.buttonName.value = "button 2"
                   form1.submit()
               }
               function button3()
               {
                   document.form1.buttonName.value = "button 3"
                   form1.submit()
               }
            // -->
        </SCRIPT>
    </BODY>
</HTML>
You can see this page in Figure 4.13.
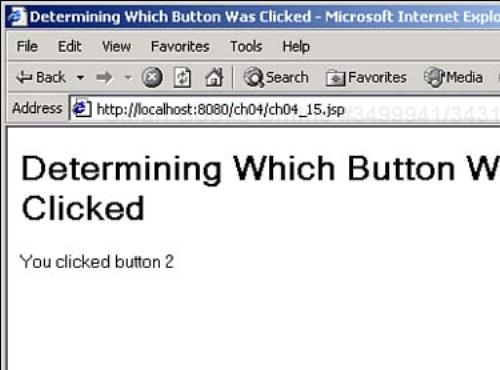
In the JSP code, all you need to do is recover the name of the button that was clicked from the hidden control and display it, as you see in Listing 4.15.
You can see the results in Figure 4.14, where, with a little help from hidden controls and JavaScript, we see that Button 2 was clicked. That's one way of handling multiple buttons—stay tuned for a few more.
So far today, we've used HTML pages that you navigate to first, and JSP pages to handle input from those HTML pages. In other words, we've used introductory HTML pages to give users access to our JSP pages.
However, it's important to realize that you can navigate directly to JSP pages, even when you're sending data to those pages. When you open the JSP page for the first time, you're not sending any data from HTML controls to that page, so request.getParameter("controlName") will return the Java value null, where controlName is a control in your page whose data you want. You can use this fact to determine whether there's any data sent to you from HTML controls, and if not, simply display an introductory Web page the way you want the users to see it before they've entered any data.
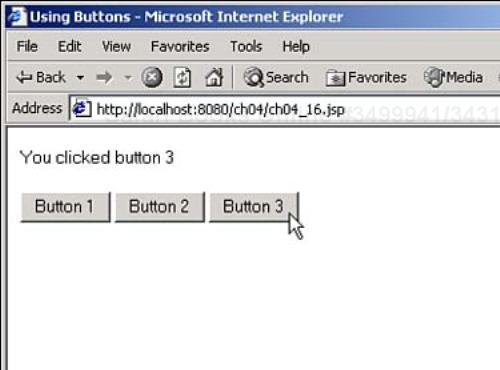
For instance, you can rewrite the previous example, putting everything into one JSP page—if the user has clicked a button, you can indicate what button was clicked; otherwise, you can just display the buttons, as you see in Listing 4.16.
Example 4.16. Using Buttons (ch04_16.jsp)
<HTML>
    <HEAD>
        <TITLE>Using Buttons</TITLE>
    </HEAD>

    <BODY>
        <%
            if(request.getParameter("buttonName") != null) {
        %>
            You clicked
            <%= request.getParameter("buttonName") %>
        <%
            }
        %>

        <FORM NAME="form1" METHOD="POST">
            <INPUT TYPE="HIDDEN" NAME="buttonName">
            <INPUT TYPE="BUTTON" VALUE="Button 1" ONCLICK="button1()">
            <INPUT TYPE="BUTTON" VALUE="Button 2" ONCLICK="button2()">
            <INPUT TYPE="BUTTON" VALUE="Button 3" ONCLICK="button3()">
        </FORM>

        <SCRIPT LANGUAGE="JavaScript">
            <!--
            function button1()
            {
                document.form1.buttonName.value = "button 1"
                form1.submit()
            }
            function button2()
            {
                document.form1.buttonName.value = "button 2"
                form1.submit()
            }
            function button3()
            {
                document.form1.buttonName.value = "button 3"
                form1.submit()
            }
            // -->
        </SCRIPT>
    </BODY>
</HTML>
To see how this works, you can navigate to http://localhost:8080/ch04/ch04_16.jsp, click a button, and you'll see the results in Figure 4.15. Everything is handled by that one JSP page—no introductory HTML page is needed.
Note that there are times when the data in HTML controls might actually return a value of null when you use getParameter, so here's a more general way of testing if data was sent to you—you can use the request object's getParameterNames method (that we'll see tomorrow), which returns the names of the HTML controls that sent you data. If this method returns null, it's a sure bet that there's no data waiting for you to process:
if(request.getParameterNames() != null) {
    //Process data from HTML controls
}
else {
    //Display introductory Web page
}
In this example, we've been handling multiple buttons in a form with the aid of JavaScript. But this isn't a book on JavaScript, it's a book on JSP. Isn't there a way to handle multiple buttons just using JSP? There is—you can use multiple HTML forms.
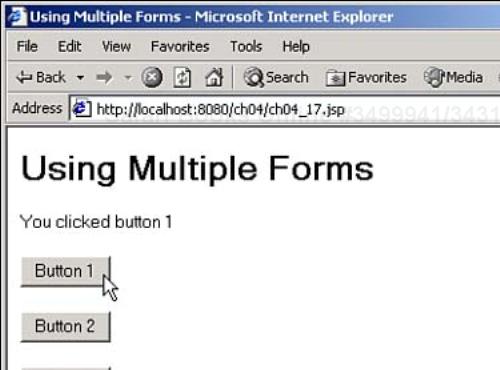
A single Web page can support multiple HTML forms, and that's often useful. For example, one way to support multiple buttons in a Web page is to make them all submit buttons and place them each in their own form. When the user clicks a button, that form's data is sent to the server. To distinguish between the various forms, you can give each form a hidden control with identifying text that you can read in your JSP code.
For example, you can see how to support three different buttons in three different forms in Listing 4.17, where each form contains hidden text holding the button's name. When the user clicks a button, our code can display the clicked button's name using that hidden text.
Example 4.17. Using Multiple Forms (ch04_17.jsp)
<HTML>
    <HEAD>
        <TITLE>Using Multiple Forms</TITLE>
    </HEAD>

    <BODY>
        <H1>Using Multiple Forms</H1>
        <%
            if(request.getParameter("buttonName") != null) {

        %>
            You clicked
            <%= request.getParameter("buttonName") %>
        <%
            }
        %>

        <FORM NAME="form1" METHOD="POST">
            <INPUT TYPE="HIDDEN" NAME="buttonName" VALUE="button 1">
            <INPUT TYPE="SUBMIT" VALUE="Button 1">
        </FORM>

        <FORM NAME="form2" METHOD="POST">
            <INPUT TYPE="HIDDEN" NAME="buttonName" VALUE="button 2">
            <INPUT TYPE="SUBMIT" VALUE="Button 2">
        </FORM>

        <FORM NAME="form3" METHOD="POST">
            <INPUT TYPE="HIDDEN" NAME="buttonName" VALUE="button 3">
            <INPUT TYPE="SUBMIT" VALUE="Button 3">
        </FORM>
    </BODY>
</HTML>
You can see the results in Figure 4.16.
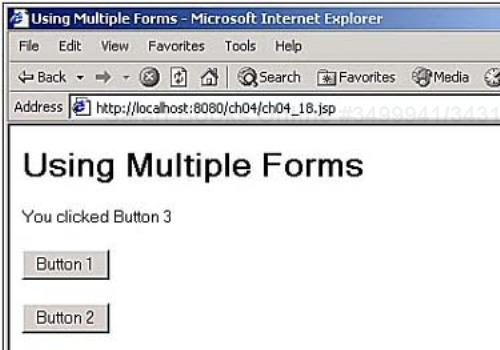
In fact, there's an easier way to do this. Submit buttons are HTML controls like any other, which means you can read the text in their VALUE attributes—that is, their captions—using getParameter. If you give each submit button the same name but different captions, you can read those captions in our JSP code to determine what button was clicked, as you see in Listing 4.18.
Example 4.18. Using Multiple Forms Using Buttons with Multiple Names (ch04_18.jsp)
<HTML>
    <HEAD>
        <TITLE>Using Multiple Forms</TITLE>
    </HEAD>

    <BODY>
        <H1>Using Multiple Forms</H1>
        <%
            if(request.getParameter("submit") != null) {
        %>
            You clicked
            <%= request.getParameter("submit") %>
        <%
            }
        %>

        <FORM NAME="form1" METHOD="POST">
            <INPUT TYPE="SUBMIT" NAME="submit" VALUE="Button 1">
        </FORM>

        <FORM NAME="form2" METHOD="POST">
            <INPUT TYPE="SUBMIT" NAME="submit" VALUE="Button 2">
        </FORM>

        <FORM NAME="form3" METHOD="POST">
            <INPUT TYPE="SUBMIT" NAME="submit" VALUE="Button 3">
        </FORM>
    </BODY>
</HTML>
You see the results in Figure 4.17, where, thanks to multiple HTML forms, we see that Button 3 was clicked.
You've seen quite a lot today. You've gotten started using HTML controls in Web pages and reading data from those HTML controls in JSP code.
You've learned how to use the various attributes of the <FORM> element to tailor your HTML forms as you want them, and to send the data in the form's controls back to the server. You use submit buttons to actually send that data to the URL given in the form's ACTION attribute.
You can decipher the data sent to you in your JSP code using the request object, and you learned the methods of that object today. The method we focused on today was the getParameter method, which lets you read the data from various controls.
The controls you've seen today included submit buttons, text fields, text areas, password controls, hidden controls, standard buttons, and reset buttons. You can handle all these controls with the getParameter method.
You also learned how to use multiple forms, and how you can use them to support multiple buttons in the same Web page. And we got a little tricky by storing form data in hidden controls, both with and without the help of JavaScript.
Tomorrow, we'll continue our work with HTML controls as we turn to the other controls that are available, from check boxes to select controls.
What if a control can return multiple values, such as a multivalue select control? I can't use | |
A1: | There are other methods you use instead—See the topic “Using Multiple-Selection Select Controls” in Day 5. |
Can I use the request object in secure channels such as HTTPS? | |
A2: | Yes. One handy method if you're using a secure channel is the |
This workshop tests whether you understand all the concepts you learned today. It's a good idea to master today's concepts by honing your knowledge here before starting tomorrow's material. You can find the answers to the quiz questions in Appendix A.
1: | Give this one a try—just read the text that the user has entered into a password control and return it in a text field. Doing so will give you practice in handling both reading and sending data using HTML controls. |
2: | Following the example in the topic “Using Request Objects” today, use the |