HOUR 23. Configuring, Maintaining, and Tuning SQL Server
The most attractive application can be extremely frustrating to use if its performance is less than acceptable. As a developer, you must take precautions to try to ensure that the SQL Server is as lean and efficient as possible. In this hour you’ll learn about:
• How to select and tune your hardware
• How to configure and tune SQL Server
• How to maintain your databases
• How to maintain your tables and other objects
Selecting and Tuning Hardware
Your choice of hardware can greatly affect the performance of your server. Areas of particular concern are the amount of memory, processor speed, and hard disk configuration. The network architecture is also an important factor. The sections that follow cover the details of each of these items.
Memory—The More RAM, the Better!
SQL Server uses memory (RAM) to hold all data pages, index pages, and log records. It also uses memory to hold compiled queries and stored procedures. Needless to say, memory is vital to the server’s performance.
Clients are always asking me how much memory they should purchase for their servers. My answer is, the more, the better. In fact, RAM is the best investment that you can make for your SQL Server. That aside, here are some guidelines. A bare minimum amount of RAM for any server is 256MB. SQL Server Express can take advantage of only 1GB of RAM! If your database requires more RAM than that, you will have to move to another version of SQL Server.
Optimizing Processor Power
Although it’s not as important as RAM, more processing power never hurts. Unfortunately, SQL Express can take advantage of only one processor. If you need additional processing power, you should move to another version of SQL Server.
Optimizing Disk Performance
Because SQL Server stores all your data on disk, the type and layout of disks that you use are both important factors. Small Computer System Interface (SCSI) disks, as well as Serial Advanced Technology Enhancement (SATA and SATA II) drives, offer excellent performance for SQL Express. It is also effective to use multiple SCSI disks, each with its own disk controller. This enables SQL Server to distribute the workload across several disks and several controllers.
You can gain both performance benefits and fault tolerance benefits if the computer running SQL Server Express has at least two physical hard drives installed. By placing the database on one disk and the log file on the other, you gain a speed advantage over using just one disk for both the database and the log file. In addition, if the hard disk containing the database fails, you can replace that hard disk, restore the database from backup media, and then SQL Express plays back (from the log file) any transactions that occurred after the backup was made up to the point in time when the drive failed. If the disk that contains the log file fails, you can simply replace the failed drive. SQL Express will create a new log file, and the SQL Express database will still be perfectly intact.
You can use more sophisticated disk configurations for your SQL Express computer as well. For example, you can set up disk mirroring (also known as RAID Level 1 or just RAID 1). Disk mirroring requires two physical disks in which data is written identically to both disks simultaneously. RAID 1 can be configured with either hardware or software, but a hardware solution is generally faster and more reliable. Disk duplexing is also referred to as RAID 1. The only difference from disk mirroring is that duplexing employs two hard disk controllers—one controller for each physical disk. Disk duplexing eliminates the single point of failure that a single disk controller offers. If your SQL Server computer is configured with RAID 1, fault tolerance is already built in.
You may have heard of RAID 5, also known as disk striping with parity. RAID 5 requires a minimum of three physical disks and a maximum of 32 disks. Disk striping with parity enables you to have more available fault-tolerant disk space at a lower cost than disk mirroring or duplexing, in terms of the quantity of disks needed. RAID 1 uses up 50% of available disk space for fault tolerance; RAID 5 uses only 33% or less of available disk space because the parity information needed to restore an array when one disk fails is roughly equal to one disk in the array. For a RAID 5 array using three 100GB disks, the equivalent of one disk is used for parity information; the remaining two disks are used as available disk space (200GB would be available—a 33% reduction in total disk capacity). For RAID 1 (disk mirroring or duplexing), two 100GB disks give you only 100GB of available disk space—a 50% reduction in total disk capacity.
You may also have heard of RAID 0—disk striping. This uses no parity information and is therefore is not fault tolerant at all. You therefore should not use this disk configuration with SQL Server Express because it is used only for performance reasons.
Optimizing Network Performance
Both the network card in the SQL Server and the network bandwidth are important factors in your application’s performance. The server should contain a 32- or 64-bit bus-mastering network card. You should use 1GB versus 100MB ethernet network cards whenever possible. You can also consider other fast networking technologies. The bottom line is that the best hardware and the best designed database do you no good on a slow, overtaxed network.
How to Configure and Tune SQL Server
If you do not configure the server properly, all the hardware in the world and the best designed database mean nothing. Processor options, memory options, I/O options, and query and index options all enable you to designate the most appropriate server configuration for you. Although most of the time you leave these options at their default values, it is useful to know what configuration options are available to you.
Memory Options
You can designate the minimum and maximum memory used by SQL Server. You can also specify the minimum memory allocated to each user for each query run. You should generally not modify any of the memory options. SQL Server does an excellent job of allocating and deallocating memory on its own. The only time you would want to modify these options is if you are running SQL Server on the same machine as another highly memory-intensive application, such as Microsoft Exchange Server. It’s a good idea to run SQL Server on a dedicated machine where this is not a problem. If you must modify the SQL Server memory options, follow these steps:
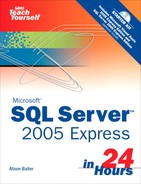
1. Right-click the server you want to affect, and select Properties. The Server Properties dialog appears (see Figure 23.1).
Figure 23.1. The Server Properties dialog contains pages that enable you to modify various properties of your SQL Server.
2. Click to select the Memory page (see Figure 23.2).
Figure 23.2. The Memory page of the SQL Server Properties dialog box enables you to set memory options.

3. Modify the options as desired.
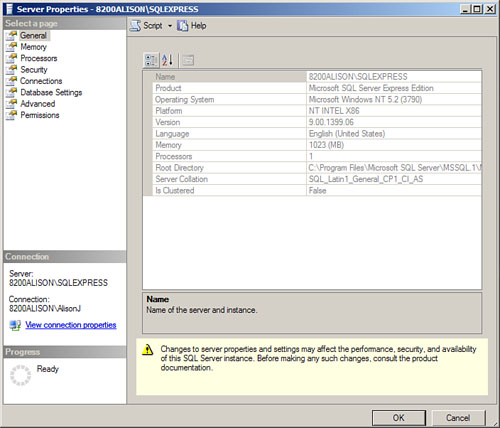
Processor Options
You can configure the way in which SQL Server uses your server’s processors. The configuration options available include the following:
• You can configure the relative priority of the SQL Server process.
• You can determine which of the server’s CPUs SQL Server will use.
• You can designate the total number of operating system threads that SQL Server can use on your computer.
• You can set the maximum number of CPUs used by parallel query operations.
To modify the processor-related properties, follow these steps:
1. Right-click the server you want to affect, and select Properties.
2. The Server Properties dialog appears.
3. Click to select the Processors page. The dialog appears as in Figure 23.3.
Figure 23.3. The Processors page of the Server Properties dialog enables you to modify processor-related properties of your SQL Server.
4. Modify the options as desired.
Security Options
You will usually work with Security options when establishing a SQL Server. Options available include what type of authentication you want on the server (Windows Authentication or SQL Server and Windows Authentication) and what type of login auditing you want to perform when user logins are unsuccessful.
To modify Security options for the server, follow these steps:
1. Right-click the server you want to affect, and select Properties.
2. The Server Properties dialog appears.
3. Click to select the Security page. The dialog appears as in Figure 23.4.
Figure 23.4. The Security page of the Server Properties dialog enables you to modify security-related properties of your SQL Server.

4. Modify the options as desired.
Connections Options
The Connections options enable you to determine the maximum number of concurrent connections that the server will allow, as well as whether the server will allow remote connections. Other options are available as well.
To modify Connections options for the server, follow these steps:
1. Right-click the server you want to affect, and select Properties.
2. The Server Properties dialog appears.
3. Click to select the Connections page. The dialog appears as in Figure 23.5.
Figure 23.5. The Connections page of the Server Properties dialog enables you to modify connection-related properties of your SQL Server.

4. Modify the options as desired.
Database Settings Options
The Database Setting page of the Server Properties dialog enables you to alter settings that impact the databases on that server. For example, you can set the default locations for database and log files, and you can set the default index file factor.
To modify Database Settings options for the server, follow these steps:
1. Right-click the server you want to affect, and select Properties.
2. The Server Properties dialog appears.
3. Click to select the Database Settings page. The dialog appears as in Figure 23.6.
Figure 23.6. The Database Settings page of the Server Properties dialog enables you to modify database-related properties of your SQL Server.

4. Modify the options as desired.
Advanced Options
The Advanced Options page of the Server Properties dialog enables you to configure various server options. These include where triggers can fire other triggers, the two-digit year cutoff, and much more.
To modify Advanced options for the server, follow these steps:
1. Right-click the server you want to affect, and select Properties.
2. The Server Properties dialog appears.
3. Click to select the Advanced page. The dialog appears as in Figure 23.7.
Figure 23.7. The Options page of the Server Properties dialog enables you to modify various properties of your SQL Server.

4. Modify the options as desired.
Permissions Options
The Permissions page of the Server Properties dialog enables you to modify permissions that relate to the server (not to a particular database). Here you can add and remove logins and roles to and from the server. You can also Grant, With Grant, and Deny server-related rights to logins and roles. Server-related rights include whether the user or role can alter any database, whether the user or role can alter any login, and much more.
To modify Permissions options for the server, follow these steps:
1. Right-click the server you want to affect, and select Properties.
2. The Server Properties dialog appears.
3. Click to select the Permissions page. The dialog appears as in Figure 23.8.
Figure 23.8. The Permissions page of the Server Properties dialog enables you to modify permission-related properties of your SQL Server.

4. Modify the options as desired.
How to Maintain Your Databases
If your data is important to you, it is imperative that you maintain your databases properly. Database maintenance generally includes backing up your database and auditing database access. It is also important that you understand how to restore a database in the case of a failure.
Backing Up Your Databases
Think of backing up your database like brushing your teeth. It is something that you don’t think about; you just do it unequivocally each and every day, without exception! Two types of backups are available:
• Full database backups—Back up the entire database and portions of the log.
• Differential database backups—Back up data modified since the last backup.
You need to decide which backup option is appropriate for you. This depends on how much information is changed each day, as well as how critical the information is to you. For example, if the data is changed throughout the day and is mission-critical, you should perform a full database backup daily and then back up the transaction log hourly.
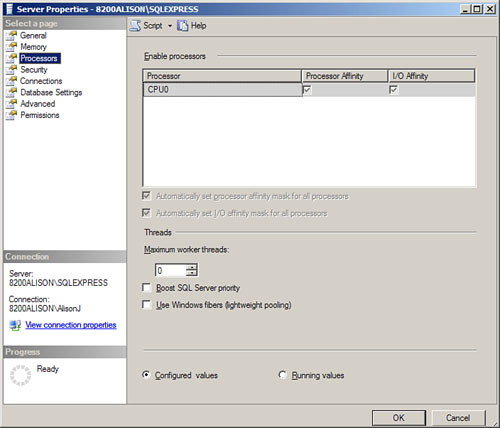
SQL Server offers three recovery models:
• Full—Offers full protection. With this option, you are able to restore all committed transactions. The database and the log are both backed up.
• Bulk Logged—Offers minimal data recovery. With this option, logging is minimal. You get the best performance and use the least amount of memory.
• Simple—In the case of failure, loses all data modified since the last backup. With this option, you can recover data only as of the last backup.
To select a recovery model, follow these steps:
1. Right-click the database for which you want to establish the recovery model and select Properties. The Database Properties dialog box appears.
2. Click the Options page.
3. Open the Recovery model drop-down list and select the appropriate recovery model (see Figure 23.9).
Figure 23.9. The Recovery model drop-down list on the Options page enables you to select the appropriate recovery model.
4. Click OK to close the Properties dialog box and save your changes.
To perform a backup, follow these steps:
1. Right-click the database that you want to back up and select Tasks, Back Up. The Back Up Database dialog box appears (see Figure 23.10).
Figure 23.10. The Backup Database dialog box enables you to designate information about the backup.

2. Designate which database you want to back up, the name for the backup, and an optional description for the backup.
3. Use the Backup Type drop-down to indicate whether you want to perform a full or a differential backup.
4. Click Add or Remove to designate the filename and location for the backup.
5. Click the Options page to designate additional backup options (see Figure 23.11). For example, you can designate whether you want SQL Server to verify the backup on completion.
Figure 23.11. The Options page of the Backup Database dialog box enables you to designate additional backup options.
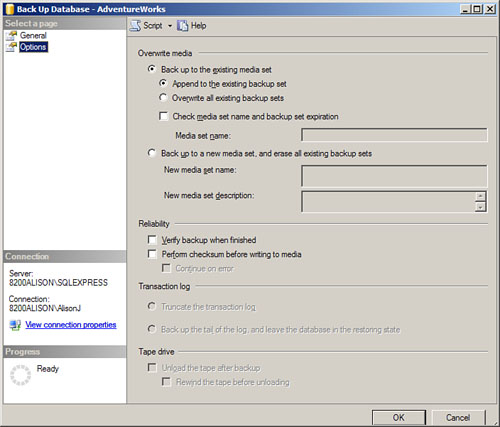
5. Designate whether you want to append to or overwrite the existing media.
6. Click OK to complete the process.
Restoring a Database
Restoring a database is similar to backing it up. You can restore a database to itself (overwrites the existing database), to another existing database, or to a new database. To restore a database, follow these steps:
1. Right-click the database that you want to restore and select Tasks, Restore, Database. The Restore Database dialog box appears (see Figure 23.12).
Figure 23.12. The Restore Database dialog box enables you to designate information about the restore process.

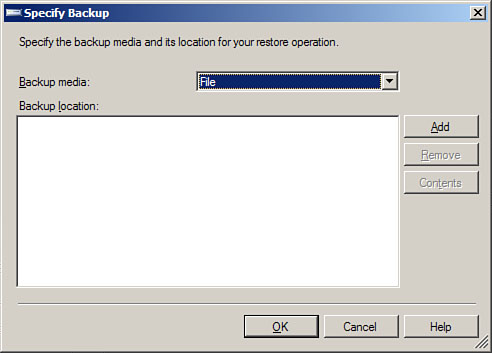
2. Designate whether you want to restore from a database or from a device.
3. If you click From Device and then click the Build button, the Specify Backup dialog box, shown in Figure 23.13, appears. Here you can designate the backup location.
Figure 23.13. The Restore Database dialog box with From Device selected.
3. Click the Options page to designate the restore options (see Figure 23.14).
Figure 23.14. The Options page of the Restore Database dialog box enables you to designate additional restore options.

4. Designate whether you want to overwrite the existing database. If you do not select this option and you attempt to restore to an existing database, SQL Server returns an error.
5. Designate the logical and physical filenames for the database and the log file. If you are restoring from one machine to another and the machines have different directory structures, you need to change the physical filename to reflect the appropriate directory structure.
6. Indicate the recovery completion state.
7. Click OK to perform the restore process.
By the Way
It is important to be aware of who has rights to your database and what rights they have. You should periodically review users and their rights to ensure that only authorized individuals can access the database and that they can perform only the intended and necessary tasks.
How to Maintain Tables and Other Objects
You should perform certain audits periodically on the tables and other objects in your database. The main things that you should keep track of are the record count and who has access to an object.
Generally, the amount of data that a table should contain is fairly predictable. It’s usually a good idea to keep an eye on the number of records in each table. If the number of records exceeds your limit, you should consider archiving the extra data.
Just as it is important to keep an eye on who has been granted access to the database, it is important to keep track of what permissions users and roles have for each object.
Summary
The best-designed system will fail to meet users’ needs if it performs poorly. The first line of attack when attempting to optimize performance is to ensure that the hardware on which SQL Server runs is adequate for the job at hand. As soon as all the proper hardware is in place, you must determine that you have properly configured the SQL Server software. After you configure your hardware and the SQL Server software, you must make sure that you take all the steps to maintain the server properly. In case things go awry, you must implement and test a backup and restore procedure.
Q&A
Q. Why is memory so important to a SQL Server?
A. SQL Server uses memory to hold all data pages, index pages, and log records. It also uses memory to hold compiled queries and stored procedures.
Q. Explain some of the security options available.
A. Using the Security page of the Server Properties dialog, you can change the type of authentication that you want to allow (Windows only versus Windows and SQL Server). You can also determine what type of logging SQL Serve will perform when logins are unsuccessful.
Q. Name and describe the three recovery models.
A. The Full recovery model enables you to restore all committed transactions. With this option, SQL Server backs up both the database and the log file. With the Bulk Logged recovery model, logging is minimal. You get the best performance while using the least memory, but with the minimal recovery. The Simple recovery model loses all data since the last backup. With this model you can recover data only as of the last backup.
Workshop
Quiz
1. Name four things you can do to your hardware to improve performance of your SQL Server.
2. Using the Memory page of the Server Properties dialog, you can configure the relative priority of the SQL Server process (true/false).
3. Name two types of database backups.
4. Using the Processor options page of the Server Properties dialog, you can determine which of the server’s CPUs SQL Server will use (true/false).
5. The Permissions page of the Server Properties dialog box enables you to modify database permissions (true/false).
Quiz Answers
1. More memory, more processors, RAID array, faster network.
2. False. Using the Processor options page of the Server Properties dialog, you can configure the relative priority of the SQL Server process.
3. Full database backups and differential database backups.
5. False. The Permissions page of the Server Properties dialog box enables you to modify server-related permissions.
Activities
View the various pages of the Server Properties dialog. When you are finished, back up the AdventureWorks database. Then restore the database.