
Using Visio to Create an ORM Model
The first step in creating your ORM model is to open Visio and select the correct drawing template for the model. After Visio opens, select the Database drawing type and you're presented with a list of the available database templates that Visio offers. Figure 21.1 is what you should see when you select the Database category.
Figure 21.1. Database template options in Visio.

Selecting ORM Source Model (U.S. Units) takes you to the main Visio window for the model. Docked to the left of the IDE is the ORM stencil. Docked to the bottom of the IDE are the Database Rules, Business Rules, and Verbalizer tabs that you'll use to define the objects, roles, and facts that make up your model.
If you don't see the docked windows on the bottom of the screen, all the ORM-specific tools are located under the View option of the Database main menu. After the ORM template and the Business Rules window are open, your screen should resemble Figure 21.2.
Figure 21.2. The ORM Model template in Visio.
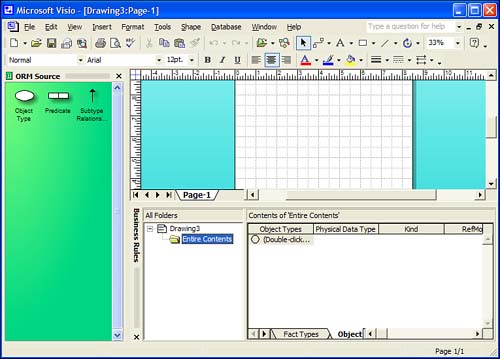
When using Visio to create drawings, you drag items from the stencil window onto the design surface of the drawing. You can do the same thing when creating ORM models. First, you must create the facts that make up the conceptual data model. Using the Business Rules Editor, you enter facts about the process you're creating, and those facts in turn make up the data model.
The data model you're creating today continues the e-commerce model that we talked about earlier. You aren't going to go crazy and build a complete system; the goal is to help you understand how an ORM model can make your life easier as your applications grow.