
The New Projects Dialog
From the Getting Started page on the Start Page, click the New Project button. The New Project dialog pops up, as shown in Figure 2.9.
Figure 2.9. The New Project dialog box.
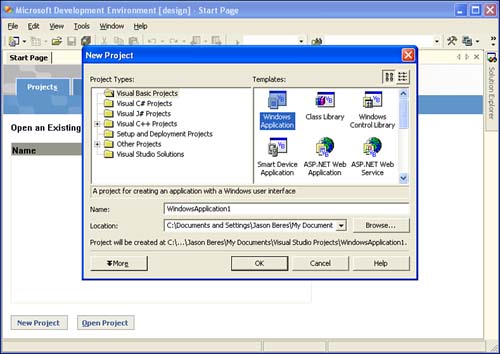
The New Project dialog lists all the possible project types that Visual Studio .NET can create. All the different project types are predefined templates that include different classes, namespaces, and designers to make working with the specific project type easier. As you go through the next 20 days, you'll learn how to use the key project templates that are offered.
You should also notice the project types are broken down by language and language-agnostic types. The types of projects that you can create in Visual Basic and C# are identical. There are no special project differences between them, except for the default language settings. Project types for C++ are specific to the C++ Active Template Library tools that come with .NET.
When you create a project, you can specify the name and location of the project source files. The default directory for all created projects is the Visual Studio Projects folder in your My Documents folder.
For Web-based projects, the actual source files are created in the Inetpubwwwroot directory of your local Web server, and the project solution file is saved in the Visual Studio Projects folder in a folder named after the project name. For all non-Web projects, all the project source files are created in a new folder using the name you enter in the Name box of the Visual Studio Project folder in My Documents. From the New Project dialog, you can change the default path of any new projects being created by clicking the Browse button and navigating to a folder on your local machine.
Tip
By default, when you create a new ASP.NET Web application or ASP.NET Web service application, the virtual Web directory in Internet Information Server (IIS) is created for you, so you don't need to do anything special with the Internet Information Server tools. The default path for all Web projects is Inetpubwwwroot on your system drive.
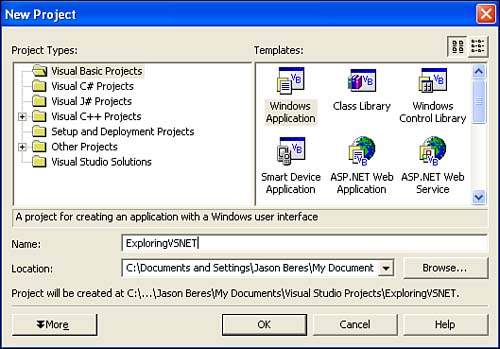
To get started working with the IDE, change the name of the project to ExploringVSNET as Figure 2.10 demonstrates and click the OK button.
Figure 2.10. Creating the ExploringVSNET project.
Note
The IDE tour and configuration settings you'll learn about for the rest of the day are shown using the ExploringVSNET project you just created in Visual Basic .NET. The screenshots and tools shown throughout the day are the same for both C# projects and Visual Basic projects. So, if you're a C# developer, you have the same IDE options as a Visual Basic developer.