Hour 1. Xcode 4
What You’ll Learn in This Hour:
• How to download and install Xcode
• Differences from Xcode 3
• The Xcode interface basics
• Benefits of being a paid developer
• What to expect during the first few hours of this book
Do you love using your Mac or iOS device? If so, you can thank Xcode. Xcode is the starting point for nearly all the applications you know and love on your favorite operating system. It contains the tools for writing code, developing interfaces, testing performance, and even submitting your creations to the Mac or iOS App Store for distribution.
This hour walks you through the evolution of Xcode, including the difference between Xcode 4 and Xcode 3, and the addition of iOS development tools to what was traditionally a desktop application development environment. You also learn the benefits of joining a paid developer program, how to install Xcode, and begin to find your way around its user interface. The hour concludes with the steps you need to take if you want to test code directly on your own iDevice rather than in a simulator.
Welcome to Xcode
There are many different reasons to learn Xcode. Perhaps you want to develop iOS applications for the iPhone, iPad, and whatever other devices Apple has up its sleeves. Perhaps you want to take the desktop route and focus on creating applications that run on your Mac. Maybe you just want to write some quick utilities in AppleScript. Regardless of what you’re looking to do, Xcode is the place to do it.
Xcode Evolves
Xcode 4 is the start of a new development environment from Apple. For the first time since the inception of Mac OS X, Apple has dramatically changed the development experience. Xcode, when introduced with Mac OS X, was an adaptation of the NeXTSTEP/OpenStep development tools. These tools were widely heralded as easy to use and innovative for their object-oriented approach.
Although features have been added over the past decade, the general development workflow went untouched. In Xcode 4, Apple is attempting to simplify and modernize the developer toolset. This isn’t to say that if you’ve used earlier versions of Xcode you won’t be able to catch on quickly, but Xcode 4 feels and acts like a new product.
By the Way
To learn more about the transition from NeXTSTEP to Mac OS X, and see a side-by-side comparison of the development process, check out this video presentation from SecondConf in 2010: http://cdn.secondconf.com/2010/videos/SecondConf-GeneBacklin-17425.mp4.
Some of the biggest changes between Xcode 3 and Xcode 4 include the following:
• A single-window unified development environment
• Instant-access editors and viewers for code files, interfaces, data models, and more
• Detailed code analysis and error detection
• Integrated interface builder
• Updated compiler and debugger
• Storyboard interface development for iOS applications
• Workspaces for combining multiple related projects
• Save-as-you go editing
• Integrated source control options, including local Git support
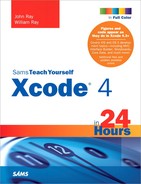
Figure 1.1 shows what an iOS project looks like Xcode 3.2, compared to Xcode 4.2 in Figure 1.2.
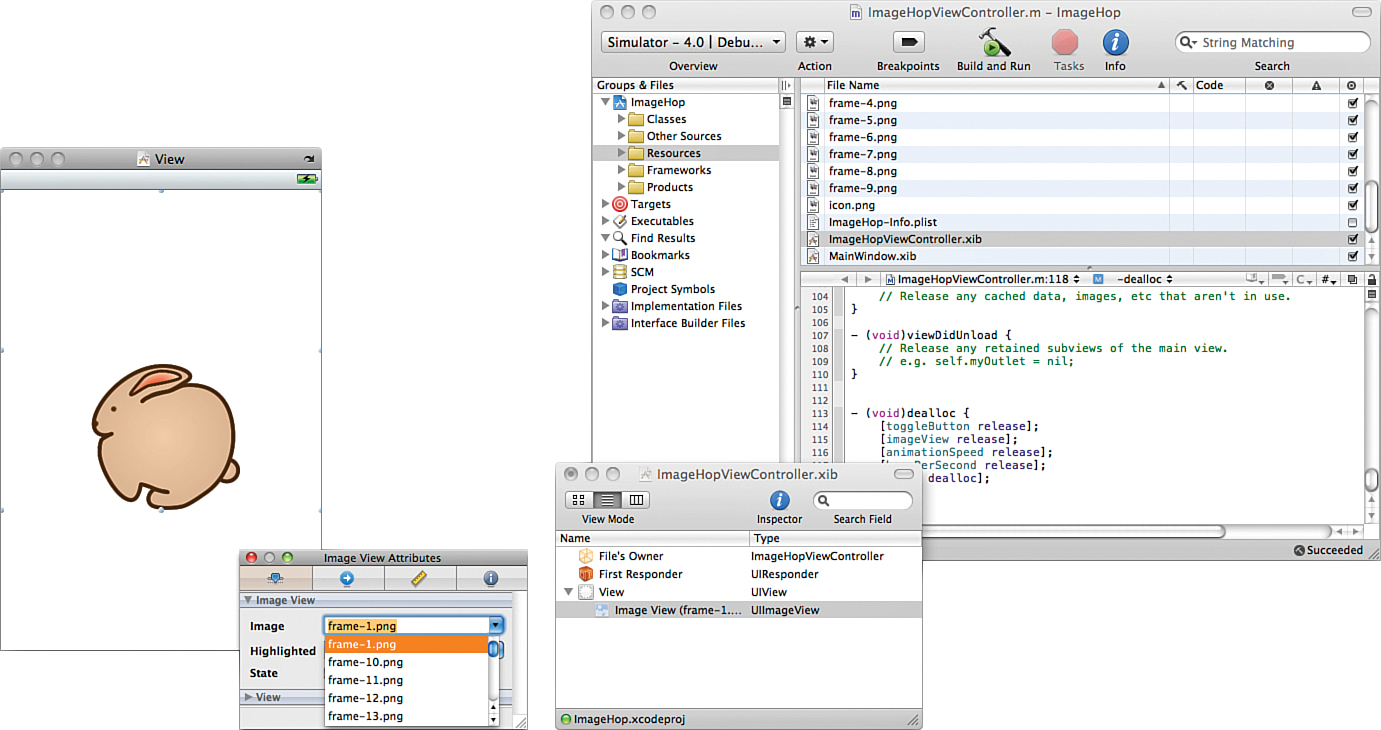
Figure 1.1. A simple iOS project in Xcode 3.2.
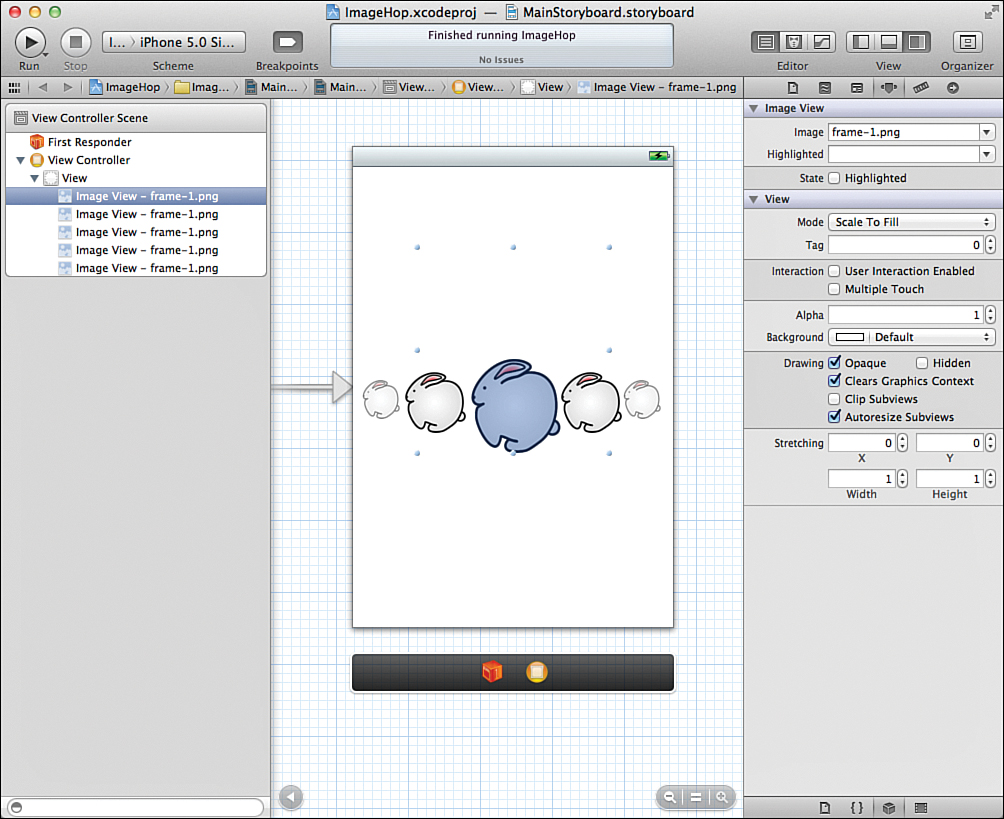
Figure 1.2. The same iOS project in Xcode 4.2.
As you read through each hour’s lesson, you’ll see that although the tools are new, the development fundamentals you use in Xcode are the same as they have always been. If you have never used Xcode before, I think you’re going to like what you see.
iOS Versus Mac OS X Development
Xcode, although originally built for desktop application development, is now the primary method of deploying applications on the iOS mobile platform. While the skills necessary for writing applications on both iOS and Mac OS X are similar, the workflow differs significantly. The goal here is to present Xcode in a way that takes into account all the Apple platforms.
Let’s take a few minutes to review some of the main differences between Mac OS X and iOS development.
Frameworks
The Mac OS X frameworks are adapted and improved versions of what was available in NeXTSTEP and OpenStep. They have been defined and refined over more than a decade. iOS, in contrast, is a new OS, based on Mac OS X. Although it includes many of the same frameworks, they are largely “light” versions that do not offer the same depth of features as their desktop counterpart.
Core Image, for example, provides advanced image-processing capabilities in Mac OS X. In iOS 5, the Core Image was introduced, but without support for many of the advanced features of its desktop brethren. The lack of a one-to-one mapping between the two platforms is a frustration to developers, but with each iteration of iOS and Mac OS X, the two operating systems grow closer and closer together.
Deployment
As you already know, iOS applications are deployed on an iPhone/iPad, and Mac OS X applications are deployed on a Mac. Although this might seem obvious, the implications for developers might not be. First, iOS applications must be run and debugged in a simulator, as shown in Figure 1.3 (unless separate development hardware is available). Mac applications are developed and debugged directly on your development machine—no simulator required.
Figure 1.3. iOS applications run in a simulator; Mac applications run directly on your Mac.
Second, iOS applications, even those that you write for yourself on your own iOS hardware, are tied to a time-limited development certificate. Without a paid developer license, iOS developers are limited to using the simulator only. Mac developers have no such restrictions. You can write a Mac application in Xcode that runs on any computer at any time.
Interface Development
After Xcode 4 shipped, Apple added an iOS specific feature called storyboarding. This presents one of biggest advances in iOS GUI development and also one of the biggest differences between iOS and Mac OS X projects. On the Mac, application interfaces are created independently of one another. Even though clicking a button in one window might lead to another window opening, no such relationship is represented when designing the interface.
iOS storyboards take a more holistic approach to the UI design. Each screen (window) within an application can be defined, and the transitions and relationships between them defined visually. Using iOS storyboarding, it is possible to create a working application UI with almost no code written.
Application Access
Another big distinction between iOS and Macintosh applications is the level of access that you, the developer, have to low-level file system and operating system internals. On the Mac, developers can do almost anything they want—because they are free to distribute an app however they please. Software submitted to the Mac App Store does have to meet a strict set of requirements, but it is a choice, not a compulsion.
The opposite is true for iOS. To publicly distribute an app for iOS means that your creation must be a well-behaved citizen of iOS and follow very strict guidelines for resource usage. Some of these restrictions are forced based on resource limits (threads, memory, storage), whereas others require you, the developer, to pay attention to Apple coding guidelines. Using Xcode, for example, you can easily create an application that accesses information across the iOS file system and that runs indefinitely in the background. You can create it, but Apple is not going to approve it.
Now that you have an idea of what to expect from Xcode, and the differences between iOS and Mac OS X development, it’s time to begin preparing your development environment. Your next step is to determine whether joining a developer program is worth your time (and money).
The Apple Developer Programs
There are two types of developers: paid and unpaid. For free, you can download the latest stable Xcode release from the Mac App Store and begin writing applications that run either on your Mac or in the iOS simulator. You even have access to the full Xcode documentation and sample projects. You cannot, however, run applications directly on iOS hardware or submit apps (iOS or Mac) to the App Store.
For hobbyists or individuals wanting to gain experience with iOS development, paid developer membership offers few advantages. Those who are committed to the deployment of a product on either iOS or Mac OS X, however, are best served by a paid membership.
Paid memberships offers early access to iOS and Mac OS X operating system releases, as well as to beta releases of Xcode. In fact, developers had access to Xcode 4 beta for the better part of a year before it was finally released in 2011. In addition, being part of a paid developer program grants you access to discussion forums, beta documentation, Worldwide Developers Conference (WWDC) materials, and in some cases, direct support from Apple.
By the Way: Test Before the Rest
Testing products on new pre-release versions of an OS and its development tools is an important part of a serious developer’s process. With each new release of iOS and Mac OS X, developers scramble to update applications, fix bugs, and implement new features. Those who take advantage of the pre-release program, however, can get their creations on the market day and date with Apple’s latest and greatest.
The cost of iOS and Mac OS X developer program memberships is currently $99/year each for an individual or a company. Corporate iOS developers seeking to deploy iOS applications in house can pay $299/year for a special enterprise-level program.
For a summary of all the current membership levels, visit http://developer.apple.com/programs/which-program/.
Big or small, free or paid, your venture into Xcode development begins on the Apple website by registering as an Apple developer.
Registering as a Developer
To start, visit the Apple Developer Registration portal (http://developer.apple.com/programs/register/) shown in Figure 1.4. If you have an existing Apple ID from using iTunes, iCloud, or other Apple services, you can to use it for your developer account. If not, or if you want a new ID to use solely for development, you have the option of creating a new Apple ID during the registration process.

Figure 1.4. Visit an Apple developer center to begin the enrollment process.
Click the Get Started link in the upper right. When the registration starts, decide whether to create an Apple ID or jump-start registration by choosing to Use an Existing Apple ID, as shown in Figure 1.5. After making your choice, click Continue.
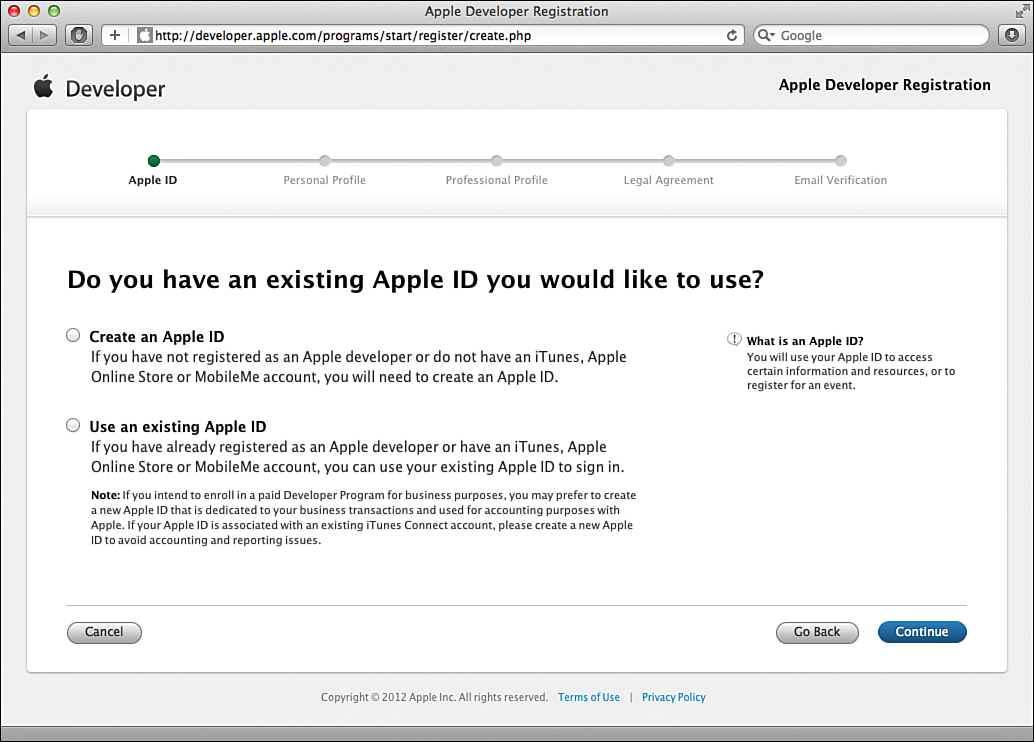
Figure 1.5. You use an Apple ID to access all the developer resources.
The registration process walks you through the process of creating a new Apple ID (if needed) and collects information about your development interests and experience, as shown in Figure 1.6.
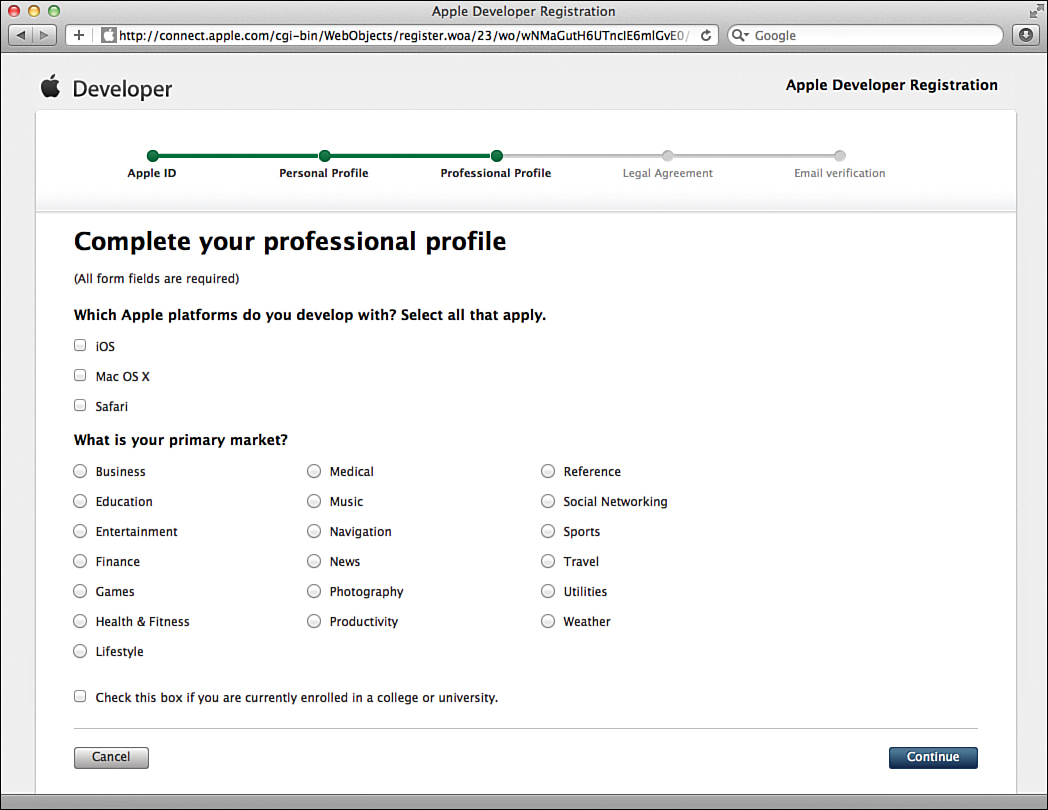
Figure 1.6. Provide Apple with information about your development experience.
If you choose to create a new ID, Apple verifies your email address by sending you a clickable link to activate your account.
Joining a Paid Developer Program (Optional)
After you have a registered and activated Apple ID, you can decide to join a paid program or to continue and use the free developer resources. If you choose to join a paid program, point your browser to the Developer Program list (http://developer.apple.com/programs/which-program/), pick the link to the program you want, and then and click the Enroll link on the subsequent page. After reading the introductory text, click Continue to begin the enrollment process.
When prompted, choose I’m Registered as a Developer with Apple and Would Like to Enroll in a Paid Apple Developer Program, and then click Continue.
The registration tool then guides you through applying for the paid programs, including choosing between the individual and company options, as shown in Figure 1.7.
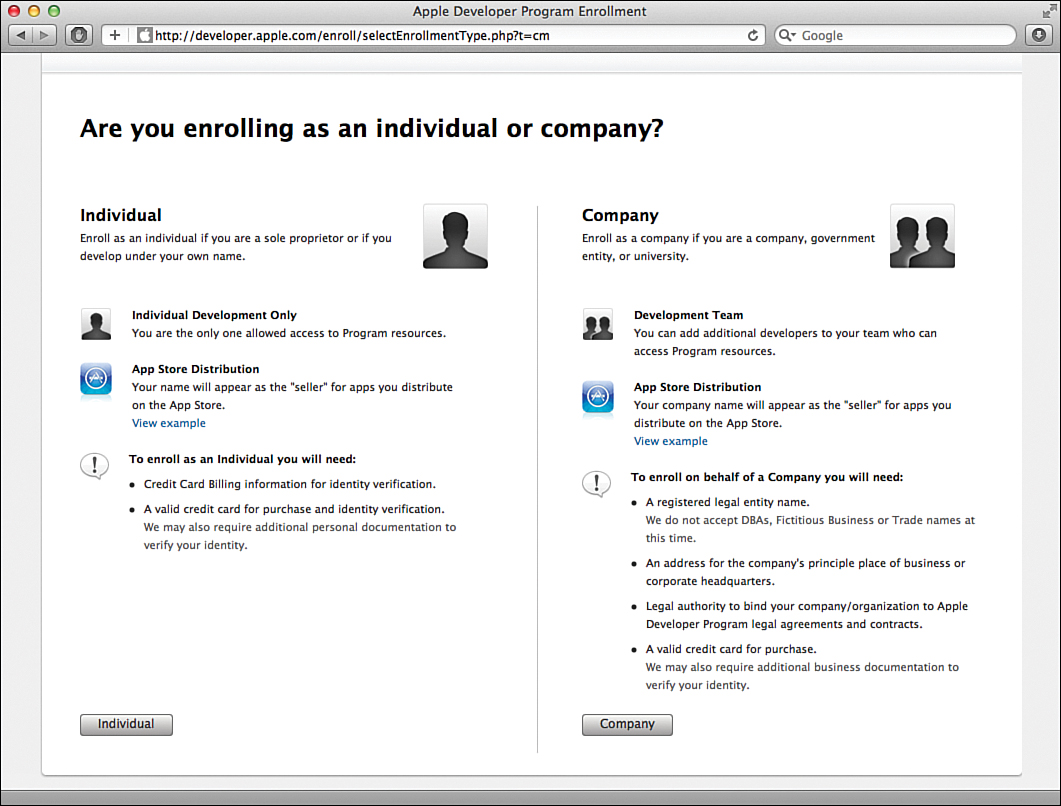
Figure 1.7. Choose whether to enroll as a company or an individual.
Unlike the free developer membership, the paid developer program does not take effect immediately. When the iOS developer program started, it took months for new developers to be approved into the program. Today, it might take hours—be patient.
Installing the Xcode Developer Tools
Downloading the Xcode developer suite is as easy as point and click. Open the App Store from your Dock, search for Xcode, and download it for free, as shown in Figure 1.8. Sit back while your Mac downloads the large (~3GB) installer. If you prefer not to use the App Store, or have difficulty with the download, you can also download the software by going to http://developer.apple.com/, choosing the developer program you enrolled in (iOS or Mac), and then logging in to access a direct-download installer for Xcode.
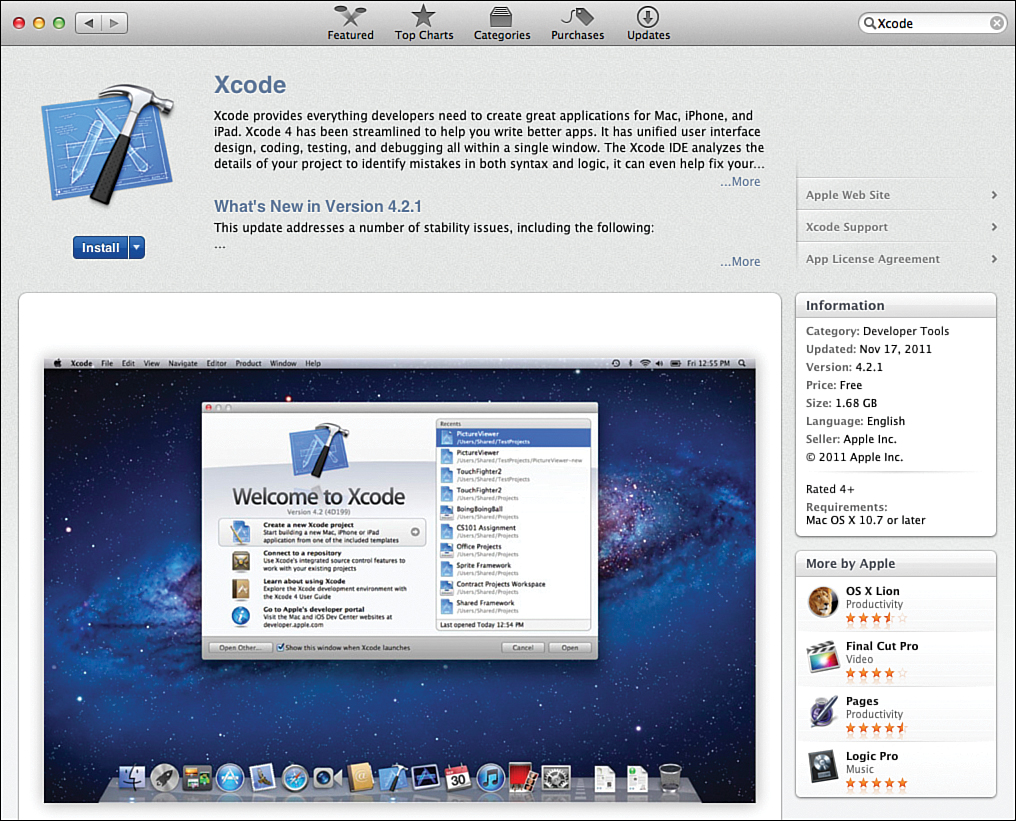
Figure 1.8. Download Xcode from the Mac App Store.
If you have the free developer membership and log in to the Dev Center, you see just a single installer for Xcode. If you’ve become a paid program member, you might see additional links for different versions of Xcode, iOS, Mac OS X, and other pre-release software. I recommend, when first starting out, to use the stable release version of the tools.
When the download completes, you have either an installer (if you downloaded from the Mac App Store) or a disk image (if you downloaded from the developer site). Open the disk image, if necessary, and run the installer. You do not have to change any of the defaults during the installation process, so just read and agree to the software license and click Continue to proceed through the steps.
Like most applications, Xcode 4.3+ is installed in your Applications folder. Additional tools are installed within the application bundle itself at the path /Applications/Xcode.app/Contents/Developer. Inside the Developer folder are dozens of files and folders containing developer frameworks, source code files, and additional developer applications. Most of your time will be spent in Xcode (see Figure 1.9), but you’ll have quick access to the additional developer tools through the Xcode, Open Developer Tool menu.

Figure 1.9. Start Xcode directly from Launchpad.
At the time of this writing, versions of Xcode installed from Apple’s developer portal (as opposed to the Mac App Store) use the path “/Developer/Applications” at the root level of your hard drive. In other words, if you don’t see Xcode installed in your main Applications folder, check your drive for a “Developer” folder—if you see it, you’ll find Xcode within that Applications folder.
The Nickel Tour
If you’re like me, it’s pretty much impossible to install a piece of software and not immediately start it. To get an idea of what you’re going to encounter in Xcode, let’s take a few minutes to walk through the basics of the Xcode interface.
Starting Up
Launching Xcode displays a welcome screen (unless you’ve disabled it) that provides quick access to online resources and common project functions—connecting to source control repositories, opening projects, and creating new projects. This window, shown in Figure 1.10, is a convenient way to access your most frequently used projects without having to delve into any local folders you’ve created.
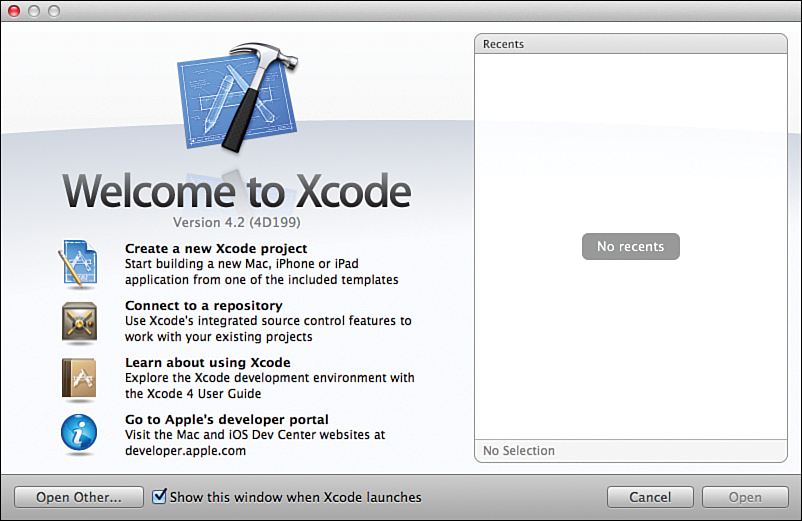
Figure 1.10. Use the welcome screen to access your projects, create new projects, or view online resources.
Creating Projects
Creating a new project (either through the welcome screen or the File menu) displays a project template selection dialog, as shown in Figure 1.11. This might seem like a bold statement to make, but you won’t be creating any applications without using a template (even if it is an empty application template). The Xcode application templates set up properly configured projects for a variety of different development scenarios.
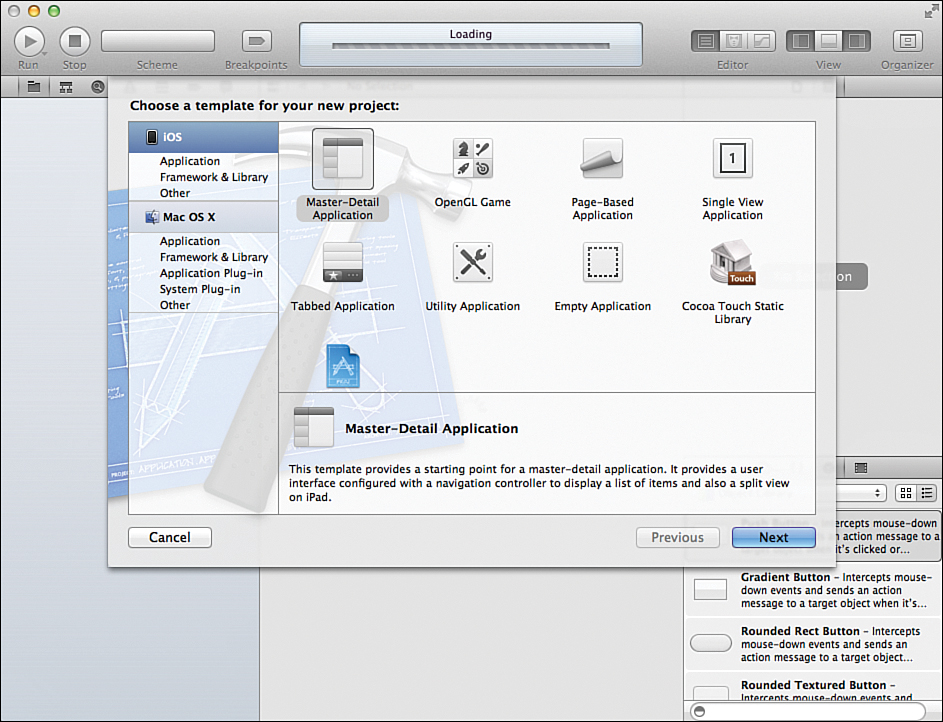
Figure 1.11. Navigate the templates for iOS and Mac OS X applications.
On the left side of the project creation screen, you choose the operating system (currently iOS and Mac OS X), and then select from a number of template categories for that OS, and finally select an individual template from within the category. For example, to create a screen saver for Mac OS X, you choose Mac OS X, System Plug-In, and Screen Saver, as shown in Figure 1.12.
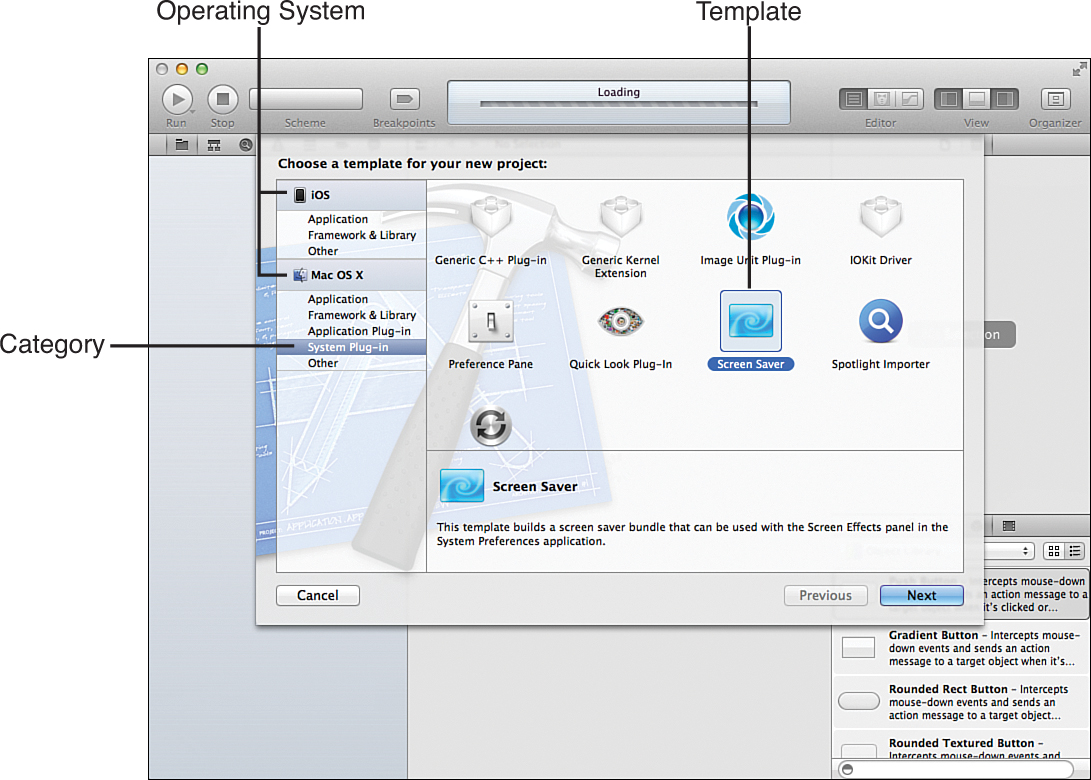
Figure 1.12. Get a quick start on almost any type of project.
After selecting a template, you are guided, wizard style, through a series of dialogs to configure any additional attributes for your project. Xcode then presents your workspace, ready for coding.
Navigating the Xcode Workspace
The Xcode 4 workspace looks like a more cluttered version of iTunes; all the development tools are contained within a single window. If you’re used to Xcode 3.x, this will come as a bit of a shock. You have much less flexibility in how you arrange your tools. However, the consistency in the interface makes it easy to switch between different editing modes and jump between interface, code, and back without losing your focus.
The Xcode IDE consists of five different functional areas, as shown in Figure 1.13.
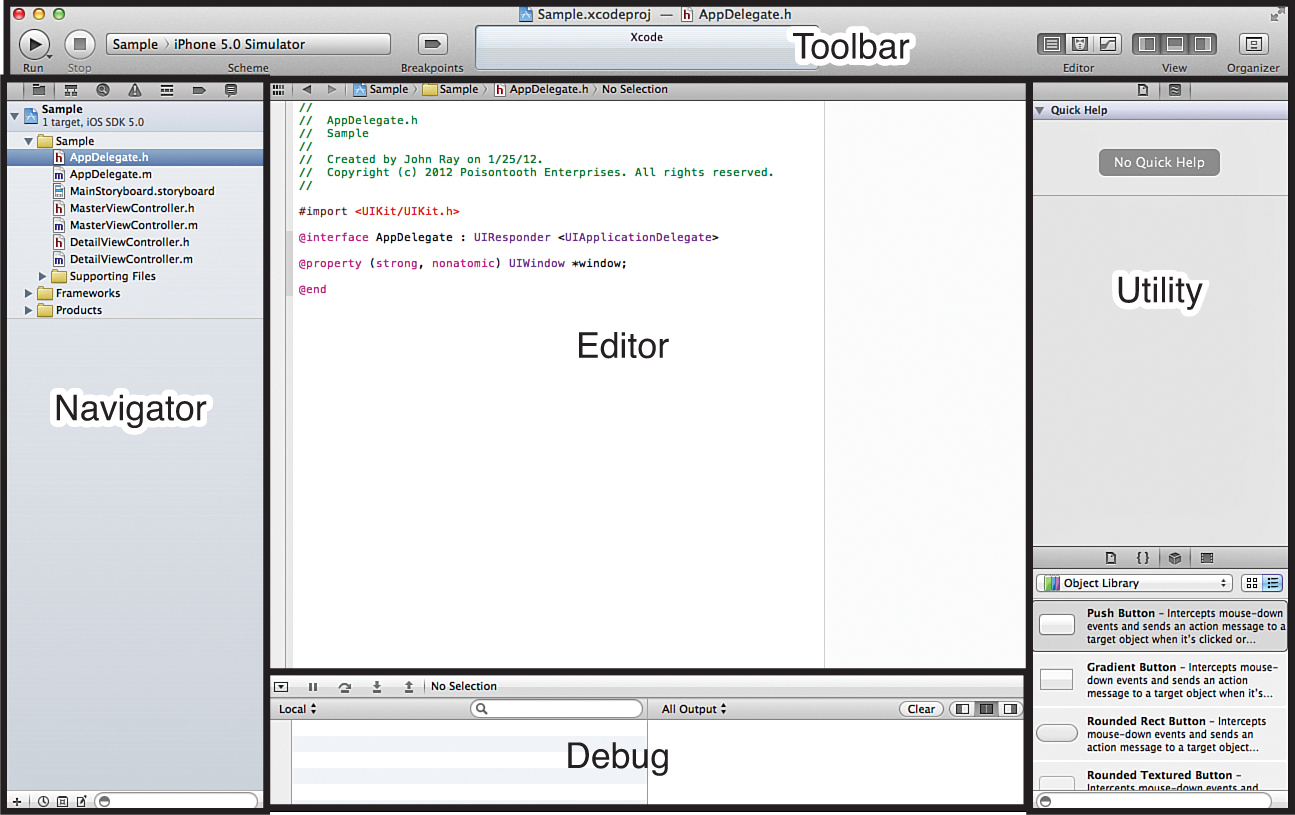
Figure 1.13. The Xcode interface is divided into five areas.
• Toolbar: Displays project status and provides easy access to common functions
• Navigator: Manages files, groups, and other information related to your project or collection of projects
• Editor: Edits or displays the currently selected project resource, such as a code file, interface file, or plist (property list)
• Utility: Provides quick access to object inspectors, help, and object/code palettes
• Debug: Visible during application debugging, the debug area provides console feedback and debugger output
We delve into each of these areas in depth in subsequent hours, so don’t worry—this isn’t the last time you’ll hear about them. Xcode can be an overwhelming application for someone who is just starting development or who is moving from another interface development environment (IDE). The toolset is immense, and it is not difficult to get lost clicking between the hundreds of configuration options available. The goal of this book is to provide an understanding of Xcode’s major functions and to give you the background you need to start coding productively. The first half of this book examines the Xcode tools. The second half reviews specific examples of how you can use the tools.
Before I wrap up this first hour’s lesson, I want like to provide a bit of instruction for those readers who are anxious to begin iOS projects: how to prepare your iDevice for running your own code.
Preparing Your iOS Device (Optional)
If you’re planning to use Xcode for creating iOS applications (and have joined a paid iOS developer program), you’ll likely want to run your creations on your actual device. Although I had been programming for most of my life, seeing my first iOS app run on my iPhone was an absolute thrill.
Watch Out!: Pay to Play
You absolutely must have a paid iOS developer program to run your Xcode projects on an iDevice. If you try to complete these steps without paying, don’t expect it to work—but you can still use the iOS simulator.
Like it or not, Apple’s current approach to iOS development is to make absolutely certain that the development process is controlled—and that groups cannot just distribute software to anyone they want. The result is a rather confusing process that ties together information about you, any development team members, and your application into a provisioning profile.
A development provisioning profile identifies the developer who may install an application, an ID for the application being developed, and the unique device identifiers for each device that will run the application. This is only for the development process. When you are ready to distribute an application via the App Store or to a group of testers (or friends) via ad hoc means, you need to create a separate distribution profile.
Installing a Development Profile
Apple has dramatically streamlined the process of creating a provisioning profile in Xcode. To install the development provisioning profile, first make sure that your device is connected to your computer, and then launch Xcode and follow these steps:
1. When Xcode launches, dismiss any welcome windows that appear.
2. Choose Window, Organizer from the menu. You should see your iDevice listed in the leftmost column of the Organizer under the Devices section, as shown in Figure 1.14.
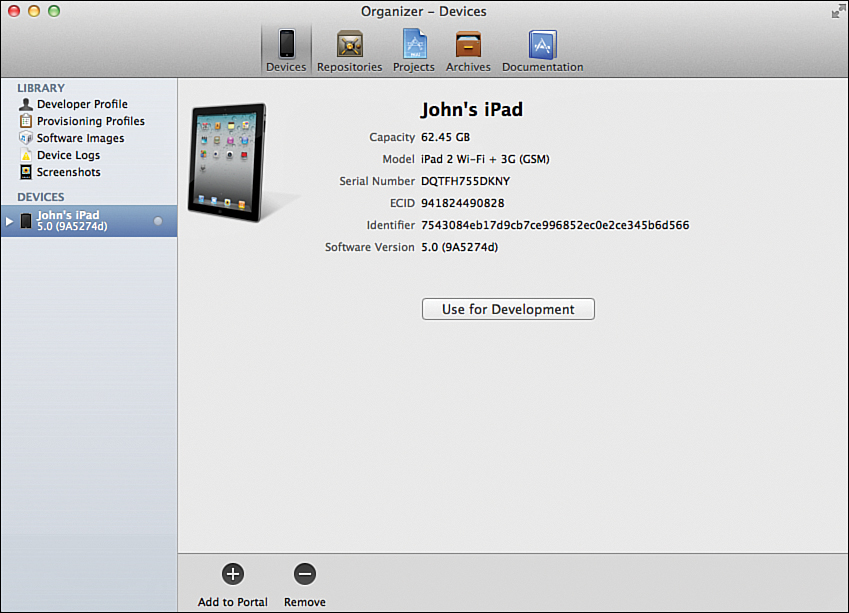
Figure 1.14. Identify your device in the Organizer.
3. Click the device icon to select it, and then click the Use for Development button.
4. Enter the Apple ID login associated with your paid developer membership when prompted.
5. In the background, Xcode is adding a unique identity to the iOS developer portal that identifies you and is used to digitally sign any applications you generate. It also registers your device with Apple so that it can run the software you create (and beta releases of iOS). If this is the first time you have been through the process, you are prompted as to whether a development certificate should be generated, as shown in Figure 1.15. Click Submit Request to continue.
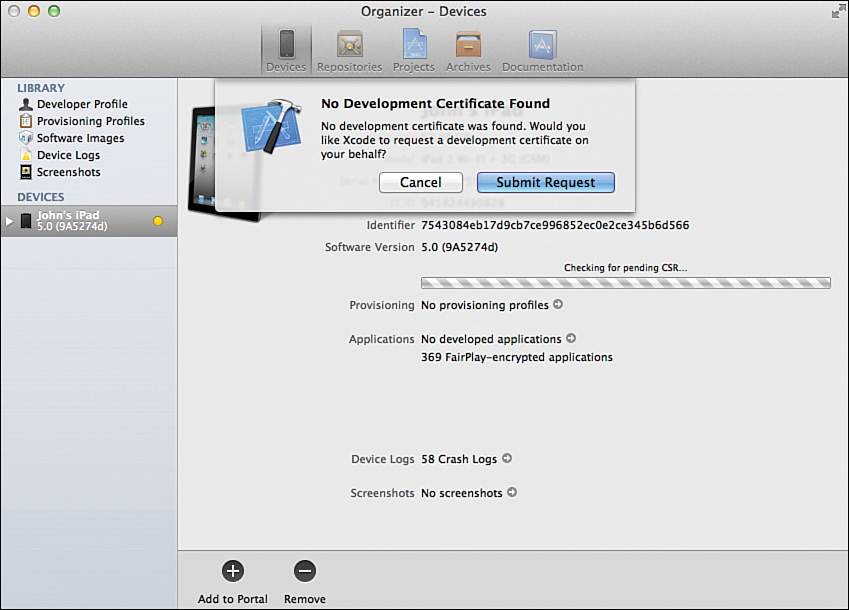
Figure 1.15. Create a development certificate.
6. Xcode communicates with Apple to create a development profile that is named Team Provisioning Profile and a unique App ID. This ID identifies a shared portion of the iOS device keychain that your application will have access to. Xcode then transparently uploads the profile to your device.
7. To view the details of the profile (and verify it has been installed), expand the disclosure arrow beside your device name in the Organizer, and then click the Provisioning Profiles line, shown in Figure 1.16.
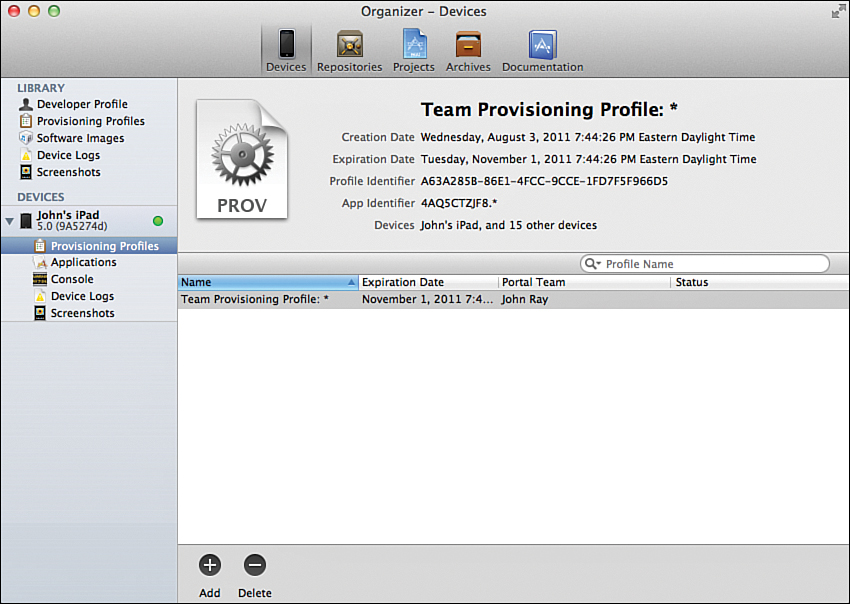
Figure 1.16. Verify that the device is installed.
That’s it! Your iDevice is ready to go, and any projects you create can be installed and executed on your hardware. You learn more about device provisioning in Hour 22, “Managing and Provisioning iOS Devices,” but you probably did not want to wait that long to run your first app.
Summary
In this hour, you learned about Xcode 4 and its relationship to Xcode 3, including the primary differences between the two IDEs. You also learned several of the ways in which development differs between iOS and Mac OS X projects.
You should now be in a position to choose between the paid and unpaid developer programs. Mac developers can develop and deploy software without paying a cent. iOS developers, however, are required to be in a paid program to test software on iDevices. Both types of developers must pay to submit applications to their corresponding App Stores.
Next, you walked through the basics of the Xcode interface. Although the interface is divided into a few general areas, the use of these areas is consistent regardless of the task you are completing. You’ll quickly get a sense of where the tools you need are located based on the five functional sections of the application.
Finally, iOS developers in a paid program were taken through the steps of preparing their devices to run their project code. Because Xcode provides an iOS simulator, this is not strictly necessary, but there is something satisfying about seeing your creation running on your very own iPhone or iPad.
Q&A
Q. If I have older projects created in Xcode 3.2, will they work in Xcode 4?
A. Yes, Xcode 4 will open your old projects, but they will not be upgraded to take advantage of all the new features of Xcode 4.
Q. Can I join just one paid developer program to get access to betas?
A. Yes and no. Joining the iOS program gets you access to the Xcode betas and iOS software releases, but not beta releases of Mac OS X. Similarly, the Mac developer program includes Xcode releases and Mac OS X betas, but not iOS releases.
Q. Are there any other good reasons to join a paid program?
A. Keep in mind that beta releases are under NDA (nondisclosure agreement), meaning that you cannot discuss them publicly. Being in a paid developer program not only lets you try out features before they are publicly available, but the Apple forums present the only legal opportunity for discussing bugs, development practices, and exchanging ideas prior to the software’s public release.
Workshop
Quiz
1. iOS and Mac OS X development are identical except for screen size. True or false?
2. A single paid developer program covers both Mac OS X and iOS. True or false?
3. Can you publish a Mac OS X app without a paid developer membership?
Answers
1. False. iOS development provides a subset of the features of Mac OS X and includes additional touch-related features not currently found in Mac OS X.
2. False. Both Mac OS X and iOS development have individual paid memberships starting at $99.
3. Yes. Although you cannot publish the app to the Mac App Store, you can still write, compile, and distribute an application on your own. The same, however, cannot be said for iOS apps.
Activities
1. Download and install the Xcode developer tools using the Mac App Store.
2. Open Xcode and use the welcome screen to create a new project. Using the new project’s workspace, click through the various functional areas of Xcode. Quit Xcode and throw away the project folder when finished.
3. If you have joined a paid iOS developer program, follow the steps in the “Preparing Your iOS Device” section to provision your iDevice for development.