
MISSION 16
Bike Indicator
Cycling is great for the environment and for your own health and fitness. No smoke comes out of your bike when you cycle, and it doesn’t use up resources such as gasoline, diesel fuel, or electricity to run it. All it takes is pedal power! To make cycling more fun and appealing, here’s a fun indicator for your bike.
Do not rely on this indicator as the only indicator for your bike. Use the correct hand signals, follow the road safety rules, use proper lights, and always wear a helmet when cycling. Be safe!
Cyclists are really hard to photograph!
There are three different options for this mission:
1. A device as an indicator on the front of your bike
2. A device as an indicator on the front of your bike with arcade buttons
3. Two devices, one as an indicator on the back and one as buttons on the front.
You need to decide NumberOfLoops and PauseLength in the following algorithm. Have a look at indicators on cars and motorbikes where you live (safely from the sidewalk!). How fast do they flash? How long do they stay on? Research!

Figure 16.1 Just a blur!
Algorithm

Build
Front Bike Indicator
Mount your device on the front of your bike. I used string through the pin holes to tie the indicator and battery on. Be careful here: if you attach the device to a metal bar, you might inadvertently connect ground to power—which is a disaster! Remember what I’ve been telling you all along? Ground to ground, power to power. We don’t ever want to connect ground and power together. I put some electrical tape on the bike just beneath the device to make sure the bar wasn’t conducting.
Arcade Button Indicator
For this build, you need the following:
![]() Four crocodile clips
Four crocodile clips
![]() Two arcade buttons
Two arcade buttons
![]() A box to hold everything in place
A box to hold everything in place

Figure 16.2 Equipment needed.
I used a plastic box to hold my device, crocodile clips, and arcade buttons in place. Plastic was really hard to work with because I had to use a drill to get the holes in the box to fit the buttons in. Drilling a plastic box is difficult because:
![]() Bits of hot plastic flew everywhere.
Bits of hot plastic flew everywhere.
![]() The box was slippery to hold.
The box was slippery to hold.
![]() It didn’t look very pretty when done.
It didn’t look very pretty when done.
I chose clear plastic so that I could show you everything attached! You’re probably better off using a cardboard box and sticking the device to the front. I used string and tape to hold everything in place. Make sure that the box is held on the handlebars securely before you set off.
1. Add the buttons to the top of the box.
2. Add your device to the front of the box, maybe using string to hold it in place. Cut a hole below or around the device for the crocodile clips to attach.
3. Connect the arcade buttons to the device. One leg of the arcade button attaches to GND. The other leg attaches to a data pin: 0, 1 or 2—it doesn’t matter which leg.
4. Don’t forget to make room for the battery.
5. Finally, make some holes in the box to attach it to the bike using string.

Figure 16.3 Device in a box.
micro:bit
Code
Indicator
Let’s create the indicators on the micro:bit using its own buttons first.

Figure 16.4 Using the micro:bit buttons.
Arcade Button Indicator
Here’s the code for one button attached to pin 0. Create another if block below it for pin 1.

Figure 16.5 Arcade button code.
I really like the arcade button build. It makes it easier to press the buttons while you’re cycling, and it looks really cool.
Back Indicator
Combine the buttons or arcade buttons with a second micro:bit and the radio blocks to create a back indicator.
1. On both micro:bits, set up the radio.
2. On the back micro:bit, display the arrows depending on what number you receive. Here’s the code just for the left arrow. Can you work out the right arrow code?
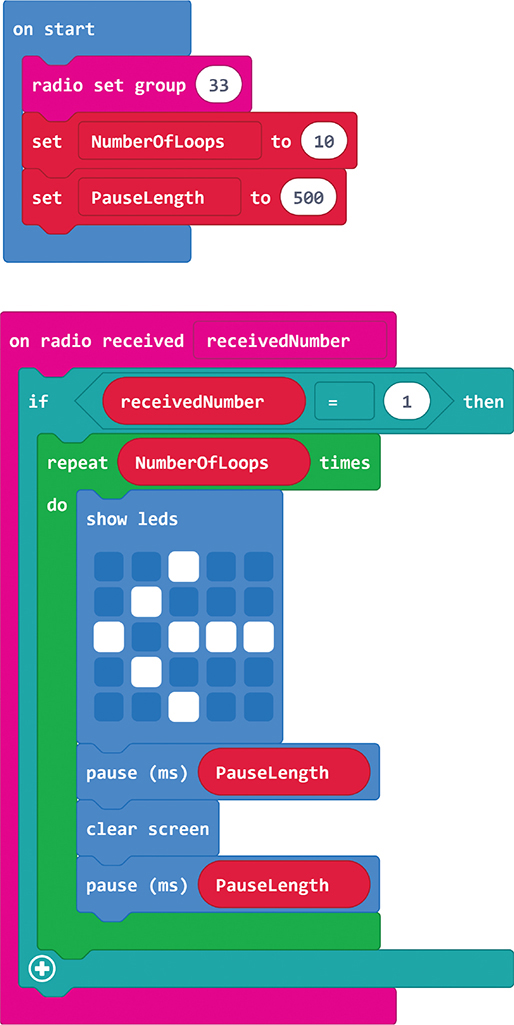
Figure 16.6 Back micro:bit.
3. Change the code on the front micro:bit.
This is the code for the micro:bit at the front to send the numbers when the micro:bit buttons are pressed:
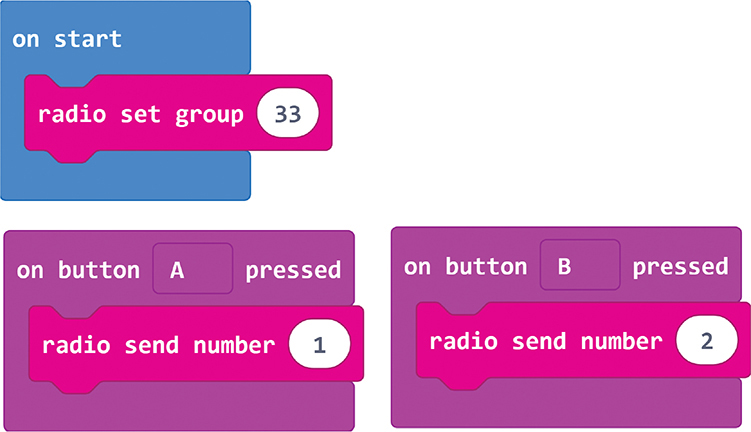
Figure 16.7 Front micro:bit code.
Here’s the code for the micro:bit attached to the arcade buttons. I’ve kept the button presses in for testing.
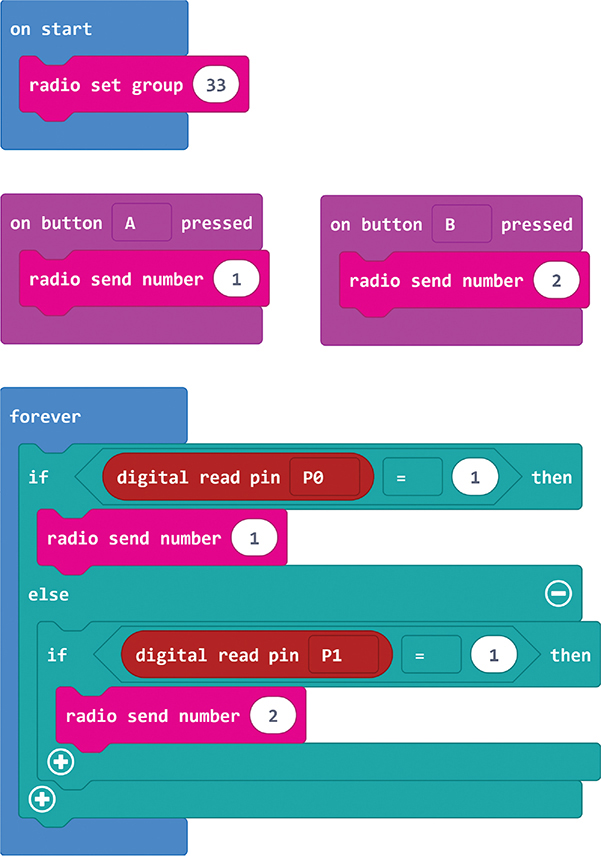
Figure 16.8 Front micro:bit arcade buttons.
Debug
For the mission with two micro:bits, I added the arrow to the front micro:bit just so I could tell which button I pressed! The first box that I had for this mission wasn’t deep enough. With two crocodile clips on the 3-V pin, one of the crocodile clips sticks up, which stopped the lid from closing. I had to start again with a different box.
Expert Level
This will really impress your friends. Do you have the light strip from Missions 4 and 5? You know what to do.
Circuit Playground Express
I think the best part of creating an indicator is having the indicator on the back of your bike. With no line of site, the Circuit Playground Express is not going to be able to act as a back indicator. It makes a great front indicator, though. Replicate the earlier code to flash the LEDs left and right, just like the direction sign in Mission 2.
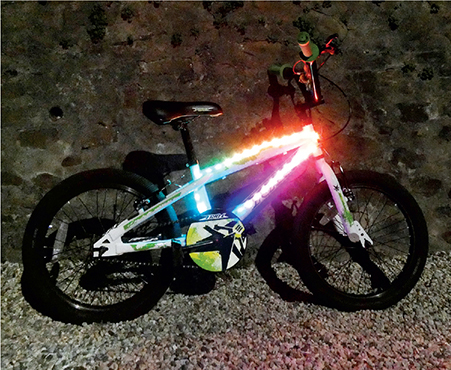
Figure 16.9 Do you have the light strip?