Enabling File-, Folder-, and Volume-Level Encryption
Enabling EFS, BitLocker, and BitLocker To Go is easy. All you have to do is open the Properties dialog box for the desired object and select the appropriate option. Here’s how to enable each type of encryption.
Enabling EFS
The first step to enabling EFS is deciding what to encrypt. Remember that individual files are stored on disk in plaintext form—unencrypted—before being encrypted. After being encrypted, the plaintext files are deleted, but not totally removed. To avoid any traces of plaintext files being left, it is recommended that you use folder encryption. Once you decide what to encrypt, open Windows Explorer and navigate to the file or folder. To encrypt the object, open the context menu by right-clicking on the object, and select Properties. From the Properties dialog box, choose the Advanced button. In the Advanced Attributes dialog box, select the “Encrypt contents to secure data” checkbox, choose OK, then choose OK again to close the Properties dialog box. The object is now stored as an encrypted object. No further action from the user is necessary. FIGURE 4-6 shows the Properties and Advanced Attributes dialog boxes.
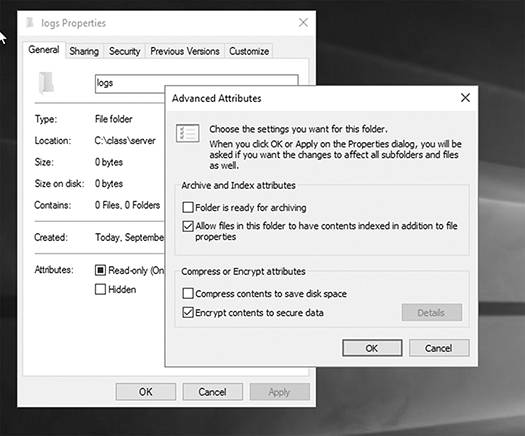
FIGURE 4-6
Object properties—Advanced Attributes.
Courtesy of Microsoft Corporation.
Enabling BitLocker
Enabling BitLocker is just as easy as EFS. First, however, ensure that you are logged on as an administrator user. To enable BitLocker, open Windows Explorer and navigate to Computer. Open the context menu of the selected volume by right-clicking on the desired volume, and select Turn On BitLocker. FIGURE 4-7 shows the BitLocker option on the object’s context menu.

FIGURE 4-7
Enabling BitLocker.
Courtesy of Microsoft Corporation.
Alternatively, you can launch the BitLocker management tool to view and manage BitLocker for all volumes. Open the Control Panel by selecting Start > Control Panel. Select System and Security, then BitLocker Drive Encryption. The BitLocker management tool displays all volumes, along with an option to turn BitLocker on or off for each volume. FIGURE 4-8 shows the BitLocker management tool.

FIGURE 4-8
BitLocker management tool.
Courtesy of Microsoft Corporation.
After selecting to enable BitLocker, Windows asks you to pick an authentication method. The authentication method tells Windows what information is required to access an encrypted volume. FIGURE 4-9 shows the BitLocker Authentication options.

FIGURE 4-9
BitLocker Authentication options.
Courtesy of Microsoft Corporation.
Once you select the desired authentication options, Windows will ask where to save a recovery key. If you lose the ability to access the primary encryption key, you’ll need the recovery key to decrypt the volume. Windows provides the following options for storing the recovery key:
Save the recovery key to a USB flash drive.
Save the recovery key to a file.
Print the recovery key.
Enabling BitLocker To Go
Enabling BitLocker To Go is very similar to enabling BitLocker. Before starting the procedure, ensure your removable device is attached. First, open Windows Explorer and navigate to Computer. Open the context menu of the selected removable volume by right-clicking on the desired volume, and select Turn On BitLocker. FIGURE 4-10 shows the BitLocker To Go option on the object’s context menu.

FIGURE 4-10
Enabling BitLocker To Go.
Courtesy of Microsoft Corporation.
The rest of the process for enabling BitLocker To Go is identical to enabling BitLocker.