
Visual Studio LightSwitch is a tool for building business applications using either C# or VB.NET. Having said that, it’s entirely possible to build a functional application using Visual Studio LightSwitch without actually writing a single line of code. The flow of building an application using Visual Studio LightSwitch starts with identifying data sources either from scratch or from an existing source. If you’re creating a new database from scratch, you’ll be using Microsoft SQL Server Express as the storage and retrieval engine. The other out-of-the-box supported data source is Microsoft SharePoint. I’ll talk about that more in a bit.
The Visual Studio LightSwitch application uses a number of different windows to present information pertinent to the current activity. Some windows, such as the Solution Explorer and Properties page (see Figure 1-2), are visible all the time unless closed. Microsoft calls this a pinned window, meaning it is pinned to the visible surface of the application.

Visual Studio LightSwitch uses the concept of a designer to simplify the process of building applications. The Data Designer is used to create or modify the structure of a data table (see Figure 1-3). The toolbar across the top of the designer gives the user quick access to functions related to the current activity. In the case of the Data Designer, this includes the ability to add a Relationship, Computed Property, Query, Screen or New Table. The other designers have a similar toolbar with different functions.

Building queries to select and sort data is another key aspect of building applications with Visual Studio LightSwitch. The Query Designer functions in much the same way as the Table Designer, giving you the ability to create a query against any defined data source. Figure 1-4 shows a parameterized query against the Name field.

Clicking the Add Screen button on the Designer toolbar will launch the Screen Designer. You can also switch to the Screen Designer from the Solution Explorer by either right-clicking on the Screen folder and choosing Add Screen or by double-clicking on any existing screen. Screens are linked to either a data source or a query.
If you have used Visual Studio in the past to create Windows Forms applications, you may find the declarative nature of building screens with Visual Studio LightSwitch a little cumbersome at first. The Screen Designer generates the user interface elements automatically and provides much more control over the layout of information without having to manually drag and drop each item from the toolbar. This makes building simple data information screens really fast.
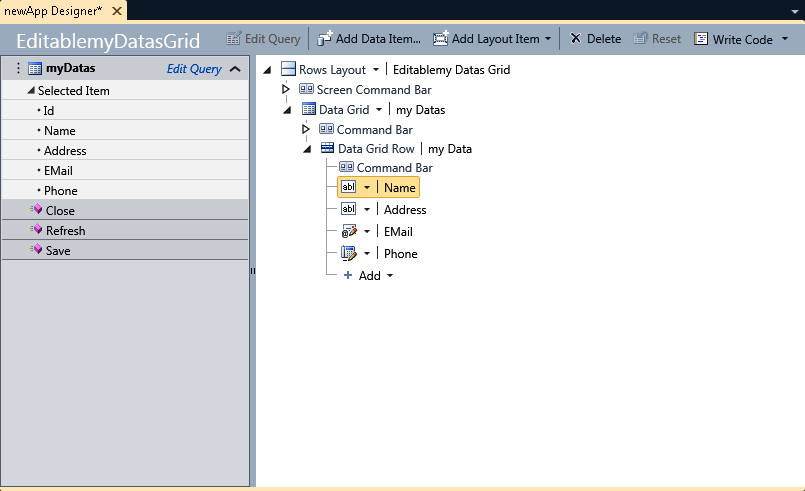
Figure 1-5 shows what you will see for a typical screen with the tree view of controls and data items on the right and the source data entities and screen methods on the left. There are convenience items, such as the Edit Query link, available to quickly take you to another task.
You do have the ability to write code in situations where you need more functionality. All designers have a button or link labeled Write Code (see Figure 1-5). It might be hidden because of the window size, but it will appear if you click on the little downward-pointing arrow on the rightmost end of the designer toolbar (see Figures 1-3 and 1-4). If you click on the Write Code link, you’ll be presented with a list of available methods applicable to the current screen (see Figure 1-6).
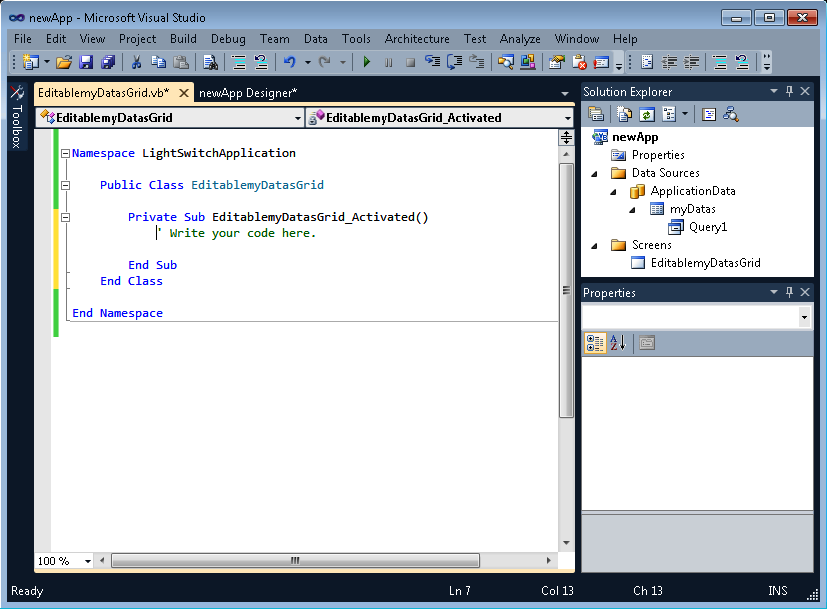
The methods should be recognizable if you’ve written any code using
Visual Studio before. In this example, the current screen is named
EditablemyDatasGrid and has a number of general methods associated with
it. The _Activated method runs just after the screen is
activated while the _Closing method runs just before
the screen closes.

If you click on one of the methods, it will open the Visual Studio code editor inside that method (see Figure 1-7). Now you have the full capabilities of writing code, such as auto completion, code formatting, and IntelliSense.
The last thing I want to point out about the Visual Studio LightSwitch application is the two different modes of the Solution Explorer. By default, the Solution Explorer displays items in a Logical View where the information mimics the different functional parts of a LightSwitch application. In general, this consists of Data Sources and Screens. You can view a solution in a more traditional Visual Studio fashion by clicking on the Project View dropdown button (fourth button from the left under Solution Explorer in Figure 1-7).
This will give you the option to switch to File View. Figure 1-8 shows what you would see for our demo app.
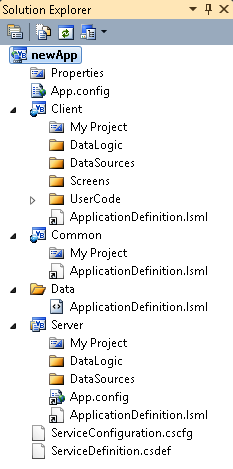
I’ll show you when this mode is needed in a later chapter.