One of the great features available with Visual Studio LightSwitch is the ability to expand the out-of-the-box capabilities with extensions. Microsoft provides several free sample extensions on the Visual Studio LightSwitch website along with both user-contributed and commercial extensions. In this section, we’ll look at one of the Microsoft extensions, the LightSwitch filter control, and then use another extension to wrap up this chapter. You can create your own extensions as well by downloading the Visual Studio LightSwitch Extensibility Toolkit.
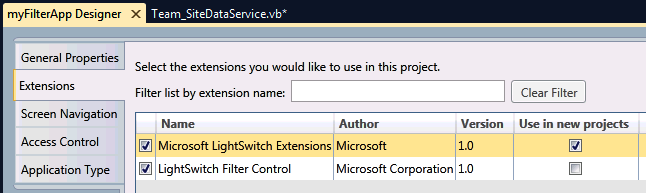
For this example, you’ll need to download the LightSwitch Filter Control from the Visual Studio Samples website (http://code.msdn.microsoft.com/Filter-Control-for-Visual-90fb8e93). Once you have the project downloaded, you’ll need to extract the files and run the .vsix file to install it. It should be in the Binaries subdirectory. To use the extension in a project, you must enable it on the project properties page, as shown in Figure 4-9.
The steps to create a screen that will use this extension are as
follows. First, start a new project, then connect to the SharePoint demo
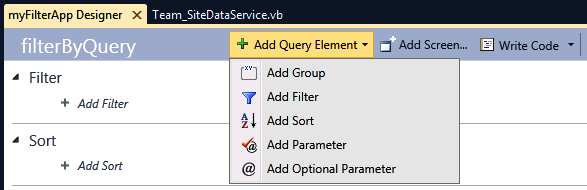
site and the UserInformationList. Next, open a query tab and simply add a
parameter using the Add Query Element dropdown, as shown in Figure 4-10. We’ll name the query
filterByQuery and the parameter FilterString.
The only line of code required to use the Filter Extension must go
in the filterByQuery_PreprocessQuery routine. To access
this code from the query designer, click on the Write Code dropdown and
select filterByQuery_PreprocessQuery. This will present
a code screen like the one in Figure 4-11. Add
the following line of code:
query = LightSwitchFIlter.Server.Filter(query, FilterString, Me.Application)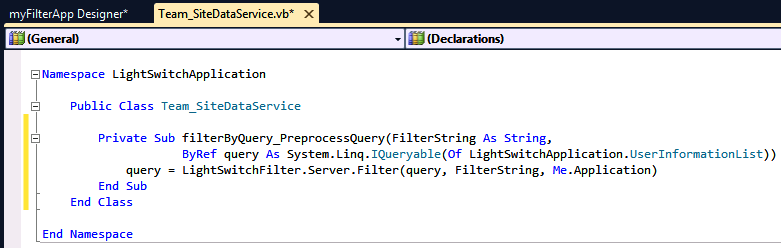
Now we’ll add a screen based on the query we just created. The
quickest way to do this is to right-click on the Screens folder in the
righthand Solution Explorer screen and choose Add Screen. From here, we
want to add a Search screen and link it to the
filterByQuery data source. In order to use the Filter
Extension, you must change the control created by LightSwitch to the
Advanced Filter Builder, as shown in Figure 4-12.
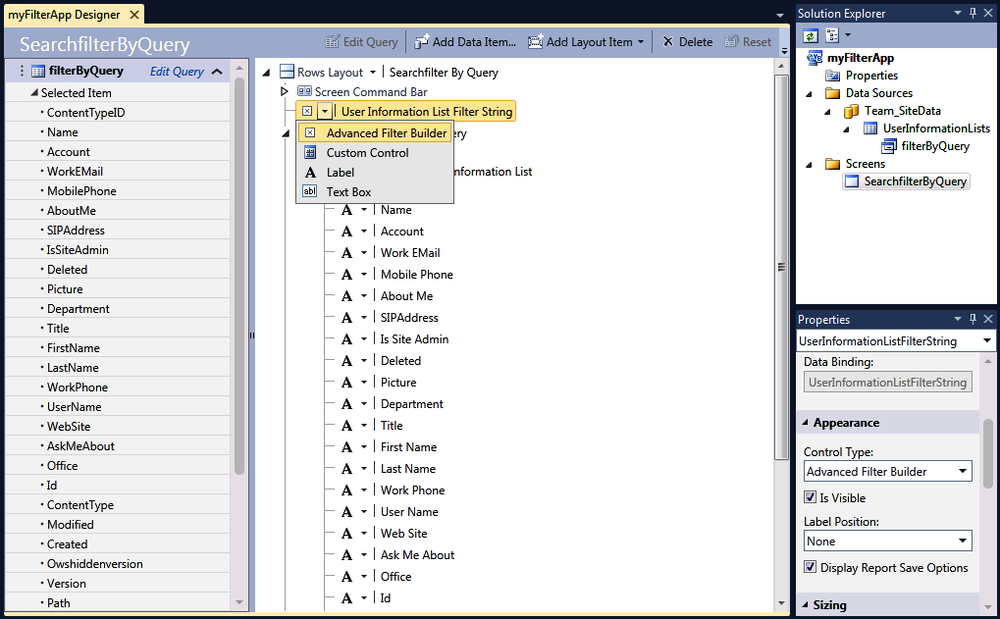
There’s one last thing you’ll want to do to make this application a little more useful. On the screen designer page, you must check the box labeled Display Report Save Options under Properties for the Advanced Filter Builder. It’s not checked by default, although you’ll want to check it to provide the option of saving queries.
The full code base of the extension comes with the project when you download the zip file. You will need to have the full version of Visual Studio Professional 2010 with Service Pack 1 (SP1) plus the Visual Studio SDK and LightSwitch Extensions toolkit in order to build the sample code. This sample provides a good example to show you how an operational extension works and what’s needed to build your own.
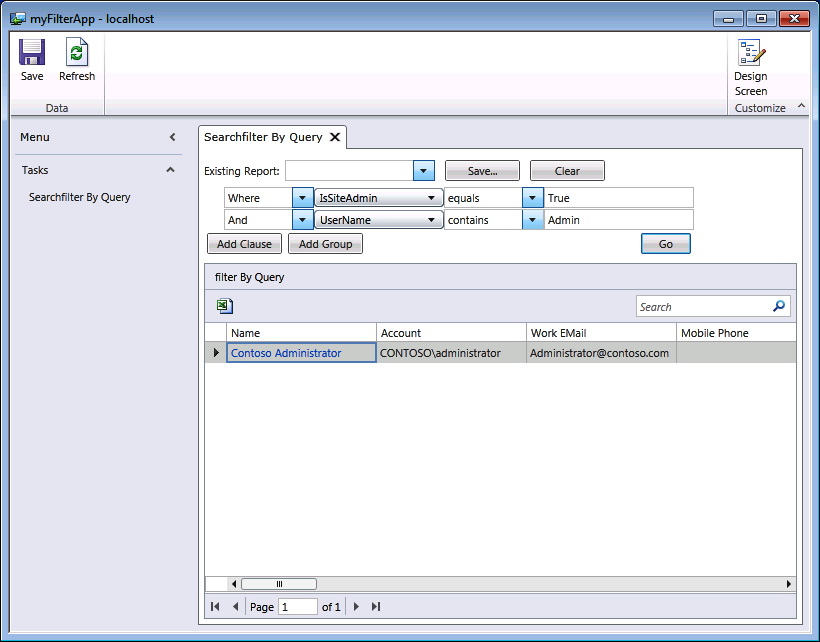
All that’s left now is to run the application. The final version
should look like what’s shown in Figure 4-13. Notice that the top
of the screen now has a number of new controls to build new queries on the
fly based on any field in the attached data source. You can also save
queries for later use with the Save button. The code behind the Save
button is a good example of how to save information to the local file
system. You can also see an example of using the
IsolatedStorageFile routine to load previously saved
queries.