There are two basic options available for installing Visual Studio LightSwitch. If you already have Visual Studio Professional 2010, you can install LightSwitch as an add-in. If not, you have the option of installing Visual Studio LightSwitch as a stand-alone tool. Microsoft offers a 90-day trial version of LightSwitch, which you can download from their download center. Be aware that the trial actually lasts for 30 days, and you can register for an additional 60 days.
The main SharePoint VM mentioned earlier comes with Visual Studio 2010 Professional installed. It does have SP1 installed, which is a prerequisite for installing Visual Studio LightSwitch. As of this writing, there is one additional action that must be taken before running the Visual Studio LightSwitch install program. One of the steps accomplished by the installation process is to install SQL Server Express 2008. This step will fail as a part of the LightSwitch installer when executed on the SharePoint VM. It is possible to download the SQL Server Express 2008 installer and run it separately (http://msdn.microsoft.com/en-us/evalcenter/ff978728.aspx?wt.mc_id=MEC_36_1_5). SQL Server Express 2008 is required by Visual Studio LightSwitch, so you must successfully install it before moving on.
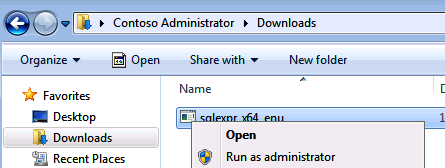
Two things are required to make this work. First, you have to run the SQL Server Express 2008 setup program with administrator privileges. The easiest way to do this is to simply right-click on the install file from Windows Explorer and select “Run as administrator” (see Figure 2-9). Second, you must wade through the SQL Express installer screens.
When you launch the setup program, you should see a screen like the one shown in Figure 2-10. Select Installation from the lefthand pane and then chose to install a new SQL instance by selecting “New SQL Server stand-alone installation or add features to an existing installation.” This will launch a process that will check to make sure you have all the prerequisites needed to install the new instance. Clicking OK on this screen will take you to another screen labeled Setup Support Files. Clicking Install will launch another process to check to make sure the system is configured properly.

At this point, you should see a screen entitled Installation Type with “Perform a new installation of SQL Server 2008” selected by default and a list of all existing instances. Clicking Next will then take you to a screen for entering a product key, which is not necessary for SQL Express, so just click Next here. Now you must check the box next to “I accept the license terms” to accept Microsoft’s license agreement for SQL Server 2008 Express Edition.
Stay with me here—there are just a few more screens. On the Feature Selection page, check the Database Engine Services box and click Next. Finally, we come to the page where you must make sure the “Named instance” box contains SQLExpress (see Figure 2-11). It typically uses this by default unless there is another instance already installed with that name.

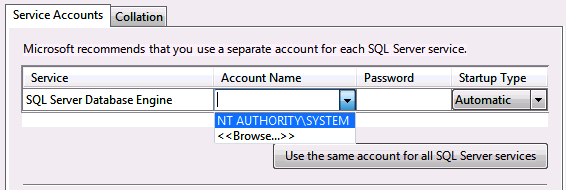
Clicking Next here takes you to the Disk Space Requirements screen. It will check to see if you have enough room on the device where you’re trying to install SQL Server Express 2008. From here, you’ll be taken to the Server Configuration screen by clicking Next. You must select an account name for the SQL Server database engine as shown in Figure 2-12.
On the next screen, click Add Current User and then Next. The next screen allows you to opt in or out of sending information to Microsoft. One final check is made and results presented on the next screen, giving you one more chance to cancel should you desire. Clicking Next will launch the installation process. Once that completes, you should be able to run the Visual Studio LightSwitch installer on the SharePoint VM without issue.
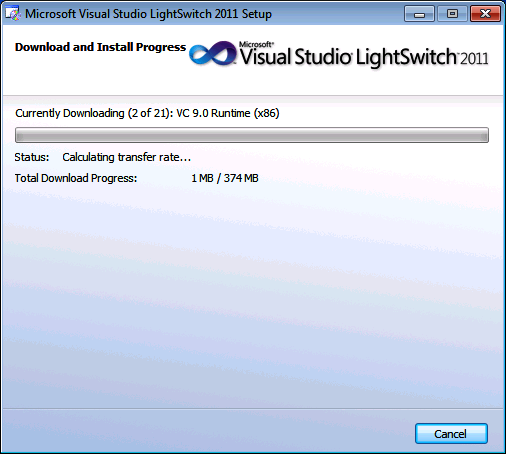
For the stand-alone option, you’ll need at least 3 GB of disk space available to install Visual Studio LightSwitch. The initial download is quite small, as it will download all necessary components over the Web. Figure 2-13 shows what you should see as the download process progresses.
You can install Visual Studio LightSwitch on any client workstation with 1 GB of memory and at least a 1.6 GHz CPU running Windows XP with SP3, Windows Vista (32- or 64-bit) with SP2, or Windows 7 (32- or 64-bit). If you choose to install using a virtual machine, you’ll need to allocate at least 1.5 GB of memory. Whatever operating system you use, you’ll need to join the workstation (or VM) to the Contoso.com domain to avoid any account privilege issues. When the installation process completes, you should be able to launch Visual Studio LightSwitch 2011 and see a screen like the one shown in Figure 2-14.