9. Develop Your Presentation Layout
Designing a portfolio that communicates who you are and what you can do.
Packaging your portfolio is like wrapping a gift. After exercising your creativity and selection skills, you carefully place your work in a box and thoughtfully fold your personality and design style around it. Then you hand it over to its recipient, who will inevitably judge the packaging as well as the content.
Just as there are an endless variety of wrapping papers, ribbons, and box styles, many options are available for packaging your book of work. But before you break out your glue gun and pinking shears, it’s important to think about how your gift will stand out in a competitive marketplace. Will it intrigue or confuse? Engage or alienate? Does it connect to your personal brand and your career objectives?
Every element of your portfolio tells a potential employer about you. The pixelated pup of my former student Brian Maya’s “Token of Appreciation” project, for instance, immediately signals that the viewer can expect to step back into the world of retro video gaming as they move forward to learn more about Brian and his brand. When you put a together package that speaks to your audience and they respond positively by inviting you to interview with them, you can walk into the meeting with confidence because you’ll be talking about what you’re proud of and what you can bring to their table.

Portfolio Types
Before locking into any of the many different portfolio types available today, you should understand each one’s potential for helping you promote your work effectively to the right audience. Keep in mind that the choices are constantly changing. Even in the several years I’ve taught Graphic Design Portfolio at the RBSD, portfolios have evolved from a single print book to having two or more (digital) versions required. Having to design and manage more than one portfolio can weigh heavily on a designer, because each book is unique but still needs to tell a consistent, cohesive personal brand story across the one or many platforms you choose. Rethinking and retelling your story after putting so much of yourself into the original version can be difficult and emotionally draining, but it’s also unavoidable if you want to reach the right audience with the right pieces.
When you’re looking for a job, you’ll need at least two types of portfolios. The first is a website—it’s how the world does business today, everyone has one, and your audience expects and appreciates a quick and easy way to view your work. You also need a print or digital book to bring with you when you interview in person.
The cost of a portfolio can vary widely. Splurging on a high-end, custom presentation book or expensive, next-generation tablet may or may not be worth it. Remember, the mission of your portfolio is to offer a preview of the great work it contains and a promise of the great work that is coming. A savvy art director will very often judge your book by its cover, so make sure the one you choose complements your work and brand and so allows the viewer to connect to what’s inside.
To help you understand your options, I’ve put together a list of the most popular portfolio configurations and reviewed their advantages and disadvantages, as well as the estimated costs to produce them. (The Resources section at the end of this book provides more detailed information.)

The traditional print portfolio
In our all-digital, all-the-time world, there’s something refreshing about a “traditional” print portfolio book—a physical binder with pages where you can arrange and display your work. A print portfolio allows you to carry and showcase actual prototypes of your best projects (packaging, product designs, renderings) so an art director can hold, touch, and experience your brand. On the other hand, it is static, has weight, and takes up real space, so the amount of content it can hold at any given time is understandably limited. A traditional portfolio can be reviewed only in person and reaches a very small audience. However, most portfolios today are presented digitally, so a one-and-only original book will tend to differentiate you from your competitors.
You can purchase a pre-made portfolio book, with or without a case, and customize it to be one-of-a-kind; design your own and put it together yourself; or have someone else fabricate what you’ve designed. To protect your portfolio book, I recommend a portfolio case, which can also accommodate additional prototypes and samples, resumes, business cards, or a pad of paper for taking notes.
Sizes and formats
• 8 x 11-inches to 13 x 19-inches (larger sizes are available, but I do not recommend them for a designer’s portfolio); includes international formats (A4 and A3)
• Landscape or portrait
Cost
• Quality store-bought portfolio presentation books and cases can cost $70 or more, depending on the size and the materials they’re made of. There are plenty to choose from (portfolios-and-art-cases.com), but I recommend Pina Zangaro presentation books because they offer a vast selection of sizes and materials, some economical customization features, and overall good value.
• If something off the shelf doesn’t work for you, consider creating a customized solution, but keep in mind that it may cost more to get exactly what you want, depending on size, materials, and finishing options—in the vicinity of $300 and up. When I was in professional practice, I designed a custom case out of mappa burl wood, with a drop bottom (for samples) and a compartment for my presentation book. Many of my clients were in financial services, and I wanted them to see how DMA’s style and presentation fit right in with their industry.
• The cost of crafting a portfolio of your own can start as low as zero dollars, but that doesn’t make it the easy route. You can use found or purchased materials, but you (or someone you know) has to have the skills to build it. One of my former students, Christi Merchant, constructed her book from debris she found on a New Jersey beach after Hurricane Sandy. Her personal brand was about travel and the environment, and the book she created captured and communicated her personal promise.

• Don’t forget to plan for paper and printing expenses. A heavier weight paper stock will give you the option to laser-print on one or both sides, because you can’t see through it to the work on the back. (Note: Even if you’re not printing on two sides, you may still want two-sided paper because it tends to be brighter, which makes the work stand out.) If you decide to use a Pina Zangaro presentation book, I recommend prepunched, matte inkjet paper because you can simply print and place it in your book. Twenty-five sheets of paper can cost upward of $65, but you can reduce your expenses by printing a practice book on regular paper and reviewing everything carefully before you print the final. Adhesive strips are a less expensive option, but you’ll still need to buy paper, and you have to be a good assembler or your pages will be uneven and wavy. You may be wondering where I stand on plastic sleeves. I’ll just say this: they are outdated, and I do not recommend using them.
Pros
• One-of-a-kind portfolio case
• Experience the sense of touch
• Project details can be viewed up-close
• Does not rely on a computer or the Internet to display
Cons
• Static format and slightly outdated, as per industry trends
• Limited content (no links to videos, PDFs, or social media)
• When you leave it with a hiring manager or client, you’re without it and may have to follow up to get it back
• Potential to sustain damage or be lost
• Project details can be viewed up-close (a negative if fine details are not your forte)
• May be costly to purchase
• Need access to a color printer or have the ability to purchase printing services
• Labor intensive, and craftsmanship skills required
Best for
• Designers with a focus on the print industry and those who have physical assets to show (i.e., print, packaging, interior, textile, industrial)
• Designers applying for positions at companies that do little or no digital design work
• Anyone who wants a tangible, non-digital presentation
The interactive PDF portfolio
An interactive PDF (a.k.a. digital portfolio) is a portfolio on the go—you can take it with you to wherever you’re meeting someone, flip it open, and show your work. It’s light, easy to carry, and has become as commonplace as a print portfolio once was. Like a website, your digital portfolio offers a full range of interactive content, but its use is typically limited to in-person presentations. Designers tend to prefer the iPad (the full-size Retina version is better for viewing projects), but there are also good PC versions on the market. Although some designers rely on the Internet for their tablet presentations, I encourage you to download your files onto your device (to view via Acrobat Reader or iBooks), so you can pull it out on the fly and show your work even when you have no Internet connection.
Sizes and Formats
• iPad Air: 2048 x 1536 pixels; iPad: 1024 x 768 pixels; Nook: 1,440 x 900 pixels, to name a few
• Landscape, portrait, or a combination of both
Cost
• The cost of purchasing Apple’s top-of-the-line iPad could run you north of $800 for the Wi-Fi and cellular model, but there are other devices available for around $400. If you cannot afford to buy one, ask to borrow one from a friend or relative, but it should be in good shape and available for impromptu interviews.
• Some apps for displaying your work are free, such as Adobe Content Viewer, Adobe Acrobat Reader, iBook, and others. If you have a subscription to Adobe Creative Cloud, you can post your portfolio online and open it up in the Adobe Acrobat mobile app. There are plenty of other apps out there that you have to pay for, and they are similar to a website building application—you drag your work into an existing template. I recommend you use Behance instead and design a layout yourself.
• You should protect your PDF as you protect your presentation book, so consider buying a case, cover, and/or stand for your tablet for carrying or presenting your work. Buying a case and incorporating it into the overall presentation speaks volumes about your ability to address the details.
Pros
• Truly interactive presentation
• Embeds or links to videos, PDFs, and social media channels
• Provides the viewer with an engaging experience of your projects and personal brand
Cons
• Requires a certain level of technical knowledge
• Initial tablet cost
Best for
• Designers who want a presentation option other than, or in addition to, a print portfolio
• Designers who want to show off technical proficiencies (website, motion, video, mobile apps)
• Designers who want to create an interactive experience
The website portfolio
When you have a website, anyone connected to a digital device (computer, tablet, phone) and the Internet can see your portfolio 24/7. A website portfolio is interactive; includes a broad range of content (print, motion graphics, videos, web links); can be accessed quickly via a web link; and has the potential to reach a large audience through social media and other channels. Most hiring agents will screen your website to qualify you before they schedule a face-to-face interview. In addition to your customized site and unique domain, websites such as Behance or Coroflot can be a great resource for connecting your work to networks of creatives and recruiters scouting for talent.
Sizes and Formats
• Screen sizes vary, so when you’re developing your website, think in terms of resolution and designing for your audience. According to Global Stats, 1366 x 768 pixels is most common. Remember: the higher the screen resolution, the smaller everything will look. Consider how your layout and images will appear in a responsive design.
• Landscape, responsive
Cost
• Purchase a domain name (costs vary, must be renewed periodically)
• Subscribe to a web hosting plan (costs vary, must be renewed periodically)
• Behance and Coroflot are free, but some creative networks may charge you. Behance ProSite is included with your Adobe Creative Cloud subscription at no extra charge.
Pros
• Easiest and quickest way to show your work (via URL link)
• Embeds or links to videos, PDFs, and social media channels
• Provides the viewer with an engaging experience of your personal brand
Cons
• Time-consuming to create
• Requires a certain level of technical knowledge
• Recurring annual costs (domain name and hosting plan)
• Requires Internet access to view
• Potential browser compatibility issues
Best for
• Every designer is expected to have one
• Designers who want to show off their technical proficiencies (website, motion, video, mobile apps)
The interactive PDF mini-portfolio
The mini-portfolio is the same thing as an interactive PDF portfolio, but smaller. For many job openings, you may be asked to submit a PDF portfolio that showcases a handful of design samples. Hiring managers look at these mini-portfolios first and then head to your website if they like what they see. As always, take the time to customize your samples to the needs of the company and position you’re interviewing for. It’s easy to create a series of PDFs that target specific audiences for specific types of work (websites, illustrations, logos). Create several PDFs that target different audiences and communicate your specialty. Select two to three projects—or eight to ten pages—to tease your viewers about what’s to come. Include web links to relevant videos or websites. Upload everything to your cloud account: if you meet someone, you can send him or her a quick email with your work.
Sizes and Formats
• You can design any size, but I recommend that you keep the same format as your digital or print books so you can minimize the need to modify your layouts. Select a size that can be viewed on a digital device or printed on standard 8.5 x 11-inch paper.
• Landscape, portrait, or a combination of both
Cost
• See Interactive PDF Portfolio
Pros
• Easy to email or send digitally from the cloud
• Embedded; little or no difficulty reading files
• Easy to print
• Can be created relatively quickly
Cons
• Static
• User needs to open the file
• Shows a narrow scope of what you can do
Best for
• Designers with a specialty skill or presentation targeted to a particular job, company, or industry
Portfolio Content
The content of your portfolio must be substantial and varied, or no one will understand your range of qualifications. You need to pack a lot of substance into your portfolio, and the choices you make about page layout, portfolio type, and content says a lot about your brand. Be sure that everything you include works in the context of each portfolio type you create.
Introduction. A starter page that introduces your brand.
This “handshake” page can be your logo, a personal brand statement, or an animation/video. Its purpose is to set the tone of your portfolio and create an intimate, yet quick, introduction to wonderful you.
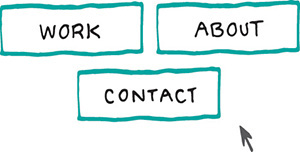
Index. A list of projects included in your portfolio.
The index helps your viewer understand the content and context of your portfolio and helps them get to the projects they want to see, based on their needs, interests, or subject matter. For a print portfolio, this is your table of contents; for the web, it is your navigation bar.
Project images. The images that explain a concept or create an engaging sensory experience.
A variety of digital presentation formats, such as custom photos, digital mock-ups, composed graphics, videos, motion graphics, or interactive prototyping tools can give your portfolio focus, depth, and energy.
Text. The words and sentences that help communicate concepts when it is not easily conveyed through visuals.
A small paragraph or well-placed line of copy can enrich how you showcase a project or help your viewer make important connections if the visuals alone can’t do it. Text can provide details, background, or a context for why you selected specific touchpoints. Some stories, such as an in-depth case study that reveals your process, require more text than others.
About. A short, insightful description that reveals something about you.
Share your vision statement, explain how you are different from the competition, or tell the story of how you became a designer. Be animated and approachable, but don’t spill it all too soon. Save some revelations for the interview.
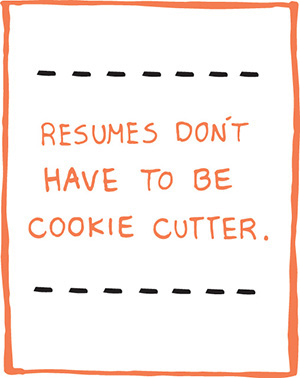
Resume. A detailed summary of your education, skills, and professional experience.
Your resume is a more expansive and comprehensive overview of who you are, what jobs you’ve held, and the responsibilities and accomplishments you’ve accumulated to date. You should review and adapt your resume whenever you apply for a particular job or if you’re targeting a particular industry. Post it to your website for potential employers.
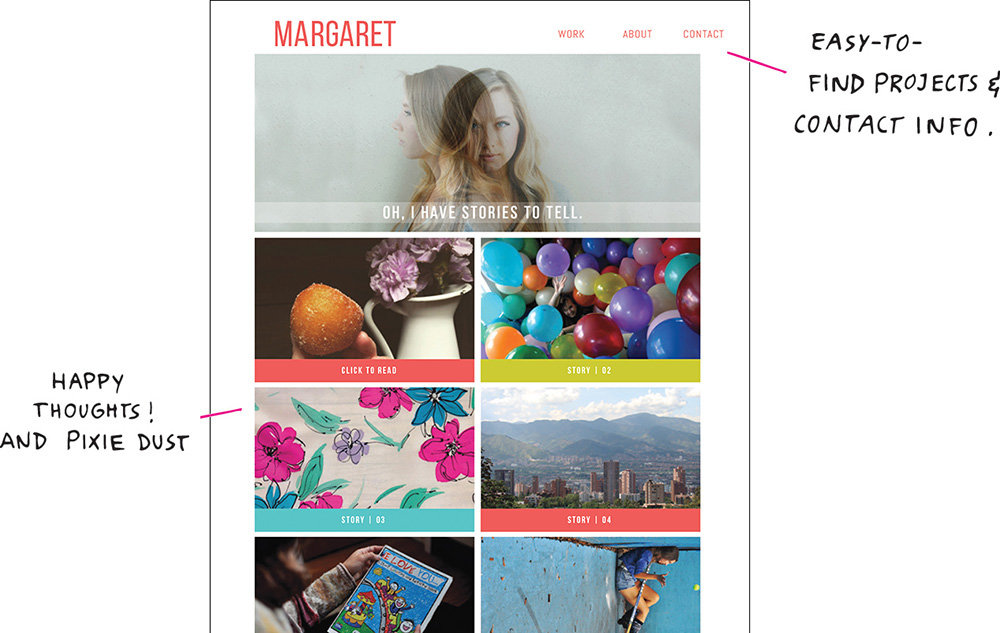
Contact. A professional email address and phone number where you can be reached to discuss a project or arrange an interview.
As you break into professional practice, it’s a good idea to have an email address associated with your domain name, and limit your personal email addresses, such as a Yahoo or Google, to personal use. Many designers link their social media accounts to give potential employers and clients additional ways to make contact, but don’t direct people to a platform that you don’t use or update regularly. Wherever you plan to send your viewers, be sure to check your incoming messages frequently and respond promptly. And, don’t bury your contact information in the dark recesses of your portfolio—your audience should be able to find your information with little or no thought.
Credits. A brief acknowledgment (name and contribution) of who you collaborated with and how it added to your project.
When another designer adds to your project (room schematics from an interior designer, for instance) or collaborates with you to enhance a concept, they deserve some credit. Acknowledging the contribution of others demonstrates your appreciation for their efforts and confidence in your own abilities. Never take credit for work that you didn’t do.
Copyright. A line of text that notifies others that the work is proprietary and legally protected.
The copyright identifies who created the work and identifies the year of first publication. This can apply to writings, artwork, photographs, and other forms of authorship protected by copyright.
Pixie dust. A little bit of magic goes a long way.
Without your pixie dust, your portfolio might come across as lackluster and unexceptional. Employers want talented and skilled professionals, but a designer with rich experiences, unique interests, and notable passions will captivate their attention. Let your portfolio stand out!
Portfolio Development Strategies
When it comes to developing a strategy for your portfolio, don’t think in terms of right and wrong. Instead, reflect on what you can do to create one that is representative and successful. Before you design the layout, consider how the following strategies will make your presentation seamless, fluid, and focused.
Make the layout simple. The layout you use for individual projects and your overall portfolio must be straightforward, well organized, and all about the work. Keep the bells and whistles (gradients, drop shadows, patterns) to a minimum, because they can interfere with the flow of the layout. Do you tend to ramble on about your project idea and overwhelm your viewer with too much text? Is the composition of your images unbalanced? Has a pattern become a focal point? These are all distractions that can swing your viewer’s attention away from the experience you want them to have.
The experience of viewing a portfolio should be like taking a Sunday drive. You set out on the journey with enthusiasm and optimism and, as long as the scenery is beautiful and the ride is enjoyable, you keep feeling pretty good. But when you hit traffic, bumps in the road, and a detour, disappointment sets in because your hopes for the day have been dashed. The drive is no longer pleasurable; you’re just looking for another road to drive on or a place to pull over. If your viewer (the driver) is distracted by your layout choices or unnecessary graphic elements (bumps in the road) or has to ask why you did something (detour), he will undoubtedly move on to another presentation (alternate road) or pull over (stop looking altogether). Hiring agents review many portfolios before recommending a designer, so yours should be effortless and pleasing to move through.
Plan the sequence of projects. There is a strategy for sequencing the projects in your portfolio: show your second-best project first and your strongest one last. The logic behind this approach is to begin with an outstanding project but end with a knock-out. The last project is the one that resonates longest with the viewer, so the impression that lingers will be one of a quality book. The projects in the middle need to act as the bridges that connect one piece to the next. If that flow is missing, you may lose the attention of the viewer before they get to your final portfolio project. Don’t place two similar projects together (industry, specialty, like colors) because they can merge into each other and your viewer may think they’re seeing one long project. Go with your gut instinct and determine an order that incorporates your overall brand story and facilitates easy movement from page to page, project to project, and beginning to end.
The sequence of your projects must also make logical sense. For example, if you’re applying for a position at a web development company, lead with your website projects. If an employer is looking for someone trained in a particular technology (motion, illustrations, branding), arrange your work by specialty. If you’re applying for a position as an art director for an advertising agency, make your focus about solving problems and not your technical proficiency.
Two years out of school, one of my former students, Michelle Neunert, contacted me for advice. She was beginning a search for another job and wanted to consult with me on what should go into her portfolio. Michelle had some professional work to use but needed to supplement with student projects. She asked me to recommend a strategy for sequencing her projects. I gave her the same advice I’m giving you: always show your best projects, targeted to the industry you want to work, and wrap it all in your brand. Let your portfolio tell a story about the talented, beautiful you.
Create an engaging experience. It can be challenging to captivate your audience because every viewer is different and you may be targeting several audiences. Regardless of who’s looking at your book, when your viewer discovers something new, all five of their senses will unite to create a sense memory. The more someone’s senses are affected, the stronger the memory will be. Dramatic use of scale and focus, interesting and varied compositions, and dynamic color palettes can be applied across print and digital portfolio types, and each component provides an experience unique to the viewer.
Your audience’s experience will differ from printed to digital portfolios, but you should aim for creating the same kind of impact. A printed portfolio is a physical object, which offers the advantage of stimulating the sense of touch. You can provide interaction by using different techniques, from creative die cutting and embossed effects to a uniquely constructed carrying case. When your audience has a chance to experience your portfolio with their hands as well as their eyes, your work becomes much more appealing and memorable.
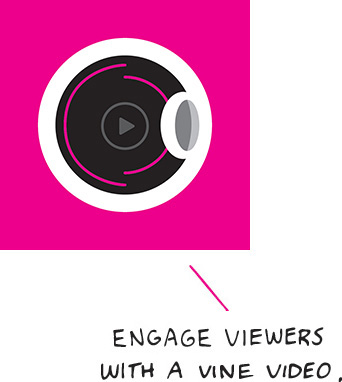
The digital portfolio experience can be just as engaging. Videos and interactive prototyping tools (for app and web design) allow the viewer to participate with your work. (Check out Brian Maya’s Squeaky Lean mobile app prototype and Vine video at brianmaya.com.) Surprising features and unexpected twists, such as buttons that lead down unpredictable paths, can hook your viewer and keep them moving through your portfolio. Everybody talks about the importance of that “first impression,” but when was the last time you considered how important a second impression can be? Nothing beats that moment when you dazzle and delight your audience by surprising them with a brand new element—don’t give them everything all at once. An effective presentation is a multi-layered, multimedia experience. You want your audience to be so engaged in your story that they stay for the whole thing.

Portfolio Layout
The way you arrange elements on a page speaks volumes about your design sensibilities. Strong compositions are neat and organized, have a clear hierarchy of information, and have a professional appearance. Your layouts should attract attention, demonstrate a coherent logic, and create consistency and balance. Is the grid you created flexible enough for a variety of layout options? Did you include white space to give your work room to breathe and your images to generate excitement? Do the pages of each layout support the overall project, and do the projects support and enhance one another? Don’t be overwhelmed by the amount of potential layout options. This is an exercise in page design, and if you follow the creative process (as you should for all design projects), your portfolio layout will serve as a meaningful and effective showcase for your work.
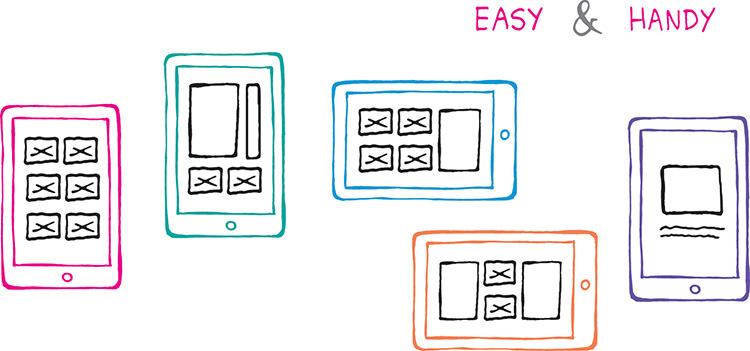
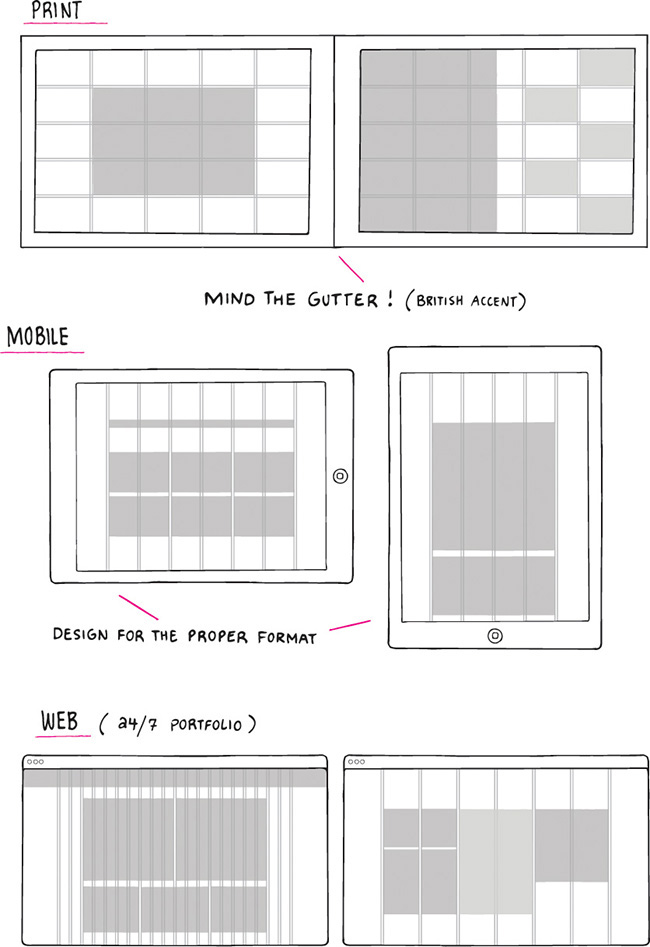
There are four steps to designing a portfolio layout:
1. Define the margins. Before you create your grid, understand the amount of space you have to work with. Identify the page size, orientation, and if you are working with single- or double-page spreads. Use any predetermined gutter space (between columns), bleed (for printing project pages), and binding margin (space for inserting pages into a print portfolio) to determine the live area. Once this step is completed, define a border around all four sides (with slightly more space on the bottom), and that’s the live page area that contains your content. Page layouts differ from print to digital, so make sure you address each before you begin to sketch.
2. Create a grid. A grid is a pattern of vertical and horizontal lines that define and reflect the compositional proportions of the page. Grids are like invisible glue that provides the foundation to the page, balance to the content elements, and order to both print and digital layouts. Art directors are savvy to the grid—they may not quickly identify what your pattern is, but they will know when something does not align.
3. Add the content. Once you select the appropriate and necessary elements for the portfolio you choose, lay them out on the page. There should be a rhyme and reason to where you place these elements. Grids lead to a consistency of layouts per page, per project, and your overall portfolio presentation. Remember, if you’re designing for small portfolio types, you may need to reduce the amount of images on a page. Yes, your viewer can zoom in, but you want to make sure they have a full experience from the start.
4. Design the layout. If you’re reading this book, it’s safe to assume that you have some degree of knowledge and experience in design. You’re in this field because you want to design, so this is when you step up, show what you are made of, and create the best possible layout to showcase your work and communicate your brand message. Your overall portfolio layout must communicate the essence of your brand, and your portfolio’s appearance must be unified with your brand touchpoints. This includes using the same fonts, colors, images, and layout style that you used for your personal brand identity.
The first time you design the layouts for your portfolios is the most difficult. Once you have a solid foundation in place, updates will come much more easily. Remember, your portfolio represents your vision of who you are and what you can do as a designer—not anyone else’s. To help guide you through the process, ask one of your professors, a mentor, or a colleague for their opinion and keep your message on track. By this time, it’s probably not news to you that your portfolio is really never finished. Just as your personal brand is organic and ever-changing, your portfolio will be too.

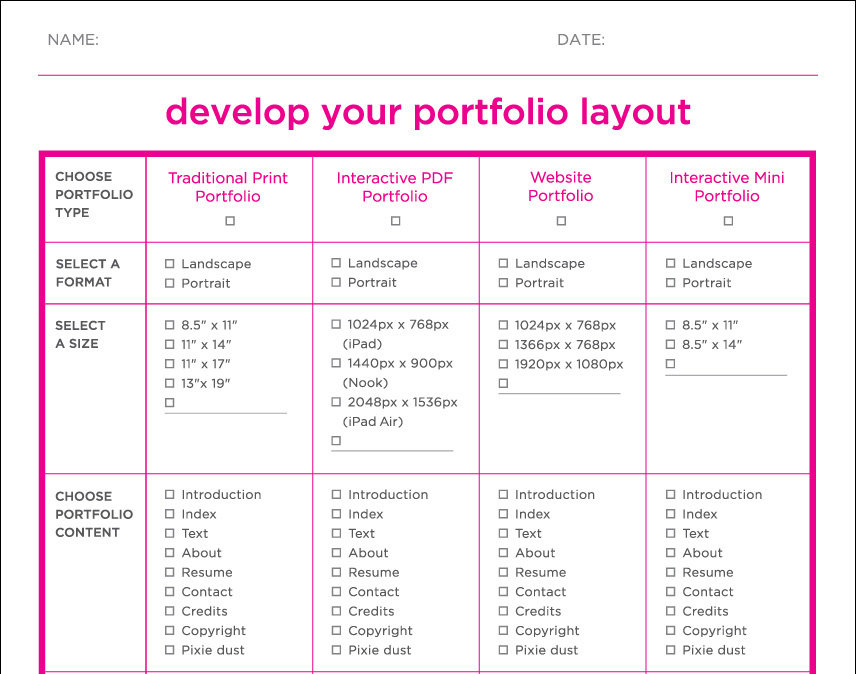
Now that you know what is required to design a successful portfolio, it is time to develop yours. Use the worksheet and instructions below to build your portfolio layout.
• Choose a portfolio type, based on its purpose
• Select a format and size
• Choose your portfolio content
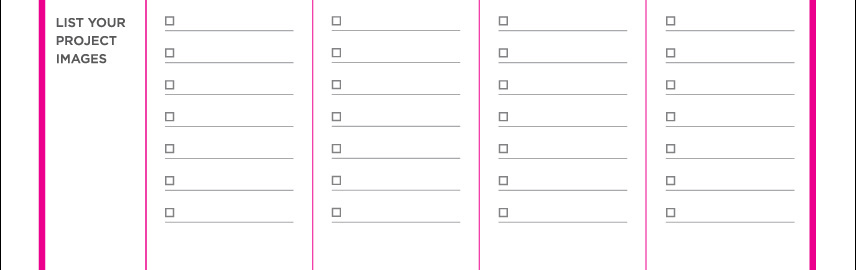
• List your project images
• Design a layout template