Connect to a Network
Whether you’re working in your own home or helping customers with a public hotspot, once you’ve set up a Wi-Fi network and connected it to the internet, you’ll want to configure your devices to connect to it.
Read this chapter to learn how to connect in macOS (just ahead), Connect in iOS and iPadOS, Connect in Windows 10, Connect in Android, and Connect in Chrome OS.
Connect in macOS
Join a Wi-Fi network by choosing it from the Wi-Fi ![]() menu on the system menu bar. Macs continuously look for networks, and a list of any yours has currently found appears in this menu when the Wi-Fi adapter is on (Figure 29). (If it’s off, click the Wi-Fi
menu on the system menu bar. Macs continuously look for networks, and a list of any yours has currently found appears in this menu when the Wi-Fi adapter is on (Figure 29). (If it’s off, click the Wi-Fi ![]() menu and then choose Turn Wi-Fi On.)
menu and then choose Turn Wi-Fi On.)

To join a network when the network broadcasts its name—as most do—choose the network name from the Wi-Fi menu. Enter the network’s password if it’s protected.
To connect to a closed (hidden) network, choose Join Other Network and then enter its name exactly. You also have to select the Security method yourself.
After the connection is completed, the Wi-Fi menu’s icon ![]() switches from gray to black, with the number of black waves indicating signal strength by their quantity. It switches to two overlapping chain links
switches from gray to black, with the number of black waves indicating signal strength by their quantity. It switches to two overlapping chain links ![]() if you’ve connected to a personal hotspot.
if you’ve connected to a personal hotspot.
Although you should now be able to access the internet normally, if the network is an unencrypted hotspot, you may see a floating window that shows a hotspot login screen. After agreeing to the hotspot’s terms or entering login details, if the window doesn’t close by itself, click Done. This window can be dismissed by clicking Cancel.
The next time you’re in range of that network, if you’ve checked “Remember this network” (as noted in the sidebar above), your Mac will automatically reconnect. You can change that via these steps:
Go to Apple > System Preferences > Network.
Click the Wi-Fi adapter’s entry in the list at left.
Click the Advanced button at right.
In the Wi-Fi tab, scroll to the network name in the Preferred Network list.
Uncheck the Auto-Join box to its right.
Click OK and then click Apply.
You can instead click the minus sign ![]() button in step 5 to remove the network, but then you lose its stored password. You’re immediately disconnected. If you delete the entry and use iCloud Keychain, the Wi-Fi network entry is removed from all connected devices.
button in step 5 to remove the network, but then you lose its stored password. You’re immediately disconnected. If you delete the entry and use iCloud Keychain, the Wi-Fi network entry is removed from all connected devices.
While still in range, you may disconnect from a network in a couple of ways:
Hold down the Option key and open the Wi-Fi
 menu. The menu item Disconnect from Current Network Name appears. This menu item also appears without the Option key if the Mac is connected to a Personal Hotspot. Choose it, and the Mac is disconnected from the network and will not re-join it unless you select it again or the device leaves the range of the network and returns.
Choose Turn Wi-Fi Off from the Wi-Fi
menu. This disables the device’s network connection entirely.
Connect in iOS and iPadOS
iOS and iPadOS let you join any Wi-Fi network with a few taps. If the Ask to Join Networks option is on in Settings > Wi-Fi, then whenever you’re in range of any open Wi-Fi network and not already connected to one, the operating system pops up a dialog asking if you want to join. Tap the network you want, and enter a password if prompted.
You can also join a network by tapping its name in a list:
In the Settings app, tap Wi-Fi to open the Wi-Fi view (Figure 30).

Figure 30: The Wi-Fi view in iOS lets you tap a network to join. Select the network from the Choose a Network list by tapping it. (If the network you’re trying to find doesn’t appear, tap Other—you may have to slide down to find Other.)
Enter a password if prompted.
You’re now connected. Tap the blue info ![]() icon next to the connected network for TCP/IP details, such as the assigned IP address.
icon next to the connected network for TCP/IP details, such as the assigned IP address.
There’s another way to select a network, too. Swipe to reveal the Control Center, hold on the network card, then hold on Wi-Fi. A list of networks appears and you can tap one to join.
Forget a Network in iOS or iPadOS
iOS and iPadOS will automatically connect to this network every time it’s in range. You can change that behavior by taking these steps:
Tap Settings > Wi-Fi.
Tap the currently connected network.
Tap Forget This Network.
The operating system immediately disconnects you, and you will remain disconnected. If you’re using iCloud Keychain, it also deletes the network entry from all of your connected machines.
Disconnect in iOS or iPadOS
To disconnect while in range of the network, do either of the following:
Swipe to bring up the Control Center, and then tap the blue (connected) circle with a white Wi-Fi icon within it. The symbol changes to a white circle with a black Wi-Fi icon. Tap again to reconnect; it will also be reenabled the next morning automatically.
Tap Settings > Wi-Fi and turn off the Wi-Fi switch to disable the Wi-Fi adapter. While it remains off, you’re disconnected.
Connect in Windows 10
To connect to a network in Windows 10 or later, follow these steps:
Click the Wi-Fi menu in the System Tray.
A Networks pane appears, showing available Wi-Fi networks (Figure 31).

Figure 31: The Windows 10 Networks pane shows which network is connected, if any (Portage Airbasestation in this case), as well as the names of any other available networks. Click the network to which you want to connect, and optionally select the “Connect automatically” checkbox. Then, click the Connect button.
Enter a password, if prompted, and click Next (Figure 32). Windows automatically figures out the right type of passphrase to send.
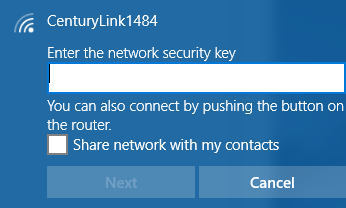
Figure 32: Enter the network’s security key and click Next.
If the connection is successful, you’ll see a Connected label appear beneath the network’s name in the Networks pane.
Forget a Network in Windows 10
Windows 10 will automatically connect to this network every time it’s in range in the future. You can change that behavior by forgetting the network using these steps:
Click the Wi-Fi menu in the System Tray.
Click Network & Internet Settings.
Scroll down, if necessary, to find “Manage Wi-Fi settings” and click that.
Under “Manage known networks,” click the network name and then click Forget.
Windows immediately disconnects from the network.
Disconnect from a Network in Windows 10
To disconnect from a network in Windows 10, you can choose either of the following methods:
Right click the connected network and click the Disconnect button.
Click the blue box in the lower-left corner of the Wi-Fi pop-up menu, which shows the name of the network. This turns Wi-Fi off, disconnecting and disabling.
If you don’t see any Wi-Fi networks listed, make sure the button in the lower-left corner of the pop-up menu reads Available.
Connect in Android
It only takes a few steps to connect to a Wi-Fi network in Android:
From the home screen, tap Settings.
Tap Wi-Fi. A list of networks should appear (Figure 33).

Figure 33: Android shows the list of available networks. Tap the network you want to join.
If it’s password protected, you will be prompted to enter the security key (Figure 34). Tap it in, and tap Connect.

If you connect correctly, the network appears at the top of the Wi-Fi list with the Connected label beneath its name.
Forget a Network in Android
In the Wi-Fi list, hold down on the network name and select Forget Network. You’re immediately disconnected.
Disconnect from a Network in Android
To disconnect from a network in Android, you do either of the following:
Tap the network name and then tap Disconnect.
Tap the switch at the top of the Wi-Fi list, which turns Wi-Fi off and thus disconnects the network.
Connect in Chrome OS
Google’s Chrome OS runs the many inexpensive, powerful, cloud-connected notebook computers known collectively as Chromebooks, though they are made by many different hardware manufacturers.
You can easily connect from Chrome OS to an Apple base station, just as to any other Wi-Fi router. Follow these steps, which are quite similar to Android, but not identical:
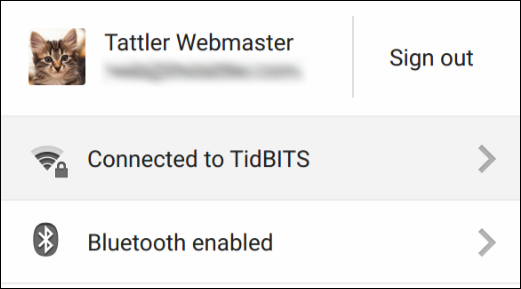
In the lower-right corner of the screen, click your avatar’s icon (Figure 35).

Figure 35: The status bar shows network status, including this x’d out icon if there’s no currently connected network. A panel appears, showing the current state of the Chromebook (Figure 36). Click the network area, which may show a Wi-Fi network name or say “No network.”

Figure 36: The Chrome OS status area includes networking information. A list of available networks appears. Click the network you want to join (Figure 37) or tap Join other
 to enter a closed network’s name.
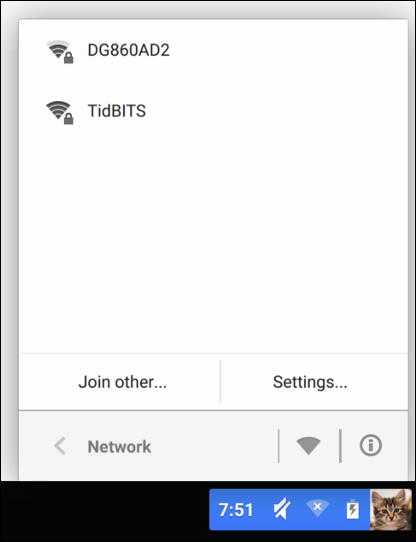
Figure 37: Chrome OS displays available networks. If the network is password protected, you’re prompted to enter that password (Figure 38). (Click the “eyeball” icon to see the password as you type.)
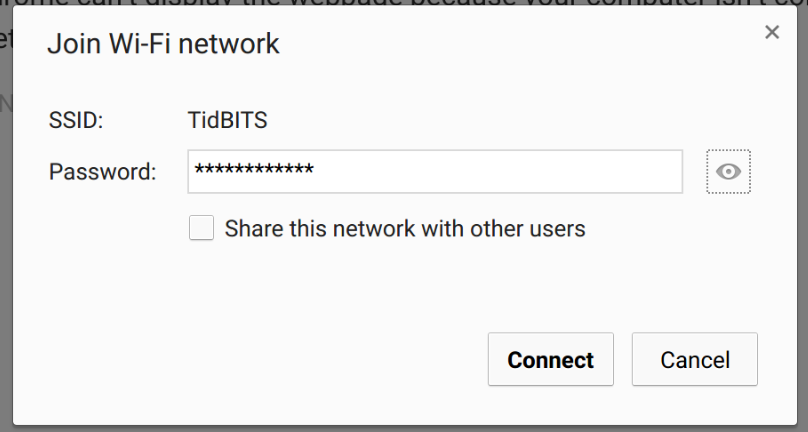
Figure 38: Enter the network password when prompted. Click Connect.
If the password was entered correctly and the network is working properly, the Chromebook connects to the network. You can click the status bar to confirm the connection (Figure 39).
You can optionally type chrome://settings into the browser location bar and click Add Wi-Fi to add a network.
Forget a Network in Chrome OS
In the Wi-Fi network list, click the network name, and then click Forget.
Disconnect from a Network in Chrome OS
To disconnect, click the network name and then click Disconnect.