Pick Wi-Fi Network Gear
I expect you bought this book for one of three reasons:
You’re setting up a network from scratch in a new location, and want to know the latest and smartest way to set it up.
You have a network that doesn’t meet your needs in terms of speed or coverage, and you want to upgrade one or more access points or gateways, while keeping most of the network intact.
The current network you’re using has fully displeased you, and you want to swap out everything. You know what kind of performance you get now, and you want to improve upon it.
Since this is the crux of why you may have purchased this book, this chapter will address all those needs. First, though, it’s helpful to understand the two types of networks you’re likely to encounter:
Standard networking: A “standard” network is essentially all you have been able to buy since the earliest days of Wi-Fi networks (Figure 4). These typically have to be configured one by one. They can connect to each other to form a larger network using either or both wireless networking and Ethernet, depending on the model. When you replace only parts of a network, you will almost certainly wind up using these kinds of standard gateways.

Figure 4: The Netgear Nighthawk AX12 has a fancy design, but there’s a standard Wi-Fi 6 gateway inside. Mesh networking: The other option is mesh networking (Figure 5). The key difference between standard gateways and mesh ones, called nodes, is that mesh networks automatically configure themselves by using radios reserved solely for inter-node communication. Mesh networks nodes may cost two or three times as much as standard gateways and extenders, but they typically require almost no effort after initial setup to work at peak performance. When setting up a network from scratch or replacing an entire network, many people have opted for mesh networks for simplicity’s sake.

Make a Plan
Let’s start by thinking about the kind of network layout you need. You need to figure out both its geography and topology. The geography is where you’ll physically place hardware; the topology is how you connect devices via Ethernet, whether in series (one to the next) or through a hub-and-spoke model. You might even consider using wireless connections, though I’ll try to talk you out of that.
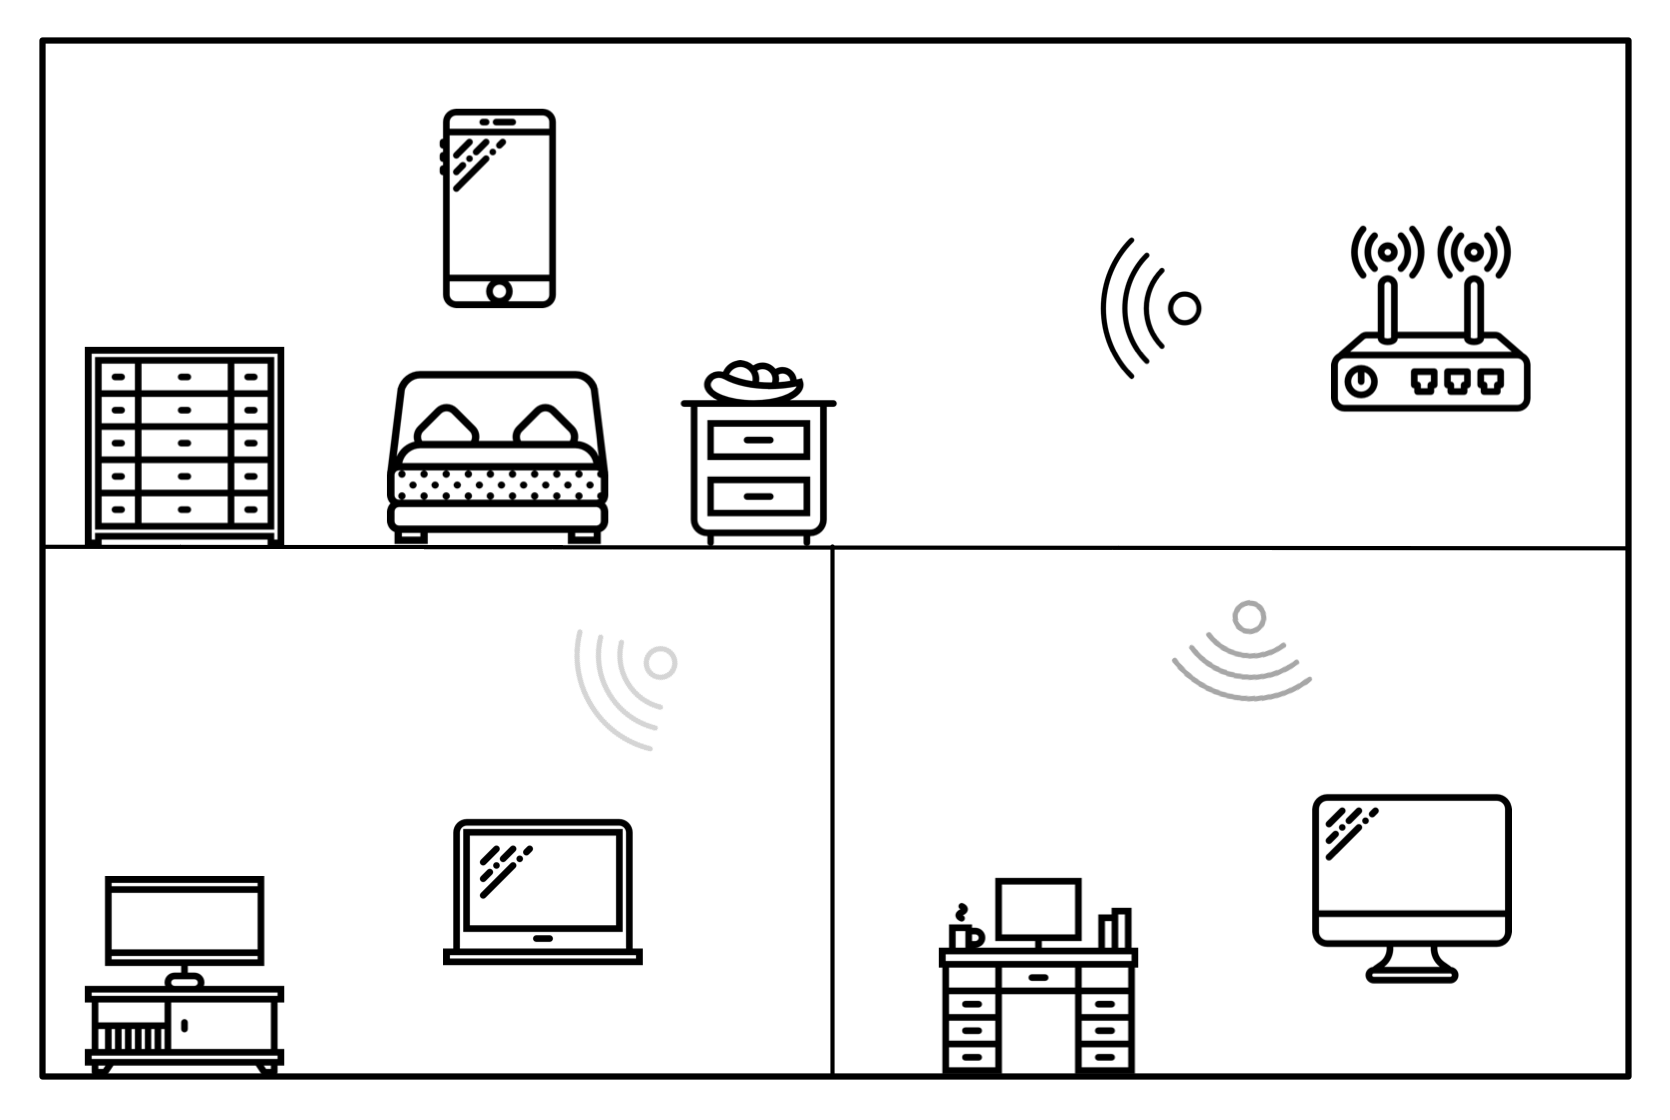
When you walk around with a cell phone, the number of bars varies, depending on the strength of signals your phone is receiving from nearby cellular network transmitters. It’s the same situation over a much smaller space when you connect a computer to a Wi-Fi gateway. Depending on where you place access points, their signals may or may or not penetrate walls or floors with enough strength to be useful (Figure 6).
When you position your standard gateway or mesh router, consider these factors:
Does your broadband hookup constrain where you locate the main gateway that must plug into the broadband modem? Many of us have phone or cable connections in non-ideal locations—like a basement or near a far corner of a front room—for locating a Wi-Fi gateway. You might turn to a nifty method of running data over your home electrical system—powerline networking—or even run an Ethernet cable through the walls. Both options are discussed in Connect via Ethernet and Alternatives later in this chapter, and both would let you place your gateway farther from your broadband modem. But the harder it is to add Ethernet, the more likely mesh suits your needs.
Where do you want to use Wi-Fi? Do you want to work in your backyard? Upstairs and downstairs? If you’re sticking to just one floor or maybe two, you might be able to manage with a single gateway instead of multiple gateways or a mesh system.
What obstacles might block your signal? Walls, ceiling, floors, and even your metal exercise bike can all absorb and reflect Wi-Fi signals, reducing their range and quality. The thicker the walls or the more dense the building material (like plaster, brick, and stone versus drywall and studs), the more trouble you’ll have with signals getting through.
2.4 and 5 GHz networks perform differently over distance at the same signal power, which typically corresponds to better range and coverage in 2.4 GHz and better throughput in 5 GHz. Can you get the faster 5 GHz signals where you need them, but have the coverage of the 2.4 GHz network for the rest of the area in which you want service (Figure 7)?

Figure 7: 2.4 GHz networks have greater coverage areas, but 5 GHz networks provide higher throughput. Do you need a superfast network? Instead of an inexpensive (sub-$100) Wi-Fi 5 gateway with one 2.4 GHz and one 5 GHz radio, you might opt for a more expensive (around $200) Wi-Fi 6 gateway with one 2.4 GHz radio and two in the 5 GHz band.
After purchasing hardware based on recommendations in the next section, pick a spot near the middle of where you want your signal to reach and test if it’s a good location for your gateway. Make sure the top part of a Wi-Fi 5 or 6 gateway isn’t obstructed: it should have a clear line of sight around it, and not be inside a cabinet or behind a computer.
Then proceed around your home or small office and see if you can achieve the performance and coverage you need:
If you’re relying on wireless connections—called backhaul—between mesh nodes, it’s an easy matter to move the units to where you want and try again, especially using planning tools that come with the hardware.
For standard networks, you may have to purchase longer Ethernet cables or go get more gear to meet your needs.
With this in mind, let’s look first at standard networks and then at mesh networks.
Build a Standard Network
The kind of Wi-Fi network most of us are familiar with relies on individual gateways and extenders. With these models, you typically have to configure everything from scratch for each unit, determine optimal placement, and figure out how to connect them—typically via Ethernet wiring.
These networks also work best if you have a small enough footprint to get by with a single Wi-Fi gateway. If you can use just one, modern gateway—with Wi-Fi 5 or 6 and superb throughput—it can be very inexpensive.
If you need more than a single gateway, however, standard networks can get complicated, making mesh more appealing and potentially not much more expensive for comprehensive coverage—plus taking less of your time to set up and run.
Understand Wi-Fi Network Devices
While I talk generally about gateways in this book, when setting up a standard network, you might wind up using a mix of two kinds of Wi-Fi devices:
Gateways, which as I’ve already described, combine an access point, network router, and (usually) an Ethernet switch. They’re an all-in-one solution, have the best coverage and throughput, and you might only need one per network, near the broadband modem. These gateways can cost as little as $100, and typically no more than $150 to $250 for the fanciest current generation that doesn’t have unnecessary extras.
Range extenders (Figure 8) typically lack the routing features of gateways, and have just access point features, sometimes including an Ethernet port or switch. Designed to connect as a client to a full-featured gateway and relay access to other Wi-Fi devices, they cost in the $25 to $100 range. Some extenders pass through all settings: They pass DHCP requests, use the same network name, and employ the same security method and key. Others have an option to set up with a unique network name and security parameters. However, extenders wind up re-broadcasting the same data over the air, because they relay it, and thus reduce your throughput. I highly recommend instead either an Ethernet or powerline connection (see Connect via Ethernet and Alternatives for details).

Pulling all this together doesn’t have to be hard, but it may be more work than you want, which is why I often refer people at this stage to mesh networking. However, if cost is your principal concern or you’re not concerned about how difficult set up may be, read on.
Picking the Right Hardware
There’s no one right answer here, although unfortunately there are a lot of wrong answers. I used to have a few go-to brands and models aside from Apple’s defunct AirPort line. Now, companies not only introduce new models at an absurdly frequent rate, but they also will keep a model number the same and change out the entire hardware innards of a well-regarded unit, sometimes to increase profit margins and sometimes when original components are no longer available.
As a result, here are the guidelines that I follow:
Find reviews on sites you trust. I’ve worked for and with Wirecutter (part of the New York Times); IDG publications TechHive, PCWorld, and Macworld; TidBITS; and Six Colors. You may have other sites you read regularly and find their reviews match up with your experience.
Don’t buy the newest, just-released device until there’s been time for people to find out if it has flaws in general use, and for early bugs to be fixed through firmware updates. Publication reviews may happen as soon as an item ships; I’d rather see a review six months later of how it has shaken out. Wirecutter does a great job of follow-up, re-testing devices as new ones come in and listening to its users’ experiences to guide revisiting recommendations.
Check customer reviews on Amazon and other sites. Beware of manufacturer-paid positive reviews of their own products and “hit” reviews of competitors. You can often smell these out on your own, as they are brief, use the same text across multiple reviews, and stand out. But you can also check Fakespot and ReviewMeta. I also look for at least dozens, if not hundreds, of reviews.
If a product has good Amazon and other site reviews, but none at major review sites, I typically avoid the product. While it’s great to give unknown brand names a chance, we live at a time when weak products are repackaged and sold under hundreds of company names with poor customer support, a high failure rate, and no firmware upgrades for security flaws or other problems. If you’re determined, use social media to find people who have purchased an item and see what their experience was.
These days, it’s not a stretch to think your Wi-Fi device could be turned into a zombie attack bot running attacks against other people or companies, or your network could be compromised. As a result, it’s very important for any product you buy to have a history of security updates: check the device’s support page to see whether any updates were released, why, and how recently. Gateways use stripped-down, custom-purpose, embedded operating systems that typically can only be updated if the manufacturer continues to provide support. In the past, many gateways have suffered from significant security flaws, and only some received firmware updates.
Wirecutter regularly updates its round-up of Wi-Fi gateways. (It describes them as routers, shorthand many people use, but networking router is one feature of a Wi-Fi gateway.) In late 2019, Wirecutter recommended the TP-Link Archer A20, which has a top raw speed of 4 Gbps across its two frequency bands. Wirecutter found in testing it could push 230 Mbps to a single client. While its street price is $190, the gateway also provided the best coverage and performance among units it tested and had three radios—one 2.4 GHz and two 5 GHz—to improve throughput.
Wirecutter’s bargain pick is the excellent TP-Link Archer A7 ($58), a great Wi-Fi 5 device with lower throughput and range, but perfect for an apartment or smaller home.
If you’re looking for a range extender, you can pick one of the following:
For coverage, but not throughput, the $30 TP-Link RE200 offers Wi-Fi 4 at up to 300 Mpbs in 2.4 GHz and Wi-Fi 5 at up to 433 Mbps in 5 GHz. However, it only sports a 10/100 Mbps Ethernet port, not the gigabit Ethernet typical of nearly all modern network equipment. Yet, it’s well reviewed—and cheap! (It has an integral AC plug that may block two outlets due to its shape.)
For better throughput and coverage at a higher price, the Linksys RE6700 ($65) manages up to 300 Mbps using Wi-Fi 4 in the 2.4 GHz band and 867 Mbps using Wi-Fi 5 in 5 GHz. It has a single gigabit Ethernet port to connect to your LAN, and has an integral AC plug, but a passthrough AC outlet. (The plug may block the second outlet in a two-outlet plate.)
Now, on to ways to connect multiple pieces of network hardware.
Connect via Ethernet and Alternatives
Newer houses and apartments often feature Ethernet wiring in the walls or you may have added the wiring yourself. Small offices that are reasonably recent may also include Ethernet jacks.
Ethernet is always the best course for connecting base stations in a standard network, as you’ll achieve the greatest possible speed without compromise among Wi-Fi gateways and other network components.
If you don’t have Ethernet wiring and can’t install it, you’ve got a strong alternative in powerline networking, discussed after Ethernet; see Try Ethernet Alternatives.
Use Gigabit Ethernet
Gigabit Ethernet is cheap, and modern gateways (but not all extenders) feature it. However, if you have existing wiring, check what “category” it is: Ethernet wiring from a few years ago might be Cat5, which typically cannot pass more than 100 Mbps Ethernet reliably.
If it’s Cat5E or Cat6, you’re fine, but also pair that with Cat5E or Cat6 patch cables—the cords that go from the wall into a port on a device—or you’ll find yourself having erratic network performance as well. I can’t tell you the number of times in recent years I’ve talked with people who saw a huge performance increase over Ethernet by getting a higher category of cable! (The cost is very slight; don’t get talked into gold-plated cabling.)
For homes or small offices without Ethernet, if you have blank outlet covers that don’t have electrical wiring pulled to them, you can typically reuse those for Ethernet jacks. And while it’s best to feed Ethernet wiring into crawlspaces and out of sight, the advantage of gigabit throughput might overwhelm your aesthetic needs, and have you running wires across the floor or behind furniture.
Remember that Ethernet relies on a hub-and-spoke topology for best performance: you need to bring each end of the Ethernet back to a switch, in which each Ethernet connection plugged into it can established up to a 1 Gbps connection with every other device.
However, if you have a LAN switch on gateways around your home or small office, you can also effectively daisy chain, too, as traffic passes among Ethernet ports on the switch in a gateway as effectively as a standalone one.
Let’s say you had a long house and needed three gateways, one at each end and one in the middle. You could connect the ones at each end to the one in the middle, and still connect switches and other devices at the far ends, too.
Try Ethernet Alternatives
The strongest available alternative to Ethernet is powerline networking, which sends networking signals as encoded data through the electrical wiring in your house. The simplest option is to get a pair of units that have Ethernet jacks on them. You plug one into one AC outlet near one of your network hubs; and then plug another into an outlet near another gateway. Connect Ethernet cables between each gateway or extender and their respective powerline devices. Done! Your home’s electrical wiring acts just like Ethernet.
Early generations of this equipment was expensive, insecure, and slow, and sometimes required some electrical fooling around to get it to work across different segments of a home’s electrical system. (Older homes may still have wiring that reduces performance, however.)
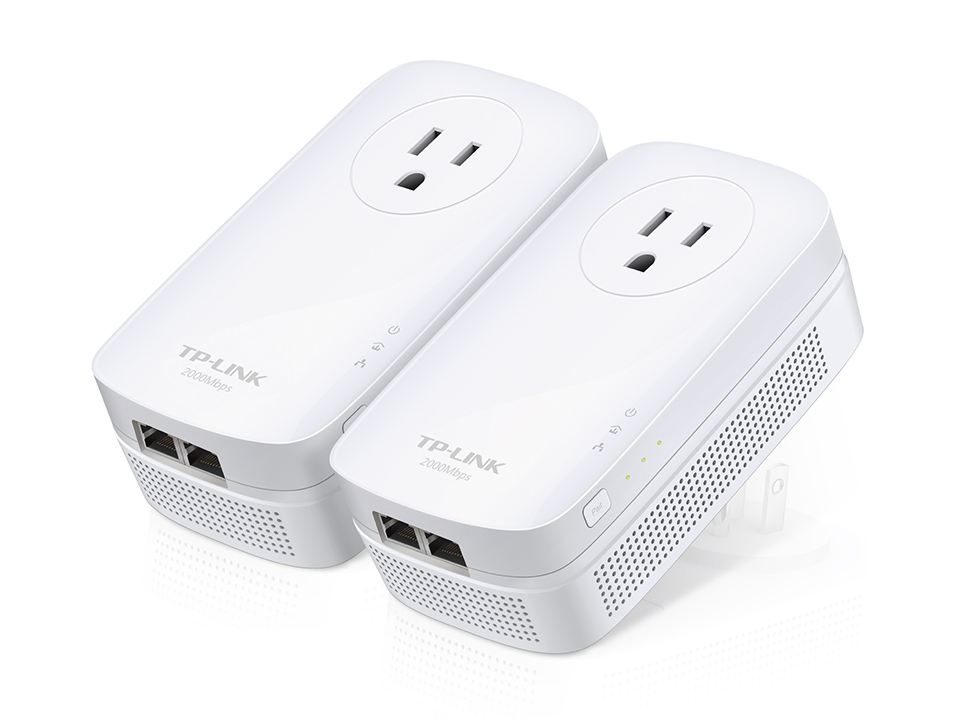
Fortunately, this improved enormously. Now, powerline devices are cheap, fast, and secure. A pair of TP-Link two-port “2,000 Mbps” adapters—the TL-PA9020P Kit—has a street price of $80 (Figure 9).
That’s probably far cheaper than the cost and time required to install a similar Ethernet setup in many houses. It’s also a great option for renters who can’t drill through walls, as well as for people who live in homes with brick or masonry in interior walls.
Your actual performance won’t be 2 Gbps across all connections, but it will still be plenty fast. Powerline networking typically shares bandwidth, like Wi-Fi, among all attached devices, as opposed to Ethernet switches, which create unique, full-speed connections among different devices.
Depending on the system, you can add several powerline nodes to attach more computers, entertainment systems, or routers. The total you can use across your home or office varies by system. While there are standards for interoperability, you should read up on compatibility if you want to mix and match among vendors.
Build a Mesh Network
Mesh networking isn’t just another buzzword, but an idea implemented in modern hardware whose time has come. At one point, mesh wasn’t ready for use, and was oversold as a solution to municipalities, public-safety agencies, and corporations. The equipment we see today has come a long way, and finally represents a maturation of ideas that date back decades.
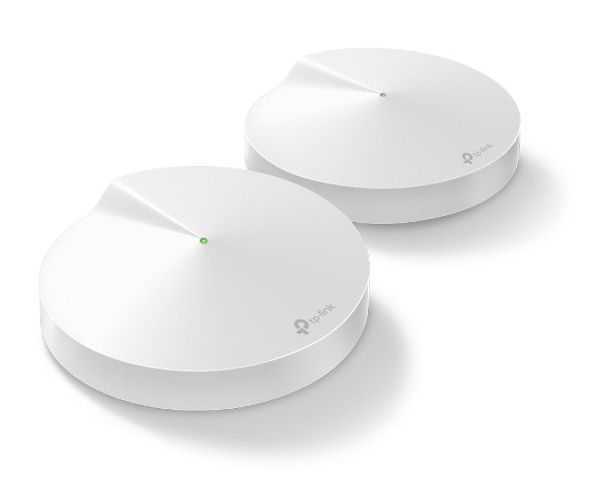
Mesh’s biggest benefit is that it’s easy to use. Instead of worrying about how to design and build your network, you can make loose plans. Buy two or more nodes from the same manufacturer and then use visual, audible, or smartphone-assisted help to place the units in optimal locations (Figure 10). Turn them on and walk away.

Let’s take a quick look at how mesh works, its pros and cons, and which system you might want to pick.
How Mesh Works
Instead of using the hub-and-spoke or daisy-chained approaches of standard Wi-Fi, Ethernet, and other technologies, mesh networks rely on independent nodes. Each node can “talk” directly to any other node on the network. Sophisticated software handles routing data among nodes, which reduces the amount of retransmission of data and other problems that slow down communication (Figure 11).

Mesh nodes have three options for backhaul, the term for how they shuffle data among themselves, as opposed to handling Wi-Fi connections to and from wireless clients:
Backhaul over the same 2.4 GHz and 5 GHz networks used for Wi-Fi with wireless clients. While today’s mesh networks are more efficient than pre-mesh gateway-to-gateway wireless links, this still steals throughput from your network’s devices.
Add a third radio system devoted to backhaul with other nodes. This additional radio picks a 5 GHz channel that’s not in use by the node for Wi-Fi for that purpose. (In the mesh system descriptions below, I note the bandwidth each system says its third radio can handle backhaul, if they provide it at all.)
Backhaul using Ethernet. This sounds contradictory! Why use Ethernet with wireless mesh? Because it can add 1 to 2.5 Gbps of backhaul in places you have Ethernet connections for nodes, and lets you extend a mesh network using a node that’s too far away to “hear” the wireless signals of the rest of the network, like in a backyard cottage or shed.
Let’s look at a detailed list of what mesh networks’ benefits are next.
Why to Pick Mesh
Although I wouldn’t say that mesh networking is as easy as “plug and play,” it does handle many details you’d have to sort out for yourself if you were using a standard Wi-Fi network:
Easy configuration: While you still have to enter some networking values to connect to the internet, a lot of the fussy settings for multi-hub networks just disappears, because they configure themselves automatically.
Low-stress device placement: You don’t have to put in a lot of effort to locate nodes, because the hardware and software that come with mesh systems offer varying kinds of help to achieve optimum results. If you’re not using Ethernet with them, you can easily move them if the initial positioning isn’t optimal.
No-worry changes: The network self heals if a unit crashes or dies—or a cat knocks its plug out of the wall.
Invisible channel selection: You ignore this entire topic, because mesh network devices silently and automatically handle it on their own. In fact, they have to, because they need to be able to shift among channels based on current needs among all the nodes.
Wireless backhaul: Mesh nodes don’t require Ethernet, allowing for the pure joy of wireless connections when connecting them up.
Wired backhaul: This might sound contradictory, but some mesh notes optionally offer Ethernet to enhance communication, producing even higher throughput without sacrificing coverage. Some even include “daisy-chain” Wi-Fi, so the nodes don’t have to connect Ethernet back to a central switch, but can connect one to the next.
No-sweat adjustments to density and coverage: Is your Wi-Fi coverage or throughput poor? Did you just add another floor to your house? Buy and plug in more nodes, and everything is magically better.
This all sounds terrific, but let me detour briefly to temper your expectations with some of the drawbacks.
Why Not To Pick Mesh
Mesh networking is still new enough that there are some significant downsides to buying in now, despite the quality of systems on the market:
High cost for some versions: I have been waiting for years for a major price drop in mesh networking equipment, assuming manufacturers would want to push for broad adoption. However, it hasn’t yet happened. This likely because the hardware remains expensive to make and the software has high development costs. And because companies are targeting a premium audience still willing to spend $250 to $700 for a handful of devices that solve Wi-Fi problems and dramatically increase throughput just by plugging them in.
No mixing and matching: Mesh devices use proprietary protocols, which means you can’t mix and match systems. While there have been some industry gestures in that direction—like a 2018 standard from the Wi-Fi Alliance, Wi-Fi EasyMesh—there have been zero signs of substantive moves towards interoperability in 2018 and 2019.
Company drops product line: If a maker of a mesh system decides to stop producing equipment and eventually discontinue support, you could be out in the cold if you need to add a node, a critical Wi-Fi security patch is required, or a cloud-based aspect ends. Standalone Wi-Fi gateways and extenders are unlikely to have many of these problems, as the market remains robust for them.
The fear of adopting too early: Most of these mesh systems rely on Wi-Fi 5 networking, which is plenty fast. Only one, released in October 2019, has shifted to the potentially higher throughput Wi-Fi 6. It’s hard to imagine a scenario in which that difference matters too much, but if people simultaneously stream a huge amount of video on multiple devices in your house or office, it might. In which case, you should wait for the right Wi-Fi 6 mesh system to arrive.
Which Mesh Systems To Consider
Four mesh systems in late 2019 offer what I consider to be the right mix of radios, other options, and price. I recommend only getting tri-band mesh nodes, because otherwise, you’re really only getting the benefit of configuration, not higher throughput, by paying more for a mesh network.
The systems I feel fit the criteria best are Netgear Orbi, Amazon’s Eero, Linksys Velop, and TP-Link Deco M5. Let’s take a look at each one.
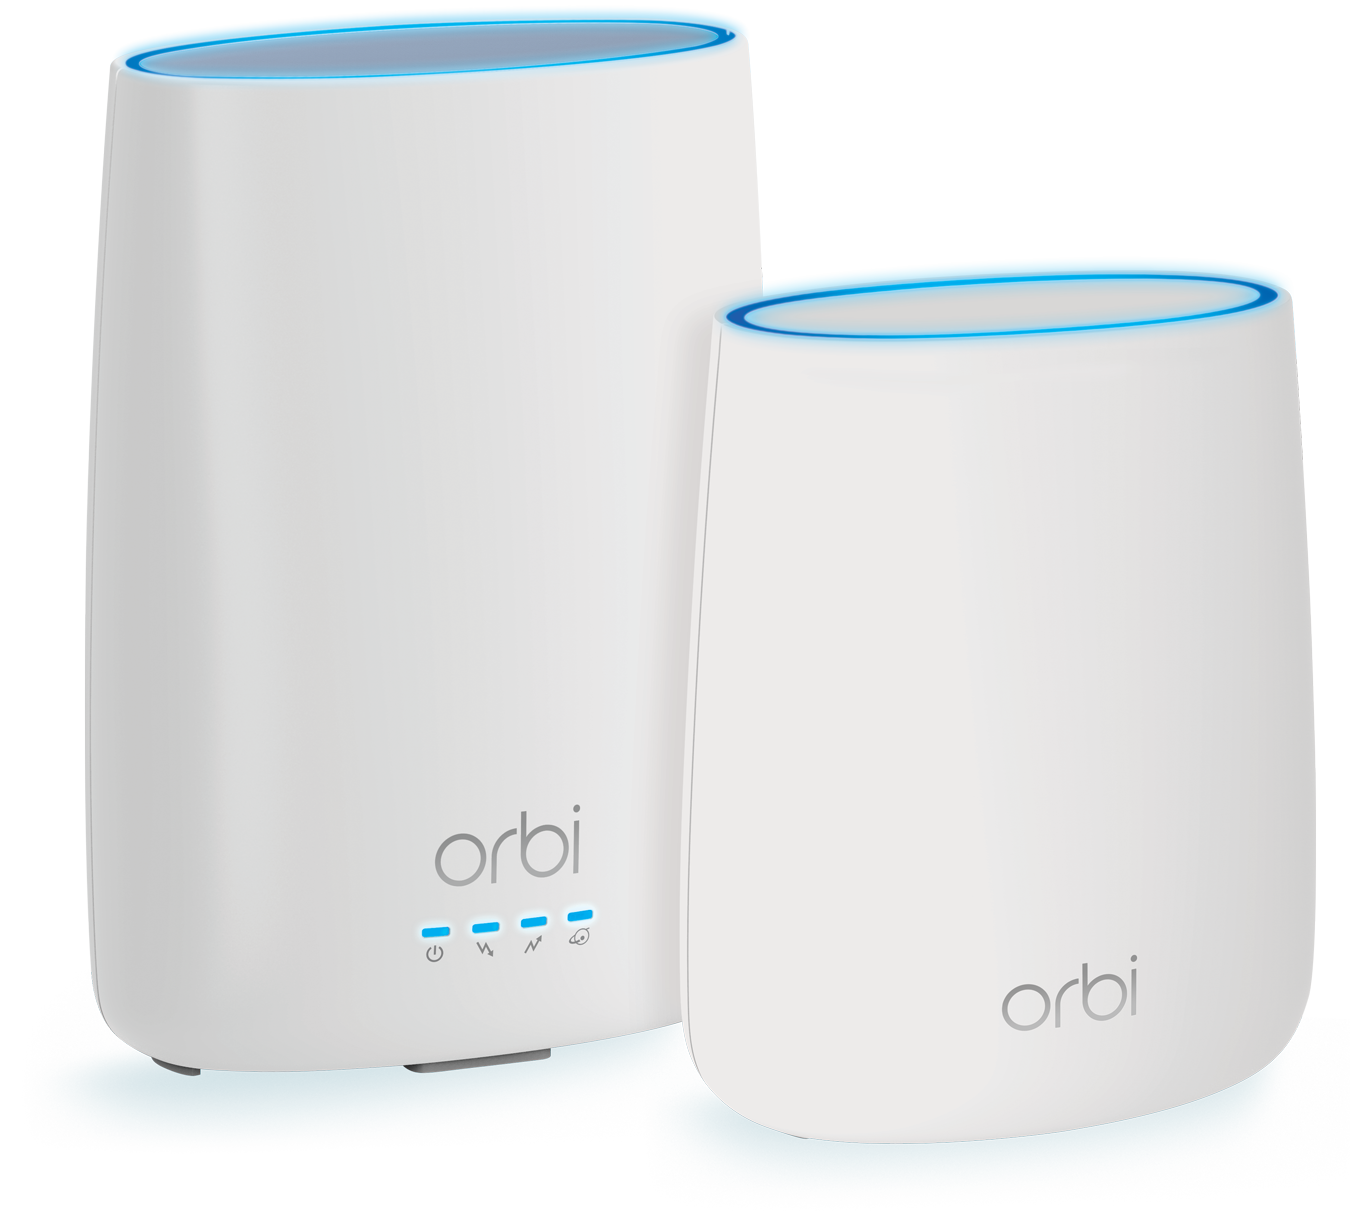
Netgear Orbi
The Netgear Orbi sells a few different models, and all of them are tri-band (Figure 12). You can purchase them in different combinations, but they really only make sense in two bundles.
I recommend you pick one of these two options:
The RBK50 kit ($300) includes two nearly identical devices: a router and what Netgear calls a “satellite.” Both have maximum data rates of 1.3 Gbps (400 Mbps in 2.4 GHz and 866 Mbps in 5 GHz), and four gigabit Ethernet ports. The main router devotes one of those Ethernet ports to connect to your broadband router. They have 1.7 Gbps wireless backhaul and support backhaul over Ethernet. Netgear says that signals from the two can cover 5,000 sq. ft.
The RBK23 kit ($260) of three units offers 866 Mbps wireless backhaul and slightly less-powerful antennas, with a coverage area (says Netgear) of about 6,000 sq. ft. Each device has two gigabit Ethernet ports, but only one can be used for a LAN connection.
In late 2019, Netgear introduced a Wi-Fi 6 model of Orbi. A pack of two (RBK852) sells for $700! The price will certainly drop as these units eventually supplant the lower-end ones. As I note earlier, it’s hard to imagine most people need this boost of throughput—and even fewer will want it at the current price.
It also introduced a much cheaper version, the Orbi RBK12 for $150 for a two-pack, but it only has two radios.
Amazon’s Eero
Another well-reviewed mesh system is eero, which has released generations of hardware. (Amazon purchased it in early 2019.) Its devices cost about as much as the Orbi Wi-Fi 5 nodes.
Eero offers three models, but only one of them, the eero Pro, is tri-band (Figure 13). As noted earlier, I don’t think the price point makes sense unless you have a tri-band router. The eero Pro costs $499 sold in a three-pack or $199 each.

The Pro doesn’t include data rates in its technical specifications, but it appears to offer up to 240 Mbps over 2.4 GHz and 600 Mbps 5 GHz for clients with one 5 GHz radio and the same for backhaul with the other 5 GHz radio. It can also use either or both of its gigabit Ethernet ports for backhaul. It says each router can cover 1,500 square feet.
Eero introduced essentially an updated version of its 2017 plug-in mesh node in October 2019 for $100 (or $83 a unit purchased in a three pack). But as with the new, cheaper Orbi, it’s only two bands.
Linksys Velop
Linksys offers one model of Velop that is tri-band with two gigabit Ethernet ports (Figure 14). The Wi-Fi service is up to 400 Mbps over 2.4 GHz and 867 Mbps over 5 GHz. The wireless backhaul is 867 Mbps, but it also handles backhaul via its two Ethernet ports, which can both be used for LAN or one can be used for WAN and one for LAN.
Velop comes as a $300 pack of two and $500 pack of three. You can buy additional units for $200 each, so the three-pack is no bargain.
TP-Link Deco M9 Plus
TP-Link rounds out the possibilities. The Deco M9 Plus has tri-band Wi-Fi (up to 400 Mbps in 2.4 GHz and 867 Mbps in 5 GHz each for adapters and backhaul), as well as two gigabit Ethernet ports. It also supports backhaul over Ethernet (Figure 15). It’s just $240 for two units, the least expensive of the four systems.