Looking for a way to allow your Web site visitors to communicate with you? This chapter shows you how to build forms that gather information from users and teaches you about the various ways to process the information.

Understanding Forms 158
Types of Form Elements 160
Gather Form Data 162
Create a Form 164
Send Form Data to an E-mail Address 165
Add a Text Box 166
Add a Large Text Area 168
Add Check Boxes 170
Add Radio Buttons 172
Add a Menu List 174
Add a Submit Button 176
Add a Reset Button 177
Add Active Labels 178
Change the Tab Order 179
Add a File Upload Element 180
Group Form Elements 182
You can use forms to collect information from the people who visit your Web site. For example, you might enable visitors to send you feedback, post comments on articles, or purchase goods or services from your business. Before you jump into building your own forms, take a moment to study how forms work and the various ways you can use them on your own Web site.

How Forms Work
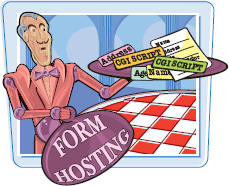
Forms use input elements to collect data from a user, such as text fields and check boxes. After a user fills in the data, he or she can click a button to submit the form, and the browser sends the data back to the Web server. As the Web developer, you decide how to handle the data. For example, you can write a script to parse the data and send back a custom Web page in response, have a program store the data in a database, or receive the data via e-mail. Most form data is processed by CGI scripts on the Web server. You can learn more about various ways to process your data in the section "Gather Form Data" later in this chapter.

HTML for Forms
Web page forms have three important parts: a <FORM> tag, form input elements, and a Submit button. When designing and building a form, you write HTML to define the different objects that allow users to type or select information. These objects can include text fields, radio buttons, check boxes, and more. All forms should include a Submit button for sending the data to a Web server for processing.

Before coding the HTML for a form, spend time thinking about how you want the user to interact with the form, what sort of data you want to collect, and how you want the form to look. Be sure to add label text to your form elements that explains what type of information you want from the user, and give users enough space to type their input. You should also explain how the information is to be used, especially if the user is submitting personal data.

Types of Forms
You can create different types of forms. For example, you can create a search form that allows users to search your Web site for information by submitting keywords. You can add data-collection forms to gather information from users, such as names, addresses, and e-mail addresses. Your form may be as simple as a guest book or as complex as a detailed survey. You can also use forms to help customers add items to an online shopping cart and make a purchase on your site.

Controlling Data Entry
You can control how a user enters data into your form. For example, you can guide the user from one input field to the next by controlling the tab order. See the section "Change the Tab Order" to learn more. You can also control the type of data entered into a field. For example, you can limit the phone number text field so that it accepts only numbers, not characters. You can use JavaScript programs to help alert users to invalid form data. See Chapter 13 to learn more about JavaScript.

Confirmation
After the form data is processed, a script typically displays a message in the browser window noting whether or not the form data was sent successfully. You might also code your script so that it sends a confirmation message by e-mail. It is always good practice when collecting form data to provide visitors with a confirmation or assurance that some sort of action will be taken based on their submission. This confirmation is usually a page that you code using HTML.

Forms are made up of a variety of input elements. Some elements, such as text boxes, give users a way to add information in a free-form manner. Others, such as radio buttons, constrain what the user can submit. You can mix different types of input elements in a single form.

Text Boxes Text boxes are input fields designed specifically for users to type data into, such as typing a name or comment. A text box can be a single line to collect a limited number of characters, such as a phone number or postal code. Text boxes can also be large, multiline fields that allow for submitting paragraphs of input. In single-line text boxes, you can control the maximum number of characters a user can type.  |
Check boxes enable a user to select one or more options from a list. For example, if you want to collect information about a user's familiarity with computers, you can place a set of check boxes next to a list of computer applications. When designing a form, you have the option of presenting check boxes as already checked.  |
Radio buttons are the small, circular buttons found on forms, named for their resemblance to the buttons found on older automobile radios. Like check boxes, radio buttons are used to present several choices to the user. Unlike with check boxes, however, users may select only one radio button in a set. For example, if you include a feedback form on your page that rates your Web site, you might include radio buttons for the values Excellent, Good, Average, and Poor. The user can select only one of the four options.
Menu and list input elements enable you to present a large set of choices in a form. In a drop-down menu, a user clicks a box to open a list of options from which he or she can select only one. For example, users will often choose from a drop-down menu when selecting their state or country in an address form. You can also present data as a scrollable list and allow users to select one option or multiple options.

Users need a way to send their data to the Web server. They can do this using a Submit button, which usually appears at the end of the form input elements. Data is collected only after the user clicks this button. You might also add a Reset button to your HTML form that allows the user to reset all the input fields and start over.

After a user submits data from a form to a Web server, you must do something with the information. Before you begin creating your form, you need to know how the collected data will be processed. Your Web host can usually help you set up programs known as scripts to process the form information.


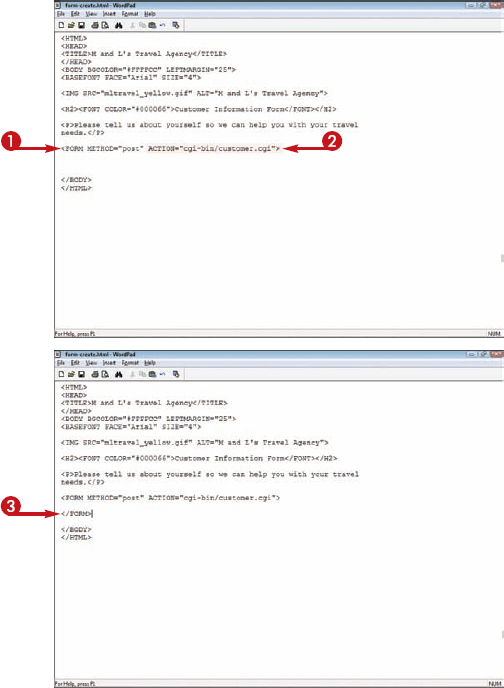
You can use a form to gather information from the people who visit your Web site. To create a form, you use the <FORM> tag to point to the CGI script that will process the form, define the form elements, and display a Submit button to send the data to the script.

Create a Form
1 Click where you want to insert a form and type <FORM METHOD=" ?", replacing ? with post or get.
The type of method to use can depend on the information you are collecting or the script that processes the form data.
If you are including a file upload element in your form, use the post method.
2 Type a space and ACTION="?">, replacing ? with the name and location of the CGI script you want to use to process the form data.
Note
You may need to contact your Web host to determine the name and path of the CGI script.
3 Type </FORM>.
You can now add input elements to your form between the <FORM> and </FORM> tags.
Note
See the remaining sections in this chapter to learn more about adding input elements.
You can instruct the browser to send form data to an e-mail address. You might pursue this route if you are creating a simple form or if your Web server does not support CGI scripts.

Send Form Data to an E-mail Address
1 Click where you want to insert a form and type <FORM METHOD="post".
2 Type a space and ENCTYPE="text/plain".
3 Type a space and ACTION="mailto:?">, replacing ? with the e-mail address to which you want to send the form data.
4 Type </FORM>.
You can now add input elements to your form between the <FORM> and </FORM> tags.
Note
See the remaining sections in this chapter to learn more about adding input elements.

You can add a text box to your form to allow users to type a single-line reply or response. When creating a text box, you must identify the input field with a unique name. You can also control the text box size and the maximum number of characters a user can type in the field.
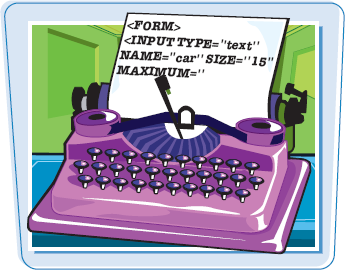
By default, browsers display the text box field at a width of 20 characters. You can make the text box wider using the SIZE attribute. You can control the number of characters allowed in a text box by specifying a value with the MAXLENGTH attribute.
Add a Text Box
1 Between the <FORM> and </FORM> tags, add a new line for the text box.
2 Type <INPUT TYPE="text".
3 Type a space and NAME="?", replacing ? with a unique identifier for the text box.
4 Type a space and SIZE="?", replacing ? with a width in characters.

5 To define a maximum number of characters for the field, type MAXLENGTH=" ?">, replacing ? with the maximum number of characters allowed.
Note
Do not forget to type a closing bracket (>) at the end of your input element tag.
• The Web browser displays the text box in the form.
The user can click inside the text box and type the required information.

Tip
Can I add a default value to a text box?

Yes. A default value is text that appears in the text box when the user views the form. You can use default values to display instructions about the type of data required, give users an example of the data you are looking for, or show a popular choice or response. To specify a default, you can add the VALUE attribute to the <INPUT> tag. For example:
<INPUT TYPE="text" NAME="email" VALUE="Enter your e-mail address">
How do I create a password text box?

Browsers handle password text boxes a bit differently from regular text boxes. Instead of displaying the characters that are typed, the input field displays the data as asterisks (*). This prevents others from seeing the password text. To create a text box for password entry, you specify the password type in the <INPUT> tag. Your code might look like this:
<INPUT TYPE="password" NAME="password" SIZE="45">
If your form requires a larger text-entry box, you can create a large text area that holds multiple lines of text. For example, if you create a feedback form, you can use a large text area to allow users to type paragraphs of text.
When defining a text area, you can control the size of the text box and how text wraps within the field. Text area size is measured in rows and columns, based on character height.
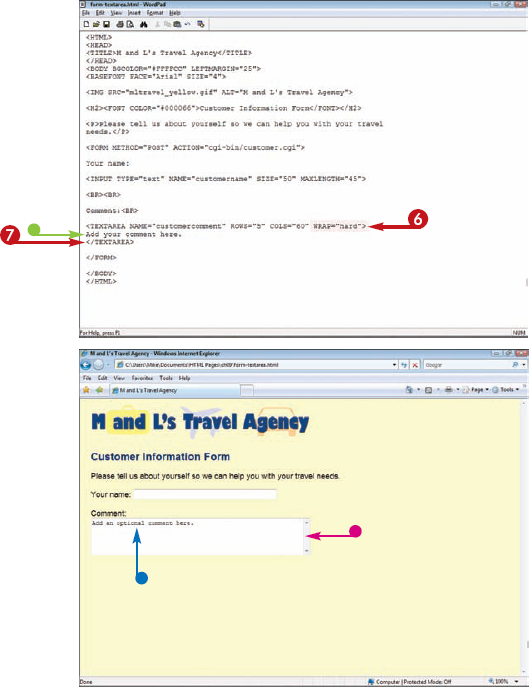
Add a Large Text Area
1 Between the <FORM> and </FORM> tags, add a new line for the large text box.
2 Type <TEXTAREA.
3 Type a space and NAME="?", replacing ? with a unique name for the text area.
Note
You can use the <BR> or <P> tag to separate input elements onto different lines in your form.
4 Type a space and ROWS="?", replacing ? with the number of rows you want to specify to determine the height of the text area.
5 Type a space and COLS="?", replacing ? with a number of character columns to determine the width of the text area.

6 Type a space and WRAP="?">, replacing ? with a text wrap control.
soft wraps text within the text area but not in the form results.
hard wraps text within both the text area and the form results.
off turns off text wrapping, forcing users to add line breaks manually as they type.
7 Type </TEXTAREA>.
• You can add a default message between the <TEXTAREA> and </TEXTAREA> tags.
• The Web browser displays the text box in the form.
• The user can click inside the text box and type information.
Tip
What happens if the user types more than can be viewed in the text area?

If the user types more text than is visible in the text area, scroll bars become active at the side of the text box. Scroll bars allow the user to scroll and view the text. The text area automatically holds as much text as the user needs to type, up to 32,700 characters.
Is there a way to keep users from typing text into a large text area?

Yes. You can use the READONLY attribute if you want to display default text in a text area and do not want users to move or edit the text. For example, you might use a large text area to explain something about your form or offer detailed instructions. You place the READONLY attribute, without assigning it a value, within the <TEXTAREA> tag.
You can add check boxes to your form to allow users to select from one or more options. You can group the check boxes under a single NAME attribute.

Add Check Boxes
1 Between the <FORM> and </FORM> tags, type <INPUT TYPE="checkbox".
2 Type a space and NAME="?", replacing ? with a unique name for the check box.
3 Type a space and VALUE="?">, replacing ? with a value to be assigned if the check box is checked.
Note
The check box value does not appear on the form.

4 Type the text you want to appear beside the check box.
5 Repeat steps 1 to 4 to create more check boxes for a group of check box options.
Note
You can optionally use <BR> or <P> tags to separate input elements onto different lines in your form.
• The Web browser displays the check box in the form.
• The user can click the box to insert a check mark.

Tip
How do I automatically show the check box as selected?

You can use the CHECKED attribute to show a check box as selected by default when the user views that page. You add the CHECKED attribute to the <INPUT> tag:
<INPUT TYPE="checkbox" NAME="favoritecolors" VALUE="Blue" CHECKED>
How do I separate my check boxes onto separate lines?
You can use the <P> or <BR> tag. Your code might look like this:
<P>What type of movie do you like the best?</P>
<INPUT TYPE="checkbox" NAME="genre" VALUE="Drama">
<BR><INPUT TYPE="checkbox" NAME="genre" VALUE="Comedy">
<BR><INPUT TYPE="checkbox" NAME="genre" VALUE="Action">
You can use radio buttons if you want to allow users to choose only one item from a group. The user clicks a button to activate the selection.

Add Radio Buttons
1 Between the <FORM> and </FORM> tags, type <INPUT TYPE="radio".
2 Type a space and NAME="?", replacing ? with a unique name for the radio button group.
3 Type a space and VALUE="?">, replacing ? with a value describing the radio button.
Note
The radio button value does not appear on the form.

4 Type the text you want to appear beside the radio button.
5 Repeat steps 1 to 4 to add more radio buttons to the group, using the same name for all the buttons in a set.
Note
You can optionally use <BR> or <P> tags to separate input elements onto different lines in your form.
• The Web browser displays the radio buttons on the form.
• The user can click the radio button to select that option.

Tip
What happens if I give radio buttons in a set different names?

When radio buttons have different NAME attributes, the browser treats them as parts of different radio button sets. This means the user is able to turn more than one of them on at a time by clicking. Make sure all the radio buttons in a set have the same NAME attribute to avoid this.
Can I show a particular radio button as selected by default?

Yes. You can use the CHECKED attribute to show one radio button in the group as selected by default. The CHECKED attribute is inserted after the VALUE attribute in your HTML code. Your code might look like this:
<INPUT TYPE="radio" NAME="agerange" VALUE="40-50" CHECKED>
You can add a menu to a form to give users a list of choices. Menus allow you to display choices as a drop-down list that appears when the user clicks the list. By storing a long list of choices as a drop-down list, you can free up space for other input items in the form.

Add a Menu List
1 Between the <FORM> and </FORM> tags, type <SELECT NAME=" ?", replacing ? with a unique name for the menu.
2 Type a space and SIZE="?">, replacing ? with the height, measured in character lines, for the menu input.
If you want to display a drop-down menu, set the height to 1.
3 Start a new line and type <OPTION VALUE=" ?">, replacing ? with a descriptive word for the menu item.
4 Type the text you want to appear in the menu list.
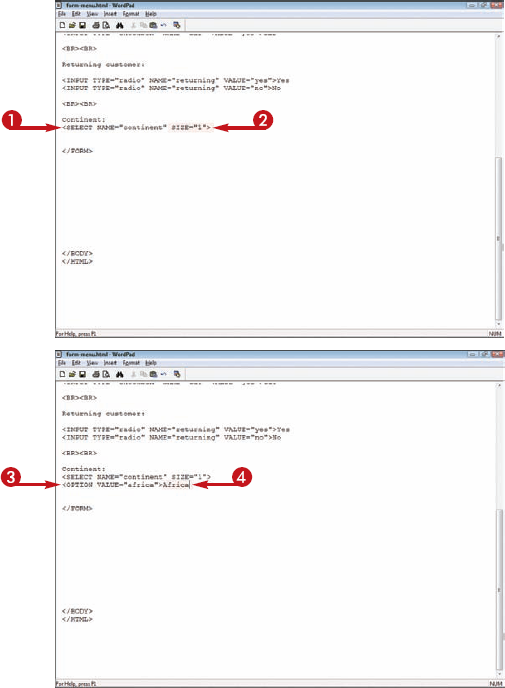
5 Repeat steps 3 and 4 to add more menu items to the list.
6 To make one menu item appear as selected in the list, type SELECTED after the VALUE attribute.
7 Type </SELECT>.
The Web browser displays the menu on the form.
• The user can click here to display the drop-down list.
• The user can click a list item to make a selection.

Tip
How do I display the entire menu on my form?

Type the number of menu entries as the SIZE attribute value. This makes the menu appear as a rectangular box that displays all the items in the list. If the menu list is long, it may take up more room on the form than you want, making users scroll to view the selections. If you prefer to save room on your form, keep the menu size at 1. This creates a drop-down menu list.
How can I create a submenu?

Use the <OPTGROUP> tag and the LABEL attribute:
<SELECT NAME="favoriteflower"><OPTGROUP LABEL="Perennial"><OPTION VALUE="Daisy">Daisy<OPTION VALUE="Lily">Lily</OPTGROUP><OPTGROUP LABEL="Annual"><OPTION VALUE="Petunia">Petunia<OPTION VALUE="Impatiens">Impatiens</OPTGROUP></SELECT>
Not all browsers support the <OPTGROUP> tag.
You can add a Submit button to your form so users can send you the data they enter. Most Web page developers add the Submit button to the bottom of the form. You can choose any label you want for the button, as long as it is easy for users to understand that they need to click it to submit their data.

Add a Submit Button
1 Between the <FORM> and </FORM> tags, type <INPUT TYPE="submit".
2 Type a space and type VALUE="?">, replacing ? with the text you want to appear on the button.
• The browser displays the button on the form.
When the user clicks the button, the form data is processed and sent to the destination specified in the <FORM> tag.

You can add a Reset button to your form to allow users to clear the data they have entered. For example, the user may want to type different information, or change his or her mind about submitting the information. A Reset button lets users erase all the information they typed into the various input fields.

Add a Reset Button
1 Between the <FORM> and </FORM> tags, type <INPUT TYPE="reset".
2 Type a space and VALUE="?">, replacing ? with the text you want to appear on the button.
• The browser displays the button on the form.
When the user clicks the button, the form is reset to its original settings.

To make your form easier to use, you can identify the text beside an input element as a label. The browser treats the text as an active form element, which means if the user clicks it, the input element changes to reflect the selection. For example, if you make the text next to a check box a label, the user can click the text as well as the check box to select the option.

Add Active Labels
1 Click inside the tag for the form element you want to label and type ID=" ?", replacing ? with a descriptive word for the element.
2 Before the text, type <LABEL FOR="?">, replacing ? with the word you assigned in step 1.
3 Type the label text and then </LABEL>.
You can repeat steps 1 to 3 to add more labels.
• The user can move the mouse pointer over the label to make the input element active as well as click to activate the input element.

Visitors filling out your form can navigate from one input element to the next by clicking the element or pressing the Tab key. By default, the Tab key follows the order in which you entered the input elements in your HTML document. You can change the tab order to move the user around the form in a different order.

Change the Tab Order
1 Click inside the first form element tag and type TABINDEX=" ?", replacing ? with a number representing the element's position in the tab order.
2 Repeat step 1 for the remaining elements.
Note
You can type a negative number to exclude an input element from the tab order.
Users can move through your form using

If you want users to send you files, such as resumes or photos, you can add a file upload element to your form. When you add the upload element, a Browse button appears with the field, allowing users to locate the file they want to send.

The upload element works only if your <FORM> tag's METHOD attribute is set to post. See the section "Create a Form" to learn more about specifying a method.
Add a File Upload Element
1 Make sure the <FORM> tag method is set to post.
2 Within the <FORM> tag, type ENCTYPE="multipart/ form-data".
3 Type the text you want to appear next to the upload element.
4 Type <INPUT TYPE="file".

5 Type a space and then NAME="?", replacing ? with a name for the input field.
6 Type a space and SIZE="?">, replacing ? with the character length for the size of the input field.
• The Web browser displays the upload element on the form.
Users can type the path to the file they want to upload, or click Browse to locate the file.

Tip
What happens to the uploaded file after it is submitted?
You need a CGI script to process the uploaded file on your server. Unless your Web host offers an uploading script, you may need to adapt a script from the Internet. You can find numerous free CGI scripts on the Internet. Visit www.cgi-resources.com or www.hotscripts.com to search for an upload script.

What if my Web server is limited to certain file types for uploads?
You can use the ACCEPT attribute to list the files your server can process. You list the files by their MIME (Multi-purpose Internet Mail Extensions) types. Your HTML code may look like this:

<INPUT TYPE="file" NAME="userfiles" ACCEPT="image/gif, image/jpeg, image/png">
If your form is particularly long, you can organize the different parts into groups. For example, you might group personal information separately from questionnaire data. Groups appear set off from the rest of the page with a border. You can assign a title to the group to distinguish the form elements from other input fields on the form. Not all browsers support form groups.

Group Form Elements
1 Type <FIELDSET> above the first input element you want to place in a group.
2 Type </FIELDSET> after the last input element you want to place in the group.
3 Below the <FIELDSET> tag, type <LEGEND.
4 Type a space and ALIGN="?">, replacing ? with an alignment for the group title (left, right, top, or bottom).
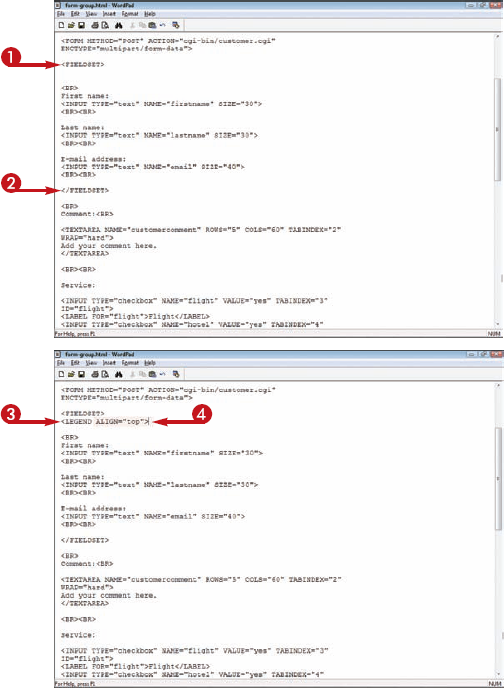
6 Type </LEGEND>.
You can repeat steps 1 to 6 to define other groups of input elements on your form.
• The Web browser displays the grouped elements together.

Tip
Is there another way to organize my form elements besides the <FIELDSET> tag?

You can also arrange your form elements into tables on your Web page. For example, a table row makes a nice receptacle for a related group of input fields. You can size a table cell to fit as many form fields as you require. To learn more about creating HTML tables, see Chapter 7.
Can I disable a form element?

Yes. You can add the DISABLED attribute to an input element's tag to display the field. For example:
<INPUT TYPE="file" NAME="userfiles" ACCEPT="image/gif, image/jpeg, image/png" DISABLED="disabled">
You may want to disable a field until the user fills out certain other required data. You can then use JavaScript on your page to enable the field. See Chapter 13 to learn more about JavaScript.