
CHAPTER 8
Being Organized and Productive
Apple Watch can be a great tool to help you stay organized and be productive. You can view upcoming events, create new events and reminders, make payments and carry key documents, get maps, and much more.
View Your Upcoming Events
The Calendar app enables you to view your upcoming events on Apple Watch for the day, by day, or as a straightforward list. When you locate the event you want to view, you tap it to display the details.
You can access the Calendar app from the Home screen, as for any app, but you may prefer to access it through the Calendar Glance or through a Calendar complication on the watch face.
View Your Upcoming Events
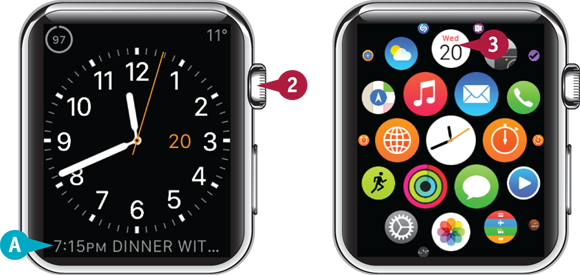
![]() Lift your wrist to wake Apple Watch.
Lift your wrist to wake Apple Watch.
The watch face appears.
![]() If your watch face includes a Calendar complication, you can tap the Calendar complication to go straight from the watch face to the Calendar app.
If your watch face includes a Calendar complication, you can tap the Calendar complication to go straight from the watch face to the Calendar app.
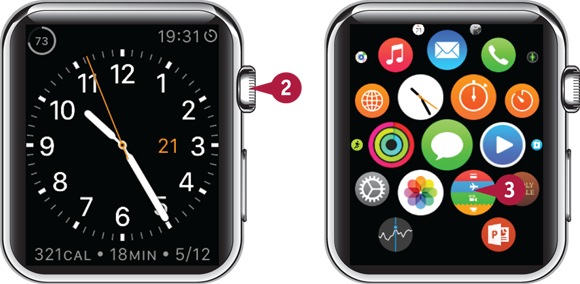
![]() Click the Digital Crown.
Click the Digital Crown.
The Home screen appears.
![]() Tap Calendar (
Tap Calendar (![]() ).
).
The Calendar app appears, showing the screen you used last, such as Today.
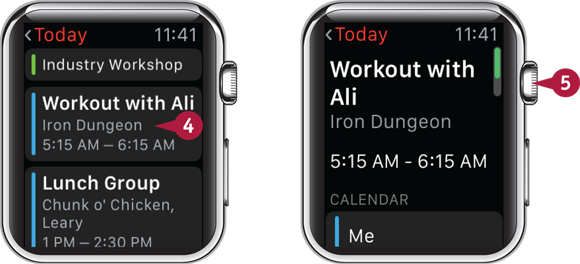
![]() Tap an event.
Tap an event.
The event’s details appear.
![]() Turn the Digital Crown clockwise.
Turn the Digital Crown clockwise.
Further details for the event appear, such as the repeat schedule for a repeating event.
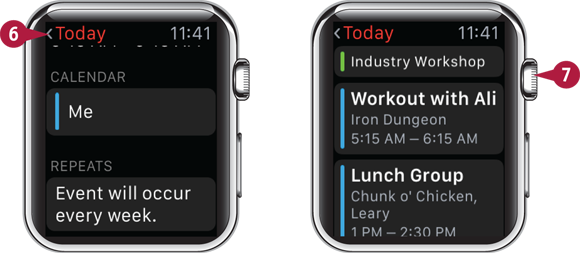
![]() Tap Today.
Tap Today.
The Today screen appears again.
![]() Turn the Digital Crown clockwise.
Turn the Digital Crown clockwise.
Later events appear.
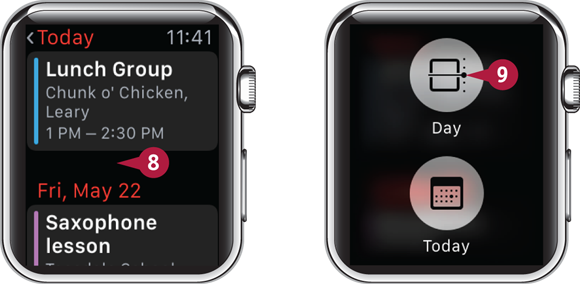
![]() Force-touch the screen.
Force-touch the screen.
The Options screen appears.
![]() Tap Day (
Tap Day (![]() ).
).
The events appear in Day view, showing a timeline on the right side of the screen.
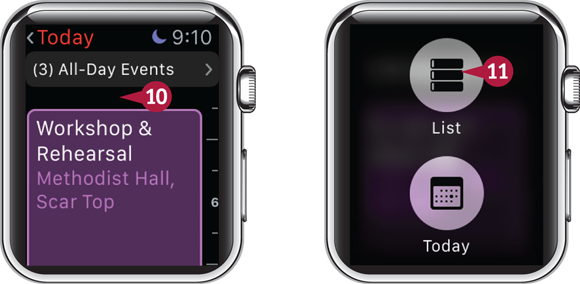
![]() Force-touch the screen.
Force-touch the screen.
The Options screen appears.
![]() Tap List (
Tap List (![]() ).
).
The events appear in List view.
![]() You can turn the Digital Crown to scroll up or down the list.
You can turn the Digital Crown to scroll up or down the list.
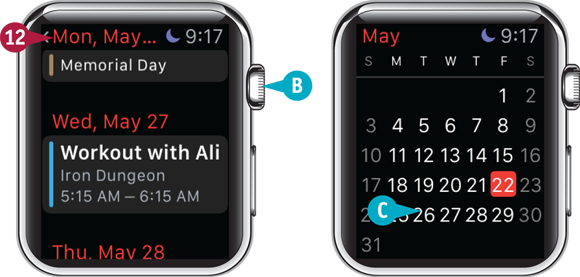
![]() Tap the button in the upper-left corner of the screen.
Tap the button in the upper-left corner of the screen.
The month appears.
![]() You can tap another day to display it.
You can tap another day to display it.
Create a New Event
Apple Watch enables you to create a new event in your calendar by using Siri. After activating Siri by pressing and holding the Digital Crown, you speak the details of the event you want to create. If the information you provide is intelligible and complete, Siri displays a calendar tile showing the event so that you can confirm it. If the information is unclear or incomplete, Siri prompts you to fill in the gaps.
Create a New Event

![]() Lift your wrist to wake Apple Watch.
Lift your wrist to wake Apple Watch.
The watch face appears.
![]() Press and hold the Digital Crown.
Press and hold the Digital Crown.
Note: You can also say “Hey Siri” to activate Siri.
The Siri screen appears.
![]() Say the details of the event you want to create. For example, say “Create an event meeting with Maria Acton at 2 pm on September 3rd for one hour,” where the name is that of one of your contacts.
Say the details of the event you want to create. For example, say “Create an event meeting with Maria Acton at 2 pm on September 3rd for one hour,” where the name is that of one of your contacts.
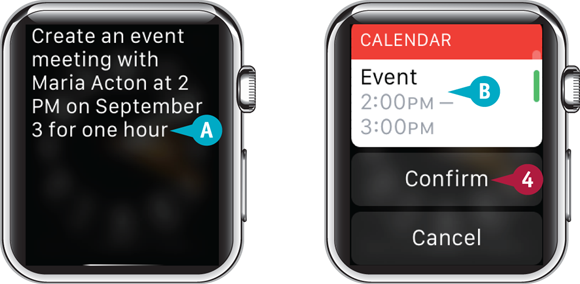
![]() Siri displays its interpretation of what you say.
Siri displays its interpretation of what you say.
![]() If your meaning is clear, Siri displays a calendar tile with a Confirm button and a Cancel button.
If your meaning is clear, Siri displays a calendar tile with a Confirm button and a Cancel button.
Note: Siri warns you if the new event conflicts with an existing event.
![]() Tap Confirm if the event is correct.
Tap Confirm if the event is correct.

![]() Siri confirms that it has added the event to your calendar.
Siri confirms that it has added the event to your calendar.
![]() Click the Digital Crown.
Click the Digital Crown.
The watch face appears again.
Create a New Reminder
Apple Watch enables you to create a new reminder by using Siri. After activating Siri by pressing and holding the Digital Crown, you tell Siri to create a reminder, followed by the details of what the reminder is for. If the information you provide is intelligible and complete, Siri displays a reminder tile showing the event so that you can confirm it. If the information is unclear or incomplete, Siri prompts you to provide what is missing.
Create a New Reminder

![]() Lift your wrist to wake Apple Watch.
Lift your wrist to wake Apple Watch.
The watch face appears.
![]() Press and hold the Digital Crown.
Press and hold the Digital Crown.
Note: You can also say “Hey Siri” to activate Siri.
The Siri screen appears.
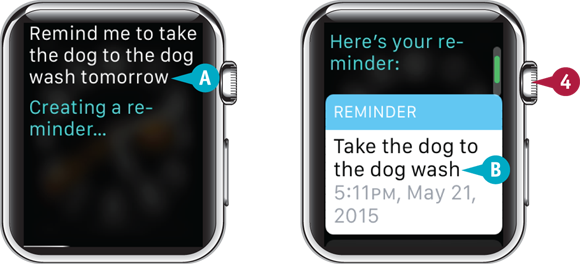
![]() Say “Remind me” and the details of the reminder you want to set.
Say “Remind me” and the details of the reminder you want to set.
![]() Siri displays its interpretation of what you say.
Siri displays its interpretation of what you say.
![]() If your meaning is clear, Siri displays a reminder tile with an OK button and a Cancel button.
If your meaning is clear, Siri displays a reminder tile with an OK button and a Cancel button.
![]() If necessary, turn the Digital Crown clockwise to scroll down.
If necessary, turn the Digital Crown clockwise to scroll down.
Note: You can also drag your finger up the screen to scroll down.

The OK button and Cancel button appear.
![]() Tap OK if the reminder is correct.
Tap OK if the reminder is correct.
Siri promises to remind you.
![]() Click the Digital Crown.
Click the Digital Crown.
The watch face appears again.
Using Apple Pay
Apple Watch enables you to make payments easily at contactless payment terminals using Apple Pay, Apple’s mobile wallet and online payment service.
Set Up Apple Pay and Specify Your Default Card

Before you can use Apple Pay on Apple Watch, you must set up Apple Pay for Apple Watch by using the Apple Watch app on iPhone. See the section “Configure Passbook and Apple Pay” in Chapter 4 for details.
You can set up Apple Pay for Apple Watch with a single credit card or debit card or with multiple cards. If you set up a single card, Apple Pay uses that card as the payment source. If you set up multiple cards, you specify the default card by tapping Default Card on the Passbook & Apple Pay screen, and then tapping the appropriate card on the Default Card screen.
Open Apple Pay on Apple Watch

Apple Watch provides a shortcut to opening Apple Pay quickly: Double-click the side button to go straight to the Apple Pay screen. This shortcut works even if the Apple Watch screen is turned off.
You can also access Apple Pay via the Home screen. From the watch face, click the Digital Crown to display the Home screen, then tap Passbook & Apple Pay (![]() ). On the Passbook screen, tap Pay.
). On the Passbook screen, tap Pay.
Select the Payment Card

After opening Apple Pay on Apple Watch, select the payment card you want to use to make the payment.
If you have set up only a single card, Apple Pay uses that card automatically. You do not need to select it.
If you have set up multiple cards, swipe left or right until the card you want to use appears on the screen.
Make the Payment

After choosing the means of payment, pay by holding the face of Apple Watch to the contactless payment terminal.
Apple Watch taps your wrist and beeps to indicate that it has sent the payment information.
When the Done screen appears, tap the check mark.
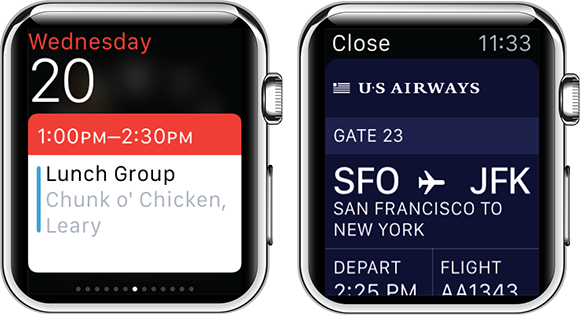
Using Passbook
The Passbook app enables you to carry essential documents with you on Apple Watch and easily display them as needed. For example, you can add the boarding pass for a flight to Passbook and then display the boarding pass on Apple Watch to scan its Quick Response code — QR code — when you reach the gate. The Passbook app on Apple Watch automatically syncs all the documents from the Passbook app on iPhone.
Using Passbook
![]() Lift your wrist to wake Apple Watch.
Lift your wrist to wake Apple Watch.
The watch face appears.
![]() Click the Digital Crown.
Click the Digital Crown.
The Home screen appears.
![]() Tap Passbook & Apple Pay (
Tap Passbook & Apple Pay (![]() ).
).

The Passbook screen appears.
![]() Tap the document you want to view or use.
Tap the document you want to view or use.
The document opens.
![]() You can tap Close to close the document and return to the Passbook screen.
You can tap Close to close the document and return to the Passbook screen.
![]() Turn the Digital Crown clockwise.
Turn the Digital Crown clockwise.

Further details appear.
![]() Turn the Digital Crown clockwise.
Turn the Digital Crown clockwise.
The QR code appears full screen, so you can scan it on a terminal.
![]() Tap the screen.
Tap the screen.
The top of the document appears, and you can tap Close to close it.
Share Your Location
Apple Watch enables you to quickly share your location with the contact with whom you are chatting in the Messages app. This capability is great when you want to meet with the contact and need to convey your exact location clearly.
For the Messages app on Apple Watch to share your location, you must allow the Messages app on iPhone to use Location Services.
Share Your Location

![]() When you receive a Messages notification from the contact, tap the notification.
When you receive a Messages notification from the contact, tap the notification.
The notification opens.
![]() Tap the message.
Tap the message.

The Messages app opens, showing the chat with the contact.
![]() Force-touch the screen.
Force-touch the screen.
The Options screen appears.
![]() Tap Send Location (
Tap Send Location (![]() ).
).
Note: If you see the message Location Sharing Disabled when you tap Send Location (![]() ), you need to turn on location sharing for the Messages app on iPhone. Press Home, tap Settings (
), you need to turn on location sharing for the Messages app on iPhone. Press Home, tap Settings (![]() ), and then tap Privacy (
), and then tap Privacy (![]() ). On the Privacy screen, tap Location Services (
). On the Privacy screen, tap Location Services (![]() ), tap Messages (
), tap Messages (![]() ), and then tap While Using the App in the Allow Location Access area.
), and then tap While Using the App in the Allow Location Access area.

Messages sends the location.
![]() You can tap Reply to send a text reply as well.
You can tap Reply to send a text reply as well.
Get Directions
Apple Watch enables you to quickly get directions to where you need to go. Either by asking Siri or by starting from an app, you can get directions to a contact’s address, to a favorite location or a location you have recently viewed, or to a new location that you specify by speaking.
Similarly, starting from the Calendar app, you can get directions to go to an event that has a location set.
Get Directions

Open the Maps App and Display the Options Screen
![]() Lift your wrist to wake Apple Watch.
Lift your wrist to wake Apple Watch.
The watch face appears.
![]() Click the Digital Crown.
Click the Digital Crown.
The Home screen appears.
![]() Tap Maps (
Tap Maps (![]() ).
).
The Maps app opens and displays your current location.
![]() Force-touch the screen.
Force-touch the screen.
The Options screen opens.
Get Directions to a Favorite Location, Recent Location, or New Location
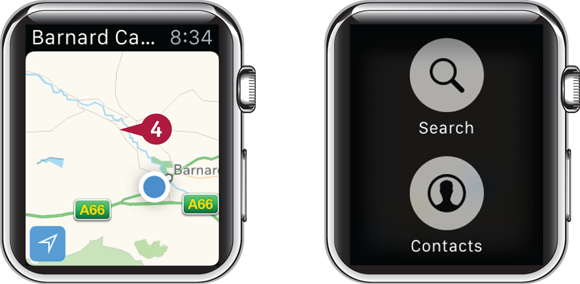
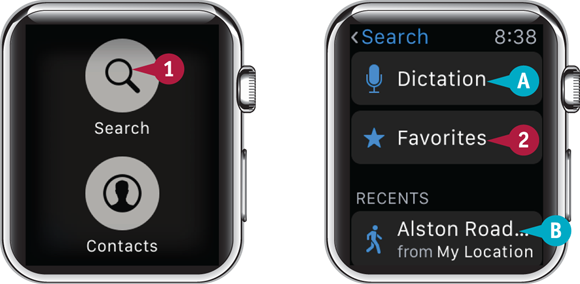
![]() On the Options screen, tap Search (
On the Options screen, tap Search (![]() ).
).
The Search screen appears.
![]() You can tap Dictation (
You can tap Dictation (![]() ) to launch Siri, and then dictate the new location to which you want directions.
) to launch Siri, and then dictate the new location to which you want directions.
Note: You can also start the process of getting directions by activating Siri and asking for directions.
![]() You can tap a recent location in the Recents list.
You can tap a recent location in the Recents list.
![]() Tap Favorites (
Tap Favorites (![]() ).
).

The Favorites screen appears.
![]() Tap the favorite to which you want directions.
Tap the favorite to which you want directions.
The directions appear.
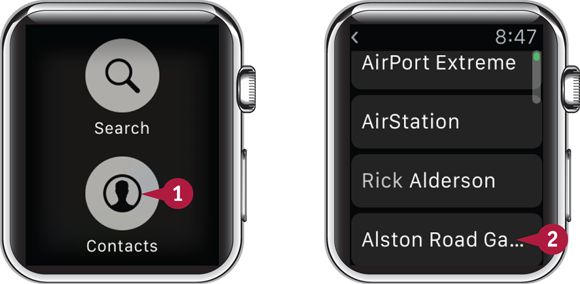
Get Directions to a Contact’s Address
![]() On the Options screen, tap Contacts (
On the Options screen, tap Contacts (![]() ).
).
The Contacts list appears.
![]() Tap the contact.
Tap the contact.

The contact record appears.
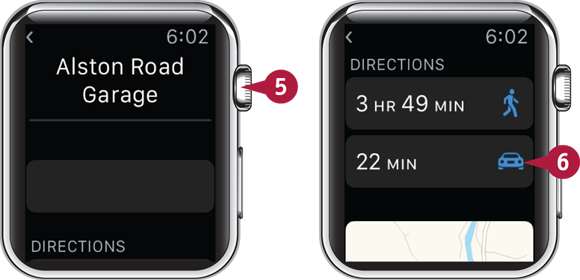
![]() Turn the Digital Crown clockwise.
Turn the Digital Crown clockwise.
The map appears.
![]() Tap the map.
Tap the map.
No matter which way you start getting directions, you follow them in the same way. After you tap Start to indicate you are starting your journey, Apple Watch monitors your progress and alerts you with a tap on the wrist, and turn-signal noises indicating left and right turns, to each subsequent stage of your journey.
When you need to see more of the map, you can switch to iPhone, where the Handoff feature puts your current map and directions right on the lock screen for instant access.
The details screen appears, showing the information for the location.
![]() Turn the Digital Crown clockwise.
Turn the Digital Crown clockwise.
The Directions section appears.
![]() Tap Walking (
Tap Walking (![]() ) or Driving (
) or Driving (![]() ), as needed.
), as needed.
The directions appear.

Get Directions for a Calendar Event
![]() With the event open in the Calendar app, force-touch the screen.
With the event open in the Calendar app, force-touch the screen.
The Options screen appears.
![]() Tap Directions (
Tap Directions (![]() ).
).
The directions appear.
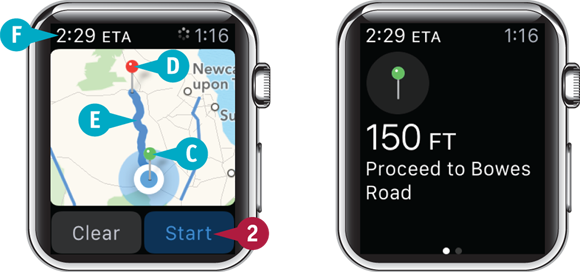
Follow Directions
![]() Follow the steps in one of the previous subsections to get directions.
Follow the steps in one of the previous subsections to get directions.
Maps displays a map showing the area.
![]() The green pin (
The green pin (![]() ) shows your current location.
) shows your current location.
![]() The red pin (
The red pin (![]() ) shows the destination.
) shows the destination.
![]() The blue line shows the route.
The blue line shows the route.
![]() The ETA readout shows your estimated time of arrival assuming you start immediately.
The ETA readout shows your estimated time of arrival assuming you start immediately.
![]() Tap Start.
Tap Start.
The first direction appears.
![]() Follow the direction.
Follow the direction.
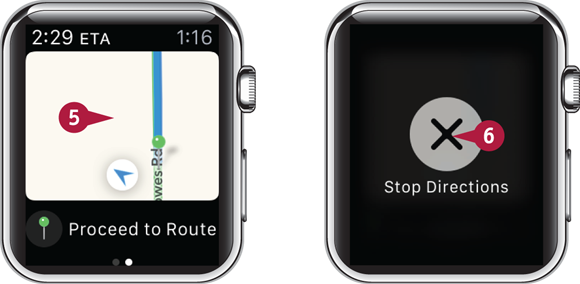
When you complete this stage of the journey, Apple Watch taps you on the wrist to alert you. Apple Watch plays turn-signal noises when you need to turn left or right.
Maps displays the next direction.
Note: You can also swipe left to display the next direction.
![]() Continue following the directions.
Continue following the directions.
![]() When you need to stop the directions, force-touch the screen.
When you need to stop the directions, force-touch the screen.
The Stop Directions icon (![]() ) appears.
) appears.
![]() Tap Stop Directions (
Tap Stop Directions (![]() ).
).
Maps displays the map area.

Use Handoff to iPhone
![]() While using Maps on Apple Watch, press Home on iPhone.
While using Maps on Apple Watch, press Home on iPhone.
iPhone wakes.
![]() The lock screen displays the current map and directions.
The lock screen displays the current map and directions.
Note: You must unlock iPhone to use other features than Maps.
Go Further with Productivity Apps
Apple Watch comes with essential productivity apps ranging from Mail and Messages to Calendar and Phone. To make the most of Apple Watch, however, you will likely want to add third-party apps that provide functionality the built-in apps do not have. For example, you may need a calculator app for quick calculations, a remote presentation app to control your presentations on iPhone, or an app that enables you to take and read notes.
CalcBot
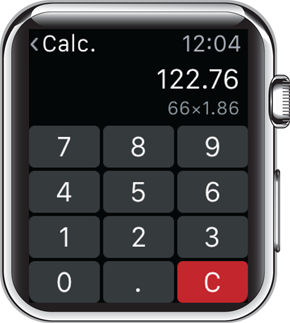
CalcBot is an easy-to-use calculator app that enables you to perform straightforward calculations on Apple Watch. The Calculate feature displays the numeric calculator shown here; to access operations, such as add and multiply, you force-touch the screen. The Convert feature enables you to convert U.S. dollars to euros, pounds to kilograms, miles to kilometers, and Fahrenheit to Centigrade. The Tip Calc feature provides an easy and fairly discreet way to calculate tips.
PowerPoint Remote

The PowerPoint Remote app for Apple Watch enables you to control the PowerPoint app on iPhone remotely. After opening a presentation in PowerPoint on iPhone, you can use PowerPoint Remote on Apple Watch to move along to the next slide or return to the previous slide. You can force-touch the screen to display the Options screen, which contains the Restart command and the End Show command.
Keynote
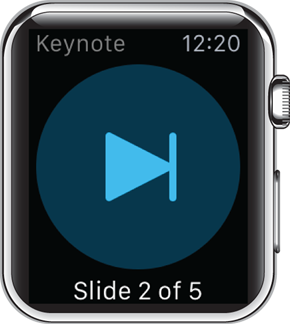
The Keynote app for Apple Watch enables you to control the Keynote app on iPhone remotely. Once you have opened a presentation in Keynote on iPhone, you can use the Keynote app on Apple Watch to control playback. The screen contains only one button, the Next button, but you can force-touch the screen to reach the Back command and the Exit Slideshow command on the Options screen.
Evernote
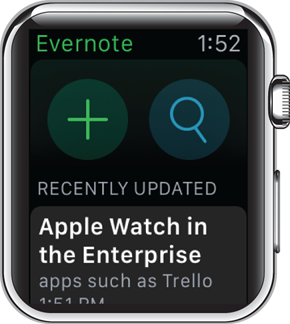
The Evernote app lets you access your Evernote account directly from Apple Watch. Tap a note on the Recently Updated list to open one of your recent notes to read its contents. As of this writing you cannot edit them, but you can create a new note either by tapping New Note (![]() ) on the app’s home screen or by force-touching the screen within an existing note and then tapping New Note (
) on the app’s home screen or by force-touching the screen within an existing note and then tapping New Note (![]() ) on the Options screen. You can search your notes by tapping Search (
) on the Options screen. You can search your notes by tapping Search (![]() ) on the app’s home screen and then dictating your search terms.
) on the app’s home screen and then dictating your search terms.
OneNote

The OneNote app for Apple Watch enables you to access content in the OneNote notebooks you have stored on Microsoft’s OneDrive service. You can browse your existing notes and read their text, but you cannot edit notes as of this writing.
You can easily create a new note by tapping New (![]() ) on the app’s home screen and then dictating the text for the note. OneNote stores these notes in your Quick Notes folder, where you can easily access them on other devices.
) on the app’s home screen and then dictating the text for the note. OneNote stores these notes in your Quick Notes folder, where you can easily access them on other devices.
Apple Watch and iPhone are a great fit for task-management apps that can keep your commitments right at hand. You can choose from a good selection of apps, many of which enable you to implement the Getting Things Done methodology — GTD for short.
The Workflow app enables you to create workflows — sequences of standard actions — by working on iPhone and then execute those workflows on Apple Watch.
Clear

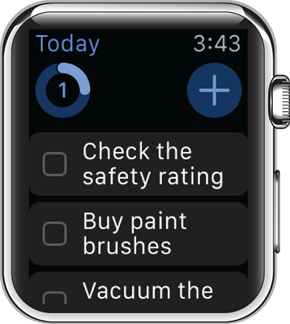
Clear is a task-management and reminders app that helps you to organize all your tasks. On Apple Watch, you can easily browse your lists, such as your Personal List or your Work List; review your tasks and mark some or all of them as complete; and add new tasks by dictating their contents. The Clear app on Apple Watch also enables you to sort your tasks and to set a reminder for an existing task that you fear you may forget.
OmniFocus

OmniFocus is a task-management app that runs on OS X; iPhone, iPad, and iPod touch; and now on Apple Watch as well. OmniFocus syncs data either via your account on its dedicated service or on a WebDAV server of your choosing, such as a corporate server. You can use OmniFocus either for GTD or for your own organizational system.
From the OmniFocus home screen, you can quickly access your past-due tasks, your tasks for today, your upcoming tasks in the Soon perspective, your flagged tasks, and your inbox. You can quickly add a new item to your inbox by force-touching the screen and then tapping New Item (![]() ) on the Options screen.
) on the Options screen.
Things
Things is a task-management app for OS X, iOS, and Apple Watch that enables you to follow GTD principles or your own system. Things stores data online in its free Things Cloud service, enabling you to sync your tasks easily across your devices.
Using the Things app for Apple Watch, you can view your existing tasks, mark them as complete, or edit them. You can add notes to a task, add a due date, or postpone it to another day.
Wunderlist
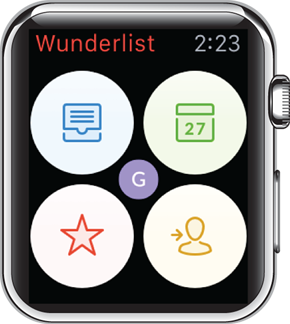
Wunderlist is a task-management app that runs on multiple platforms, including iOS, Android, and the Web. Wunderlist enables you to assign tasks to others — and for others to assign tasks to you — as well as letting you create and manage your own tasks.
Wunderlist is straightforward to use. From the home screen, tap Inbox (![]() ) to view your inbox, tap Today (
) to view your inbox, tap Today (![]() ) to view the tasks due today, tap Starred Tasks (
) to view the tasks due today, tap Starred Tasks (![]() ) to view the tasks you have starred for importance, or tap Assigned to Me (
) to view the tasks you have starred for importance, or tap Assigned to Me (![]() ) to view tasks that others have assigned to you.
) to view tasks that others have assigned to you.
Workflow

Workflow is a task-automation app for iOS and Apple Watch. Using Workflow on iPhone, you create a workflow — a sequence of predefined actions — that can accomplish a specified task at the tap of an icon. The actions you can use include adding calendar events, adding reminders, getting a map location, recording audio, and selecting photos, giving you a wide range of options when you combine them.
Other productivity apps for Apple Watch provide a wide range of functionality. You can find apps for recording audio on Apple Watch, such as for interviews or for notes; apps for summoning cabs or private-driver vehicles; apps to help you organize and run meetings efficiently; and even apps to facilitate shopping online.
Trello
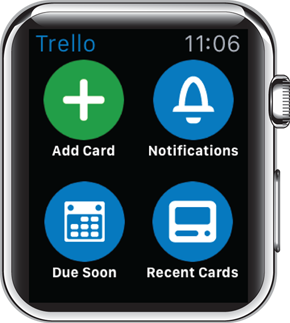
Trello is an app for organizing tasks. Trello works on the principle of a whiteboard, but takes it much further. After you create an account on the Trello service, you can create multiple boards to organize all your projects. To record your ideas, you create Trello cards and then assign them to the appropriate boards. You can keep a board to yourself or invite other people to work with you on it.
Trello works across a wide variety of platforms, including the Web. On Apple Watch, you can view your notifications, display your cards that are due soon, or simply go to your recent cards. You can also create new cards on Apple Watch, assign them to specific locations, and reply to comments from your collaborators.
Awesome Voice Recorder

The Awesome Voice Recorder app enables you to record audio directly on Apple Watch. The app has a straightforward interface and is easy to use.
After recording audio, you can play it back on Apple Watch. The Awesome Voice Recorder app for Apple Watch syncs its recordings to iPhone, where you can easily play them back at different speeds — such as half speed or double speed — and manipulate them.
The free version of Awesome Voice Recorder is supported by ads, but you can get rid of them by upgrading to the Pro version.
Uber
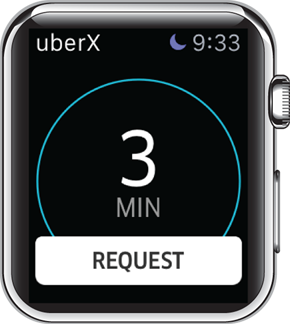
The Uber app enables you to request a ride on the Uber private-driver service. After setting up your account in the Uber app on iPhone, you can specify your pickup location, see the positions of nearby Uber vehicles, and request a fare estimate to your destination. On Apple Watch, you can see the approximate time an Uber vehicle will take to reach you and place your request for a ride.
Do

The Do app helps you to organize and run meetings. After installing the app on iPhone and Apple Watch, you create an account on the Do service. Do offers free accounts for personal use with plenty of features to get you started, but you might want to sign up for a Business subscription if you plan to use Do seriously. You can then start setting up meetings, either by importing your existing calendar events or by specifying the meeting details manually on iPhone or on the app’s website.
On Apple Watch, you can view the details of your upcoming meetings and display the agenda and any notes to help keep the meeting on track and on time.
Amazon

The Amazon app enables you to search for items on the Amazon website directly from Apple Watch. You perform a search by dictating your search terms and then tapping Done; the app returns a list of results that you can browse on the Apple Watch screen.
After you locate an item you want, you can save it to your Wish List for future reference. Alternatively, you can use Handoff to transfer the current page to iPhone so that you can view full product details, including reviews, and purchase the item if it matches your needs.