CHAPTER 10
Viewing and Editing Photos and Videos

Whether you want to look at your photos, or you want to edit them to fix problems, OS X comes with a number of useful tools for viewing and editing photos. It also offers tools for viewing digital videos.
View a Slideshow of Your Photos
Import Photos from a Digital Camera
View a Preview of a Photo
OS X offers several tools you can use to see a preview of any photo on your Mac. The Finder application has a number of methods you can use to view your photos, but here you learn about the two easiest methods. First, you can preview any saved image file using the OS X Quick Look feature; second, you can see photo previews by switching to the Cover Flow view. You can also preview photos using the Preview application.
View a Preview of a Photo
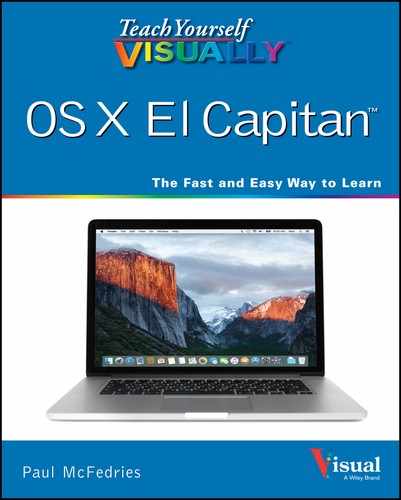
View a Preview with Quick Look
![]() In Finder, open the folder that contains the photo you want to preview.
In Finder, open the folder that contains the photo you want to preview.
![]() Click the photo.
Click the photo.
![]() Click Quick Look (
Click Quick Look (![]() ) or press
) or press ![]() .
.
![]() Finder displays a preview of the photo.
Finder displays a preview of the photo.
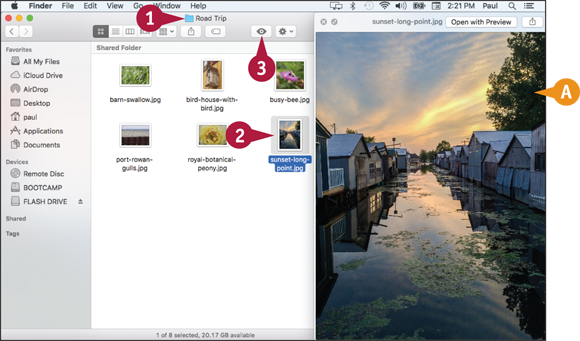
View a Preview with Cover Flow
![]() In Finder, open the folder that contains the photo you want to preview.
In Finder, open the folder that contains the photo you want to preview.
![]() Click the photo.
Click the photo.
![]() Click Cover Flow (
Click Cover Flow (![]() ).
).
![]() Finder displays a preview of the photo.
Finder displays a preview of the photo.

View a Preview in the Preview Application
![]() In Finder, open the folder that contains the photo you want to preview.
In Finder, open the folder that contains the photo you want to preview.
![]() Click the photo.
Click the photo.
![]() Click File.
Click File.
![]() Click Open With.
Click Open With.
![]() Click Preview.
Click Preview.
Note: In many cases, you can also simply double-click the photo to open it in the Preview application.
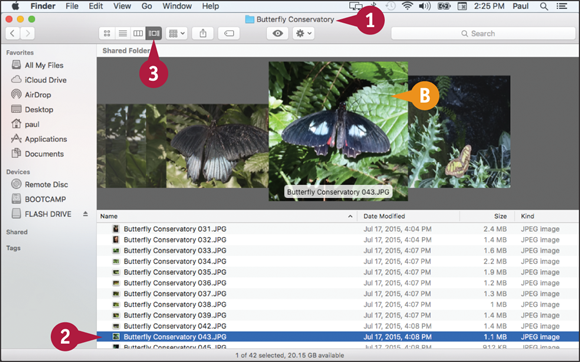
The Preview application opens and displays the photo.
![]() Use the toolbar buttons to change how the photo appears in the Preview window.
Use the toolbar buttons to change how the photo appears in the Preview window.
![]() More commands are available on the View menu.
More commands are available on the View menu.
![]() When you finish viewing the photo, click Close (
When you finish viewing the photo, click Close (![]() ).
).
View a Slideshow of Your Photos
Instead of viewing your photos one at a time, you can easily view multiple photos by running them in a slideshow. You can run the slideshow using the Preview application or Quick Look. The slideshow displays each photo for a few seconds and then Preview automatically displays the next photo. Quick Look also offers several on-screen controls that you can use to control the slideshow playback. You can also configure Quick Look to display the images full screen.
View a Slideshow of Your Photos
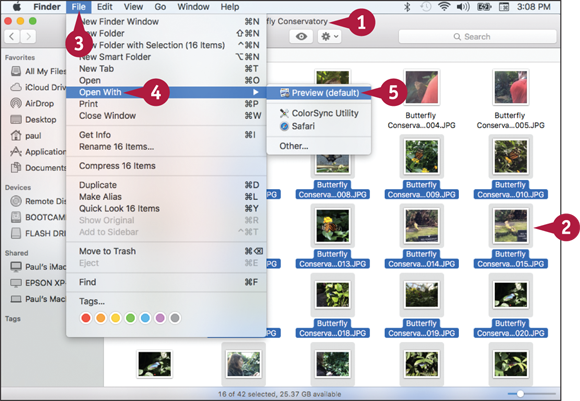
![]() In Finder, open the folder that contains the photos you want to view in the slideshow.
In Finder, open the folder that contains the photos you want to view in the slideshow.
![]() Select the photos you want to view.
Select the photos you want to view.
![]() Click File.
Click File.
![]() Click Open With.
Click Open With.
![]() Click Preview.
Click Preview.
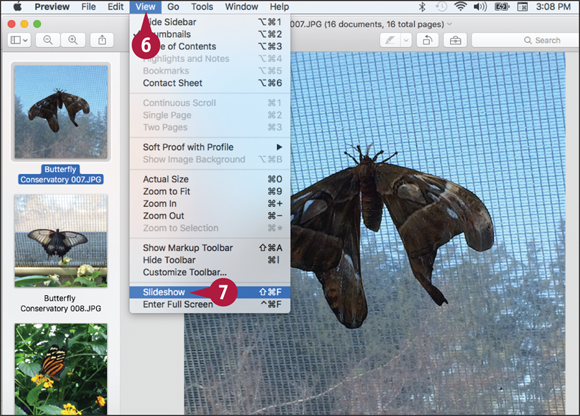
The Preview window appears.
![]() Click View.
Click View.
![]() Click Slideshow.
Click Slideshow.
You can also select Slideshow by pressing ![]() +
+![]() +
+![]() .
.

Preview opens the slideshow window.
![]() Move the mouse (
Move the mouse (![]() ).
).
![]() Preview displays the slideshow controls.
Preview displays the slideshow controls.
![]() Click Play (
Click Play (![]() ).
).
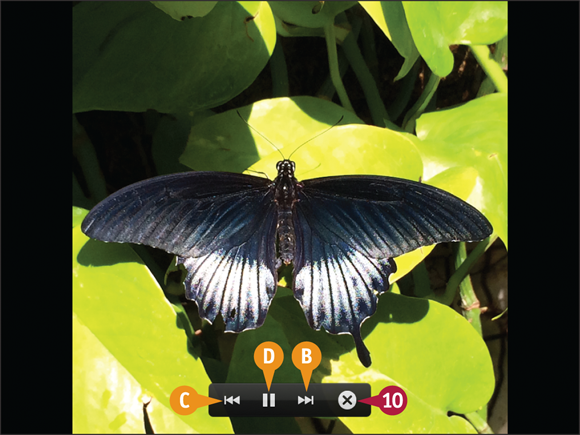
Preview begins the slideshow.
![]() You can click Next (
You can click Next (![]() ) to move to the next photo.
) to move to the next photo.
![]() You can click Back (
You can click Back (![]() ) to move to the previous photo.
) to move to the previous photo.
![]() You can click Pause (
You can click Pause (![]() ) to suspend the slideshow.
) to suspend the slideshow.
![]() When the slideshow is over or when you want to return to Finder, click Close (
When the slideshow is over or when you want to return to Finder, click Close (![]() ) or press
) or press ![]() .
.
Import Photos from a Digital Camera
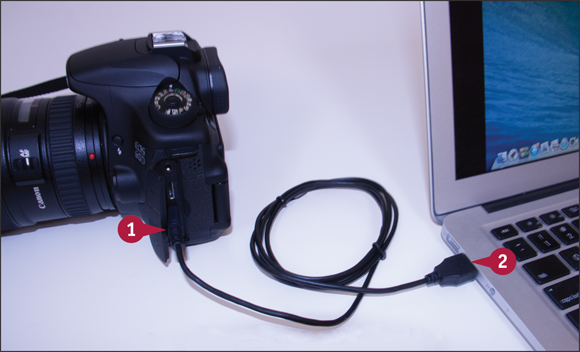
You can import photos from a digital camera and save them on your Mac. You can use the Photos application to handle importing photos. Photos enables you to add a name and a description to each import, which helps you to find your photos after the import is complete. To perform the import, you need a cable to connect your digital camera to your Mac. Most digital cameras come with a USB cable. Note that the steps in this section also apply to importing photos from an iPhone or iPad.
Import Photos from a Digital Camera
Import Photos from a Digital Camera
![]() Connect one end of the cable to the digital camera.
Connect one end of the cable to the digital camera.
![]() Connect the other end of the cable to a free USB port on your Mac.
Connect the other end of the cable to a free USB port on your Mac.
![]() Turn the camera on and put it in either playback or computer mode.
Turn the camera on and put it in either playback or computer mode.
Your Mac launches the Photos application.
Note: You can also launch the application by clicking Photos (![]() ) in the Dock.
) in the Dock.

![]() Your digital camera appears in the Devices section.
Your digital camera appears in the Devices section.
![]() Photos displays previews of the camera’s photos.
Photos displays previews of the camera’s photos.
![]() If you want Photos to remove the images from your camera after the import, click Settings (
If you want Photos to remove the images from your camera after the import, click Settings (![]() ) and then click Delete items after import.
) and then click Delete items after import.

![]() Click and drag the mouse (
Click and drag the mouse (![]() ) around the photos you want, or press and hold
) around the photos you want, or press and hold ![]() and click each photo you want to select.
and click each photo you want to select.
![]() Click Import X Selected, where X is the number of photos you selected in step 5.
Click Import X Selected, where X is the number of photos you selected in step 5.
![]() To import all the photos from the digital camera, click Import All New Photos.
To import all the photos from the digital camera, click Import All New Photos.
Photos imports the photos from the digital camera.
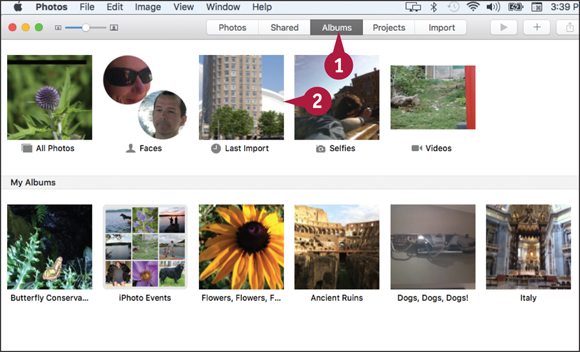
View the Imported Photos
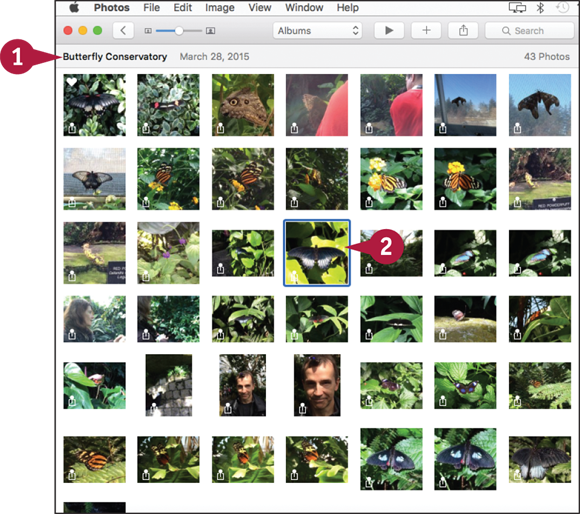
![]() Click Albums.
Click Albums.
![]() Click Last Import.
Click Last Import.
View Your Photos
If you want to look at several photos, you can use the Photos application. Photos offers a single-image view, which hides everything else and displays each photo using the entire height of the window. Once you activate the single-image view, Photos offers on-screen controls that you can use to navigate backward and forward through the photos. You can also configure single-image view to show thumbnail images of each photo, so you can quickly jump to any photo you want to view.
View Your Photos
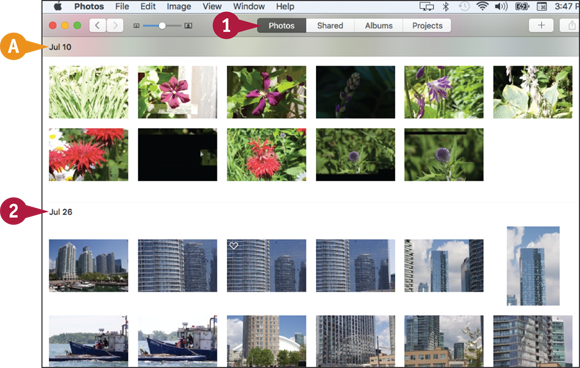
![]() In the Photos application, click the Photos tab or press
In the Photos application, click the Photos tab or press ![]() +
+![]() .
.
![]() The Photos tab organizes your photos by moments — that is, by the date they were taken.
The Photos tab organizes your photos by moments — that is, by the date they were taken.
![]() Locate the date that contains the photos you want to view.
Locate the date that contains the photos you want to view.
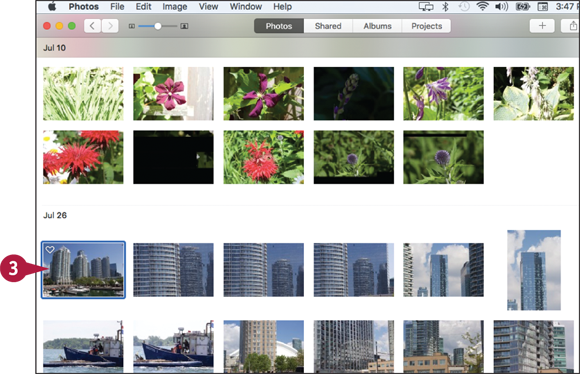
![]() Double-click the first photo you want to view.
Double-click the first photo you want to view.

Photos displays the photo.
![]() Click Next (
Click Next (![]() ) to view the next photo.
) to view the next photo.
![]() You can also click Previous (
You can also click Previous (![]() ) to see the previous photo.
) to see the previous photo.
Note: You can also navigate photos by pressing ![]() and
and ![]() .
.
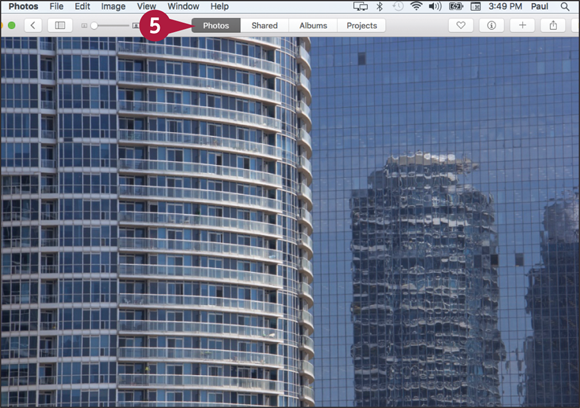
![]() When you are done, click Photos or press
When you are done, click Photos or press ![]() +
+![]() to return to the Photos tab.
to return to the Photos tab.
Create an Album
You can use Photos to organize your photos into albums. In Photos, an album is a collection of photos that are usually related in some way. For example, you might create an album for a series of vacation photos, for photos taken at a party or other special event, or for photos that include a particular person, pet, or place. Using your Photos library, you can create customized albums that include only the photos that you want to view.
Create an Album

![]() Click New (
Click New (![]() ).
).
![]() To add an entire moment to a new album, move the mouse (
To add an entire moment to a new album, move the mouse (![]() ) over the moment and then click New (
) over the moment and then click New (![]() ) beside the moment.
) beside the moment.
![]() Click Album.
Click Album.
Note: You can also start a new album by pressing ![]() +
+![]() .
.
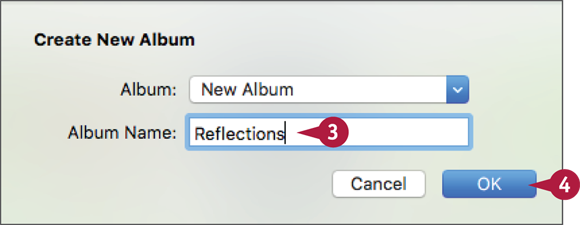
![]() Type a name for the new album.
Type a name for the new album.
![]() Click OK.
Click OK.

Photos prompts you to add items to the new album.
![]() Click each photo you want to add to the album.
Click each photo you want to add to the album.
![]() Click Add.
Click Add.
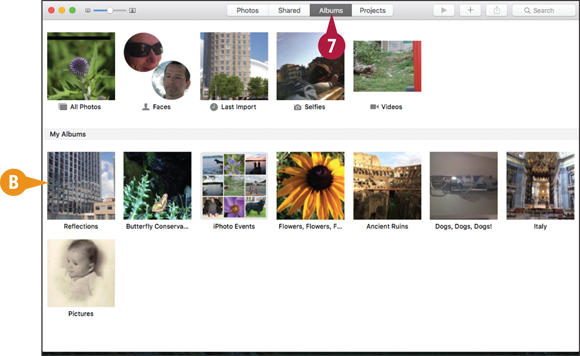
![]() Click Albums.
Click Albums.
![]() The new album appears in the My Albums section.
The new album appears in the My Albums section.
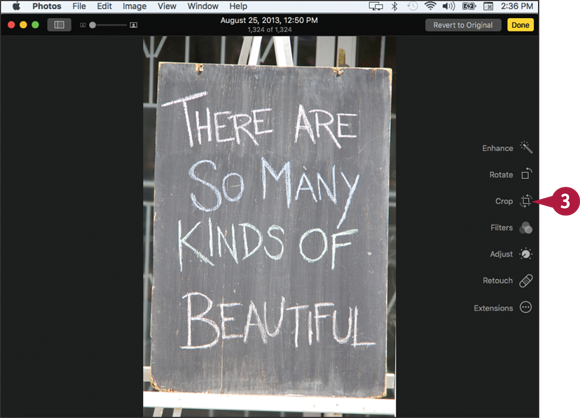
Crop a Photo
If you have a photo containing elements that you do not want to see, you can often cut out those elements. This is called cropping, and you can do this with the Photos app. When you crop a photo, you specify a rectangular area of the photo that you want to keep. Photos discards everything outside of the rectangle. Cropping is a useful skill because it can help give focus to the true subject of a photo. Cropping is also useful for removing extraneous elements that appear near the edges of a photo.
Crop a Photo

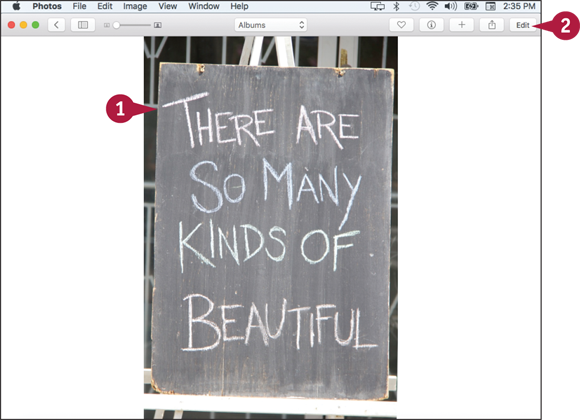
![]() Open the photo you want to crop.
Open the photo you want to crop.
![]() Click Edit.
Click Edit.

Photos displays its editing tools.
![]() Click Crop.
Click Crop.
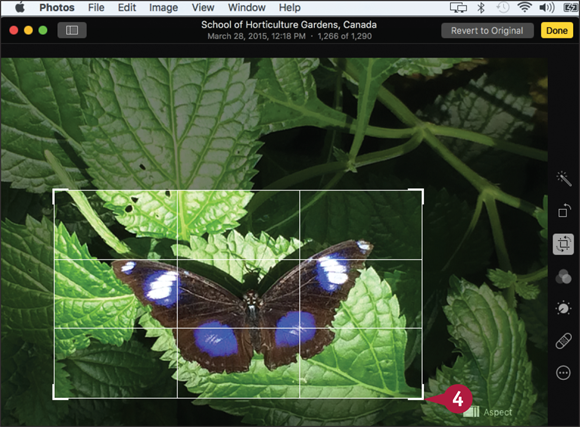
Photos displays a cropping rectangle on the photo.
![]() Click and drag a corner or side to define the area you want to keep.
Click and drag a corner or side to define the area you want to keep.
Note: Remember that Photos keeps the area inside the rectangle.
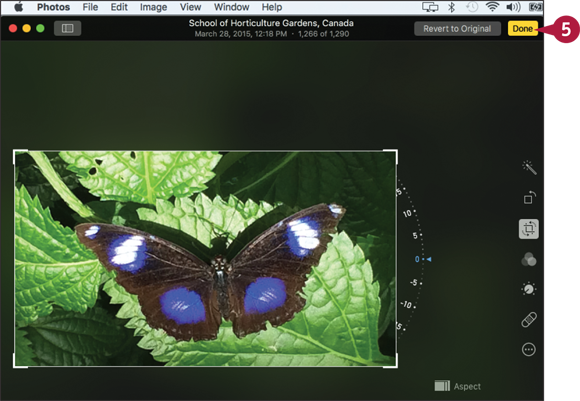
![]() Click Done.
Click Done.
Photos saves the cropped photo and exits edit mode.
Rotate a Photo
You can rotate a photo using the Photos app. Depending on how you held your camera when you took a shot, the resulting photo might show the subject sideways or upside down. This may be the effect you want, but more likely this is a problem. To fix this problem, you can use Photos to rotate the photo so that the subject appears right-side up. You can rotate a photo either clockwise or counterclockwise.
Rotate a Photo

![]() Open the photo you want to rotate.
Open the photo you want to rotate.
Note: A quick way to rotate a photo is to right-click the photo and then click Rotate Clockwise.
![]() Click Edit.
Click Edit.

Photos displays its editing tools.
![]() Click Rotate.
Click Rotate.
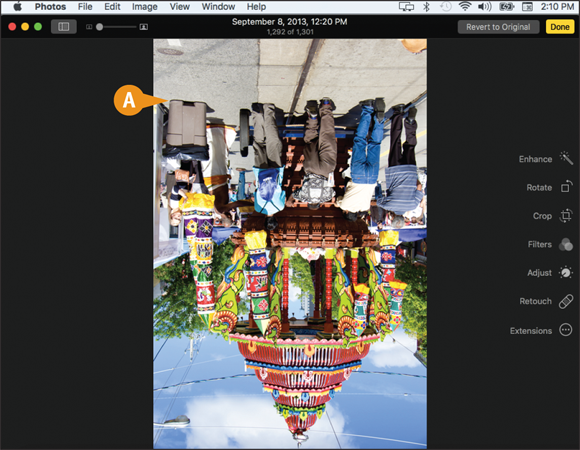
![]() Photos rotates the photo 90 degrees counterclockwise.
Photos rotates the photo 90 degrees counterclockwise.

![]() Repeat step 3 until the subject of the photo is right-side up.
Repeat step 3 until the subject of the photo is right-side up.
![]() Click Done.
Click Done.
Photos saves your changes and exits edit mode.
Straighten a Photo
You can straighten a crooked photo using the Photos app. If you do not use a tripod when taking pictures, getting your camera perfectly level when you take a shot is very difficult and requires a lot of practice and a steady hand. Despite your best efforts, you might end up with a photo that is not quite level. To fix this problem, you can use Photos to nudge the photo clockwise or counterclockwise so that the subject appears straight.
Straighten a Photo
![]() Open the photo you want to straighten.
Open the photo you want to straighten.
![]() Click Edit.
Click Edit.
Photos displays its editing tools.
![]() Click Crop.
Click Crop.
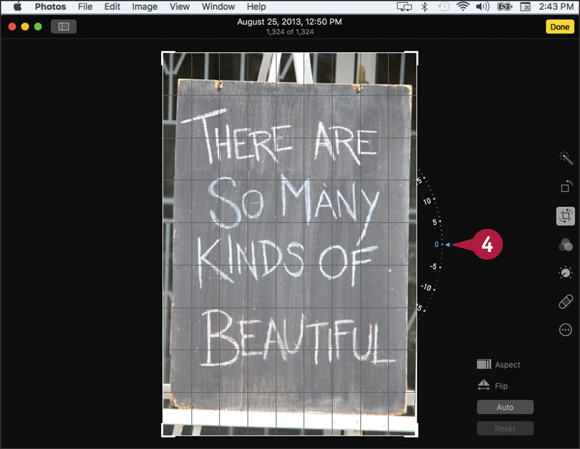
Photos displays its cropping and straightening tools.
![]() Click and drag the Angle slider.
Click and drag the Angle slider.
Drag the slider up to angle the photo counterclockwise.
Drag the slider down to angle the photo clockwise.
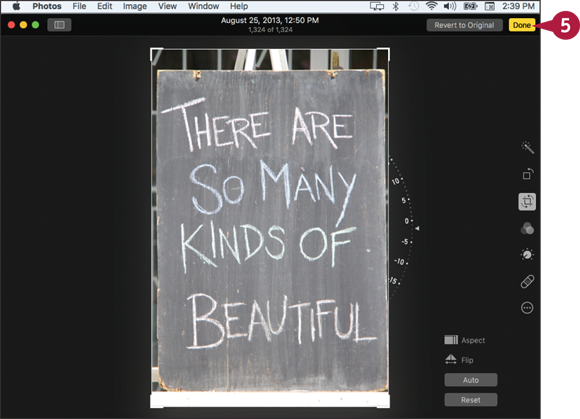
![]() Click Done.
Click Done.
Photos saves your changes and exits edit mode.
Remove Red Eye from a Photo
You can remove red eye from a photo using the Photos app. When you use a flash to take a picture of one or more people, in some cases the flash may reflect off the subjects’ retinas. The result is the common phenomenon of red eye, where each person’s pupils appear red instead of black. If you have a photo where one or more people have red eyes due to the camera flash, you can use Photos to remove the red eye and give your subjects a more natural look.
Remove Red Eye from a Photo
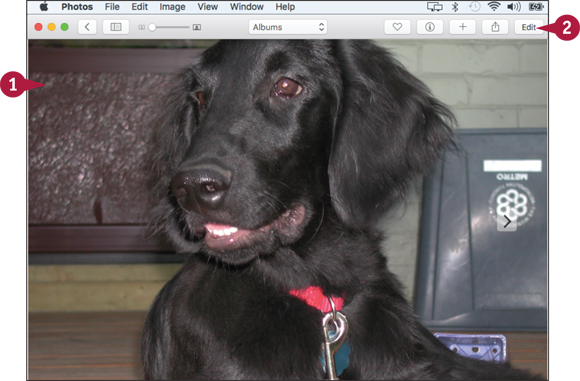
![]() Open the photo that contains the red eye.
Open the photo that contains the red eye.
![]() Click Edit.
Click Edit.
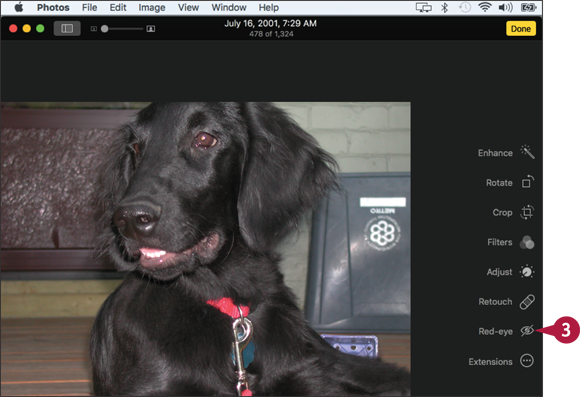
Photos displays its editing tools.
![]() Click Red-eye.
Click Red-eye.
Photos displays its Red-eye controls.
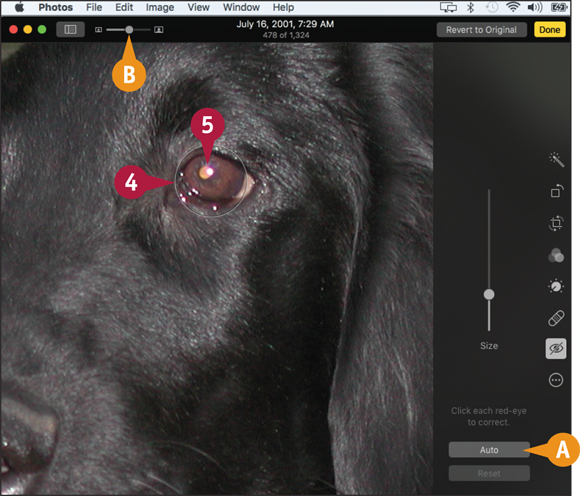
![]() You may be able to fix the red eye automatically by clicking Auto. If that does not work, continue with the rest of these steps.
You may be able to fix the red eye automatically by clicking Auto. If that does not work, continue with the rest of these steps.
![]() If needed, you can click and drag this slider to the right to zoom in on the picture.
If needed, you can click and drag this slider to the right to zoom in on the picture.
![]() Move the Red-Eye pointer over a red eye in the photo.
Move the Red-Eye pointer over a red eye in the photo.
![]() Click the red eye.
Click the red eye.

![]() Photos removes the red eye.
Photos removes the red eye.
![]() Repeat steps 4 and 5 to fix any other instances of red eye in the photo.
Repeat steps 4 and 5 to fix any other instances of red eye in the photo.
![]() Click Done.
Click Done.
Photos saves your changes and exits edit mode.
Add Names to Faces in Your Photos
You can make your photos easier to manage and navigate by adding names to the faces that appear in each photo. This is sometimes called tagging, and it enables you to navigate your photos by name.
Specifically, Photos includes a special Faces section in its library, which organizes your faces according to the names you assign when you tag your photos. This makes it easy to view all your photos in which a certain person appears.
Add Names to Faces in Your Photos
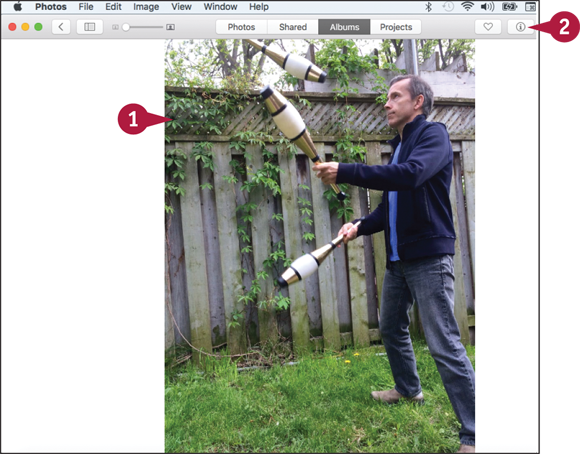
![]() Open the photo that you want to tag.
Open the photo that you want to tag.
![]() Click Show Info (
Click Show Info (![]() ).
).
Photos displays information about the photo.
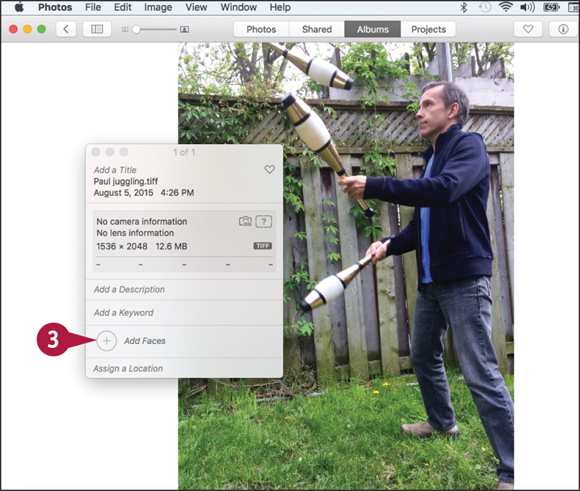
![]() Click Add Faces.
Click Add Faces.
Photos displays its naming tools.
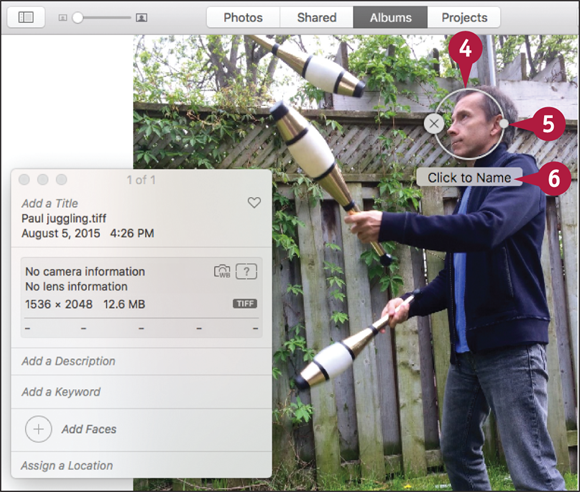
![]() Click and drag the circle to center it on the person’s face.
Click and drag the circle to center it on the person’s face.
![]() Click and drag this dot to size the circle to the person’s face.
Click and drag this dot to size the circle to the person’s face.
![]() Click the Click to Name label.
Click the Click to Name label.

![]() Type the person’s name.
Type the person’s name.
![]() Press
Press ![]() .
.
![]() Repeat steps 4 to 8 to name each person in the photo.
Repeat steps 4 to 8 to name each person in the photo.
![]() Click Close (
Click Close (![]() ).
).
Photos saves the changes and exits naming mode.
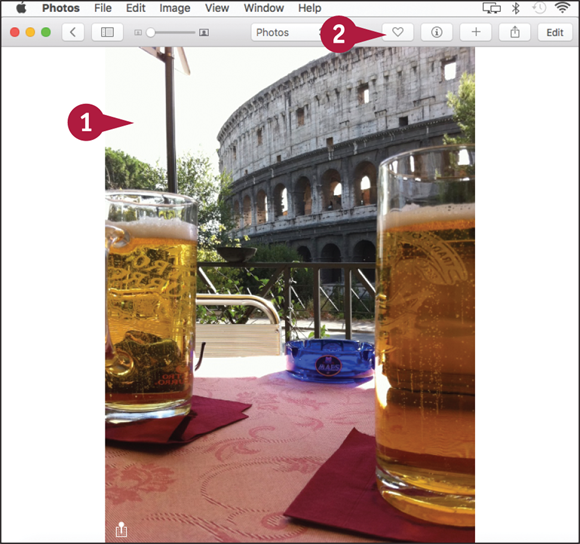
Mark Your Favorite Photos
You can make it easier and faster to find the photos you like best by marking those photos as favorites. If you take photos regularly, you can easily end up with hundreds or even thousands of images in your Photos library, and you might end up creating dozens of albums. Locating a cherished photo quickly becomes a time-consuming and frustrating chore. You can greatly speed up the task of locating such photos by marking them as favorites. Photos stores all your favorites in a special album, so it takes only a few clicks to view them.
Mark Your Favorite Photos
Mark a Single Photo
![]() Open the photo that you want to mark as a favorite.
Open the photo that you want to mark as a favorite.
![]() Click Add to Favorites (
Click Add to Favorites (![]() ).
).
Photos marks the photo as a favorite.

Mark Multiple Photos
![]() Open the album that contains the photos you want to mark as favorites.
Open the album that contains the photos you want to mark as favorites.
![]() Press and hold
Press and hold ![]() and click each photo you want to mark.
and click each photo you want to mark.
![]() Click Add to Favorites (
Click Add to Favorites (![]() ) in one of the selected photos.
) in one of the selected photos.
Photos marks all the selected photos as favorites.
Note: To view your favorites, open the Albums tab and double-click the Favorites album.
Set an Album’s Key Photo
You can make it easier to navigate your albums and to understand the content of your albums by setting the key photo for each album. The key photo is the image that appears in the Albums tab as the thumbnail used to display the album. As such, the key photo acts as a representative of all the photos in the album, so it should therefore either reflect the content of that album or contain text or an image that help you to identify the album.
Set an Album’s Key Photo
![]() Open the album you want to work with.
Open the album you want to work with.
![]() Double-click the image that you want to set as the album’s key photo.
Double-click the image that you want to set as the album’s key photo.

Photos opens the image.
![]() Click Image.
Click Image.
![]() Click Make Key Photo.
Click Make Key Photo.
You can also press ![]() +
+![]() +
+![]() .
.
Photos sets the image as the album’s key photo.
Email a Photo
If you have a photo that you want to share with someone, and you know that person’s email address, you can send the photo in an email message. Using Photos, you can specify what photo you want to send, and Photos creates a new message. Even if a photo is very large, you can still send it via email because you can use Photos to shrink the copy of the photo that appears in the message.
Email a Photo
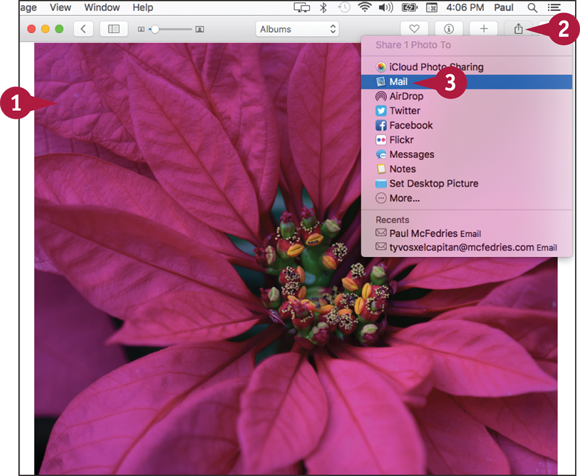
![]() Open the photo you want to send.
Open the photo you want to send.
![]() Click Share (
Click Share (![]() ).
).
![]() Click Mail.
Click Mail.

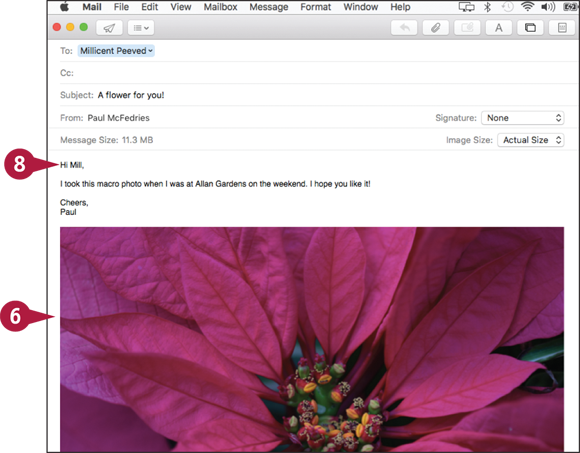
![]() Photos creates a new message and adds the photo to the message body.
Photos creates a new message and adds the photo to the message body.
![]() Type the address of the message recipient.
Type the address of the message recipient.
![]() Type the message subject.
Type the message subject.
![]() Click to the left of the image.
Click to the left of the image.
![]() Press
Press ![]() once or twice to move the image down.
once or twice to move the image down.
![]() Click here and then type your message text.
Click here and then type your message text.

![]() Click Send (
Click Send (![]() ).
).
Photos sends the message with the photo as an attachment.
Take Your Picture
You can use your Mac to take a picture of yourself. If your Mac comes with a built-in iSight or FaceTime HD camera, or if you have an external camera attached to your Mac, you can use the camera to take a picture of yourself using the Photo Booth application. After you take your picture, you can email that picture, add it to Photos, or set it as your user account or Messages buddy picture.
Take Your Picture

Take Your Picture with Photo Booth
![]() Click Spotlight (
Click Spotlight (![]() ).
).
![]() Type photo.
Type photo.
![]() Click Photo Booth.
Click Photo Booth.

The Photo Booth window appears.
![]() The live feed from the camera appears here.
The live feed from the camera appears here.
![]() Click Take a still picture (
Click Take a still picture (![]() ).
).
![]() Click Take four quick pictures (
Click Take four quick pictures (![]() ) to snap four successive photos, each about 1 second apart.
) to snap four successive photos, each about 1 second apart.
![]() Click Take a movie clip (
Click Take a movie clip (![]() ) to capture the camera feed as a movie.
) to capture the camera feed as a movie.
![]() Click Take Photo (
Click Take Photo (![]() ).
).
Photo Booth counts down 3 seconds and then takes the photo.
Work with Your Photo Booth Picture
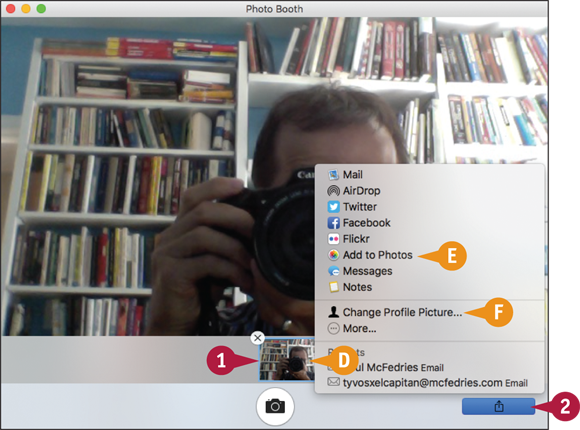
![]() Photo Booth displays the picture.
Photo Booth displays the picture.
![]() Click the picture.
Click the picture.
![]() Click Share (
Click Share (![]() ).
).
![]() You can click Add to Photos to add the image to the Photos app.
You can click Add to Photos to add the image to the Photos app.
![]() You can click Change profile picture to set the photo as your user account picture.
You can click Change profile picture to set the photo as your user account picture.
Play a DVD Using DVD Player
If your Mac has a DVD drive, you can insert a movie DVD into the drive and then use the DVD Player application to play the movie on your Mac. You can either watch the movie in full-screen mode, where the movie takes up the entire Mac screen, or play the DVD in a window while you work on other things. DVD Player has features that enable you to control the movie playback and volume.
Play a DVD Using DVD Player
Play a DVD Full Screen
![]() Insert the DVD into your Mac’s DVD drive.
Insert the DVD into your Mac’s DVD drive.
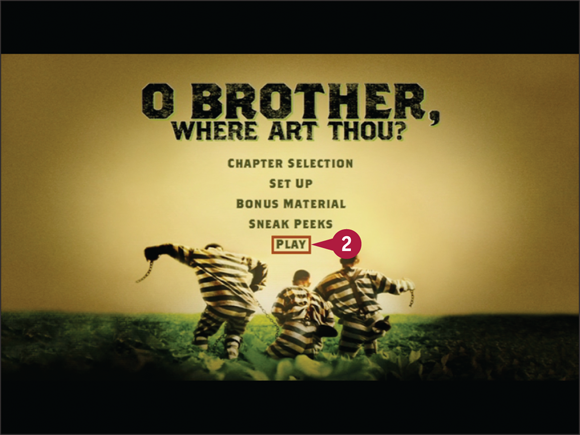
DVD Player runs automatically and starts playing the DVD full screen.
Note: If DVD Player does not appear, click Spotlight (![]() ), type dvd, and then double-click DVD Player.
), type dvd, and then double-click DVD Player.
![]() If you get to the DVD menu, click Play to start the movie.
If you get to the DVD menu, click Play to start the movie.
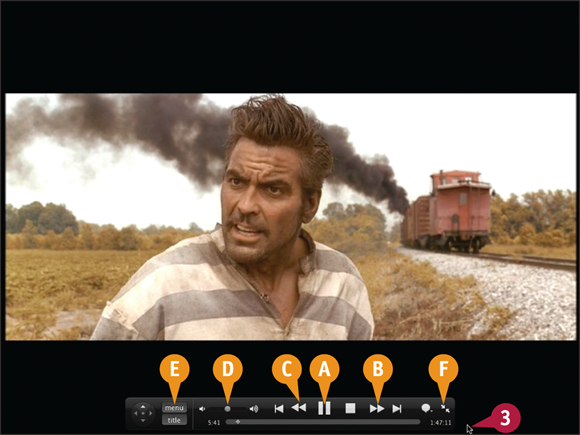
![]() Move the mouse (
Move the mouse (![]() ) to the bottom of the screen.
) to the bottom of the screen.
The playback controls appear.
![]() You can click
You can click ![]() to pause the movie.
to pause the movie.
![]() You can click
You can click ![]() to fast-forward the movie.
to fast-forward the movie.
![]() You can click
You can click ![]() to rewind the movie.
to rewind the movie.
![]() You can drag the slider to adjust the volume.
You can drag the slider to adjust the volume.
![]() You can click menu to display the DVD menu.
You can click menu to display the DVD menu.
![]() You can click
You can click ![]() to exit full-screen mode.
to exit full-screen mode.

Play a DVD in a Window
![]() Insert the DVD into your Mac’s DVD drive.
Insert the DVD into your Mac’s DVD drive.
DVD Player runs automatically and starts playing the DVD full screen.
![]() Press
Press ![]() +
+![]() .
.
Note: You can also press ![]() or move the mouse (
or move the mouse (![]() ) to the bottom of the screen and then click Exit full screen.
) to the bottom of the screen and then click Exit full screen.
DVD Player displays the movie in a window.
![]() DVD Player displays the controller.
DVD Player displays the controller.
![]() When you get to the DVD menu, click Play to start the movie.
When you get to the DVD menu, click Play to start the movie.
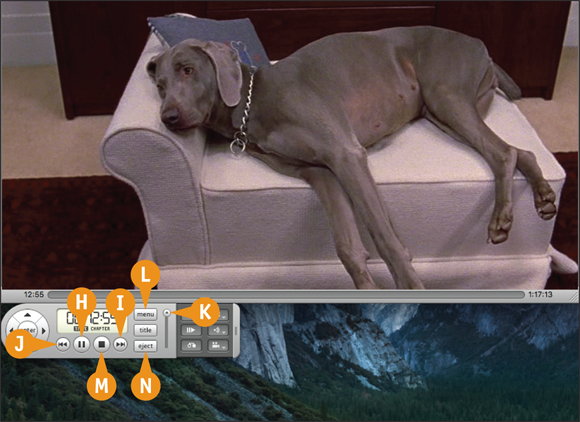
![]() You can click
You can click ![]() to pause the movie.
to pause the movie.
![]() You can click and hold
You can click and hold ![]() to fast-forward the movie.
to fast-forward the movie.
![]() You can click and hold
You can click and hold ![]() to rewind the movie.
to rewind the movie.
![]() You can drag the slider to adjust the volume.
You can drag the slider to adjust the volume.
![]() You can click menu to display the DVD menu.
You can click menu to display the DVD menu.
![]() You can click
You can click ![]() to stop the movie.
to stop the movie.
![]() You can click to eject the DVD.
You can click to eject the DVD.
Play Digital Video with QuickTime Player
OS X comes with an application called QuickTime Player that can play digital video files in various formats. You will mostly use QuickTime Player to play digital video files stored on your Mac, but you can also use the application to play digital video from the web.
QuickTime Player enables you to open video files, navigate the digital video playback, and control the digital video volume. Although you learn only how to play digital video files in this section, the version of QuickTime that comes with OS X comes with many extra features, including the capability to record movies and audio and to cut and paste scenes.
Play Digital Video with QuickTime Player

![]() Click Spotlight (
Click Spotlight (![]() ).
).
![]() Type quick.
Type quick.
![]() Click QuickTime Player.
Click QuickTime Player.
The QuickTime Player application appears. If you see the Open dialog, skip to step 6.
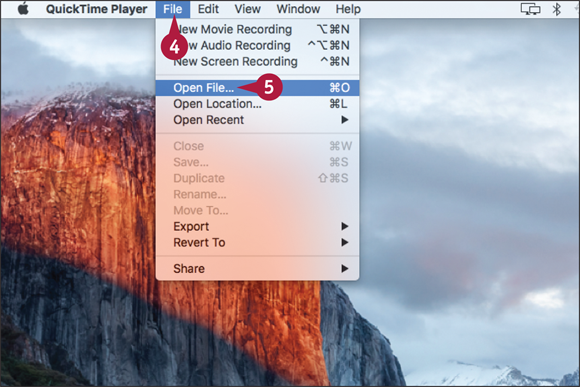
![]() Click File.
Click File.
![]() Click Open File.
Click Open File.
Note: You can also press ![]() +
+![]() .
.
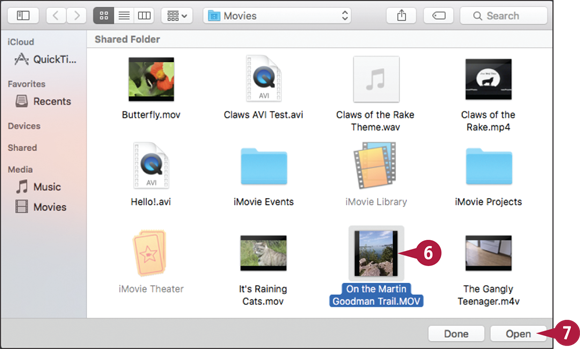
The Open dialog appears.
![]() Locate and click the video file you want to play.
Locate and click the video file you want to play.
![]() Click Open.
Click Open.

QuickTime opens a new player window.
![]() Click Play (
Click Play (![]() ).
).
![]() You can click
You can click ![]() to fast-forward the video.
to fast-forward the video.
![]() You can click
You can click ![]() to rewind the video.
to rewind the video.
![]() You can click and drag this slider to adjust the volume.
You can click and drag this slider to adjust the volume.
If you want to view the video in full-screen mode, press ![]() +
+![]() .
.