CHAPTER 14
Working with iCloud

You can get a free iCloud account, which is an online service that lets you automatically synchronize data between iCloud and your Mac (as well as your iPhone, iPad, or iPod touch). You can also use iCloud to generate website passwords, store documents online, and locate a lost Mac.
Activate and Configure iCloud Drive
Create an Apple ID
To use iCloud, you need to create a free Apple ID, which you use to sign in to iCloud on the web and to synchronize your Mac and other devices. An Apple ID is an email address. You can use an existing email address for your Apple ID. When you use an existing email address, you are required to verify via email that the address is legitimate. Once you have created an Apple ID, you can use it to sign in to iCloud on the web, on your Mac, and on your devices, such as your iPhone or iPad.
Create an Apple ID
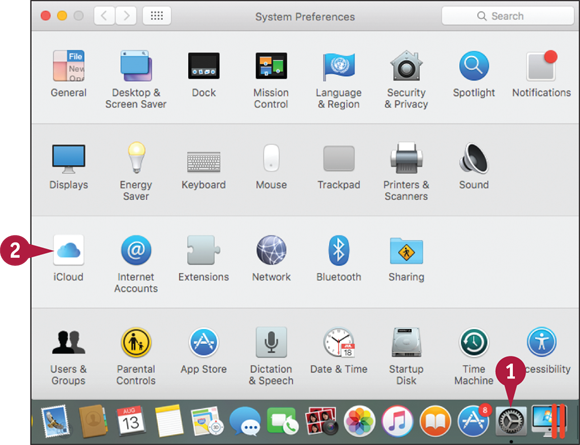
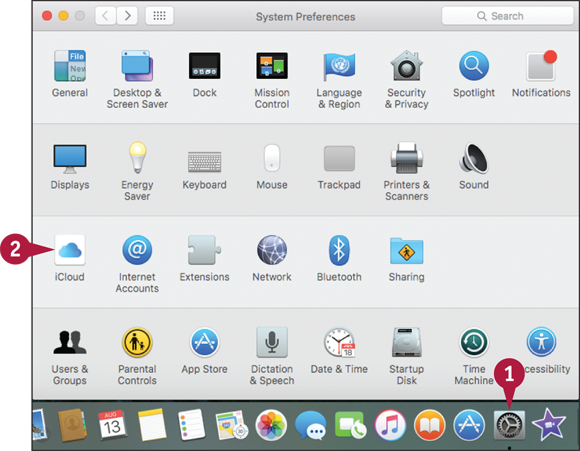
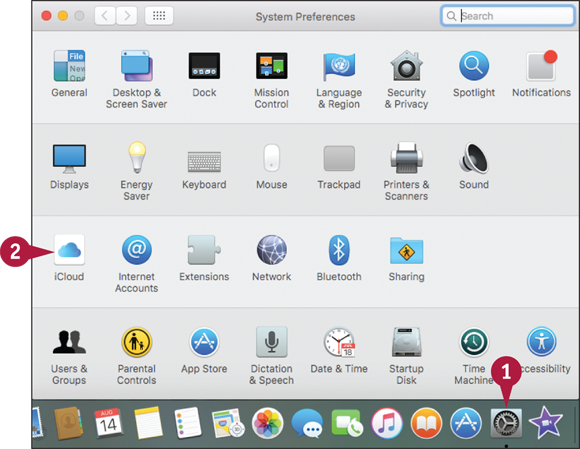
![]() Click System Preferences (
Click System Preferences (![]() ).
).
The System Preferences appear.
![]() Click iCloud.
Click iCloud.
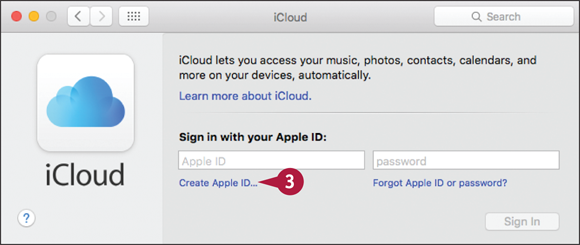
The iCloud preferences appear.
![]() Click Create Apple ID.
Click Create Apple ID.
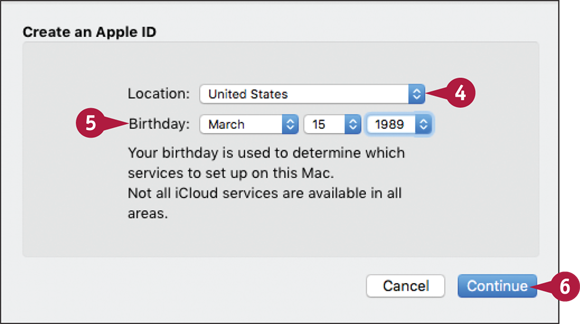
The Create an Apple ID dialog appears.
![]() Click the Location
Click the Location ![]() to choose your country.
to choose your country.
![]() Click the three Birthday pop-up menus to choose your month, day, and year of birth.
Click the three Birthday pop-up menus to choose your month, day, and year of birth.
![]() Click Continue.
Click Continue.

![]() Type your name.
Type your name.
![]() Type the email address you want to use.
Type the email address you want to use.
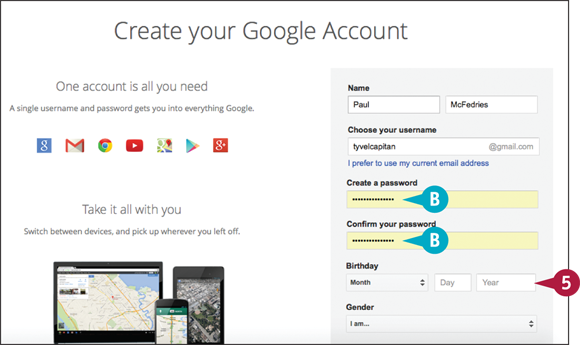
![]() Type the password (twice).
Type the password (twice).
![]() Click Continue.
Click Continue.
Although there is nothing to stop you from using any email address as your Apple ID, you really should use an address that belongs to you. Also, you need to be able to retrieve and read messages that are sent to that address, because this is part of the verification process. That is, once you give Apple your details and agree to the terms of service, Apple will send a verification message to the email address you provided. Before you can use your iCloud account, you must click a verification link in that message.

![]() For each security question, click
For each security question, click ![]() to select a question and then type an answer.
to select a question and then type an answer.
![]() Click Continue.
Click Continue.
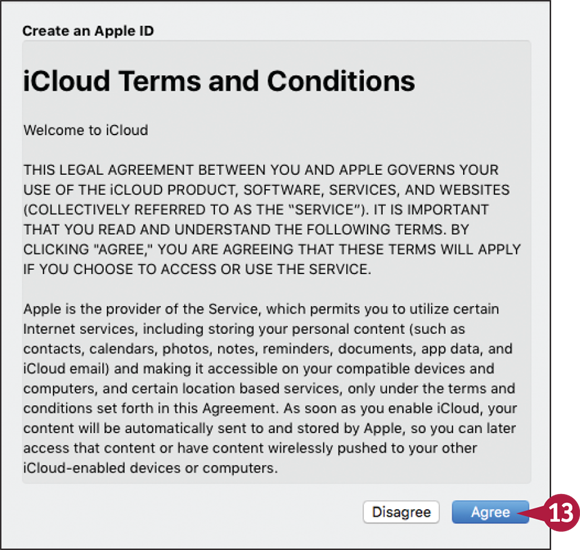
![]() Click Agree.
Click Agree.

Apple sends an email message to the address you typed in step 8.
![]() In your email program, open the message from Apple.
In your email program, open the message from Apple.
![]() Click Verify now.
Click Verify now.

Apple prompts you to sign in to verify your email address.
![]() Type your Apple ID (that is, the email address from step 8).
Type your Apple ID (that is, the email address from step 8).
![]() Type your password.
Type your password.
![]() Click Verify Address.
Click Verify Address.
Apple verifies your address and then OS X sets up your iCloud account on your Mac.
Sign In to iCloud Online
Although you can access most iCloud features using your Mac, you can also sign in online using a web browser, which is useful if you need to access iCloud data when using someone else’s Mac or Windows PC. Most modern browsers work well with iCloud, but Apple recommends that you use at least Safari 8, Firefox 22, Internet Explorer 10, or Chrome 28.
To sign in to iCloud using a Mac, you must be using at least OS X Lion 10.7.5, although Apple recommends OS X Yosemite (10.10.3) or later. To access iCloud using a Windows PC, the PC must be running Windows 7 or later.
Sign In to iCloud Online

![]() In your web browser, type
In your web browser, type www.icloud.com.
![]() Press
Press ![]() .
.
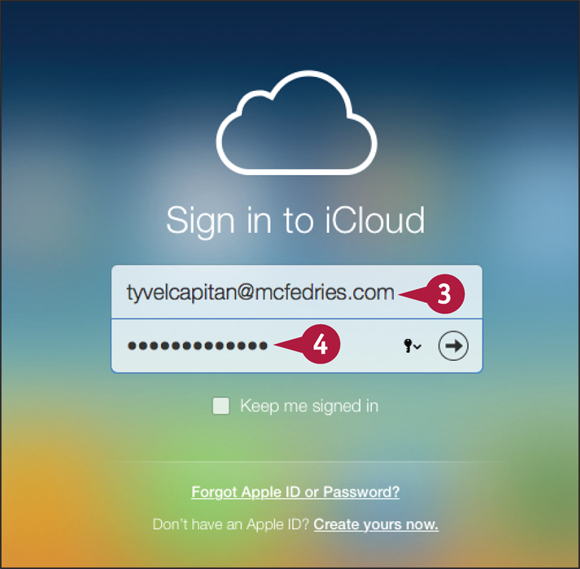
The iCloud Login page appears.
![]() Type your Apple ID in the Apple ID text box.
Type your Apple ID in the Apple ID text box.
![]() Type the password for your Apple ID in the Password text box.
Type the password for your Apple ID in the Password text box.
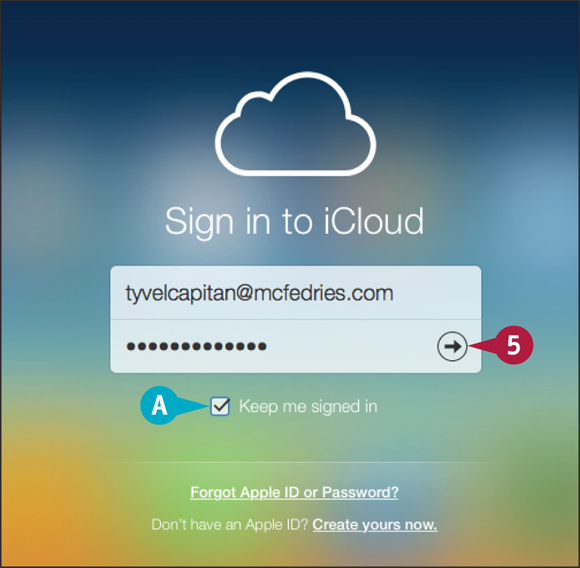
![]() If you want iCloud to sign you in automatically in the future, click the Keep me signed in check box (
If you want iCloud to sign you in automatically in the future, click the Keep me signed in check box (![]() changes to
changes to ![]() ).
).
![]() Click Sign In (
Click Sign In (![]() ).
).
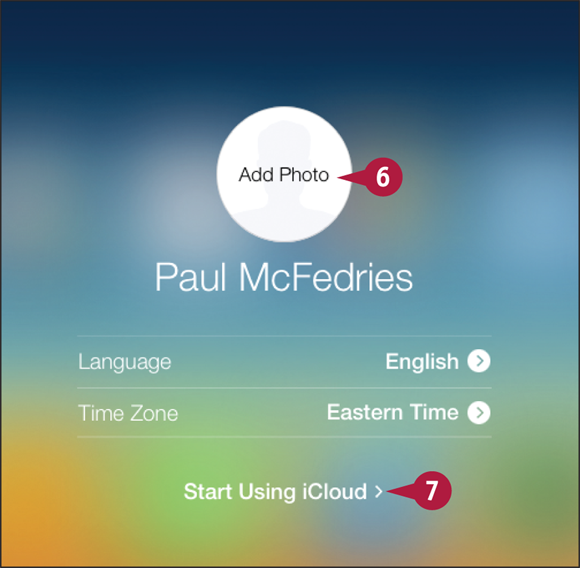
The first time you sign in, iCloud prompts you to configure some settings.
![]() Click Add Photo, drop a photo on the dialog that appears, and then click Done.
Click Add Photo, drop a photo on the dialog that appears, and then click Done.
![]() Click Start Using iCloud.
Click Start Using iCloud.
Set Up iCloud Synchronization
You can ensure that your Mac and your iCloud account have the same data by synchronizing the two. The main items you will want to synchronize are email accounts, contacts, calendars, reminders, and notes. However, there are many other types of data you may want to synchronize to iCloud, including Safari bookmarks, photos, and documents. If you have a second Mac, a Windows PC, or an iPhone, iPad, or iPod touch, you can also synchronize it with the same iCloud account, which ensures that your Mac and the device use the same data.
Set Up iCloud Synchronization
![]() Click System Preferences (
Click System Preferences (![]() ).
).
The System Preferences appear.
![]() Click iCloud.
Click iCloud.
The first time you open iCloud, OS X prompts you to choose which iCloud services you want to use.
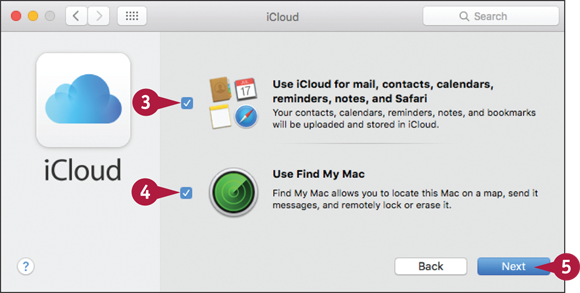
![]() If you do not want to sync your data to iCloud, click the Use iCloud for mail, contacts, calendars, reminders, notes, and Safari check box (
If you do not want to sync your data to iCloud, click the Use iCloud for mail, contacts, calendars, reminders, notes, and Safari check box (![]() changes to
changes to ![]() ).
).
![]() If you do not want to use iCloud to locate your Mac, click the Use Find My Mac check box (
If you do not want to use iCloud to locate your Mac, click the Use Find My Mac check box (![]() changes to
changes to ![]() ).
).
![]() Click Next.
Click Next.
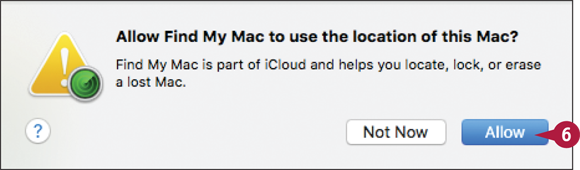
If you elected to use Find My Mac, OS X asks you to confirm.
![]() Click Allow.
Click Allow.

The iCloud preferences appear.
![]() Click the check box beside a type of data you want to sync (
Click the check box beside a type of data you want to sync (![]() changes to
changes to ![]() ).
).
Note: If you do not want to sync a type of data, click its check box (![]() changes to
changes to ![]() ). If OS X asks if you want to keep or delete the iCloud data that you are no longer syncing, click Keep or click Delete from Mac.
). If OS X asks if you want to keep or delete the iCloud data that you are no longer syncing, click Keep or click Delete from Mac.
Your Mac synchronizes the data with your iCloud account.
Set Up iCloud Keychain
You can make it easier to navigate secure websites by setting up iCloud Keychain. A keychain is a master list of usernames and passwords that a system stores for easy access by an authorized user. iCloud Keychain is a special type of keychain that stores website passwords auto-generated by Safari, as described in the next section, “Generate a Website Password.” This means that you do not have to remember these passwords because Safari can automatically retrieve them from your iCloud account.
Set Up iCloud Keychain

![]() Click System Preferences (
Click System Preferences (![]() ).
).
The System Preferences appear.
![]() Click iCloud.
Click iCloud.

The iCloud preferences appear.
![]() Click the Keychain check box (
Click the Keychain check box (![]() changes to
changes to ![]() ).
).
Note: If OS X prompts you to create a password to unlock your screen, see Chapter 11.
OS X prompts you for your Apple ID password.
![]() Type your password.
Type your password.
![]() Click OK.
Click OK.
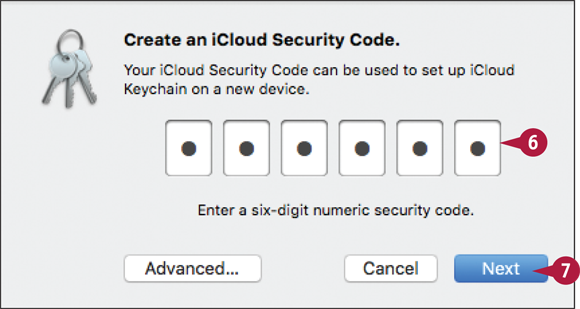
OS X prompts you to enter an iCloud security code.
![]() Type a six-digit security code.
Type a six-digit security code.
![]() Click Next.
Click Next.
OS X prompts you to confirm the iCloud security code.
![]() Repeat steps 6 and 7 to confirm the security code.
Repeat steps 6 and 7 to confirm the security code.

OS X prompts you to enter a phone number that can receive SMS (text) messages.
Note: If you have previously set up a phone number with iCloud, OS X sends a verification code to that number and then prompts you to enter the code.
![]() Type the phone number.
Type the phone number.
![]() Click Done.
Click Done.
OS X activates iCloud Keychain.
Generate a Website Password
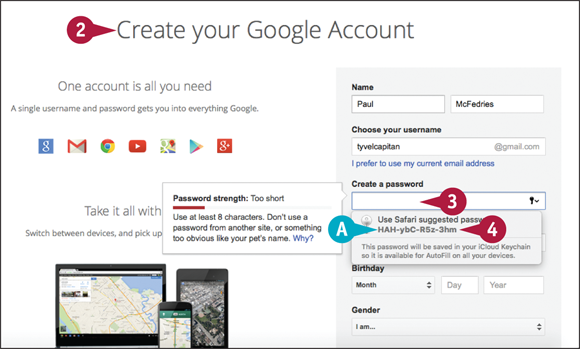
You can make it easier and faster to navigate many websites by using Safari to generate, and iCloud to store, passwords for those sites that require you to log in. Many websites require you to set up an account, which means you must log in with a username and password. Good security practices dictate using a unique and hard-to-guess password for each site, but this requires memorizing a large number of passwords. To enhance security and ease web navigation, you can use Safari to automatically generate for each site a unique and secure password stored safely with your iCloud account.
Generate a Website Password
Generate a Website Password
![]() Turn on iCloud Keychain.
Turn on iCloud Keychain.
Note: See the previous section, “Set Up iCloud Keychain,” to learn how to activate iCloud Keychain.
![]() In Safari, navigate to a web page that requires a new password.
In Safari, navigate to a web page that requires a new password.
![]() Click inside the password field.
Click inside the password field.
![]() Safari displays its suggested password.
Safari displays its suggested password.
![]() Click the password.
Click the password.
![]() iCloud enters the password. iCloud also enters the password in the confirmation field, if one exists.
iCloud enters the password. iCloud also enters the password in the confirmation field, if one exists.
![]() Fill in the rest of the website form data as required.
Fill in the rest of the website form data as required.
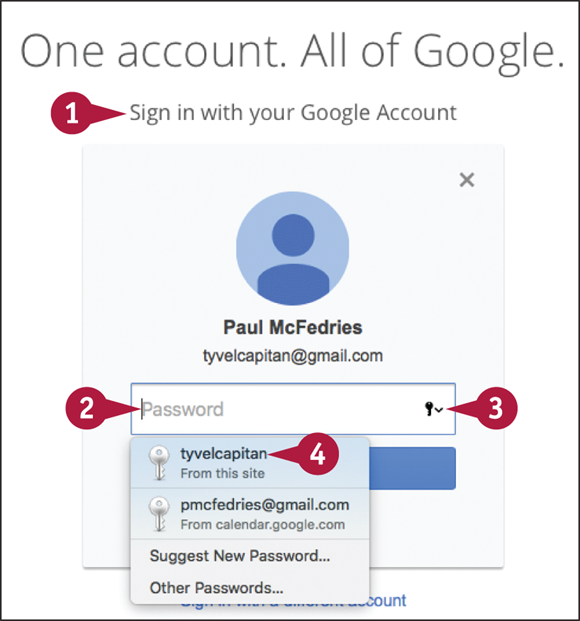
Using a Generated Website Password
![]() In Safari, navigate to a web page that requires you to log in using a previously generated password.
In Safari, navigate to a web page that requires you to log in using a previously generated password.
![]() Click inside the Password box.
Click inside the Password box.
![]() Click Keychain (
Click Keychain (![]() ).
).
![]() Click the saved website password.
Click the saved website password.

![]() Safari fills in the website password.
Safari fills in the website password.
Activate and Configure iCloud Drive
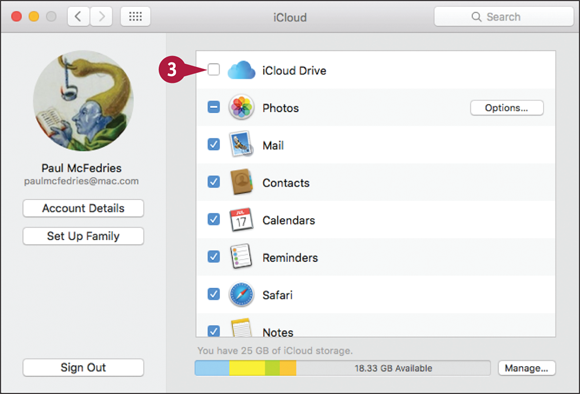
You can use the iCloud Drive feature to store documents online. You can then access those documents either via the iCloud website or by using any other device — such as an iPhone or iPad — that is signed in to the same iCloud account. iCloud Drive works with all your Mac apps, so you can store any document in any iCloud Drive folder. If you have apps that you do not want to access your online storage, you can configure iCloud Drive to exclude those apps.
Activate and Configure iCloud Drive

![]() Click System Preferences (
Click System Preferences (![]() ).
).
The System Preferences appear.
![]() Click iCloud.
Click iCloud.
The iCloud preferences appear.
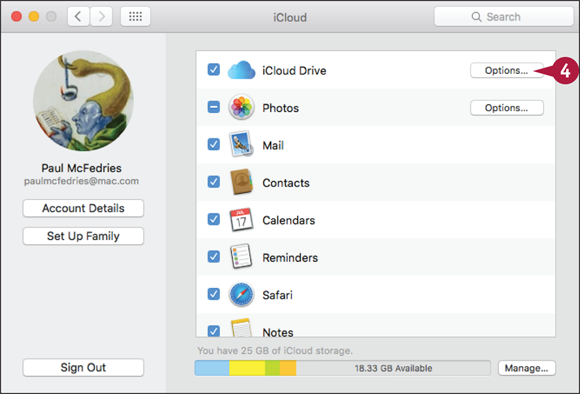
![]() Click the iCloud Drive check box (
Click the iCloud Drive check box (![]() changes to
changes to ![]() ).
).
OS X activates iCloud Drive on your Mac.
![]() Click Options.
Click Options.
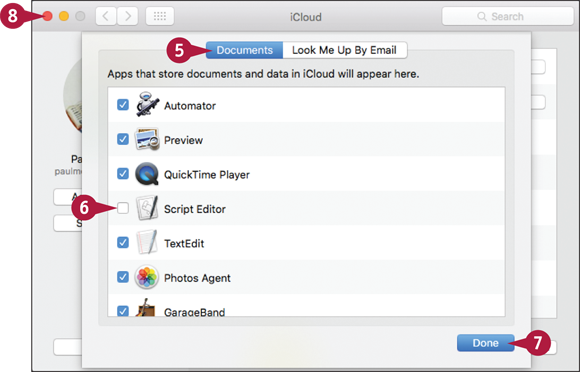
![]() Click the Documents tab.
Click the Documents tab.
OS X displays a list of apps that store documents using iCloud Drive.
![]() Click the check box for each app that you do not want to access iCloud Drive (
Click the check box for each app that you do not want to access iCloud Drive (![]() changes to
changes to ![]() ).
).
![]() Click Done.
Click Done.
![]() Click Close (
Click Close (![]() ).
).
OS X puts your iCloud Drive settings into effect.
Save and Open Documents Using iCloud Drive
Now that you have activated iCloud Drive, you can use any OS X application to save your documents to iCloud Drive. If a program has its own iCloud Drive application library, you can use that folder to save your documents. Otherwise, you can save your documents in any iCloud Drive folder.
Once you have documents saved to iCloud Drive, you can use the associated OS X applications to open and work with those documents. You can also access iCloud Drive documents directly using Finder.
Save and Open Documents Using iCloud Drive
Save to an Application Library
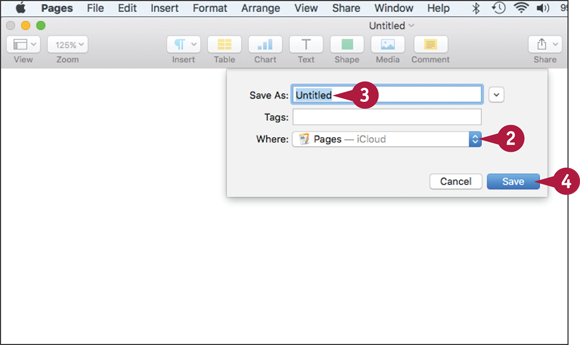
![]() Run the app’s Save command.
Run the app’s Save command.
Note: In most apps, you run the Save command by clicking File and then clicking Save, or by pressing ![]() +
+![]() .
.
![]() Click the Where
Click the Where ![]() and then click App — iCloud, where App is the name of the app, such as Pages, as shown here.
and then click App — iCloud, where App is the name of the app, such as Pages, as shown here.
![]() Fill in the other file details.
Fill in the other file details.
![]() Click Save.
Click Save.
OS X saves the document to the program’s application library.
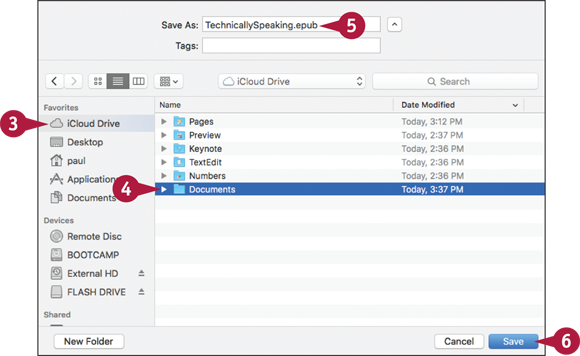
Save to Any iCloud Drive Folder
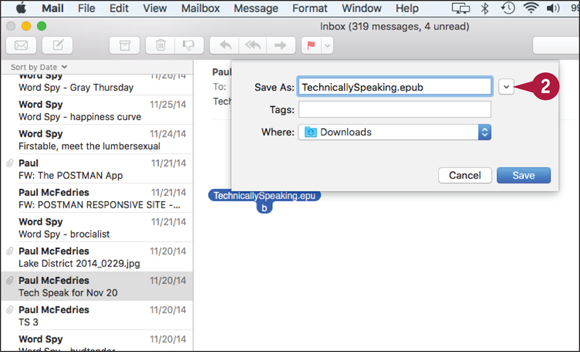
![]() Run the app’s Save command.
Run the app’s Save command.
![]() Click Expand (
Click Expand (![]() ).
).
OS X expands the dialog.
![]() In the Favorites section of the sidebar, click iCloud Drive.
In the Favorites section of the sidebar, click iCloud Drive.
OS X displays the contents of your main iCloud Drive folder.
![]() Double-click the folder you want to use to store the document.
Double-click the folder you want to use to store the document.
![]() Fill in the other file details.
Fill in the other file details.
![]() Click Save.
Click Save.
OS X saves the document to the iCloud Drive folder.

Open a Document Using Finder
![]() Click Finder (
Click Finder (![]() ).
).
![]() In the sidebar’s Favorites section, click iCloud Drive.
In the sidebar’s Favorites section, click iCloud Drive.
![]() Open the folder than contains the document you want to open.
Open the folder than contains the document you want to open.
![]() Double-click the document.
Double-click the document.
OS X opens the document in its associated application.
Manage Your iCloud Storage
The iCloud preferences include a feature that enables you to manage your iCloud Drive storage. When you sign up for iCloud, Apple automatically gives you 5GB of free storage. Upgrading your storage, as described in the Tip at the end of this section, costs money, so if you do not want to spend anything for your iCloud Drive storage, then you need to manage your storage. This means deleting data that you no longer need from iCloud Drive. You can delete the backups stored for one or more devices, or you can delete the documents and data stored by one or more apps.
Manage Your iCloud Storage
![]() Click System Preferences (
Click System Preferences (![]() ).
).
The System Preferences appear.
![]() Click iCloud.
Click iCloud.
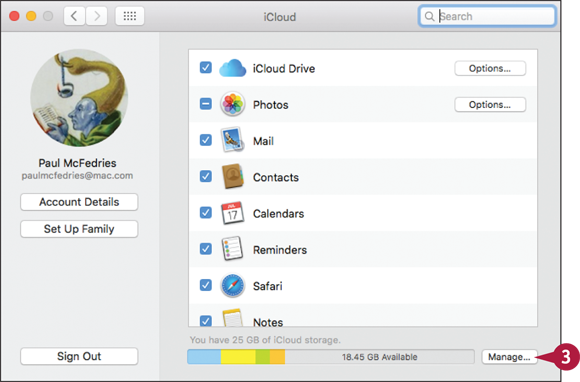
The iCloud preferences appear.
![]() Click Manage.
Click Manage.
The Manage Storage dialog appears.
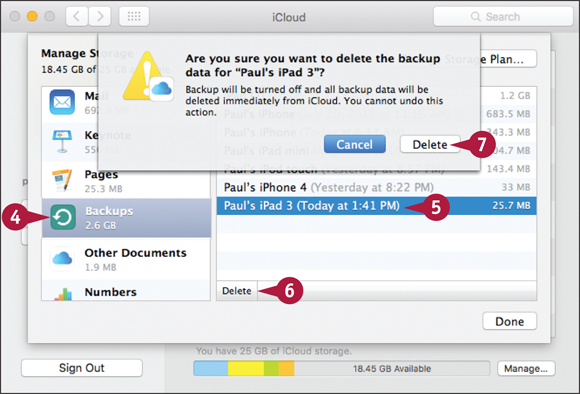
![]() Click Backups.
Click Backups.
![]() Click the device backup you want to remove.
Click the device backup you want to remove.
![]() Click Delete.
Click Delete.
iCloud Drive asks you to confirm.
![]() Click Delete.
Click Delete.
iCloud Drive removes the device backup.

![]() Click an app.
Click an app.
![]() Click Delete Documents and Data.
Click Delete Documents and Data.
iCloud Drive asks you to confirm.
![]() Click Delete.
Click Delete.
![]() Repeat steps 8 to 10 to remove the data for other apps, as needed.
Repeat steps 8 to 10 to remove the data for other apps, as needed.
![]() Click Done.
Click Done.
![]() Click Close (
Click Close (![]() ).
).
OS X puts your iCloud Drive settings into effect.
Set Up Family Sharing
Not being able to see what other members of your family are sharing on iCloud has long been a major drawback of the service because the only way to work around it was to share an account. Now, however, iCloud offers a feature called Family Sharing, which lets up to six family members share each other’s content, including photos, calendars, and reminders. And if purchases are made through the App Store, iTunes Store, or iBookstore using a single credit card, then each family member also gets access to the others’ purchased apps, songs, movies, TV shows, and e-books, where the seller allows that sharing.
Set Up Family Sharing
Note: These steps assume you want to be the Family Sharing organizer, which means you are responsible for maintaining Family Sharing.
![]() Click System Preferences (
Click System Preferences (![]() ) in the Dock (not shown).
) in the Dock (not shown).
![]() Click iCloud (not shown).
Click iCloud (not shown).
The iCloud preferences appear.
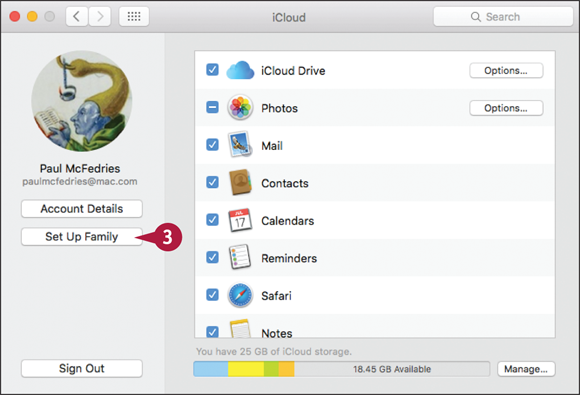
![]() Click Set Up Family.
Click Set Up Family.

The Family Sharing preferences appear.
![]() Click Continue.
Click Continue.
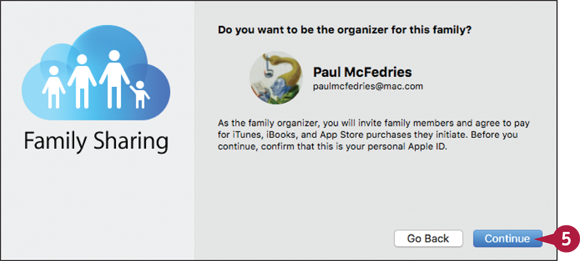
iCloud asks if you want to be the organizer.
![]() Click Continue.
Click Continue.

iCloud lets you know that purchases made through your account will be shared with your family.
![]() Click Continue.
Click Continue.
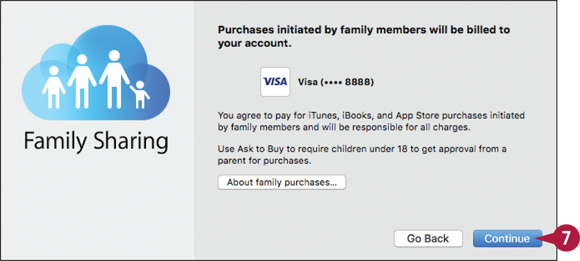
iCloud displays the payment method associated with your account.
![]() Click Continue.
Click Continue.
iCloud asks if you want to share your location with your family.
![]() Click the Share your location option (
Click the Share your location option (![]() changes to
changes to ![]() ) (not shown).
) (not shown).
![]() Click Continue (not shown).
Click Continue (not shown).
iCloud sets up Family Sharing.
Locate and Lock a Lost Mac, iPod, iPhone, or iPad
You can use iCloud to locate a lost or stolen Mac, iPod touch, iPhone, or iPad. Depending on how you use your Mac, iPod touch, iPhone, or iPad, you can end up with many details of your life residing on the device. That is generally a good thing, but if you happen to lose your device, you have also lost those details, plus you have created a large privacy problem because anyone can now see your data. You can locate your device and even remotely lock the device using an iCloud feature called Find My iPhone, which also works for Macs, iPod touches, and iPads.
Locate and Lock a Lost Mac, iPod, iPhone, or iPad
![]() Sign in to the iCloud website.
Sign in to the iCloud website.
Note: See the section “Sign In to iCloud Online,” earlier in this chapter.
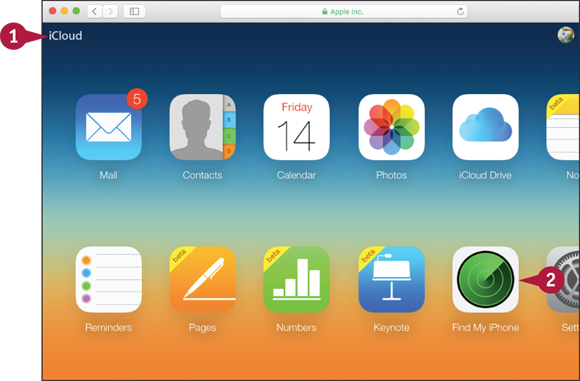
![]() Click Find My iPhone.
Click Find My iPhone.
Note: If iCloud asks you to sign in to your account, type your password and click Sign In.
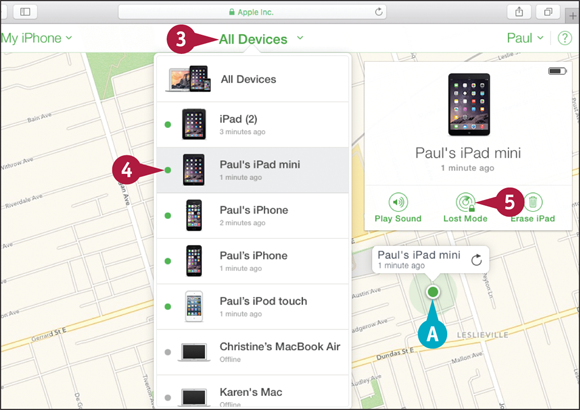
![]() Click All Devices.
Click All Devices.
![]() Click the device you want to locate.
Click the device you want to locate.
![]() iCloud displays the device location on a map.
iCloud displays the device location on a map.
![]() Click Lost Mode.
Click Lost Mode.

The Lost Mode dialog appears. If the device is not protected by a passcode, iCloud prompts you to enter one. If the device is protected by a passcode, you can skip to step 8.
![]() Type a four-digit lock code.
Type a four-digit lock code.
![]() Type the lock code again to confirm (not shown).
Type the lock code again to confirm (not shown).

iCloud prompts you to enter a phone number where you can be contacted.
![]() Type the phone number.
Type the phone number.
![]() Click Next.
Click Next.

iCloud prompts you to enter a message to display on the device.
![]() Type your message.
Type your message.
![]() Click Done.
Click Done.
iCloud locks the device and sends the message, which then appears on the device screen.