CHAPTER 9
Connecting to Social Networks
In this age of ubiquitous social connection, OS X makes everything easier by enabling you to connect and post content to a number of social networks, including Facebook, Twitter, LinkedIn, Flickr, and Vimeo.
Sign In to Your Facebook Account
Publish a Photos Album to Facebook
Sign In to Your Twitter Account
Connect to Your LinkedIn Account
Update Your Social Network Profile Picture
Sign In to Your Facebook Account
If you have a Facebook account, you can use it to share information with your friends directly from OS X because OS X has built-in support for Facebook accounts. This enables you to post status updates and other data directly from many OS X apps. For example, you can send a link to a web page from Safari or post a photo from Photos. OS X also displays notifications when your Facebook friends post to your News Feed. Before you can post or see Facebook notifications, you must sign in to your Facebook account.
Sign In to Your Facebook Account
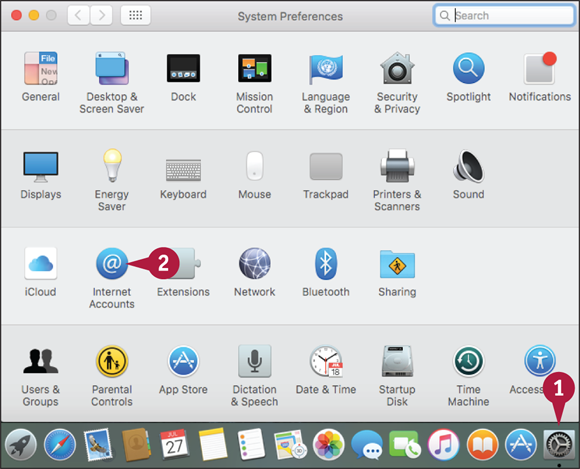
![]() Click System Preferences (
Click System Preferences (![]() ).
).
Note: You can also click Apple (![]() ) and then click System Preferences.
) and then click System Preferences.
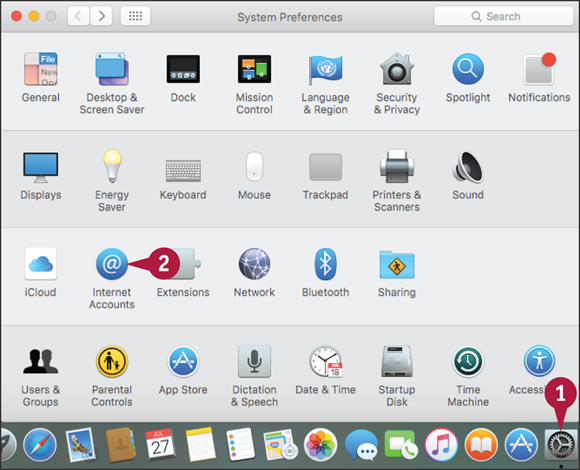
The System Preferences appear.
![]() Click Internet Accounts.
Click Internet Accounts.

The Internet Accounts preferences appear.
![]() Click Facebook.
Click Facebook.

System Preferences prompts you for your Facebook username and password.
![]() Type your Facebook username.
Type your Facebook username.
![]() Type your Facebook password.
Type your Facebook password.
![]() Click Next.
Click Next.

System Preferences displays information detailing what signing in to Facebook entails.
![]() Click Sign In.
Click Sign In.
OS X signs in to your Facebook account.
Post to Facebook
Once you sign in to your Facebook account, you begin seeing notifications whenever your friends post to your News Feed. However, OS X’s Facebook support also enables you to use various OS X apps to post information to your Facebook News Feed. For example, if you surf to a web page that you want to share, you can post a link to that page. You can also post a photo to your News Feed.
Post to Facebook
Post a Web Page
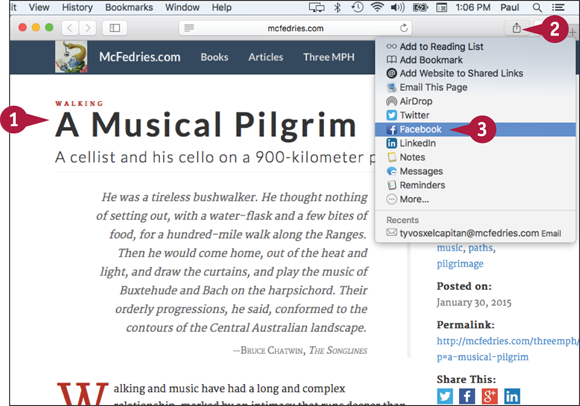
![]() Use Safari to navigate to the web page you want to share.
Use Safari to navigate to the web page you want to share.
![]() Click Share (
Click Share (![]() ).
).
![]() Click Facebook.
Click Facebook.

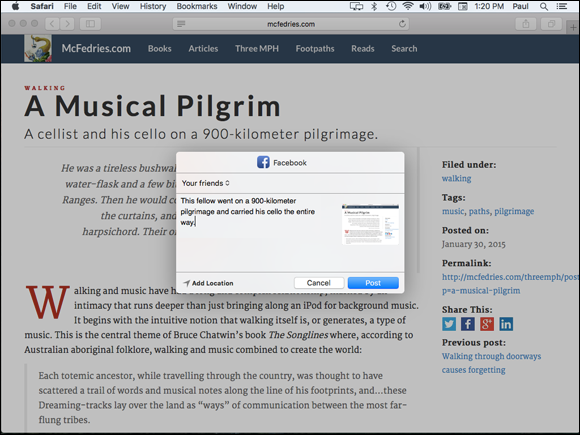
OS X displays the Facebook share sheet.
![]() The web page appears as an attachment inside the post.
The web page appears as an attachment inside the post.
![]() Type your post text.
Type your post text.
![]() Click Post.
Click Post.

Post a Photo
![]() In Finder, open the folder that contains the photo you want to share.
In Finder, open the folder that contains the photo you want to share.
![]() Click the photo.
Click the photo.
![]() Click Share (
Click Share (![]() ).
).
![]() Click Facebook.
Click Facebook.
OS X displays the Facebook share sheet.
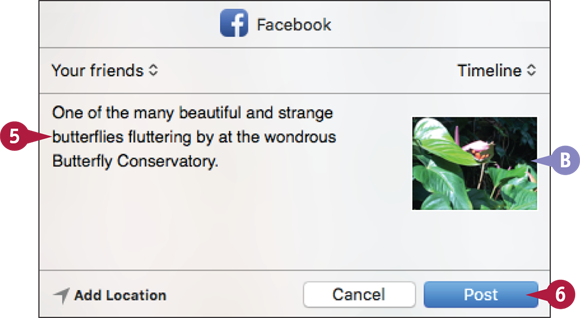
![]() The photo appears as an attachment inside the post.
The photo appears as an attachment inside the post.
![]() Type some text to accompany the photo.
Type some text to accompany the photo.
![]() Click Post.
Click Post.
Publish a Photos Album to Facebook
If you have connected OS X to your Facebook account, you can use that connection to publish a collection of Photos pictures to a new album in your Facebook profile. The easiest way to do this is to upload an album that you have created in Photos. However, you can also upload a selection of photos from the Photos library, or an item in the Faces or Places categories.
Publish a Photos Album to Facebook
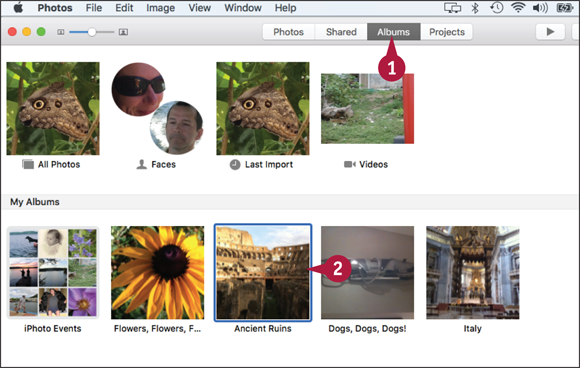
![]() In Photos, click Albums.
In Photos, click Albums.
![]() Click the album you want to publish to Facebook.
Click the album you want to publish to Facebook.
If you want to upload a different collection of photos, select the photos.
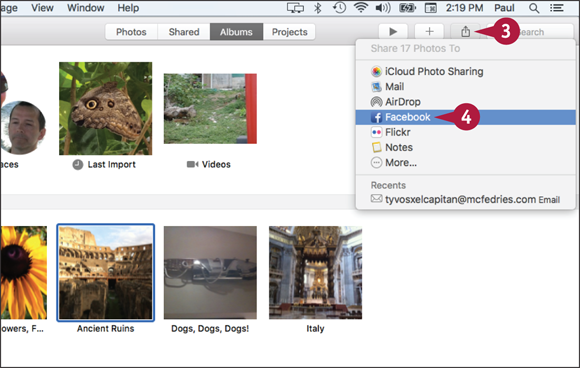
![]() Click Share (
Click Share (![]() ).
).
![]() Click Facebook.
Click Facebook.
Photos displays the Facebook photo-sharing options.
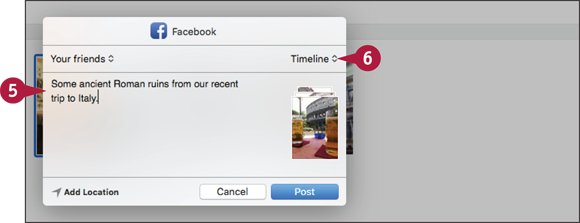
![]() Type a description of the photos.
Type a description of the photos.
![]() Click Timeline.
Click Timeline.
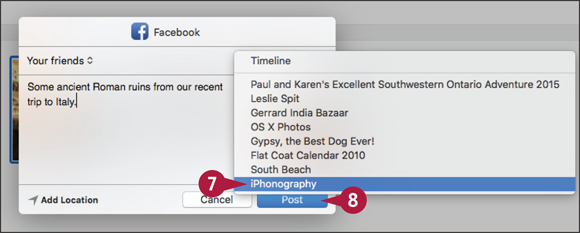
Photos displays a list of your Facebook albums.
![]() Click the album to which you want to add the photos.
Click the album to which you want to add the photos.
![]() Click Post.
Click Post.
Sign In to Your Twitter Account
If you have a Twitter account, you can use it to share information with your followers directly from OS X, which comes with built-in support for Twitter. This enables you to send tweets directly from many OS X apps. For example, you can send a link to a web page from Safari or tweet a photo from Photos. OS X also displays notifications if you are mentioned on Twitter or if a Twitter user sends you a direct message. Before you can tweet or see Twitter notifications, you must sign in to your Twitter account.
Sign In to Your Twitter Account

![]() Click System Preferences (
Click System Preferences (![]() ).
).
Note: You can also click Apple (![]() ) and then click System Preferences.
) and then click System Preferences.
The System Preferences appear.
![]() Click Internet Accounts.
Click Internet Accounts.

The Internet Accounts preferences appear.
![]() Click Twitter.
Click Twitter.

System Preferences prompts you for your Twitter username and password.
![]() Type your Twitter username.
Type your Twitter username.
![]() Type your Twitter password.
Type your Twitter password.
![]() Click Next.
Click Next.

System Preferences displays information detailing what signing in to Twitter entails.
![]() Click Sign In.
Click Sign In.
OS X signs in to your Twitter account.
Send a Tweet
After you sign in to your Twitter account, you can send tweets from various OS X apps. Although signing in to your Twitter account is useful for seeing notifications that tell you about mentions and direct messages, you will mostly use it for sending tweets to your followers. For example, if you come across a web page that you want to share, you can tweet a link to that page. You can also take a picture using Photo Booth and tweet that picture to your followers.
Send a Tweet

Tweet a Web Page
![]() Use Safari to navigate to the web page you want to share.
Use Safari to navigate to the web page you want to share.
![]() Click Share (
Click Share (![]() ).
).
![]() Click Twitter.
Click Twitter.
OS X displays the Tweet share sheet.
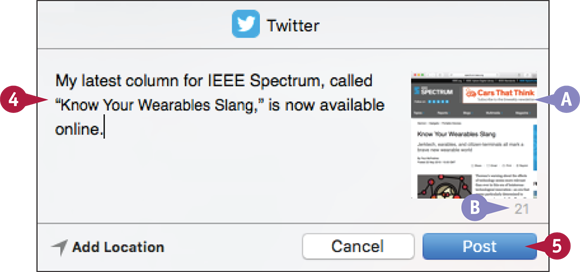
![]() The attachment appears as a link inside the tweet.
The attachment appears as a link inside the tweet.
![]() Type your tweet text.
Type your tweet text.
![]() This value tells you how many characters you have remaining.
This value tells you how many characters you have remaining.
![]() Click Post.
Click Post.
Tweet a Photo Booth Photo
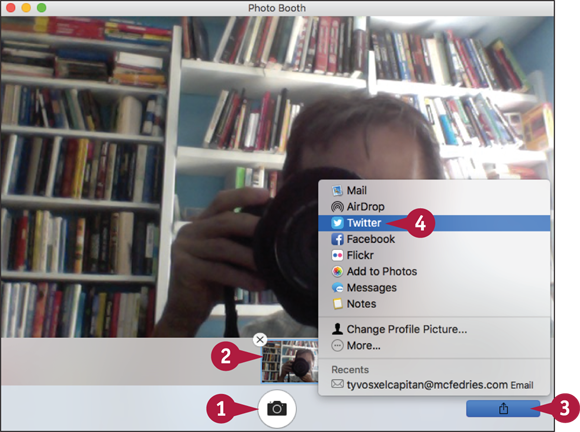
![]() Use Photo Booth to take a picture.
Use Photo Booth to take a picture.
![]() Click the picture you want to share.
Click the picture you want to share.
![]() Click Share (
Click Share (![]() ).
).
![]() Click Twitter.
Click Twitter.

OS X displays the Twitter share sheet.
![]() The attachment appears as a link inside the tweet.
The attachment appears as a link inside the tweet.
![]() Type your tweet text.
Type your tweet text.
![]() This value tells you how many characters you have remaining.
This value tells you how many characters you have remaining.
![]() Click Post.
Click Post.
Connect to Your LinkedIn Account
You can use your LinkedIn account to share information with your connections directly from OS X, because OS X comes with built-in support for LinkedIn. This enables you to use Safari to send web page links to your connections and to display the links that your connections share. OS X also displays notifications if one of your connections endorses you or sends you a message. Before you can post updates or see LinkedIn notifications, you must sign in to your LinkedIn account.
Connect to Your LinkedIn Account
![]() Click System Preferences (
Click System Preferences (![]() ).
).
Note: You can also click Apple (![]() ) and then click System Preferences.
) and then click System Preferences.
The System Preferences appear.
![]() Click Internet Accounts.
Click Internet Accounts.

The Internet Accounts preferences appear.
![]() Click LinkedIn.
Click LinkedIn.

System Preferences prompts you for your LinkedIn username and password.
![]() Type your LinkedIn username.
Type your LinkedIn username.
![]() Type your LinkedIn password.
Type your LinkedIn password.
![]() Click Next.
Click Next.
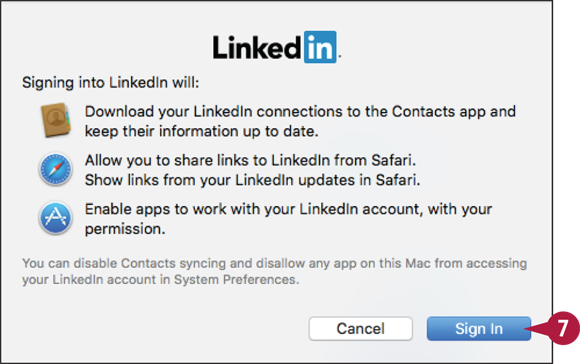
System Preferences displays information detailing what signing in to LinkedIn entails.
![]() Click Sign In.
Click Sign In.
OS X signs in to your LinkedIn account.
Post to LinkedIn
After you sign in to your LinkedIn account in OS X, you can send updates to your connections. Although signing in to your LinkedIn account is useful for seeing notifications that tell you about endorsements and other messages, you will mostly use it for sending updates to your followers. For example, if you come across a web page that you want to share, you can post a link to that page. You can share the link with just your connections or with the entire LinkedIn community.
Post to LinkedIn

![]() Use Safari to navigate to the web page you want to share.
Use Safari to navigate to the web page you want to share.

![]() Click Share (
Click Share (![]() ).
).
![]() Click LinkedIn.
Click LinkedIn.
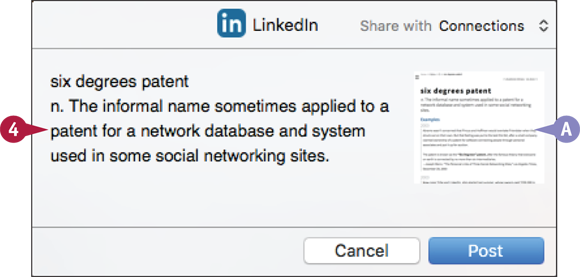
OS X displays the LinkedIn share sheet.
![]() The attachment appears as a link inside the post.
The attachment appears as a link inside the post.
![]() Type your update text.
Type your update text.
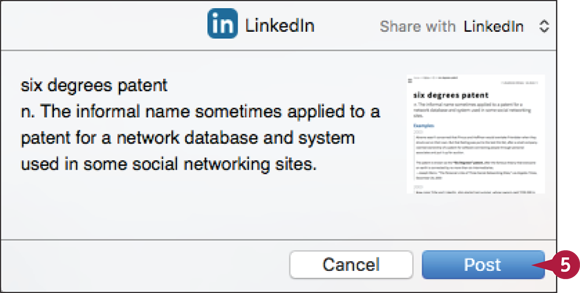
![]() Click Post.
Click Post.
OS X sends the update to LinkedIn.
Update Your Social Network Profile Picture
You can use OS X social network connections to easily and quickly update the profile picture for one or more of your accounts. All supported social networks identify you with a photo, which is part of your account profile. Updating this picture for just a single social network is usually a convoluted task, and it is only made worse if you want to use the same photo across multiple social networks. OS X enables you to take a single Photo Booth picture and use it to update your profile picture for Facebook, Twitter, and LinkedIn.
Update Your Social Network Profile Picture

![]() Use Photo Booth to take a picture.
Use Photo Booth to take a picture.
![]() Click the picture you want to use.
Click the picture you want to use.
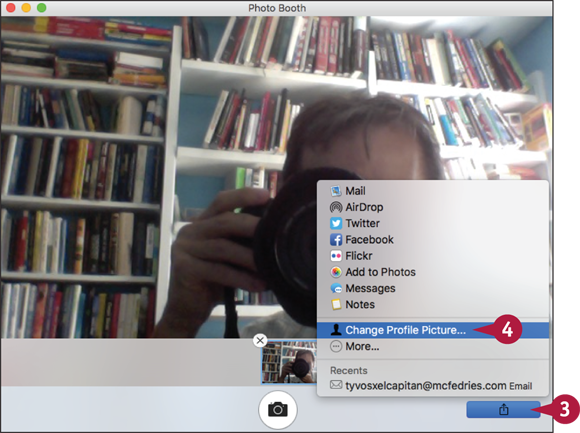
![]() Click Share (
Click Share (![]() ).
).
![]() Click Change Profile Picture.
Click Change Profile Picture.

![]() Drag the photo to the position you want.
Drag the photo to the position you want.
![]() Use this slider to set the magnification you want.
Use this slider to set the magnification you want.
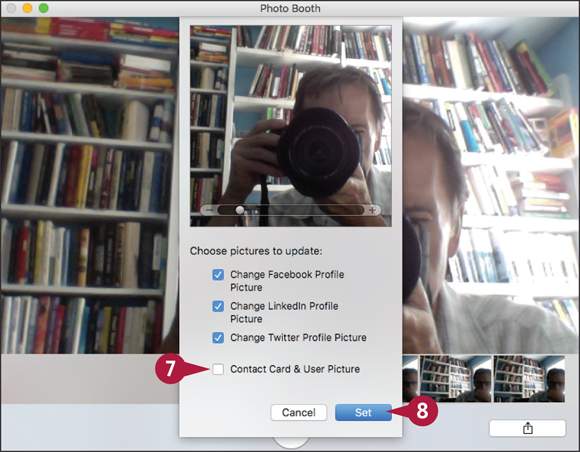
Photo Booth asks which profile you want to update.
![]() Click to deselect the profile pictures you do not want to update (
Click to deselect the profile pictures you do not want to update (![]() changes to
changes to ![]() ).
).
![]() Click Set.
Click Set.
Connect to Your Flickr Account
Tens of millions of people use Flickr to share their photos with the world. If you have a Flickr account, you can use it to share photos directly from OS X, which comes with built-in support for Flickr. This enables you to send photos from many OS X apps, including Finder, Preview, Photos, and Photo Booth. Before you can send photos, you must sign in to your Flickr account.
Connect to Your Flickr Account

![]() Click System Preferences (
Click System Preferences (![]() ).
).
Note: You can also click Apple (![]() ) and then click System Preferences.
) and then click System Preferences.
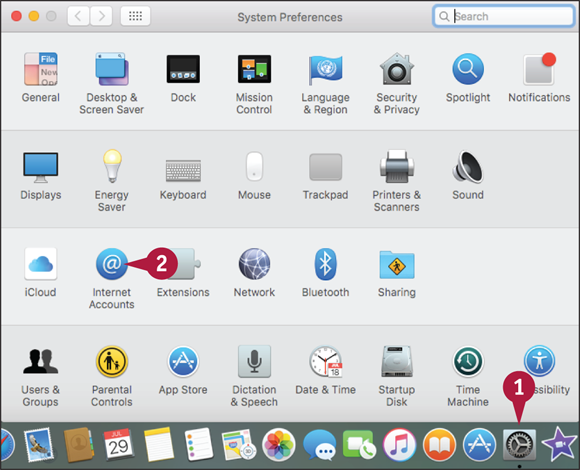
The System Preferences appear.
![]() Click Internet Accounts.
Click Internet Accounts.
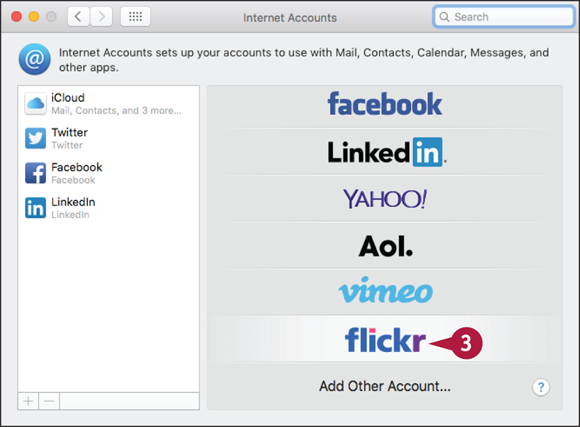
The Internet Accounts preferences appear.
![]() Click Flickr.
Click Flickr.
System Preferences prompts you for your Yahoo! ID and password.
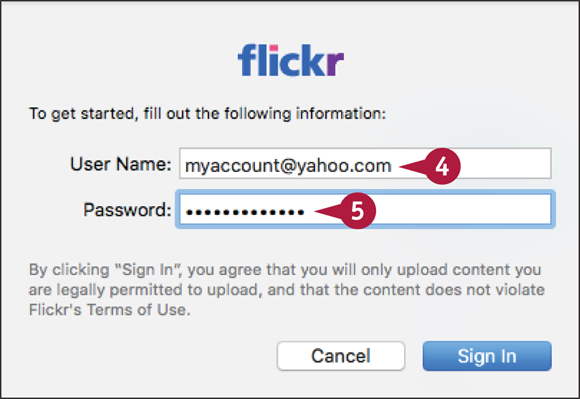
![]() Type your Yahoo! ID.
Type your Yahoo! ID.
Note: Your Yahoo! ID is the email address associated with your Yahoo! account.
![]() Type your Flickr password.
Type your Flickr password.
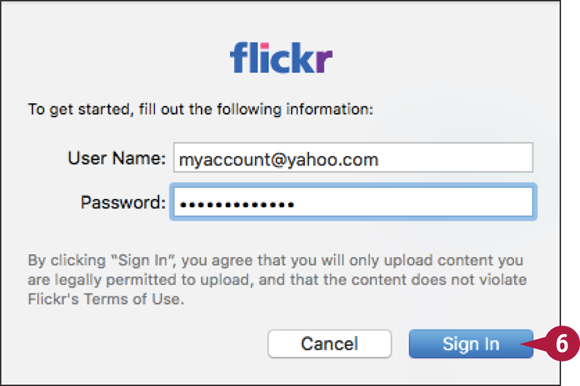
![]() Click Sign In.
Click Sign In.
OS X signs in to your Flickr account.
Send Photos to Flickr
Flickr is all about sharing your photos, so once you have connected OS X to your Flickr account, you can begin using that connection to upload photos. You can upload individual photos to Flickr using Finder, Quick Look, Preview, or Photo Booth, and those photos appear as part of your Flickr Photostream or an album. Similarly, you can upload multiple photos or an album from the Photos app, and you can add those photos to an existing Flickr album.
Send Photos to Flickr

![]() In Finder, Quick Look, Preview, or Photo Booth, select or open the photo or photos you want to upload. In Photos, you can also select an album to upload.
In Finder, Quick Look, Preview, or Photo Booth, select or open the photo or photos you want to upload. In Photos, you can also select an album to upload.
![]() Click Share (
Click Share (![]() ).
).
![]() Click Flickr.
Click Flickr.
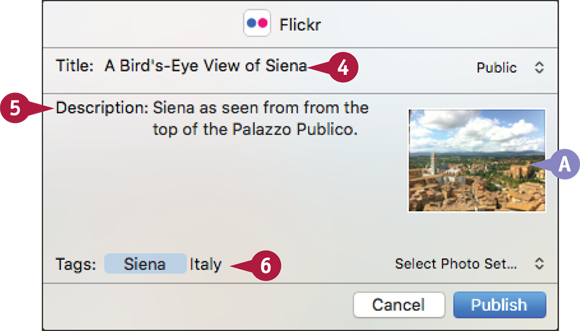
OS X displays the Flickr share sheet.
![]() The photo appears inside the post.
The photo appears inside the post.
![]() Type a title.
Type a title.
![]() Type a description.
Type a description.
![]() Type one or more tags, separated by commas.
Type one or more tags, separated by commas.
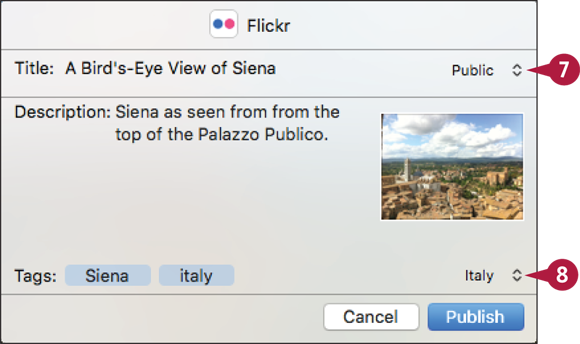
![]() Click the Access
Click the Access ![]() and then click who can see the photo.
and then click who can see the photo.
![]() To add the photo to an album (also called a photo set), click the Select Photo Set
To add the photo to an album (also called a photo set), click the Select Photo Set ![]() and then click an album.
and then click an album.
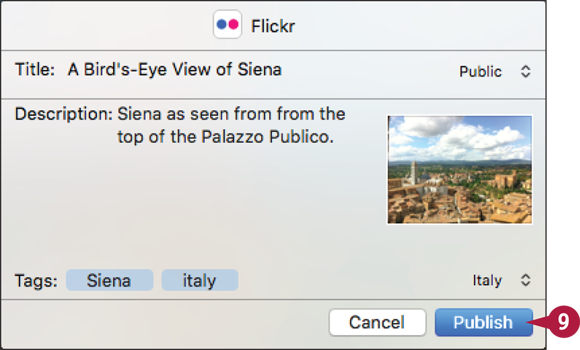
![]() Click Publish.
Click Publish.
OS X sends the photo to Flickr.
Set Up Your Vimeo Account
If you have a Vimeo account, you can use it to post videos online directly from OS X, which comes with built-in support for Vimeo. This enables you to send videos from many OS X apps, including Finder, QuickTime Player, Photo Booth, and iMovie. Before you can send videos, you must sign in to your Vimeo account.
Set Up Your Vimeo Account
![]() Click System Preferences (
Click System Preferences (![]() ).
).
Note: You can also click Apple (![]() ) and then click System Preferences.
) and then click System Preferences.
The System Preferences appear.
![]() Click Internet Accounts.
Click Internet Accounts.
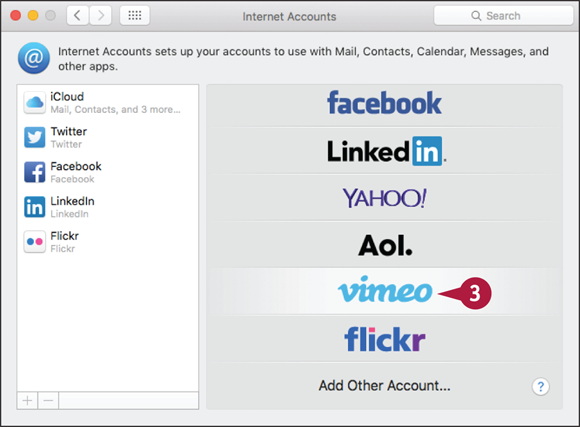
The Internet Accounts preferences appear.
![]() Click Vimeo.
Click Vimeo.
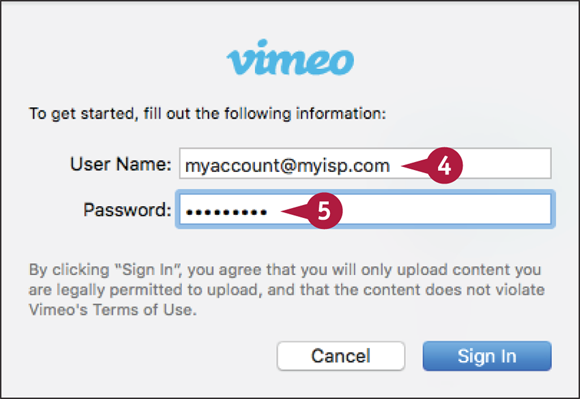
System Preferences prompts you for your Vimeo login data.
![]() Type the email address associated with your Vimeo account.
Type the email address associated with your Vimeo account.
![]() Type your Vimeo password.
Type your Vimeo password.
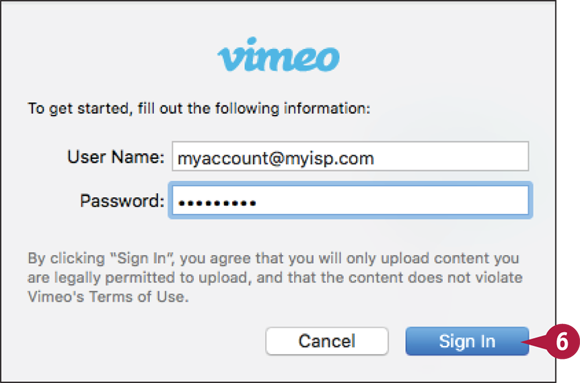
![]() Click Sign In.
Click Sign In.
OS X signs in to your Vimeo account.
Send a Video to Vimeo
Vimeo is one of the web’s most popular video-sharing services, so once you have connected OS X to your Vimeo account, you can begin using that connection to upload videos. You have two ways to publish photos from OS X to Vimeo. First, you can use an OS X share sheet to upload a video to Vimeo using Finder, QuickTime Player, or Photo Booth. Second, you can upload a video to Vimeo from an iMovie project, which gives you many more options for publishing the video.
Send a Video to Vimeo
Send a Video Using a Share Sheet
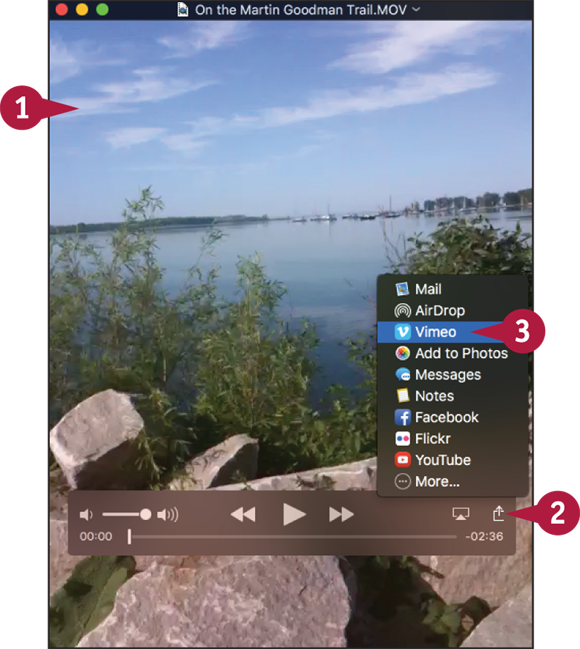
![]() In Finder, QuickTime Player, or Photo Booth, select or open the video you want to upload.
In Finder, QuickTime Player, or Photo Booth, select or open the video you want to upload.
![]() Click Share (
Click Share (![]() ).
).
![]() Click Vimeo.
Click Vimeo.

OS X displays the Vimeo share sheet.
![]() The attachment appears as a link inside the post.
The attachment appears as a link inside the post.
![]() Type a title.
Type a title.
![]() Type a description.
Type a description.
![]() Type one or more tags, separating each with a comma.
Type one or more tags, separating each with a comma.
![]() If you want anyone to be able to view the video, click the Make this movie personal check box (
If you want anyone to be able to view the video, click the Make this movie personal check box (![]() changes to
changes to ![]() ).
).
![]() Click Publish.
Click Publish.
OS X sends the video to your Vimeo account.
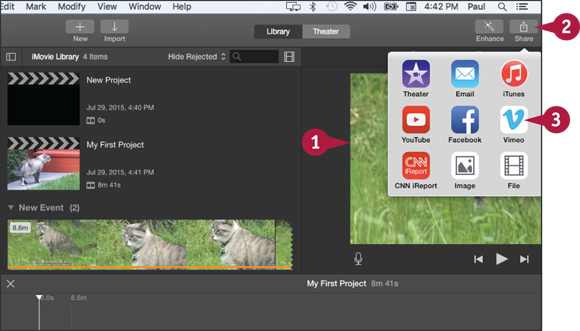
Send a Video from an iMovie Project
![]() In iMovie, open the project you want to publish to Vimeo.
In iMovie, open the project you want to publish to Vimeo.
![]() Click Share.
Click Share.
![]() Click Vimeo.
Click Vimeo.

iMovie displays the Vimeo dialog.
![]() Click Sign In, type your Vimeo email address and password, and then click OK.
Click Sign In, type your Vimeo email address and password, and then click OK.
![]() Type a title.
Type a title.
![]() Type a description.
Type a description.
![]() Type one or more tags, separating each with a comma.
Type one or more tags, separating each with a comma.
![]() Select the movie size you want to use.
Select the movie size you want to use.
![]() Click the Viewable by
Click the Viewable by ![]() and then click with whom you want to share the video.
and then click with whom you want to share the video.
![]() Click Next.
Click Next.
![]() Click Publish (not shown).
Click Publish (not shown).
iMovie uploads the video.
Share Information with Other People
You can use OS X to share information with other people, including web pages, notes, pictures, videos, photos, and maps. OS X was built with sharing in mind. It comes with a feature called the share sheet, which not only enables you to easily share data via Facebook and Twitter, as you have seen in this chapter, but also via multiple other methods such as email and instant messaging.
Share Information with Other People
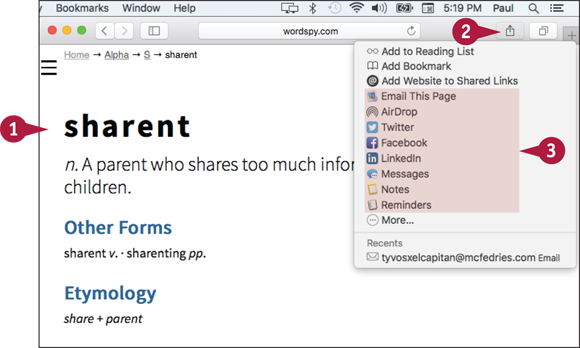
Share a Web Page
![]() Use Safari to navigate to the web page you want to share.
Use Safari to navigate to the web page you want to share.
![]() Click Share (
Click Share (![]() ).
).
![]() Click the method you want to use to share the web page.
Click the method you want to use to share the web page.

Share a Note
![]() In the Notes app, click the note you want to share.
In the Notes app, click the note you want to share.
![]() Click Share (
Click Share (![]() ).
).
![]() Click the method you want to use to share the note.
Click the method you want to use to share the note.
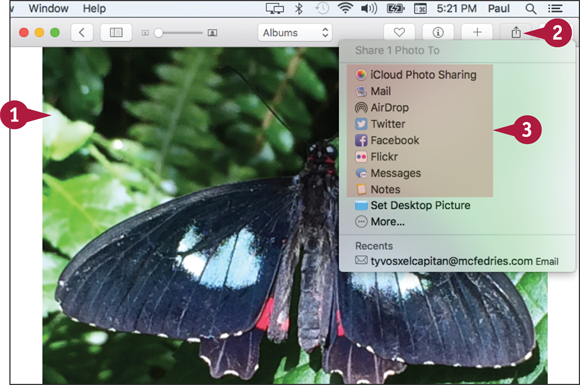
Share a Photos Picture
![]() In Photos, click the picture you want to share.
In Photos, click the picture you want to share.
![]() Click Share (
Click Share (![]() ).
).
![]() Click the method you want to use to share the picture.
Click the method you want to use to share the picture.
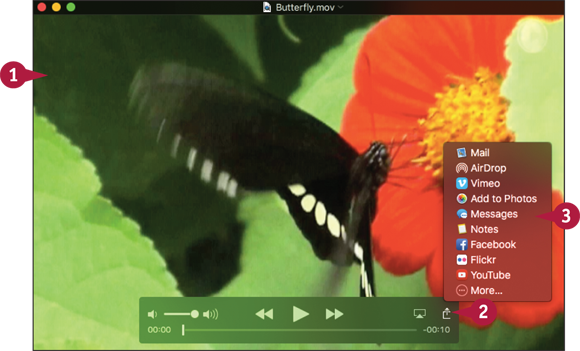
Share a Video
![]() In QuickTime Player, open the video you want to share.
In QuickTime Player, open the video you want to share.
![]() Click Share (
Click Share (![]() ).
).
![]() Click the method you want to use to share the video.
Click the method you want to use to share the video.